|
Re: Rear axle help (54-55)
|
||||
|---|---|---|---|---|
|
Home away from home

|
Quote:
Yes, that's the way I've always understood it/done it. This quote from Red is what threw me off: "2. Hit the end of the puller hard straight-on with a sledge hammer several times". I wanted to bring it up so that the was no confusion for others who will read this in the future.
Posted on: 4/7 8:42
|
|||
|
||||
|
Re: Rear axle help (54-55)
|
||||
|---|---|---|---|---|
|
Home away from home
|
Quote:
I thought hitting the end of the puller was a no-no? Doesn't that damage the thrust block when you hit the axle like that?
Posted on: 4/7 0:14
|
|||
|
||||
|
Re: hph's 55 Clipper Project
|
||||
|---|---|---|---|---|
|
Home away from home
|
Glad I'm not the only one dragging cars home! Pretty cool that the paint codes match on yours. And I have to say I like the stance on the new parts car. I'm sure the suspension is shot, but it looks nice just a touch lower to the ground.
Any good useable parts?
Posted on: 4/7 0:06
|
|||
|
||||
|
Re: KPack's 1954 Panama
|
||||
|---|---|---|---|---|
|
Home away from home
|
Thanks, very happy with how it's turning out so far. I checked with the upholstery place, sounds like the front seat will be done tomorrow or Monday. They should also be able to adjust the padding as well. With any luck I should be able to get the car back on the road next week, weather permitting.
Posted on: 4/5 9:22
|
|||
|
||||
|
Re: KPack's 1954 Panama
|
||||
|---|---|---|---|---|
|
Home away from home
|
Seats are getting close to being done. The upholstery shop finished the rear seat, so my wife picked it up while she was in that town and brought it back. I took a quick look at them. Overall they look great. Maybe a couple of adjustments needed.
They stripped down to the springs and frames, sandblasted and powdercoated 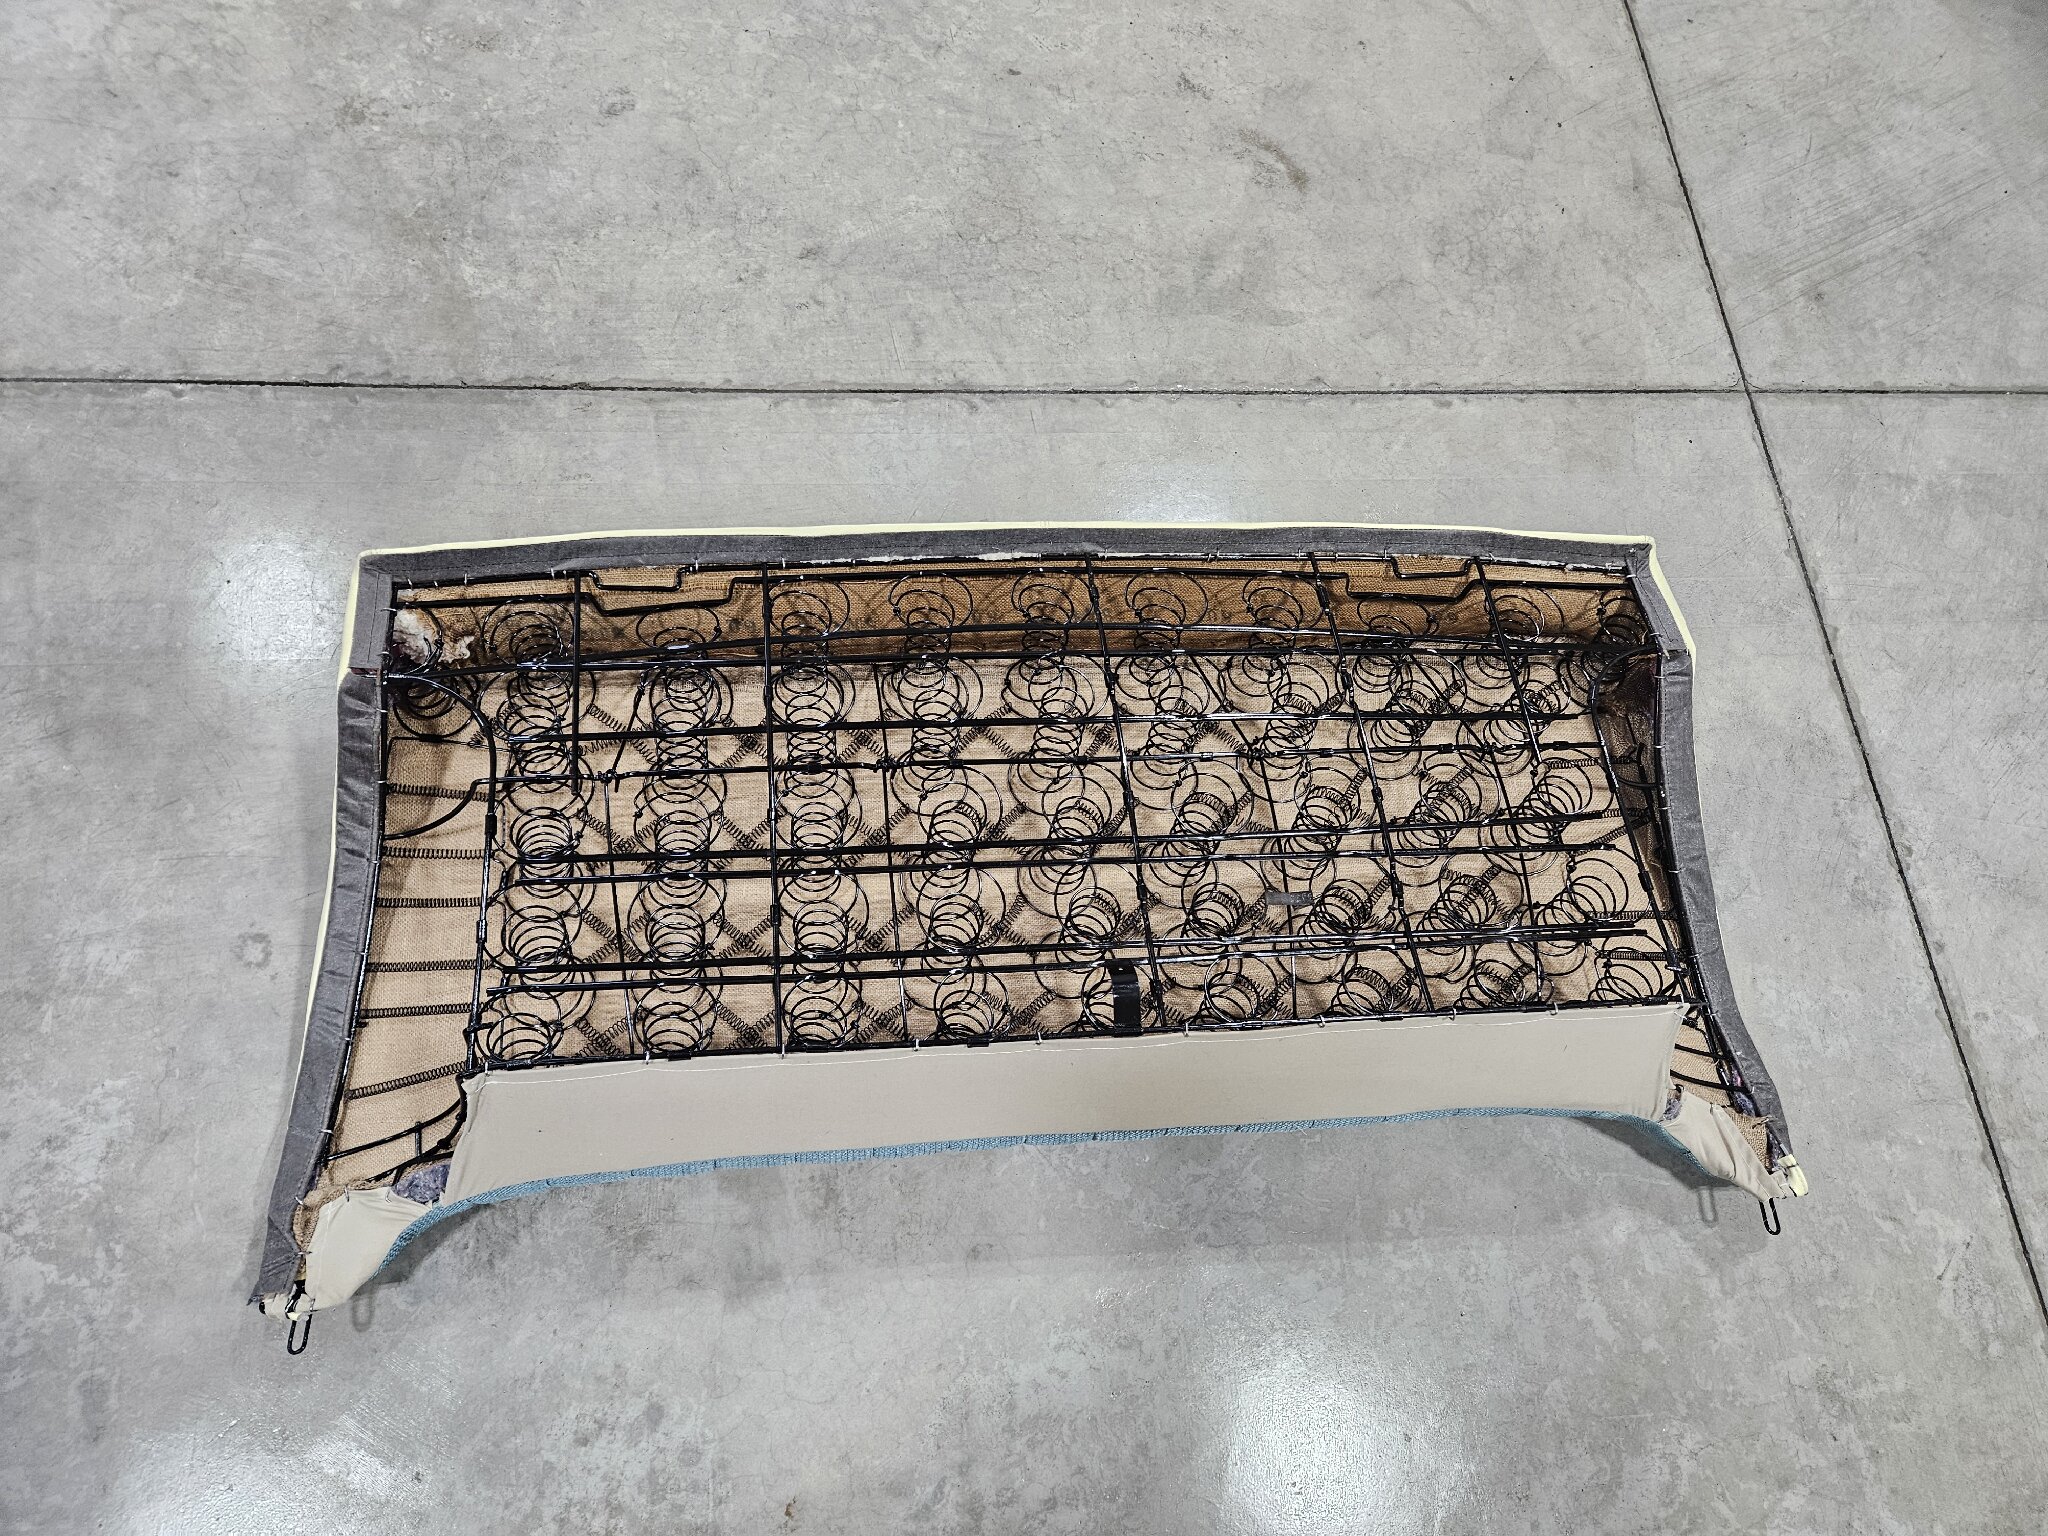 New burlap, cotton and some foam. We did not replicate the burlap sacks around the rear springs. The back two rows of springs on the rear seat are the only springs that had burlap surrounding them originally. 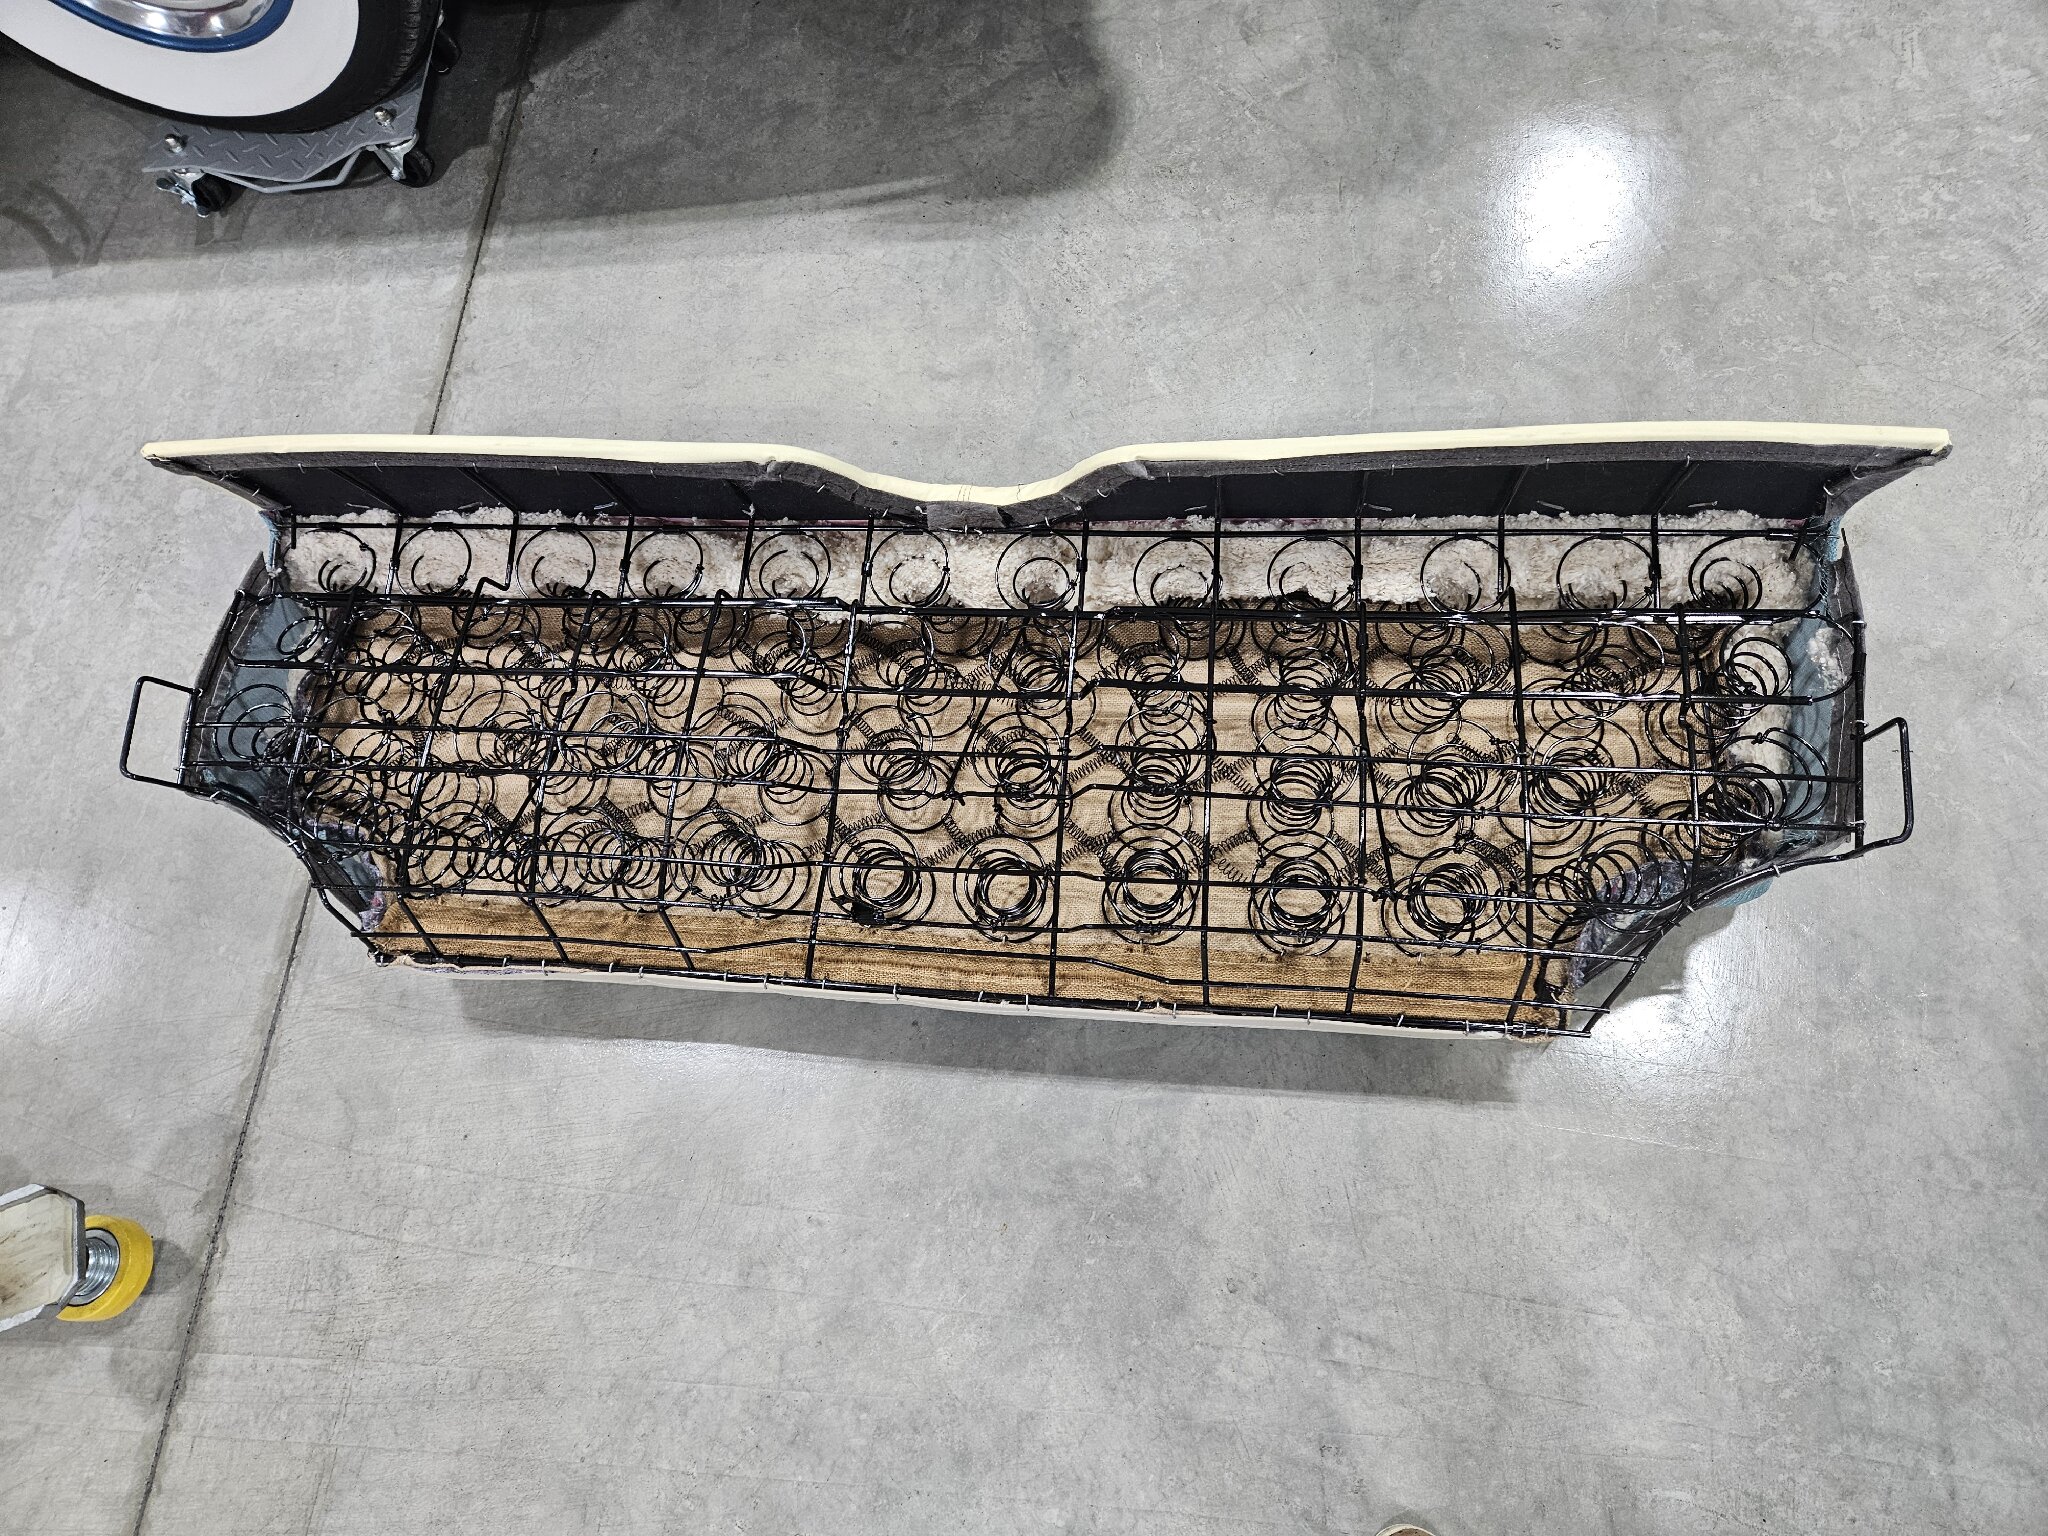 I think I would like to see more padding on the upper corners of the rear backrest. It should be a bit puffier than what it is now. But the stitching overall looks great. 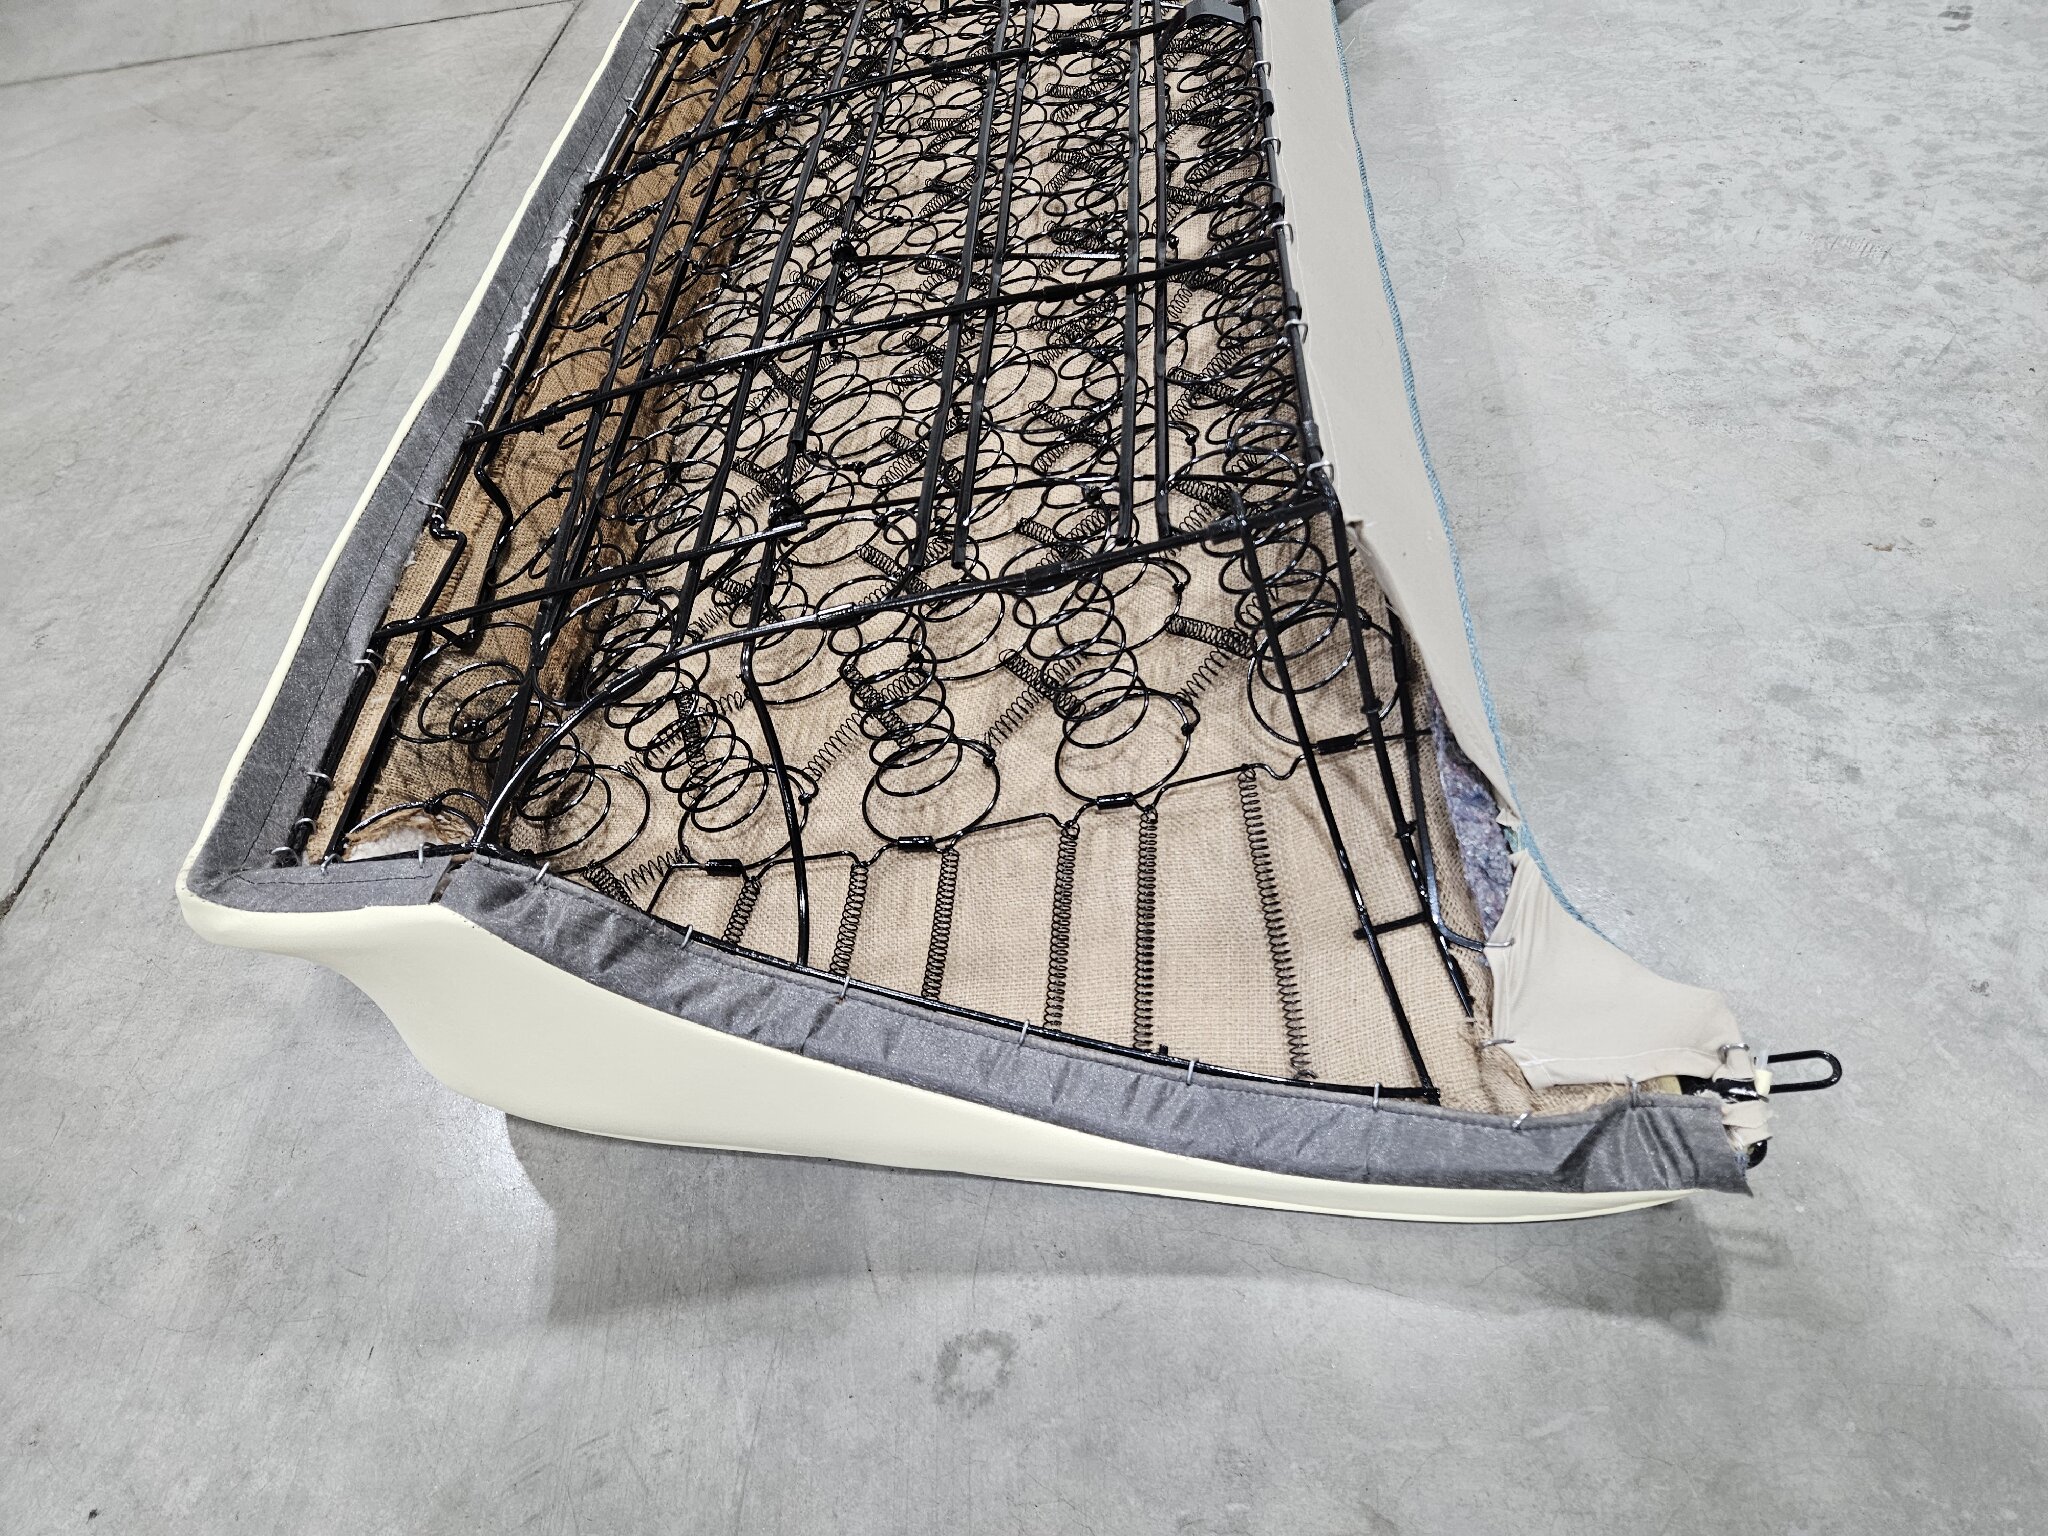 Tuck and roll pleats, as original. We were able to save the original stainless trim and reuse it 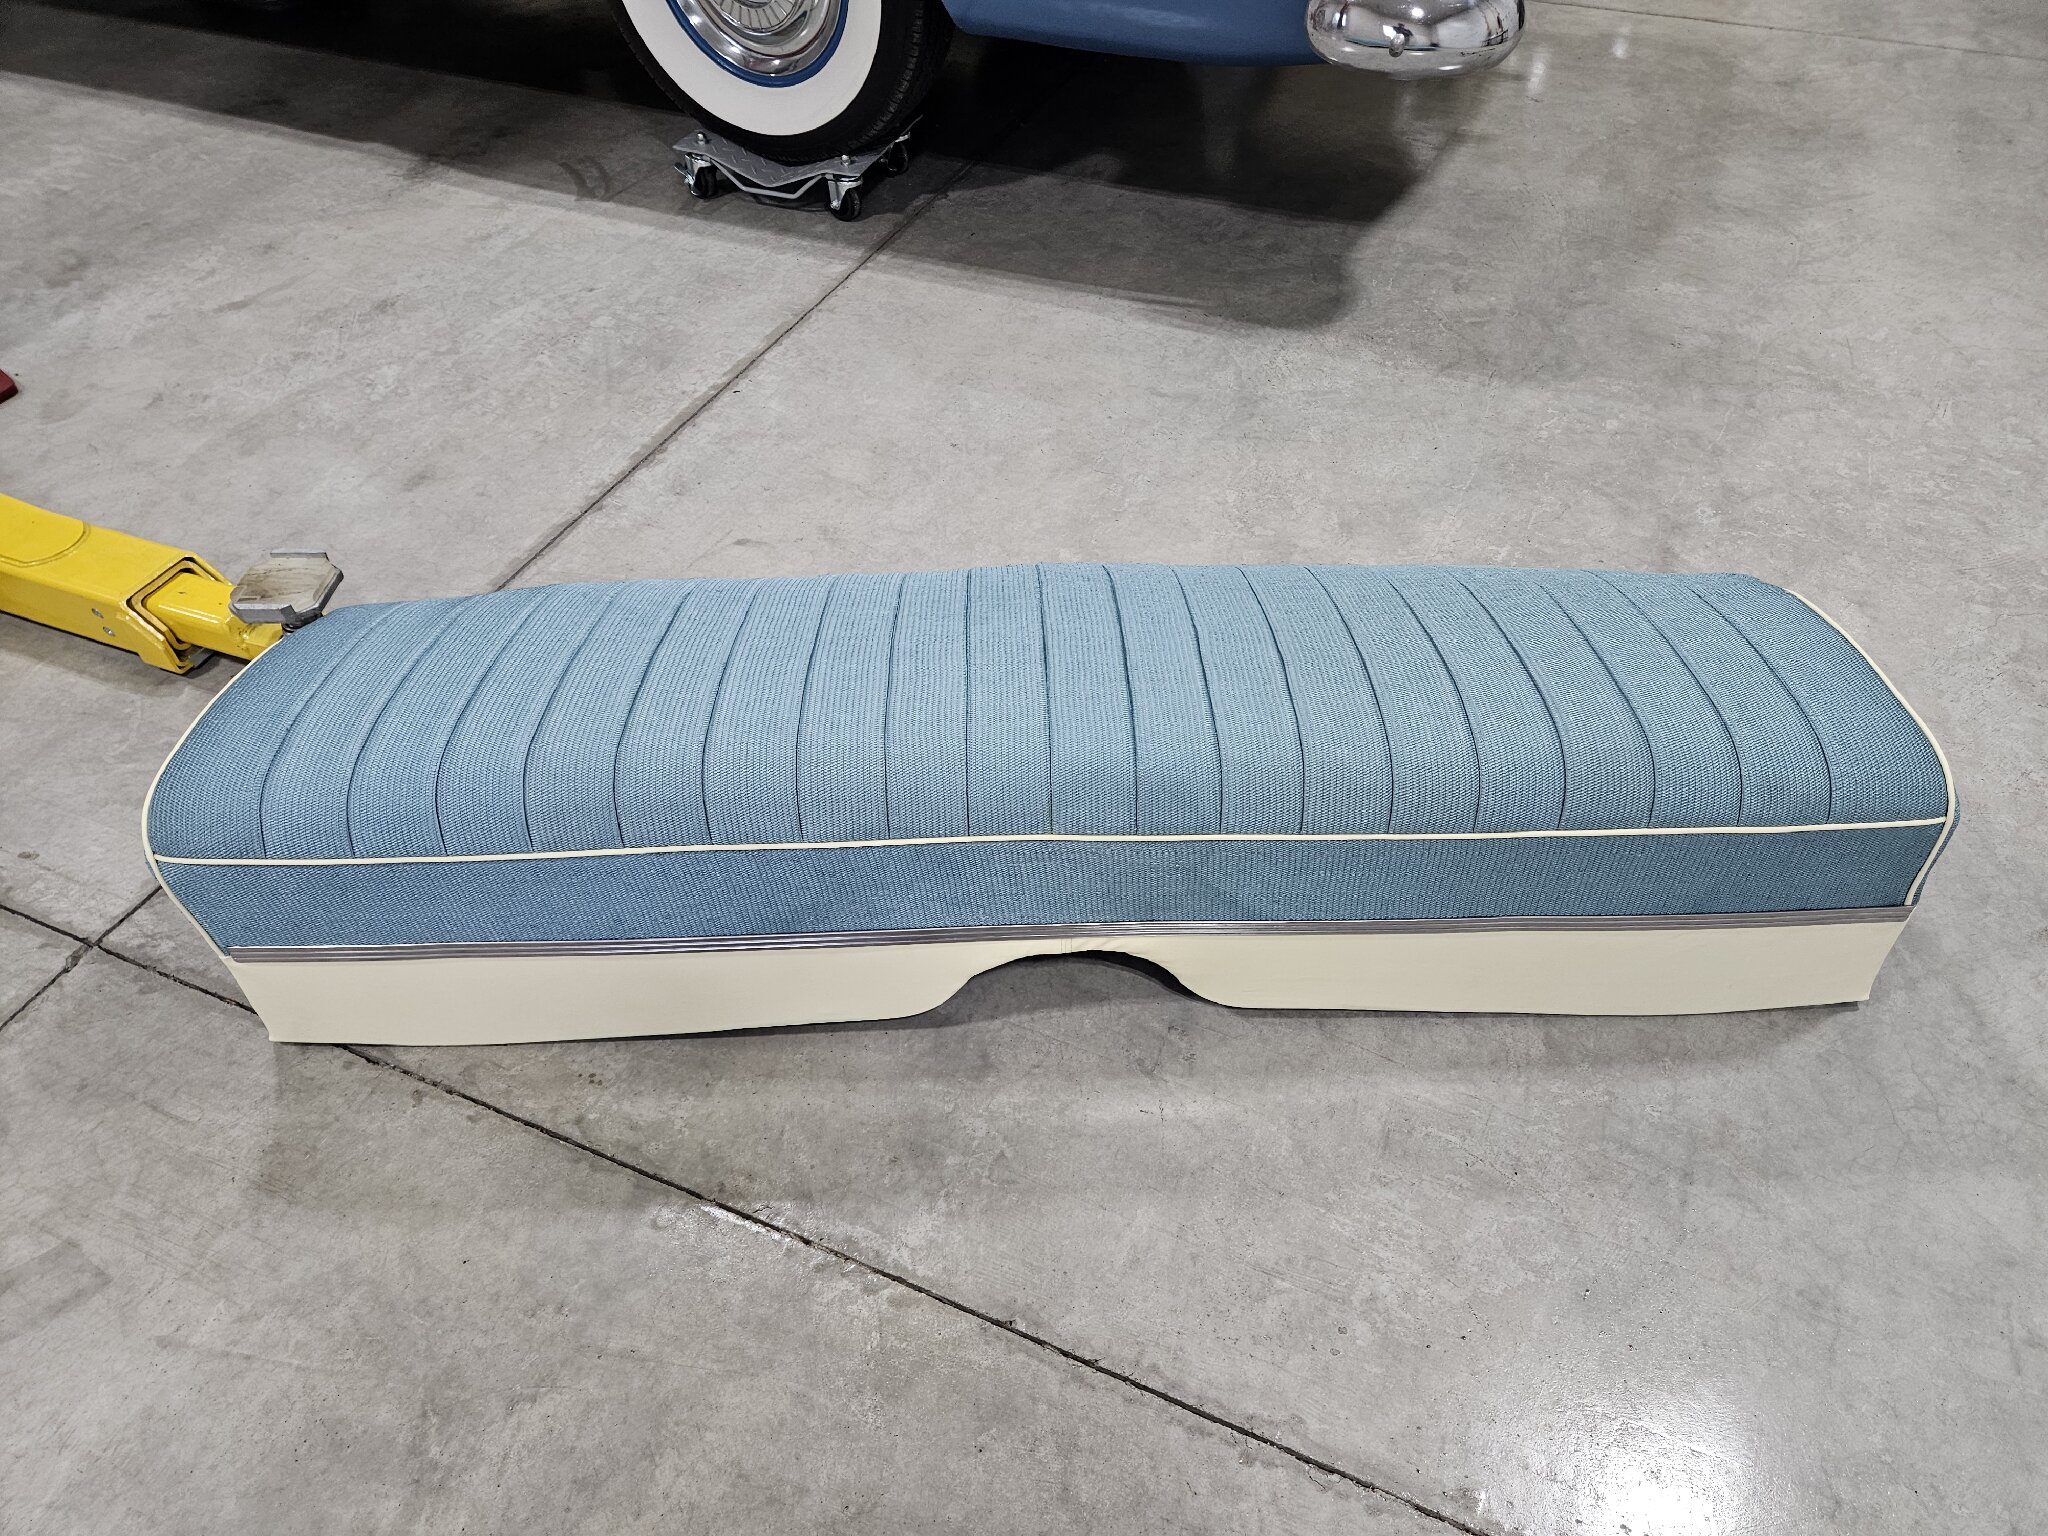 Rear backrest. Might be a little too much padding on top edge. Looks square instead of rounded. 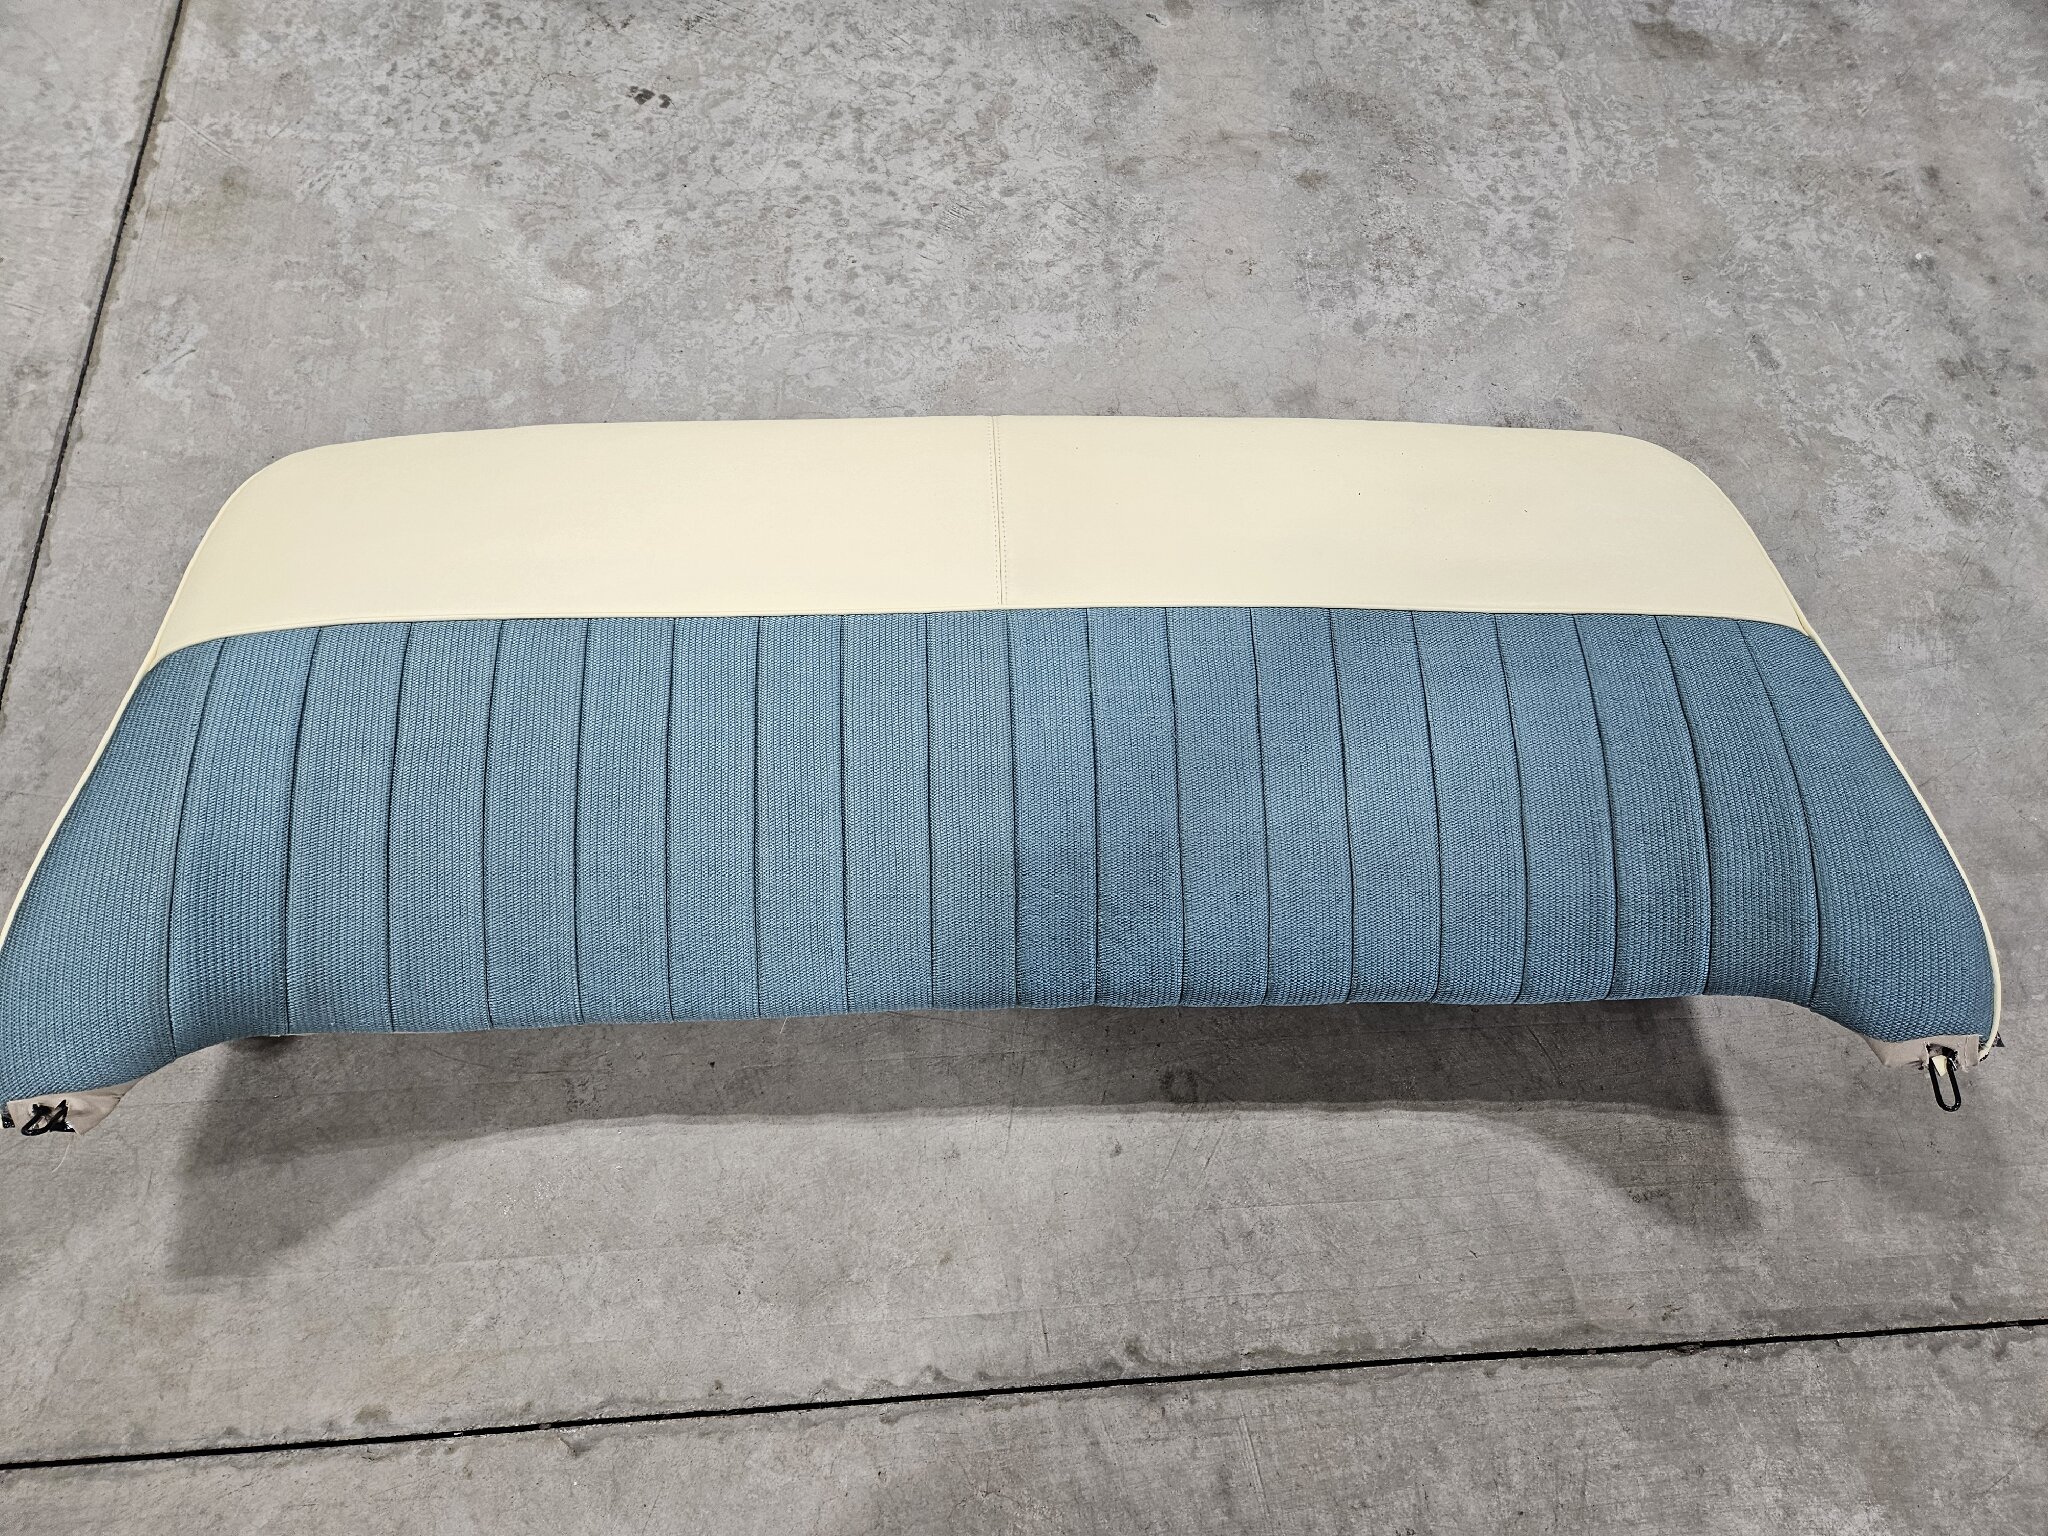 This angle shows it best 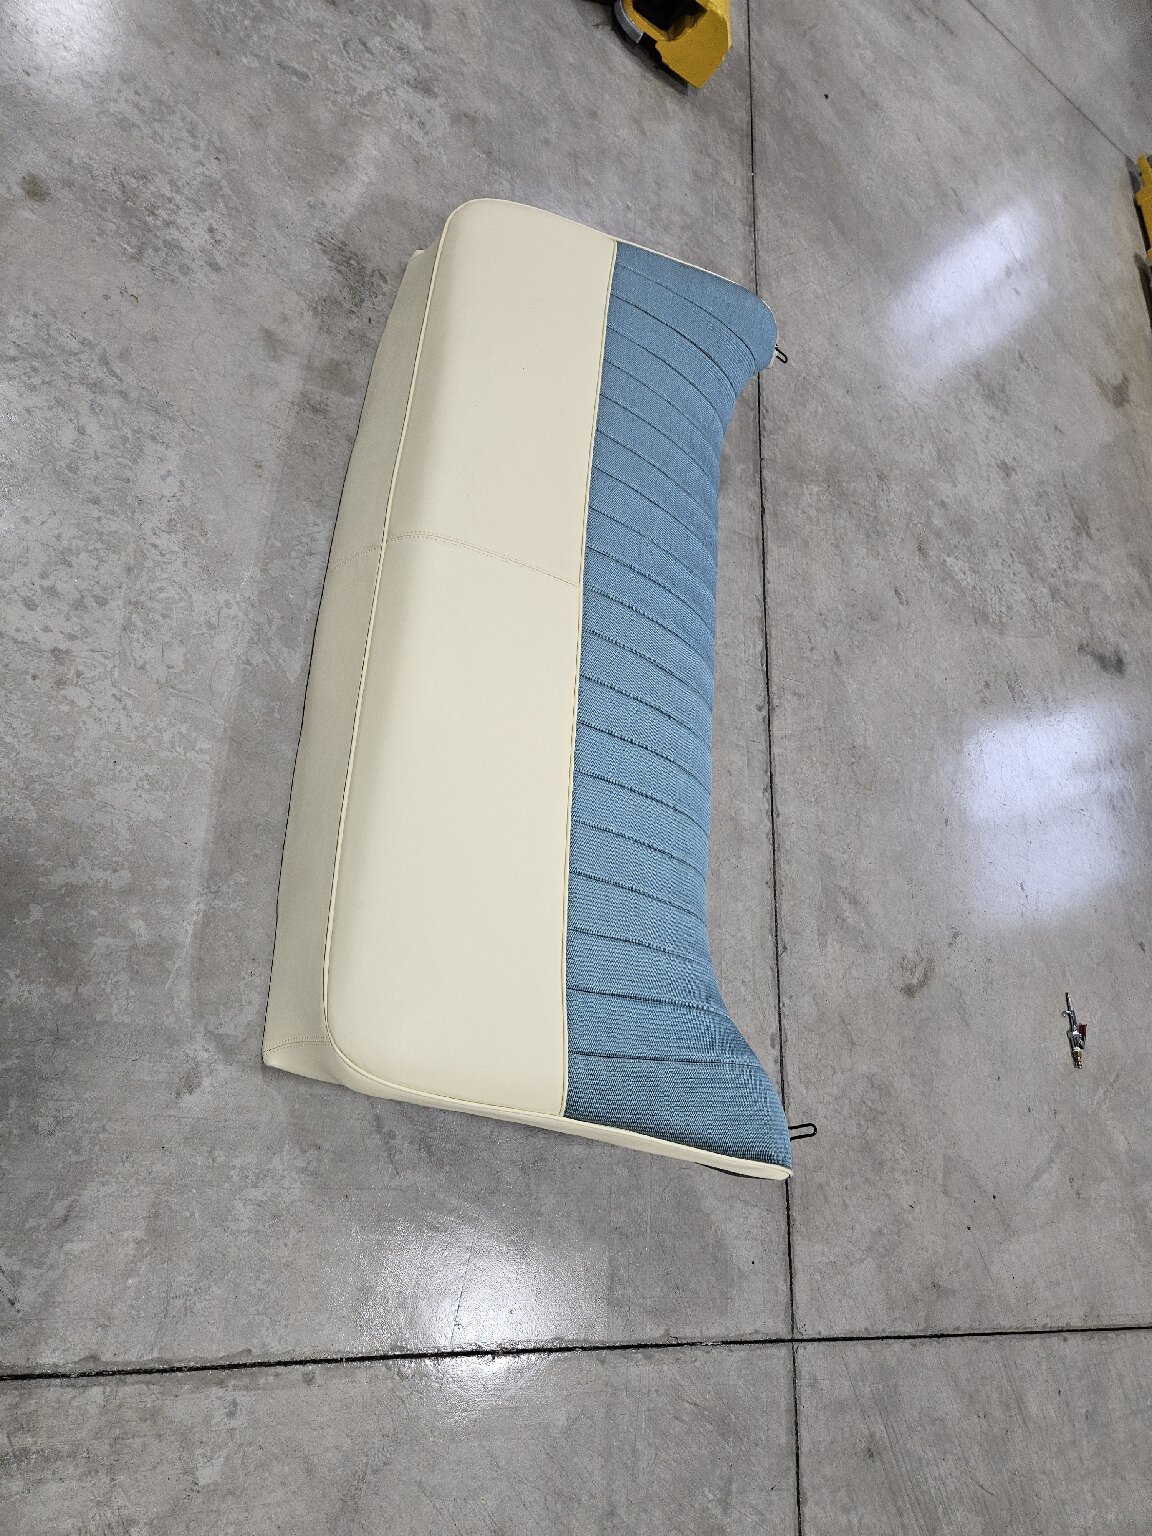 I quickly threw them in the car to see how they look, which then made me late for work. But work can wait. 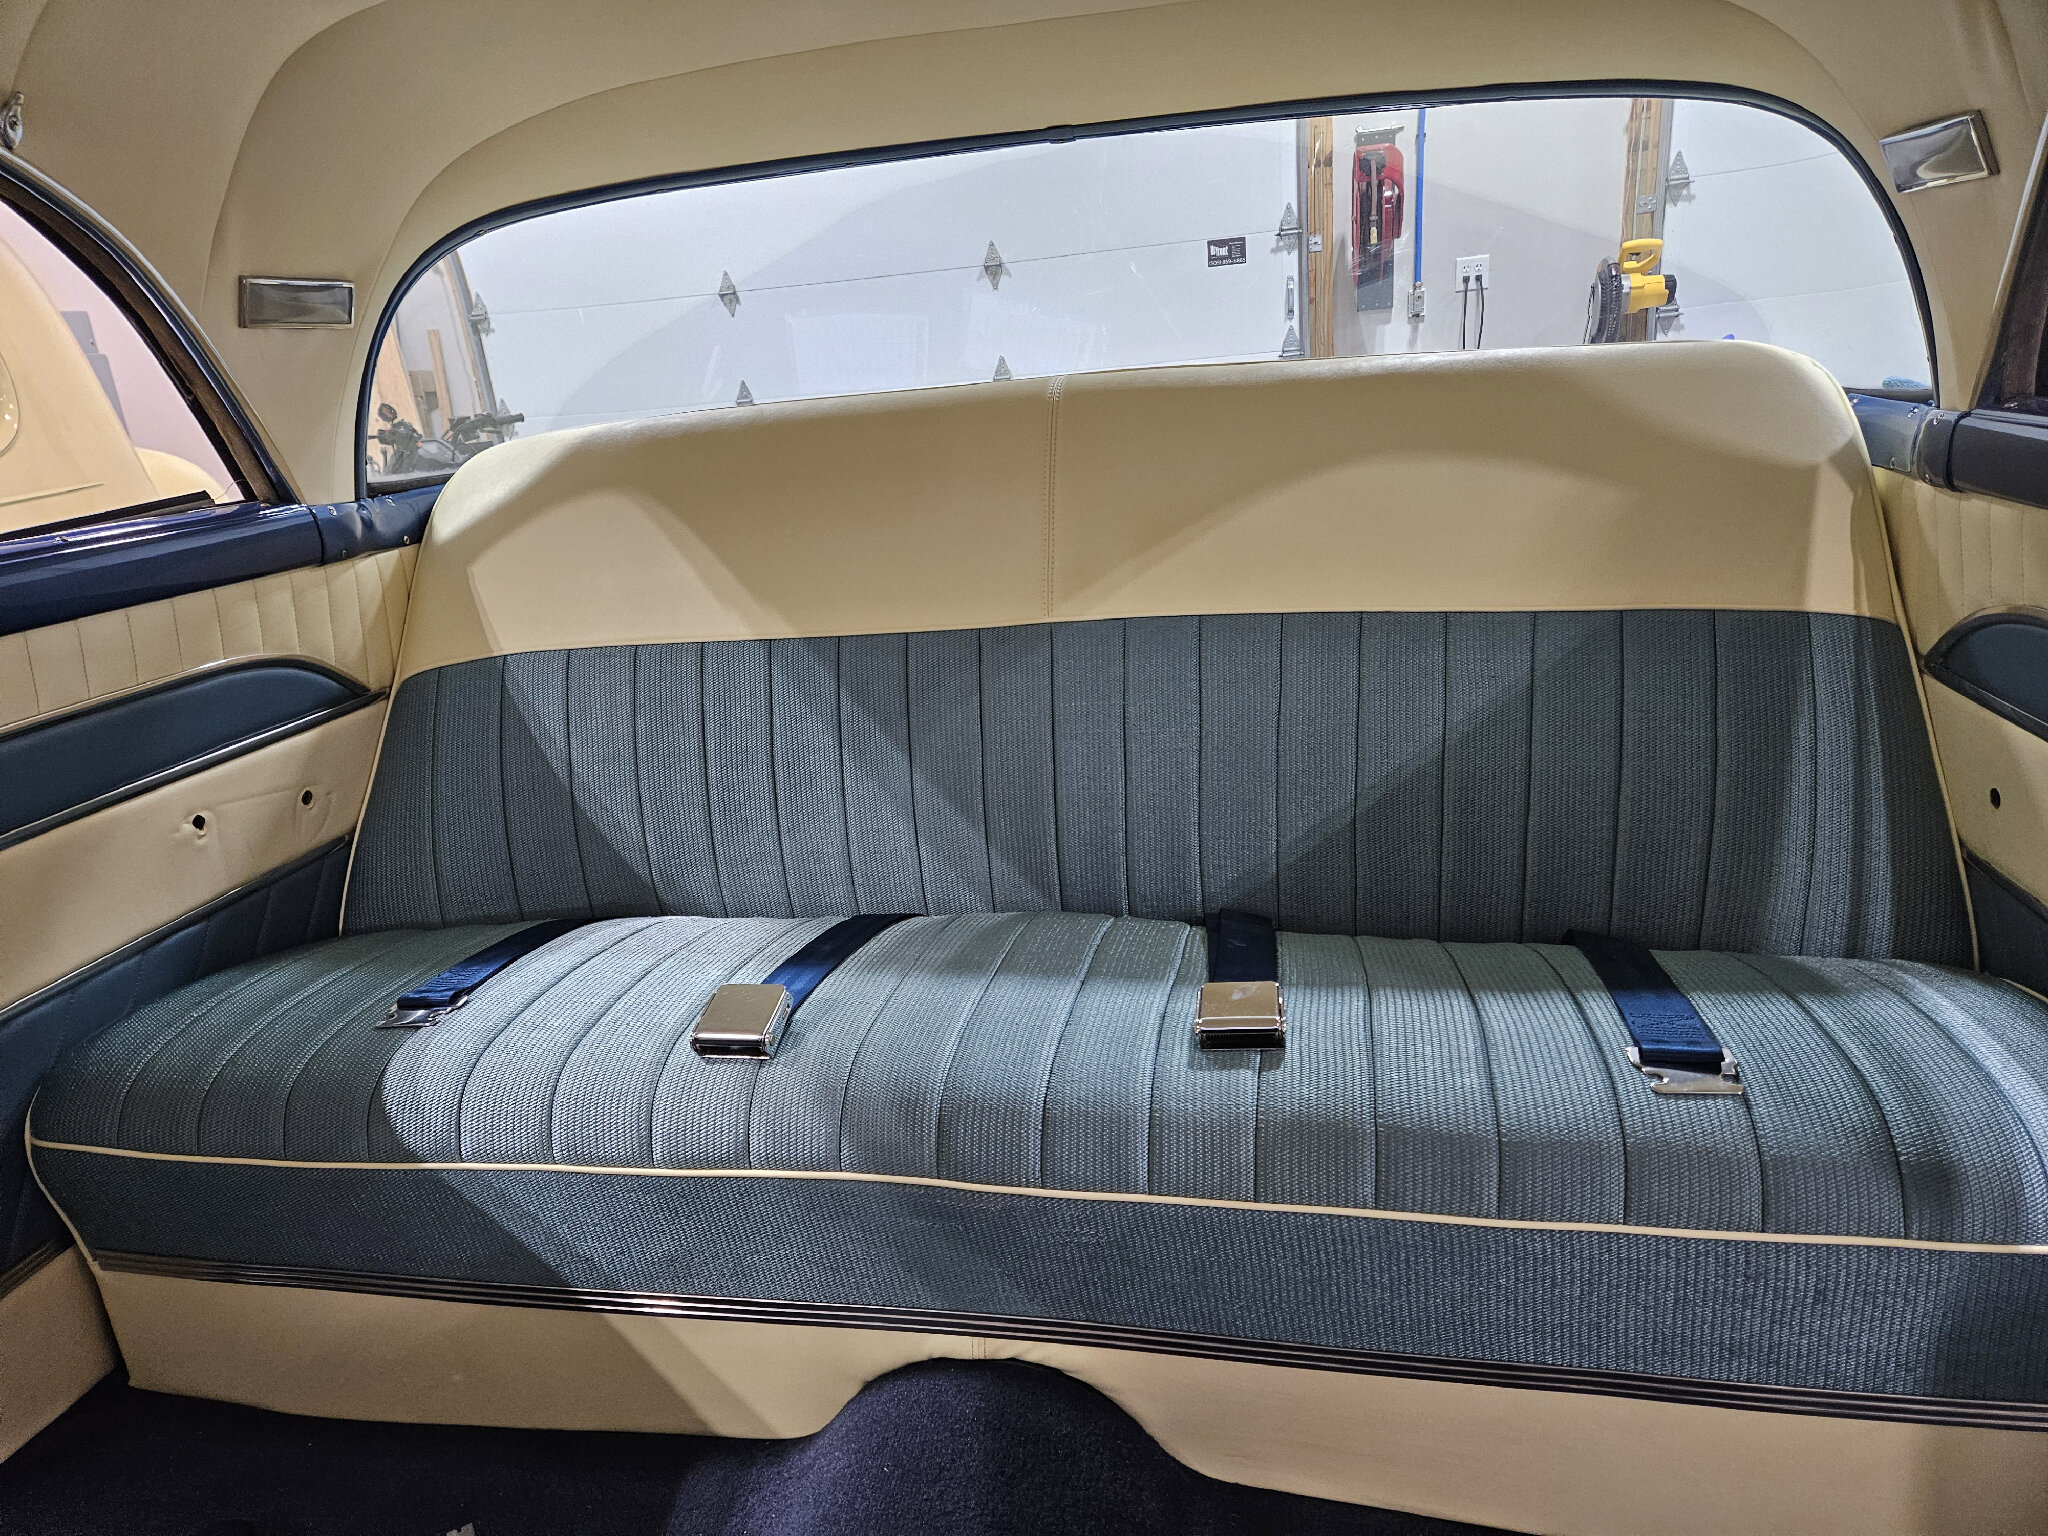 I sat in them for a short minute and they definitely feel stiffer than original. Some of that is going to be the new padding (not sure what thickness of foam they used, but they did put cotton no the outer layer), and some of it is going to be new fabric that isn't falling apart. 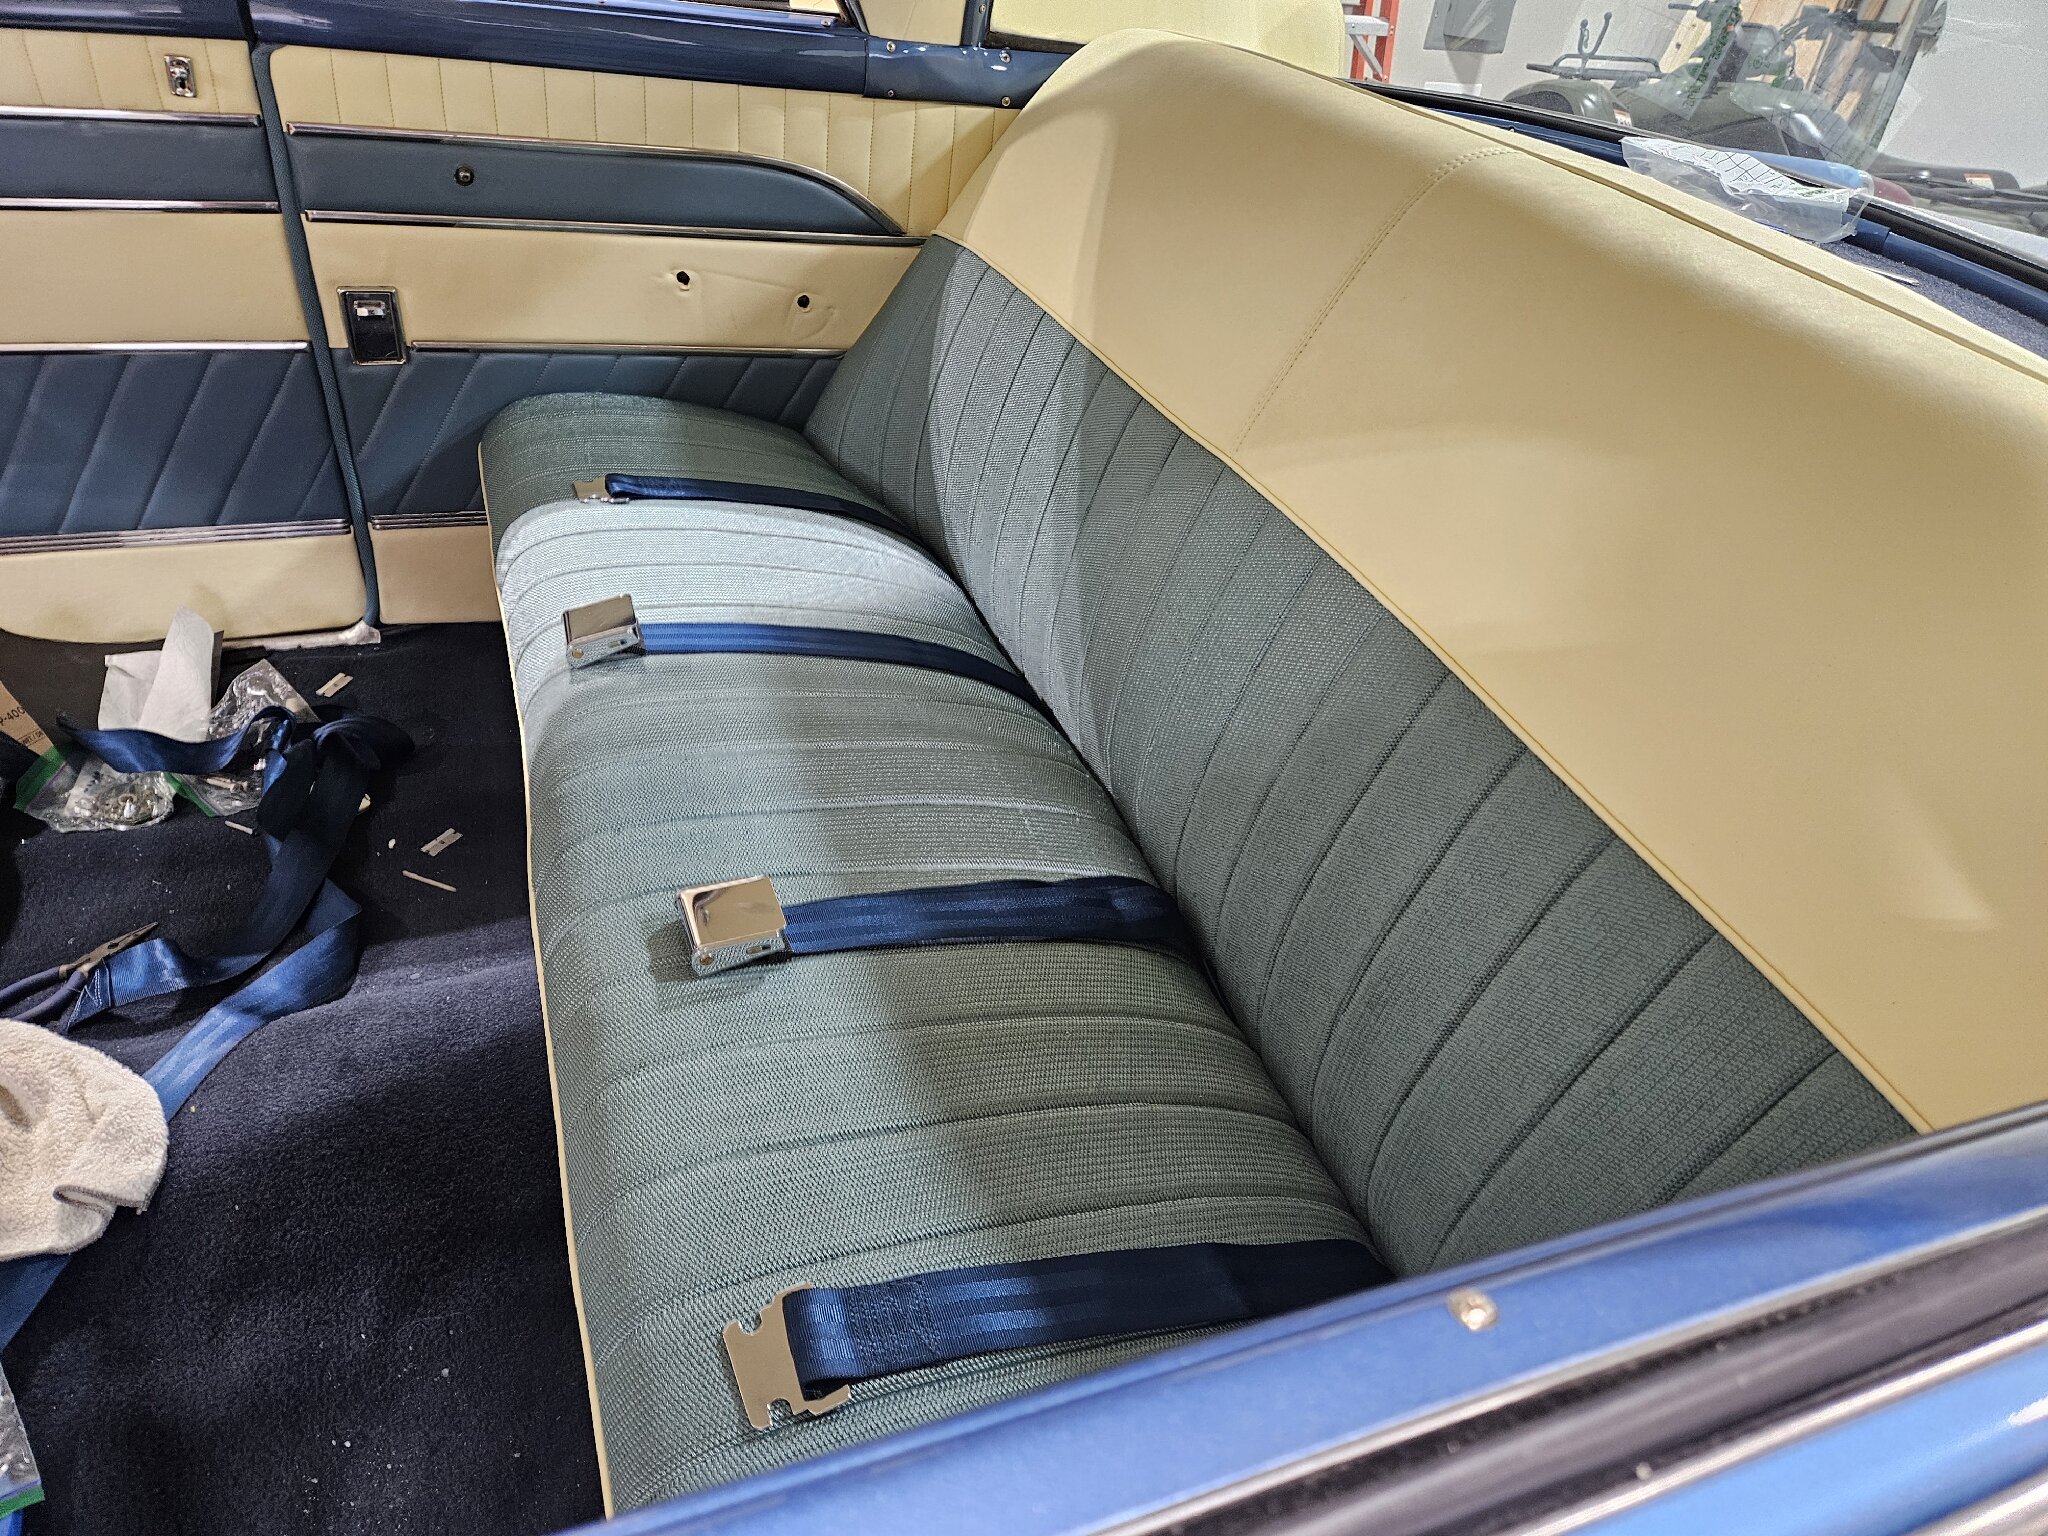 I may talk to them about taking a bit of the padding off the upper edge of the backrest, and adding more to each upper corner of the backrest. Not a deal breaker, but I do think it would help look a bit nicer. -Kevin
Posted on: 4/4 16:17
|
|||
|
||||
|
Re: Various CL Pickings
|
||||
|---|---|---|---|---|
|
Home away from home
|
A few more from the NW.
1955 400. Project car, comes with extra parts (doors, hood, trim, etc). Engine has been pulled and rebuilt, also has oil pump conversion. Painted correct color. Interior is rough, as is exterior paint. Price is on target though: $2,500. 1951 200. This one has popped up for sale several times over the past few years. Still not many pictures shown, just like all the past ads. And the pictures that are there are garbage. No idea what the interior or engine bay looks like. It's not far from me so if anyone wants me to take a look at it let me know. $10,000. 1948 Club Sedan. Not sure if this one has been posted here already. Attractive body style but needs work. Engine has been rebuilt, painted in blue. Interior redone in some sort of non-original fabric. Not a bad car to start with, maybe talk the price down? Also not far from me, so if someone wants me to take a look I will. $7,500
Posted on: 4/3 18:53
|
|||
|
||||
|
Re: Rear axle help (54-55)
|
||||
|---|---|---|---|---|
|
Home away from home
|
Quote:
I beat on the '52 for over an hour until my arm was sore. Heat was the only thing that ended up working for me. But I didn't have that problem on my dad's '38, and my '54 came off without too much of a fight. Corrosion maybe?
Posted on: 4/2 10:00
|
|||
|
||||
|
Re: Rear axle help (54-55)
|
||||
|---|---|---|---|---|
|
Home away from home
|
Here's the link to where I started my rear brakes/axles. The drum puller I used is linked to Amazon there. I highly recommend you spend the money and buy one of these large pullers. Nothing from Autozone or other rental places will work. And you'll need a big puller every time you need to mess with the rear brakes.
You will almost certainly need to use heat to get the drums off. A lot of heat. On my brother-in-law's '52 I had to apply heat many times over several days until it finally popped. I had the puller as tight as it would go and heated the hub until there was smoke coming out of the drum. Several heat and cooling cycles did the trick. This video shows what will be required, except ignore the puller they are using. Get a real man's puller. For the axle seals I'd recommend renting a slide hammer. Makes taking the inner seal out a breeze, as well as pulling the axle itself. A couple taps and you're done. Like David said earlier, be sure to lubricate any new seals with gear oil. I had a heck of time chasing down a squealing noise after I did all my axle work, only to find that I had installed the outer seal on the driver's side without lubricating the leather. The leather was rubbing against the axle as it rotated and made a ton of noise.
Posted on: 4/1 21:18
|
|||
|
||||
|
Re: Floor pan repairs
|
||||
|---|---|---|---|---|
|
Home away from home
|
That looks great! Seam sealer is awesome.... It covers a multitude of sins. That plus the POR-15 will do a great job protecting your floor. This car will probably never see the elements like it used to, so you for should last forever.
Posted on: 3/30 20:55
|
|||
|
||||
|
Re: KPack's 1954 Panama
|
||||
|---|---|---|---|---|
|
Home away from home
|
Quote:
Thanks Howard. I didn't see a way to disassemble the solenoid further without unsoldering wires and such. I decided against it. Rotating the studs would be rather simple, I may do that. The solenoid does have a number stamped on it, which I'll need to look at and record when I get home. It's likely that it was used on other makes and models. Regardless, I think most of my issues were due to the brushes being completely worn out. I don't think they were making much contact with the commutator. That and the wiring to and from the starter was ugly. But I will probably rotate those studs for good measure before I put the starter back in. No harm in that.
Posted on: 3/28 12:57
|
|||
|
||||


