|
Re: Exhaust Manifold Heat Riser Spring
|
||||
|---|---|---|---|---|
|
Home away from home
|
I do notice a difference in time for the engine to warm up and run smoothly when I wire the valve closed and then open it once the carb choke plate fully opens. So I'd like to get this back to original.
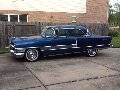
I bought a new spring from Max for $35. It is quite a bit different than the 'generic' one I bought for less than half the price. Question for those that have played with these before: The 'tang' in the center ofthe spring is very long compared to the shallow slit in the heat riser shaft. I hate to butcher something I just spent $35 on, but it looks like I need to snip this tang down so it will go into the slot? I'm debating cutting the shaft all the way through to make this easier, but wondering if others have had a go at this and have some advice. thanks Attach file:  (308.39 KB) (308.39 KB)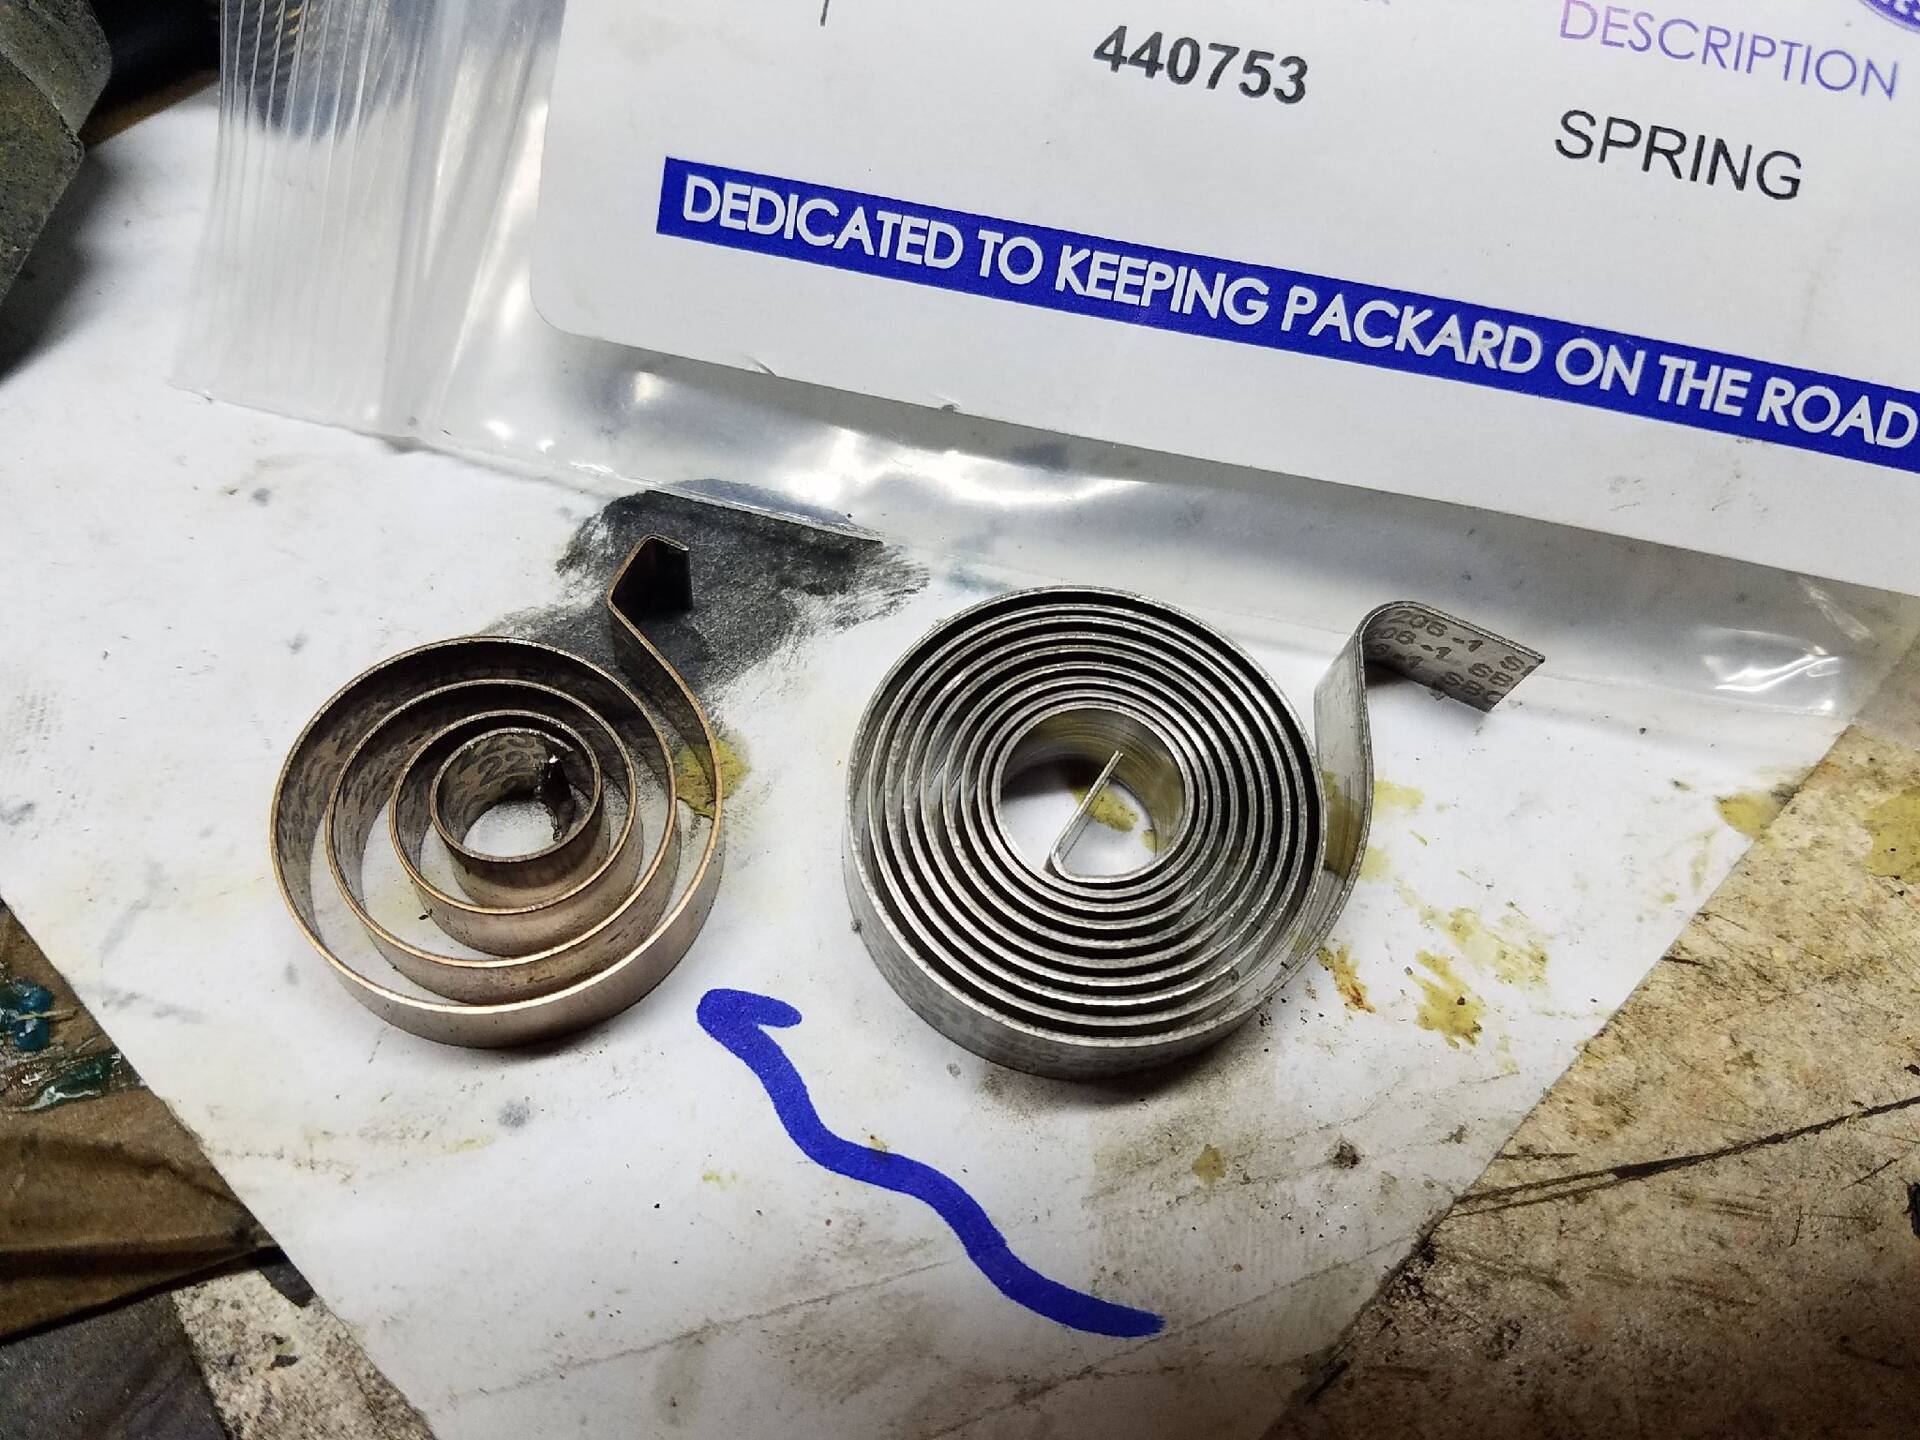 (277.09 KB) (277.09 KB)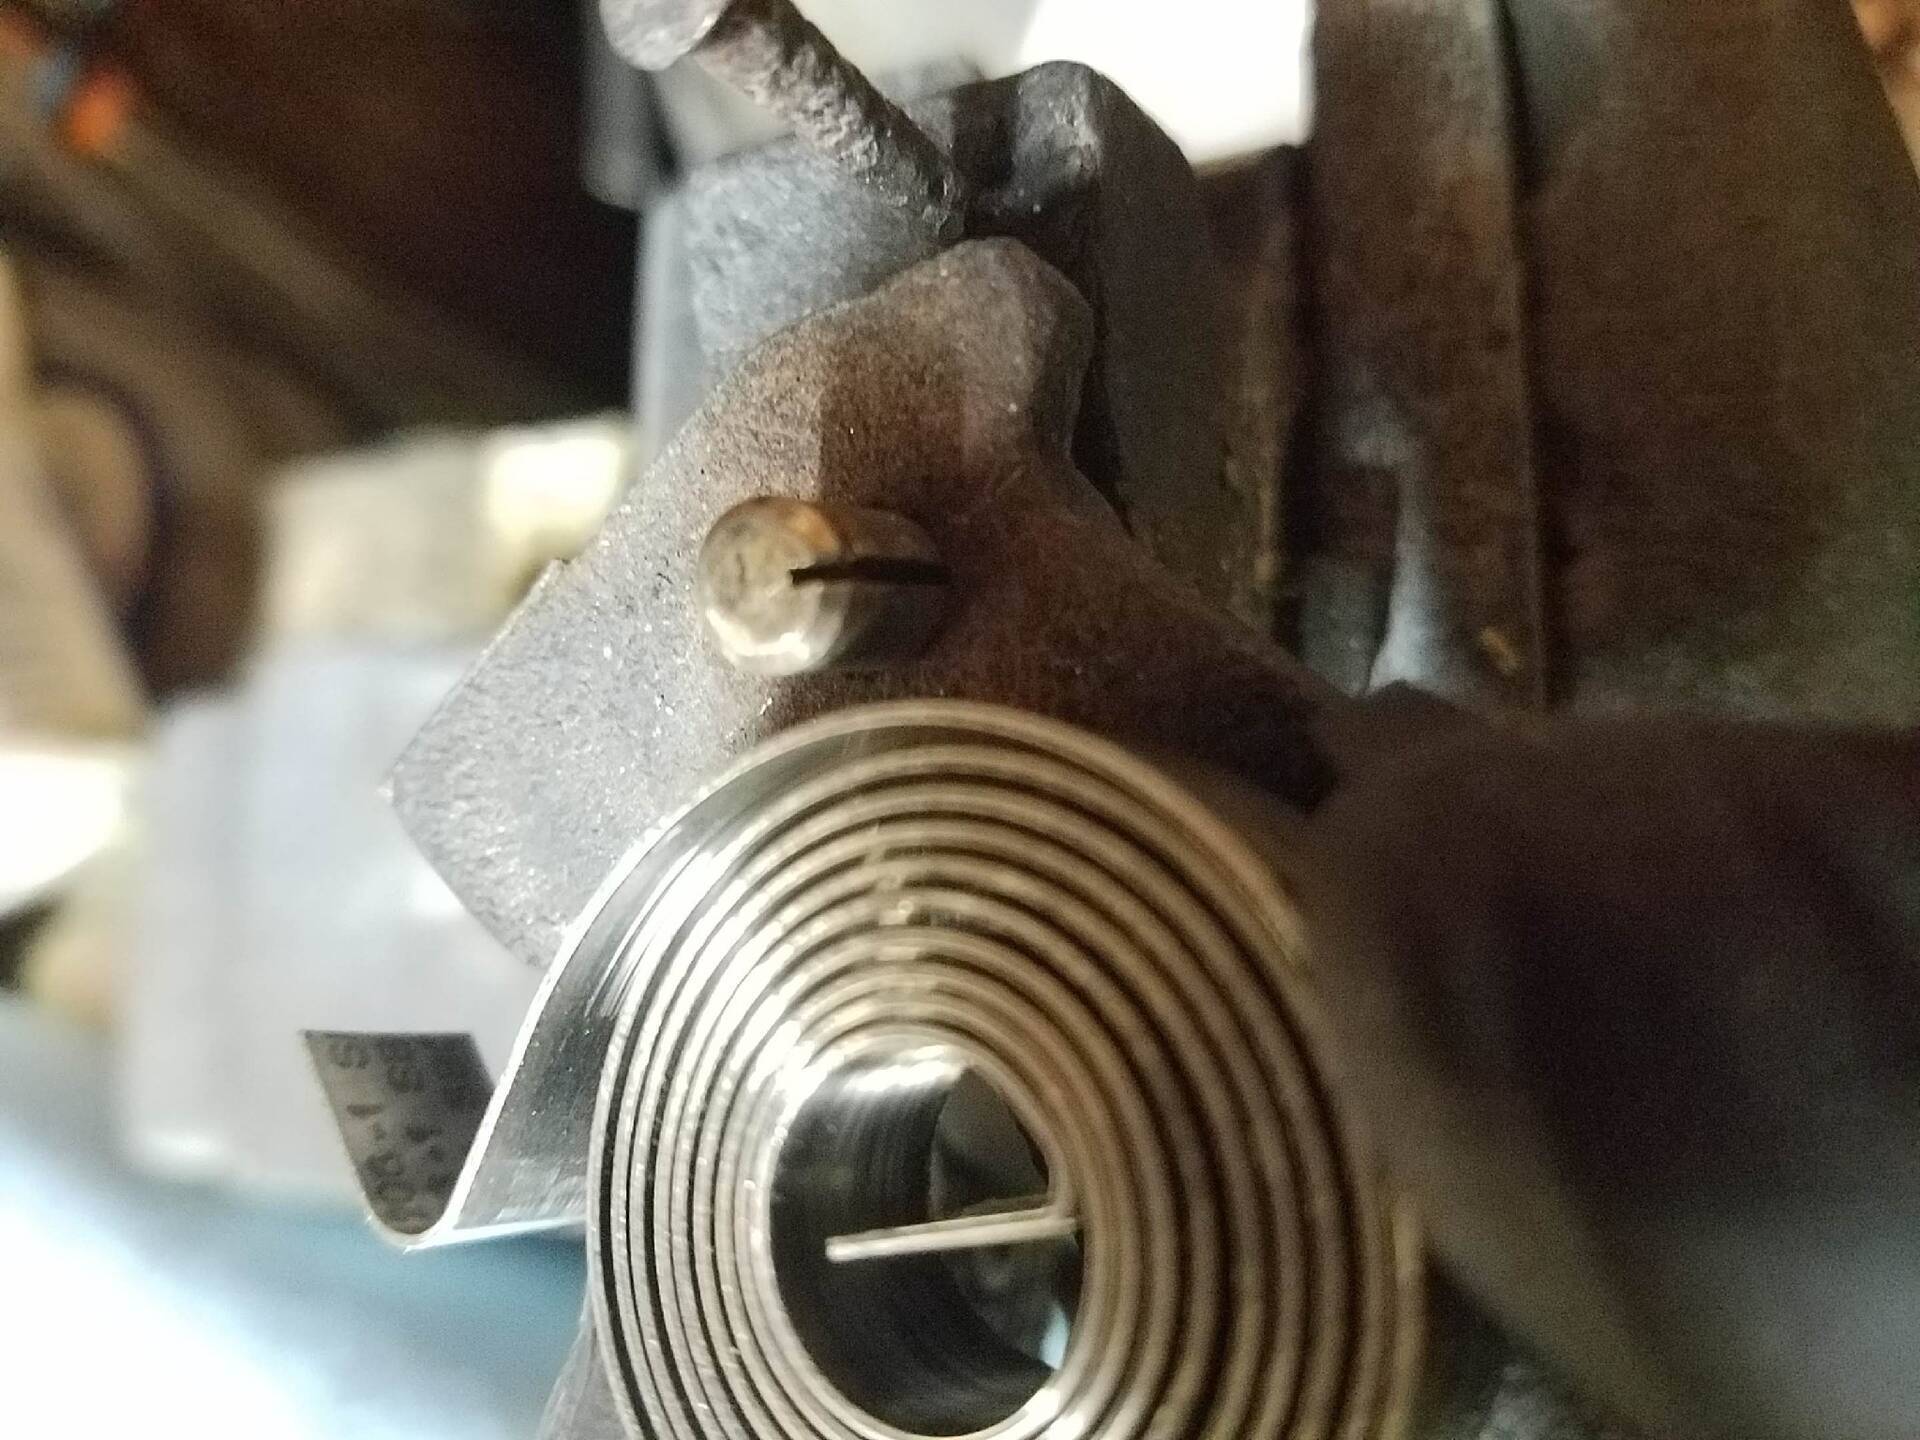
Posted on: 2019/11/22 19:43
|
|||
|
Bob
1955 Packard Patrician Sapphire Blue |
||||
|
||||
|
Exhaust Manifold Heat Riser Spring
|
||||
|---|---|---|---|---|
|
Home away from home
|
Folks,
I replaced a very distorted thermostatic spring with a "universal" one from Hagen. I twisted it around (counterclockwise) to bend it in place so that the valve was barely closed when cold with the spring just contacting the post. Upon heating up, the valve opens a little but not nearly enough. While the engine was warm, I used my heat gun from ~6" away and the spring relaxed and the valve fully opened. Seems like the spring is too strong or not enough heat is getting to the spring for it to work properly. Is there some other way to 'prep' the universal spring to work? Or would a $35 spring from Max (part # 440753) work without having to play around with it??? thanks -Bob (unrelated, but I want to replace the Brake vacuum check valve at the carb (part 440822). Max has them for $40 but haven't found another, cheaper source. Have you?)
Posted on: 2019/11/5 22:45
|
|||
|
Bob
1955 Packard Patrician Sapphire Blue |
||||
|
||||
|
Re: Carb/Intake Gasket seal
|
||||
|---|---|---|---|---|
|
Home away from home
|
UPDATE:
I used the approach suggested by Dave and took a long file and dressed that corner. I was careful to always maintain corner to corner contact, which helped make it much flatter. When I started, the file didn't make any marks in the middle of the manifold. So I continued, swapping corners, until all of the manifold was lightly touched. Also, and this may be the bigger contributor, I switched gaskets. The gasket that came with it from Daytona was a relatively thin, compressed paper gasket. I replaced that with one that came in the engine rebuild kits that is a little thicker and more 'fibrous' In addition, I bought a fuel pressure regulator and dialed down the pressure from about 7psi to ~5 psi as per Daytona's strong insistence that this is the major problem. The first pic shows this plumbed in. No one else on this forum talks about this, so thinking that the Carquest/Airtex #6866 fuel pump (from the Parts X-Ref section) works but is too high in pressure to allow the engine to run smoothly. It is rated at 6psi-7.5psi. Anyone else have a similar issue?? End result is that the engine runs much more smoothly. I am able to get it to idle around ~450rpm. The noticeable, random miss (shudder) is still there but significantly reduced in magnitude. The picture shows the rpm along with vacuum gauge (connected to the carb rear vac source normally used for the check valve and connection to vacuum cylinder and brakes). ~17in vac seems low to me for a rebuilt engine. I adjusted the 2 idle mixture screws to maximize vacuum. Not sure what else to do so planning on putting the front clip back on and driving it for a while. Thanks again to all for the suggestions!! Attach file: (345.15 KB) (110.42 KB) (110.42 KB)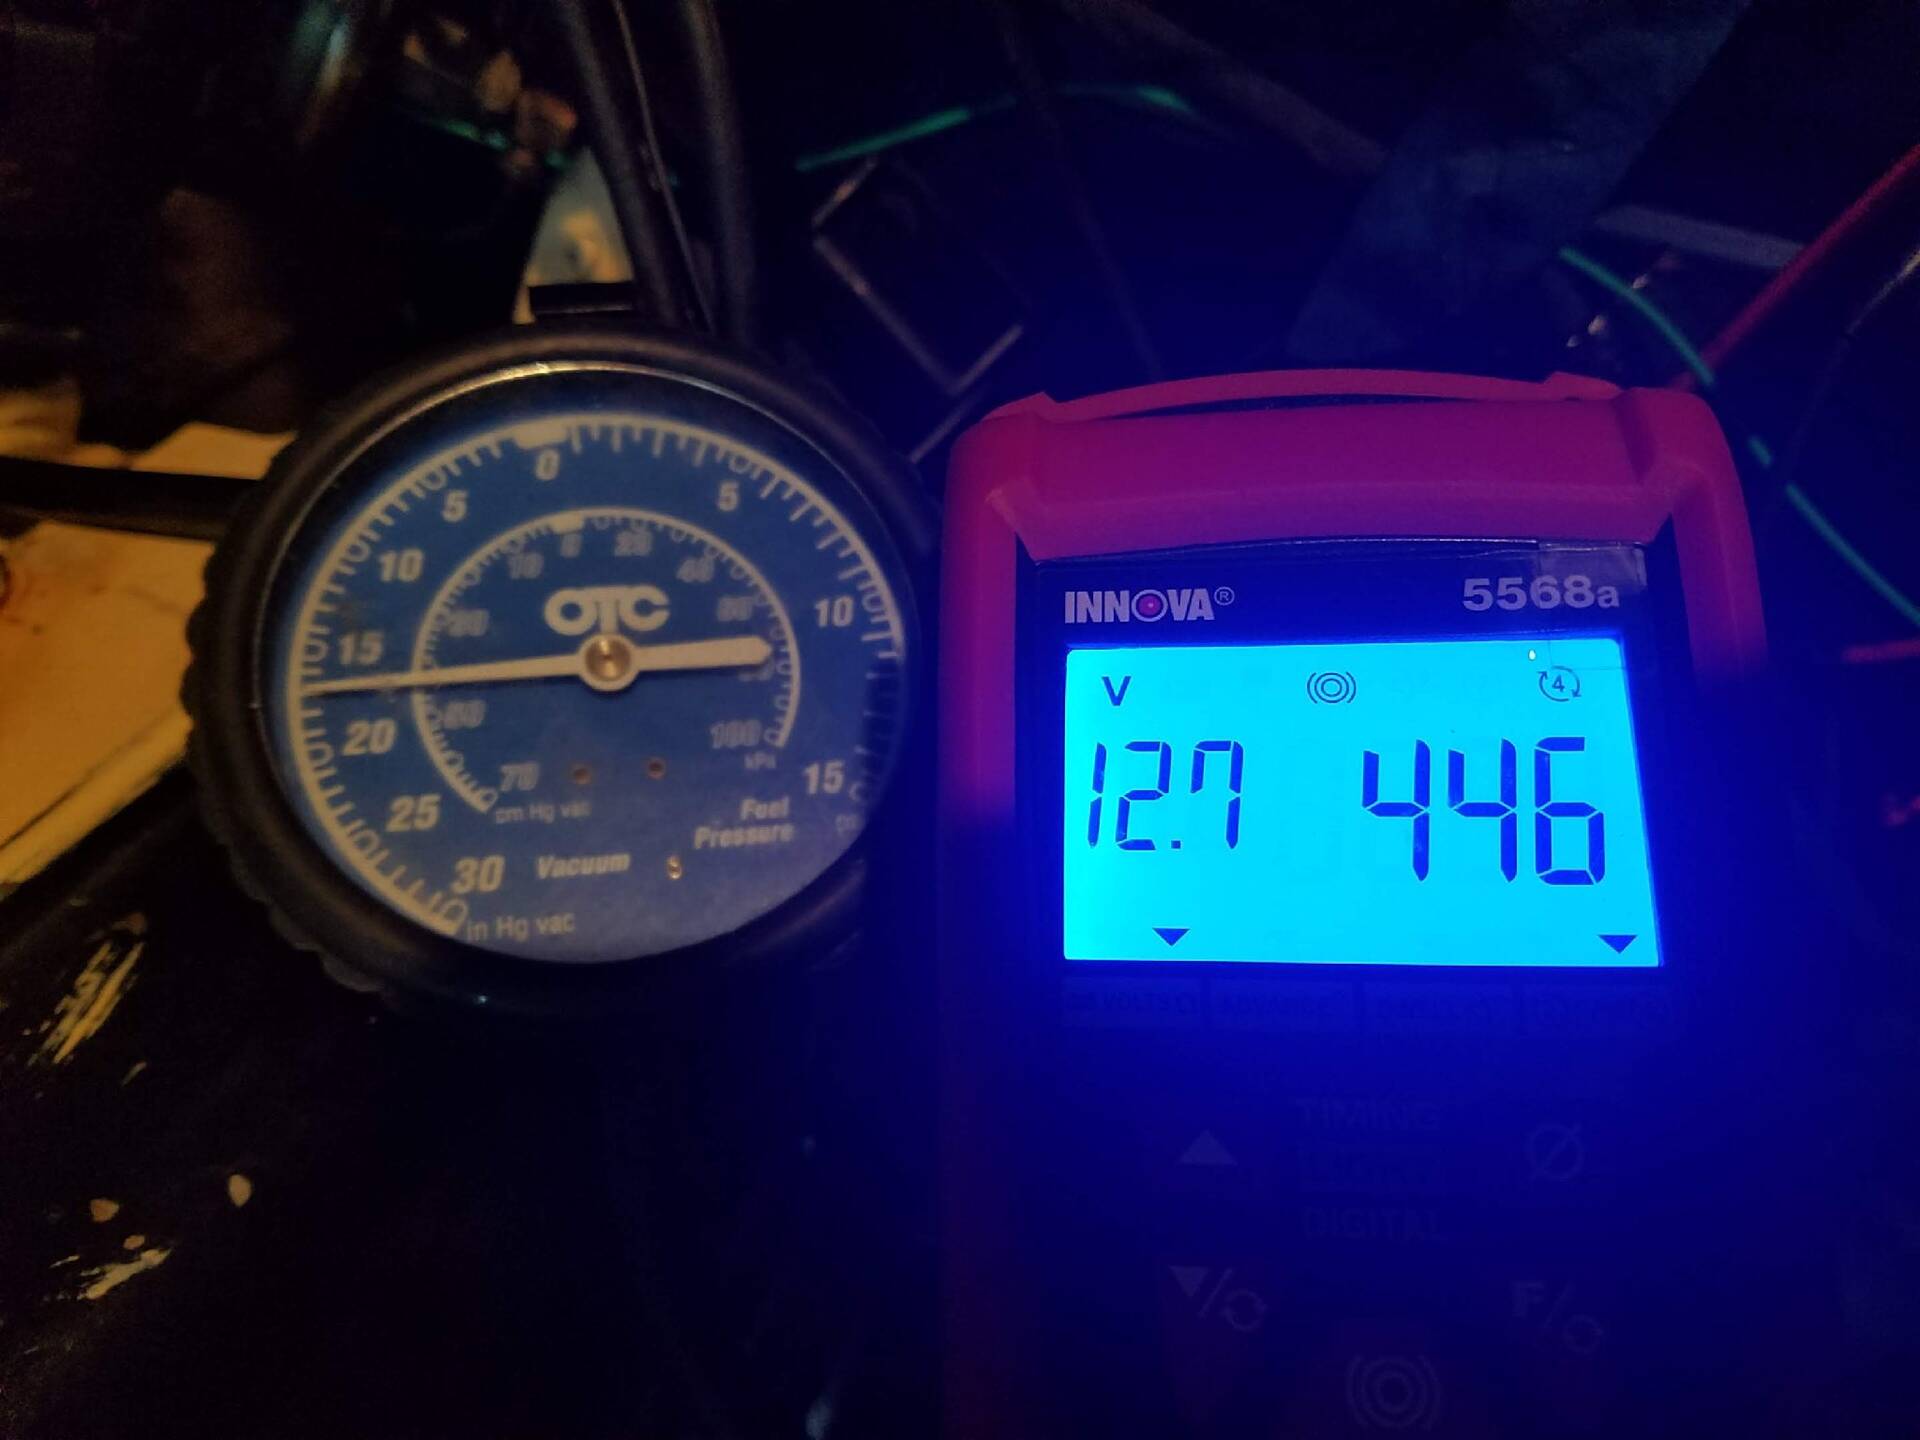
Posted on: 2019/11/3 15:57
|
|||
|
Bob
1955 Packard Patrician Sapphire Blue |
||||
|
||||
|
Re: Carb/Intake Gasket seal
|
||||
|---|---|---|---|---|
|
Home away from home
|
I did check the carb throttle body/base plate with a straight edge both across each side and diagonally (corner to corner). Even with shining a light through the back it seems very flat to me.
I did the same with the mounting surface of the intake manifold. Mostly the same story, but as you can see in the picture there is a gap close to the forward, driver-side stud. It looks like the metal outside of the stud is slightly raised leaving a gap of about 0.009". When i got the car the 2 studs on the driver side would come out as the nut was rusted on the stud. Maybe years of torquing or overtorquing somehow distorted that corner? I'm try to convince myself that even with a paper gasket thicker than 0.009", torquing down the base plate to the intake in this condition will cause the base plate to warp enough to allow air to come in. I squirted a lot a starter fluid around and when I hit the base plate to main body gasket (in the front) rpm would rise ~150rpm. Same thing if I squirted the air horn to main body gasket near the accel pump area: rpm rise. Any easy way to deal with this? Multiple gaskets? Finding a machine shop that can make the manifold flat as flat can be sounds like the right answer, but i have a hard time finding those places thanks Bob Attach file: (202.15 KB)
Posted on: 2019/10/2 20:33
|
|||
|
Bob
1955 Packard Patrician Sapphire Blue |
||||
|
||||
|
Carb/Intake Gasket seal
|
||||
|---|---|---|---|---|
|
Home away from home
|
Hi,
Been fighting an idle and high rpm miss for a while (see project blog): https://packardinfo.com/xoops/html/modules/newbb/viewtopic.php?topic_id=20490&viewmode=flat&order=ASC&type=&mode=0&start=70 I've been trying everything to isolate with no luck. last week, I removed the intake manifold (with carb attached) and now that I reinstalled it, it runs even worse and won't idle below 700rpm. Very much a vacuum leak. Took some starter fluid and was spraying around the carb/manifold interface. When I squirted the driver side throttle shaft area, the rpm picked up. Due to the linkages, I can't tell if the rpm changed when the fluid hit the throttle shafts or the carb/manifold interface. Carb was rebuilt by Daytona so I am assuming they would have checked a need to re-sleeve the throttle shaft bores. I pulled the carb off and as you can see from the attached photo, there is no indent in the gasket from the manifold side on the driver side, but a noticeable one on the passenger side. This makes we want to believe this is the source of the vacuum leak. I checked the carb nuts torque several times so I know each 4 nuts were the same. Should I just crank harder on the driver side? Or is there some RTV type material I could use and trust? I'm hesitant to use anything that fuel may deteriorate and end up in the engine. I've had a miss since before I tore my engine apart, not sure this is related. Anyone have experience with these intake manifolds warping a little and need to be machined? I guess it could be the carb face could be the culprit too and bending when I torque down the nuts. thanks -Bob Attach file: (388.60 KB)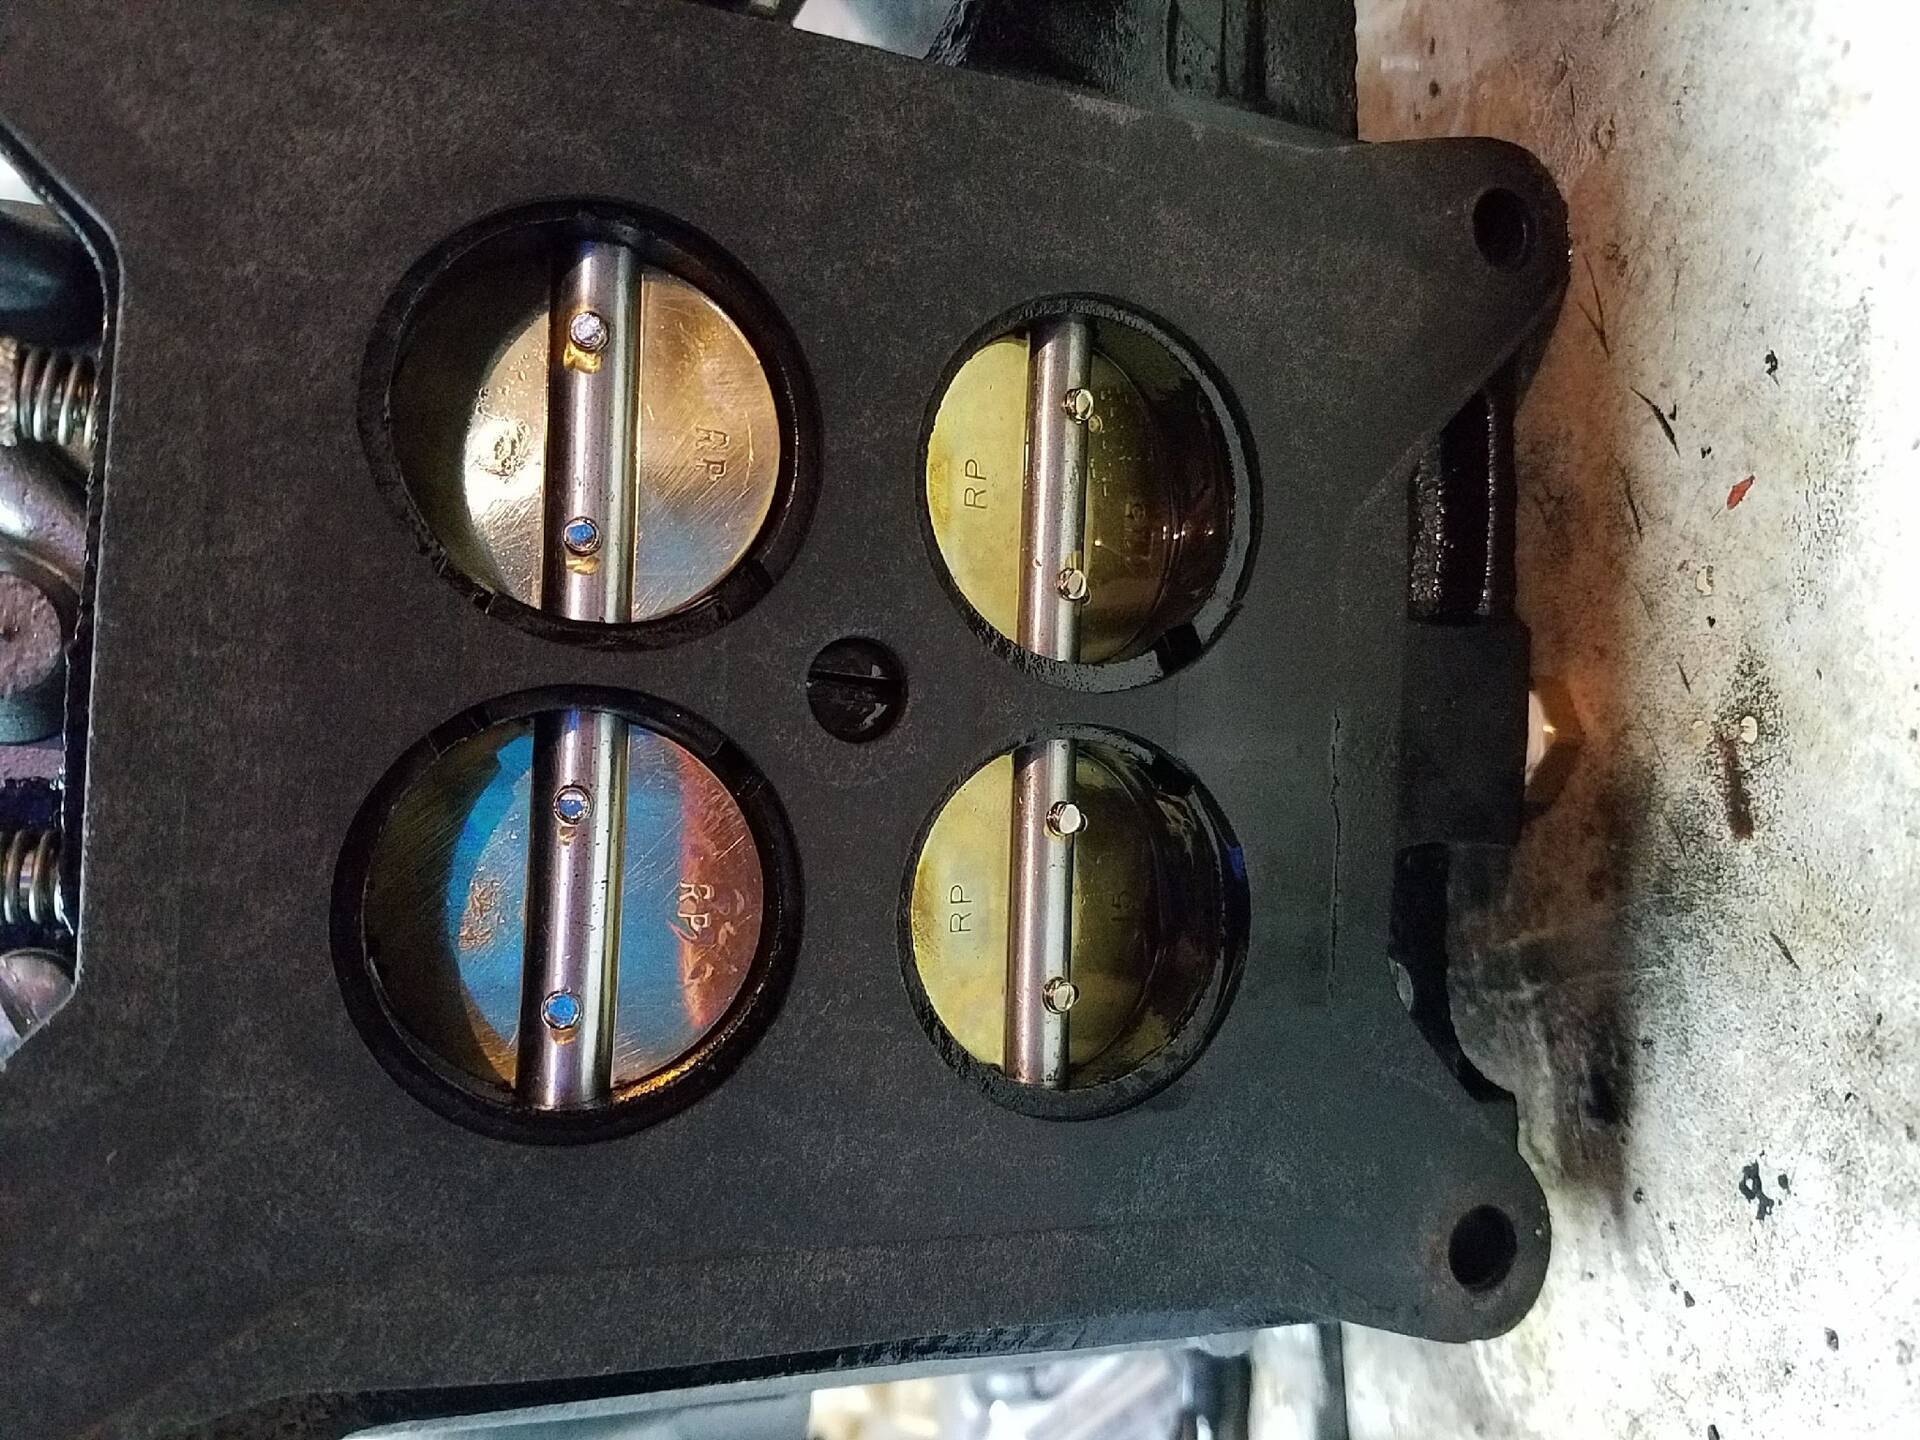
Posted on: 2019/9/14 16:10
|
|||
|
Bob
1955 Packard Patrician Sapphire Blue |
||||
|
||||
|
Re: More troubleshooting
|
||||
|---|---|---|---|---|
|
Home away from home
|
decided to open it up. Pulled out the lifter for #6-Exhaust. Hard to tell from photo but it shows a wear pattern of not rotating, although there is a ring around the circumference as well. I know at one point it was rotating from earlier post #25 in:
https://packardinfo.com/xoops/html/modules/newbb/viewtopic.php?post_id=205415#forumpost205415 Felt around in bore and seems very smooth. Might try to brush it with plastic bore brush and be careful with anything falling into engine. Attach file: (286.22 KB)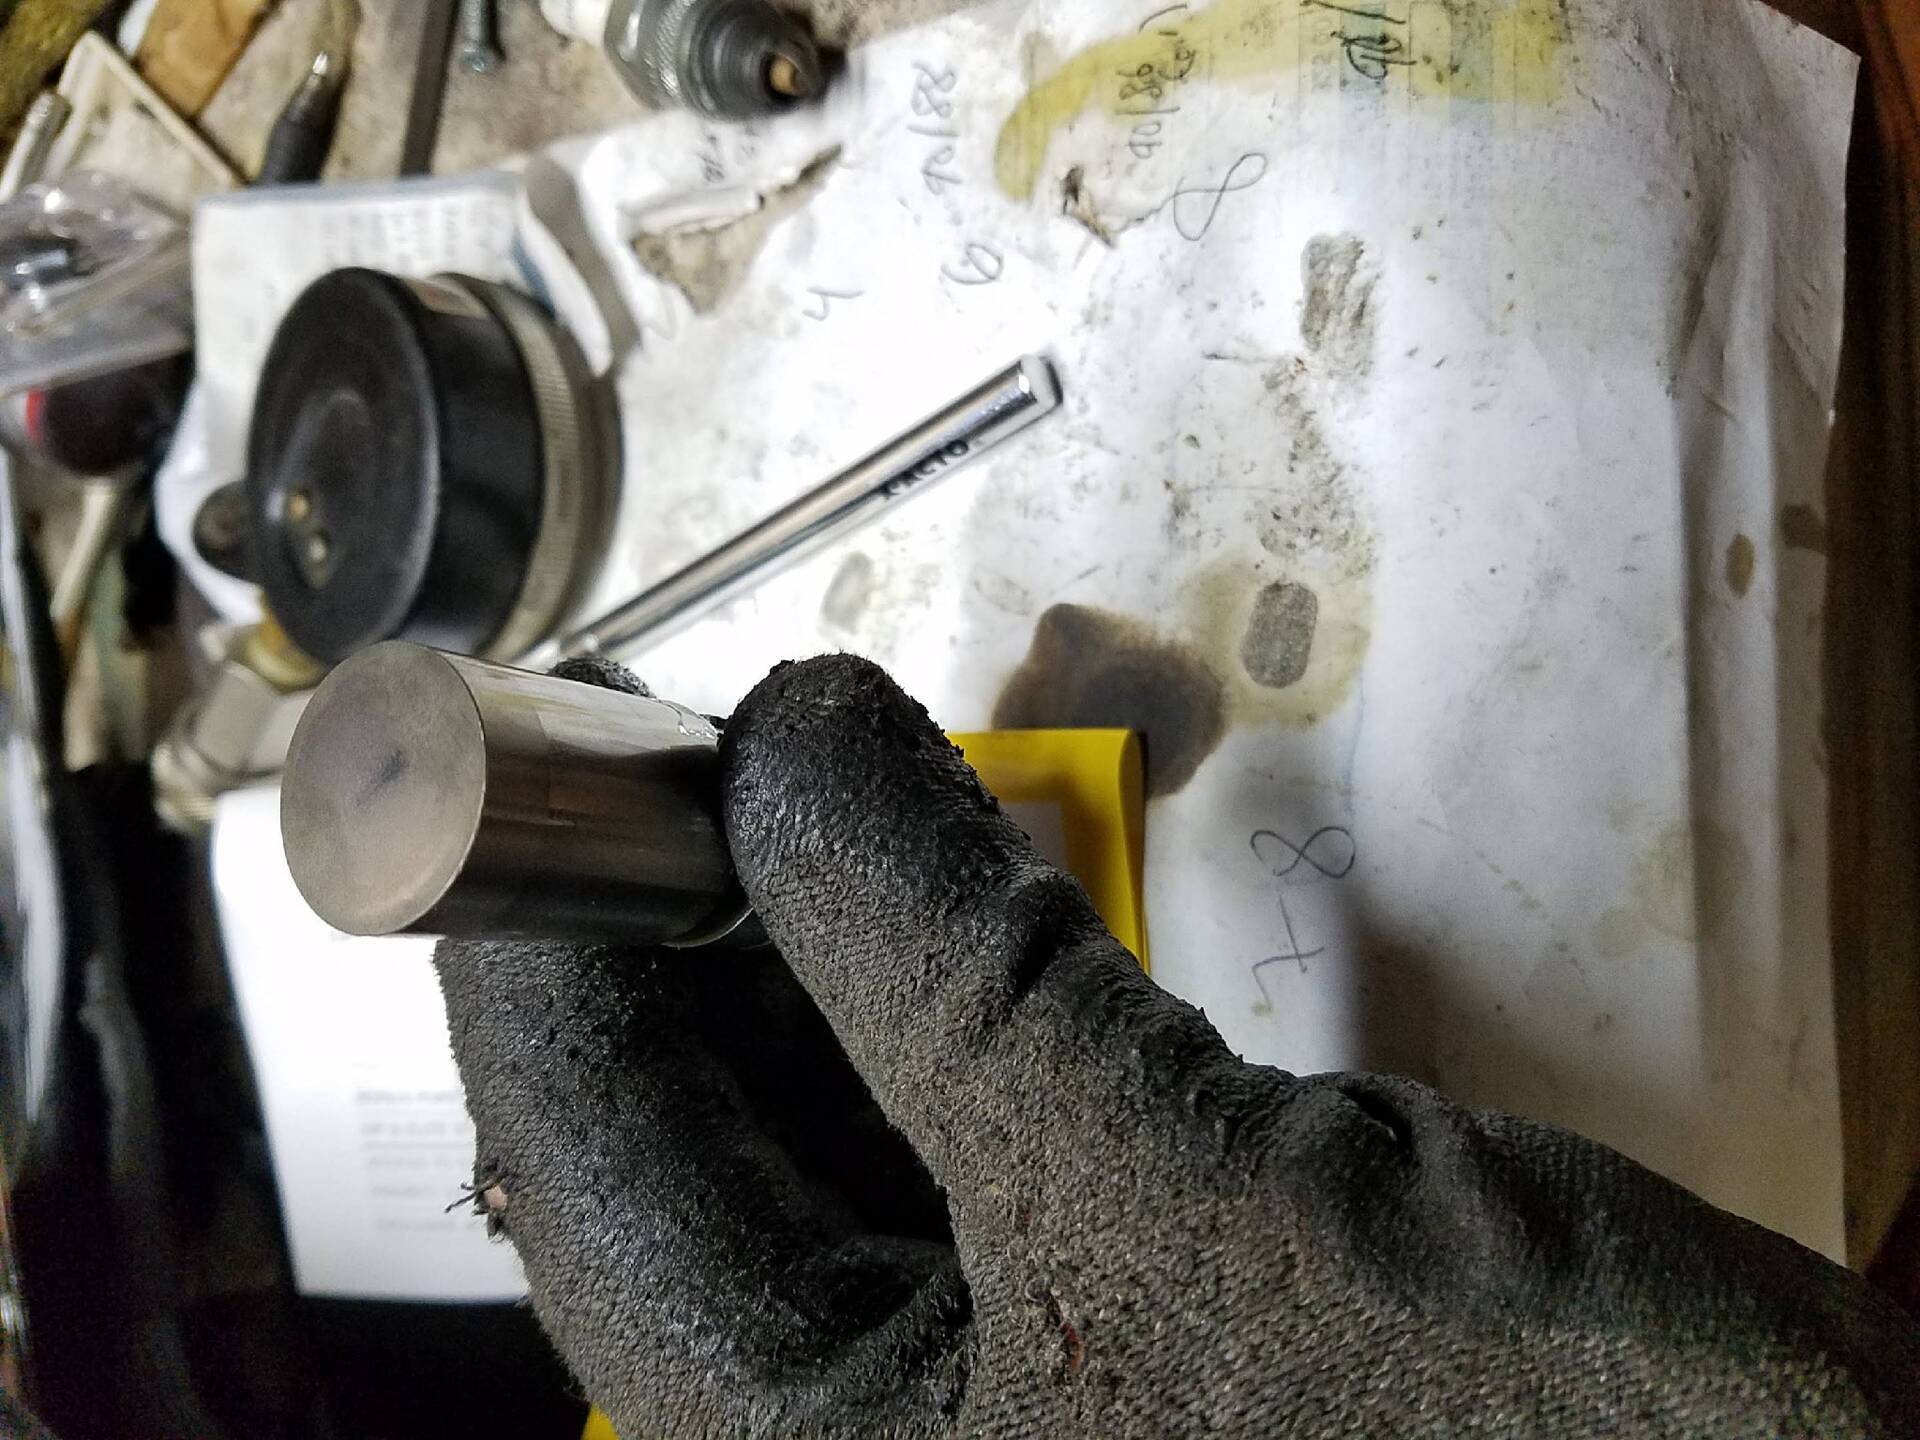
Posted on: 2019/9/1 14:56
|
|||
|
Bob
1955 Packard Patrician Sapphire Blue |
||||
|
||||
|
Re: More troubleshooting
|
||||
|---|---|---|---|---|
|
Home away from home
|
Pulled the passenger side valve cover. Looks like normal rocker arm action. Did notice that some of the pushrods are really rotating quickly, some not so quick, and #6 exhaust is not rotating at all. You can see a video at my Youtube channel at:
https://www.youtube.com/channel/UCXxvWDoVWUSusn7JVgi1Fkw I pulled off the rocker arm assembly and checked this pushrod. Ends looked nice and round/smooth and rolled it on flat surface and no evidence of being bent. Rocker arm cup itself looks good and the same as the others. Put a dab of assembly lube on tips of rocker arms, reinstalled with no change. From idle to ~3000rpm that pushrod does not rotate. Trying to convince myself not to pull the intake manifold and lifter valley cover to see if the lifter itself is not rotating. But seems like the only logical next step. Any thoughts of what to do or look for next would be appreciated. I feel that I have a vacuum leak but can not find it. thx
Posted on: 2019/8/30 19:45
|
|||
|
Bob
1955 Packard Patrician Sapphire Blue |
||||
|
||||
|
More troubleshooting
|
||||
|---|---|---|---|---|
|
Home away from home
|
Still working through a troubleshooting process on the miss at idle and at elevated RPM and documenting what I am doing so I can recall later in time if this happens again:
Tested all the spark plug wires for continuity; nothing interesting there. Listening to the exhaust pipes, the right (passenger) side is noticeably more 'forceful' than the driver side. I know the exhaust manifold riser valve can restrict this to some degree, but I have the spring removed so it is mostly open. (note, i manually close it when starting the car until it is warmed up). Have some muffler holes that were patched with tape so maybe there is some leakage on the driver's side The miss is audible from the right exhaust pipe along with a low frequency "whoom" sound at the sound of the miss (and reduction of rpm). I think this is telling me that my problem is not a generic fuel/carb problem or primary side ignition problem. Pulled the even cylinder plugs and 2,6,8 look normal. #4 looks too clean to be right; the insulator core is very clean. Started engine with #4 plug removed and touching block. Seems like a proper spark visually so I would assume it is firing in the cylinder. I also have lowish vacuum (oscillates between ~16"-~17")so maybe there is a vacuum leak in #4 air path that is causing a very lean condition. More to come, just wanted to write down what i did recently so I didnt forget. Next steps: pull right valve cover to see if anything weird going on with #4 intake valve. Also maybe use a spark tester to see if any difference between the plugs. Attach file: (185.77 KB)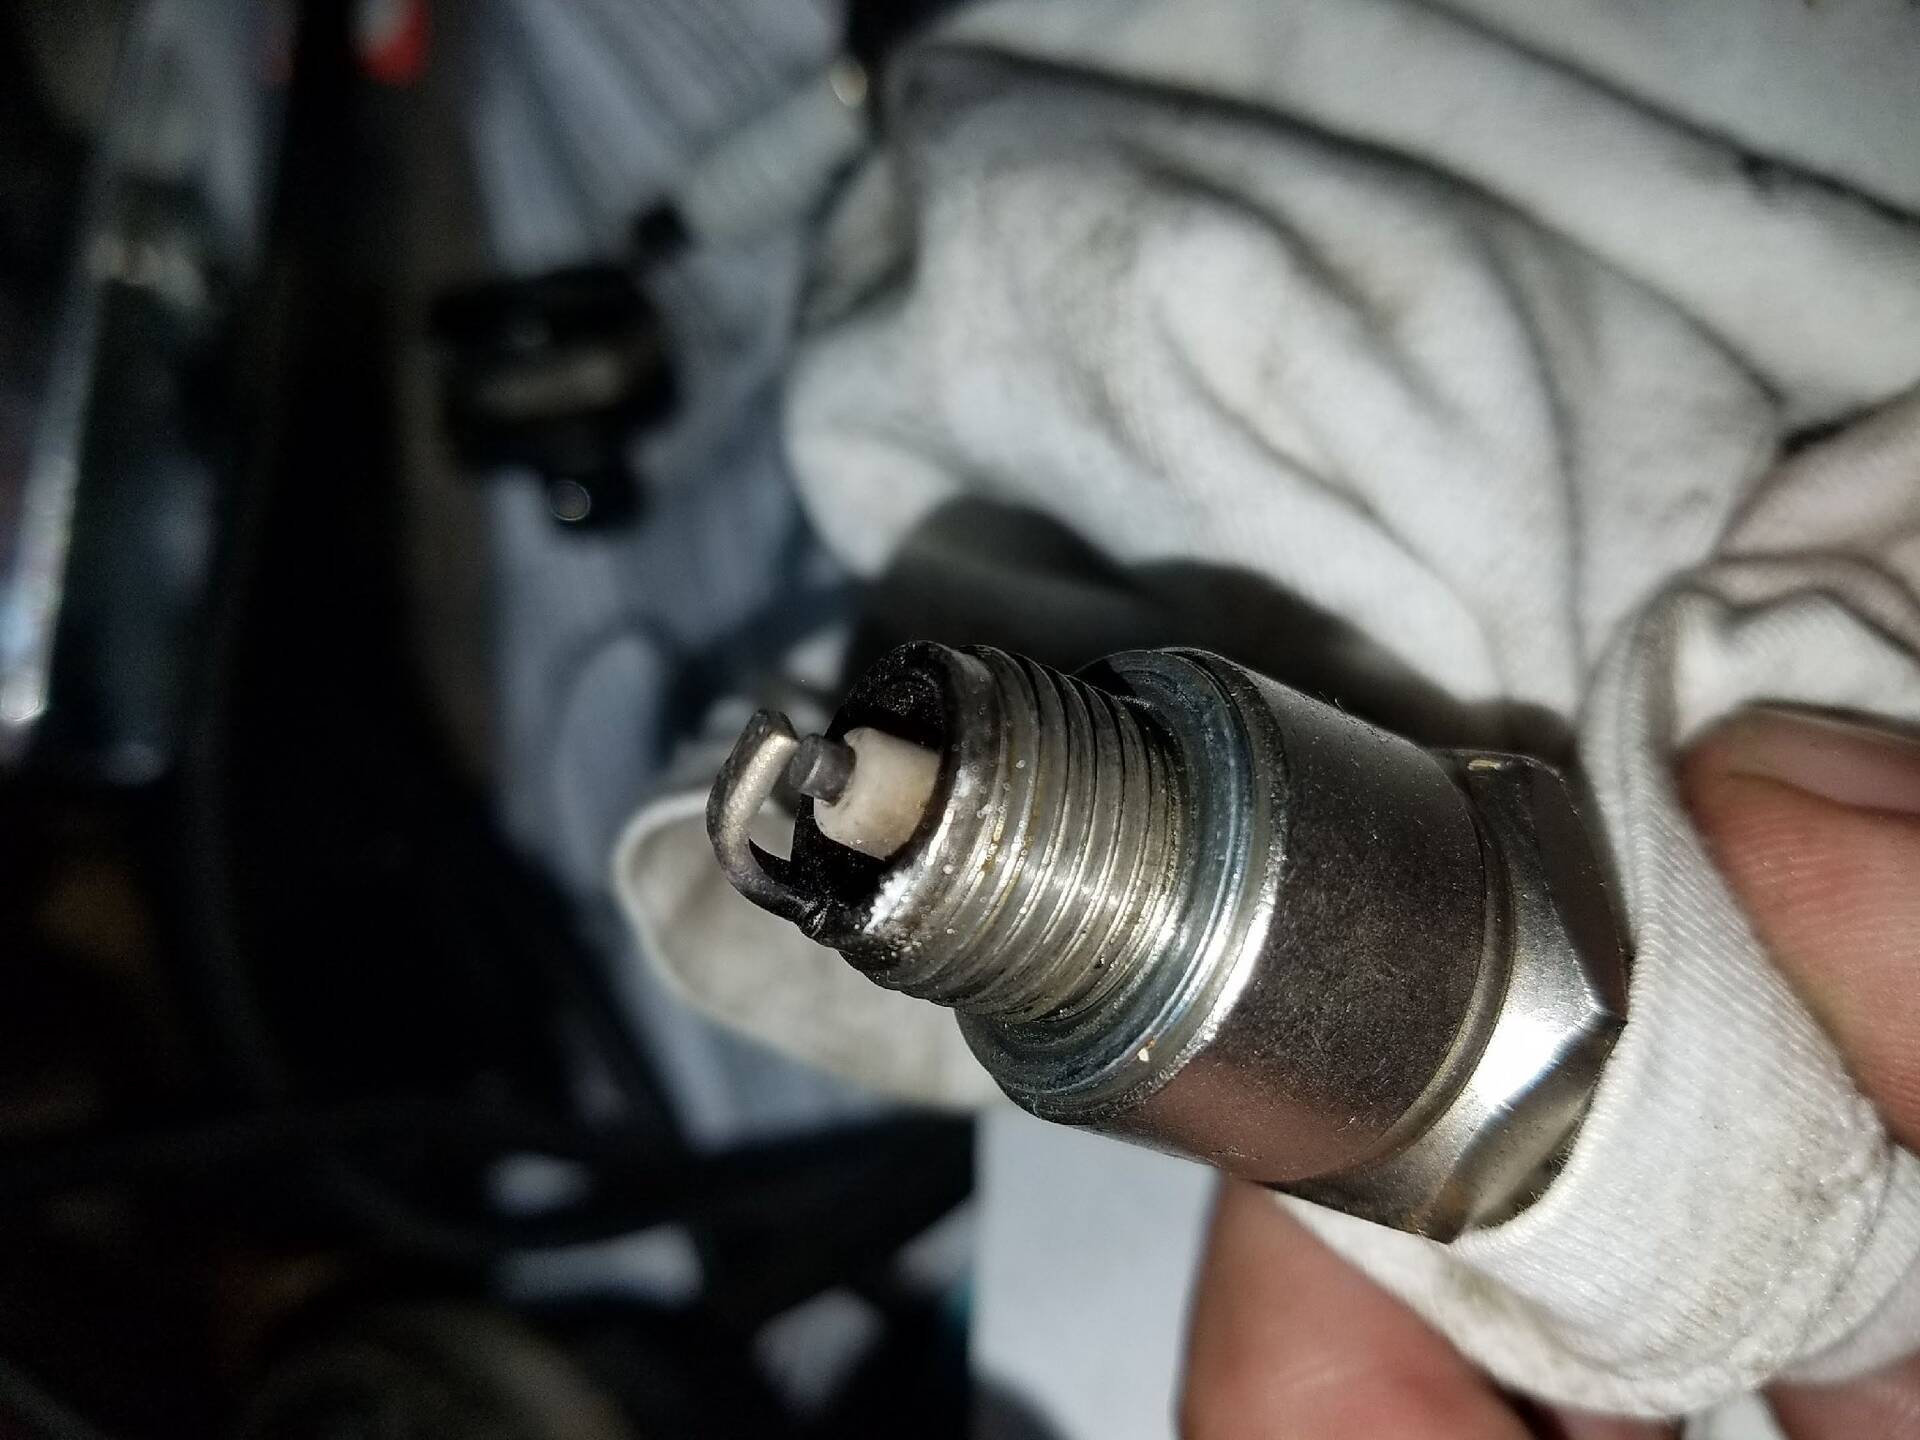 (242.14 KB) (242.14 KB)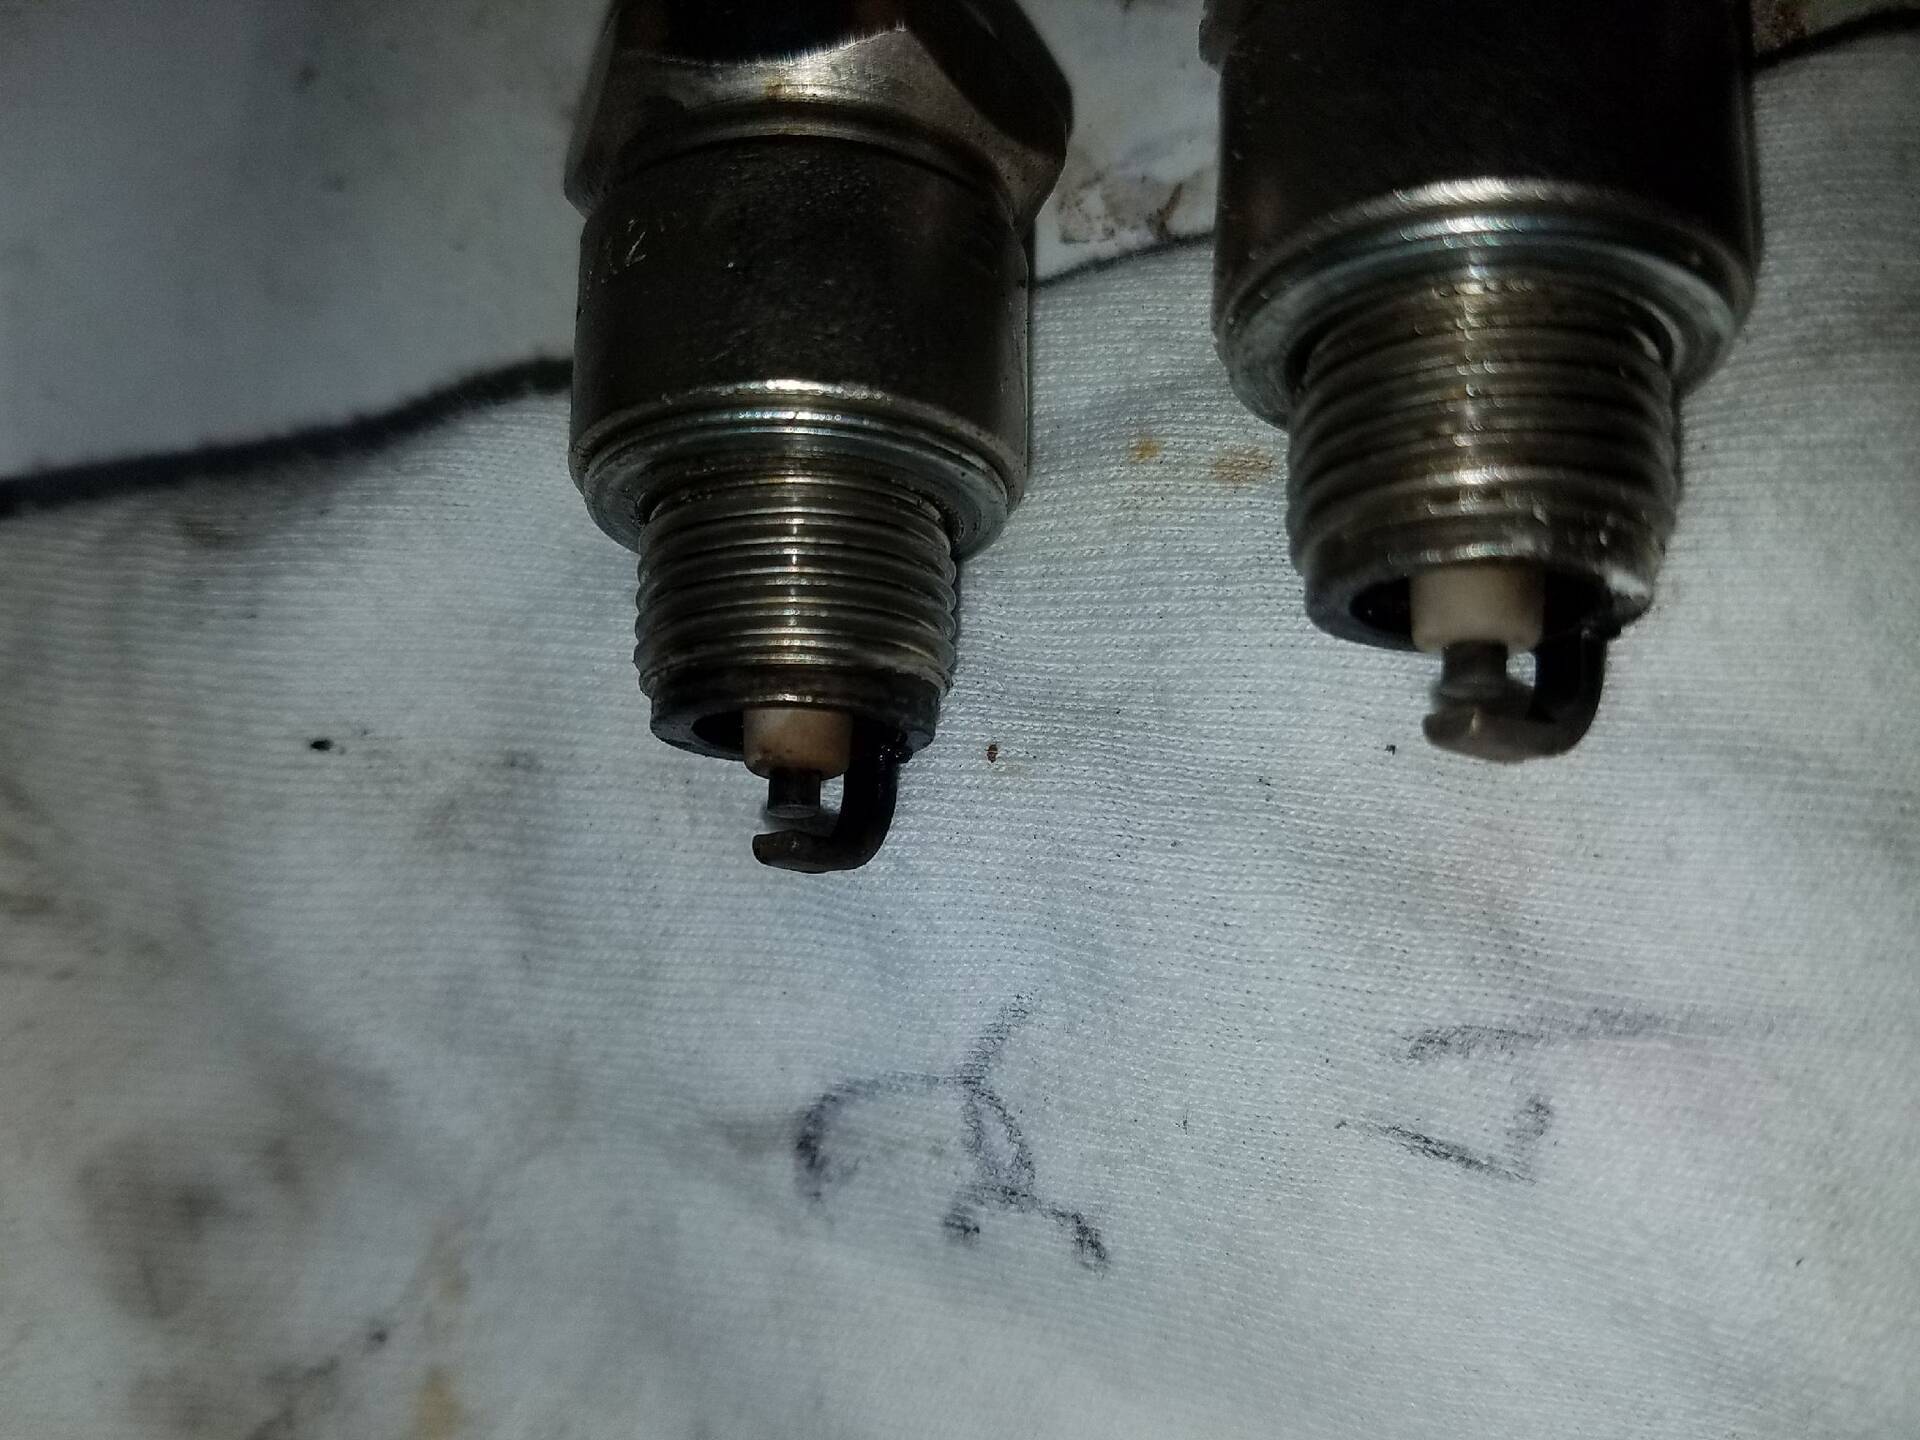
Posted on: 2019/8/29 11:32
|
|||
|
Bob
1955 Packard Patrician Sapphire Blue |
||||
|
||||
|
Cylinder Leak Test
|
||||
|---|---|---|---|---|
|
Home away from home
|
After running out of ideas as to what could be a vacuum leak, I decided to take a step back and see how the engine is running overall.
Observations: -Engine starts right up, carb choke works well -Fast idles around 1100rpm, idle when warm at 450rpm -idle vac is ~17", high speed ~20"-21" -Right (passenger) exhaust is noticeably more "forceful" -than left; even when exhaust bypass valve is fully open after warm. Feels like more air is coming out and 'pulses' for each cylinder firing are more distinct -Also hear a low frequency 'whoom' every once in a while that corresponds to a slight dip in rpm and vac -Rpm doesnt vary at idle like it is going up and down. But steady at 450rpm and then drops every once in a while, then goes back to 450rpm. Same behavior at higher rpm; it's not an oscillation but a steady-ish rpm that drops every once in a while (once every second or two) -Ran a Cylinder Leak test for more info. fully warmed engine, pulled all plugs. Results below. Repeated test for cyl #7 the next day to be sure. Redid compression test just for #7 (battery was getting finicky so couldnt do them all) and it was 135psi (all plugs out, choke fully open). Pressurized cylinder tester at 90psi Cyl Press % leakage 1 88 2 3 86 4 5 88 2 7 79 12 2 87 3 4 88 2 6 86 4 8 85 6 Audible leakage for ALL cylinders was in Oil fill tube, no sounds in carb, exhaust, or bubbles in radiator
Posted on: 2019/8/17 21:19
|
|||
|
Bob
1955 Packard Patrician Sapphire Blue |
||||
|
||||
|
Re: TrevorK's 1955 Packard Patrician
|
||||
|---|---|---|---|---|
|
Home away from home
|
Trevor,
I have done this a couple times recently. The short answer is that it is not hard, but cleanliness is next to godliness. 0. Read the service manual. It has a lot of good pictures for awareness of some of these steps and what things are going to look like 1. Pull carb (have a new carb to manifold gasket handy) 2. Remove intake manifold (ditto on new gaskets) 3. Remove valve covers and rocker arm mounting bolts (no need to remove the heads) 4. Remove lifter valley cover (my existing gasket ripped when I removed; so have new one ready) 5. Look at rocker arm tip to push rod interface. I had one where the rocker arm tip was very recessed possibly causing some interference as it rocked. It was due to the factory original arm not being properly ground so the recess was deeper than the rest. crazy. 6. With rocker arms removed, or pulled out enough to release pressure on the pushrods, you can push the pushrod up and out through the hole in the head. 7. While the pushrod is out, might as well roll on a flat surface to see if they are bent and need replacing. 8. Lifters come out by hand by pushing up from the cam interface, may need to use a wire with a hook on the end if you cant get them out easily. (Note: good chance to look around, see if any pushrods are bent, etc) - Easiest to keep pushrods in the same position if you remove them as they are worn in to lifter. But if you are replacing lifters, it doesnt matter. 9. Carefully clean the lifter bore; It needs to be clean so the lifter will rotate. But this is also an opportunity to drop stuff down onto the cam lobes and below. So protect the cam. I covered the cam in a lint-free towel, then used a rag with brake cleaner on it to clean the bore with my finger, then wrapped a rag around a plastic bore brush and repeated. (this is a lot easier to do if the cam is out and you are replacing all the lifters, but maybe you don't want to go that far. 10. Lintless rags are important. Do NOT use paper towels or anything that can leave lint, etc in your engine. 11. Apply a little cam lube to base of new lifter as well as the top bore where the pushrod seats 12. Apply a little oil to the sides of the lifter bore and the sides of the lifter itself -No need to pre-soak lifter in oil or anything like that you may see online. 13. Reassemble.There is no valve lash adjustment on these engines. The hydraulic lifters take care of all of that. 14. Use a Cam break in procedure which is essentially running at higher RPM right away to get enough oil moving around for a nice break in. I went between 2500 and 3000 for about 20 minutes. Don't worry too much about it. I didnt know how to do this either and the great folks on this site helped me through it. Posting specific questions to the main 55-56 forum usually gets faster responses than in the project blogs. I think because not everyone reads the project blogs. Good luck -Bob
Posted on: 2019/8/15 14:06
|
|||
|
Bob
1955 Packard Patrician Sapphire Blue |
||||
|
||||


