|
Re: 50 Deluxe horn
|
||||
|---|---|---|---|---|
|
Home away from home
|
Try cleaning the points, worked for me.
Posted on: 2020/7/20 9:00
|
|||
|
||||
|
Re: Joe's '49 Club Sedan
|
||||
|---|---|---|---|---|
|
Home away from home
|
As usual, Howard's sharp eye caught how my horn switch had been haywired. I didn't know the difference from someone's earlier handiwork. Will be corrected!
Posted on: 2020/7/16 12:55
|
|||
|
||||
|
Re: Joe's '49 Club Sedan
|
||||
|---|---|---|---|---|
|
Home away from home
|
Dallas,
The front section is one piece. I made a pattern and cut a crescent-shaped hole to go over the hump. Very similar to some of the factory carpets. Took some work to get the cutout just right. Joe
Posted on: 2020/7/16 10:19
|
|||
|
||||
|
Re: Joe's '49 Club Sedan
|
||||
|---|---|---|---|---|
|
Home away from home
|
Howard,
Because I have learned never to doubt you, I pulled it back apart to check the ground contacts. The diagram is not real clear. I swear that's how I assembled it before and I had a working horn! Joe
Posted on: 2020/7/15 13:35
|
|||
|
||||
|
Re: Joe's '49 Club Sedan
|
||||
|---|---|---|---|---|
|
Home away from home
|
I had to remove the steering wheel to be able to work on the dash re-wiring. When I took it apart, I put all the many parts in a plastic bag and put it aside. I've put this back together several times, but it never fails that I have to stare at all the parts to try to figure out how it goes back together. Might even have to check a diagram Howard sent me a long time ago! It came back to me and I got all the insulators and the disk on the horn wire in the right place and the horn ring assembled.
The biggest trick in re-assembly is getting the horn wire all the way down the steering shaft and out at the bottom of the steering box. Trying to push the wire down the shaft is like trying to push a snake up hill by the tail. The opening in the shaft narrows at the steering box and it seems no matter how hard you try, the horn wire will not go past that point. I've found that the easiest way to get the wire installed is to run something from the bottom up to and out of the steering wheel. I used a piece of safety wire, the stuff that is used to secure critical nuts and bolts from coming loose. It is very thin and very strong. It slides right up the column. Attached a piece of nylon cord to the wire and pulled the cord down the shaft. Attached the end of the horn wire to the cord and pulled the cord and wire down the shaft and out the steering box. There is no connector on the end of the horn wire, it was removed before disassembly. A new connector will be added to connect to the horn relay wire. The last 6 inches of the assembly gets tricky as the horn ring spring needs to be lined up with the horn ring and the steering wheel as the last part of the cable is pulled, easier with 2 people. The 3 screws then attach the ring plate to the steering wheel and the plastic cover is attached. There needs to be something between the steering wheel and the plastic cover, I used a piece of 1 1/2" thick foam cut in a 3" circle. What Packard originally used had turned into a glob of goop! Now need to install the interior windshield trim and the front seat and the car will be ready to drive. Attach file:  (131.95 KB) (131.95 KB)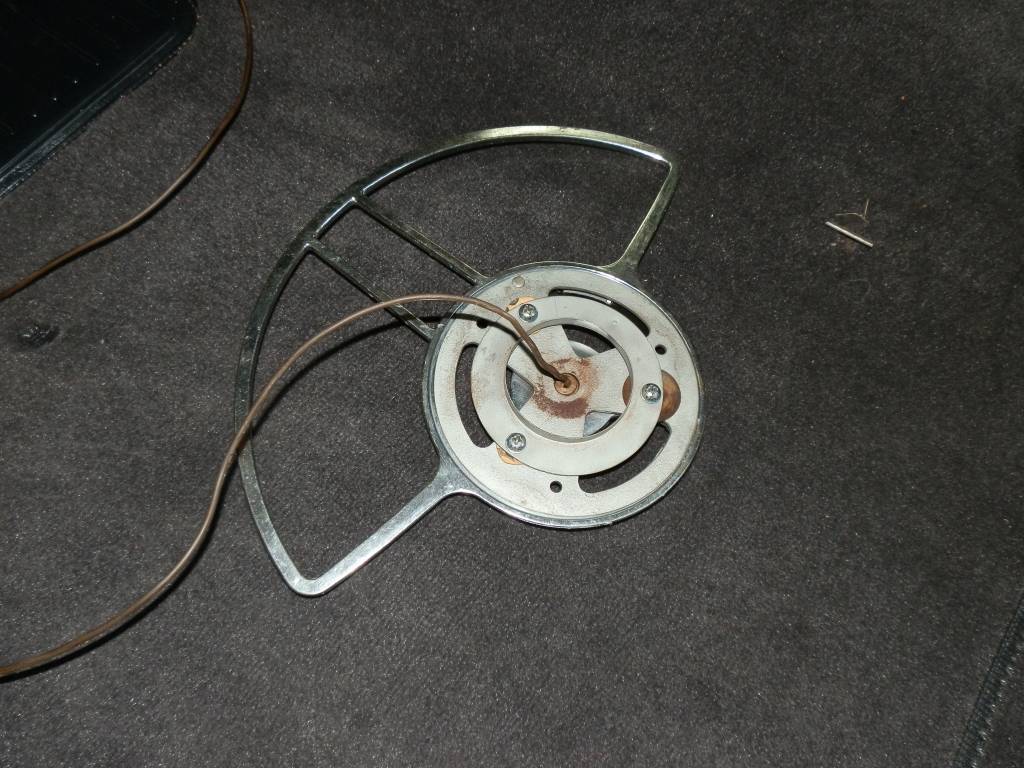 (100.39 KB) (100.39 KB)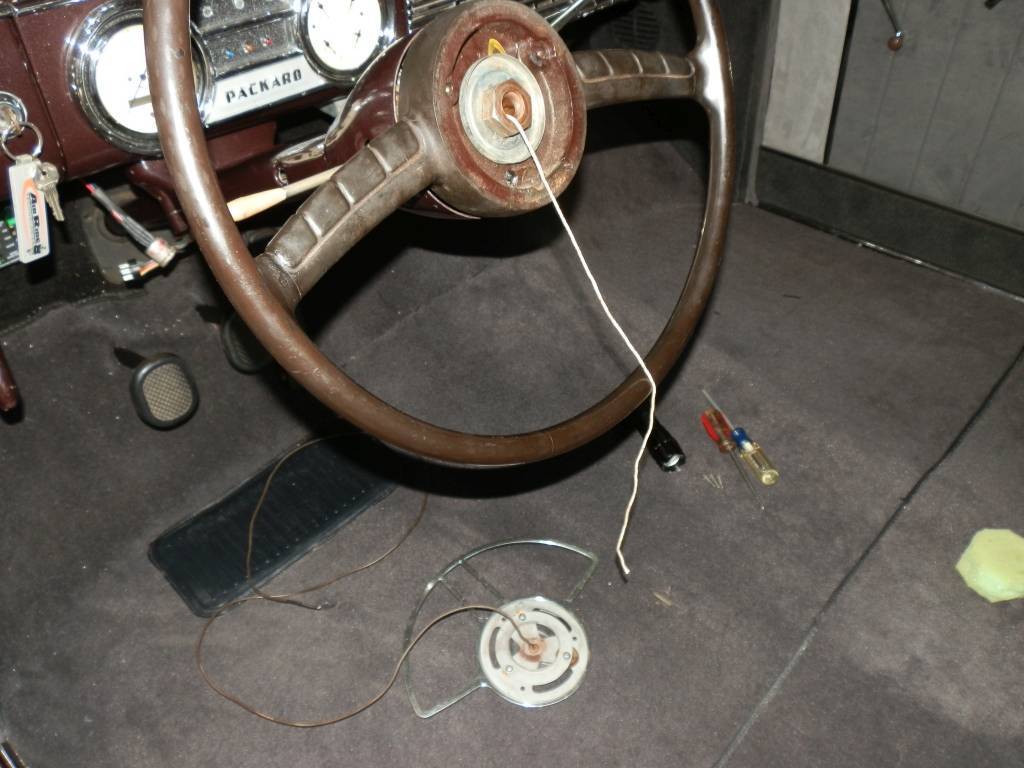 (127.05 KB) (127.05 KB) (84.75 KB) (84.75 KB)
Posted on: 2020/7/15 9:58
|
|||
|
||||
|
Re: Stewart's 1955 Packard 400
|
||||
|---|---|---|---|---|
|
Home away from home
|
I've used both 6V positive ground and 12V negative ground Pertronix ignitions in my '49 Club Sedan and both work extremely well with over 1,000 miles of trouble free operation on the 6V version before I converted to 12V. I attribute my good fortune with using it to the fact that it wasn't pairing it up with poor wiring and unstable generation. I had alternators on both versions and new wiring throughout. If you plan on running a typical generator/regulator setup with 70+ year old wiring, stick with your good "old" points and condensers!
Posted on: 2020/7/9 8:54
|
|||
|
||||
|
Re: Joe's '49 Club Sedan
|
||||
|---|---|---|---|---|
|
Home away from home
|
Howard,
The vertical AC control panel fitting in the dash was just pure luck, any bigger and it would not have fit! I didn't notice the wires showing through the speaker grille until I took the picture! The dash has been hanging down until I competed the wiring and ducts, didn't see them. I'll stick a piece of grille material behind it. I'm going to use my cell phone with a Bluetooth speaker for a radio. I removed the lighted strip from above the switches. There are 4 operating switch positions in the original cluster: the power port (former cigar lighter), the headlight switch (pull to operate the GM switch), the starter button (push to start) and the fuel pump switch (pull to start). I'm going to have some ID tags made for them later. For now, if you look at the switches in the picture, there are 3 colored dots to help me identify what to use. Finding a USB adapter that would fit in the former cigar lighter was hard, very tight fit. I did find a single USB adapter that will work to power 12V accessories. Here's a picture of the USB adapter and the modified cigar lighter knob with the element replaced with a grommet to hold it in place when the port is not used. Joe Attach file: (115.55 KB)
Posted on: 2020/7/5 12:07
|
|||
|
||||
|
Re: Joe's '49 Club Sedan
|
||||
|---|---|---|---|---|
|
Home away from home
|
Got the dash back in place and attached the hood release brackets and bolted the AC unit to the lower dash. The AC control panel with vertical slide switches fit snugly where the radio block-off plate is mounted. Just plain lucky with that! The center AC vent is mounted below the switches where the original heater controls were located. On the same panel as the AC vent, on the left is the switch for the 2-speed electric windshield wipers and on the right is a toggle switch to turn on the courtesy lights. The Autometer gauges were fitted to the original gauge bezels. On the right, a 4-gauge unit with temperature, voltage, fuel level and oil pressure replaced the non-working clock. On the left is an electronic speedometer replacing the broken original mechanical speedometer. The speedometer is driven by a GPS antenna mounted on the dash. The original Packard ignition switch is maintained but the starter is activated by a push button switch in the original switch cluster. Right and left turn signals and high beam indicators are added where the original gauges were located. Below that, are indicator lamps to show the operation of the electric fan, the electric fuel pump and the activation of the overdrive governor.
Need to re-test everything than the project can be finally wrapped up. Attach file: (244.93 KB)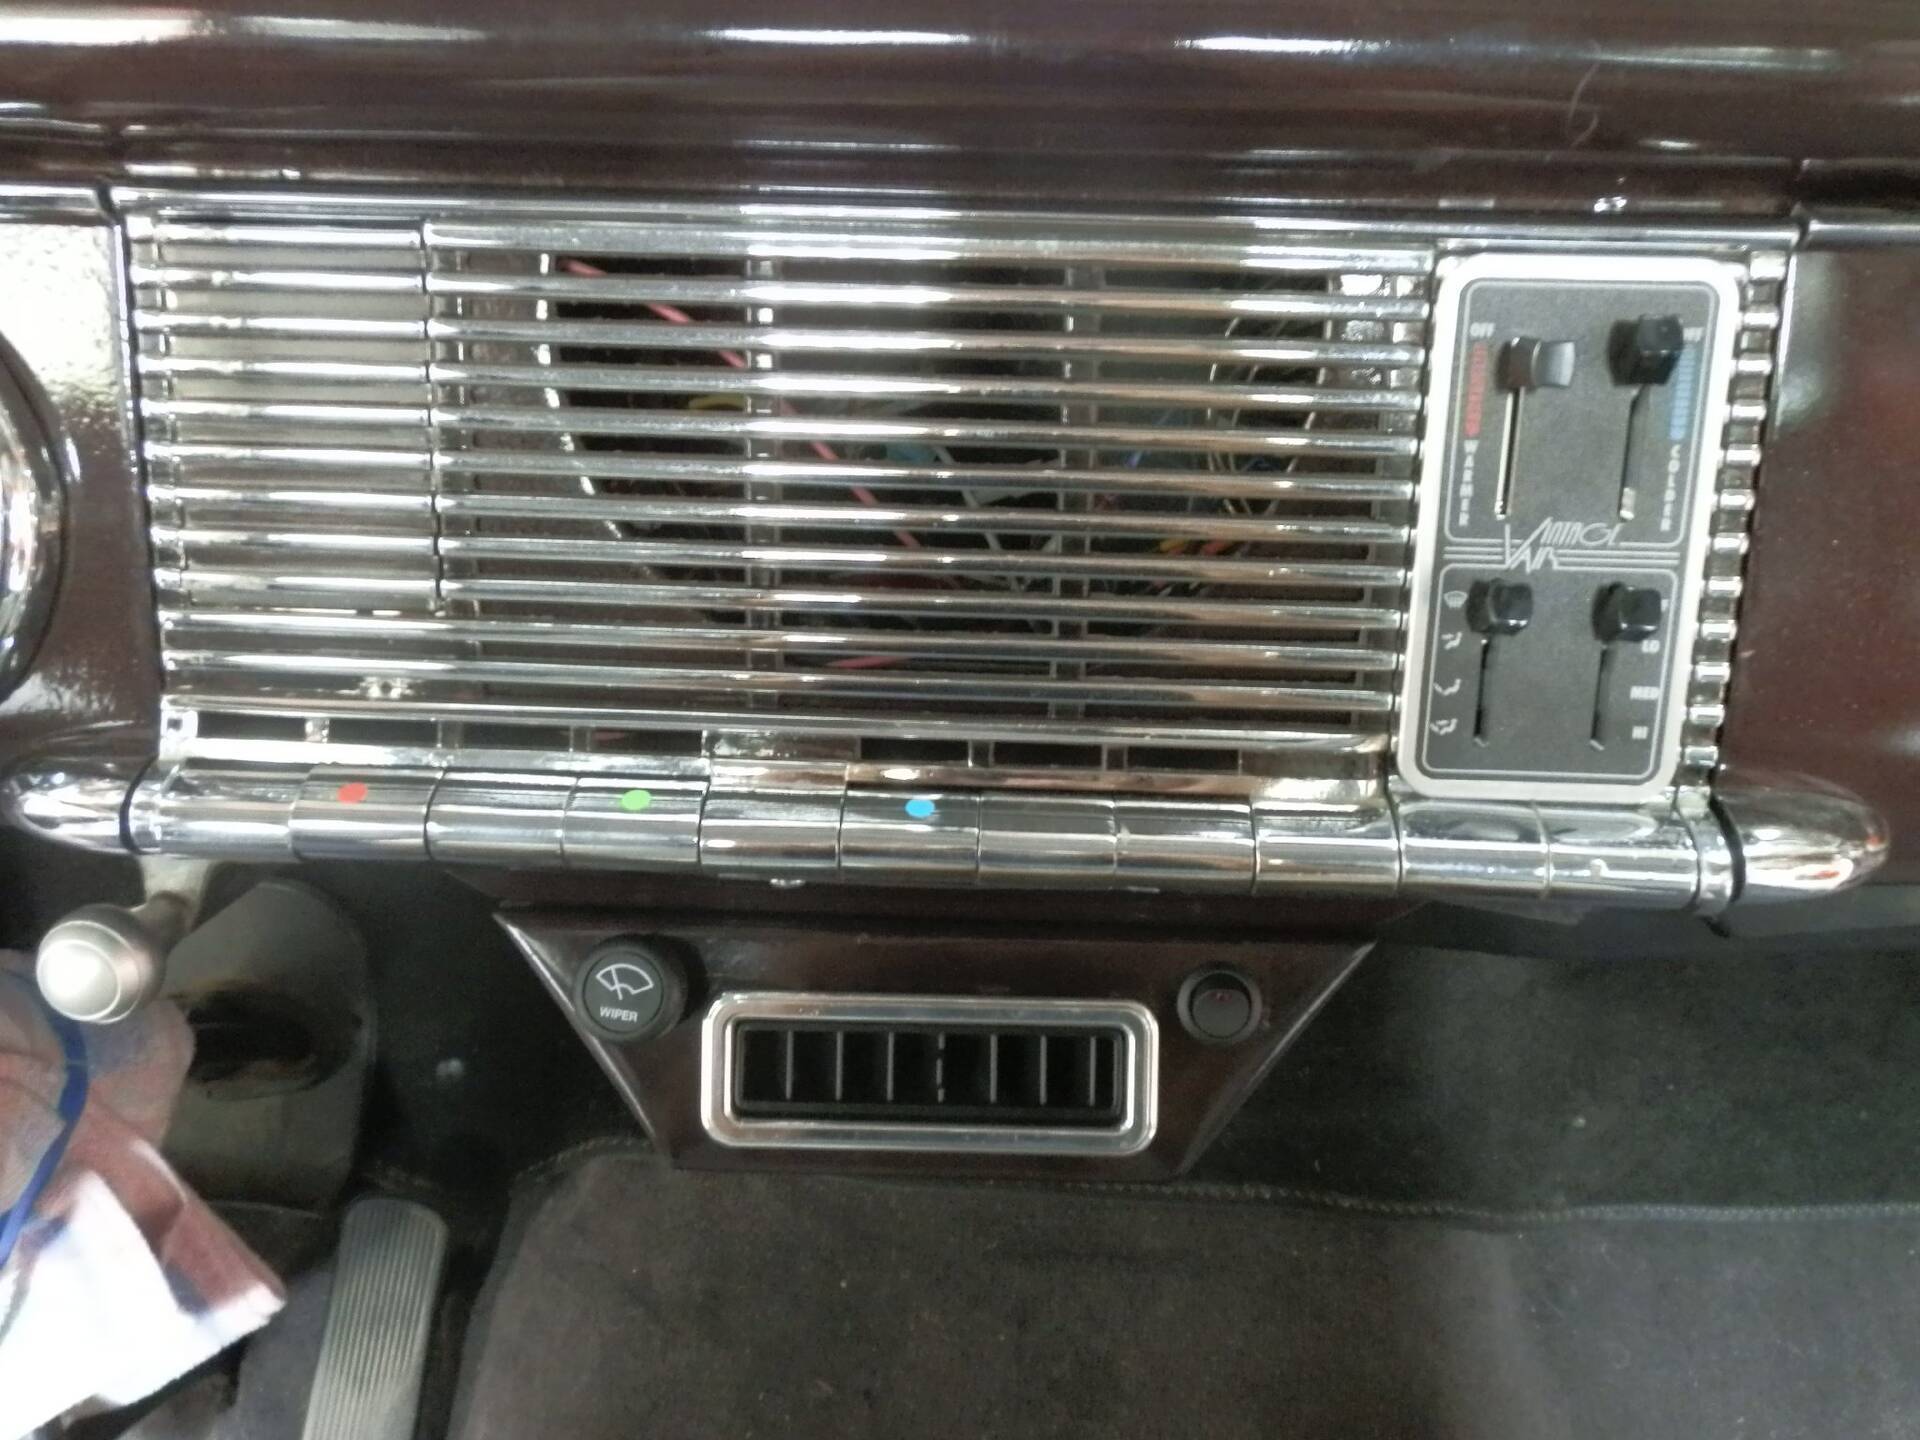 (188.36 KB) (188.36 KB)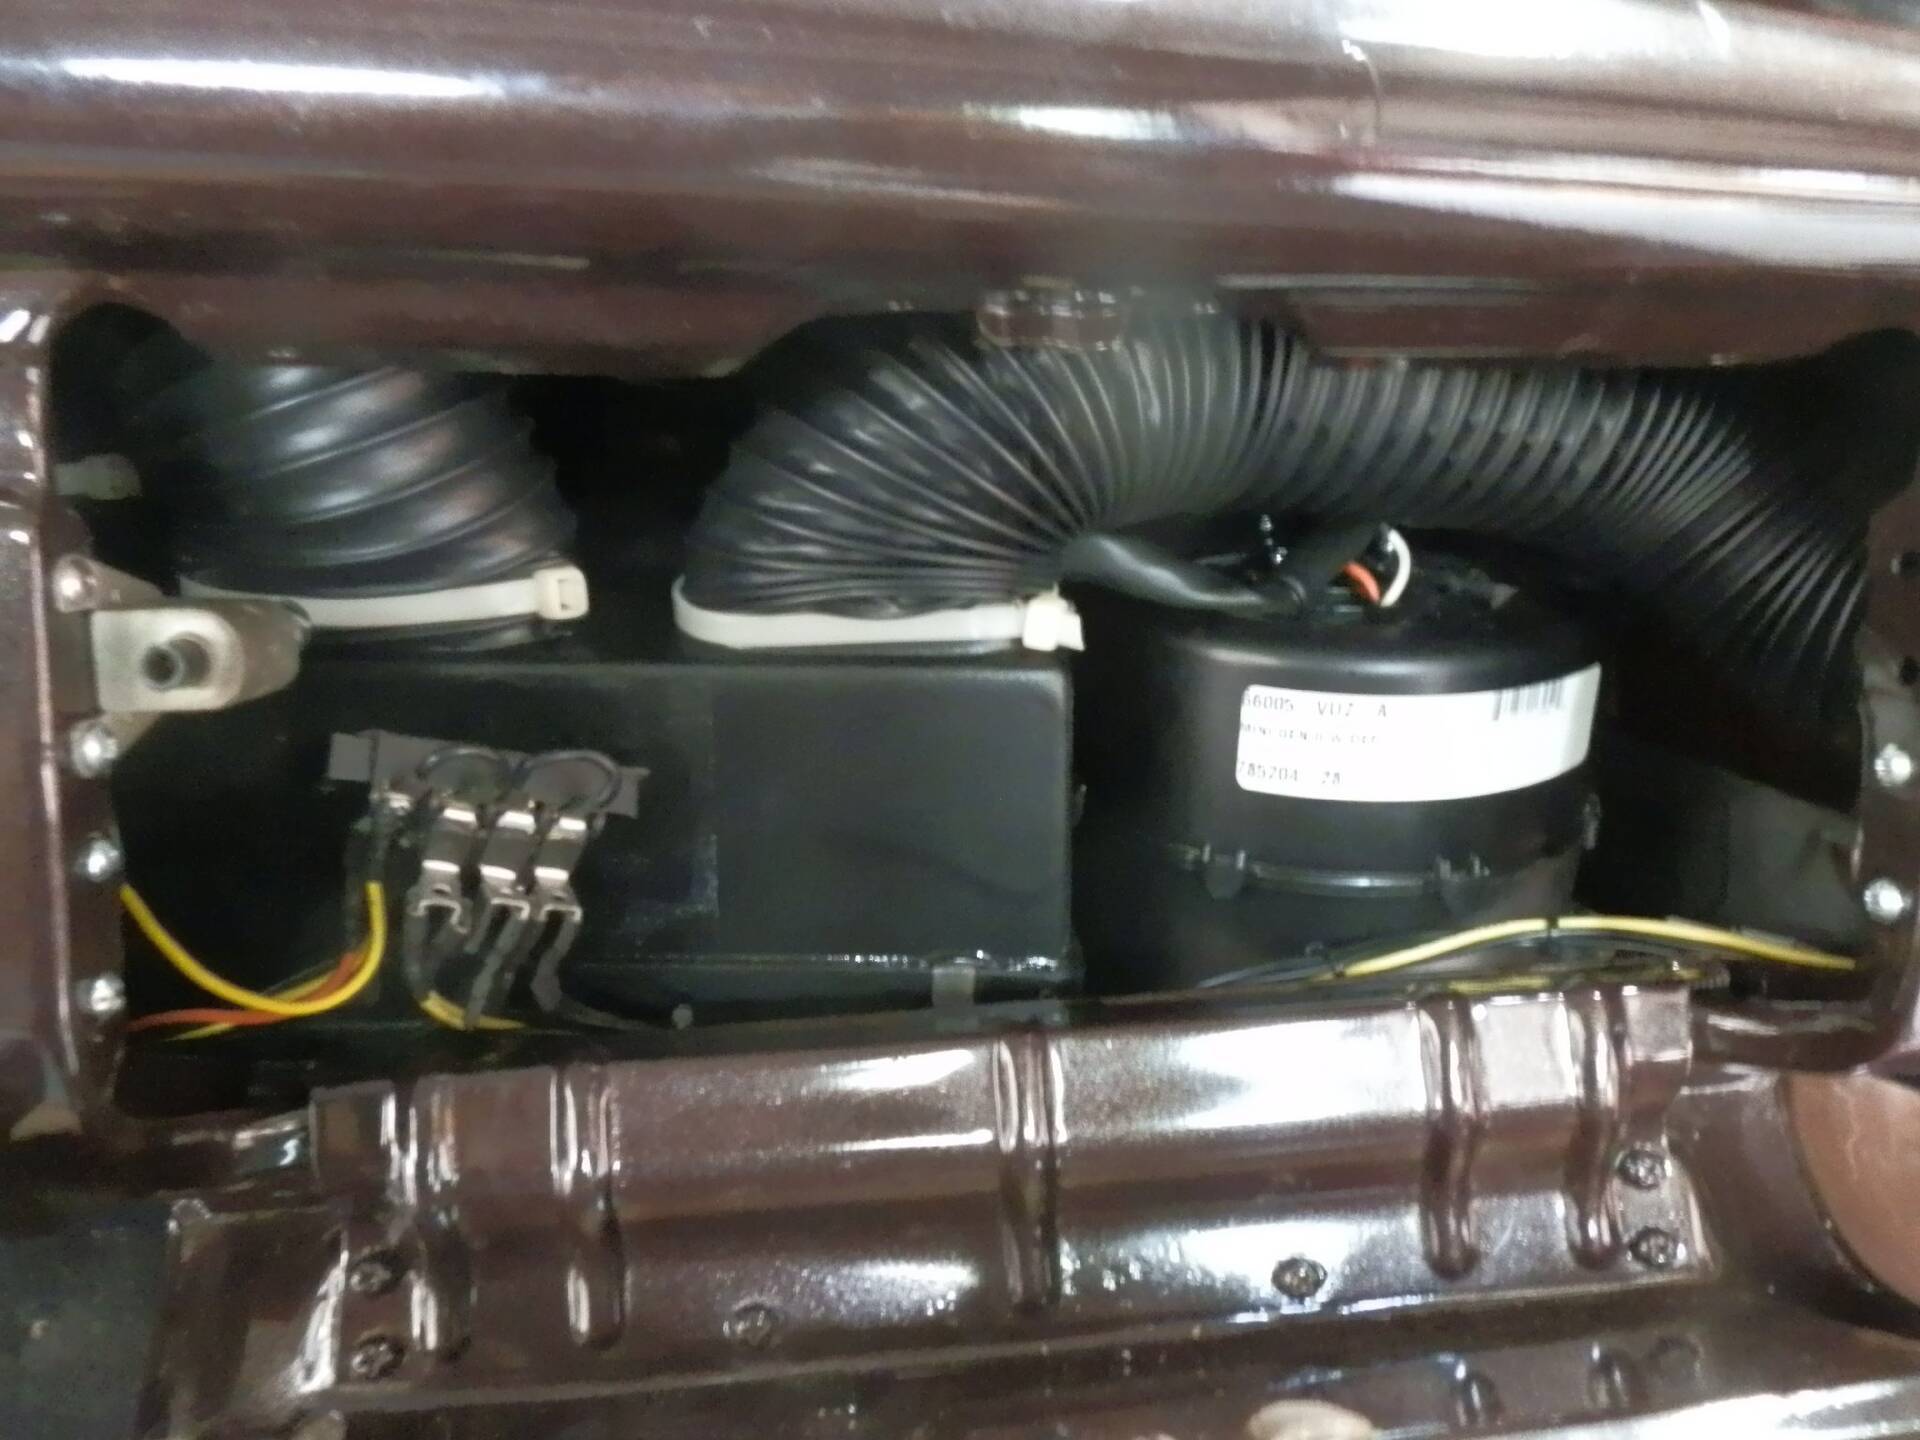 (240.35 KB) (240.35 KB)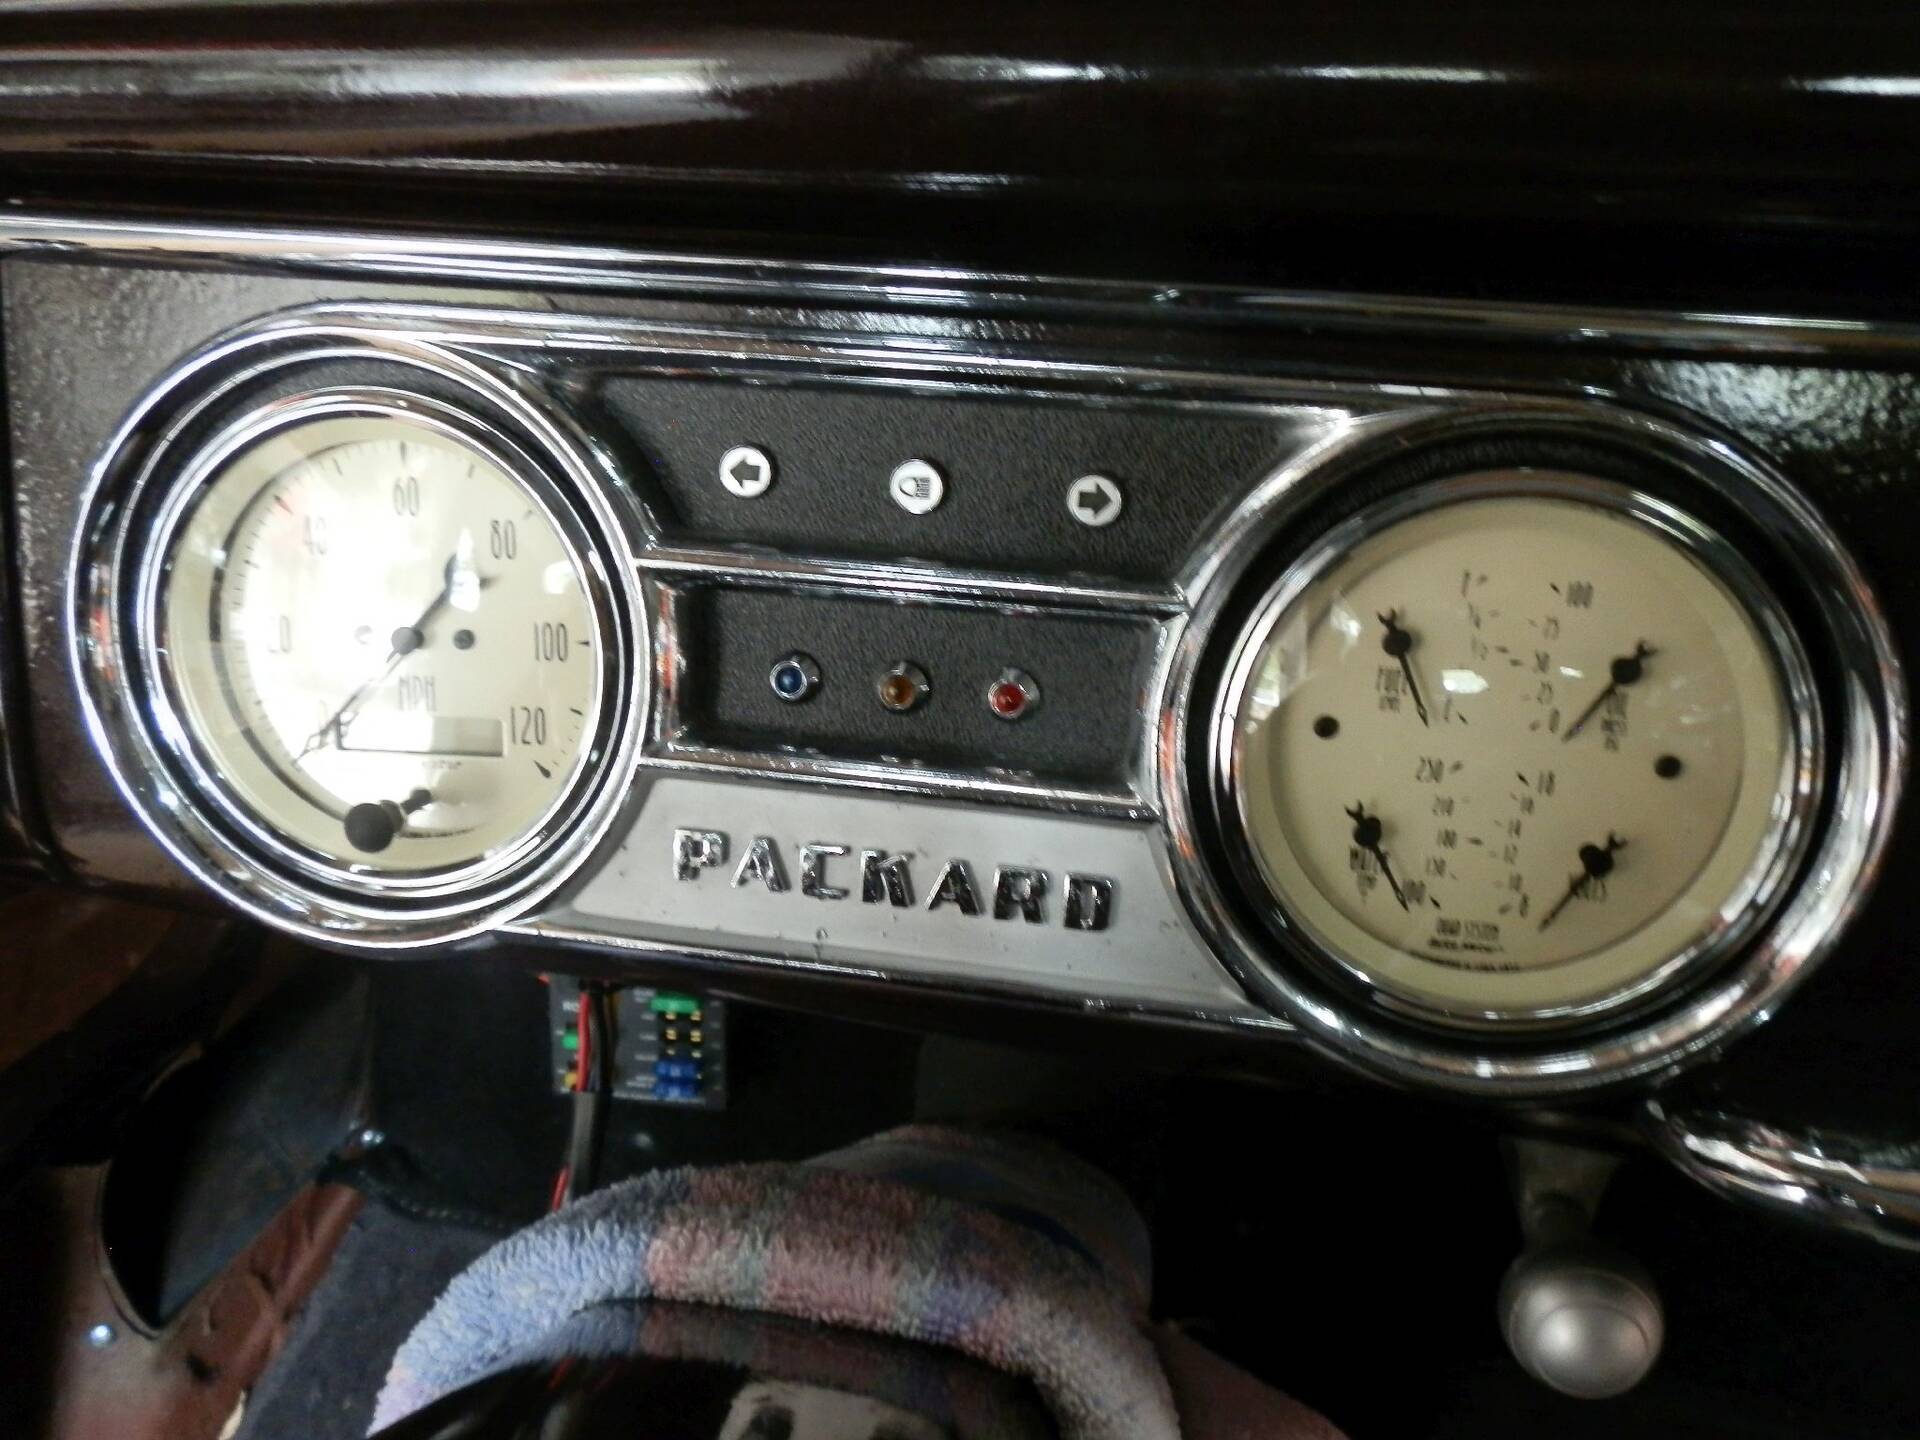 (225.91 KB) (225.91 KB)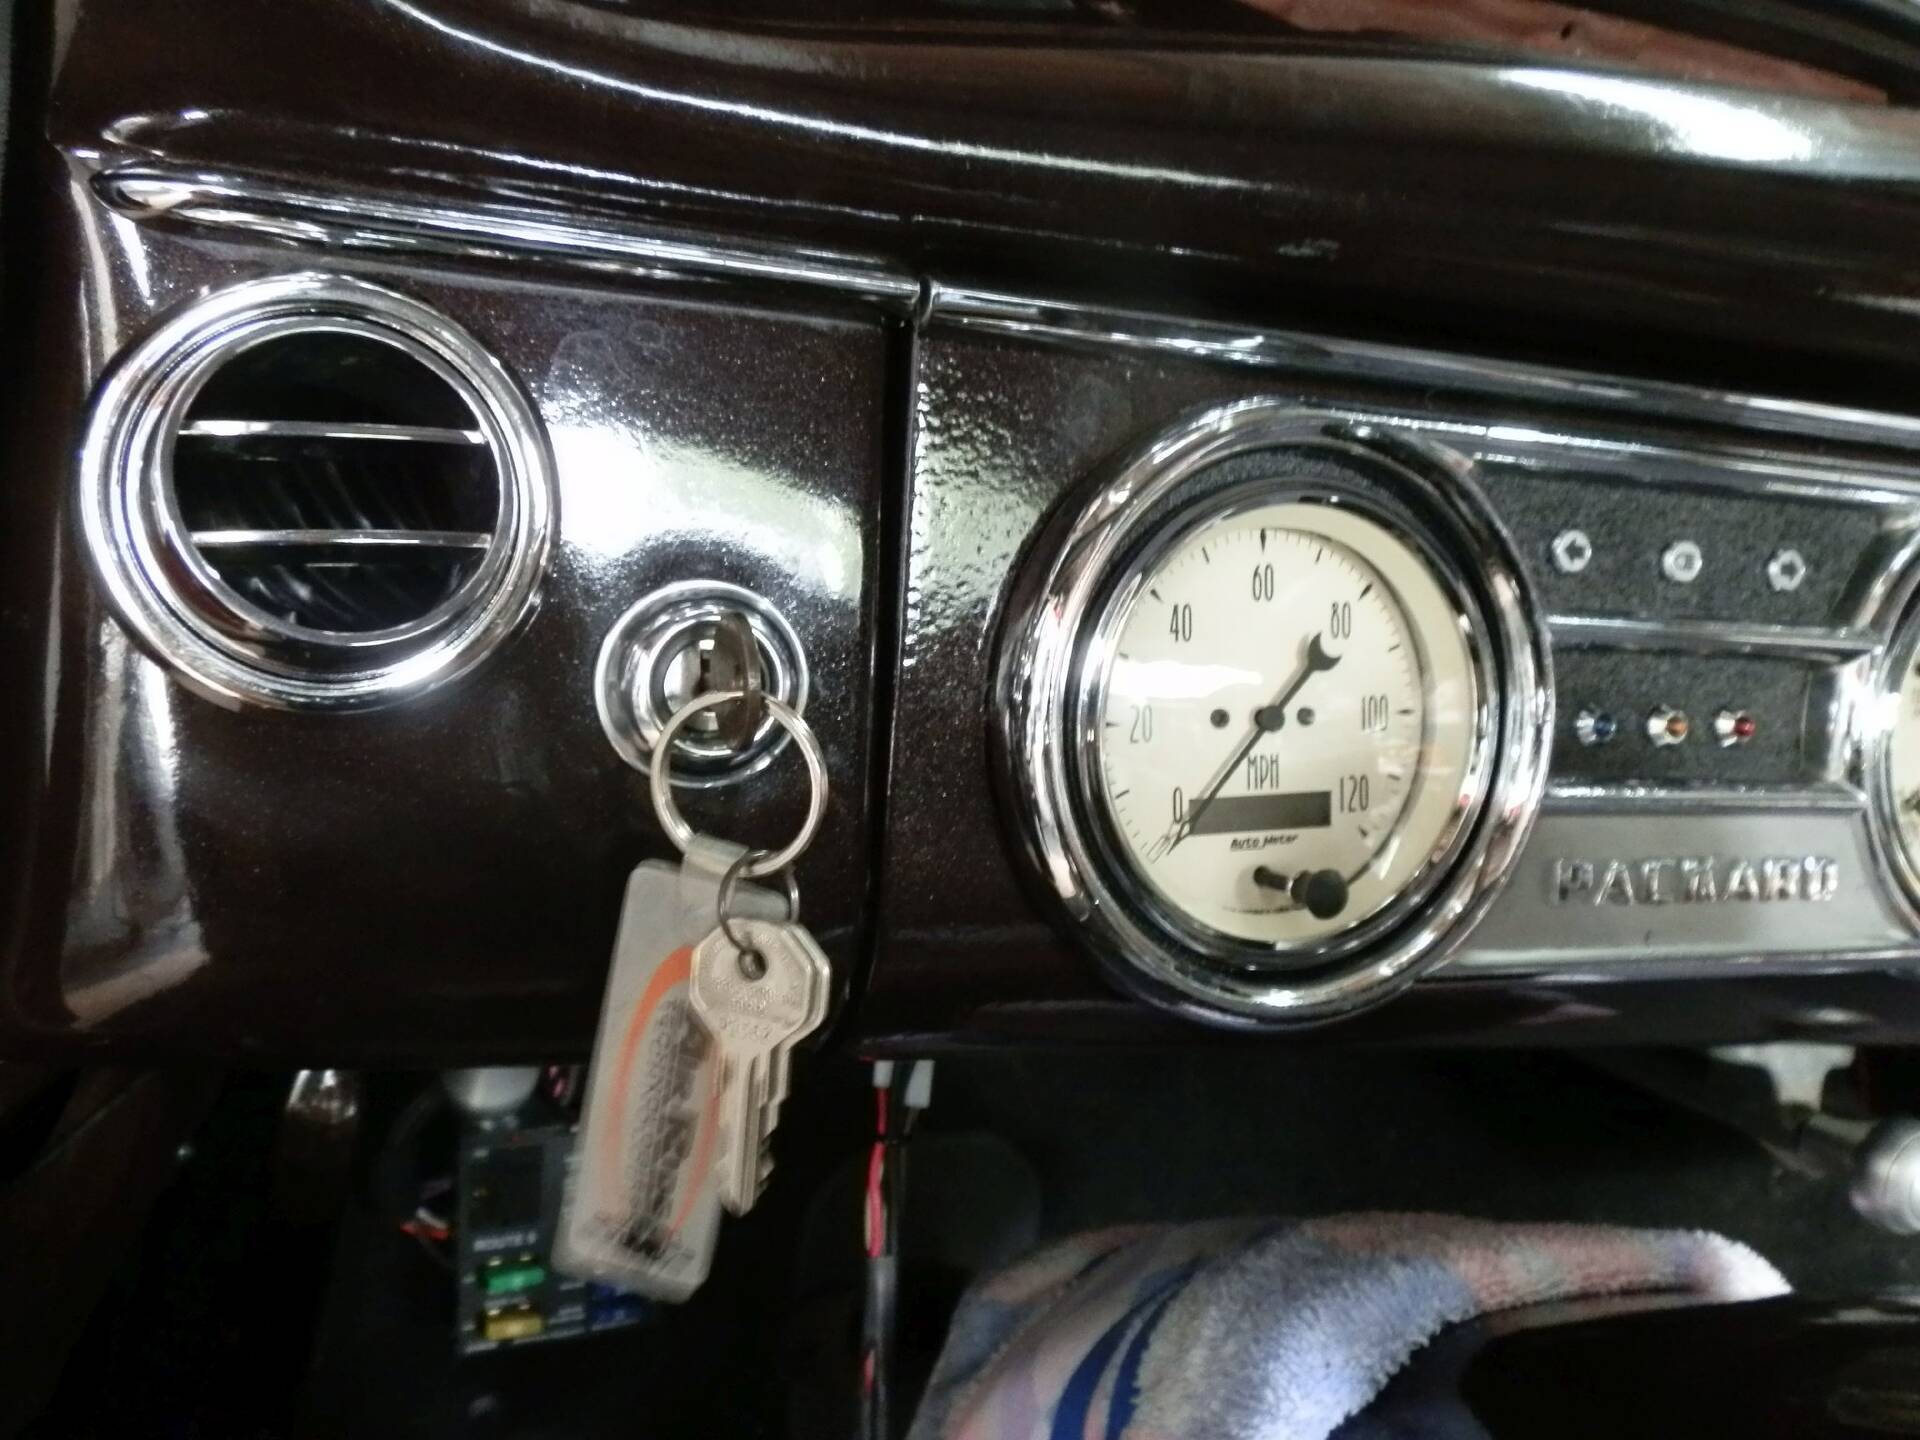
Posted on: 2020/7/5 8:30
|
|||
|
||||
|
Re: Joe's '49 Club Sedan
|
||||
|---|---|---|---|---|
|
Home away from home
|
Howard,
here's a picture of the AC bracket. It bolts to the head where the oil filter attached with a support brace between the bracket and the alternator mount. A strengthening gusset was also welded to the lower plate. The compressor is driven by a single wide belt with adjustment at the compressor and the alternator. The original filter is too big to mount anywhere. Could mount a small remote filter off the head just beyond the coil but would have to use a different air filter. Not concerned since the filtration is only partial and the fact that the engine is squeaky clean when I rebuilt it, no old sludge being dredged up. Also change oil frequently. The compressor and bracket will probably block more air flow than the original oil filter. The front-mounted electric fan runs full time. The engine has been run at fast idle while the air was being charged with no problem. We'll have to see how it does in the Florida heat with the air on. Adding AC to a Series 22/23 is not ideal, so much original stuff in the way. If I had planned this while the car was apart, I would have probably tried a 2-belt, right-mounted compressor. That would have required figuring out what parts to used from a later '51-'54 with power steering. I took a path I thought would be easier, NOT! Attach file: (91.38 KB)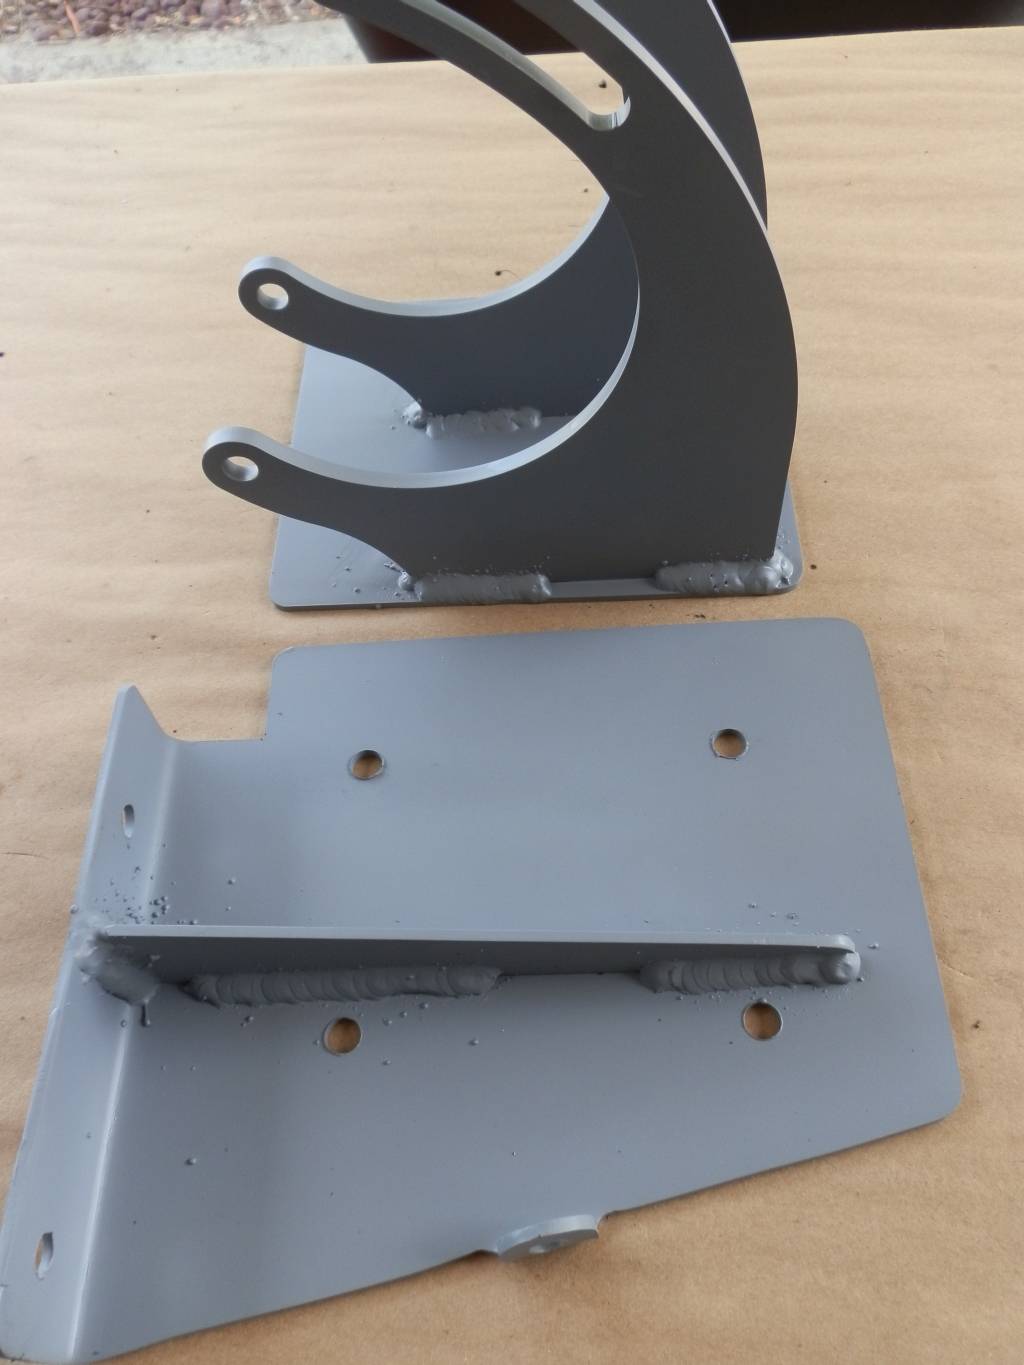
Posted on: 2020/7/4 10:02
|
|||
|
||||
|
Re: Joe's '49 Club Sedan
|
||||
|---|---|---|---|---|
|
Home away from home
|
Finished the under hood work now it's work on the dash to finish the AC add and 12 volt conversion. The wiring is completed and the wires are laced up with plastic ties. With the AC and the new gauges and switches there is a lot more wire. Had to add an additional fuse panel to support the AC and electric wipers. Added the defroster duct hose from the AC unit to the original defrost vents. The only problem was that the original vents were 2" but the defrost hoses are 2 1/2". Took a piece of heavy clear plastic 2" tube, heated it and slipped it over the end of the vent then put the duct hose over it for a snug fit. Cut and installed the AC dash vent hoses temporarily to check the routing and fit. It's very tight, behind the dash is stuffed! I need to come up with some support for the AC and defrost hoses then it will be ready to button up the dash.
Attach file: (134.84 KB)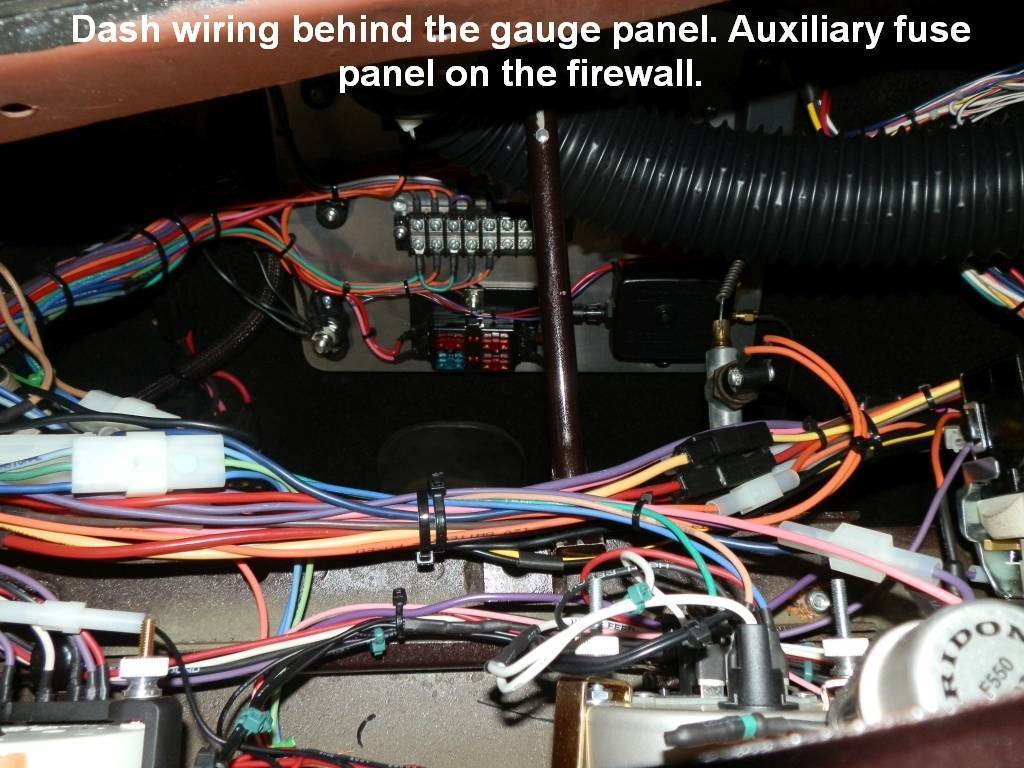 (136.98 KB) (136.98 KB)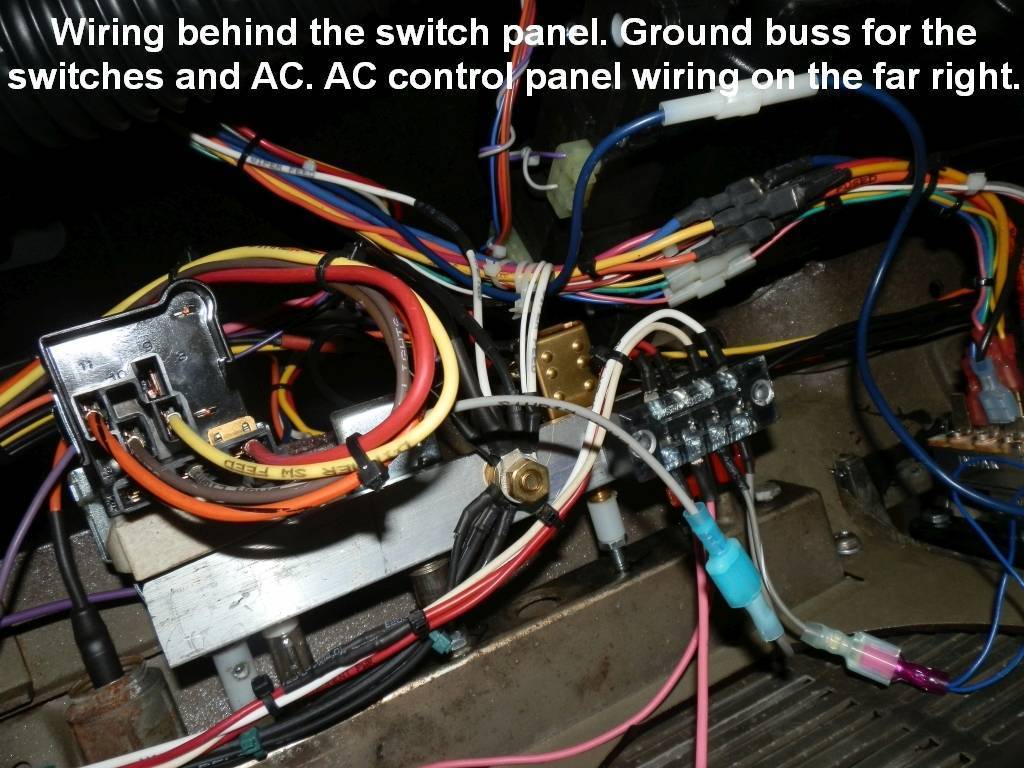 (115.09 KB) (115.09 KB)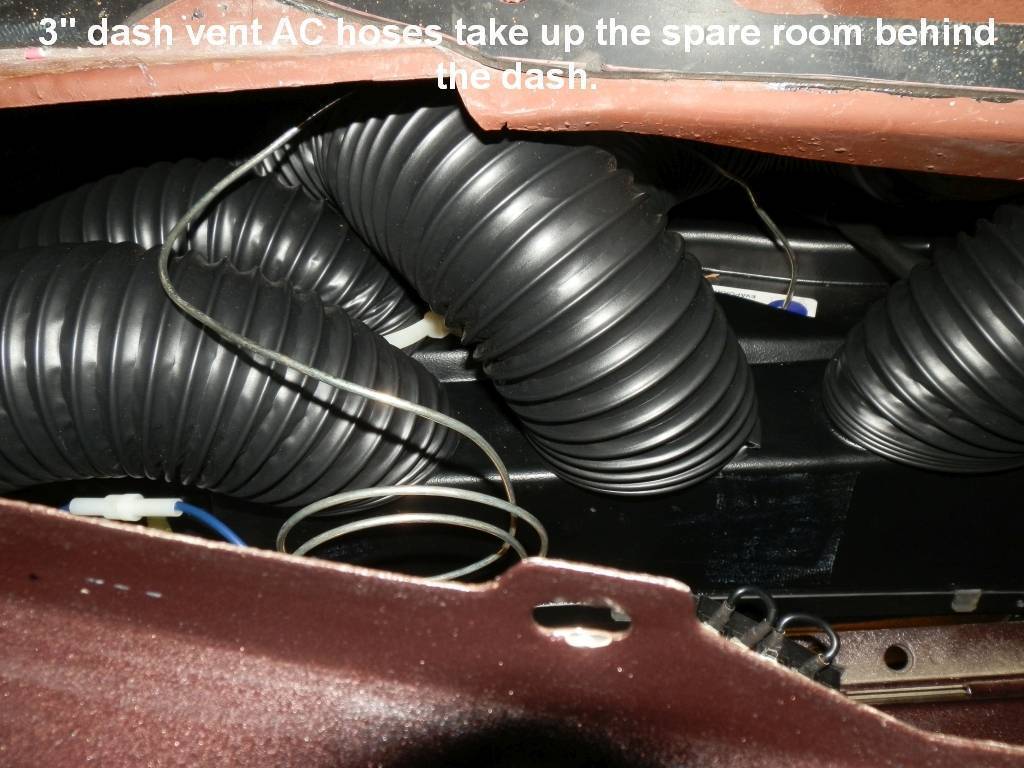
Posted on: 2020/7/4 8:47
|
|||
|
||||


