|
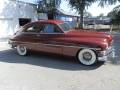
1932 Packard Limo
|
||||
|---|---|---|---|---|
|
Home away from home
|
Saw this on the Packard Automobile Classics Facebook page. Lots of pictures, asking about $6,000. Another one of those restore for 3 times the value projects.
Attach file:  (533.42 KB) (533.42 KB)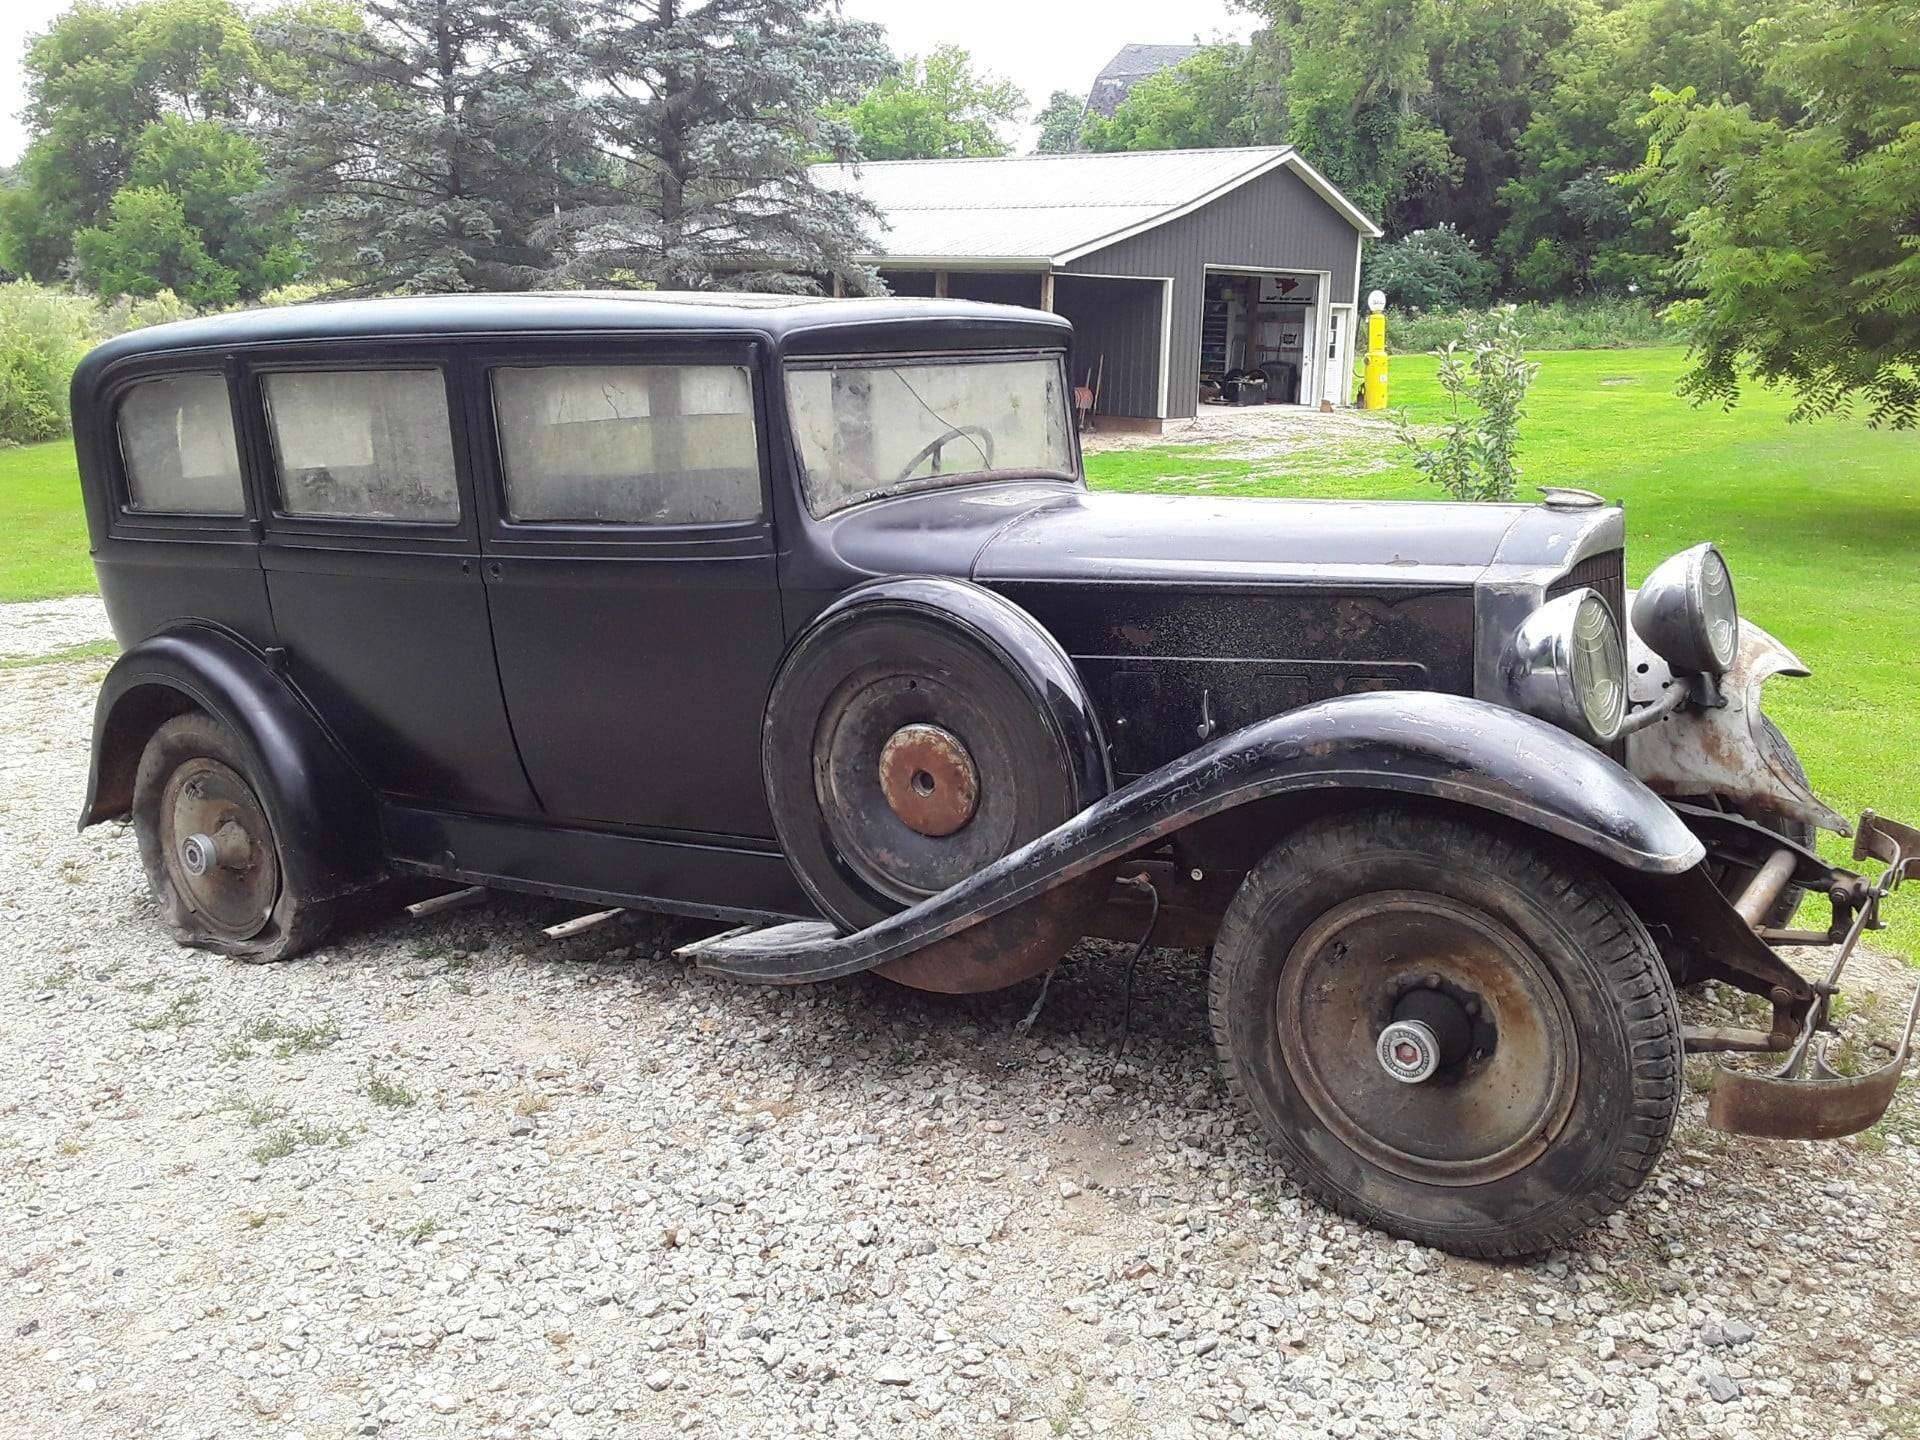
Posted on: 2020/8/19 10:55
|
|||
|
||||
|
Re: Joe's '49 Club Sedan
|
||||
|---|---|---|---|---|
|
Home away from home
|
Howard,
It's an Echlin ECH ST53. Bought it thinking it was ignition battery start, when that didn't work, I found it was ground start. Changed the starter button wiring. $13.99 + tax. Joe Attach file: (81.03 KB)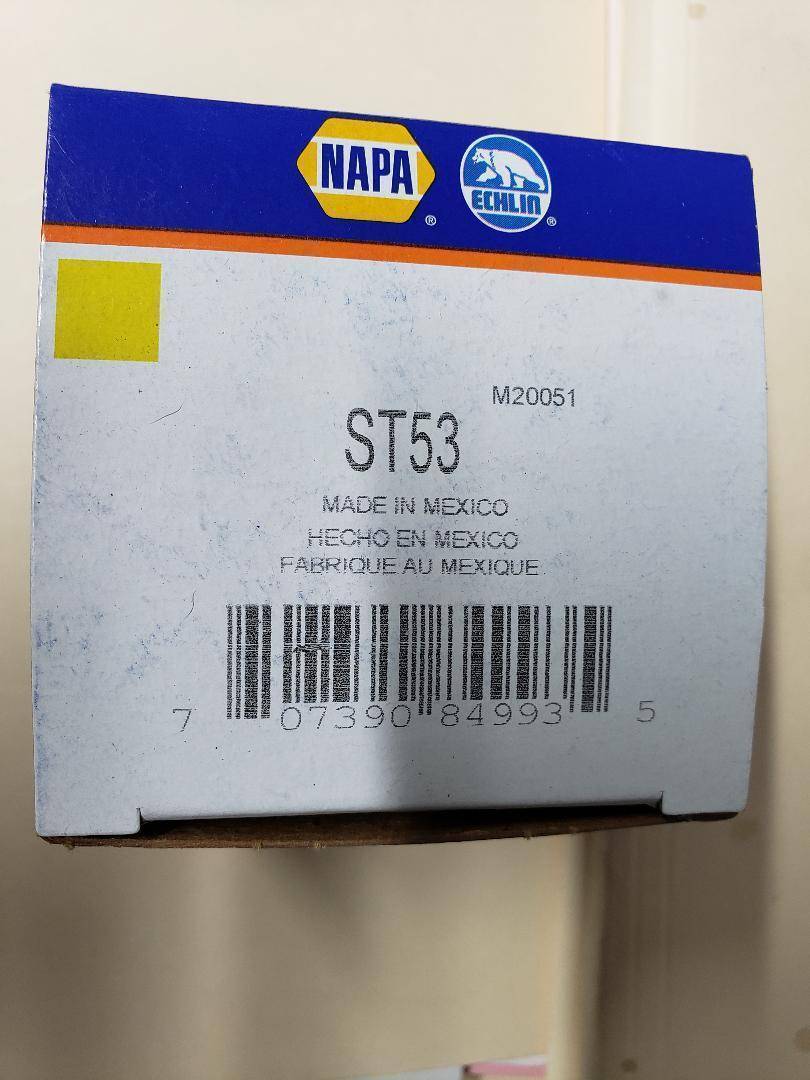
Posted on: 2020/8/19 10:38
|
|||
|
||||
|
Re: KPack's 1954 Panama
|
||||
|---|---|---|---|---|
|
Home away from home
|
Dragging a multimeter around under the dash can be a pain if all you need test is hot continuity rather than a voltage reading. Here's a couple I used back in my 6V days. A cheap Harbor Freight 12V test light will work and detect 6V with a bit dimmer illumination. Also, I soldered test leads to a 6V taillight bulb (used only one element)) with colored leads to one element and the bulb ground.
Hope this helps. Attach file: (71.45 KB)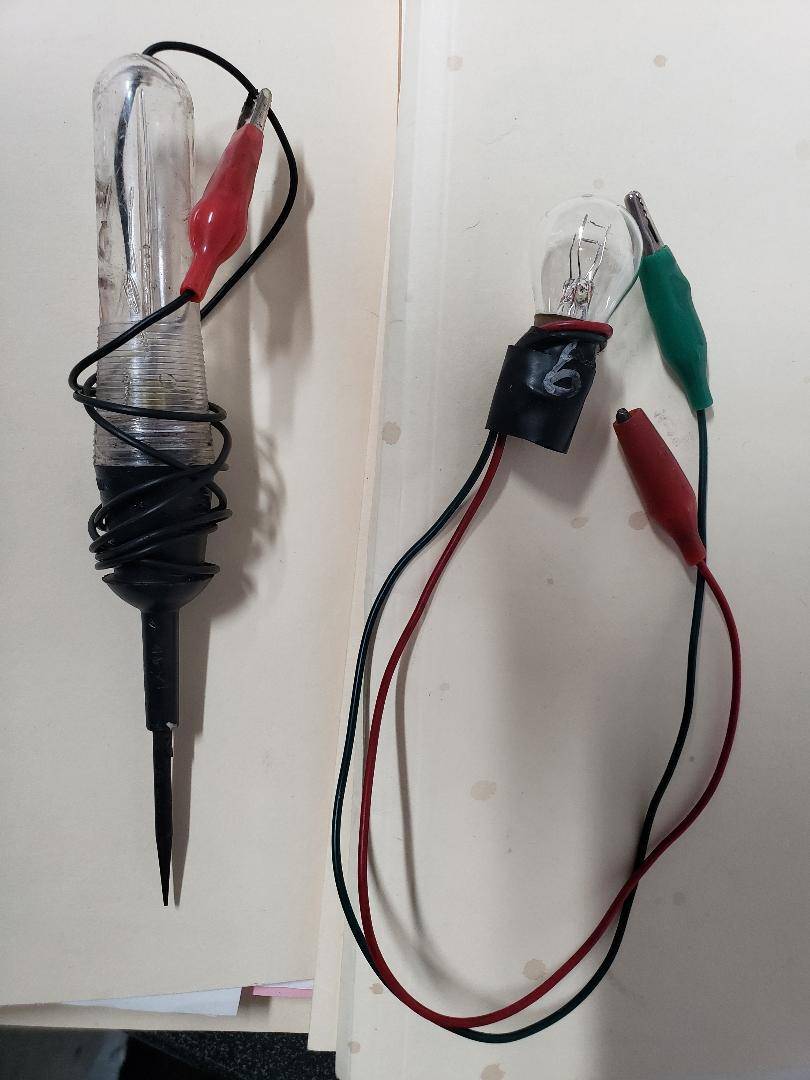
Posted on: 2020/8/19 10:23
|
|||
|
||||
|
Re: Joe's '49 Club Sedan
|
||||
|---|---|---|---|---|
|
Home away from home
|
Got the battery and starter situation resolved. The Ford starter solenoid threw me a curve. Unlike the original solenoid, it is activated by a ground from the starter switch rather than positive voltage. Once I figured that out and made a minor wiring change, the car starts fine.
Corrected the horn issue that Howard pointed out. The problem started when someone in the past removed the steering wheel with a sledge hammer rather than a puller. The result was that the steering shaft was bent and the threads were messed up so the steering wheel would not go on as far as it should. Fixed the threads with a special 3/4" X 20 UNEF thread chaser but the steering wheel only went on slightly further due to the bent shaft. Used a shim on the contact disk to make up the distance and now the horn works perfectly. The fan spacer that I made previously was installed on the water pump pulley. With the fan moved forward there were very tight quarters to install the 4 bolts that attach the fan and spacer assembly. The bolts are fine thread and could only be turned about a 1/4 turn at a time with a box or open end wrench! Took quite a while to get them all secure. The fan now clears the AC clutch and is still almost an inch from the radiator. It will supplement the cooling from the electric fan that is is the front of the radiator and condenser. Took the car out for a ride this morning in 90 degree heat and the temperature stayed pegged at 180 degrees. A potential problem avoided. Just about time to bring this 7 year project to a close.
Posted on: 2020/8/18 12:14
|
|||
|
||||
|
Re: Stewart's 1955 Packard 400
|
||||
|---|---|---|---|---|
|
Home away from home
|
I used LizardSkin on the roof of my Packard, both the thermo insulation and sound deadener. The stuff sprays easily with the proper equipment. It is water soluble and accidental overspray can be wiped off witha damp cloth but if you let it dry, you'll need to grind it off. Used a product called HushMat on the floors and firewall, cheaper than DynaMat. Tried to use Hushmat on the roof of another car and it pealed off and I had to remove the headliner to remove it. Like LizardSkin for the roofs.
Posted on: 2020/8/14 10:43
|
|||
|
||||
|
Re: Joe's '49 Club Sedan
|
||||
|---|---|---|---|---|
|
Home away from home
|
My 2 6V Optimas were not a matched pair but the new ones will be. Size was important to replace the original battery and to give the option of 6 or 12 volts. I have had good luck with the 12V Optimas in my '39 Ford and '64 Chevy pickup, both are much older than the 2 6Vs. I think the age and outside temperature with the engine heat and the placement of the batteries finally got to these batteries. I'm going to try a heat shield with the new ones.
With all the tools I have, I can't believe I didn't own a battery load tester. In addition to load testing the condition of the battery, it can be used to determine an estimate of cold cranking amps, read the voltage and determine alternator/generator output. Handy with a price of only $20 to $40.
Posted on: 2020/8/7 7:56
|
|||
|
||||
|
Re: Joe's '49 Club Sedan
|
||||
|---|---|---|---|---|
|
Home away from home
|
I was out with one of my final test drives, everything was good until I pulled up to my shop gate, shut the car off to open the gate and when I went to re-start, nothing happened.
I dragged the car back into the shop and checked the battery, the voltage was good and I had no trouble starting the car earlier that morning several times so I immediately blamed the Chinese 12 volt solenoid that has previously given me trouble. Went to NAPA and bought a Ford 12 volt solenoid, pulled the starter and modified the solenoid to fit. Bench-tested the starter and re-installed. Ouch! Still no start! All indications are now that there was a sudden failure of one or both of the 6 volt Optima batteries. I'm kicking myself for not having by jumper box charged before deciding to remove the starter! I had no way of load testing the batteries and they are a real chore to remove to be tested. So I grabbed a 20% off coupon and headed to Harbor Freight to buy a 100 amp battery load tester. Total cost, $16 plus tax. Tested the batteries in the car at 12V and sure enough there was a problem. Removed the batteries and tested each at 6V and one was totally dead and the other was marginal. One was bought in 2015 and the other in 2016. Ordered a new pair of 5 volt Optimas for $375 and waiting for them to be delivered. Lesson learned, don't jump to conclusions, check all options first and suspect the less obvious! Attach file: (79.66 KB)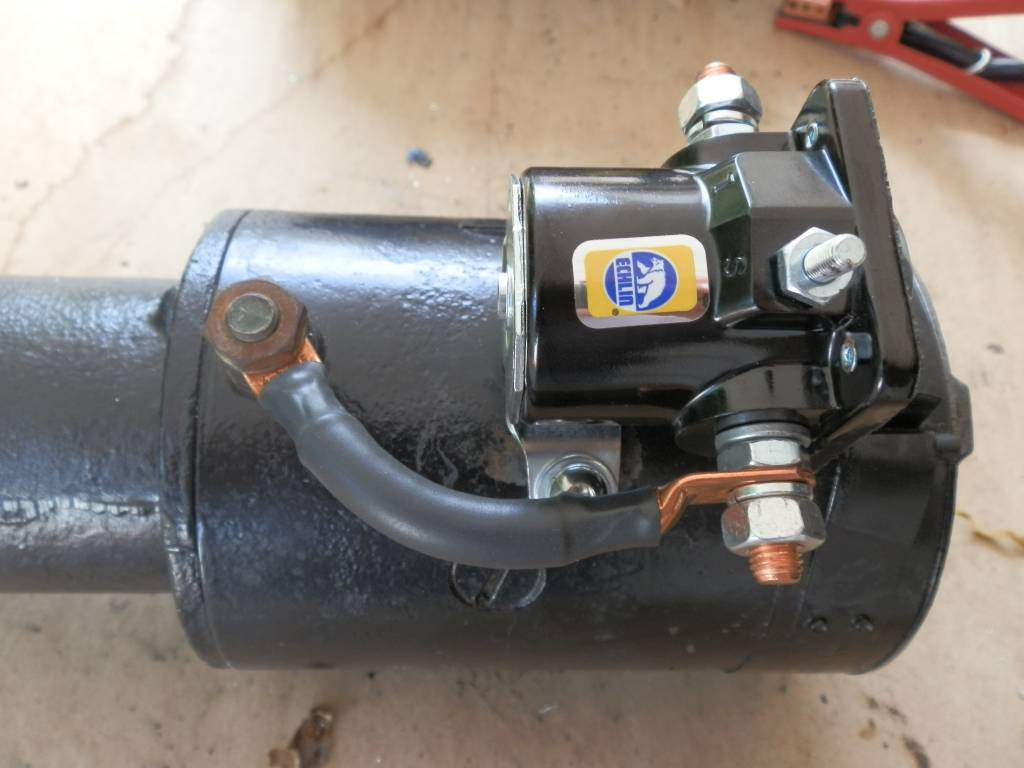 (99.57 KB) (99.57 KB)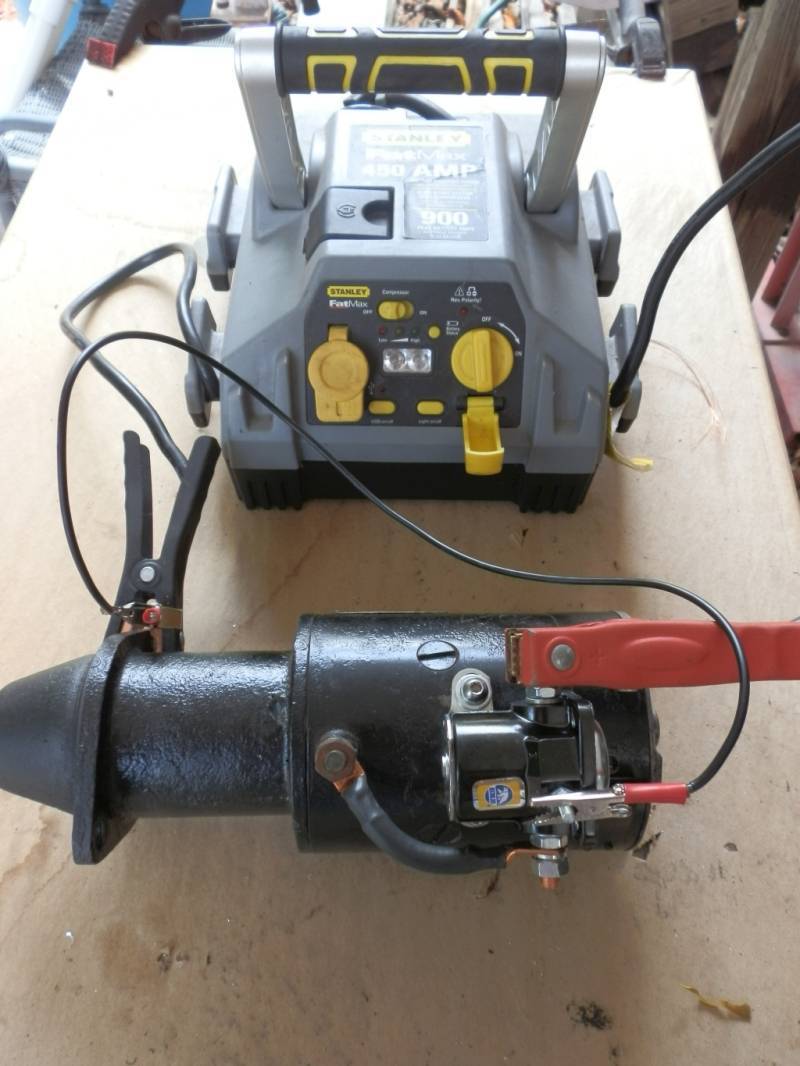 (88.41 KB) (88.41 KB)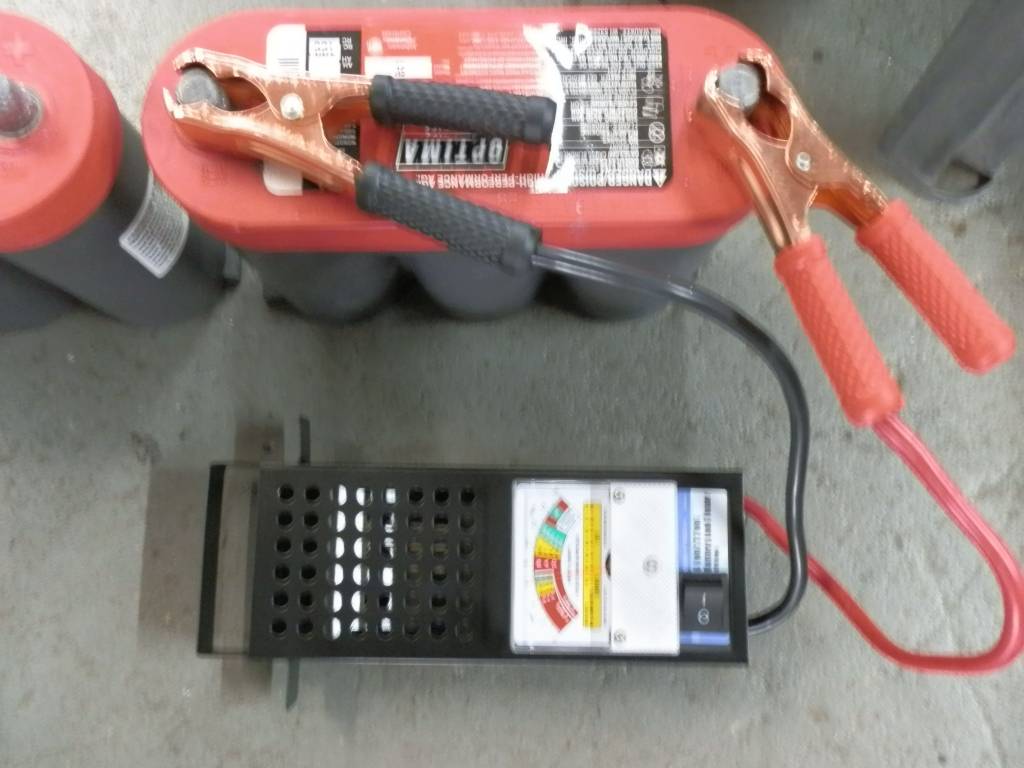
Posted on: 2020/8/6 11:00
|
|||
|
||||
|
Re: Joe's '49 Club Sedan
|
||||
|---|---|---|---|---|
|
Home away from home
|
Took the Packard out early this week with 95 degree heat and the AC on full blast. Ran fine, didn't overheat but ran warmer than I would like, about 200 (new gauge has numbers). Decided to go with Plan B, adding the mechanical fan back on the water pump. The problem was that with the single belt arrangement with the compressor on the left, the fan in the original position hit the clutch of the compressor. I had planned to build a spacer, if necessary, to move the fan toward the radiator about 7/16". On most cars this would be pretty simple, drill 4 holes in a spacer and bolt it on. Not so with Packard, it has a lip on water pump bracket that centers the fan. This makes a spacer much more difficult to build.
I started by buying a $6 piece of 5/8" thick aluminum billet. First used a hole saw with the correct inside diameter to cut the relief that will center the fan on the front of the adapter. Then used another hole saw to cut into the back of the spacer for the hole to center the back of the spacer on the water pump. Then used a 2 3/4" hole saw to get the round 2 1/2" round disk. Used a drill press for this.I have a small lathe but it is not powerful enough the carve out the excess material to finish the spacer. I used a 1/2" end mill in a drill press with a clamp to carve out the excess material. Not as pretty as using a lathe but equally effective. Drilled the 4 mounting holes and it is ready to mount. Would have been much easier with a lathe, but still possible with some available tools! Now the hardest part, getting the assembly mounted with little room! Attach file: (90.39 KB)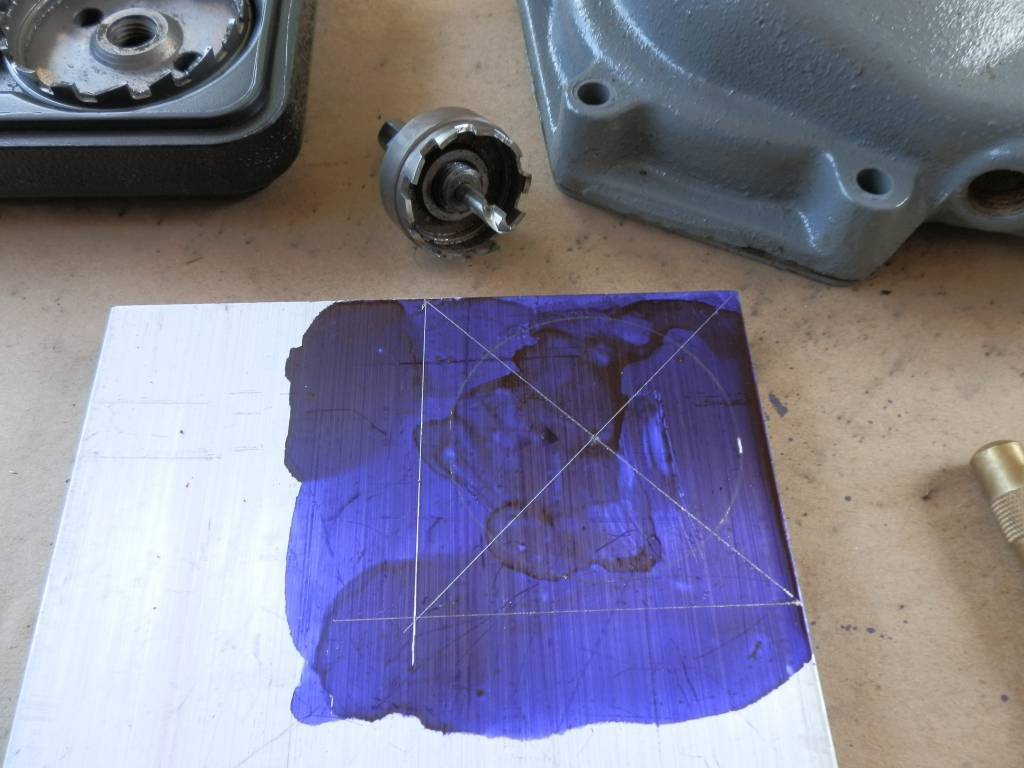 (126.97 KB) (126.97 KB)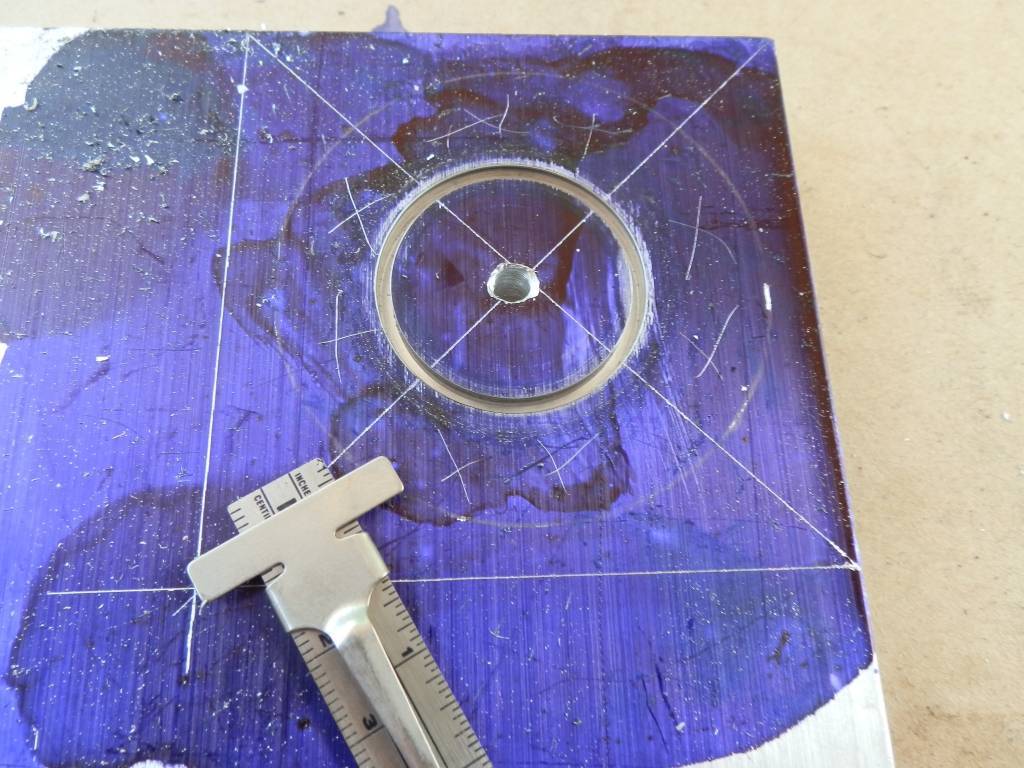 (82.53 KB) (82.53 KB)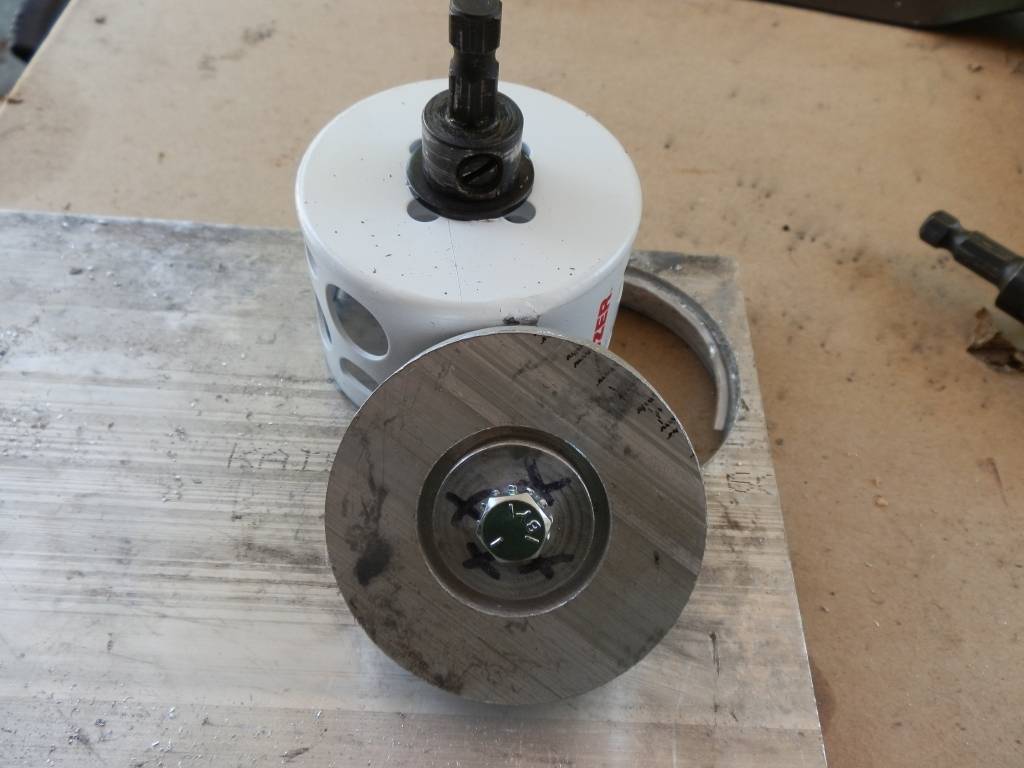 (75.96 KB) (75.96 KB)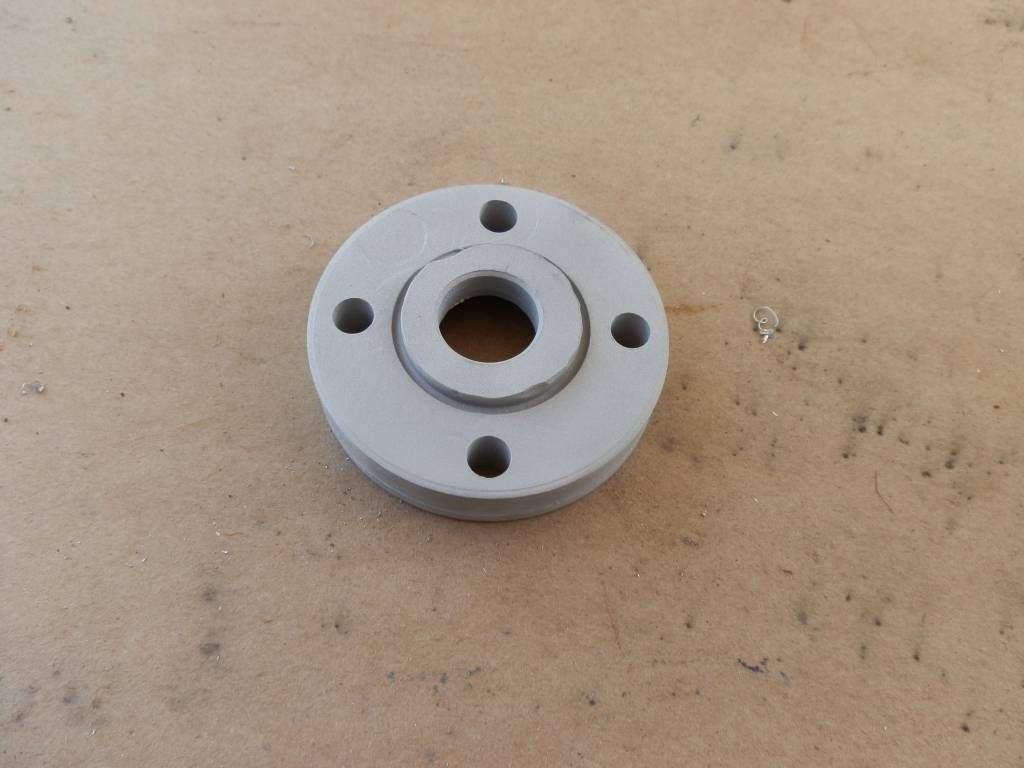 (77.72 KB) (77.72 KB)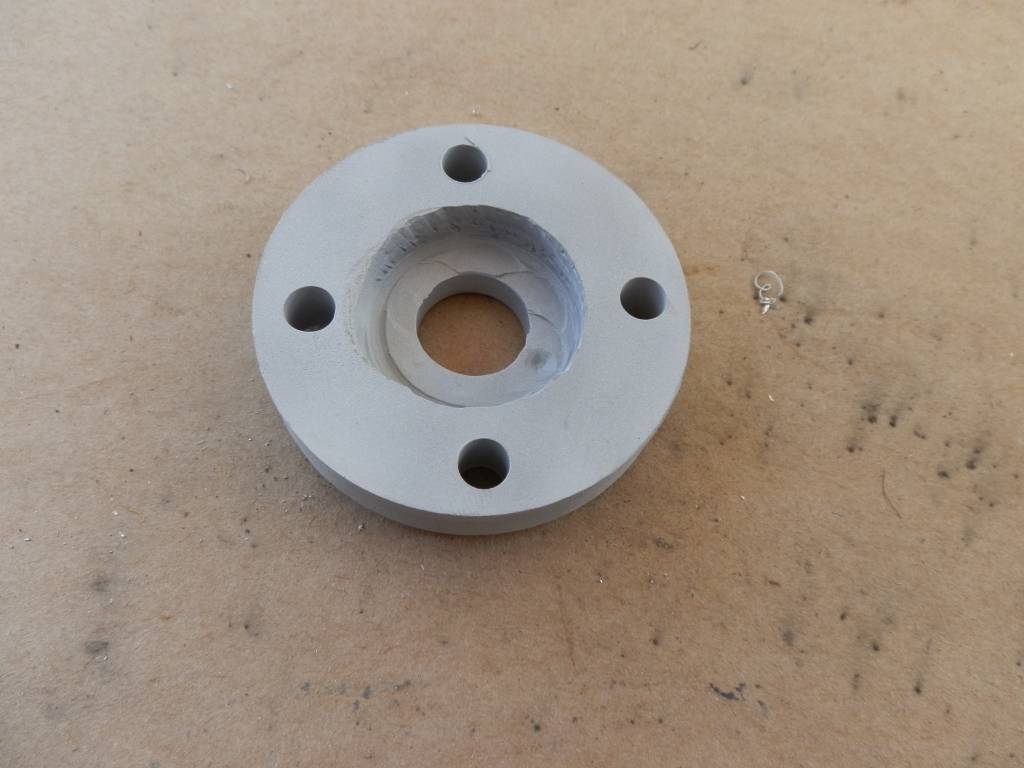 (85.94 KB) (85.94 KB)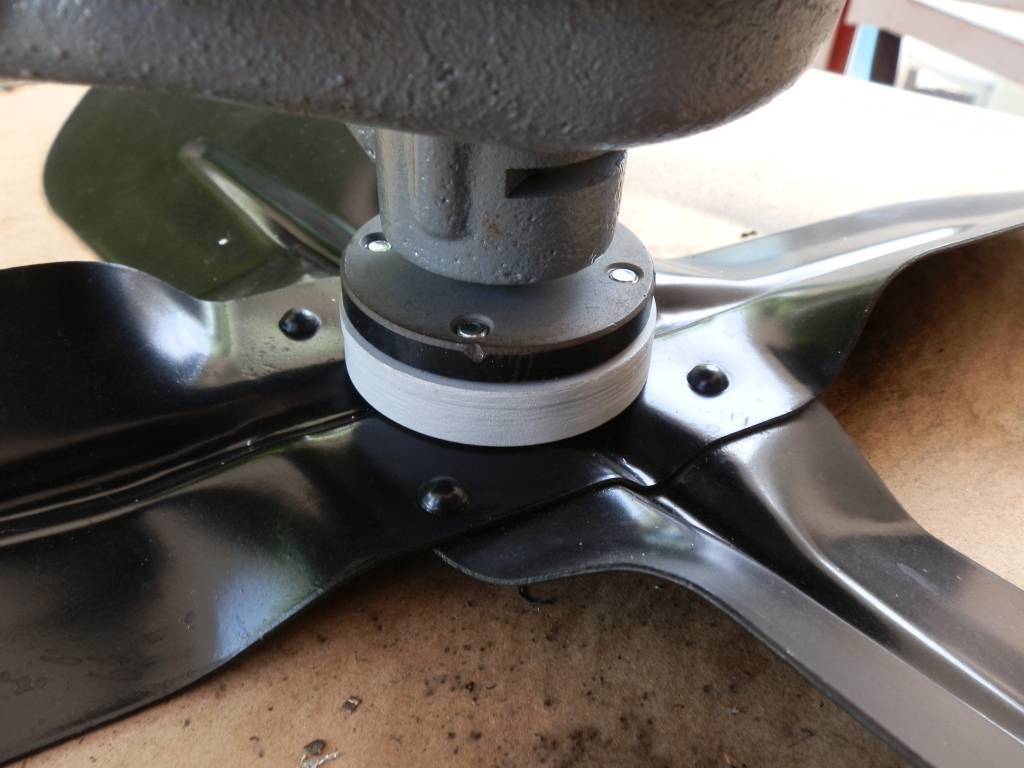
Posted on: 2020/8/1 12:41
|
|||
|
||||
|
Re: KPack's 1954 Panama
|
||||
|---|---|---|---|---|
|
Home away from home
|
How's the repair of the roof going? Did I miss it?
Posted on: 2020/8/1 12:26
|
|||
|
||||
|
Re: Various CL Pickings
|
||||
|---|---|---|---|---|
|
Home away from home
|
1949 Packard 4-door
https://tampa.craigslist.org/psc/ctd/d/new-port-richey-1949-packard-super-8/7161839133.html
Posted on: 2020/7/28 10:17
|
|||
|
||||


