|
Re: Stewart's 1955 Packard 400
|
||||
|---|---|---|---|---|
|
Home away from home
|
I can't answer the corrosion question as this is my first carb rebuild ever.
As for the floats, I ordered some replacement screws fromhttps://quadrajetparts.com/. Looking at the site now I see floats for everything except the 4Jet. My float is all one piece and all the floats I see appear to be in multiple pieces. Maybe one of them is a modern replacement. If it is someone else would have to answer that. Upon review, I guess I really don't have an answer at all. Do I?
Posted on: 2017/10/28 16:04
|
|||
|
Stewart Ballard
|
||||
|
||||
|
Re: Stewart's 1955 Packard 400
|
||||
|---|---|---|---|---|
|
Home away from home
|
jselph,
That's actually along the lines of what I wanted to hear.
Posted on: 2017/10/26 19:37
|
|||
|
Stewart Ballard
|
||||
|
||||
|
Re: Stewart's 1955 Packard 400
|
||||
|---|---|---|---|---|
|
Home away from home
|
I get that there is no need to even paint it. Any work I do to make it look better will be covered up and it will not stay that way for long.
I guess my real concern is with the current anodizing. Is it going to effect the carb any due so much of the anodizing wearing off? Do I need to get the anodizing redone?
Posted on: 2017/10/26 6:15
|
|||
|
Stewart Ballard
|
||||
|
||||
|
Re: Stewart's 1955 Packard 400
|
||||
|---|---|---|---|---|
|
Home away from home
|
The carburetor sections are looking better. The original bronze coloring is coming off. It is not pealing it is just fading or rubs off. I have new paint on the way.
I am thinking about lowering the air pressure on my blast cabinet and giving the valve body and chock section a light blasting before I paint them. This is the first carb I have ever dissembled so if this is the wrong thing to do please let me know. The bottom image is of this tiny screen within the depth of the throttle body. I am not planning to mess with this screen but it was not mentioned in the manual that I have. Attach file:  (246.65 KB) (246.65 KB)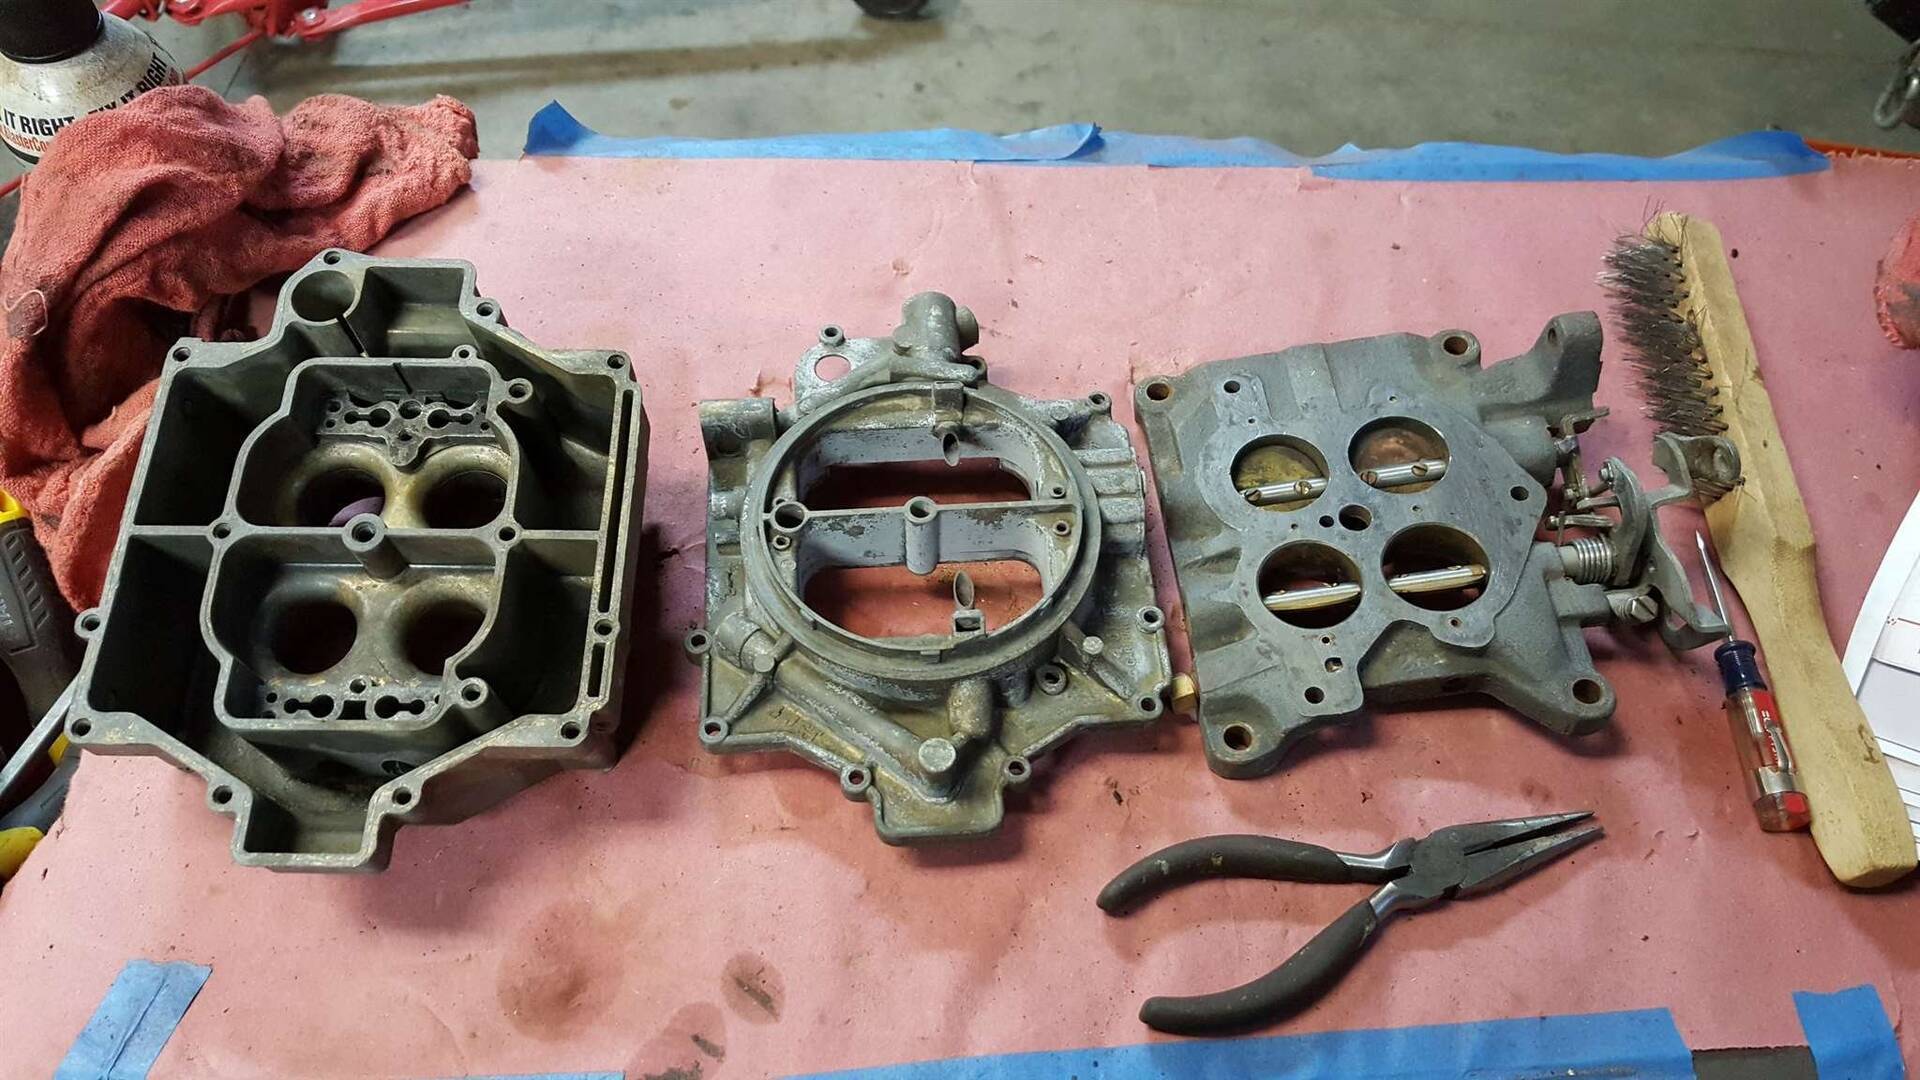 (169.30 KB) (169.30 KB)
Posted on: 2017/10/25 19:31
|
|||
|
Stewart Ballard
|
||||
|
||||
|
Re: Stewart's 1955 Packard 400
|
||||
|---|---|---|---|---|
|
Home away from home
|
I forgot to post the dramatic image of me putting the throttle body into the bucket.
Attach file: (198.12 KB)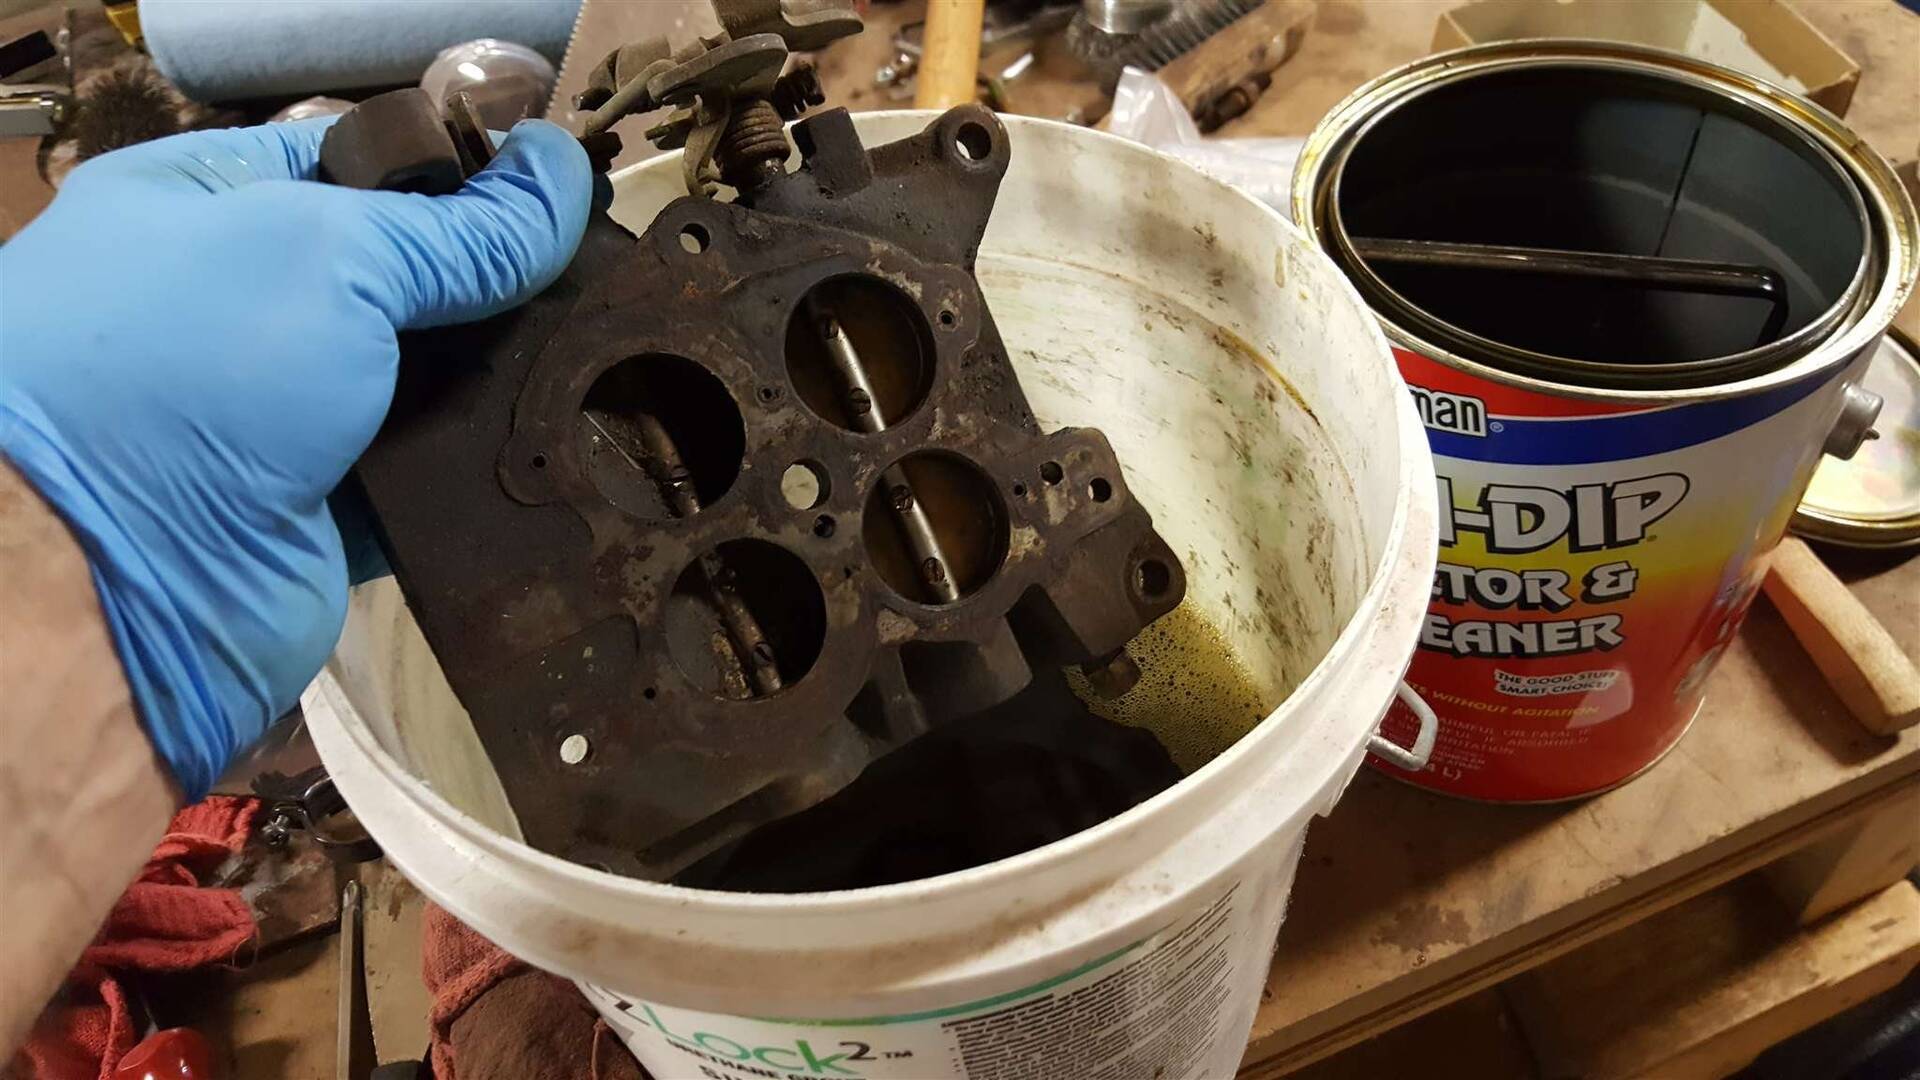
Posted on: 2017/10/18 20:41
|
|||
|
Stewart Ballard
|
||||
|
||||
|
Re: Stewart's 1955 Packard 400
|
||||
|---|---|---|---|---|
|
Home away from home
|
OK Ross, I took your advice and left the throttle body intact. I put the whole thing into the Chem-Dip this evening. I'll check it out tomorrow night.
Howard is right the screws are hammered/locked into position. I already have to replace the two I removed from the chock but that's not a problem. Thanks for the input.
Posted on: 2017/10/18 20:39
|
|||
|
Stewart Ballard
|
||||
|
||||
|
Re: Stewart's 1955 Packard 400
|
||||
|---|---|---|---|---|
|
Home away from home
|
Thanks guys. I got that little T shaped part out of the valve body tongiht. Its amazing what you can do once the fear is gone. Also the kit came with new like you said (image 2).
In the third image below (the piston with the long spring) I had to apply heat to get that out. Its supposed to more freely. The last image is of the throttle body. All the little brass screws holding the flaps to the shaft are going to need heating also as they are all stuck. I put some PB Blaster on them but I am not expecting it to help much. Attach file: (142.67 KB)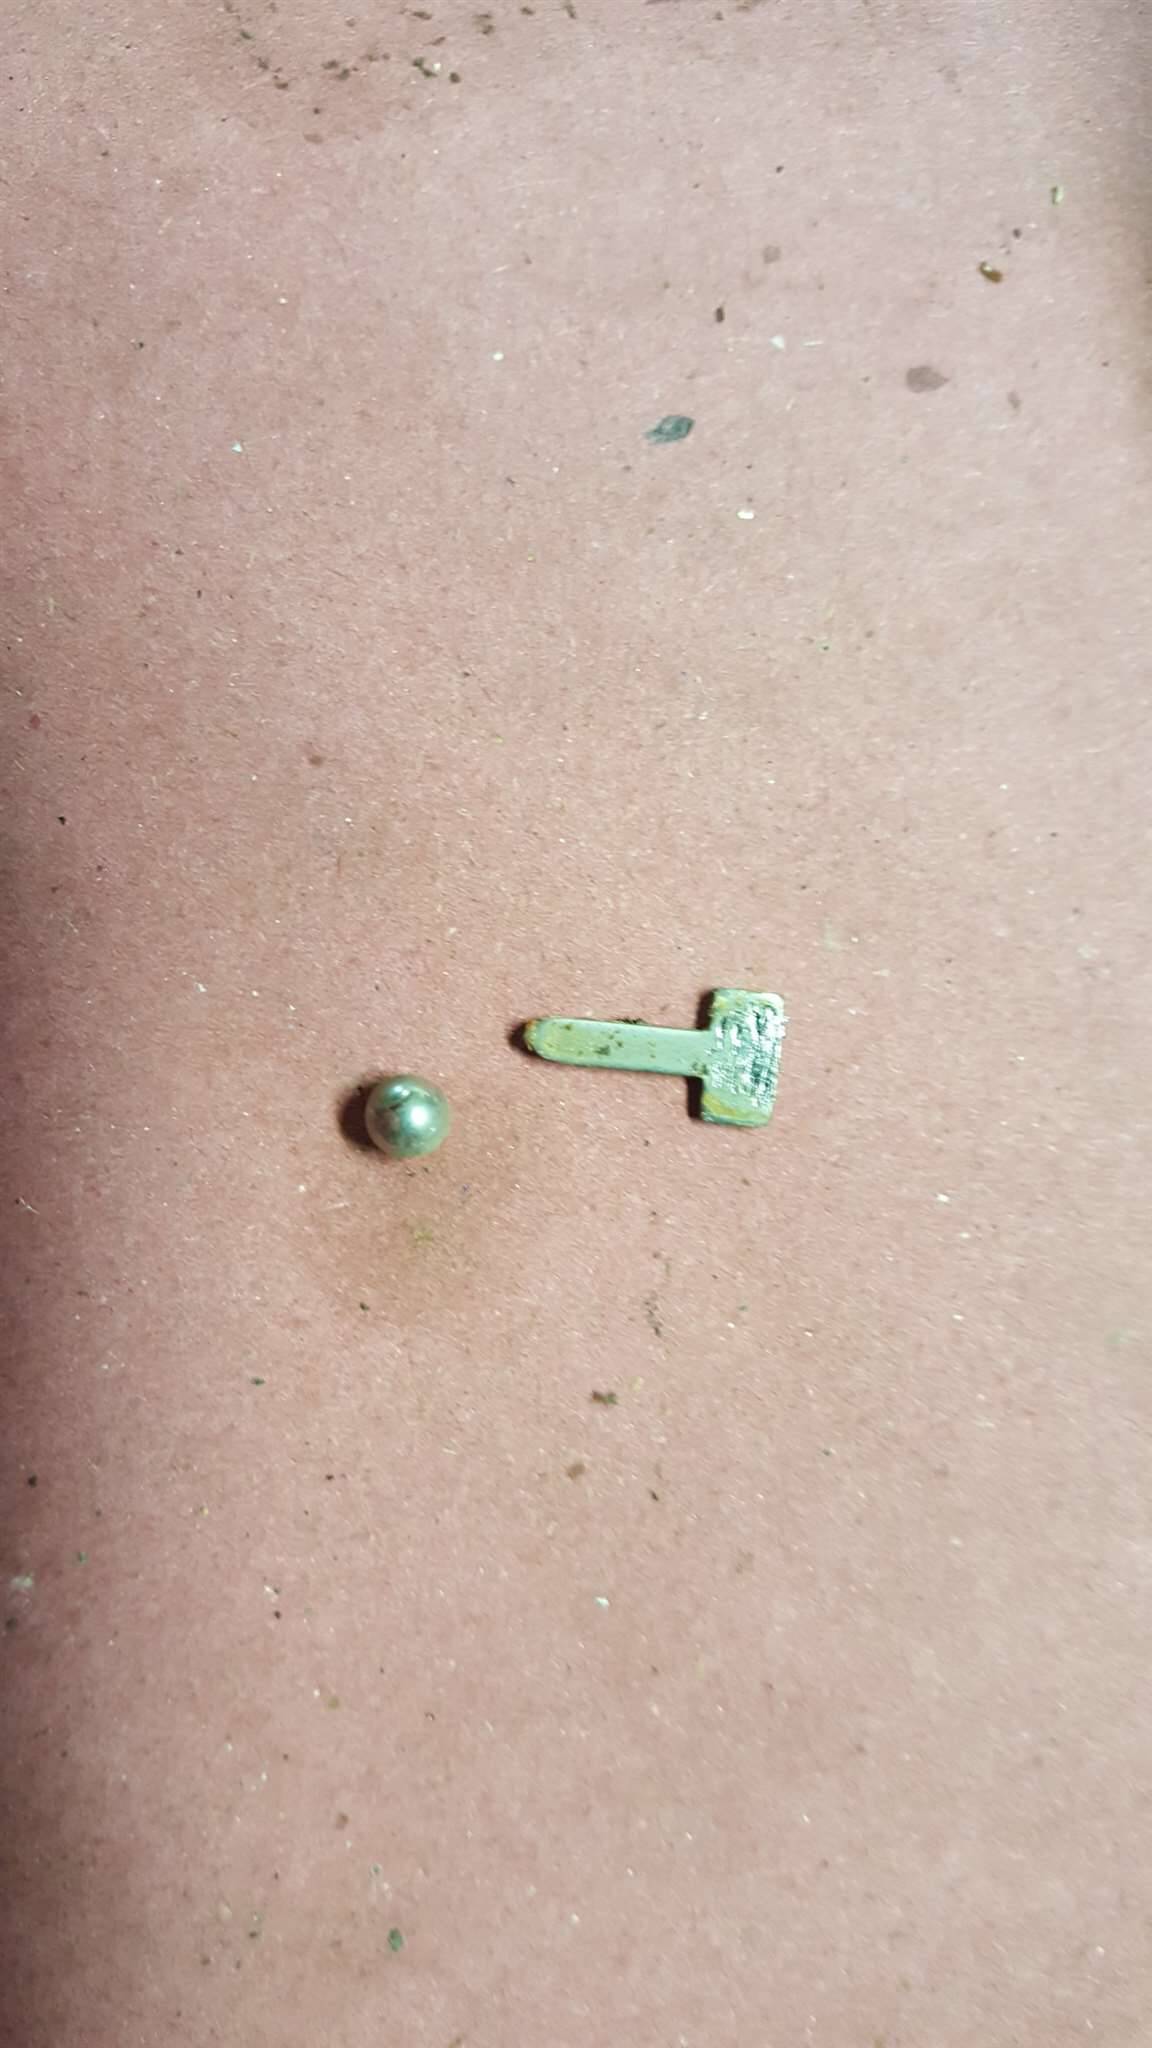 (139.11 KB) (139.11 KB) (141.88 KB) (141.88 KB)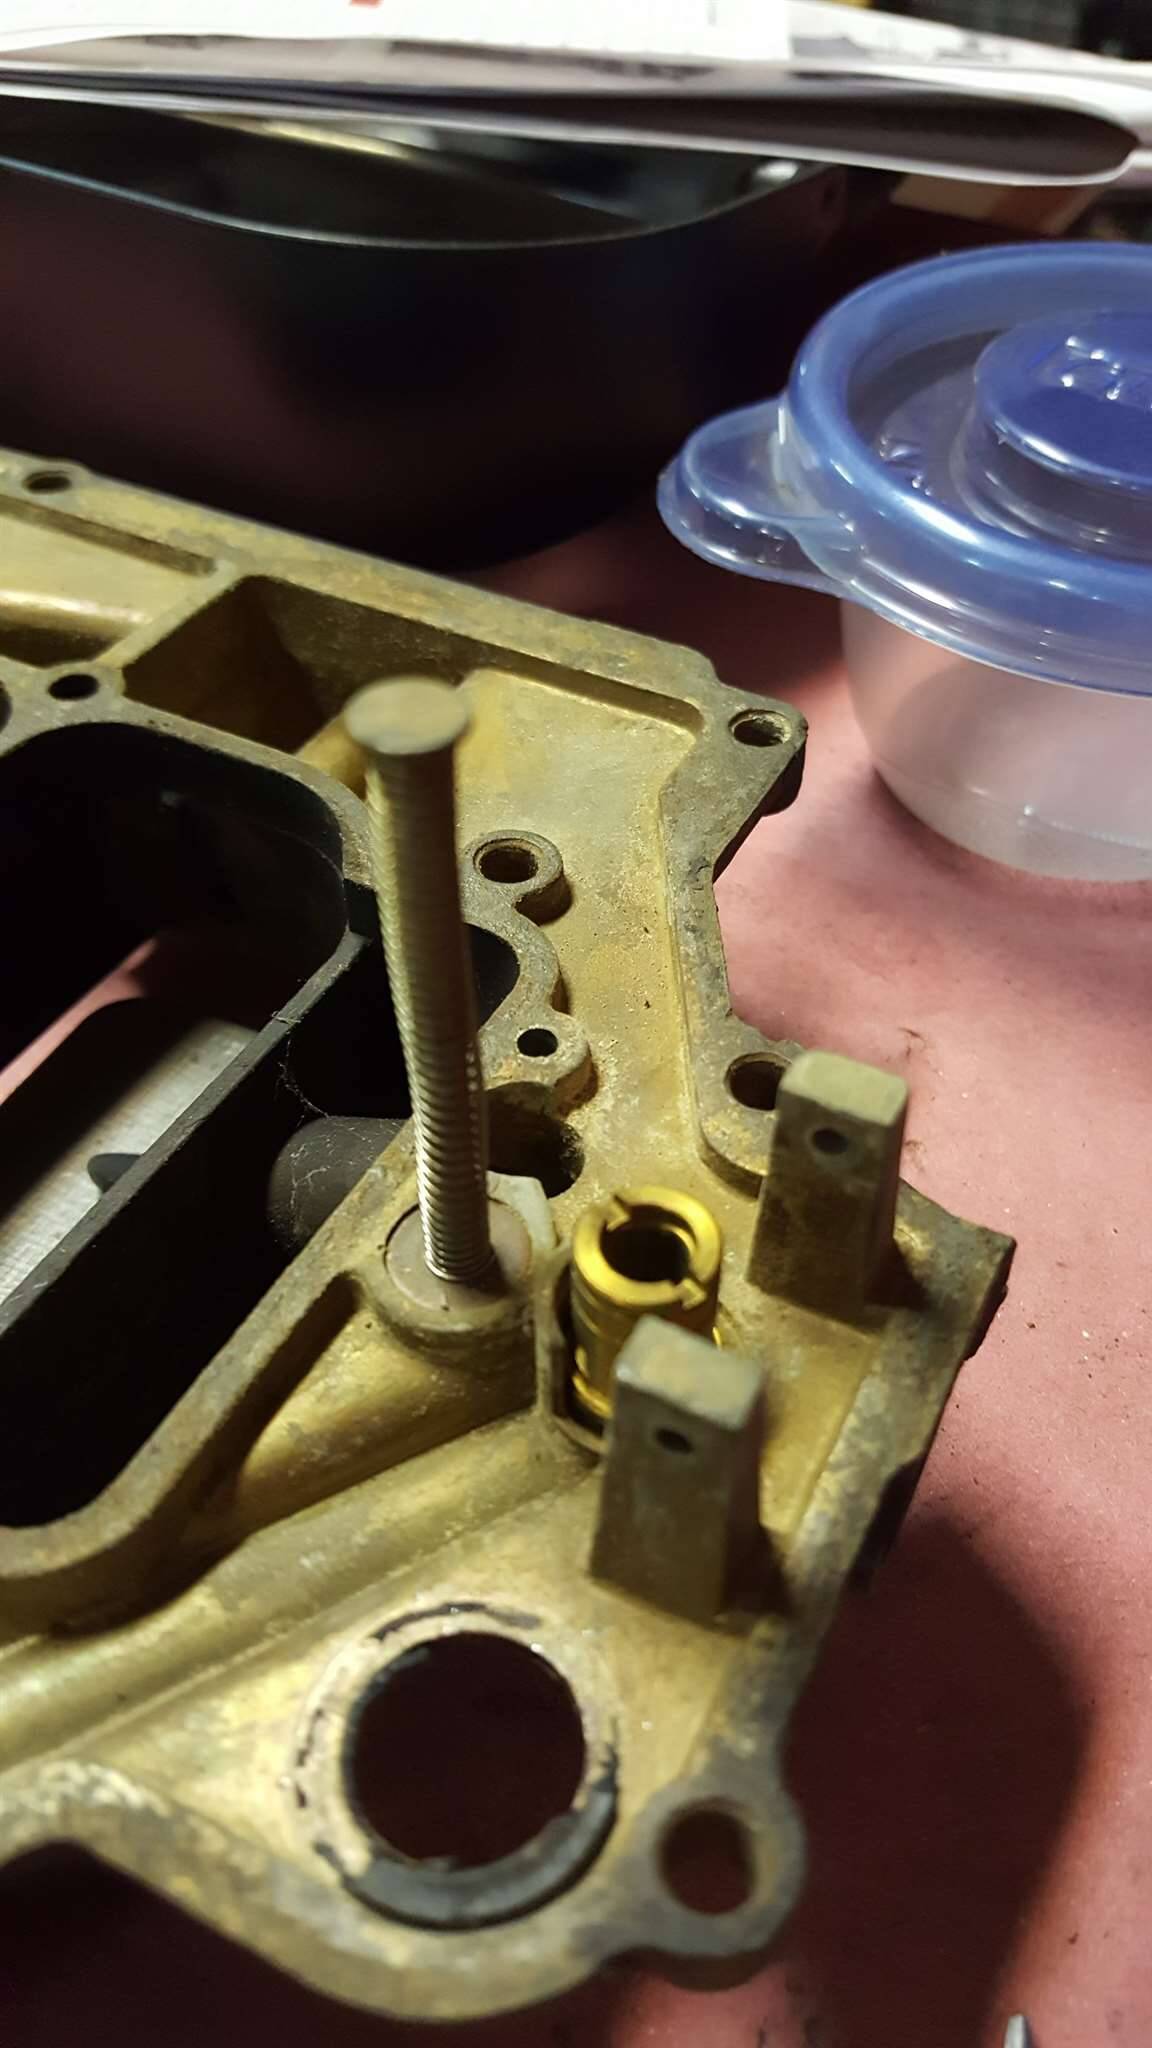 (170.67 KB) (170.67 KB)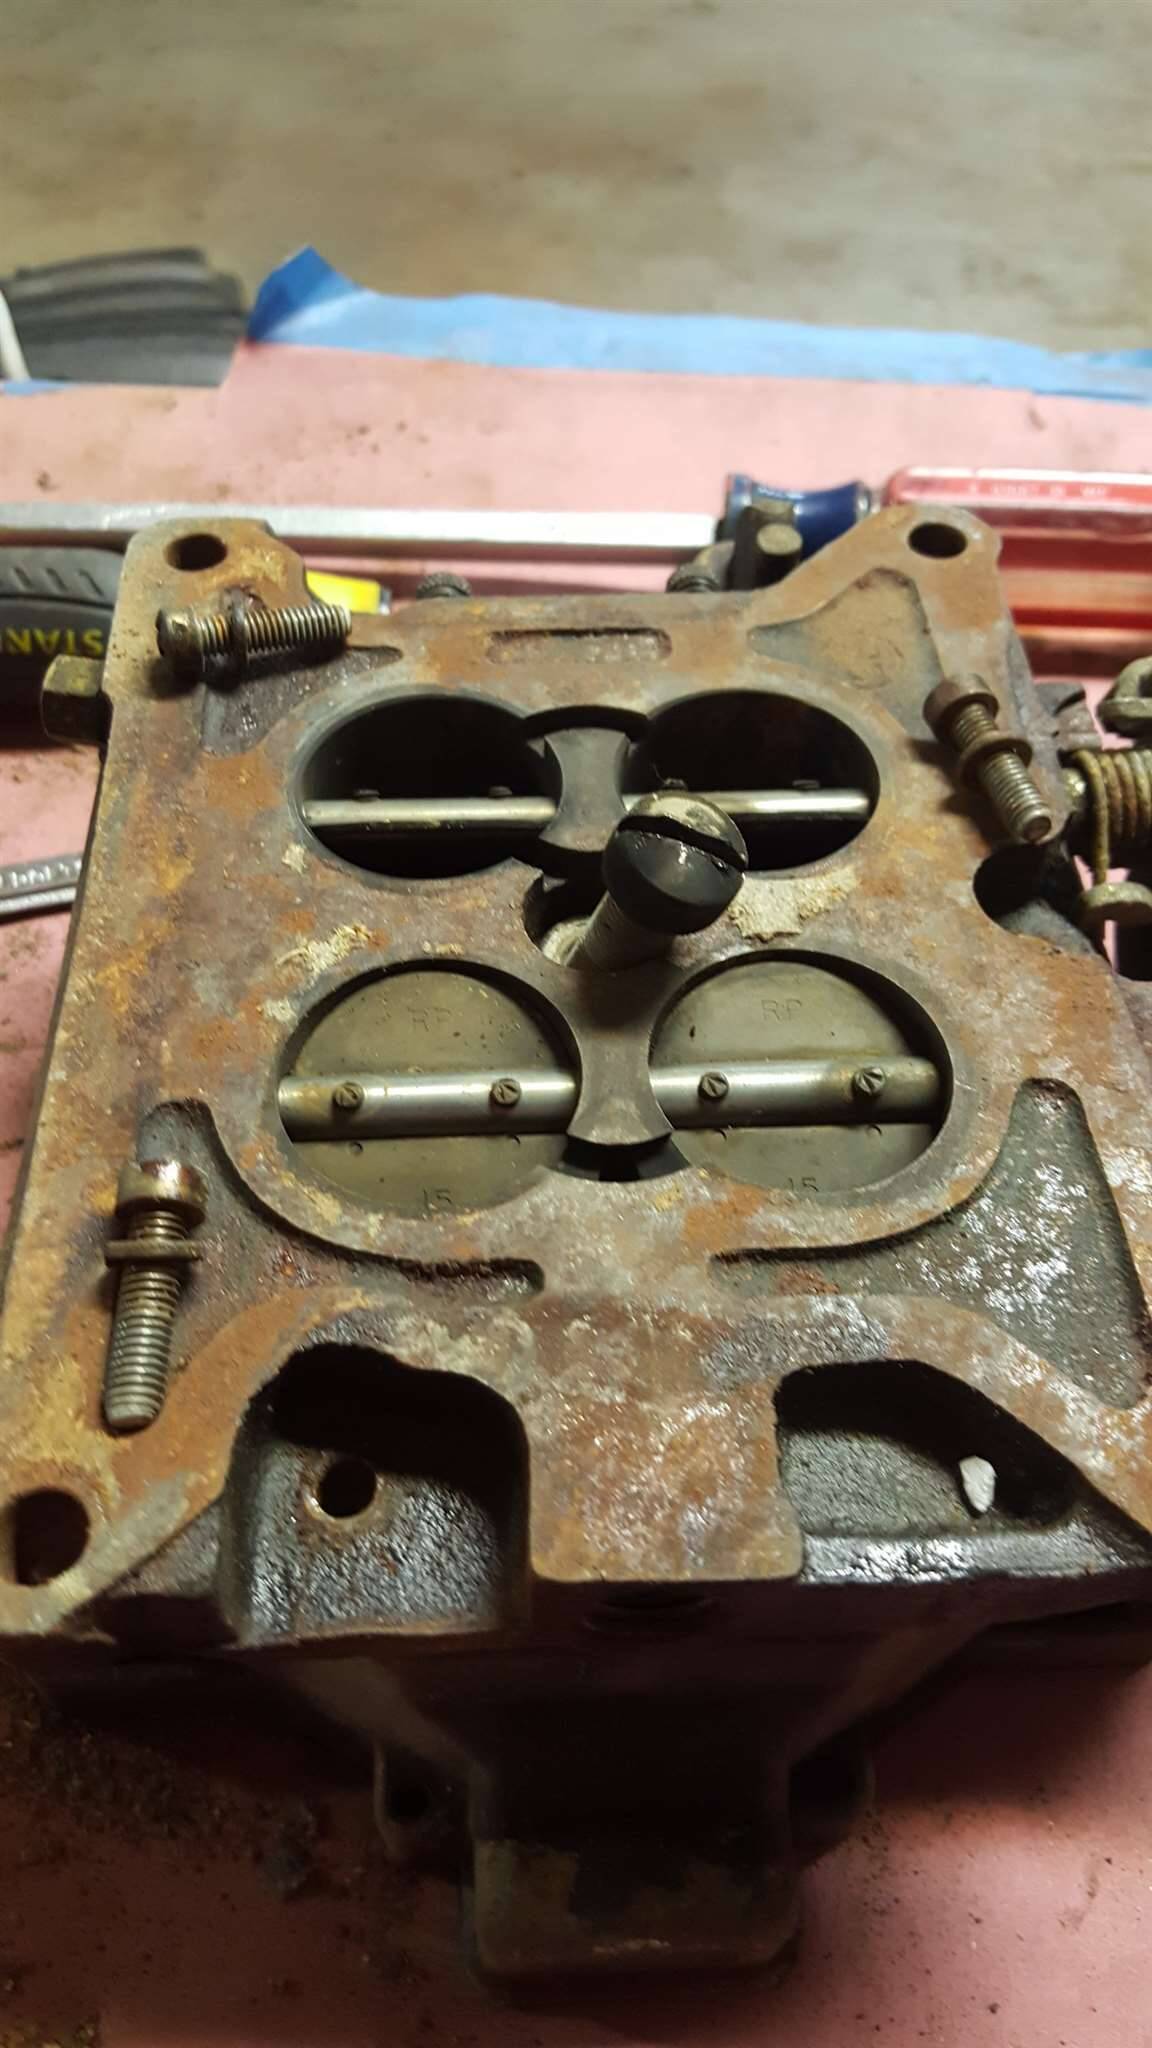
Posted on: 2017/10/16 20:16
|
|||
|
Stewart Ballard
|
||||
|
||||
|
Re: Stewart's 1955 Packard 400
|
||||
|---|---|---|---|---|
|
Home away from home
|
OK so welding in new metal into the area I was talking about before is not as hard as I thought it would be but I forgot to take pics.
I have been dissembling the Rochester carburetor. Been taking my time and photographing everything along the way. I do have one question for anyone that has ever rebuilt this carb. I clipped a photo (below) of the 4GC manual that I am using to guide me. I removed the both floats and then got hung up on item number 6. It says "Remove the pumps return spring from the pump well with a pair of long nose pliers". However, my 4GC has this small bar across the hole (I am pointing to it in the second image below) and its not wanting to come out. I am afraid of breaking it. Anyone familiar with removing this tiny little item have any tips on this? Attach file:  (515.85 KB) (515.85 KB)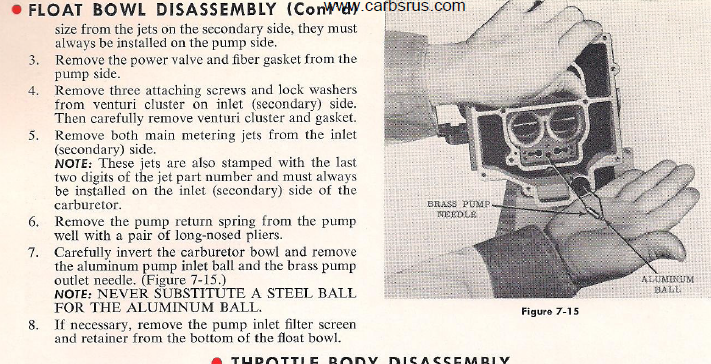 (150.35 KB) (150.35 KB)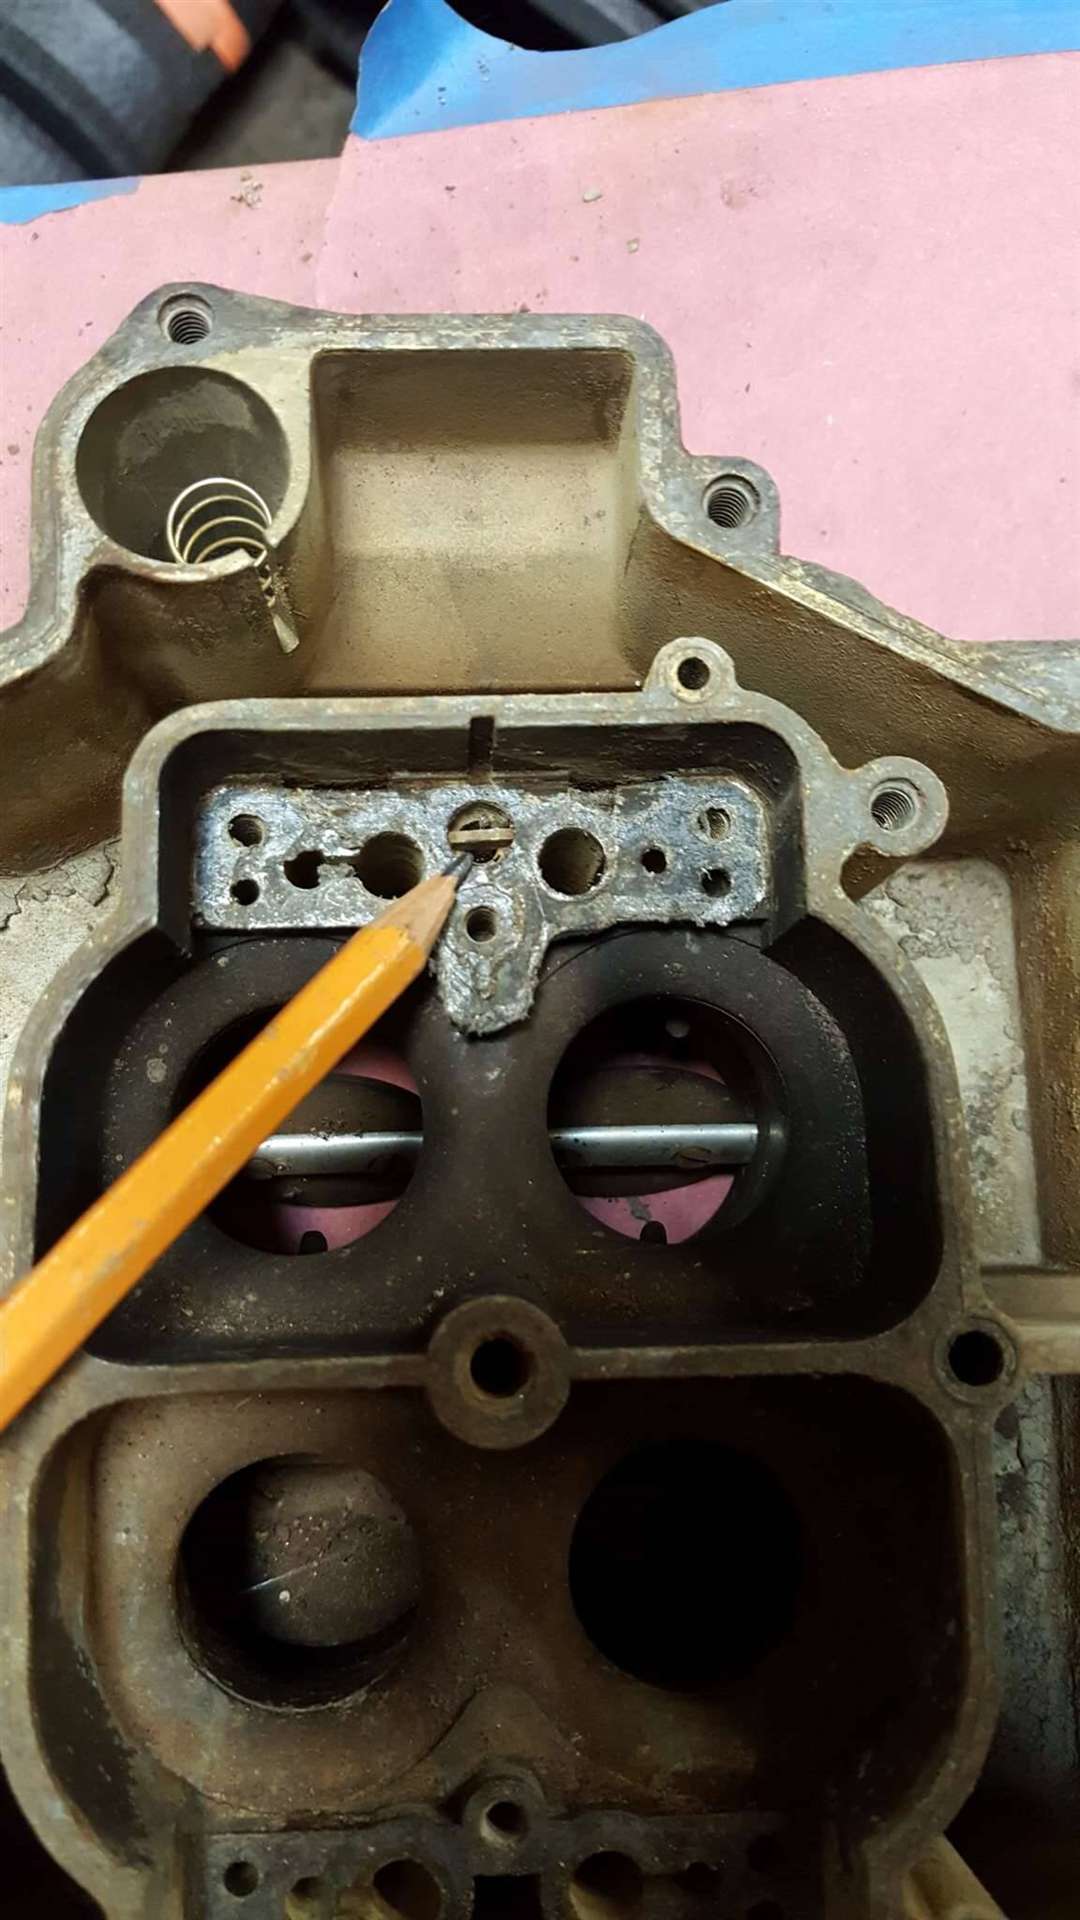
Posted on: 2017/10/15 19:02
|
|||
|
Stewart Ballard
|
||||
|
||||
|
Re: Stewart's 1955 Packard 400
|
||||
|---|---|---|---|---|
|
Home away from home
|
I wish I had more to post but I'm not getting into the shop as much has I hoped. Other task just keeping in my way. I'm kind of looking forward to colder temps outside/
I spent so much money on the rubber body mounts that I have decided to rebuild the Rochester 4GC carburetor myself. This should be fun as I have never down this before. I have the GM manual and there are multiple YouTube videos so why not. Its the same amount of information I had when I rebuilt the GM transmission myself. I got the kit from Summit as it was half the price as other other well known parts suppliers. Does anyone know of any other carb related issues that I should know in advance? Also been cleaning the interior. The worst area is where the rear view mirror and sun visors bolt into. The rust is pretty bad. I have no idea how the moisture got into that location as it is several inches behind and above where the windshield sets. I have already cut out the rust on one side (photo below). The other side is just as bad. I'm glad this area will not be visible when complete as I don't think its going to be a very pretty welding job. Attach file: (57.63 KB)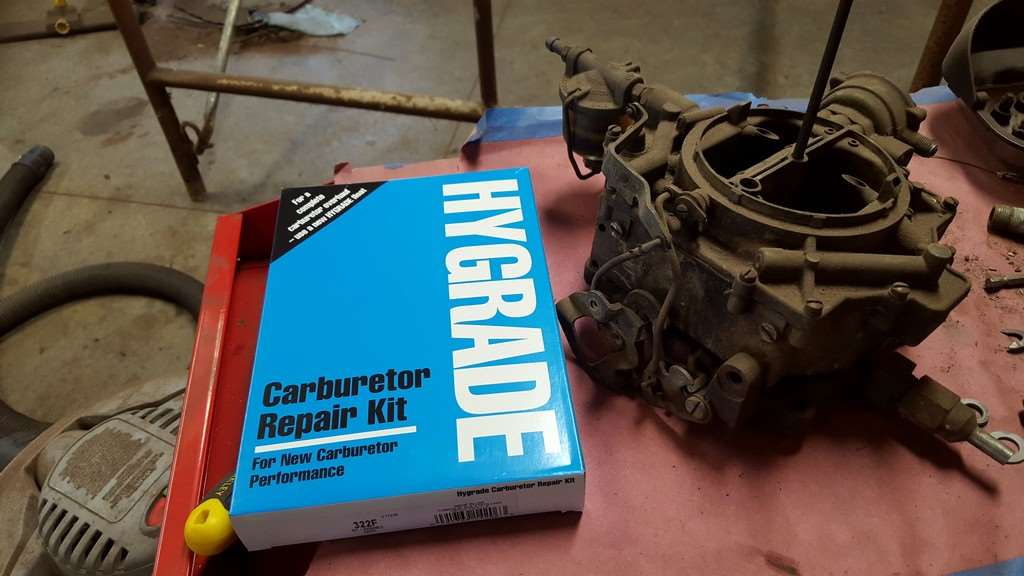 (36.31 KB) (36.31 KB)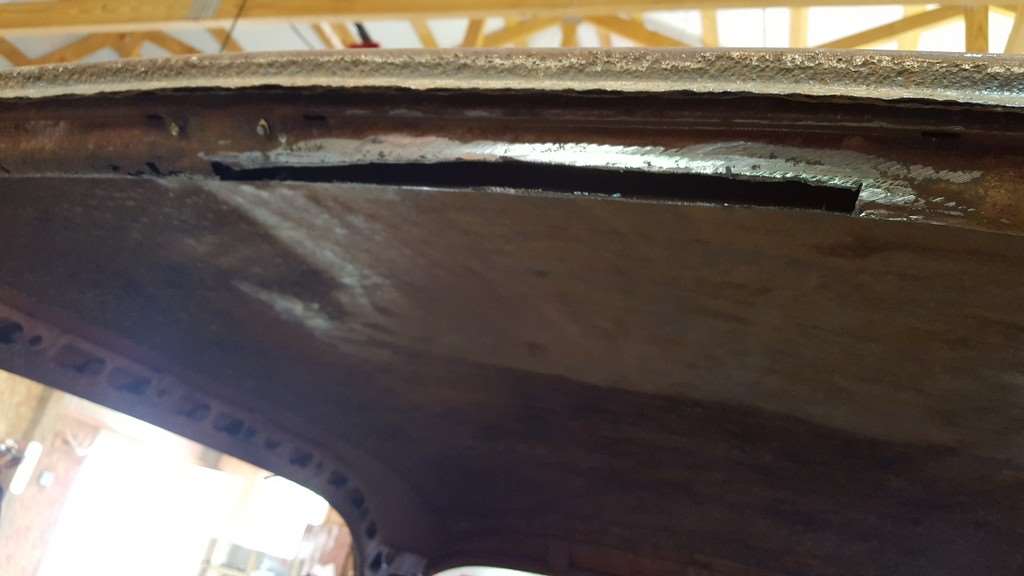
Posted on: 2017/10/1 16:17
|
|||
|
Stewart Ballard
|
||||
|
||||
|
Re: Stewart's 1955 Packard 400
|
||||
|---|---|---|---|---|
|
Home away from home
|
Still working on getting the body mounts bolted in. The drawing I got off Henry's blog was actually made from a 56 and its slightly different from my 55. No big deal just need to get some different length in bolts here and there.
Also, decided to cut off one of the gutter trims along the edge of the roof. Looks like I found my winter project as you can see below. I think its fixable. Still plenty of metal on the curve of the actual roof its just the angle piece that makes up the door frame that's gone. I'm sure my welder won't blow any holes in it and all will go together perfectly. Attach file: (42.51 KB)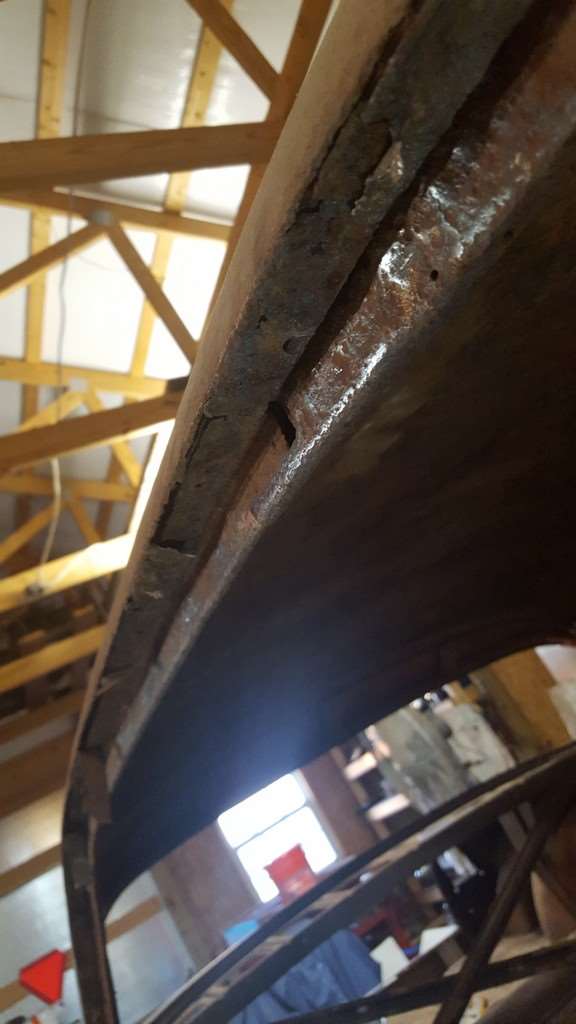 (31.65 KB) (31.65 KB)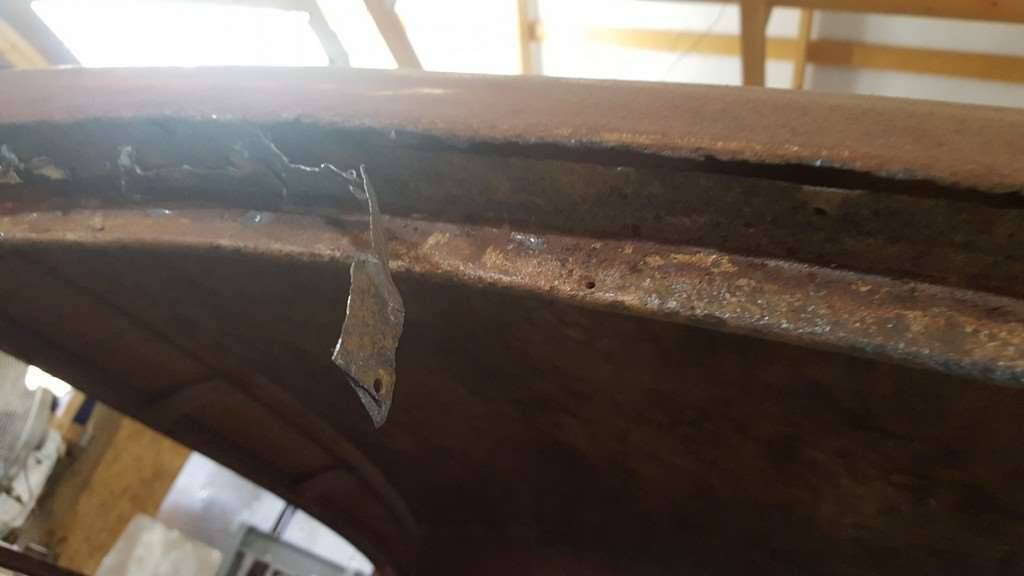 (35.00 KB) (35.00 KB)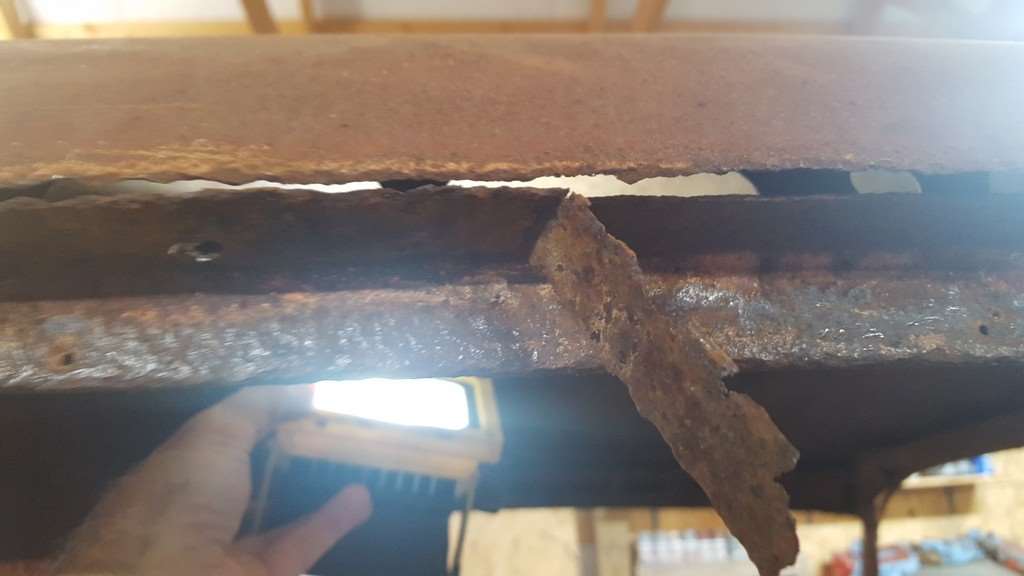 (48.40 KB) (48.40 KB)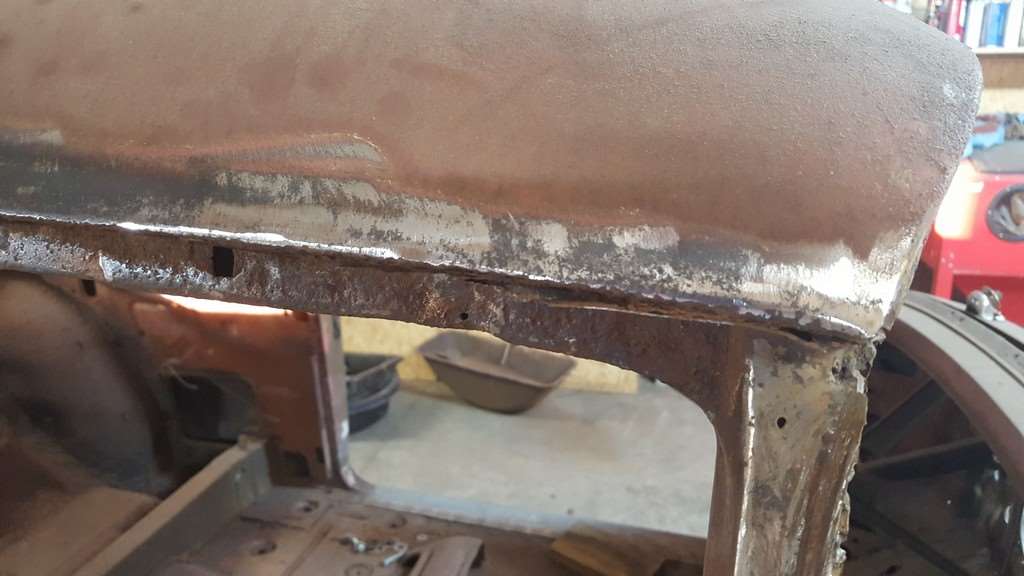 (38.83 KB) (38.83 KB)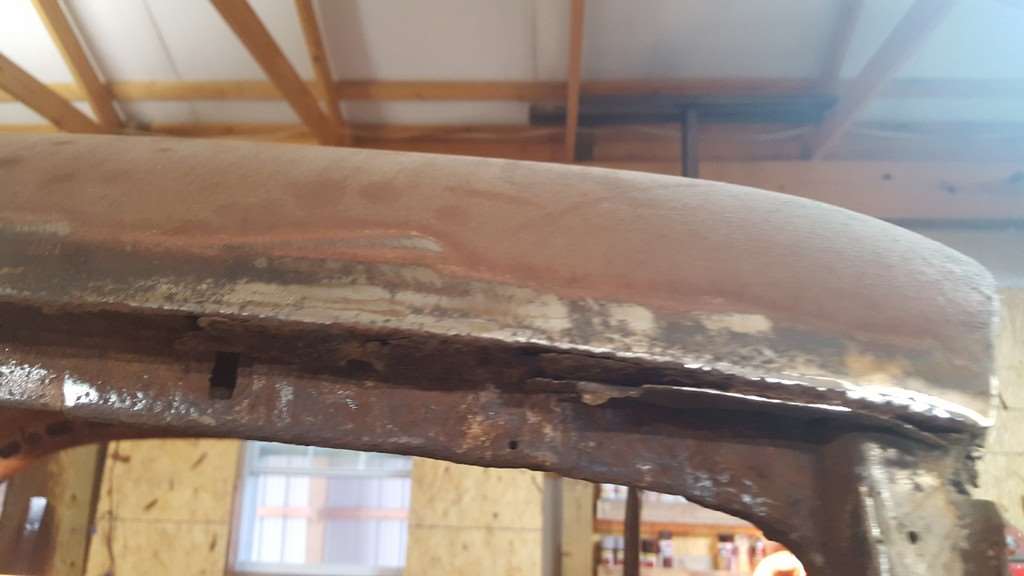
Posted on: 2017/9/6 20:25
|
|||
|
Stewart Ballard
|
||||
|
||||


