|
Re: Autoworld Brussel Belgium
|
||||
|---|---|---|---|---|
|
Home away from home

|
My father was born in Brussels and came to Canada as a very young child but I still have relatives there and usually spend a few days there anytime I am in Europe. The aviation wing of the military museum is always worth a visit as they have a number of rare early aircraft in addition to the more modern ones. I was there last fall and toured the Autoworld exhibit which was new since my previous trip. As others have noted it is very nicely done with the cars arranged in chronological order.
Posted on: 2009/6/14 21:31
|
|||
|
||||
|
Re: Power Steering ,Back to Manual
|
||||
|---|---|---|---|---|
|
Home away from home
|
This is on a 1951 300 - correct?
Do you know if the conversion was done using the 1952 to 1954 Packard power steering setup or some other system. The linkage for the Packard system is all completely different between manual and power steering except for the outer tie rod ends and connecting sleeves. The steering box for power steering also has a different ratio with fewer turns lock to lock. You may need to change all these parts back in order to return to the manual system.
Posted on: 2009/6/11 1:14
|
|||
|
||||
|
Re: Carl's 1952 Packard 300
|
||||
|---|---|---|---|---|
|
Home away from home
|
The differential pinion seal for 1952 and earlier is a 3 piece assembly consisting of a retainer that is pressed into the carrier, an outer felt ring and an inner seal that is pressed into the retainer and holds the felt ring in position. If you can remove the assembly without damaging the retainer the inner seal can be replaced with a new one that is readily available. I have only done this in the past by taking the ring gear and pinion out of the carrier so that the seal assembly could be pushed out by using a drift against the rear side of the front pinion bearing. Chicago Rawhide # 16117 is a number that worked in the past for the inner seal.
Posted on: 2009/6/10 12:54
|
|||
|
||||
|
Re: Carl's 1952 Packard 300
|
||||
|---|---|---|---|---|
|
Home away from home
|
Carl,
A supplement was issued for the 25th Series in the Ultramatic section in the 1951-54 service manual. One of the changes noted is the relocation of the converter drain plugs from the front face of the clutch housing to the outer diameter of the housing, so it looks like you found the right plugs. I checked an old 1952 or 53 Ultramatic that I have laying around and the drain plugs are on the outer diameter on it. Still, it seems strange that there was no fluid left in the converter.
Posted on: 2009/6/9 20:22
|
|||
|
||||
|
Re: 1954 Caribbean questions
|
||||
|---|---|---|---|---|
|
Home away from home
|
Quote:
See PM sent with some past history on the 733
Posted on: 2009/6/1 0:48
|
|||
|
||||
 for the bonus of your '30 733 Tourer in the Registry as well!
 |
Re: 48-50 Frame question
|
||||
|---|---|---|---|---|
|
Home away from home
|
Quote:
That sounds like the wrecking yard that used to be north of Coeur d'Alene, Idaho. I drove past it many times on the way to and from Spokane.
Posted on: 2009/5/27 1:07
|
|||
|
||||
|
Re: Carpet Suggestions?
|
||||
|---|---|---|---|---|
|
Home away from home
|
I don't have a photo readily available of my installation as the car is stored in a location 140 miles away but i took a few shots of an original front carpet. The edges are finished by wrapping the carpet material over the sides and bonding it to the rubber backing.
Attach file:  (109.45 KB) (109.45 KB) (106.22 KB) (106.22 KB)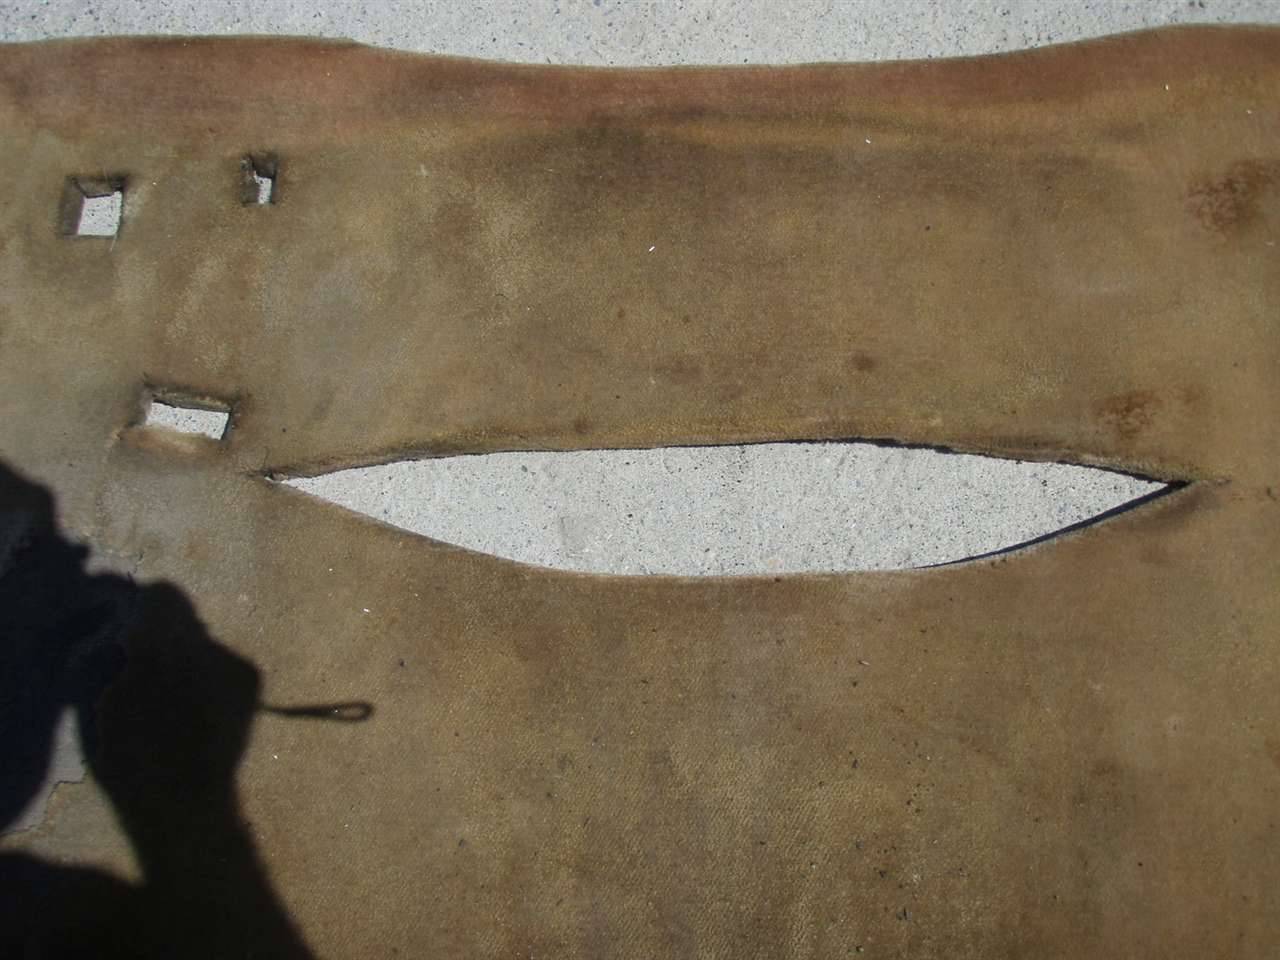 (121.61 KB) (121.61 KB) (167.72 KB) (167.72 KB) (118.31 KB) (118.31 KB)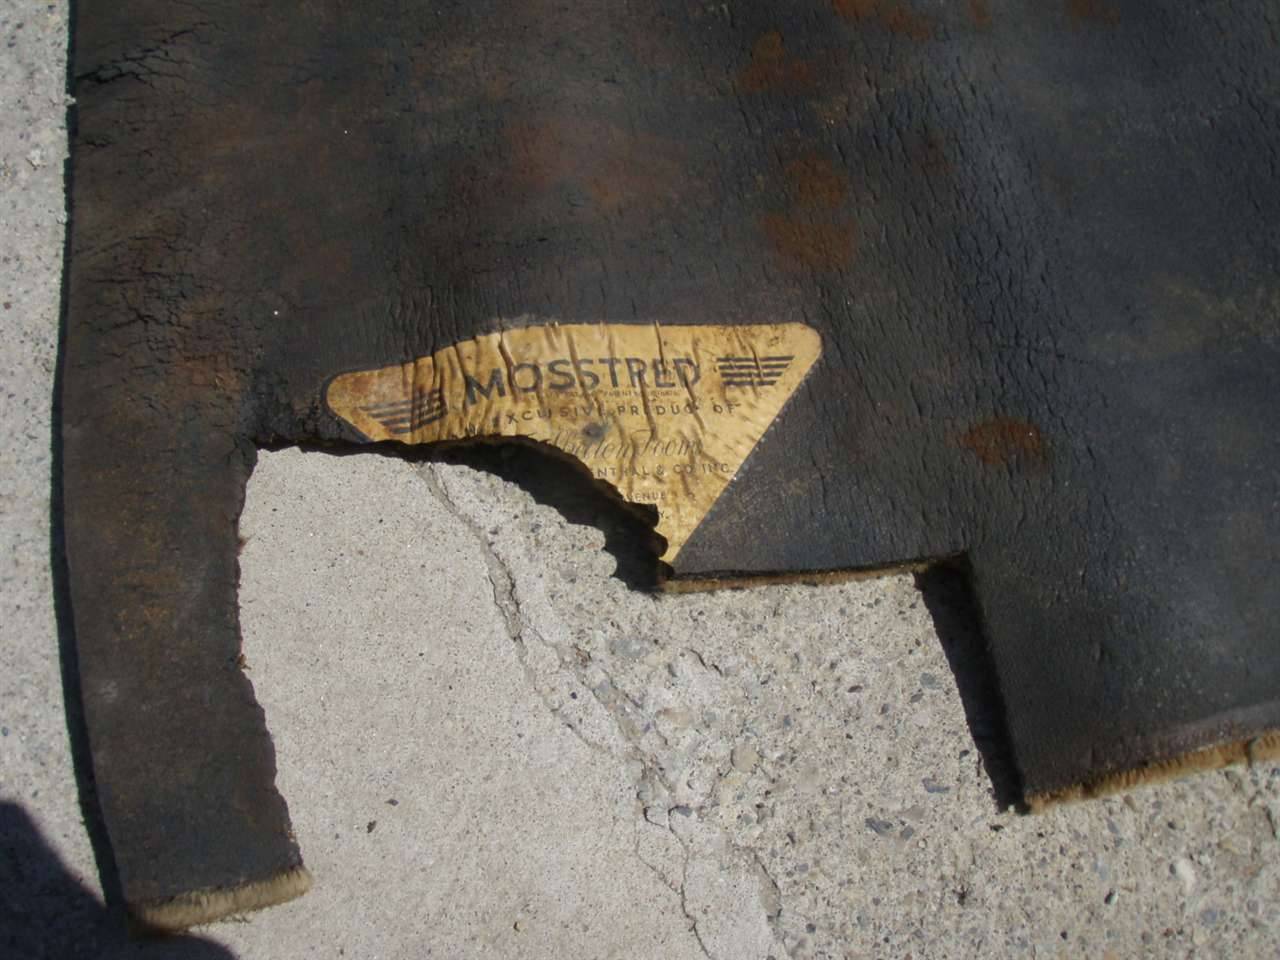
Posted on: 2009/5/24 15:56
|
|||
|
||||
|
Re: Carpet Suggestions?
|
||||
|---|---|---|---|---|
|
Home away from home
|
The 22nd Series Custom 8's used Mosstred carpet which is a Wilton wool carpet bonded to heavy foam rubber. There is no binding on the original as the carpet material wraps around the edge of the rubber backing. I duplicated this on my car by purchasing the Wilton carpet material from Bill Hirsch and attaching it to 3/8" thick closed cell neoprene with spray on 3M adhesive 90. In hindsight I should perhaps have used open cell neoprene for a closer match to the original but thought that the closed cell would be less likely to hold water in the event that it became wet. I was very careful about fitting up the carpet and backing material before using the spray adhesive which is like contact cement, so once pressed together it is there to stay. The rear carpet is quite easy but the front takes a bit more care as it has a cutout where it goes over the transmission hump that is not sewn but simply butts together.
I have no experience with 23rd Series cars but the parts book shows different numbers for the Custom 8's so it looks like different material was used.
Posted on: 2009/5/24 0:50
|
|||
|
||||
|
Re: Aircraft Models
|
||||
|---|---|---|---|---|
|
Home away from home
|
You might try some of the air museums that have WW II aircraft. The RAF museum lists some of the more common models on their website. You would probably need to visit in person or send an inquiry by email to find the more obscure ones however.
Posted on: 2009/5/22 18:13
|
|||
|
||||
|
Re: Accessory Spare Tire Valve Extension
|
||||
|---|---|---|---|---|
|
Home away from home
|
I'm not sure if your valve extension kit came with a box but here are the instructions from the back of the box for accessory part # PA-383928:
1-Drill a 5/16" diameter hole in the rear body panel a few inches to the right of the left tail lamp and two or three inches below the bottom edge of the trunk lid. 2-Assemble the connection tightly to the valve on the spare tire and install the hose along the left side of the trunk compartment so it will be clear of luggage. 3-Insert valve core end through the hole in the body with the small nut and lock washer against the inside of the body panel. 4-Assemble the gasket and large retaining nut on the outside surface of the body and tighten securely. 5-Check the tire pressure and then apply valve cap. Hope this helps.
Posted on: 2009/5/18 0:37
|
|||
|
||||


