|
Re: 1936 Junior 120B
|
||||
|---|---|---|---|---|
|
Quite a regular
|
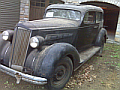
I just posted my 120b (1936) straight 8 plus tranny and rear diff for sale in classifieds. I've decided to go a different route on the drive train, namely Ford. Came across a low miles Ford 240 in line 6 (1965) with 4 speed tranny and rear axle 3.25. Some of my friends are now calling my project, a "Packford" (get it?). Anyway have already overhauled the Ford 6 cylinder during the winter and getting ready to weld new mounts and install the engine and tranny in about a month. This 1965 in-Line 6 came from a State of Kentucky F100 Ford truck and appears very promising for suitable drivetrain, less maintenance and future reliability. This 240 engine had gear drive and is historically known to go up to 300K miles. Because it was so reliable and successful, Ford changed the design and went to a 300 version. With extra space in the front (in the 6 cylinder versus 8), I will install 14 inch electric fan and maybe go new aluminum radiator. Also converting everything to 12 volt. I guess I am now in the modification class.
Attach file:  (65.94 KB) (65.94 KB) (58.36 KB) (58.36 KB) (40.93 KB) (40.93 KB)
Posted on: 2010/3/3 8:59
|
|||
|
||||
|
Re: 1936 Junior 120B
|
||||
|---|---|---|---|---|
|
Quite a regular
|
to me, part of the enjoyment of owning an old car, is understanding its past history. When we buy these cars, in most cases, we are the 3rd, 4th, 5th, 6th, etc owners (or caretakers) in the line and its not possible to trace prior ownerships. When an old car is handed-down to relatives, often the receipts and stories are passed-along. This car was last registered in Michigan in 1954. The original owner has since died and the car probably sat in a garage for 40 some years. It's a shame that some relative didn't have an interest in getting back on the road. Then it sat another 13 years in the previous owner's garage (who had 13 other cars waiting for work) before I purchased it in June 2009. When I bought it for $5K, I was mostly interested in the rust factor, figuring the mechanicals could always be renewed or replaced. I remember the clutch pedal depressing with no problem and the brakes were totally frozen. Since then, I have rebuilt the master cylinder, new lines, and have new wheel cylinders (they were toast). recently I removed the tranny inspection plate while cleaning the underside and noticed a few clutch disc pieces in the basket. Good thing this was picked up before everything was reassembled. The first plan was to remove the tranny ONLY....I can only imagine how aggrevating that would have been (knowing the problem hanging it up now). With the absence of fenders, radiator, engine gas lines and electric lines to contend with, removing the entire engine with tranny was best idea at this stage. This is my first (and probably last) attempt (of many cars previously)at a full body-off restoration. My last car, a 1951 mercedes was in decent shape, fun to drive, but annoying and nagging that many things (especially the frame parts) needed work. I had given thought to one day out in the garage, tearing it completely apart from ground 0...but probably lacked the motivation, but more importantly, realized the cost versus value factor. Although it takes a long time, methodically attending to every need of the car, in my opinion, is the only way to get true satisfaction. It's fun to scheme and plan, buy replacement parts, tell stories, sit there in the garage looking at it and trying to decide what's next. When I an unable drive it anymore, I will pass along all receipts and descriptions of the work down to the next owner...maybe a relative. Moral? enjoy your experiences with these cars while we are the caretakers. Endure the problems with satisfaction of resolve. Solving the problem is a story to tell over pancakes and sausage. Posting the solution, with the help of guys on this site, who have "been there and done that" will help others in the future. Big Kev has given us the means. I hope to start the engine (first time 53 years?) this spring, meanwhile there is plenty to do. Next up> Sometime, next week, the cutting torch will remove the pilot bearing, the tranny will be separated, the oil pan will be cleaned, the rear main seal (asbestos?) will be replaced, a new pressure plate, clutch disc, bearings, will be replaced. The engine and tranny will be re-joined, and put back in the car...and all the areas where these items reside, will have been thoroughly degreased, cleaned and repainted. Is this fun or what?
Posted on: 2009/12/8 5:25
|
|||
|
||||
|
Re: 1936 Junior 120B
|
||||
|---|---|---|---|---|
|
Quite a regular
|
it's not the throwout...so the pilot bearing it is.
Thanks Guys ! The inner race circle of the bearing is frozen to the shaft and the outer race spins. when you go to pull the tranny out, the pilot stops abruptly at the disc and won't budge....I hate to say what we used to pry, but it was 2 rusty spare rear axle shafts - great pry bars (:)
Posted on: 2009/12/7 18:21
|
|||
|
||||
|
Re: 1936 Junior 120B
|
||||
|---|---|---|---|---|
|
Quite a regular
|
I'll check that out.....this bearing is at the very end of the shaft (towards the fly wheel)
External edge? I see 2 bolts on the bottom and 2 on the top. The 2 on the top would take a very long wrench (and with the flywheel present, there's about 1 inch of clearance max). As I look at diagram in the clutch/tranny book, it looks like the fly wheel has a tighening bolt to keep it from moving on the shaft (?) Always learning..... On some other vehicles I have worked on, the bell housing tightened on the outside (accessbile from the engine side).... There's probably something we are not doing right...it shouldn't be this much trouble to remove the tranny from the bell housing......have to get it out so we can remove and replace the clutch....
Posted on: 2009/12/7 15:21
|
|||
|
||||
|
Re: 1936 Junior 120B
|
||||
|---|---|---|---|---|
|
Quite a regular
|
the transmission would not pull out of the bell housing...the shaft was hung up on the pressure plate and disc. With considerable prying, we managed to get 5 inches of separation and turned the engine/tranny over to see what was going on. A bearing on the very end of the shaft is frozen and will not budge (preventing us from pulling the tranny and shaft out). We were planning on torching it (heating it up) so the bearing will slide accordingly and the tranny can be removed .... then replace the disc and pressure plate. The bell housing bolts internally to the back of the engine (of course we do not need to remove the bell housing).
Not sure the name for this bearing, but its on the absolute end of the tranny shaft. Has anyone had this problem, or is there something I am missing?
Posted on: 2009/12/7 14:50
|
|||
|
||||
|
Re: 1936 Junior 120B
|
||||
|---|---|---|---|---|
|
Quite a regular
|
This weekend I decided to pull the engine and tranny before going further (the preliminary reason, was that after recently pulling the inspection cover of the bottom tranny, I discovered the clutch disc was toast (partially disinigrated, probably because it sat for over 30+ years and?) AND I wanted to have it easier to clean the oil pan and pump, etc... After pulling the engine (which came out with the hoist within minutes after disconnecting linkage and motor mount bolts, removed the oil pan and it is full of sludge. although the images are not great, in the one with the oil pan, you can actually see the imprint of the pump screen which sits low to the bottom of the pan. It was totally built-up sludge and had I run the engine, would have not gotten far. I had a fellow (who will work for cash and do anything) help me (he is in the photo with the blue Kentucky Sweatshirt).
Had a problem removing the transmission from the bell housing and engine....one of the end bearings is frozen/rusted and needs to be torched. Once torched, can remove the disc plate and presssure plate and get replacements. I am told the disc and plate are sold in matching sets...and its best to remove them first to ensure that you have the correct one for the car (hoping someone in the past didn't put something else there AND because of the core charges. Removing the engine also allowed me to get to some other spots before finalizing everything. while I'm cleaning up everything, going to inspect the rear main seal as well and make sure everything appears okay. This will be my only change once I get everything assembled and get the engine running by spring. Attach file: (39.79 KB) (42.62 KB) (42.62 KB)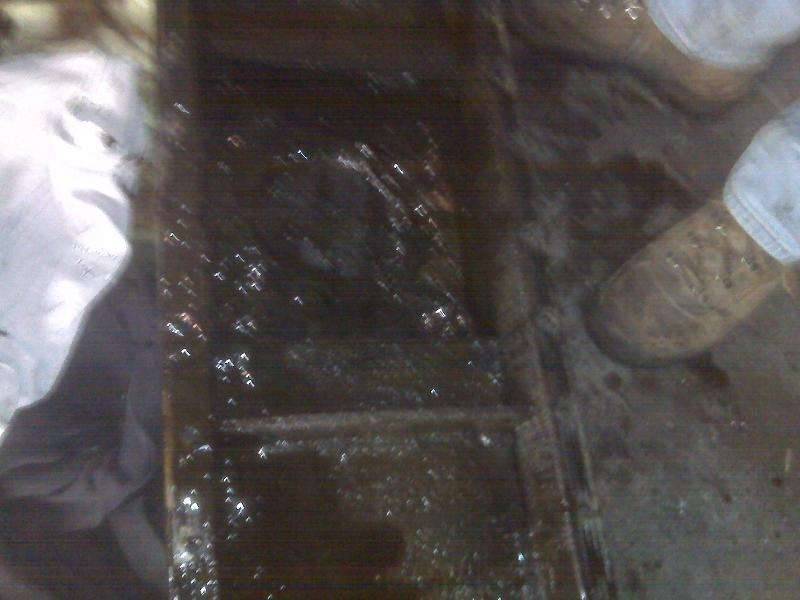 (49.14 KB) (49.14 KB)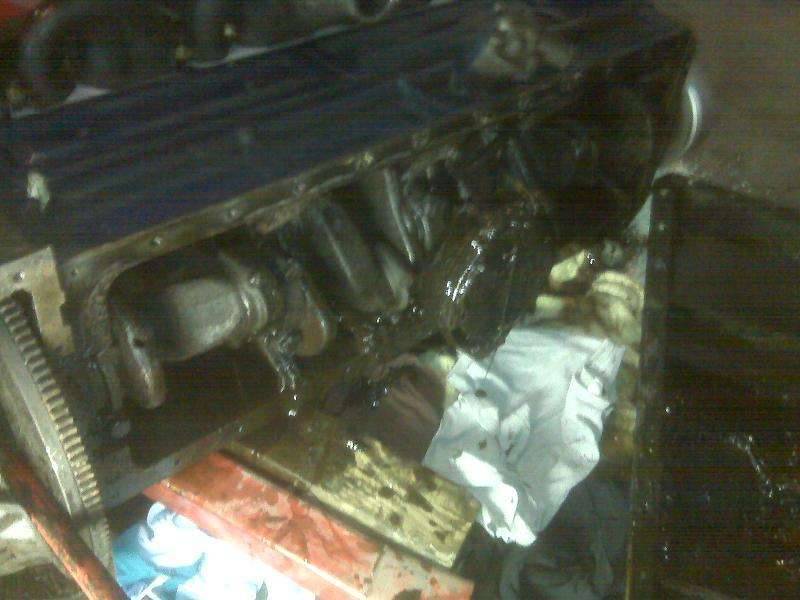
Posted on: 2009/12/7 11:34
|
|||
|
||||
|
Re: 1936 Junior 120B
|
||||
|---|---|---|---|---|
|
Quite a regular
|
images taken with my blackberry yesterday. Hauled the 36 120B frame on a tow dolly over to where the body was painted. I rent 2 (40x60) units in Frankfort, and one I co-rent with a mustang guy (and that unit has a paint booth). We put the finished painted body on the frame yesterday (the doors and hood and radiator shell are painted). color is "bonnie grey" a greenish grey formula of the 30s. We're doing black fenders later (probably spring) as they won't be needed while I do other stuff. Letting the body paint cure for a while, then buff out. Nice to get them back together. Welded new 18 gauge floor. The frame has new gas and brake lines and muffler system. I have new 7:00x16 ganster wide whitewall tires coming from Coker next week. Next up, re-wire dash this winter and work more on the engine. Still have to get to the front suspension and about 100 other things...but it's a step at a time.
Attach file: (76.78 KB)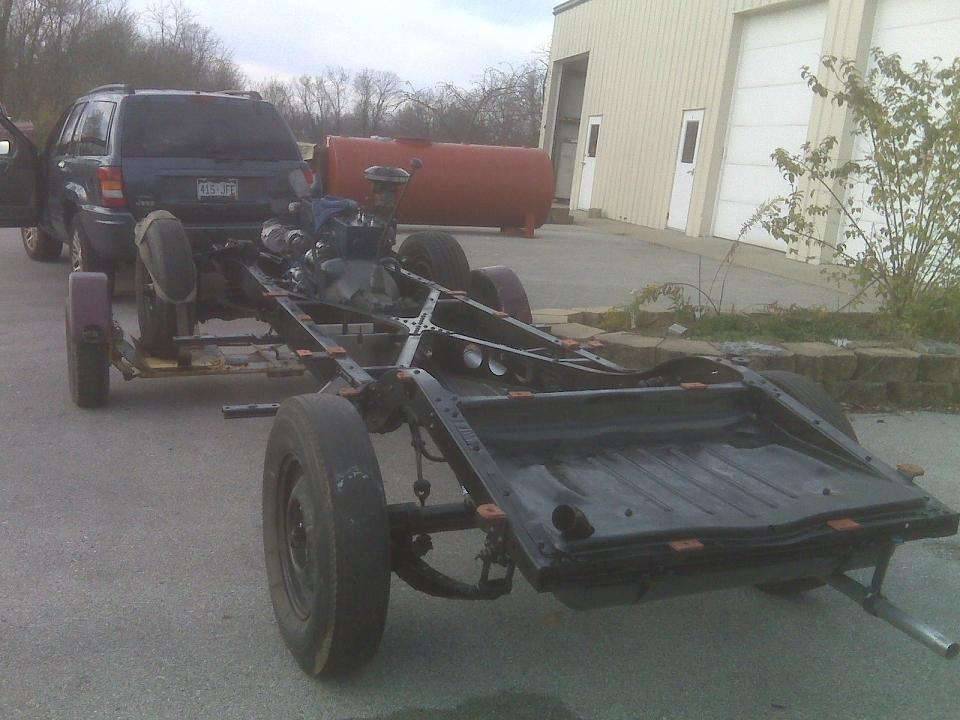 (94.14 KB) (94.14 KB)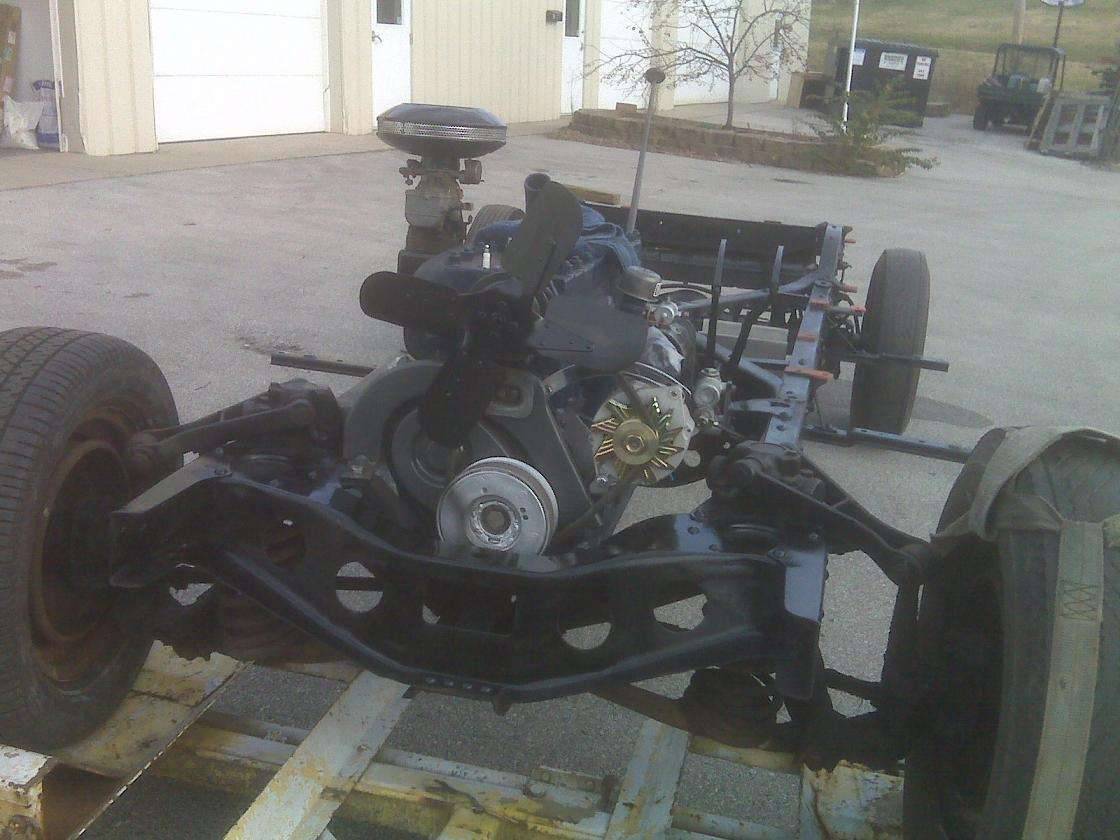 (94.59 KB) (94.59 KB) (61.59 KB) (61.59 KB)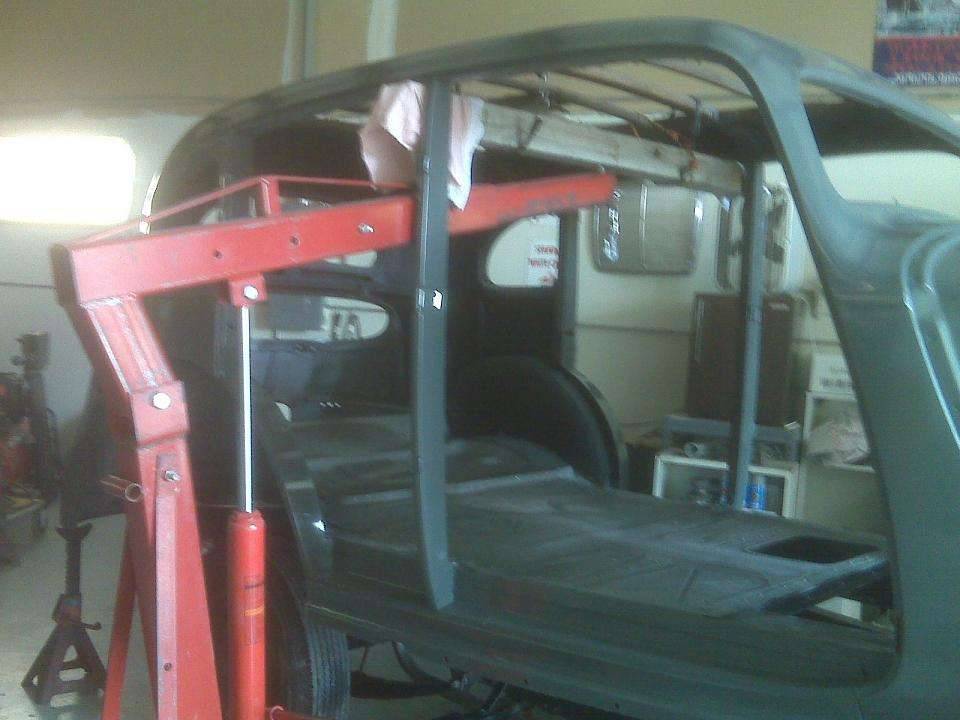
Posted on: 2009/11/23 7:33
|
|||
|
||||
|
Re: Heat Riser Valve
|
||||
|---|---|---|---|---|
|
Quite a regular
|
another question on this subject: mine is totally frozen; I see that there is a replacement kit available for the shaft, etc... but not quite sure how to remove the frozen/rusted shaft...any suggestions? Looks like the shaft is in a bushing on each end. Thanks
Posted on: 2009/11/18 16:48
|
|||
|
||||
|
Re: Electric fuel Pump
|
||||
|---|---|---|---|---|
|
Quite a regular
|
thanks for the info; I'll see how it develops. I am not close to starting the engine yet....but preparing ahead. Wasn't aware of the fuel pump block off plate. I see several on summitt racing. Thanks
Posted on: 2009/11/16 11:33
|
|||
|
||||
|
Re: Electric fuel Pump
|
||||
|---|---|---|---|---|
|
Quite a regular
|
I am at the juncture now of running a new gas line up front. At this point I don't have the OEM fuel pump, don't have carb installed, still trying to resolve my pickup tube in the original fuel transmitter. I do have a very clean tank, new straps, and a new muffler system installed. So the gas side is up for grabs at this point, while I run new brake lines to the rear, so we can reinstall the body shell next weekend.
Posted on: 2009/11/15 10:52
|
|||
|
||||


.jpg")


