|
Re: BigKev's 1954 Packard Clipper Deluxe Sedan
|
||||
|---|---|---|---|---|
|
Webmaster

|
This interior style from the Super Clipper is more like what I want:
Attach file:  (73.49 KB) (73.49 KB)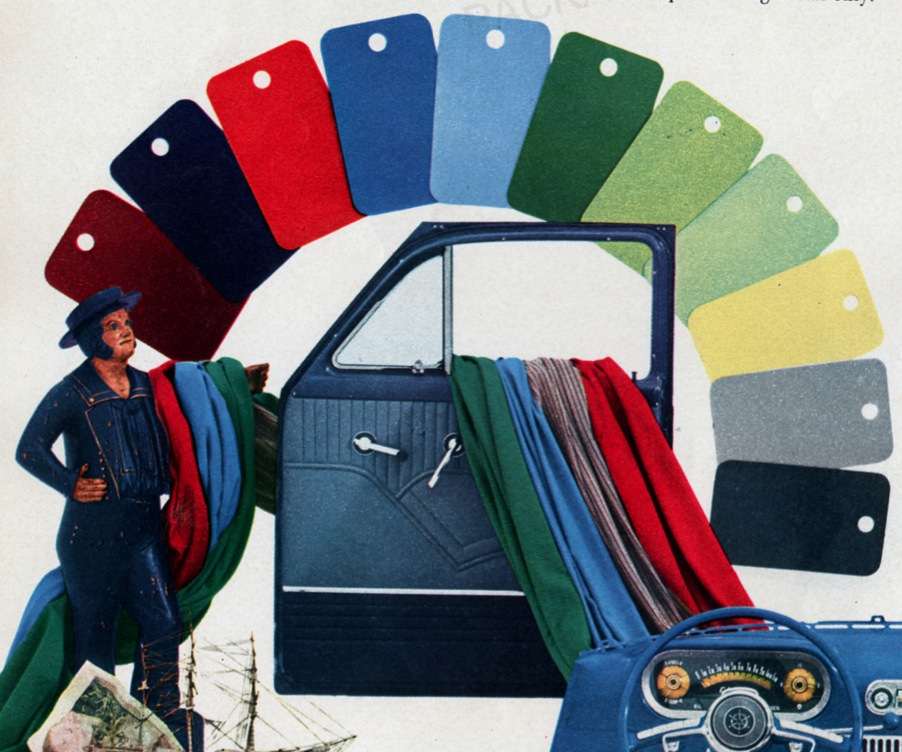
Posted on: 2010/6/29 17:00
|
|||
|
-BigKev
1954 Packard Clipper Deluxe Touring Sedan -> Registry | Project Blog 1937 Packard 115-C Convertible Coupe -> Registry | Project Blog |
||||
|
||||
|
Re: BigKev's 1954 Packard Clipper Deluxe Sedan
|
||||
|---|---|---|---|---|
|
Webmaster
|
With a little horse-trading I managed to get a 7 sheets of 48x32x1/8" Black Panel Board on the way to me. That should be plenty enough to rebuild all the upholstery paneling in the car, and perhaps build some side panels for the trunk. I love it when a plan comes together!
Posted on: 2010/6/29 22:59
|
|||
|
-BigKev
1954 Packard Clipper Deluxe Touring Sedan -> Registry | Project Blog 1937 Packard 115-C Convertible Coupe -> Registry | Project Blog |
||||
|
||||
|
Re: BigKev's 1954 Packard Clipper Deluxe Sedan
|
||||
|---|---|---|---|---|
|
Webmaster
|
Jim, I think my 17th century dutch clipper sailing outfit was lost at the cleaners. Darn....looks like I will be buying myself dinner.
Posted on: 2010/6/30 0:01
|
|||
|
-BigKev
1954 Packard Clipper Deluxe Touring Sedan -> Registry | Project Blog 1937 Packard 115-C Convertible Coupe -> Registry | Project Blog |
||||
|
||||
|
Re: BigKev's 1954 Packard Clipper Deluxe Sedan
|
||||
|---|---|---|---|---|
|
Webmaster
|
Well finally back in garage this morning before the heat got to bad. I managed to get the rear bottom and back stripped down to the bare spring units. Wire brushed to remove any rust, and painted. Also did some minor repair where some of the spring retainers had rusted through.
Also ran the Clipper for about 15 minutes as it hadn't been run in about a month. Attach file: (124.44 KB)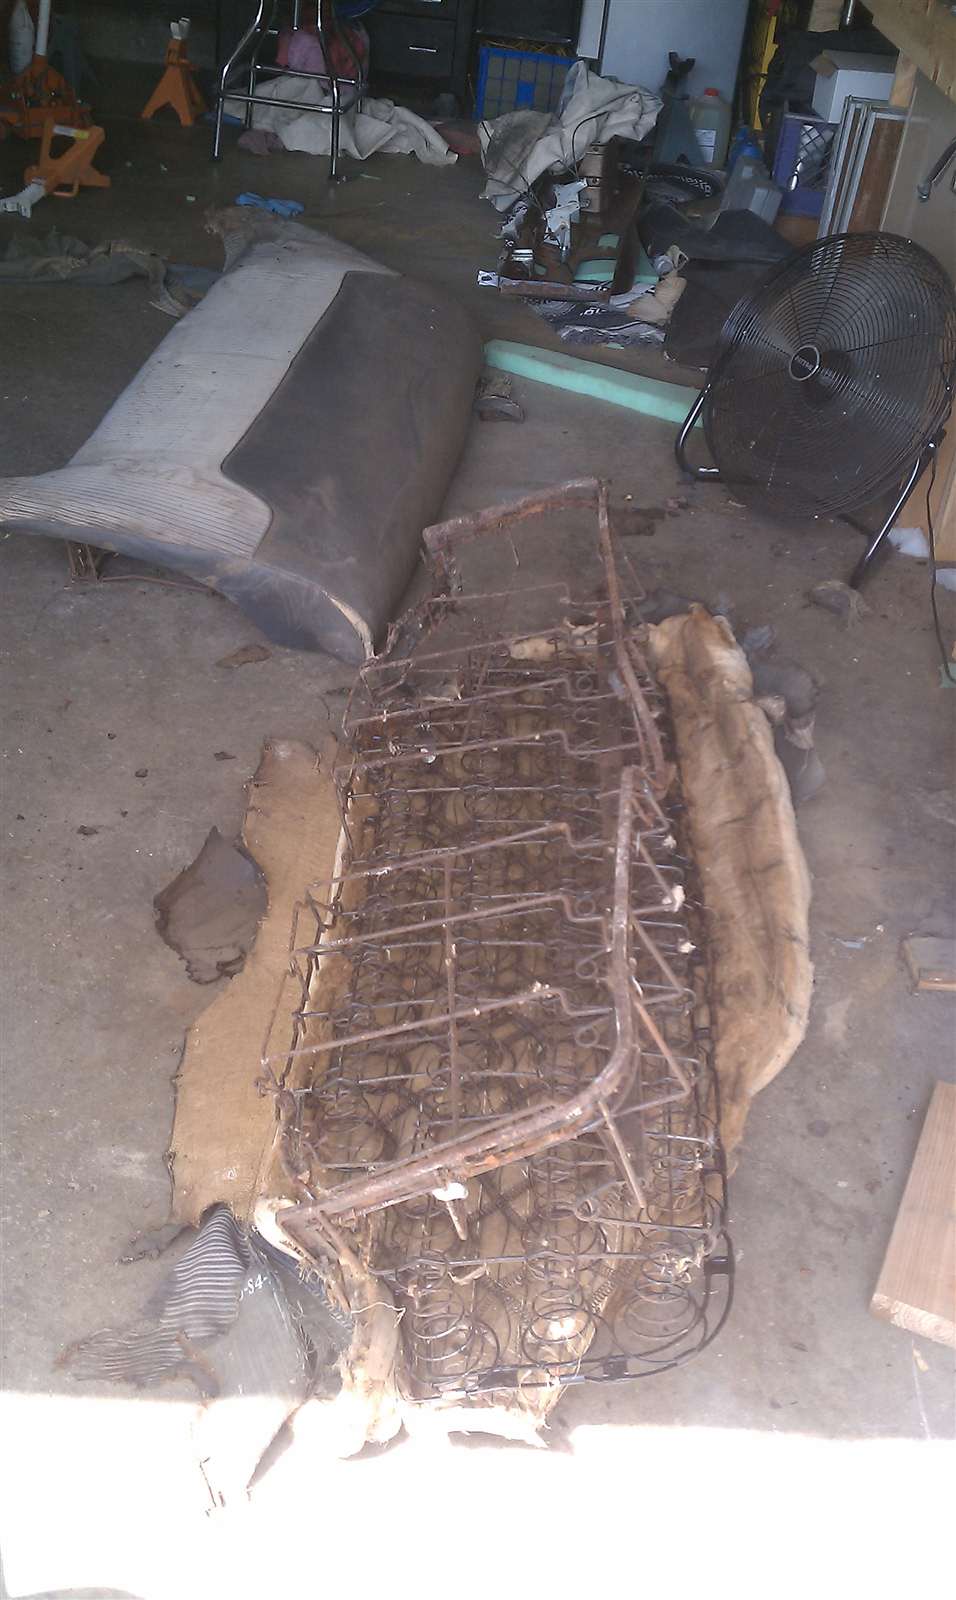 (37.66 KB) (37.66 KB)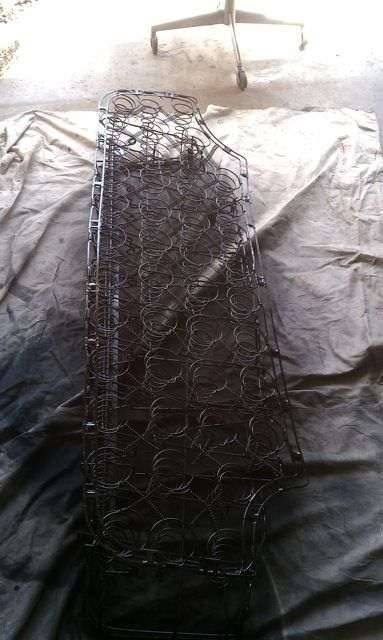 (31.40 KB) (31.40 KB) (39.79 KB) (39.79 KB)
Posted on: 2010/8/7 19:55
|
|||
|
-BigKev
1954 Packard Clipper Deluxe Touring Sedan -> Registry | Project Blog 1937 Packard 115-C Convertible Coupe -> Registry | Project Blog |
||||
|
||||
|
Re: BigKev's 1954 Packard Clipper Deluxe Sedan
|
||||
|---|---|---|---|---|
|
Webmaster
|
More progress today on the rear seat. I got the rear seat bottom built back up and recovered. First challenge was making new the pattens for the kick plate that goes along the bottom edge of the seat. The original one in my car was completely rotten. Since the back seat sits directly on the floor, it soaked up any water that got into the car. This destroyed the kick plates, and rusted the frame.
So I got the first side dialed in, and then copied the pattern for the other side and used the original retainers to hold the kick plate in place. Then the canvas spring cover was hog ringed into place. Then the 1" foam was next, followed by the batting (no pic), and finally the seat cover was hog-ringed into place. Doesnt look too bad for a "generic" seat cover that I am using as upholstery. It is not tailored to this seat frame, so I just had to do the best I could. Not perfect but will do until I can afford real upholstery. I started on that seat back, but ran out of hog rings and spray adhesive. Attach file: (25.09 KB)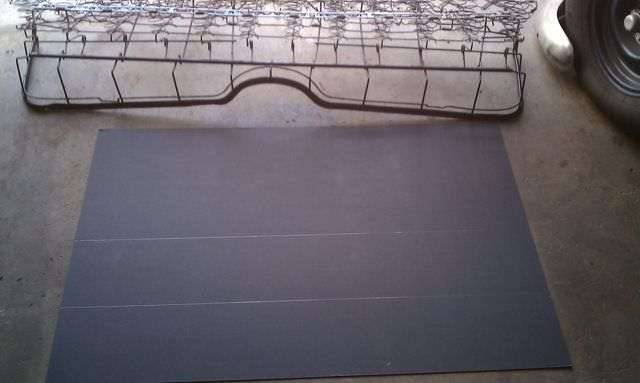 (33.41 KB) (33.41 KB)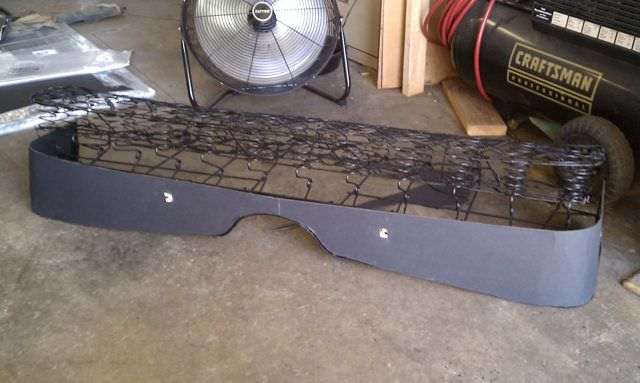 (28.76 KB) (28.76 KB)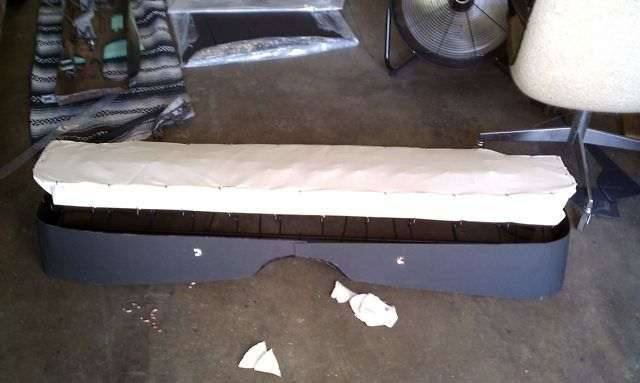 (26.69 KB) (26.69 KB)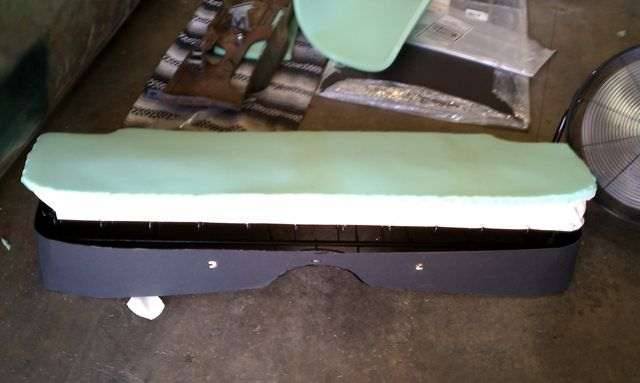 (35.13 KB) (35.13 KB)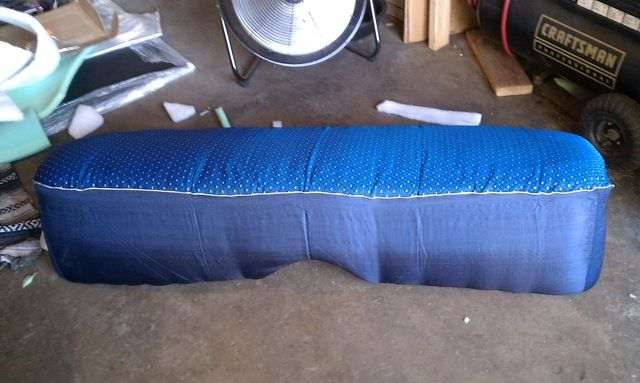
Posted on: 2010/8/8 20:38
|
|||
|
-BigKev
1954 Packard Clipper Deluxe Touring Sedan -> Registry | Project Blog 1937 Packard 115-C Convertible Coupe -> Registry | Project Blog |
||||
|
||||
|
Re: BigKev's 1954 Packard Clipper Deluxe Sedan
|
||||
|---|---|---|---|---|
|
Home away from home
|
BigKev,
Work on the interior is proceeding very well! I am most certainly NOT an expert on 54 Deluxe Clipper interiors but my 53 Deluxe Clipper used a lot of gray and gray is kind of a conservative, neutral color and would not show dirt like white so if that would be an authentic color for your car, that might be a color to consider. Think it would go well with your blue. Just a thought. Your taste may not be the same as mine. Ken
Posted on: 2010/8/8 22:14
|
|||
|
||||
|
Re: BigKev's 1954 Packard Clipper Deluxe Sedan
|
||||
|---|---|---|---|---|
|
Webmaster
|
I was thinking two-toned blue like in the picture of the door panel above with the color swatches. The '54 Deluxes used the stripped white/color broad cloth, while the Supers use two-toned solid colors. The solid colors will be easy to locate and match.
Sewing is not in my skill set, so that will get farmed out when the time comes.
Posted on: 2010/8/8 22:39
|
|||
|
-BigKev
1954 Packard Clipper Deluxe Touring Sedan -> Registry | Project Blog 1937 Packard 115-C Convertible Coupe -> Registry | Project Blog |
||||
|
||||
|
Re: BigKev's 1954 Packard Clipper Deluxe Sedan
|
||||
|---|---|---|---|---|
|
Webmaster
|
Back seat is covered and back in the car. It's actually pretty darn comfortable. With the seats in the car, the rest of the interior really looks like total crap now (and it is).
I have to get the peeling door panels removed, and remove the rest of remnants of the old upholstery. I guess I will roll utilitarian until I can get more done. Attach file: (174.62 KB)
Posted on: 2010/8/9 21:30
|
|||
|
-BigKev
1954 Packard Clipper Deluxe Touring Sedan -> Registry | Project Blog 1937 Packard 115-C Convertible Coupe -> Registry | Project Blog |
||||
|
||||
|
Re: BigKev's 1954 Packard Clipper Deluxe Sedan
|
||||
|---|---|---|---|---|
|
Webmaster
|
Got back in the garage yesterday to get a few things done. The summer heat is finally on us like a sledgehammer, and the garage turns into a sweat lodge quickly.
The one main thing that is standing between taking the car for a test drive to see if the transmission is functional, is the electrical. It was pretty chewed up from rodent, heat, and time. So out it all is coming. All the wiring was already removed from the engine compartment, and I have been running the motor using a couple of alligator clip jumper wires on the coil. So today I started the process of getting the new wiring back in. As mentioned before the budget does not allow me to buy a repro 6v harness. Plus as I converted the car to 12v because of the A/C going in, I just ended up buying a 12v GM-coded universal harness. The GM wiring coding is very similar to the Packard one (Packard-Delco ya know). So first order of business is getting the engine bay wiring in place. This involves a couple of sub-harness that need to be built. There is a sub-harnesses that feeds from the fender junction blocks to the headlights. I already have those in place, and just needed to install the junction blocks on the fenders. The block were media blaster to remove all rust, and then reinstalled. I then installed the terminals on the headlight harnesses and attached them to the junction blocks (sorry for the lousy photo). Next I need to build the junction block crossover harness. The next big challenge was finding a place for the fusebox. The space behind a 51-54 is pretty tight, so I needed somewhere that I could get to, and wouldn't get in the way of anything else. Also the box is secured the firewall with two bolts, so I didn't want the hardware showing through in the engine bay. So I picked a space that was out of the way, and where the bolts would be hidden by the fender . This is a 21 circuit box, so it has enough capacity for any future things I may want to add later. Right now it is in place for mock up. I still need to cleanup under the dash, and paint to ward of any more rust. There was also rust on the back side of the dash around the defroster vents. So I am imagining this means I have a leaky windshield gasket. Attach file: (52.05 KB)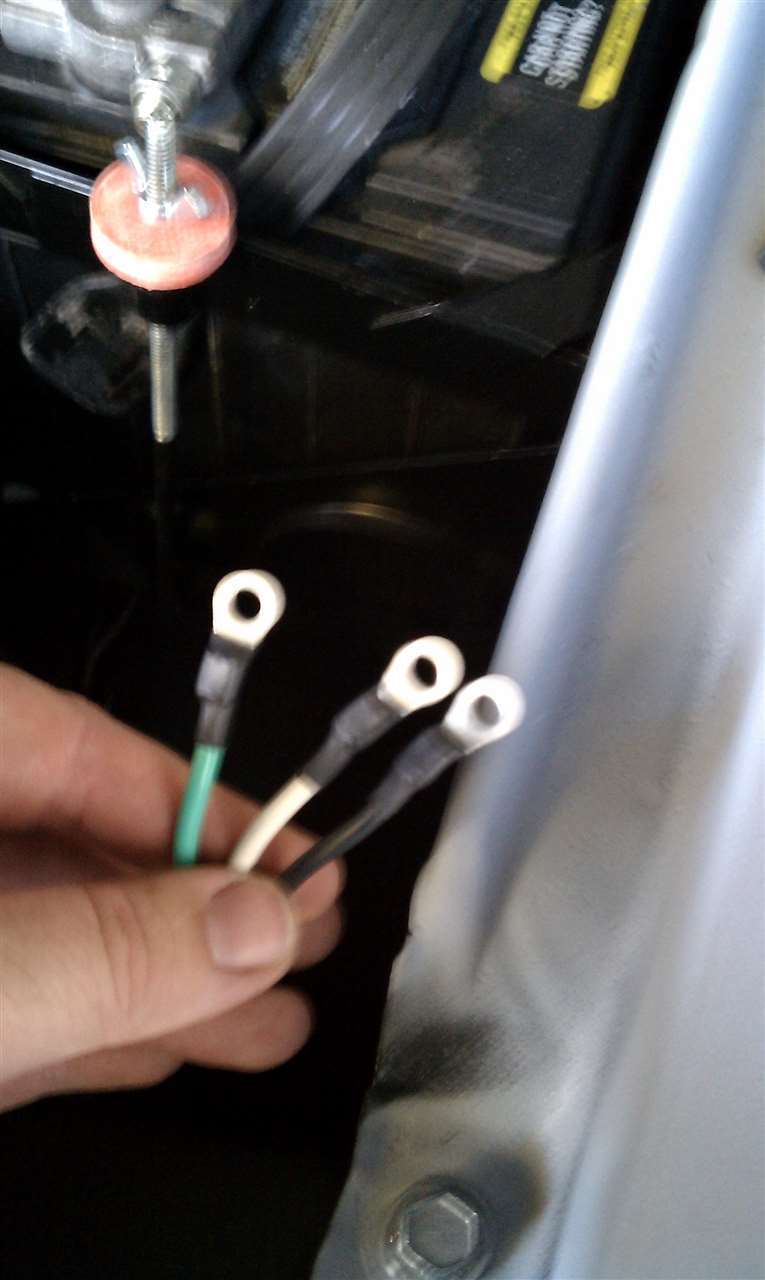 (53.22 KB) (53.22 KB)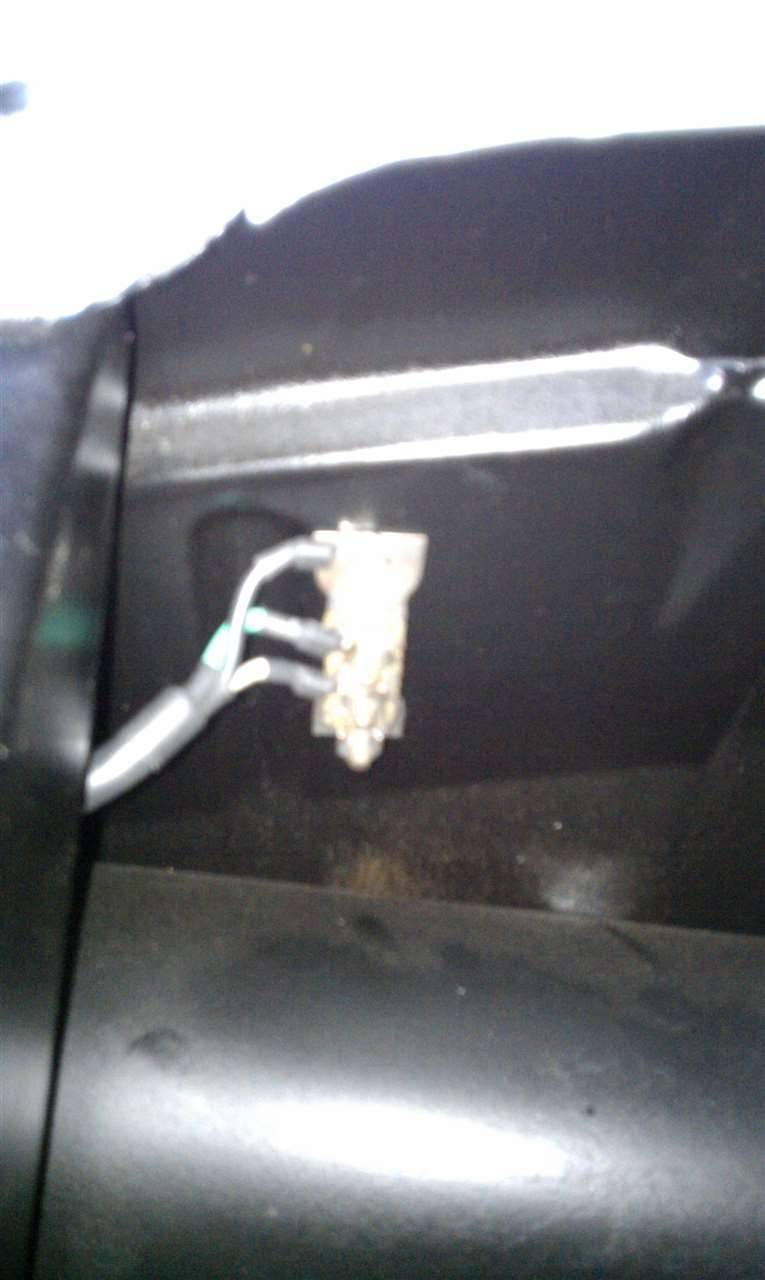 (120.42 KB) (120.42 KB)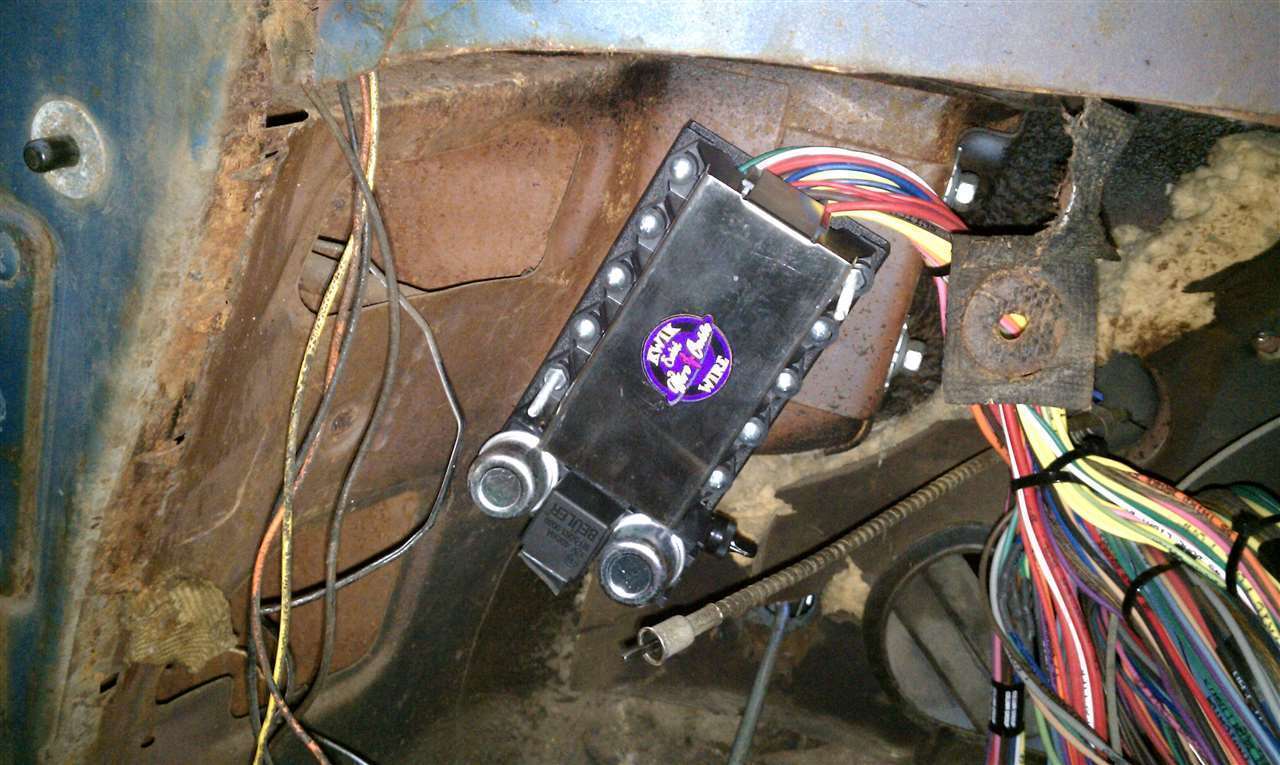 (94.19 KB) (94.19 KB)
Posted on: 2010/8/22 13:51
|
|||
|
-BigKev
1954 Packard Clipper Deluxe Touring Sedan -> Registry | Project Blog 1937 Packard 115-C Convertible Coupe -> Registry | Project Blog |
||||
|
||||


