
|
Re: Howard's 47 Custom project
|
||||
|---|---|---|---|---|
|
Forum Ambassador

|
Mostly piddling things have happened and been noted in other posts so haven't updated this blog for awhile. Been too hot to do any serious work anyway.
Wilton III carpet has been here for some time and will look quite nice once installed. Might get around to gluing it onto the rubber one of these days. Headliner, I skimped on and decided to use the Kanter repro because of the AC vent playing around project. Didn't want to to make holes in $1000 dollar wool and not have vents work out. Have pretty much decided on two round chrome vents close together between the sun visors. Round because they are easily adjustable and will sort of go with the large round speedo and clock. Chrome because of all the other chrome close by in the Custom. Looks halfway decent and being between the visors and above the mirror, relatively unobtrusive. Would have preferred Hirsch's broadcloth because it was a bit more refined feeling but he didn't have enough of the dark blue shade I wanted for the order and wouldn't get any more for several months. My upholsterer is booked solid and has me scheduled tentatively in October so that long wait for fabric wouldn't do. Ordered from SMS instead and while fabric is not quite as smooth feeling, it is heavy and seems to be good quality so should do nicely. I was not pleased with the way it was packaged and the poor condition the package was in upon arrival and told them so. They said they didn't know why it was shipped in a single layer of paper instead of 3 -- which I think is still skimpy. Onward and upward or is that forward. This car will have a $10k inside and patina'd $200.00 outside -- and unless Hank visits Calif, will be without the patina.  Attach file:  (73.38 KB) (73.38 KB)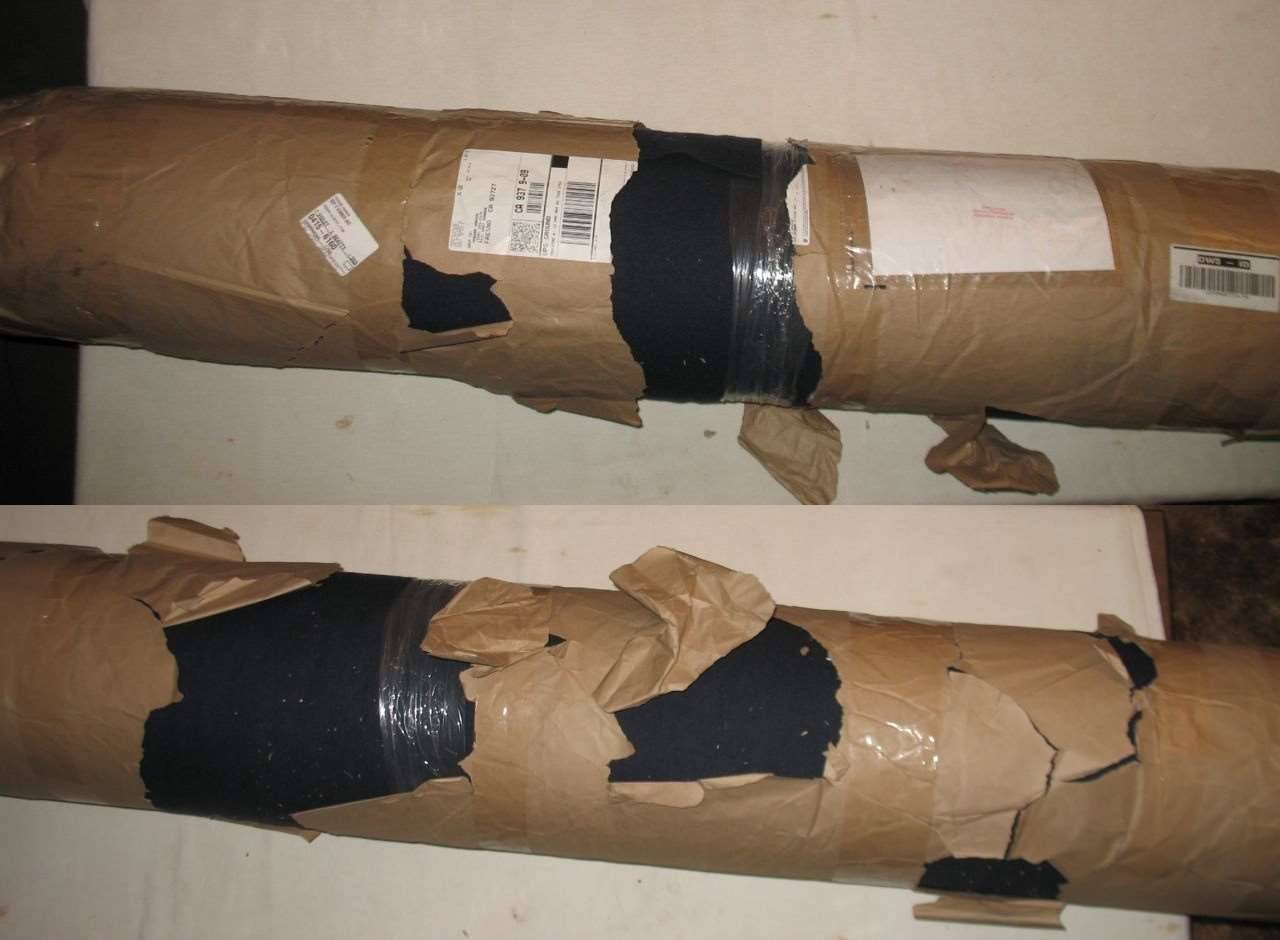
Posted on: 2014/8/13 18:15
|
|||
|
Howard
|
||||
|
||||
|
Re: Howard's 47 Custom project
|
||||
|---|---|---|---|---|
|
Home away from home

|
I definitely got Royal Treatment with my cloth shipment from SMS . . . . They sent it halfway around the world BUT they wrapped it in THREE sheets of brown paper.
Makes me feel special.
Posted on: 2014/8/28 7:16
|
|||
|
1951 Packard Club Sedan | [url=ht
|
||||
|
||||
|
Re: Howard's 47 Custom project
|
||||
|---|---|---|---|---|
|
Forum Ambassador

|
Lol if there is a free plane ticket involved ill go anywhere!
Posted on: 2014/8/28 8:37
|
|||
|
1937 Packard 138-CD Deluxe Touring Limousine
Maroon/Black 1090-1021 [url=https://packardinfo.com/xoops/html/modules/registry/View.php?ID=232]1955 Packard |
||||
|
||||
|
Re: Howard's 47 Custom project
|
||||
|---|---|---|---|---|
|
Forum Ambassador
|
Long time since there was anything of substance posted in this blog since not much has been accomplished but here are a couple of changes and updates.
Redid the AC comp bracket by making the vertical piece out of thicker metal and adding another brace. Would like to have changed it more but for all my searching can't find a shorter drive belt in a D size so the comp has to be about where it is. Would be nice to know exactly what Packard did on the Clippers when they moved the AC comp to the drivers side. What did they do with the oil filter and did they still feel the need for the vent tube on the 356. Believe that was to direct air into the crankcase because of turbulence caused by the filter canister. I made a new vent tube anyway to fit under the bracket. Made it so it can be removed relatively easily since changing the filter may prove interesting with it in place. If info ever comes to light on the factory install then it might go. Also decided to revise the return air plenum. Originally I was going with the large one completely behind the rear seat with return air from top and bottom. There is a photo of that somewhere in the blog. Decided since Packard apparently only raised the seat cushion and didn't move the back forward I would try to do that too. Made the new plenum the same depth but was able to recess it into the X bracing a bit. Top of seat will be in it's original location but bottom is kicked out about an inch. That will go with the raised bottom cushion which is approx 5/8" higher. No idea how or how much Packard raised theirs but decided that might not be enough to get decent flow around the carpet if seat recessed. Am adding some small vents in the bottom of seat front. 3 spaced small rectangles on each side located between the bottom and middle chrome trim strips. Same color as bottom covering so should be very unobtrusive. The rear seat pieces go to the upholsterers next week so will post photos of the final result when it comes back. Am currently working on new knobs for the AC controls. Molded some out of plastic with lettering from the custom rubber stamp place I mentioned in another thread. Those turned out very nice with what appears to be a close font match. If there was an easy way to chrome them or a paint that really looked like chrome would just use those instead of trying to make some out of metal. The metal knobs will be the next project that is AC related. Attach file: (73.86 KB)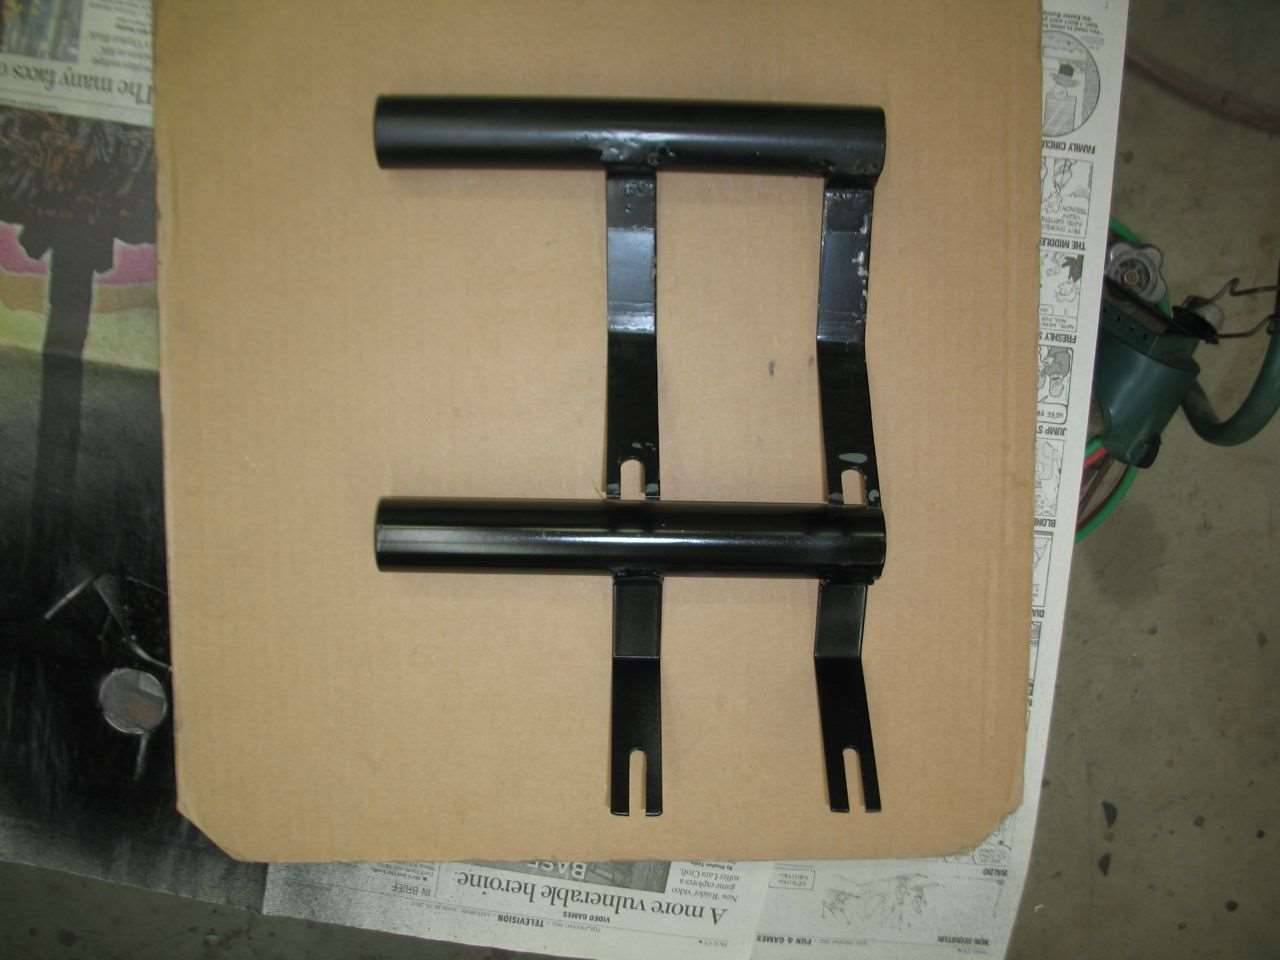 (116.00 KB) (116.00 KB)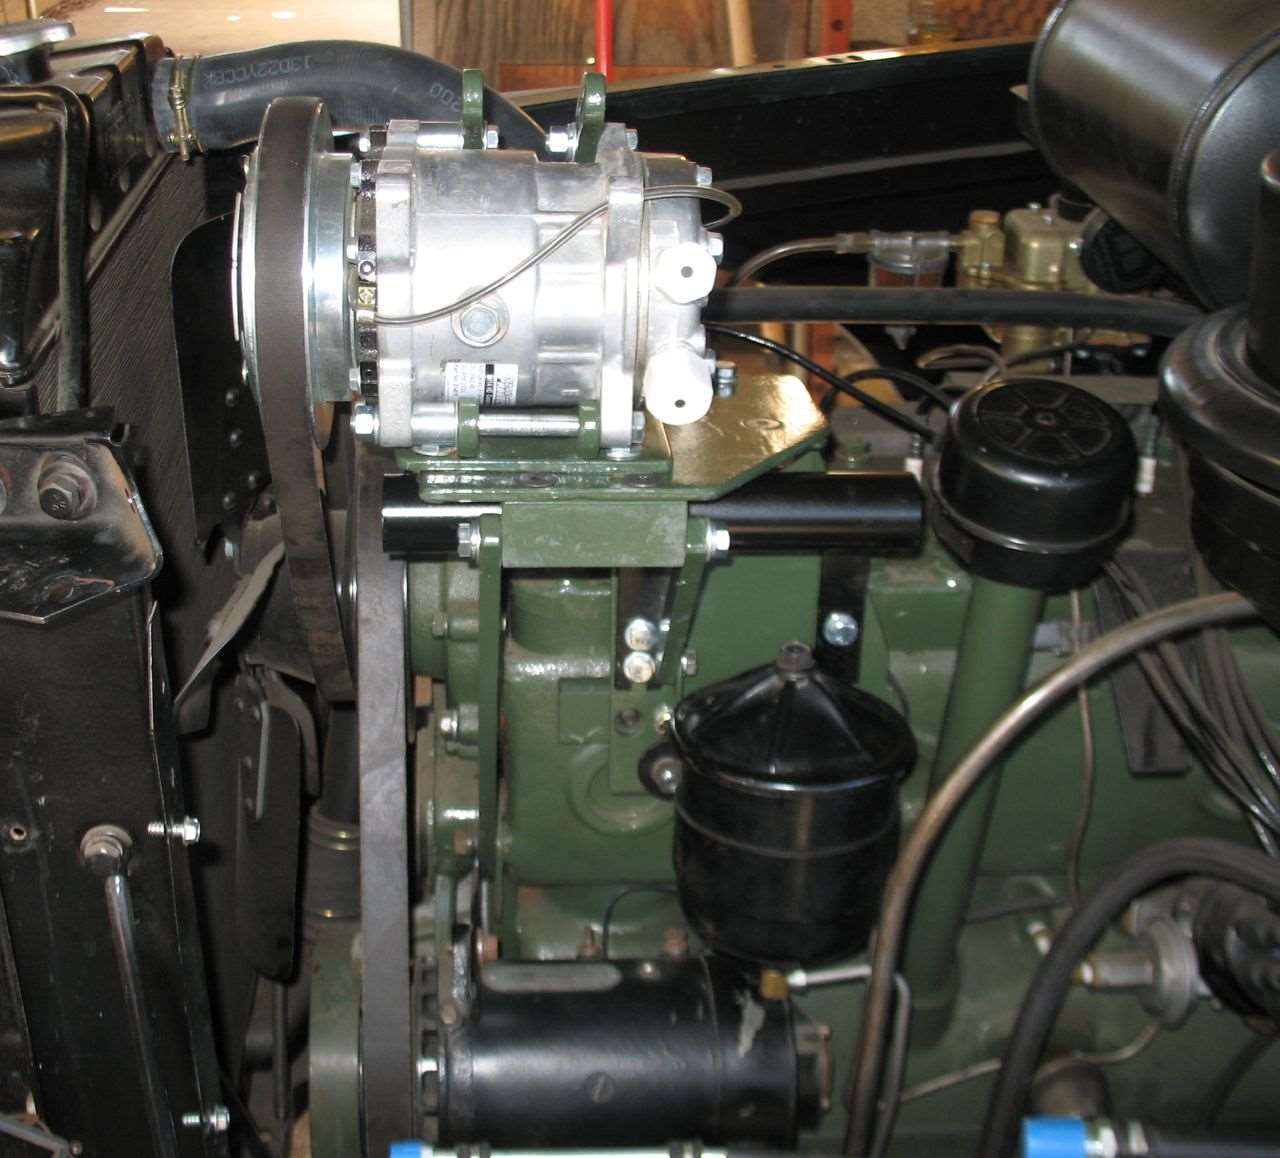 (245.70 KB) (245.70 KB) (109.36 KB) (109.36 KB)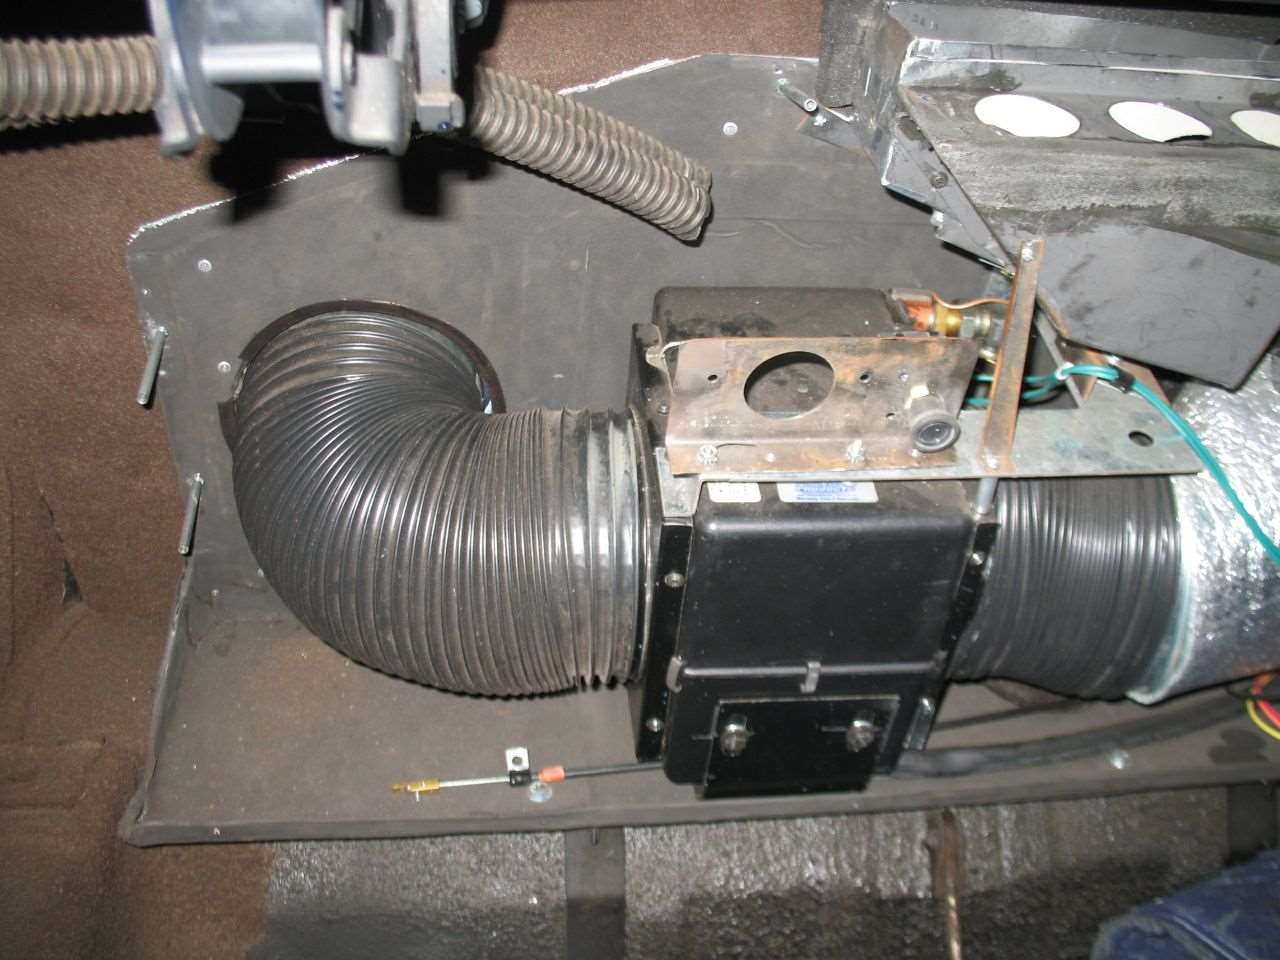
Posted on: 2015/3/27 12:57
|
|||
|
Howard
|
||||
|
||||
|
Re: Howard's 47 Custom project
|
||||
|---|---|---|---|---|
|
Just can't stay away
|
Howard you can have your plastic knobs Chrome plated. Also I see your car has front to back headliner bows, would you or anyone know anyone that would have a set for sale.
Posted on: 2015/3/27 17:42
|
|||
|
||||
|
Re: Howard's 47 Custom project
|
||||
|---|---|---|---|---|
|
Forum Ambassador
|
Quote:
I'm not sure how well the cast urethane would plate but I know there are places that advertise plastic chrome plating. I may look into that if all else fails. I am going to see what kind of luck I have with using the plastic as a pattern for a fine grain sand mold and zinc. Not sure enough of the detail would come across or not be destroyed getting the pattern out. If no luck is on to plan two. Eastwood has a two or three part paint process they claim is almost indistinguishable from the real thing but we've heard that before. Might be worth the $100 to find out once and for all. Caswell also has some products to precoat plastic to make it conductive for plating but the rest of the stuff needed is somewhat expensive. I don't know of any long bows off hand and they were only in Customs so that kind of narrows the parts cars. Good thing is the same bows appear to be used in 21st and 22nd series Custom 4dr sedans so that does broaden the availability a bit if anyone happens to have one of those parts cars.
Posted on: 2015/3/27 18:31
|
|||
|
Howard
|
||||
|
||||
|
Re: Howard's 47 Custom project
|
||||
|---|---|---|---|---|
|
Forum Ambassador
|
Photos taken while testing the fit on the plastic knobs and a view of the revised modern switches for heat/def and AC mounted. Some temp AC wiring is shown but will not stay like that. In the middle is the added control cable for selecting package tray vent or overhead vent or a combination therof. Still debating best course of action on the knobs. Am leaning toward casting some new knobs out of high temp epoxy and then trying the Eastwood "chrome like" paint before attempting any out of metal.
The single switch will control both defroster/footwarmer and heater but decided to have them individual for now so both won't be usable at the same time. Might be a downside that needs to be addressed later. Made a new resistor for the heater speed. Defrost/footwarmer will be high only. Underseat heater will only be two speeds so I made the resistor to have that speed right between the normal low and medium. Since resistor was more exposed & able to short and also gets hot, encased the resistance wire inside a ceramic tube for protection. FYI, for anyone needing to make a 6v resistor for these type motors here is some general info. Using the Packard switch I measured 6.1v or full bat voltage for high, 4.9v for med and 4.3v for low. 8" of 20ga nichrome wire dropped the voltage to 4.7v for my inbetween speed. Attach file: (105.52 KB)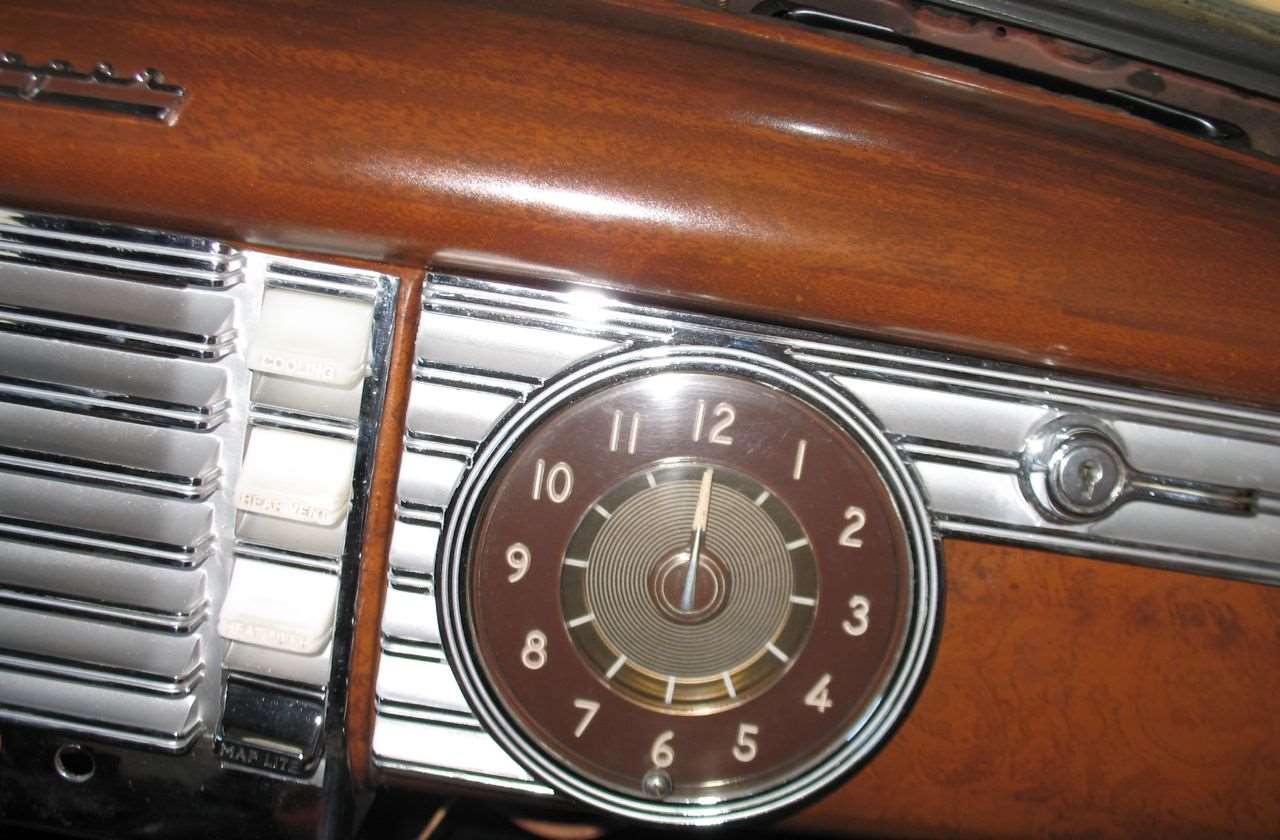 (127.52 KB) (127.52 KB) (31.21 KB) (31.21 KB)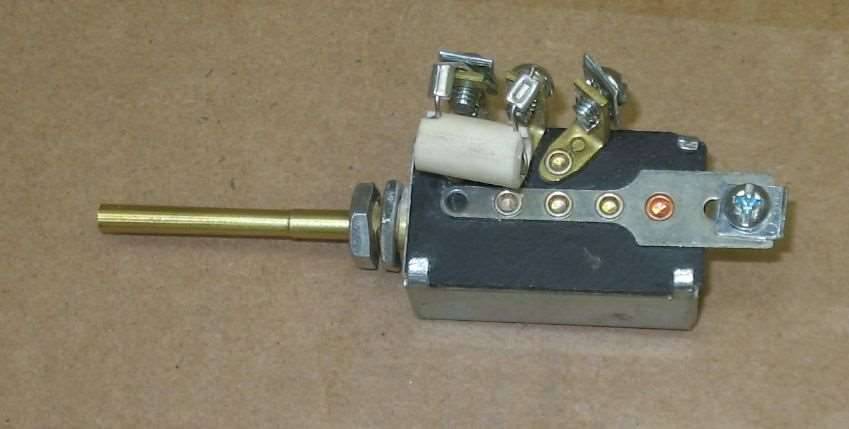
Posted on: 2015/3/29 15:47
|
|||
|
Howard
|
||||
|
||||
|
Re: Howard's 47 Custom project
|
||||
|---|---|---|---|---|
|
Forum Ambassador
|
I'm taking my back seat pieces to the upholsterer this week and have a question on the strip of wheel well less than an inch wide between the bolster side and windlace. None of my photos have a good detail of that area.
There is a curved piece of cardboard following the door opening with padding and fabric tacked vertically between the windlace and wheelwell but that leaves a strip of wheel well visible between the bolster and that vertical piece. Either my bolsters have been crushed and needs to go over more -- possible -- or else there must have been fabric on the wheelwell. I don't find any old fabric strips or any mounted to cardboard. Was there anything there and if so, did they just glue a strip to the wheelwell or was there padding under or was it on a cardboard and then attached. Any description or photo would be appreciated. Attach file: (30.75 KB)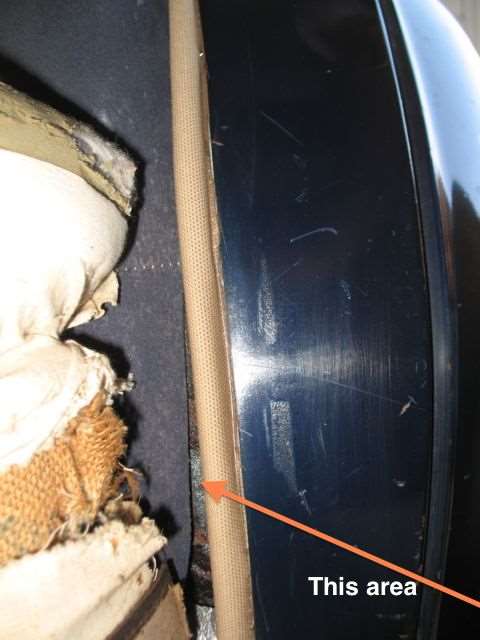
Posted on: 2015/3/30 11:01
|
|||
|
Howard
|
||||
|
||||
|
Re: Howard's 47 Custom project
|
||||
|---|---|---|---|---|
|
Forum Ambassador

|
Processes for plating on plastics has been common for at least 40 years, I spent quite a bit of my career as a chemist developing such processes for plating the plastic "thru hole" on printed wiring boards with copper to provide connectivity from one side of the panel to the other. It's the same process for RFI shielding (though usually with nickel rather than copper) for electrical cabinetry. Of course plating of plastics for decorative purposes like hardware, auto dashboard components, etc. can be done similarly.
In a nutshell, after the piece is properly cleaned it is immersed in an catalyst usually consisting of a palladium/tin colloidal mixture, or in more recent times with a carbon black or graphite catalyst. That surface is then exposed to a chemical mixture similar to "Fehlings Solution", a chelated alkaline copper salt mixture. With a reducing agent like formaldehyde present, the copper will deposit out of the solution as metallic copper on the plastic surface. The common names for such a process are "electroless copper" or "electroless plating" and it is in wide commercial use. Googling either of those terms should give hours of reading to those interested in the subject. Even older than the above-mentioned process, going back probably 200 or more years, was a chemical metal deposition process using silver for making mirrors. More recently, metal vapor deposition has surfaced as an alternative process, also widely practiced commercially.
Posted on: 2015/3/30 11:57
|
|||
|
||||


.jpg")


