|
Re: Richter's '53 Caribbean
|
||||
|---|---|---|---|---|
|
Home away from home

|
Ok that makes sense. Glad you have done this before and have not experienced any problems. Sounds like nothing to worry about.
Posted on: 2015/4/9 19:22
|
|||
|
[url=h
|
||||
|
||||
|
Re: Richter's '53 Caribbean
|
||||
|---|---|---|---|---|
|
Home away from home

|
Alright, got it working - unfortunately I have the knack for forgetting to take pictures - I need to patch a few tiny holes in the speaker, so I'll try to remember to get a picture whenever I go back in for that.
Essentially though, the safest, easiest place to install a phono plug is at the terminals for the volume potentiometer. If you're looking at the potentiometer (Volume knob piece from the left side of the radio that increases volume when you turn it.) The first thing is stay away from the pins on the very back - there are two and one is incoming positive and the other is negative. What I did is take a stereo extension cable that I had lying around, cut the female end off of it, leaving just the male (part that plugs into the headphone jack.) Stripped it back to get the three wires inside, (Left, Right, and Ground) and used the Ohms setting on my multimeter to figure out which was which. (I would have thought Red for Right and White for Left, then the yellow left over was ground, because that's pretty standard, but in this case, left and right were opposite.) A quick Google search indicated that the tip should be left, middle band should be right, and the base should be ground for standard stereo. For my case, I tied the left and right together (to pick up signal from both sides, in case I ended up playing a song where vocals or guitar or something only came through one side or the other). Looking at the potentiometer from the front, there are 2 rows of three. On the right hand side, the front and back pins are soldered together, and then onto a ground strap. I soldered my ground wire here. On the second row, the farthest left pin is where the signal goes - this actually brings it back to the output of the second IF transformer, in case you were interested, which according to the schematic feels a 0.1V signal wave. The plug end feeds through a convenient hole on the back of the radio. It probably would be best to incorporate some sort of strain relief so you can't accidentally jerk the wire loose by pulling on the plug too hard. It won't hurt anything, but it'll ruin your day having to take the whole thing out to resolder it. After recapping and resoldering some suspect connections, I get a good loud volume with just a little noise in it, and no hum to speak of. The noise may be down to the holes in the speaker, or it may just be 'old car radio'. It's not audiophile grade, but it sounds perfectly period to me, which is still a satisfactory result in my book. :) The other benefit to doing it this way is, if you remove the cable from the source (unplug your mp3 player) then the connections go to open, so your radio should function normally. I haven't tested it because I don't have a good enough antenna, but I would expect the opposite problem - hearing radio and mp3 player together - rather than having no radio after connection, but that doesn't seem to happen, or I'd have a lot more noise, even if I was off station. So I just need to patch up the speaker and I'll be able to check another thing off the list. Soon the carshow for the Triumph will be done and I can get back to actually working on the Packard car itself again.
Posted on: 2015/4/22 16:22
|
|||
|
||||
|
Re: Richter's '53 Caribbean
|
||||
|---|---|---|---|---|
|
Home away from home
|
NOTE ON SPEAKER:
This probably wouldn't be a huge issue for most people, but i have a flaky power supply I've been using for testing. Either way, it's cheap insurance. Stick a filter capacitor on the ground lead/pin going out to your phono jack or cable, and that'll prevent DC from leaking back out to your device. It probably wouldn't come up on an mp3 player, because there's no actual ground, so it'd only pull in the amount of power it put out, but my testing input actually has a ground, so when my powersupply negative lead wasn't strong enough, I found it was putting a couple of amps of 6v back to ground, and the phono line plug was getting pretty warm. After the filter capacitor (I just used a 823k (.082 Microfarad, I think) inline, because that was the first thing I grabbed, pretty much any value should block DC) - I had good volume with a hum, that it turns out I was also getting from the power supply. Now nothing but good clean music.
Posted on: 2015/4/27 8:03
|
|||
|
||||
|
Re: Richter's '53 Caribbean
|
||||
|---|---|---|---|---|
|
Home away from home
|
Remembered to get pictures this time - hopefully they're clear enough. The red and white wires are tied to the far left on the back row. The yellow wire ties to the filter capacitor, which ties to ground, which is the far right on both rows.
The nearest row is the tone pot, and the second row is the volume pot, and the very back is the on off switch, so brings power from the fused cable (leave this alone for wiring aux.) And the takeaway from all this is - if you have hum you can't isolate, see if you can test with a 6v battery to make sure it's not your crappy eBay power supply. :) Attach file:  (49.66 KB) (49.66 KB)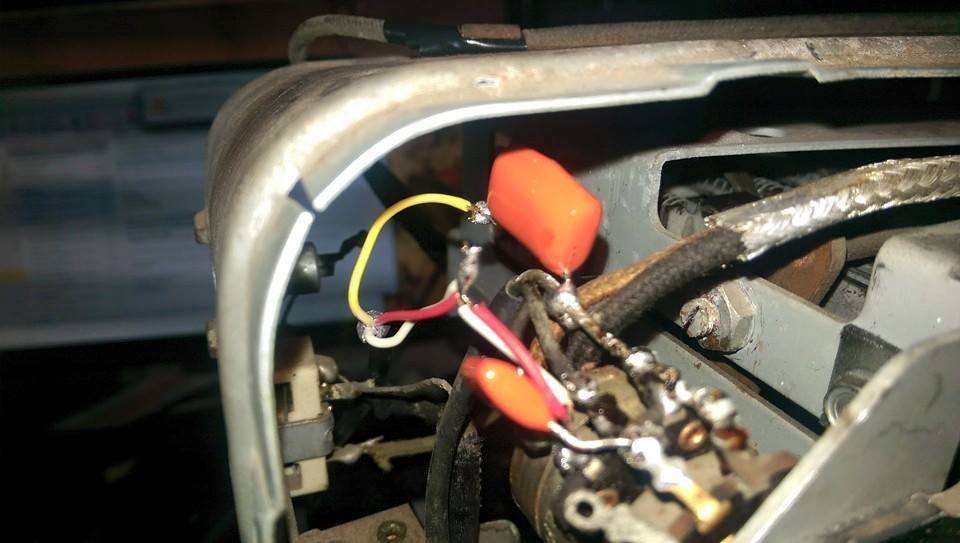 (64.56 KB) (64.56 KB)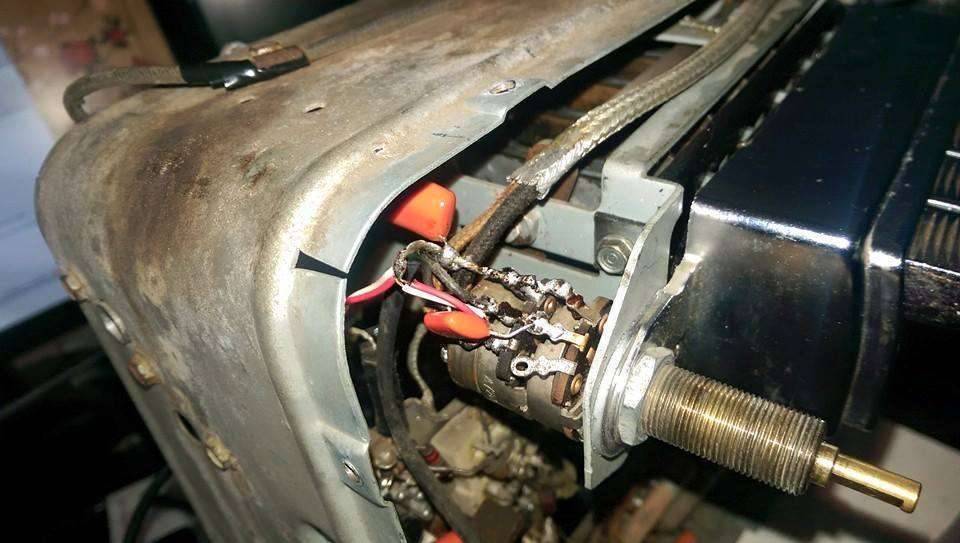
Posted on: 2015/4/27 11:14
|
|||
|
||||
|
Re: Richter's '53 Caribbean
|
||||
|---|---|---|---|---|
|
Home away from home
|
Just an update - I started cleaning up the differential. I'm having a beast of a time getting the u-joint out. One side I managed to get free, the other side was stuck, so I had to break out the 12 ton press, thinking if I can free it up, then I can lube it and push it back out the other way. Nope, popped all the way in. I'll have to come back to that issue later.
Beyond that, I had a great idea for how to get the floor pan from the Clipper into the bottom of the Caribbean, but it didn't work out the way I planned exactly. My hope was that the inner bolts would be through the center section of the floor, and the outer bolts would go through on the other side of the seam weld for the inner rockers, so my hope was that I could cut the inner floor free on the Caribbean part, and the outer rockers off of the Clipper floor, and then use the frame to hold it all in place while I welded the floor back in. Was so excited about it I had a hard time sleeping that night (thought came to me about 11pm). Next day I looked at it, and it's not quite so easy, but it may not be much harder. Since the convertible frames have the extra boxed section under the body, I can still keep that attached while I cut the floor out above it (hopefully). So it will be similar to the thought I had, but not quite so amazingly clever. I just have to be careful not to cut all the way through the convertible support when I cut the floor out from above it. I also ground off the rivets from the rear section of frame that I need to replace, and from the Caribbean donor piece (Clipper had a welded on tow bar, and after 30 minutes of grinding, I just chopped that section off on the junk Caribbean frame.) Now I just need to clean it up, paint it, and bolt it back in. (Packard service manual recommends replacing the rivets with appropriately sized bolts if sections need replacing, particularly for the body braces.) I also ground out the body braces and popped them loose, sourced the bolts, washers, lock washers and nuts to fit the Caribbean braces. They too just need to be cleaned up and painted, and now I can clean up the area underneath them on the frame better than I was able to before. Getting the Triumph finished and to the car show kinda helped motivate me. After getting the paint polished up and everything back together and seeing how amazing it looked in the light, and how well it drove the 100 miles to the show and back kinda re-validated that I have it in me to take a car from junk back to something special, so I'm excited to be working on the Packard again. Likewise, my wife will be excited when we can get that space in the garage back again, and don't have a rusty floor tied to the garage door rail. :P Attach file: (67.16 KB)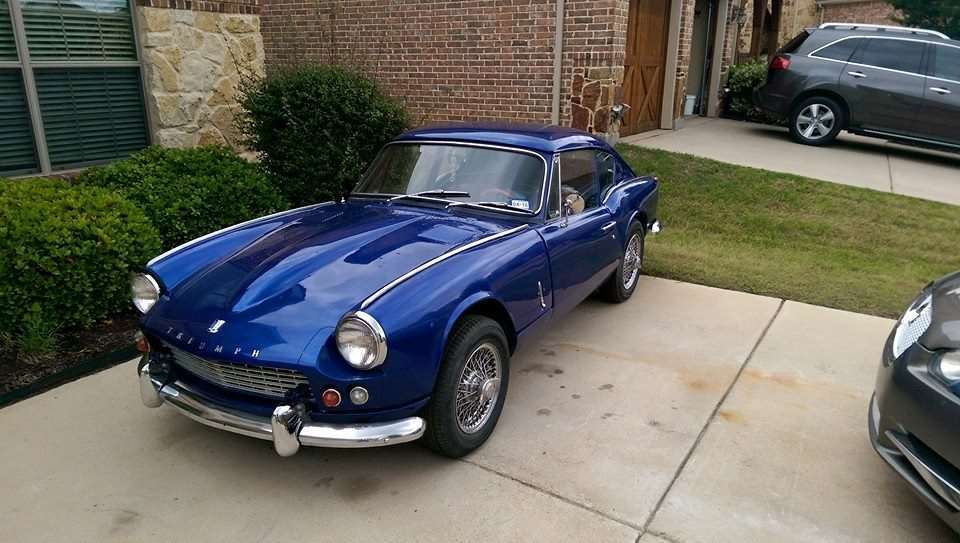
Posted on: 2015/5/12 23:12
|
|||
|
||||
|
Re: Richter's '53 Caribbean
|
||||
|---|---|---|---|---|
|
Home away from home
|
I've been sneaking up on getting the floor replaced. I haven't got the most genius idea of how it's going to go yet, so I've been working on things I know have to happen - I added some additional reinforcement to the body, prepared the Clipper floorpan to go in (removing the pieces that go to the Clipper but not the Caribbean, like the door post reinforcement). I've also cut out the rest of the basic floor from the Caribbean. Right now I have the box steel supports that run from front to back on either side, and the one that runs across the middle at the bottom (which the Clipper doesn't have.) My intent is to grind the bottom of that cross beam to remove the original Caribbean floor, then I'll just push the Clipper floor in place and weld it to that without removing it from the body. The scary bit is the side beams. I'm sure I've got enough bracing, the body doesn't do anything, and the bracing is rock solid, but removing those is probably going to be the last thing I do.
It's also rained about 20 of the last 30 days, so I haven't been able to do much that requires pushing the car out of the garage. We did have a nice day yesterday though, so I was able to finish prepping and painting the rearend. It turns out the diff DID have the gear ratio stamped on it, I just couldn't understand until I manually tested it. It's got a 3 5 and 4 stamped on it, but not all together. Counting the turns of the pinion shows that it is a 3.54 though. Attach file: (83.58 KB)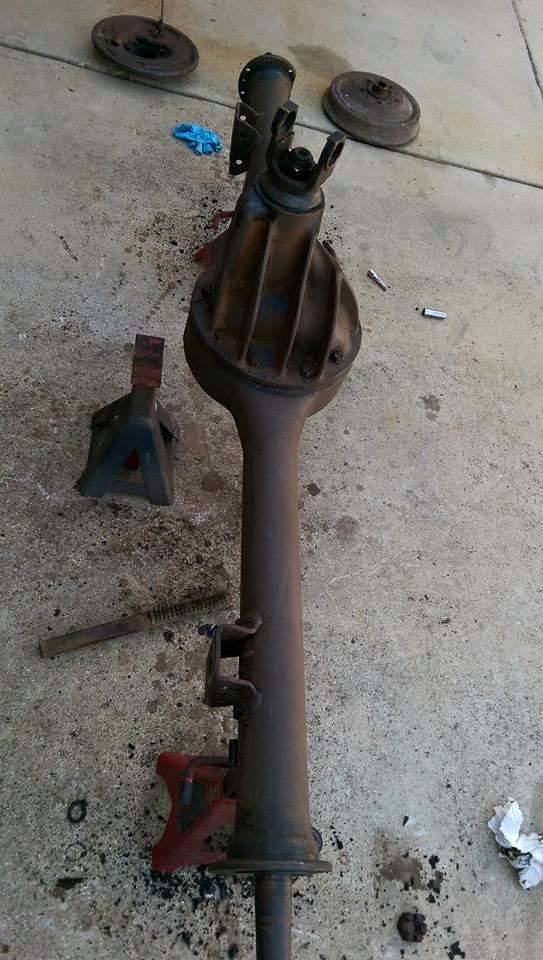 (80.79 KB) (80.79 KB)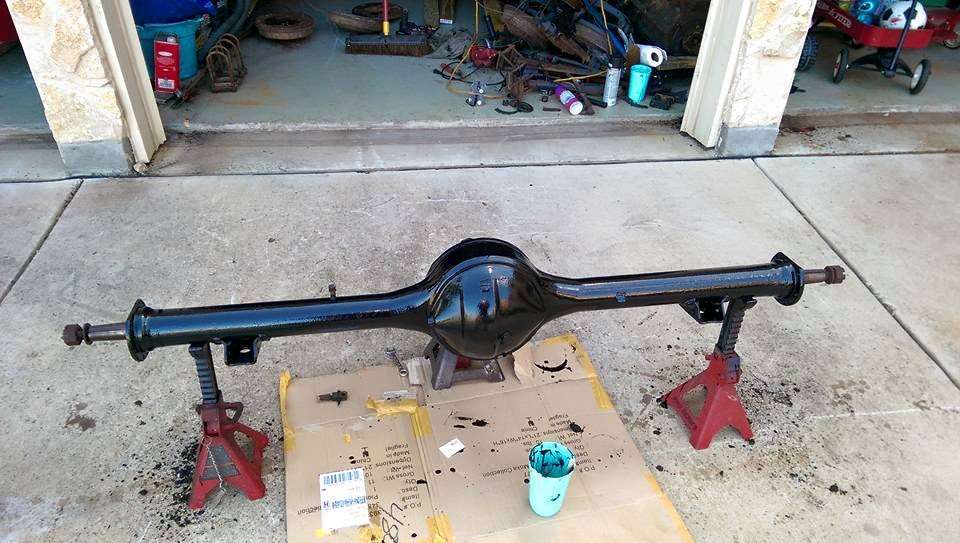
Posted on: 2015/6/1 10:31
|
|||
|
||||
|
Re: Richter's '53 Caribbean
|
||||
|---|---|---|---|---|
|
Home away from home
|
Wow, I guess it's been a while since I updated.
A few weeks ago I managed to get the body up, the old floor cut out, the new floor is now sandwiched between the body and the frame, and all has gone surprisingly well, although at the time there was a quite a bit more cutting and grinding than I'd counted on, and the bottom of the Caribbean body had quite a bit more damage than I'd thought before, which is why I don't have it all welded back in place yet. I seperated the floors at the pinch weld below the firewall in the engine bay, and then right along the floor pans to the outer rockers on back. The wheelwells and trunk pan is seperated, but it looks like I'm going to be using those panels as well. The drawback is with the bottom portion of the Caribbean being in such rough shape, the only part available to weld to at the moment is that same pinch weld at the firewall. The bottom of the A pillars needs to be replaced because it's pinholed with rust - luckily I managed to keep those from the Clipper, because I knew there were some pieces I would need. The next part I'll have to worry about is where the doors come down in the back, to the rear wheel well, and that'll probably be some custom fabrication (the Clipper was a 4 door, and it doesn't match) but it shouldn't be too hard to continue the curve up to match the door. The body reinforcement for the convertibles is actually built of two thicker sheets of metal welded together rather than a single boxed section, so despite being a pain to fabricate, it should be easier to source and get done than finding an exact size of box steel. I may have to break down and buy a sheet metal brake finally. At least it's mostly contained in one bay of the garage now, which makes me (and the wife!) much happier. This past weekend, despite the holiday I only managed to get 5 hours or so to work on it, so I decided to tackle the front suspension rebuild, which took quite a bit longer than I had thought. I have the kit will all new bushings and bearings and kingpins, and I had expected to get at least one side totally disassembled, cleaned, painted, reassembled and installed. As it happened, I barely managed to get the upper control arm finished, but at least it's progress! I found that installing the bushings using a 3 jaw puller and a socket presses them in quite nicely without disturbing the spacing, and eliminates the need for the custom spreader tool. The first one goes on great, but the second one is work because you have to have that center pin installed (the part that bolts to the frame). Since the end isn't perfectly level, when you add the large socket (so that you can press without damaging the bolt head) it wants to press off-center, so the going is slow, like a half turn, hammer the socket back to center, then a half turn, hammer the socket back. Finally completed it though Scraped all the old grease off with a blade, screwdriver, and wire wheel, then a quick blast in the sanding cabinet. A nice double coat of semi-gloss black, new bushes installed, and torqued to spec on the chassis. At this rate, only 4 more weeks and I'll be ready to tackle the spindles. :P
Posted on: 2015/7/6 11:07
|
|||
|
||||
|
Re: Richter's '53 Caribbean
|
||||
|---|---|---|---|---|
|
Home away from home

|
Look at this thread,
https://packardinfo.com/xoops/html/modules/newbb/viewtopic.php?topic_id=6086&forum=4&post_id=127961#forumpost127961 That will show you how the inner rocker box was constructed. The box goes up the firewall support as well. EDIT: Here are some pictures that may help, hopefully. 55 Caribbean, original as far as I know. Attach file: (54.98 KB)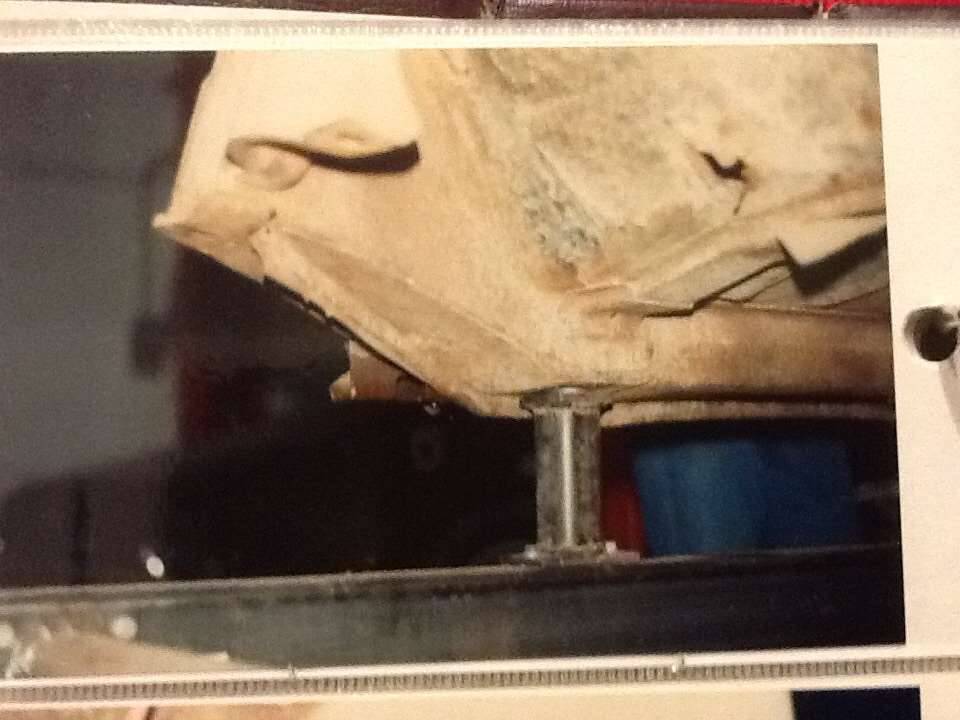 (48.27 KB) (48.27 KB)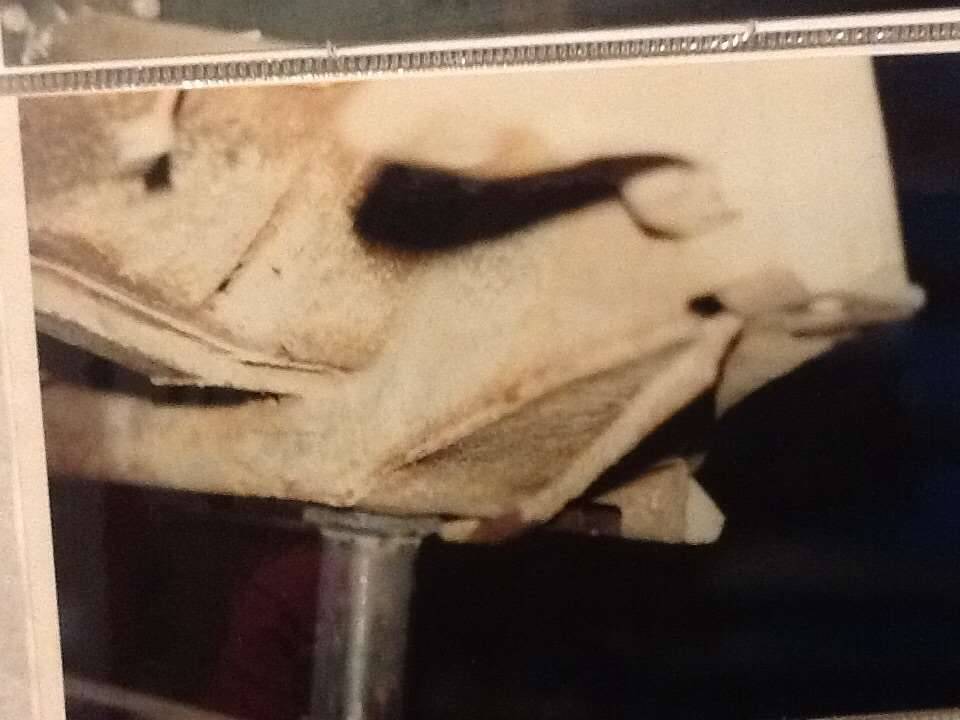 (65.10 KB) (65.10 KB)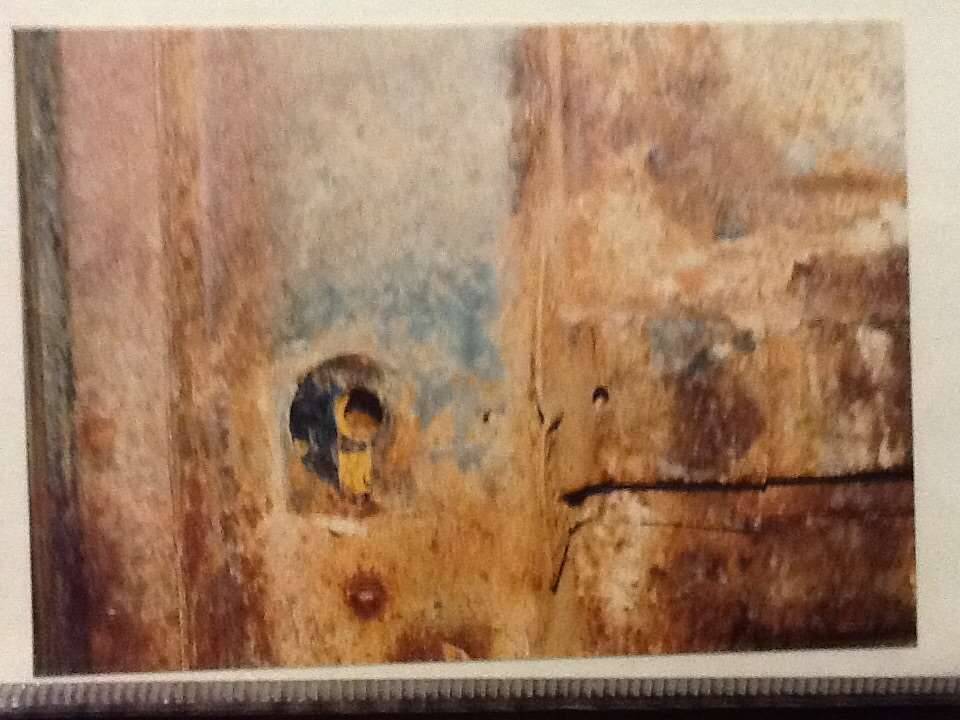 (62.48 KB) (62.48 KB) (58.12 KB) (58.12 KB)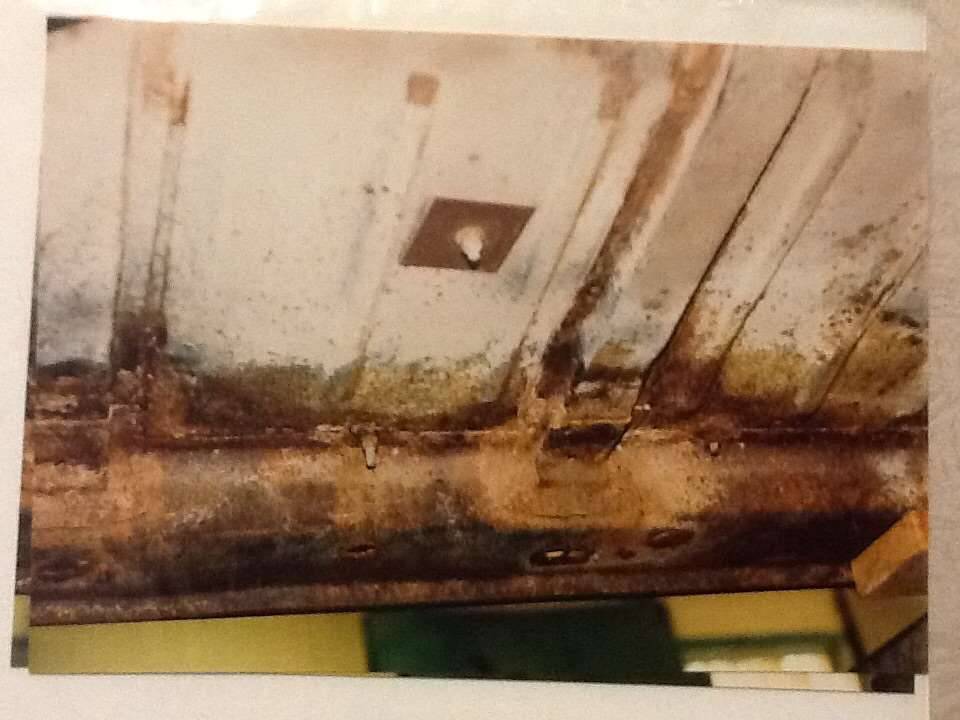 (68.02 KB) (68.02 KB)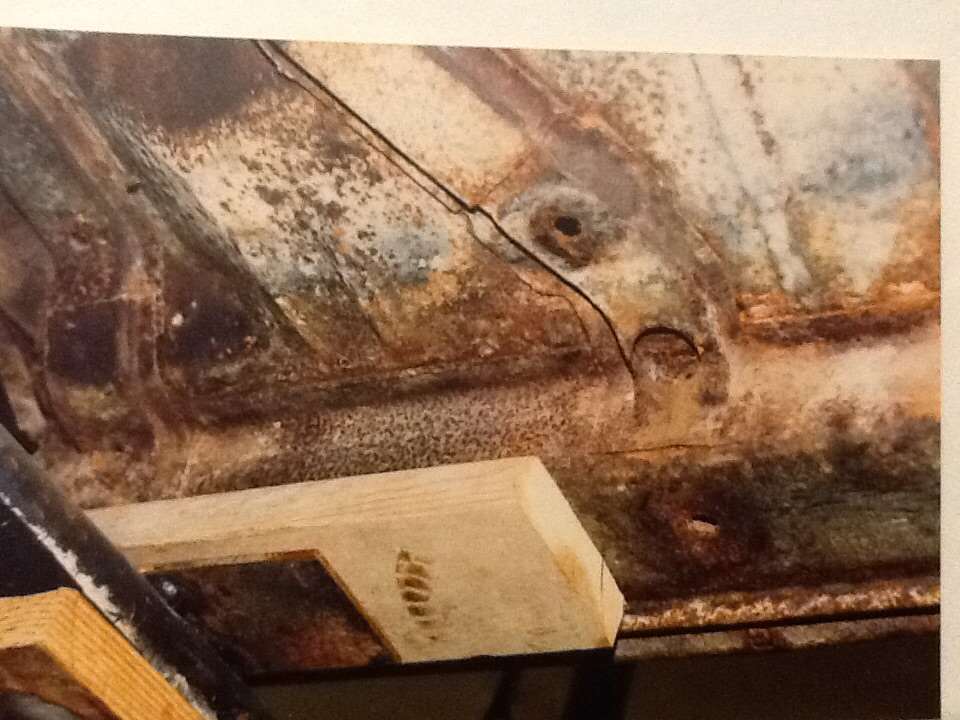
Posted on: 2015/7/6 17:29
|
|||
|
||||
|
Re: Richter's '53 Caribbean
|
||||
|---|---|---|---|---|
|
Home away from home
|
This is an original 54 convertible;
Attach file: (41.21 KB)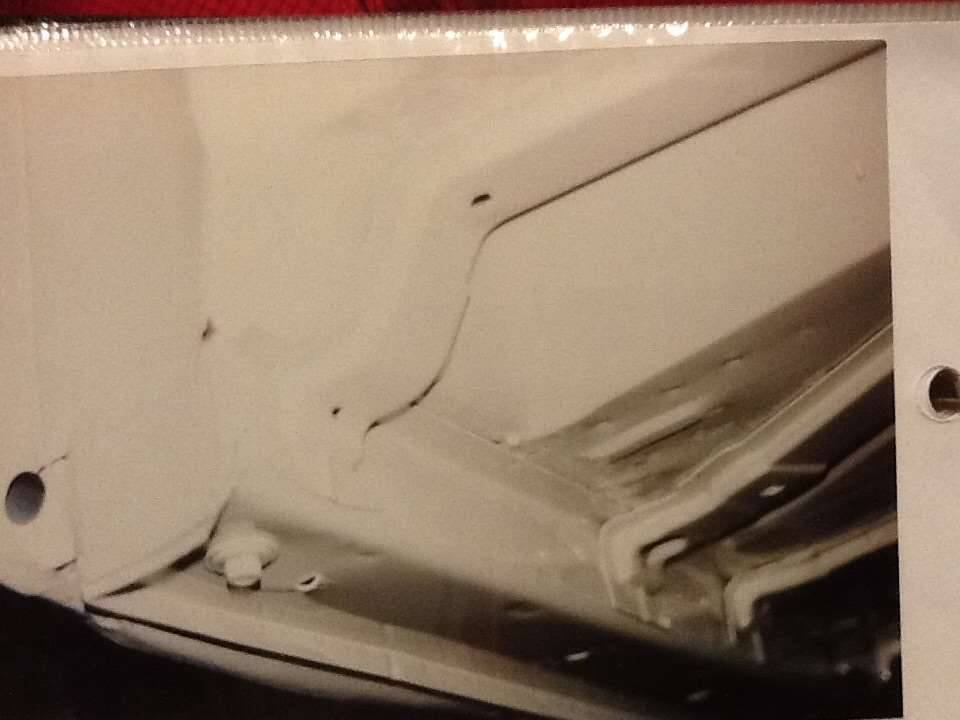 (35.97 KB) (35.97 KB)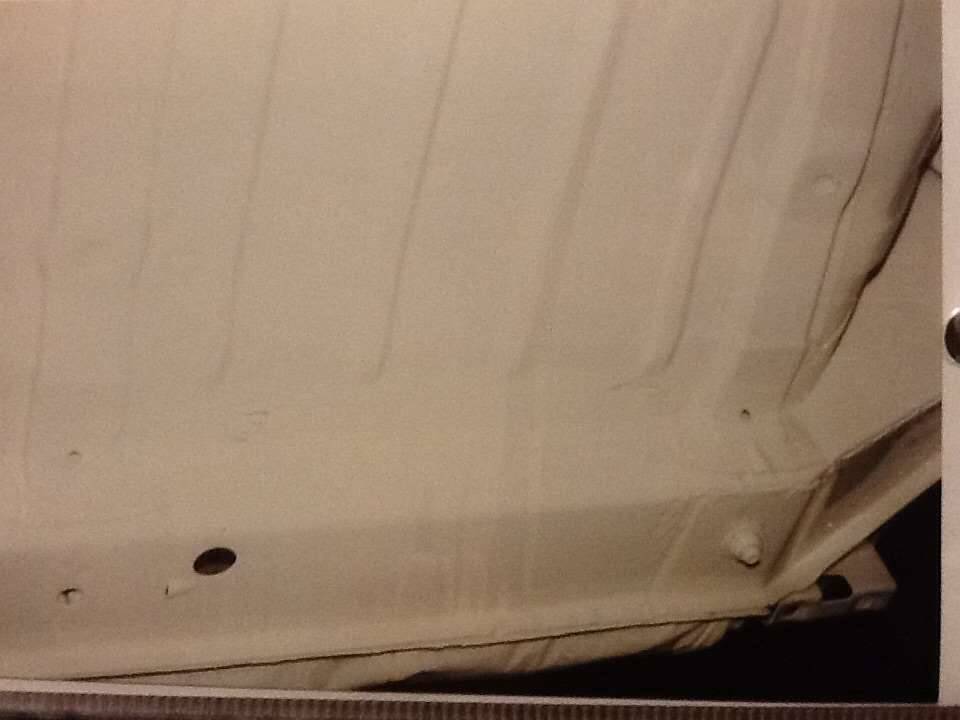 (40.79 KB) (40.79 KB)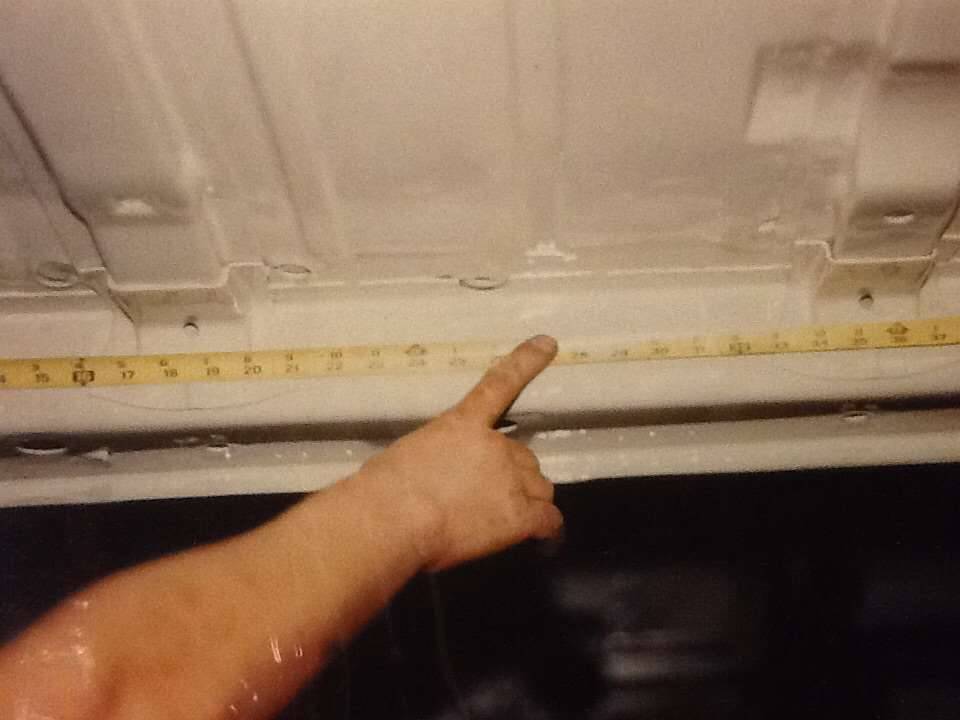 (46.21 KB) (46.21 KB)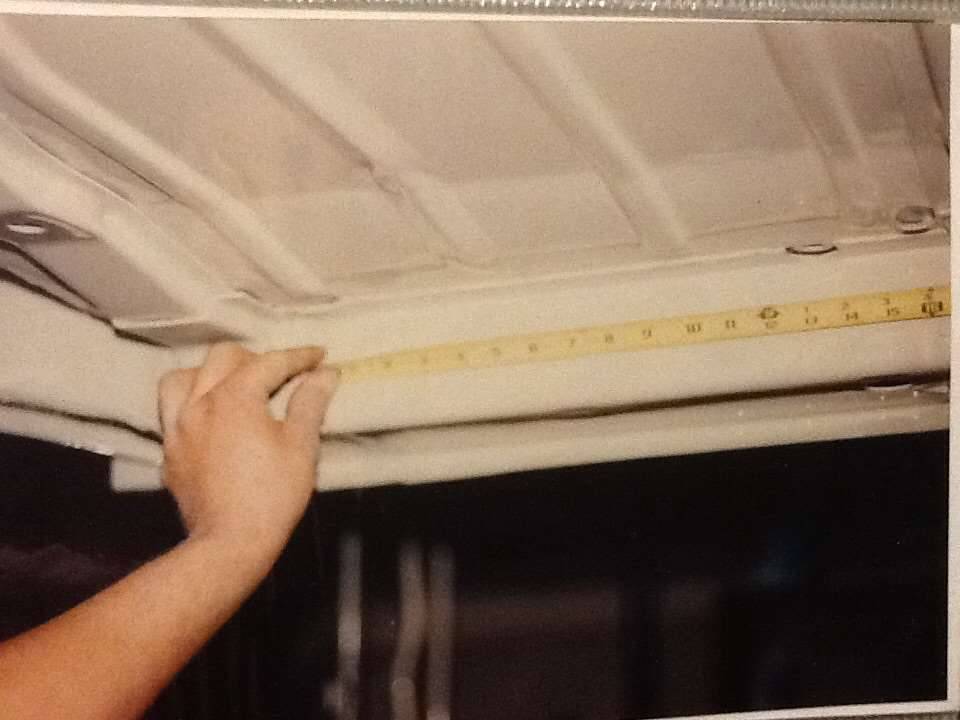 (40.59 KB) (40.59 KB)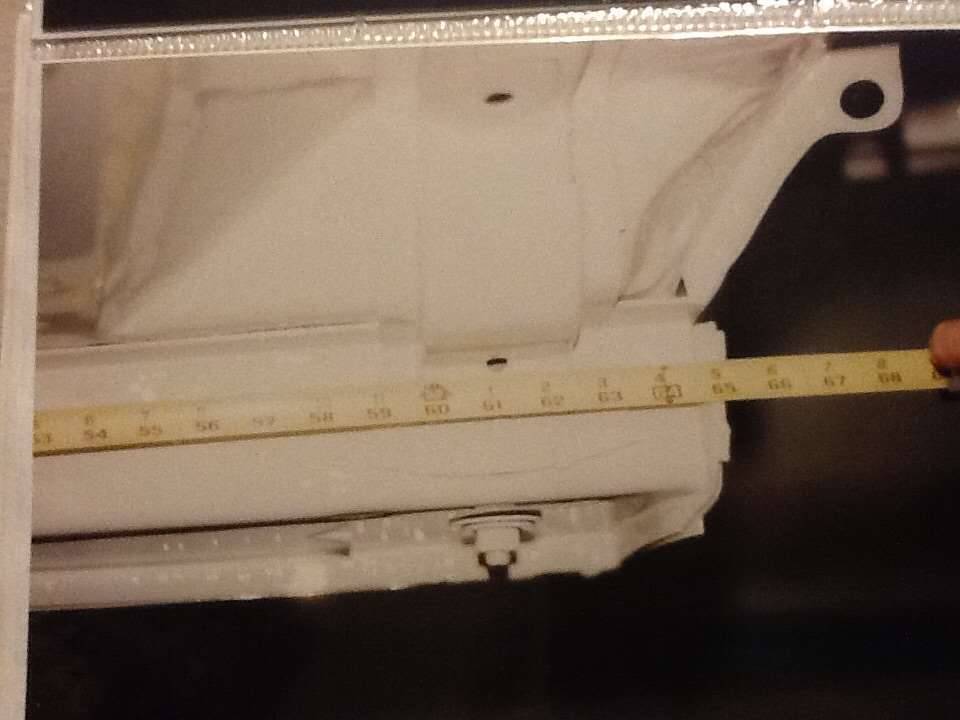 (44.04 KB) (44.04 KB)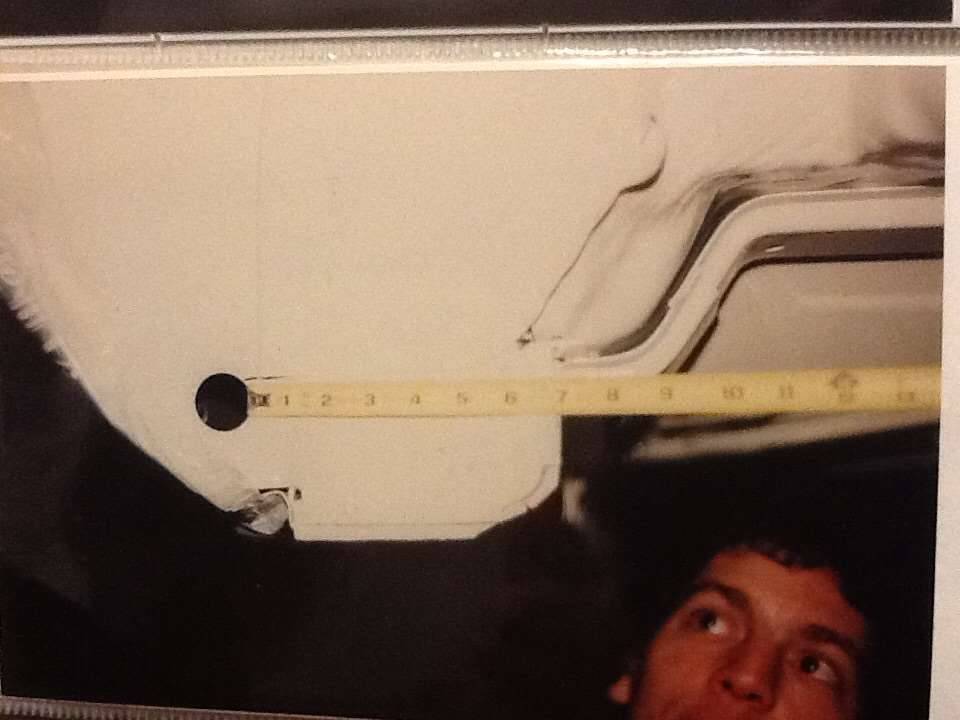
Posted on: 2015/7/6 18:06
|
|||
|
||||


.jpg")


