|
Re: 1940 120 Convertible Coupe Restoration
|
||||
|---|---|---|---|---|
|
Home away from home

|
Glad that you enjoy the detailed postings. I like making a build thread for each restoration we do as it lets the customer see exactly what we're doing to the car. The owner of this car lives in Connecticut so driving down to South Carolina isn't something they can do often. Instead of just sending an invoice with a description of the labor completed, they can follow the thread and see the work we're doing without having to make the trip to check on progress. If the car is ever sold there is a full log of all the work completed that can be used to show the quality of the restoration work- no surprises hiding under the paint this way. I don't really do it to promote the business, I've only had a handfull of people interested in having us do restoration work based off of the build threads I've posted since 2011.
Another thread you may be interested in is MP&C's '55 Wagon topic on the 67-72 Chevy truck forum. He has a ton of info on metalwork and bodywork in the topic, and shows off all of the tools and procedures involved in the process of restoring the car's body. http://67-72chevytrucks.com/vboard/showthread.php?t=564201
Posted on: 2015/8/27 13:29
|
|||
|
Project Goldilocks '66 C10 Short Fleet BBW Build
[url=http://67-72chevytrucks.com |
||||
|
||||
|
Re: 1940 120 Convertible Coupe Restoration
|
||||
|---|---|---|---|---|
|
Home away from home
|
One thing nobody likes to do is attempt to reassemble a car that another person took apart. Parts are usually scattered out, hardware is misplaced, labled wrong, or completly missing. Even if everything is there you still didn't take it apart yourself to really see how it was assembled. Since I wasn't familiar at all with Packards I was thinking that this could be a huge problem with the build when we first considered the job... thankfully I couldn't have been more wrong. The owner completly documented the car before and while it was being dissasembled. All of the parts are in boxes that are labeled with the contents, and inside each box are all of the needed parts and hardware for that respective part of the car. There are full size color pictures in each box of how the parts go together- no guesswork involved. Many of the parts are already restored, with new hardware included, ready to bolt on and go. This will save countless hours once we start the reassembly. It's already been helpful with the few things we've needed while doing the metalwork. The owner definitely wins the "best customer ever" award for having everything organized to this level of detail. I needed to make sure that the seat mounting brackets were in the correct location before welding in the floor pans. So I pulled out the seat frame and "seats" box, and found already-stripped/painted seat tracks, new hardware, and clear pictures of how they're assembled. Had it together quickly since I didn't have to hunt for random parts scattered in boxes. I also double checked the location and height of the floor braces. All of the body mounts are shimmed with the same amount of spacers to keep the body braces level with the frame. This will make it easier to mount the body for the final time- no guessing with how many shims go in each location. It's all solid mounted with no rubber bushings at this point, hopefully this will help the body to remain in the correct alignment once the bracing is cut out.
Attach file:  (48.11 KB) (48.11 KB)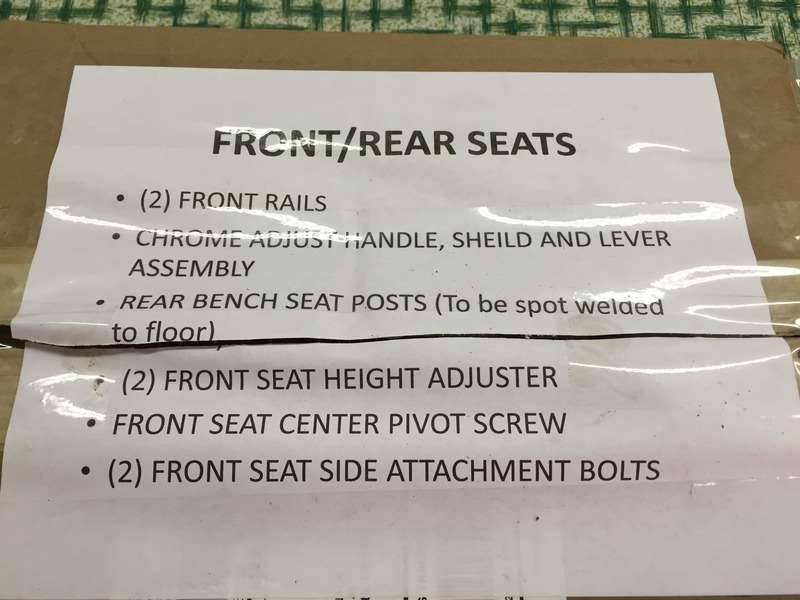 (78.52 KB) (78.52 KB)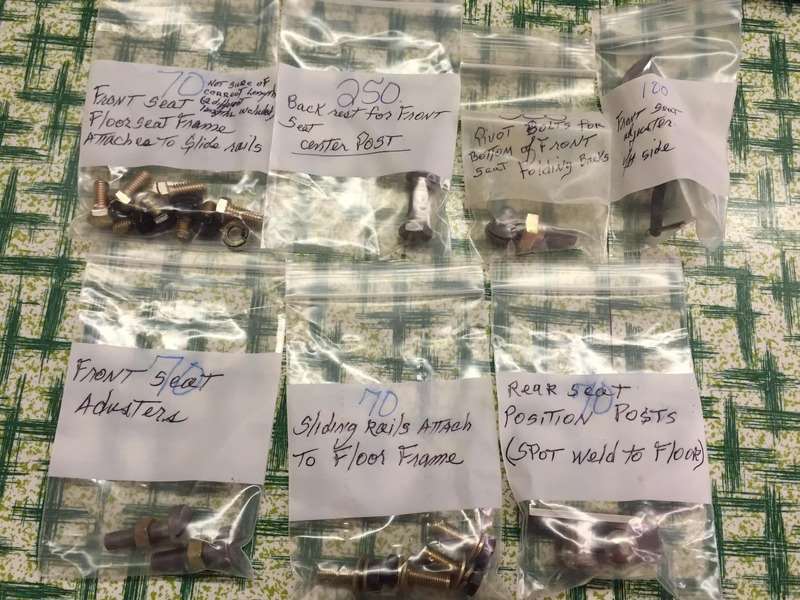 (51.73 KB) (51.73 KB)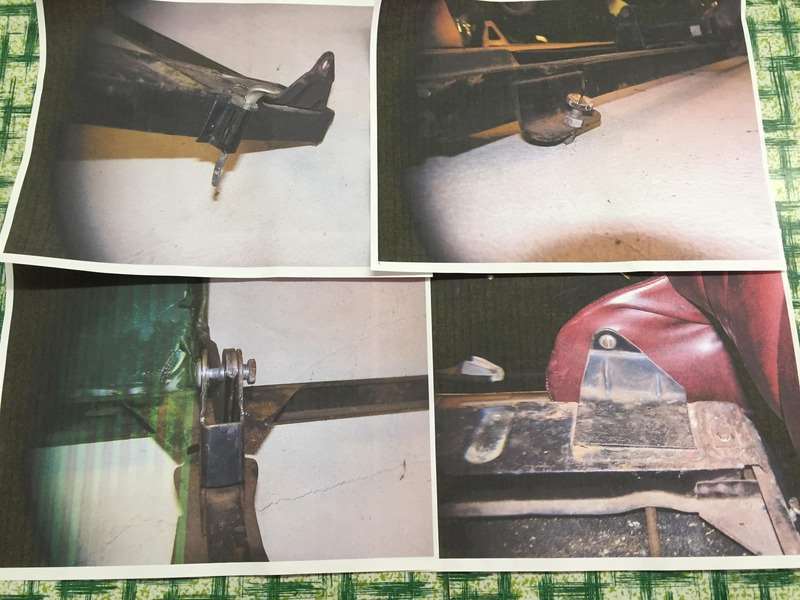 (71.27 KB) (71.27 KB)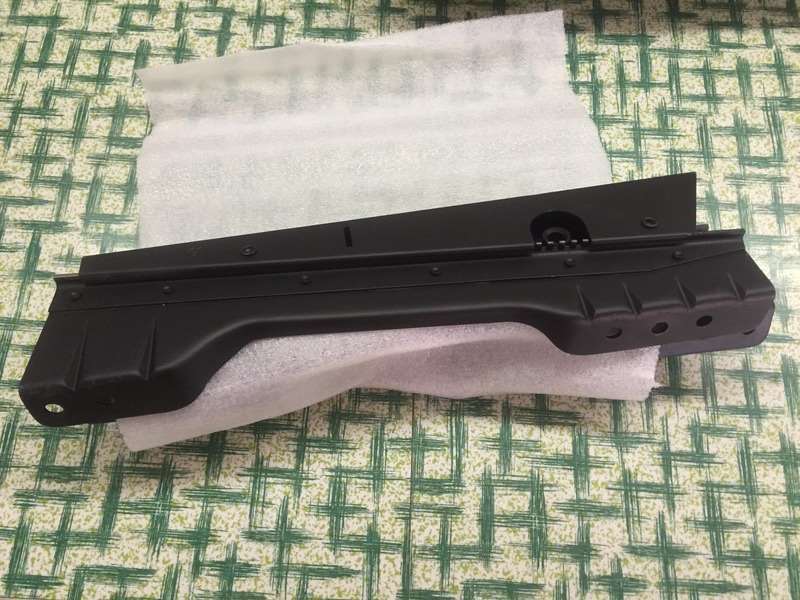
Posted on: 2015/8/27 13:34
|
|||
|
Project Goldilocks '66 C10 Short Fleet BBW Build
[url=http://67-72chevytrucks.com |
||||
|
||||
|
Re: 1940 120 Convertible Coupe Restoration
|
||||
|---|---|---|---|---|
|
Home away from home
|
The driver side seat bracket had alignment holes through the floor braces on both ends so I went ahead and welded it to the cross braces. The passenger side didn't have any way to locate it so I bolted the seat tracks and seat frame in the car and positioned the right side with clamps to hold the passenger seat bracket. Tested the tracks to make sure they weren't in a bind, then welded the passenger brace in and coated the top side of the braces with POR15. Took a little extra time to fit it all up but there won't be any surprises later once the seat is upholstered and ready to bolt in.
Attach file: (66.52 KB)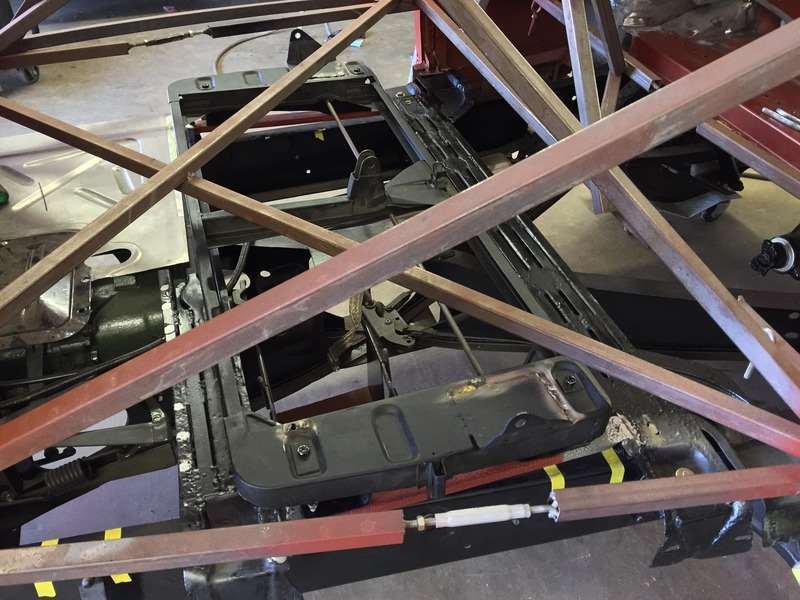 (46.99 KB) (46.99 KB)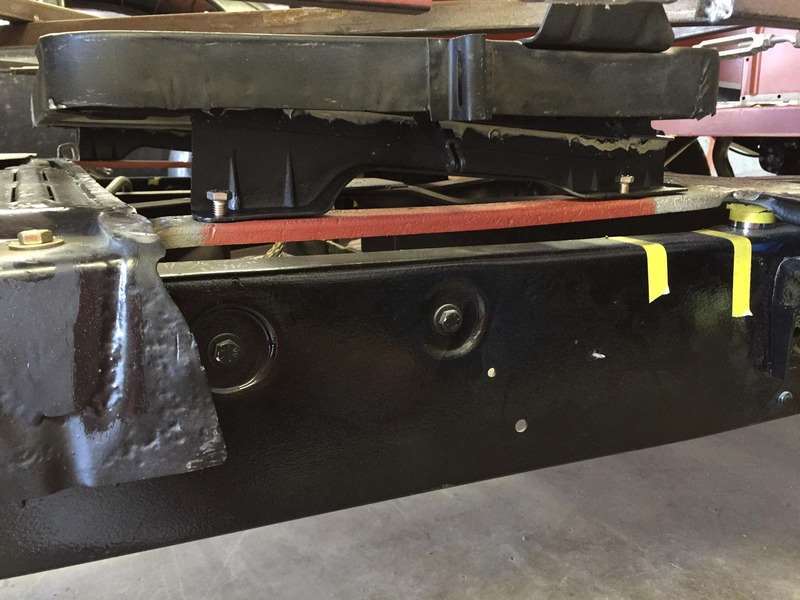
Posted on: 2015/8/27 13:38
|
|||
|
Project Goldilocks '66 C10 Short Fleet BBW Build
[url=http://67-72chevytrucks.com |
||||
|
||||
|
Re: 1940 120 Convertible Coupe Restoration
|
||||
|---|---|---|---|---|
|
Home away from home
|
I've started re-fitting the panels so I can mark the spot weld locations. I like to prime the panels, then mark and grind the primer off only where the spot weld will be. This keeps more of the seams protected from rust in the future.
Attach file: (45.64 KB)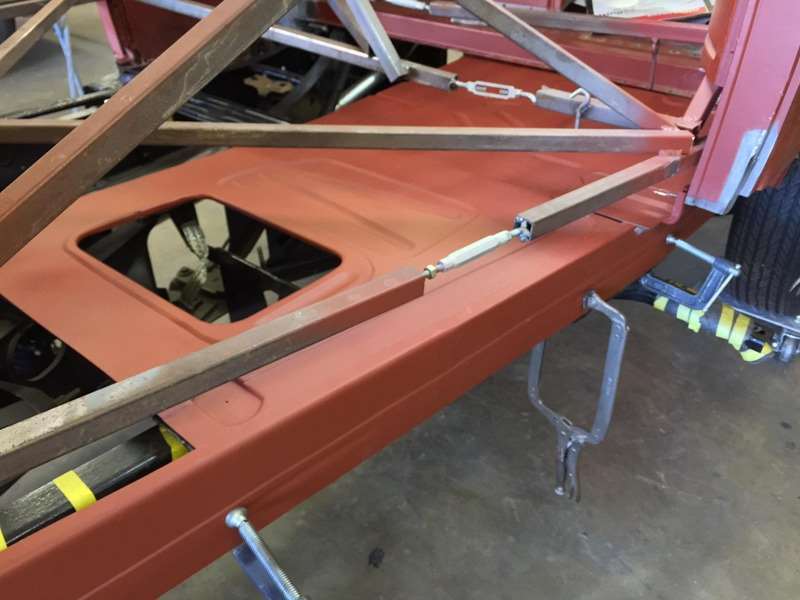 (34.35 KB) (34.35 KB)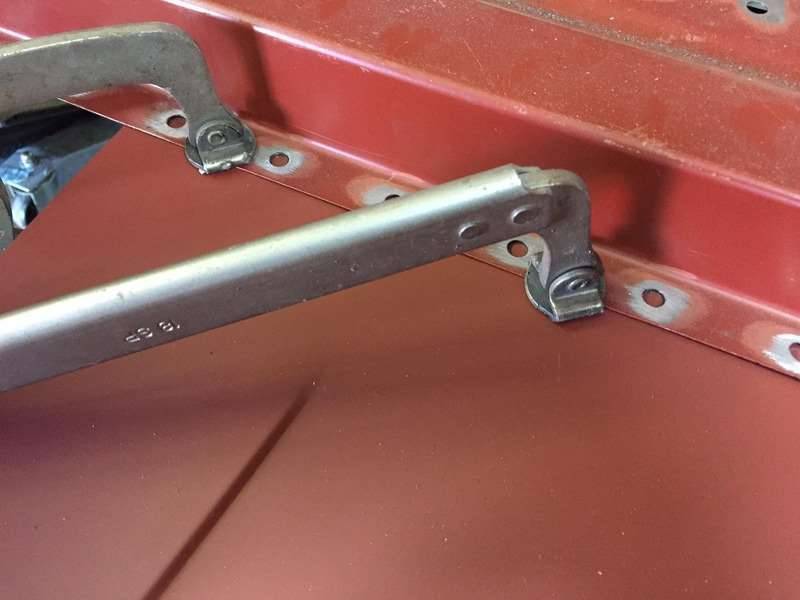 (24.51 KB) (24.51 KB)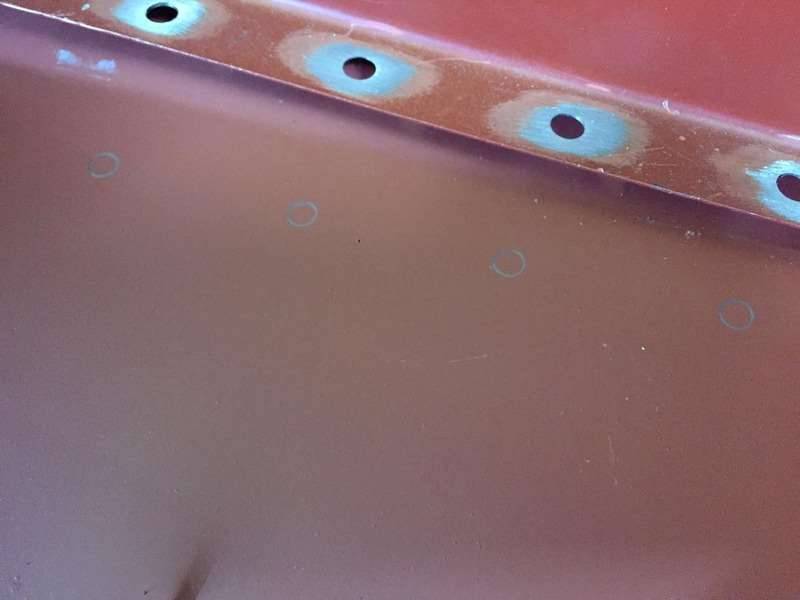
Posted on: 2015/8/27 13:39
|
|||
|
Project Goldilocks '66 C10 Short Fleet BBW Build
[url=http://67-72chevytrucks.com |
||||
|
||||
|
Re: 1940 120 Convertible Coupe Restoration
|
||||
|---|---|---|---|---|
|
Home away from home

|
Yes, those photos are what I had in mind, showing the tools and method. An excellent site also.
And your customer, also a great job of prep for you. Are you aware that some engineering drawings are available through the Packard Museum or Proving Grounds? https://packardinfo.com/xoops/html/modules/newbb/viewtopic.php?topic_id=11405&forum=4&post_id=119320#forumpost119320 packardblueprint@aol.com (Bruce Blevins_
Posted on: 2015/8/27 13:56
|
|||
|
||||
|
Re: 1940 120 Convertible Coupe Restoration
|
||||
|---|---|---|---|---|
|
Home away from home
|
Quote:
I didn't know of those, that is pretty interesting.
Posted on: 2015/9/8 8:52
|
|||
|
Project Goldilocks '66 C10 Short Fleet BBW Build
[url=http://67-72chevytrucks.com |
||||
|
||||
|
Re: 1940 120 Convertible Coupe Restoration
|
||||
|---|---|---|---|---|
|
Home away from home
|
I need help determinig the location of the rear floor pan braces. I assume that a Coupe would have the same pans and bracing. Can anyone photograph these braces so I have a reference to go by?
The ones in question are the two longer braces that stretch from the rearmost cross brace to the back of the rear floor pans. I have a picture from a '39 2 door sedan, but if I place the braces in the same location on the Convertible they come up short. Attach file: (150.09 KB)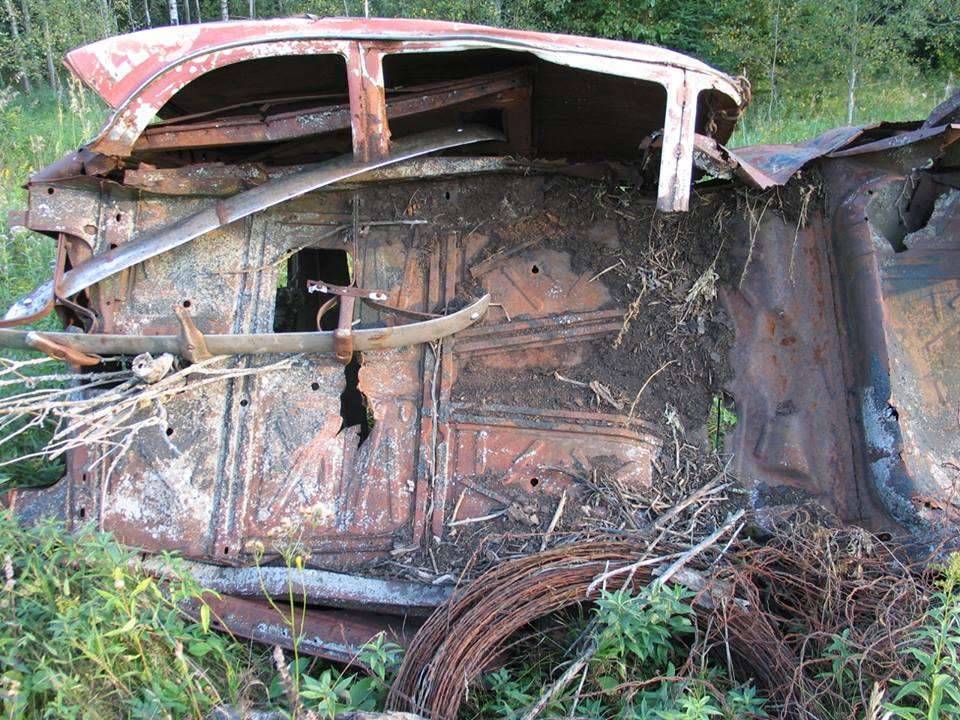 (46.06 KB) (46.06 KB)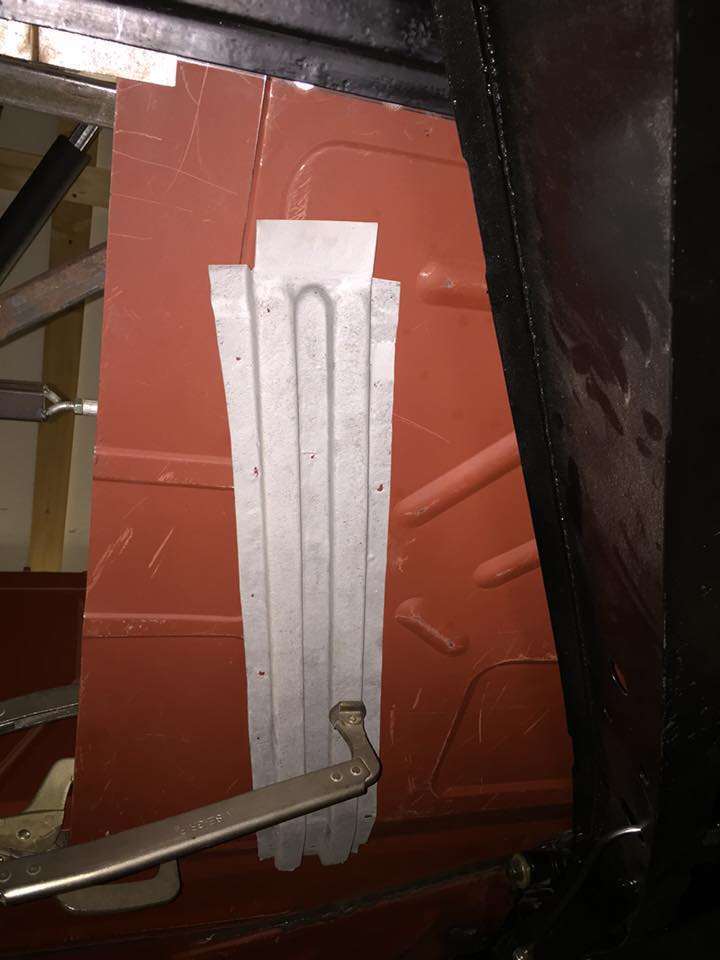 (41.47 KB) (41.47 KB)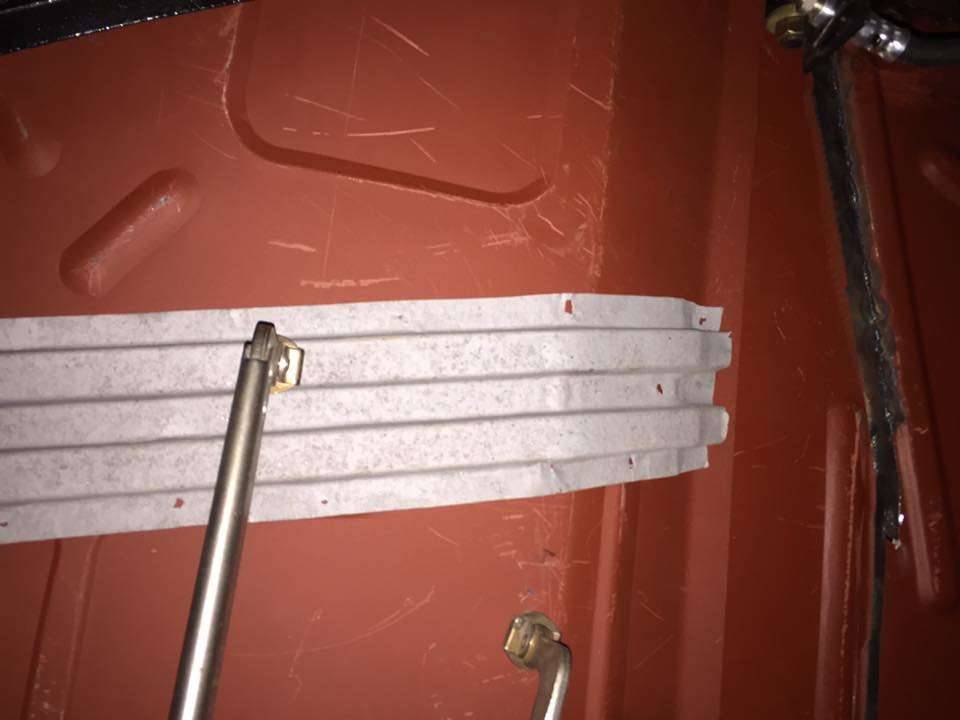 (39.57 KB) (39.57 KB)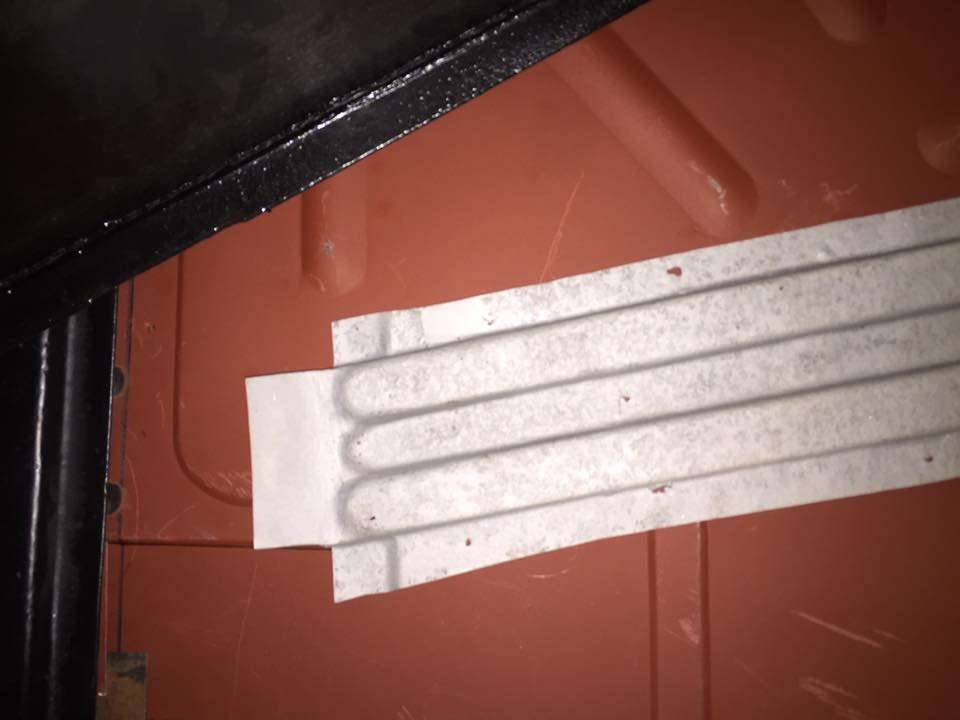
Posted on: 2015/9/8 8:53
|
|||
|
Project Goldilocks '66 C10 Short Fleet BBW Build
[url=http://67-72chevytrucks.com |
||||
|
||||
|
Re: 1940 120 Convertible Coupe Restoration
|
||||
|---|---|---|---|---|
|
Home away from home
|
I have nearly the whole left side welded in; everything except one rear body mount brace against the inner fenderwell, the outer quarter panel, and lower front cowl panel. Lots of final fitting/trimming/reshaping to get it all fit together well. This is where good patterns would have helped a lot, but the original parts were in such rough shape it was impossible to make 100% correct patterns. There were 308 plug welds so far. Next step is to fit the outer quarter and cowl panel, then lead all the door jamb seams.
Attach file: (56.18 KB)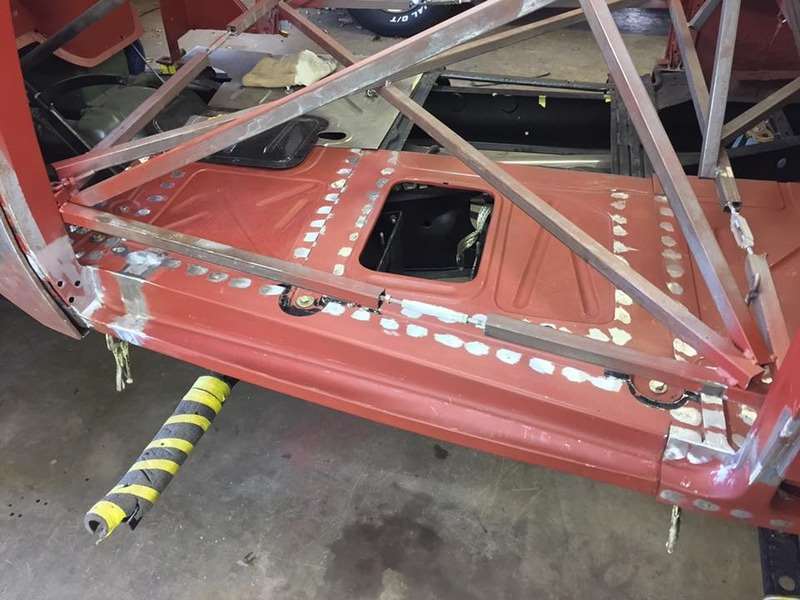 (38.81 KB) (38.81 KB) (38.42 KB) (38.42 KB)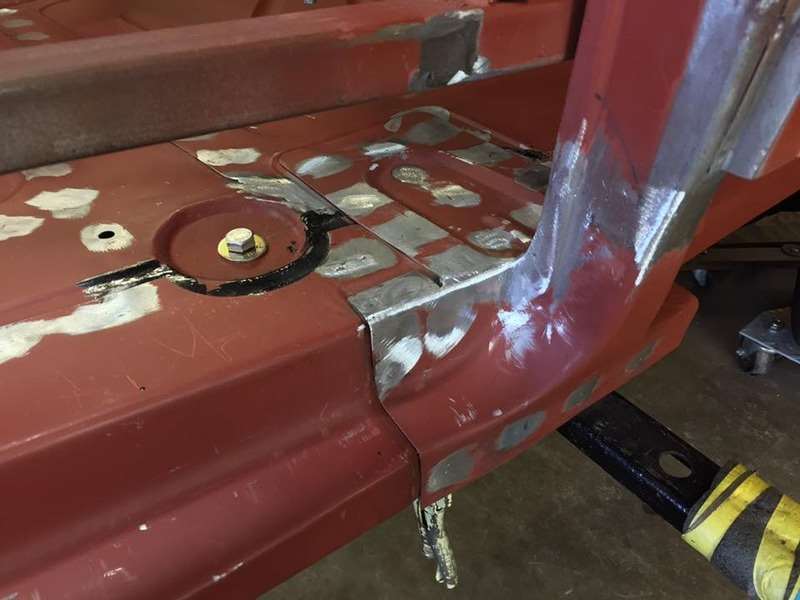 (41.14 KB) (41.14 KB)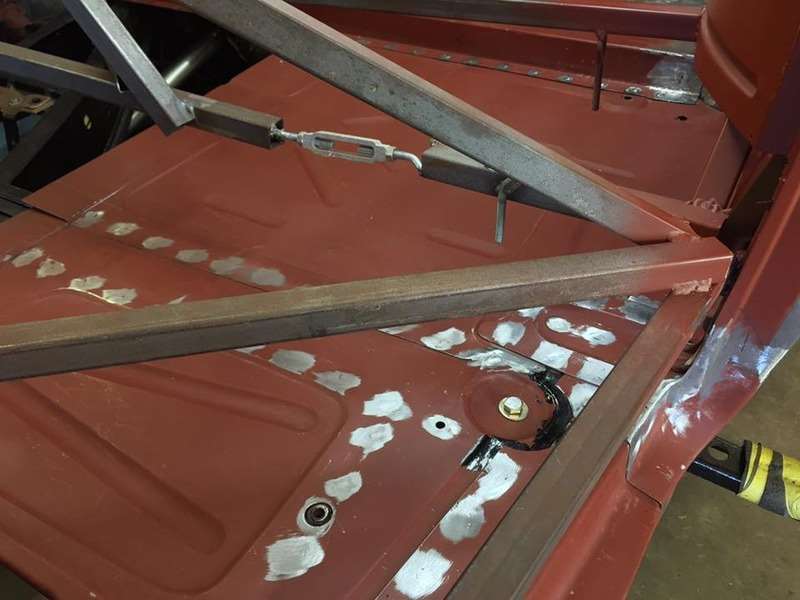 (45.31 KB) (45.31 KB)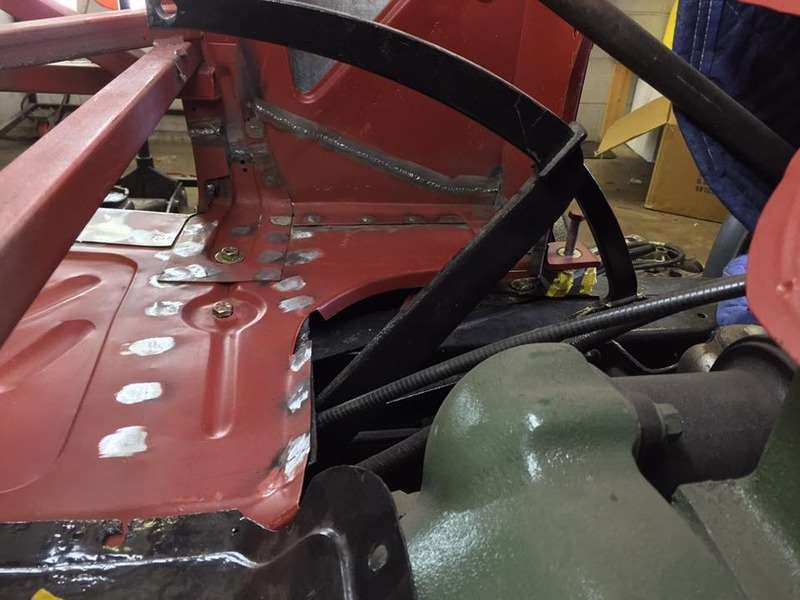
Posted on: 2015/10/8 14:39
|
|||
|
Project Goldilocks '66 C10 Short Fleet BBW Build
[url=http://67-72chevytrucks.com |
||||
|
||||
|
Re: 1940 120 Convertible Coupe Restoration
|
||||
|---|---|---|---|---|
|
Home away from home
|
Front lower cowl side welded in.
Attach file: (42.73 KB)
Posted on: 2015/11/3 9:19
|
|||
|
Project Goldilocks '66 C10 Short Fleet BBW Build
[url=http://67-72chevytrucks.com |
||||
|
||||
|
Re: 1940 120 Convertible Coupe Restoration
|
||||
|---|---|---|---|---|
|
Home away from home
|
For the quarter panel, I modified a set of panel clamps for a tighter gap between the panels. The "divider" piece was originally ~.045", which I ground down to around .020". I also tried Robert/MP&C's tack/planish/grind/overlap technique since I was able to access the back side of the panel. Great technique that really helps to reduce shrinking/warpage and keep the shape of the panel while welding. It'll only need minimal work to get it ready for bodywork.
For those not familiar with Robert (MP&C on forums), here's a link to check out his work. Very talented metal shaper and he's great at posting his techniques. http://67-72chevytrucks.com/vboard/showthread.php?t=564201 Attach file: (41.15 KB) (60.61 KB) (60.61 KB)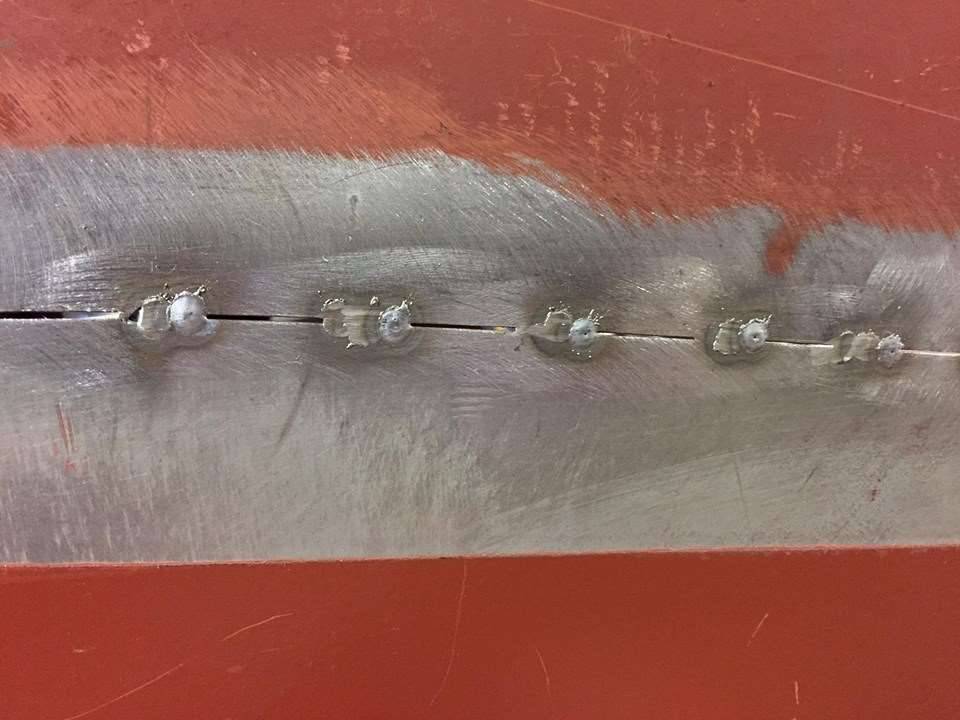 (49.54 KB) (49.54 KB) (54.63 KB) (54.63 KB)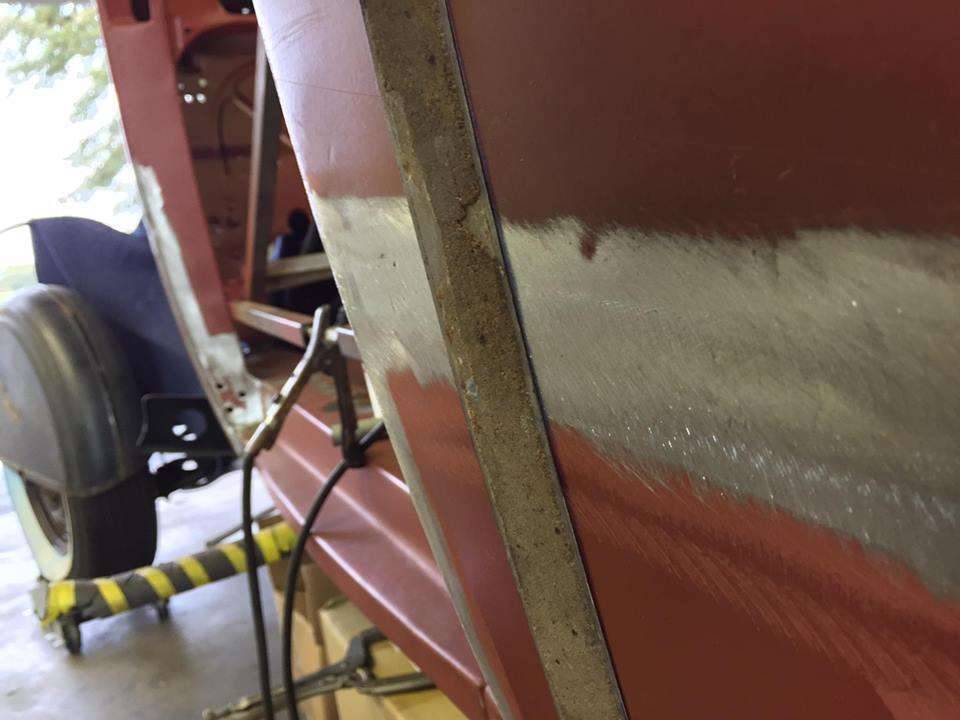
Posted on: 2015/11/3 9:25
|
|||
|
Project Goldilocks '66 C10 Short Fleet BBW Build
[url=http://67-72chevytrucks.com |
||||
|
||||


.jpg")


