|
Re: Our 1932 901
|
||||
|---|---|---|---|---|
|
Home away from home

|
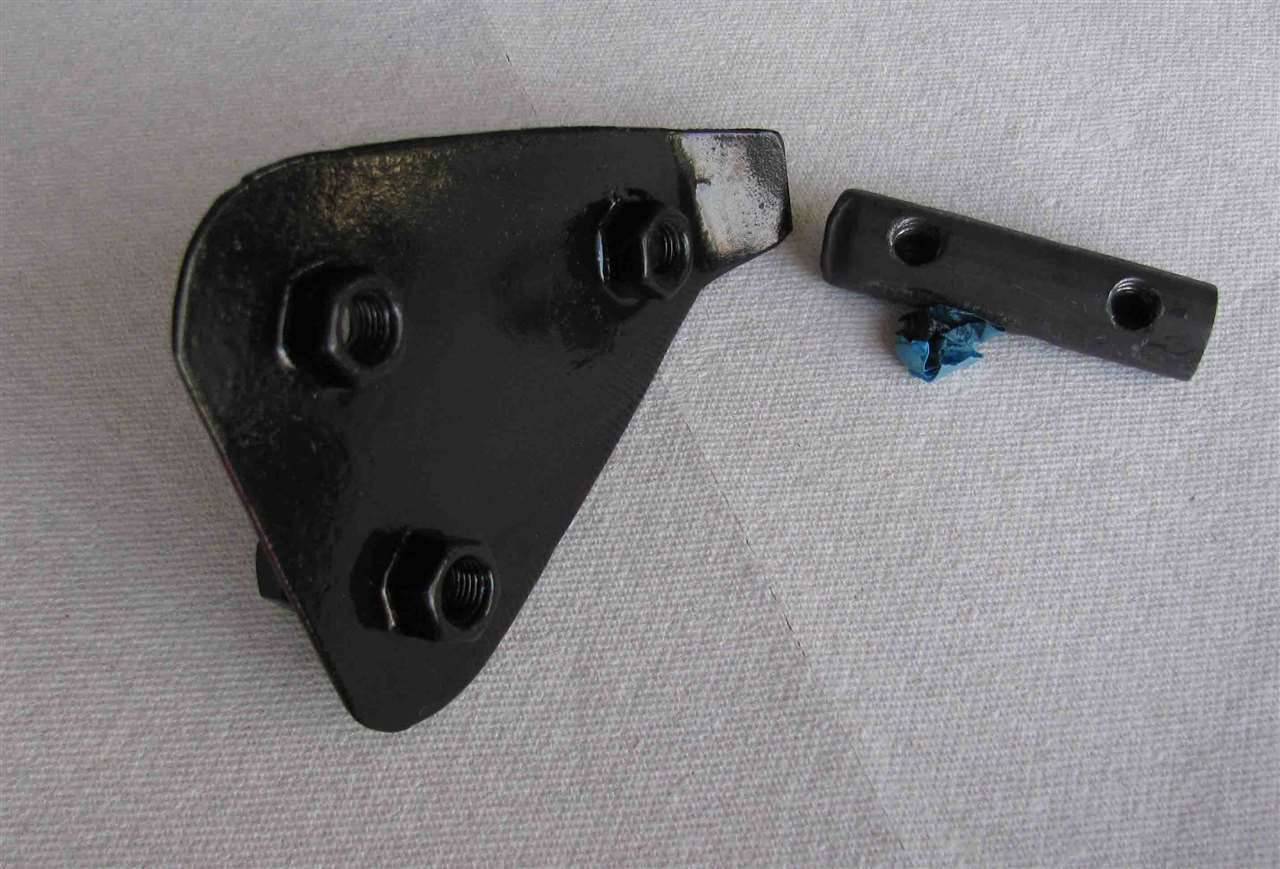
I've been at work on the four door latches and the boards that holds them and the window regulators. The wood was pretty well shot - warped and cracked. While the door-latch assembly plates needed to be re-plated.
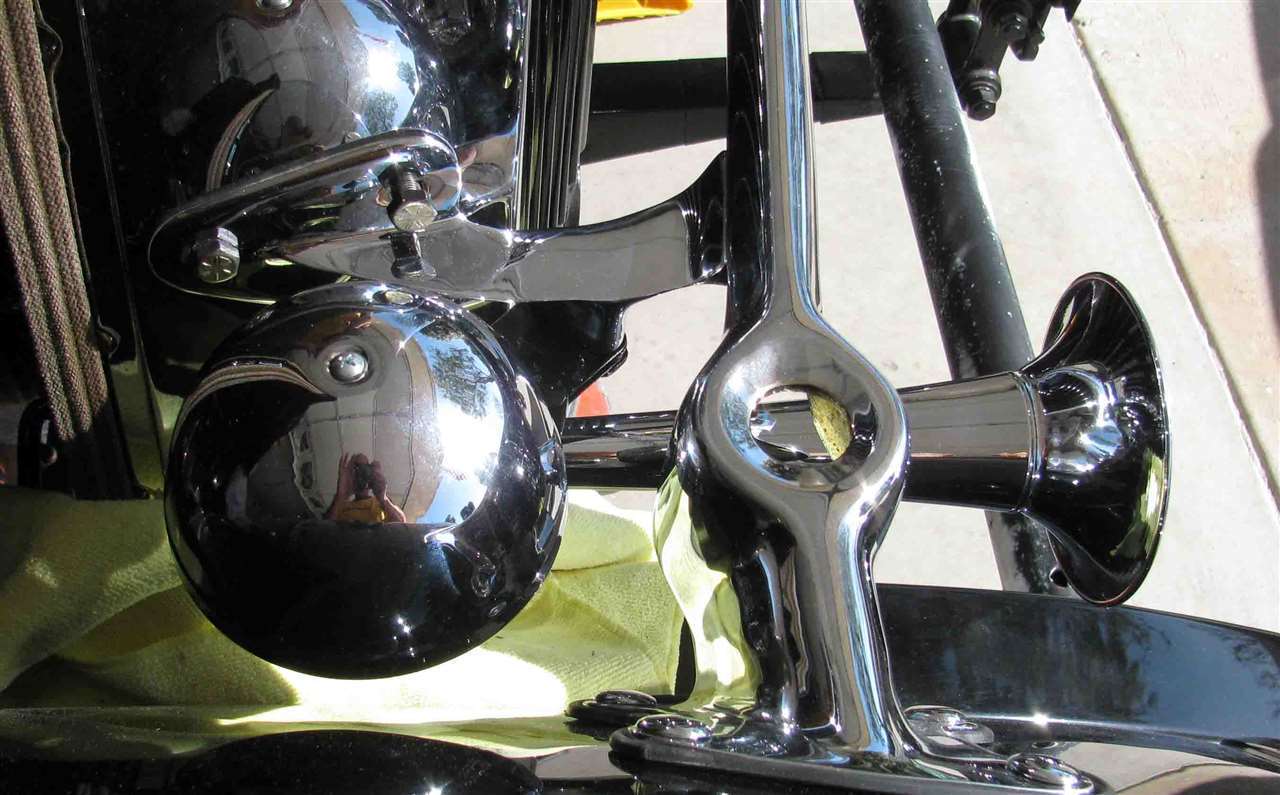
The rivets on the latch assemblies were drilled out and they were disassembled. The plates were sent out for a polished nickel plating and the rest of the hardware was cleaned up and painted semi-gloss black. Since I could not find shoulder rivets with the correct dimensions, I turned five of each size on a lathe. New boards were made by gluing pieces of 1" maple. The thickness was planed to 9/16" like the original ones. Templates were made from MDF so the recessed areas could be cut out with a router. After the boards were cut and milled, they were treated with an ebony stain. I also worked on some of the hardware that holds the bumpers on. The covers were "well rusted" and bent up. I was able to straighten the covers up, pound out the dents and braze the cracks and tears so they looked good enough to send out from chrome plating In the next week or so, I'll mount the door & window hardware on the boards and fit them to the doors. Attach file:  (132.51 KB) (132.51 KB)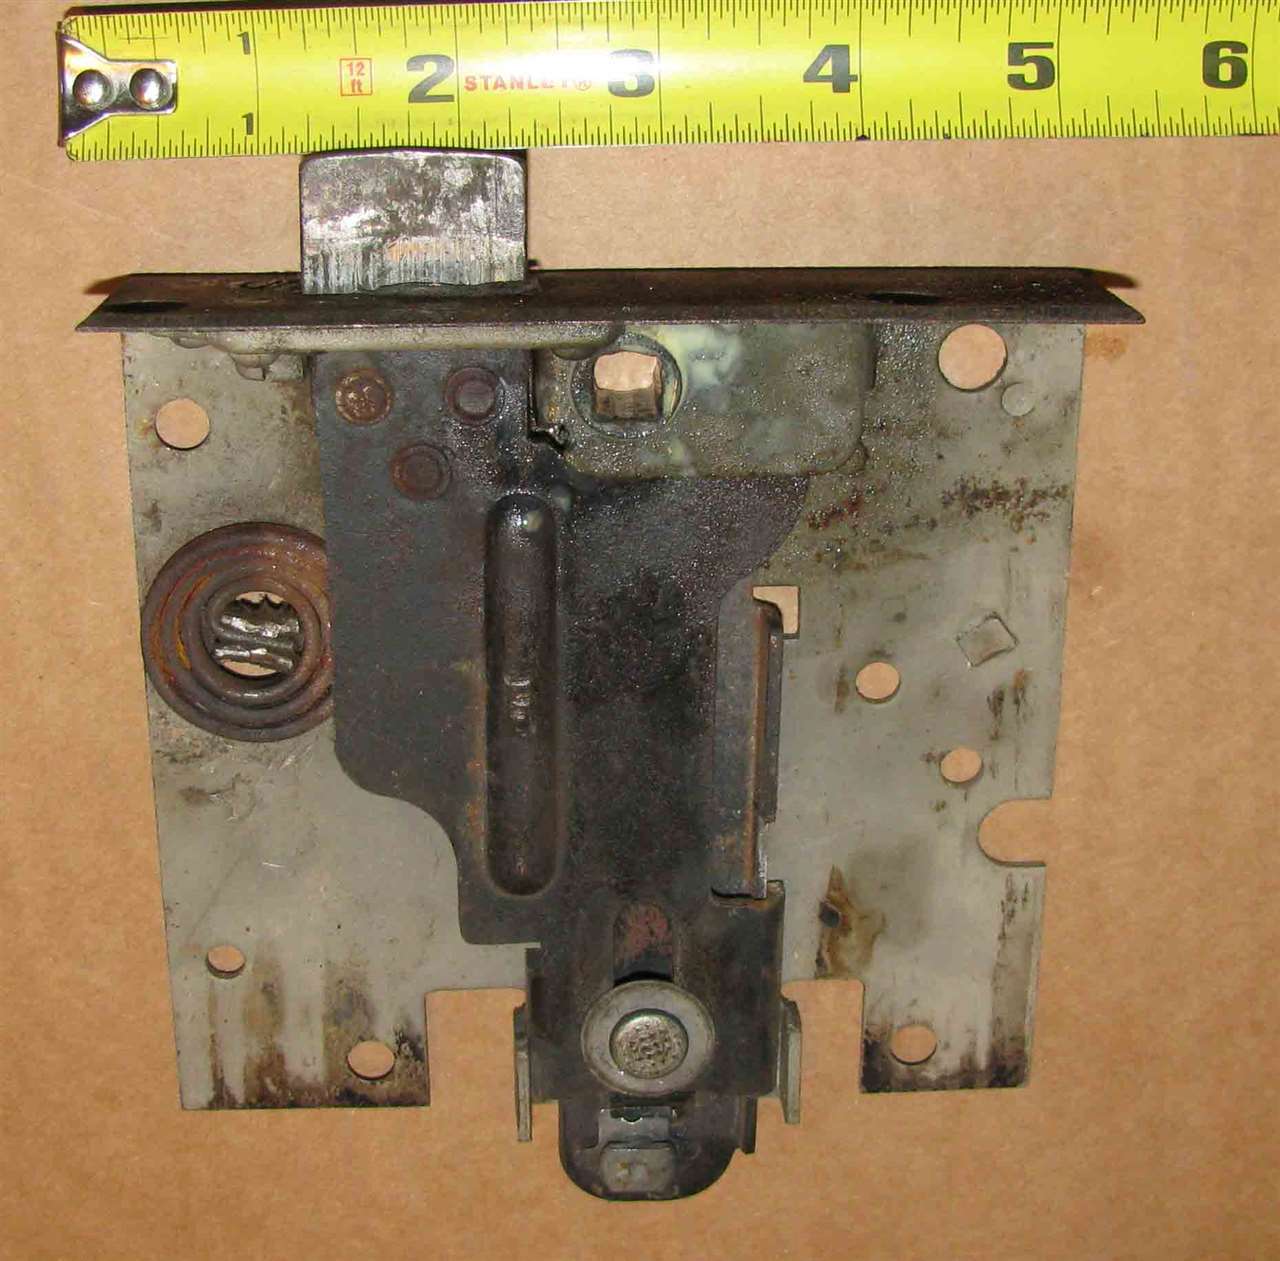 (124.20 KB) (124.20 KB)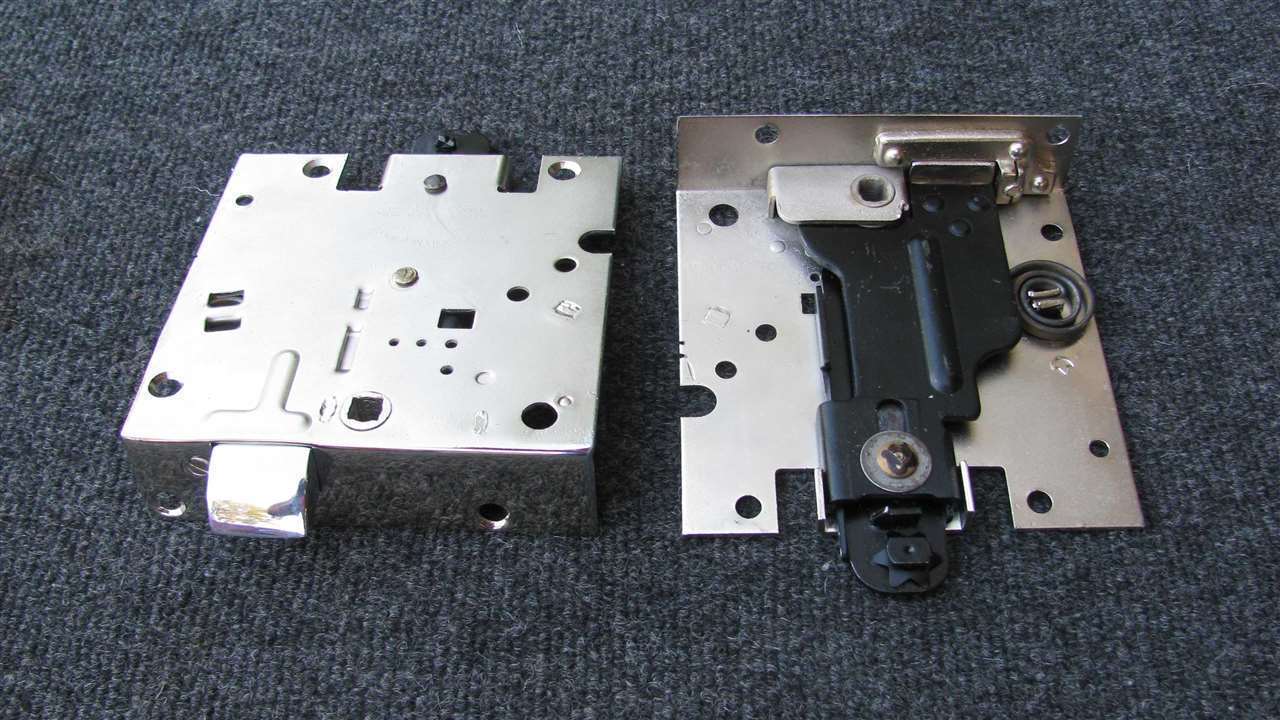 (59.79 KB) (59.79 KB)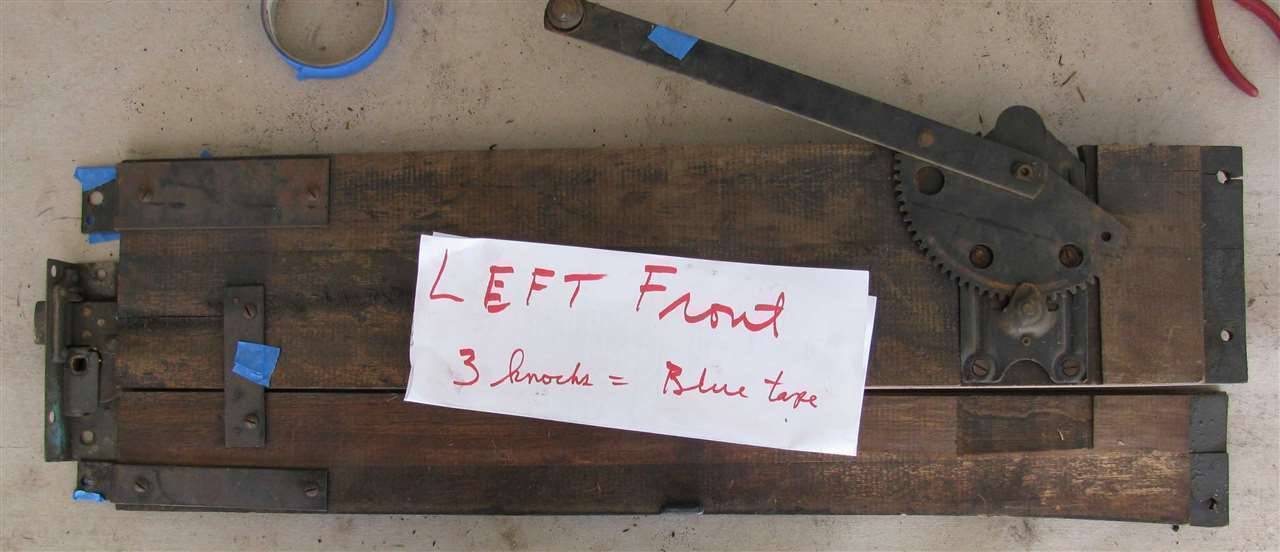 (120.89 KB) (120.89 KB)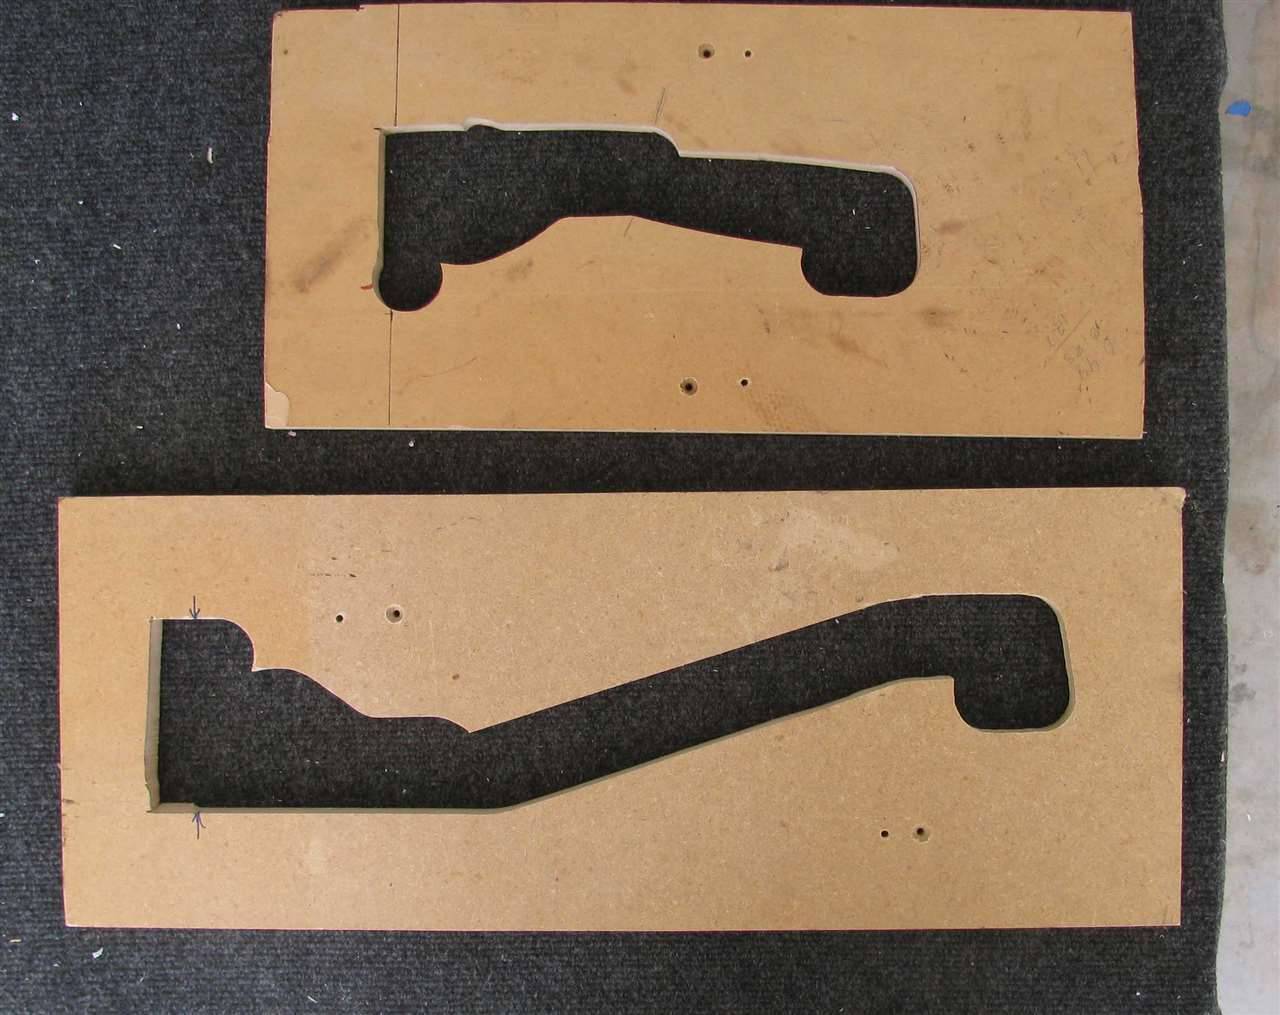 (76.40 KB) (76.40 KB)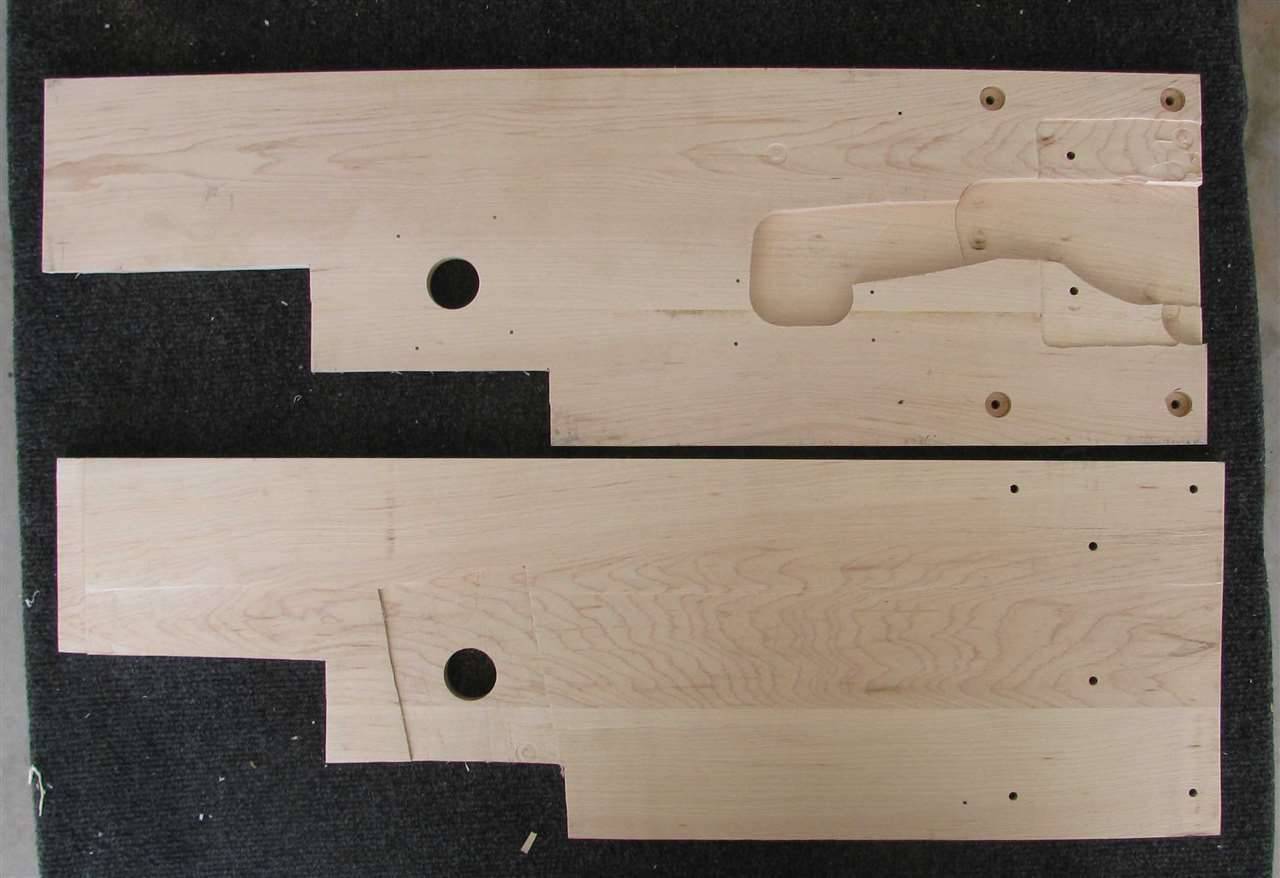 (62.38 KB) (62.38 KB)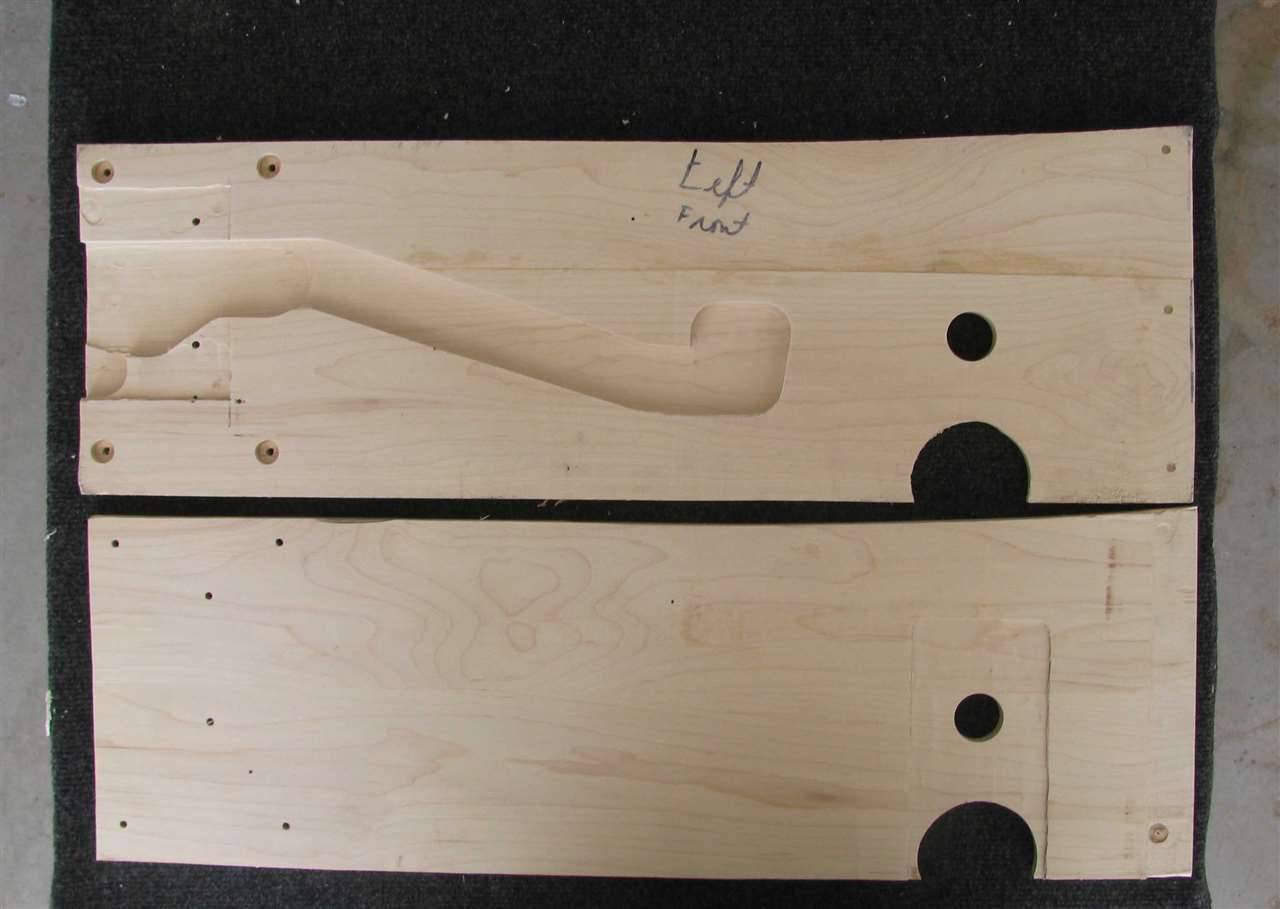 (146.03 KB) (146.03 KB)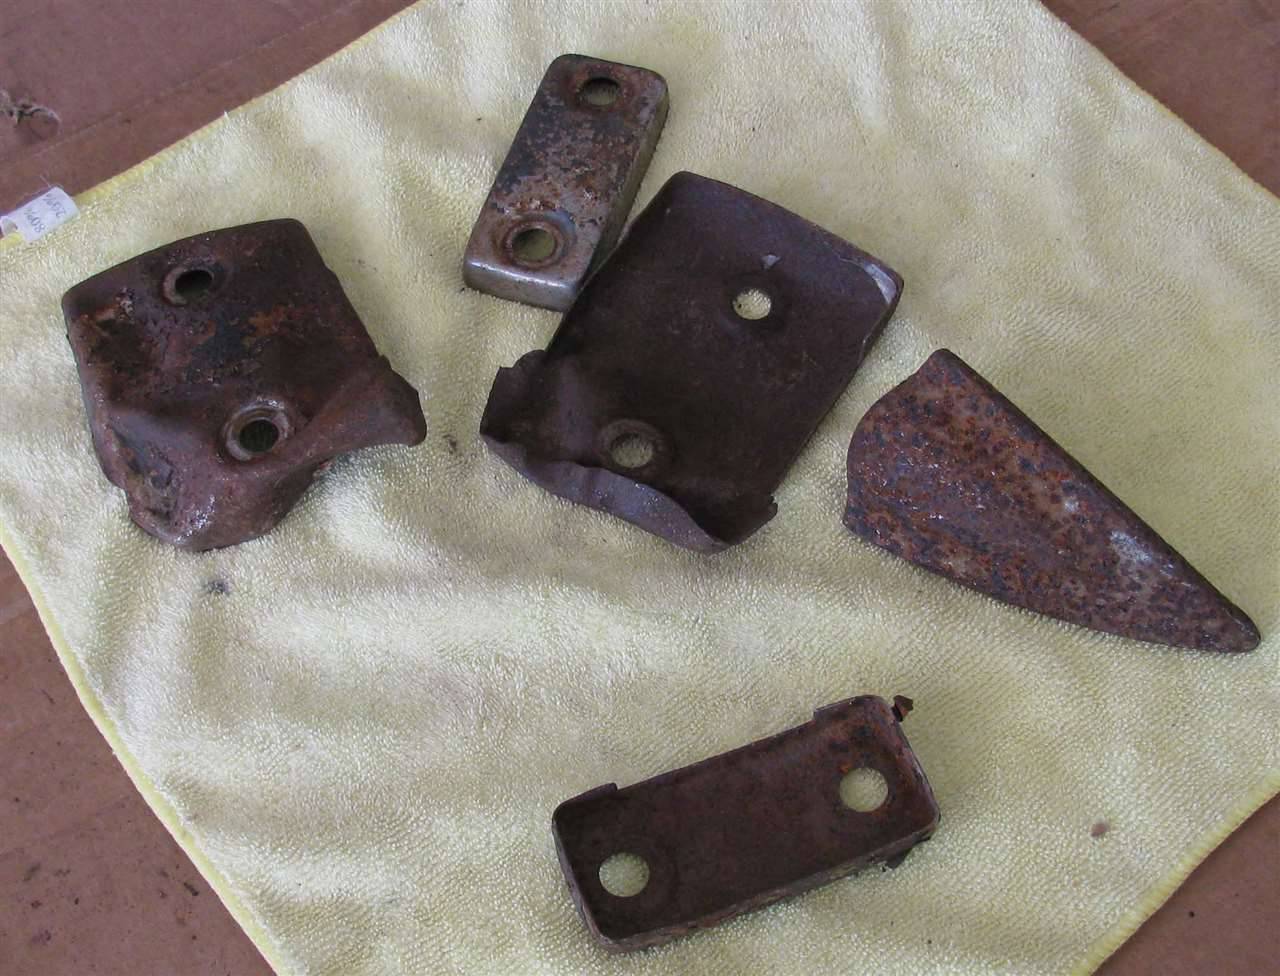 (106.33 KB) (106.33 KB)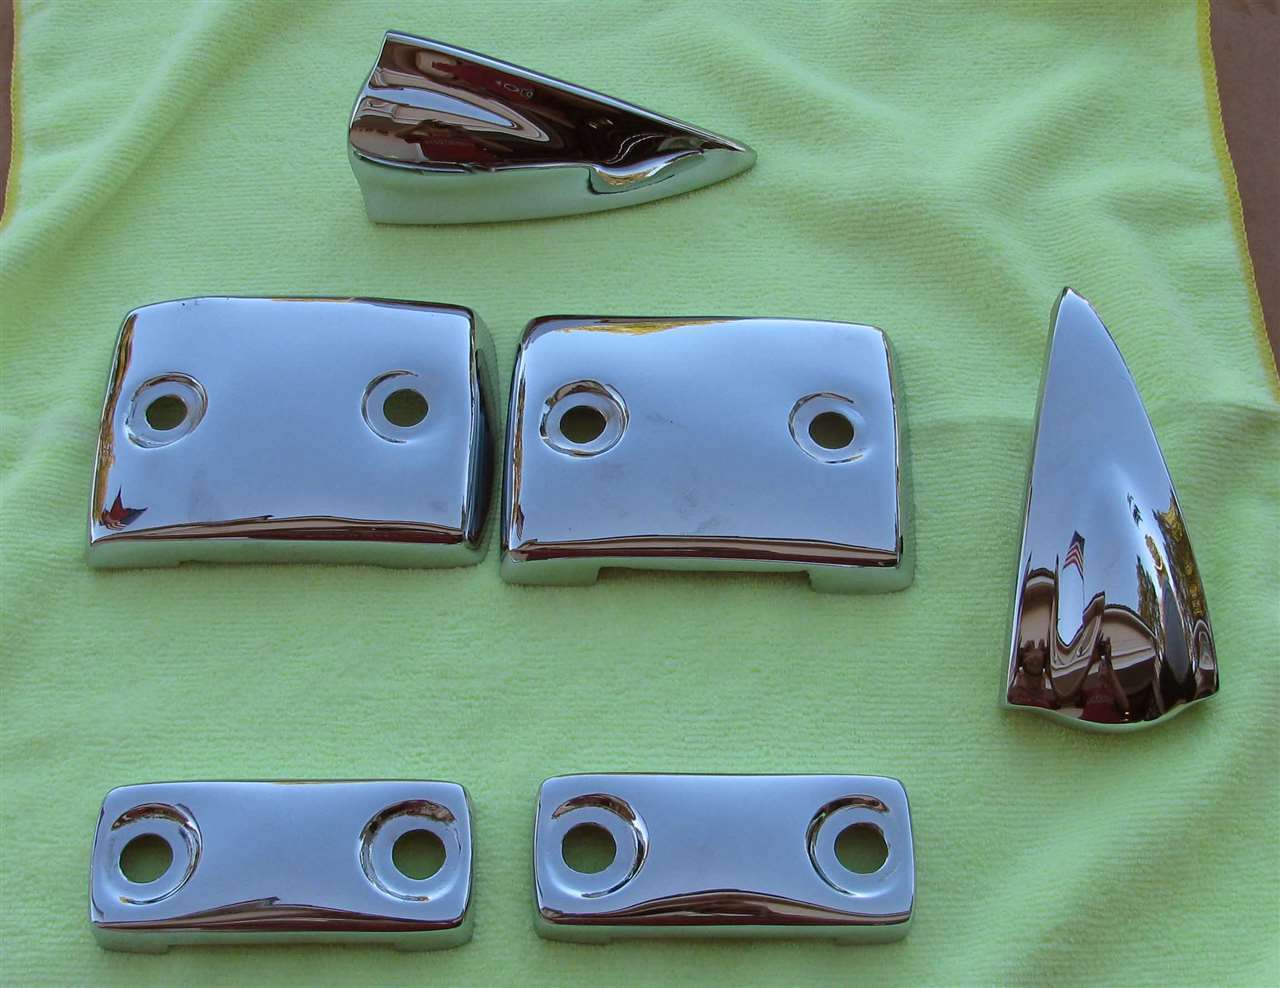
Posted on: 2014/9/27 10:18
|
|||
|
||||
|
Re: Our 1932 901
|
||||
|---|---|---|---|---|
|
Forum Ambassador

|
Very nice work, congratulations. On the bumper frame end caps, were those you show plated reproductions from Bill Hirsh (I think he still offers them), or the old ones repaired?
Posted on: 2014/9/27 12:36
|
|||
|
||||
|
Re: Our 1932 901
|
||||
|---|---|---|---|---|
|
Home away from home
|
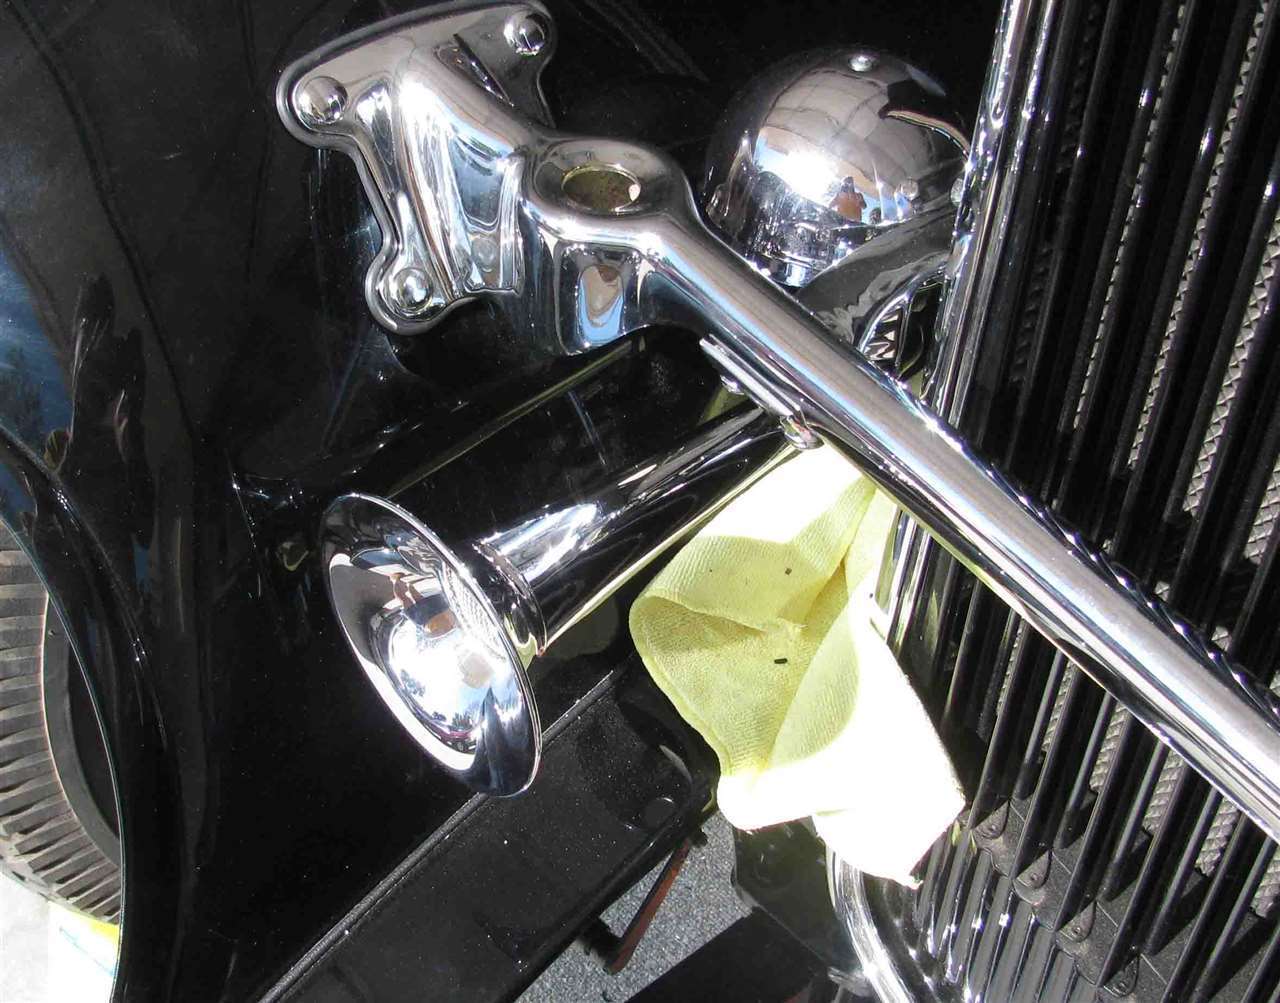
Those were the old ones. I debated about buying repros, but thought there was an outside chance that with a little heat from a torch and a lot of soft touches from a body hammer & dolly I could get them back together.
So after about 30 minute each and an untold number of taps they looked pretty good. I silver solder a crack or two and sent them off for chrome plating. Don't know how much copper they used, but it must have taken a bit to fill the pits. One of them has a small area that could be better, but it isn't big enough to see unless you get within a foot or so.
Posted on: 2014/9/28 22:49
|
|||
|
||||
|
Re: Our 1932 901
|
||||
|---|---|---|---|---|
|
Home away from home
|
It's been several months since I have posted an update. I painted the new boards black and mounted the door latches and window regulators on them. They were installed on the car to make sure they fit and to keep them out of my hair.
I've posted several things on the Pre-war (1946-54) side of this site getting information from those who know a lot more than I. One was on wiring and I completed the installation for the harness that takes care of the steering wheel column switch. As part of the electrical the head lights were installed and wired. I was missing bulb sockets for the headlights. Therefore, I bought some for a 30's era Ford and alter them to fit. When I got ready to install the wiring that goes to the starter switch I discovered that the brake pedal doesn't seem to be correctly (see post for the nitty-gritty). Glass for the car has been ordered and should be delivered in the next several weeks. My current challenge with the windows is find correct glass run channels. I have some of the original ones, but don't think that I have all of them. They are beaded with and felt lined. It appears that they were not nickel or chrome plated, but painted. As many of you know, the lever for the cowl vent was made of cast aluminum. Mine was cracked all over and the area where it bolts to the cowl was broken. I decided that it should be easy enough to make one out of brass. So I got a piece of 9/16' rod 2 feet long, some 3/8"X 1.0 " brass flat bar, and a 7/8" mild steel ball. I tapered the rod so it looked like the bad one. Then heated and bent it to match the original lever. I drilled and tapped the rod and ball so I could screw them together (just to hold them in position). Then I silver solder the two together. A ~3' piece of the flat bar was drilled, tapped and screwed to the rod (again to hold it in place) before it was silver soldered. Cost of the project was about $15 and took 3 to 4 hours to make. Attach file: (229.89 KB)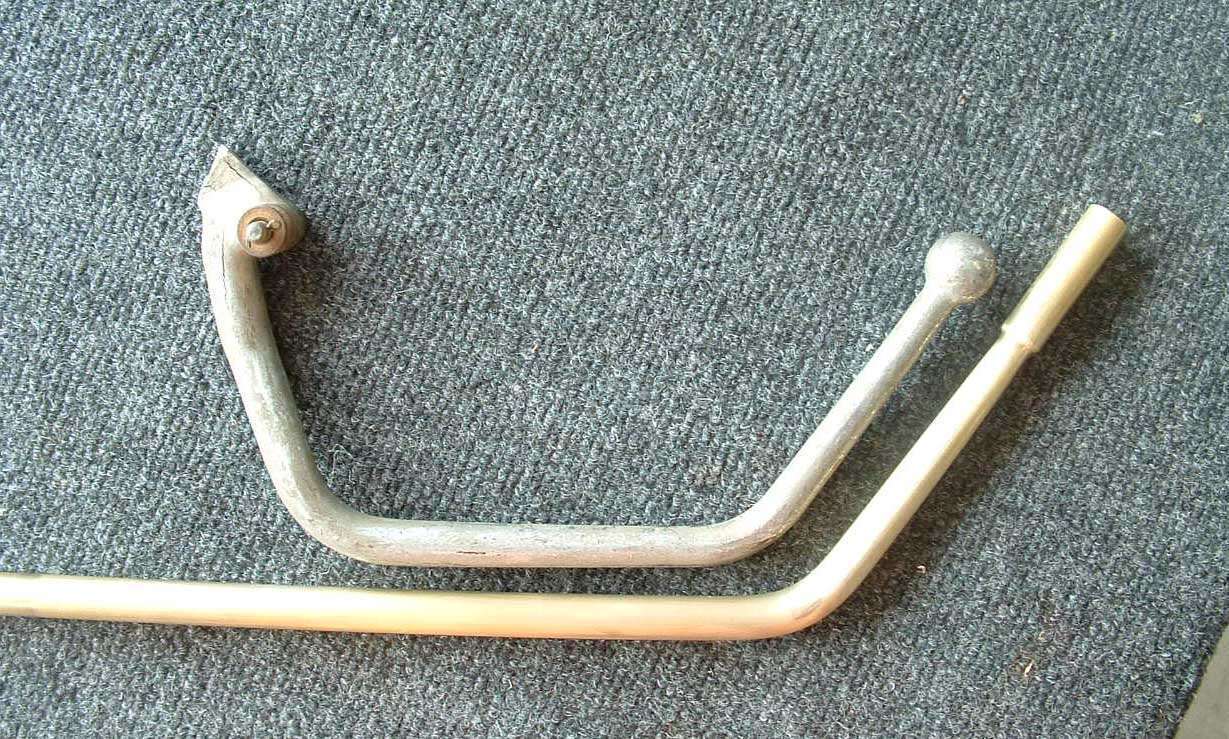 (136.49 KB) (136.49 KB)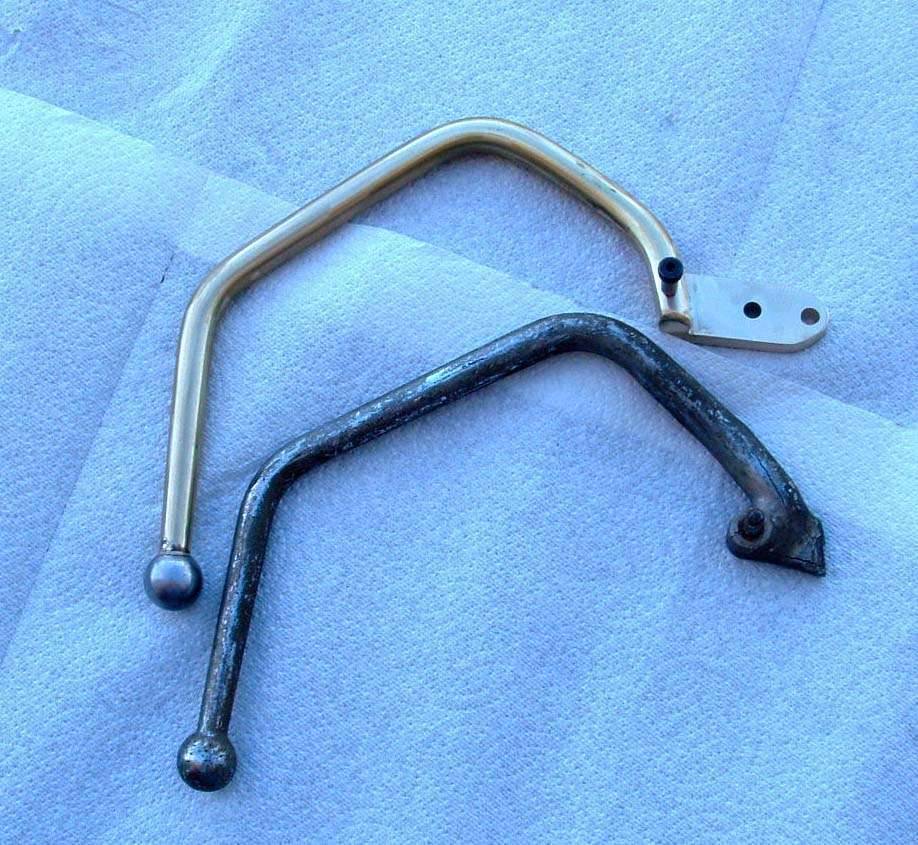
Posted on: 2015/2/3 23:05
|
|||
|
||||
|
Re: Our 1932 901
|
||||
|---|---|---|---|---|
|
Home away from home
|
Just a quick note on the above post. The 3' piece of brass flat bar should have been 3" (A.K.A. 3 inches). It should have also been mentioned that it was 1" wide and 3/8" thick. It should be back from the plater's next week.
When I studied the brake pedal in greater detail, it appeared that it had been straighten somewhat. Therefore, I'm having the chrome removed from it and I'll try heating it bending it in order try see if I can get it to fit.
Posted on: 2015/2/13 19:11
|
|||
|
||||
|
Re: Our 1932 901
|
||||
|---|---|---|---|---|
|
Home away from home
|
To get ready for the arrival of the window glass I performed the following:
1. Cut and installed the window run channel in the car. 2. The door glass channels were all cleaned up and painted. 3. The rubber weatherstrip seal that goes in the door glass channel was installed. I received the windshield last week and the rest of the glass should show up in a couple of days. The screw holes for the windshield hinge on the car were cleaned up with a 8-32 tap. Oval head 8-32 machine screws have been order and should arrive this week. Since I could not find chrome plated screws, I bought stainless steel screws and the heads will be polished to look like the chrome plated frame. I have the hardware that latches the windshield frame to the body and will need to clean it up a bit and then send it out for chrome plating. I cannot find the hardware that holds the windshield slightly open and was wondering if someone out there could take a few pictures of one on their car so I have a better idea of what I should be looking for in my various boxes of parts.
Posted on: 2015/3/9 17:40
|
|||
|
||||
|
Re: Our 1932 901
|
||||
|---|---|---|---|---|
|
Home away from home
|
I've worked off and on the car since the last post. We've been busy with our RV and several marriages (son & grandson). A RV trip took up 3 months as we traveled the mid-west.
I did manage to get the all glass installed except for the windshield. The T-groove channel in frame for the windshield was two narrow for the weather stripping to fit into. I think this was due to the plating process. I trimmed the weather stripping (Steele Rubber) and cemented it in with a black urethane material and will install it in the next several weeks. If the urethane doesn't do the job, I'll need to grind the channel opening some, send it out for re-plating, and install a new piece of rubber. The Bijur system was cleaned up and checked out. I had to replace about a dozen metering units, which were bought from Bruce Blevins along with some other parts. There were several leaks that were also repaired The brake pedal that presented a problem (See January post) was installed. The brakes were checked out and adjusted. I had problems with the front wheels locking up when they were turned hard left or right. I followed the instructions in the "Service Bulletin Bendix Brakes Packard" found on this site and the procedure A11 found in the 1929-1932 Service manual.. The procedures were tried several times, but the front tires would lock up when turned either full right or full left. Finally A11 was repeated and then the brake adjusting nut was backed off on both fronts the same amount of turns until there was no binding when turned hard in either direction. The tires were 1) turned straight ahead, 2) pedal pressure applied until one of the wheel had a lot of drag, and 3) the adjusting nut on the tightest wheel was backed off a little at a time until the drag for both front wheels became the same. At this point there was no lockup when the wheels were turned either hard right or left. The rear tires were then adjusted so the rear left and right were equalized. There seems to be plenty of brake pedal so I'll see how it works out after I get it on the road.
Posted on: 2015/12/22 19:27
|
|||
|
||||
|
Re: Our 1932 901
|
||||
|---|---|---|---|---|
|
Home away from home
|
My only New Year's resolution is to post the progress on the car at least once a month. So we'll see how this works out.
As mentioned in the last post the windshield weather strip was trimmed and glued in with a black urethane adhesive. I was able to install the windshield and the urethane seems to do a great job at holding. I must report that it was an extremely tight fit. It was discovered that the u-joint on the rear end side of the driveshaft was in bad shape. I bought the rear section from a drive shaft that Dave (32model901) had and will have it welded on to mine and have it balanced. Probably sometime in February The glove boxes were cleaned up and painted. Then new cloth for them was installed. The large pieces of wood that goes behind the glove boxes was cracked so new ones were made. While I was at it, I also made the wood pieces that go to support the panels in the back seat area. Started working on installing the dash. I received support from other users (see Dash & Oil line on a 1932 901) and I want to thank them for their help. The first step was to make the embossed board that covers the inside firewall. I cut a pattern by taping 8 ? by 11 sheets of paper to the metal firewall trimming and cutting holes in the paper as necessary. After the entire wall was covered with the small sheets they were firmly taped together and the entire mosaic pattern removed. This pattern was used to cut a test piece out of cardboard. After making several minor adjustments for holes, the firewall board was cut and installed. I did not find some of the original carburetor linkage. So I made linkage to connect the automatic choke and the piece that runs from the firewall to the carburetor for the accelerator. I made and installed the oil line that runs from the engine to the firewall that eventually goes to the oil pressure gauge from 1/8" copper tubing. I'll send the line out in the future to get it plated. Attach file: (95.27 KB)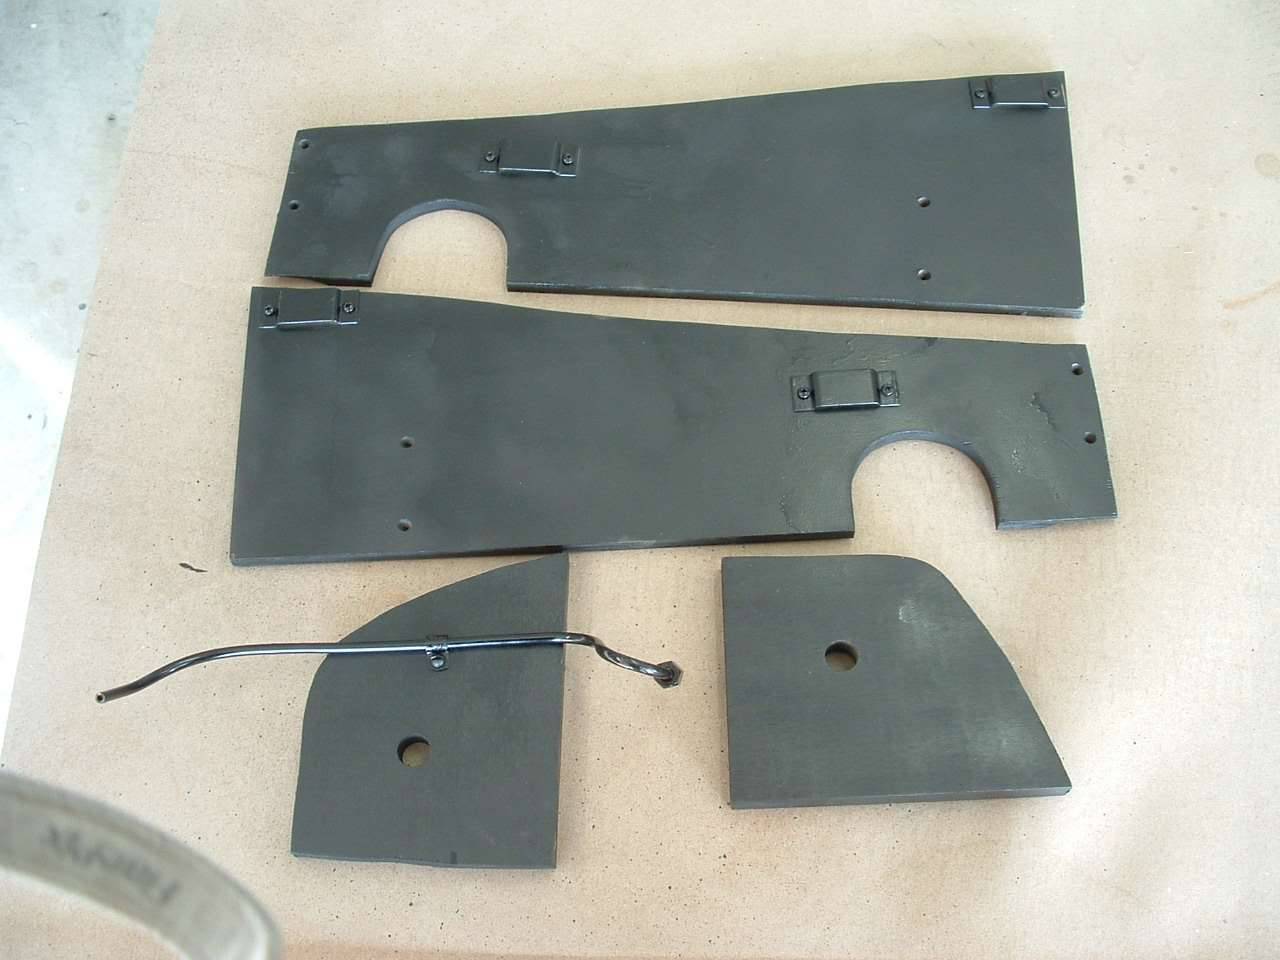 (154.61 KB) (154.61 KB)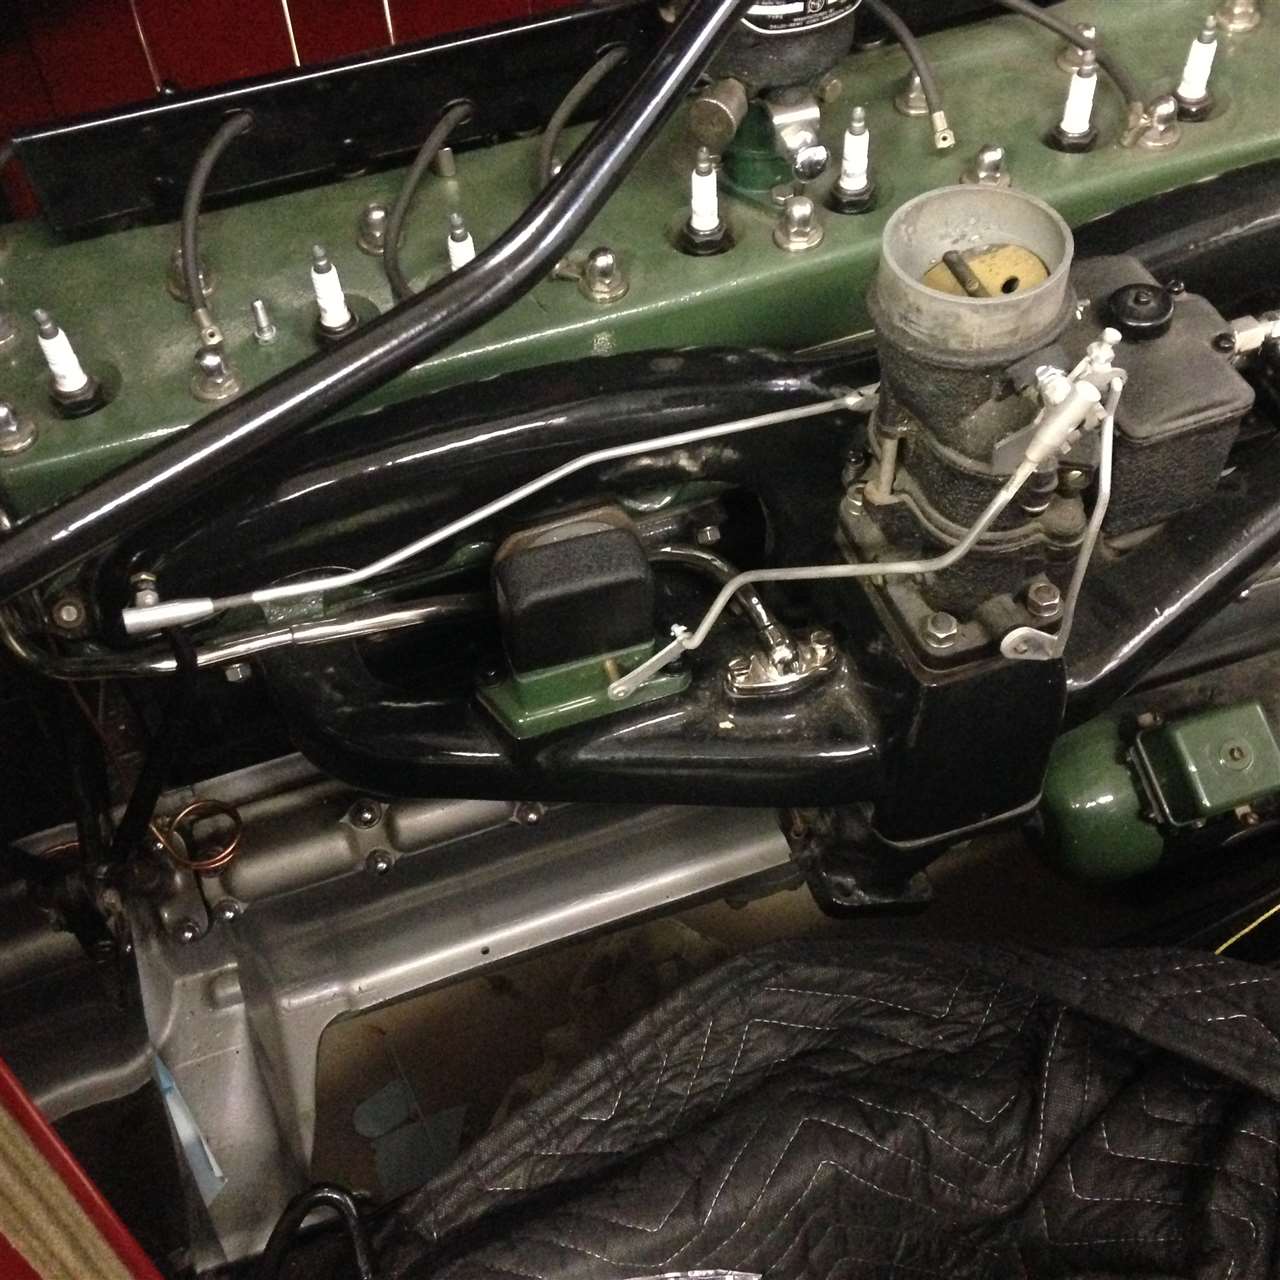 (131.95 KB) (131.95 KB)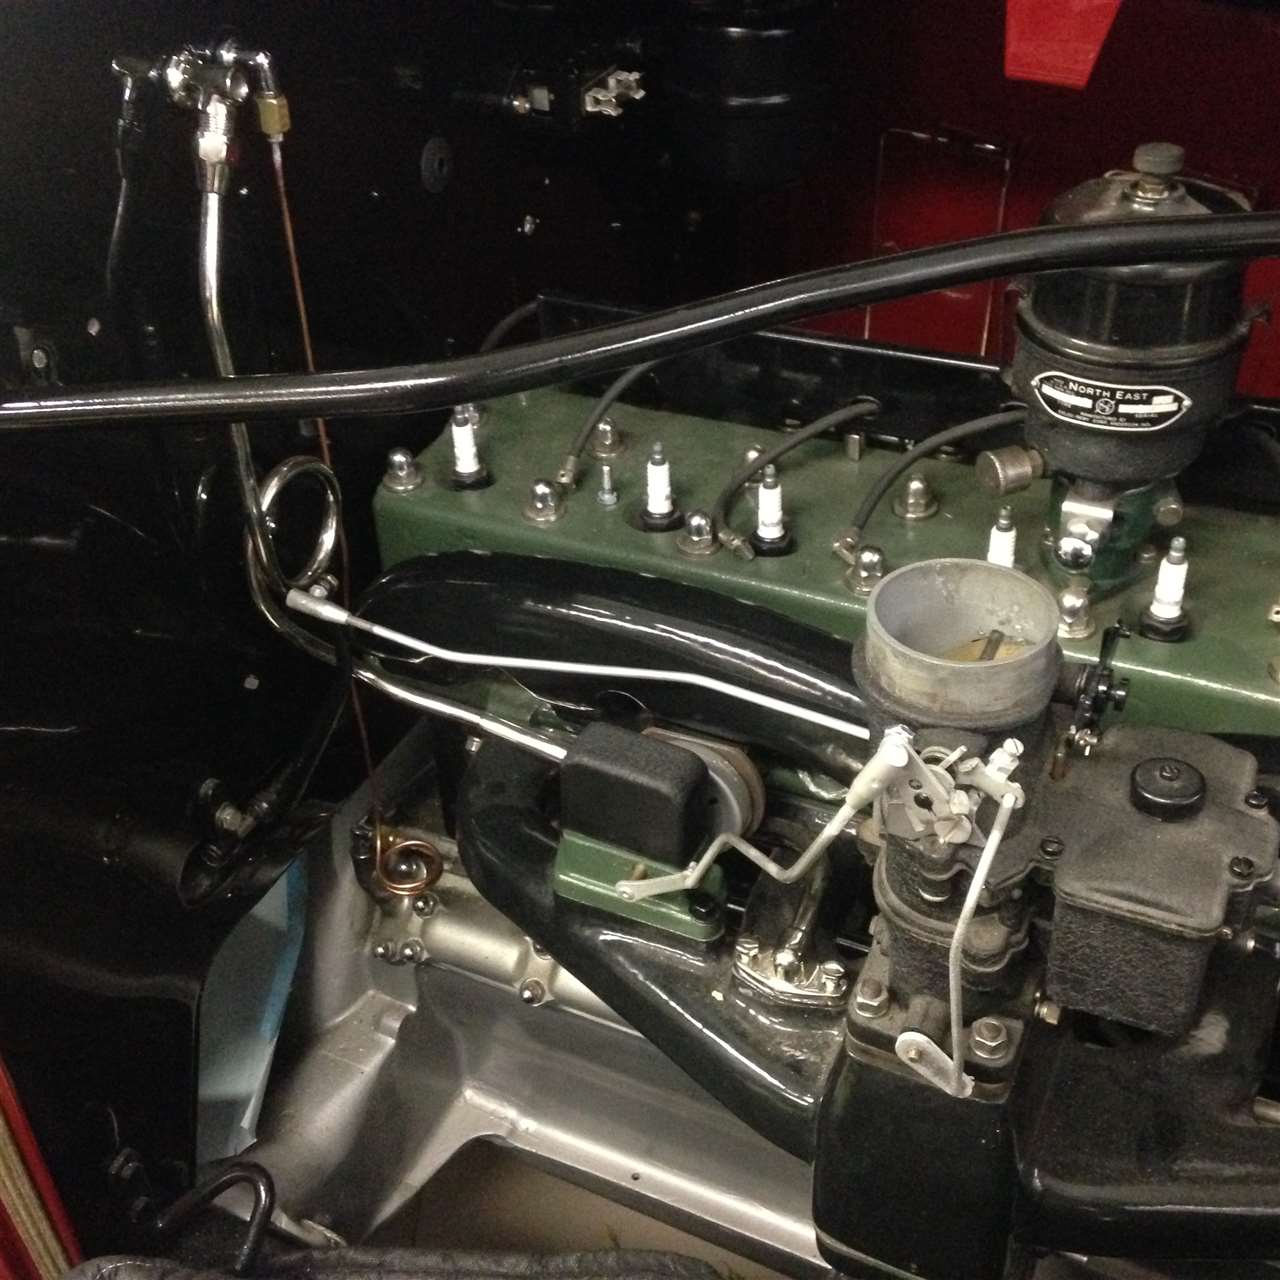 (128.23 KB) (128.23 KB)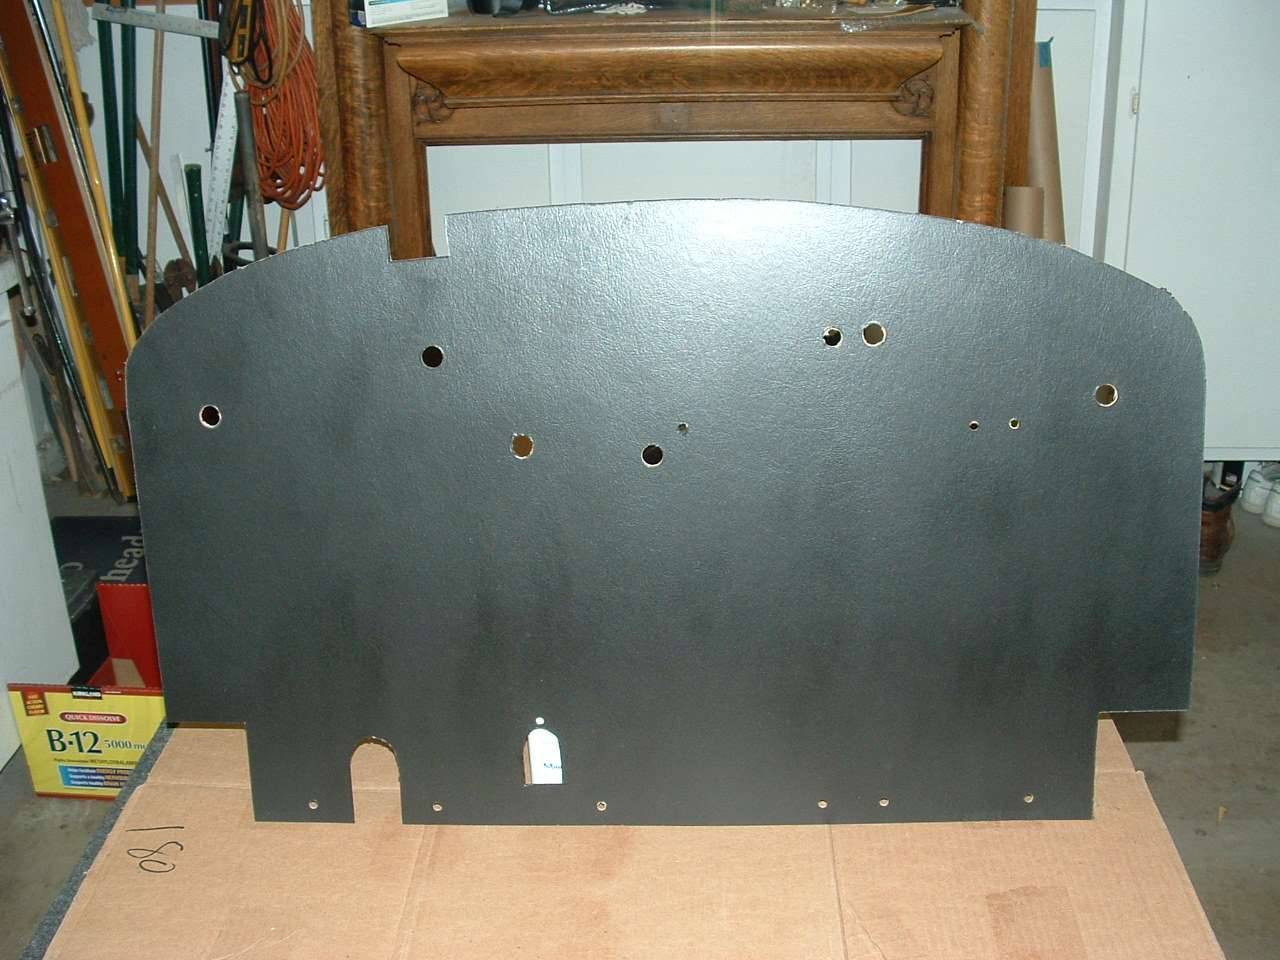 (129.96 KB) (129.96 KB)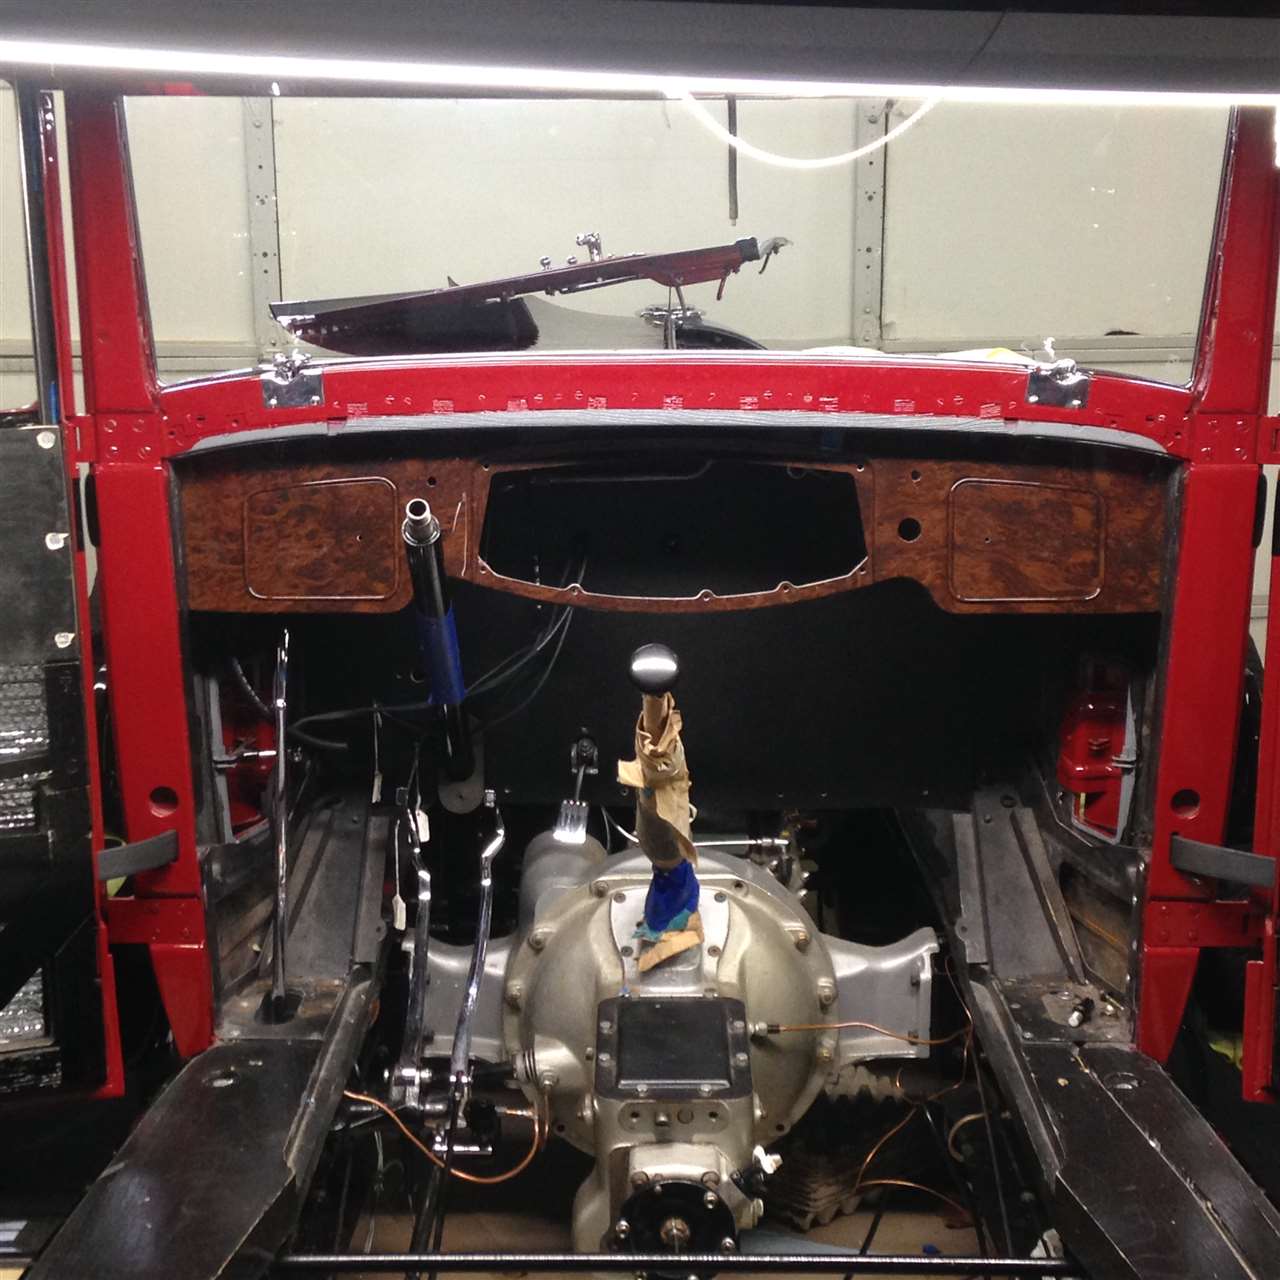
Posted on: 2016/2/1 9:45
|
|||
|
||||
|
Re: Our 1932 901
|
||||
|---|---|---|---|---|
|
Forum Ambassador
|
Lovely work, looking great!
The automatic choke linkage rod is available as a reproduction from Brian Joseph at Classic & Exotic and has been for some years. It differs a bit from yours in that it's a long sweeping arc rather than two distinct offseting bends. I know as I loaned him my original for the setup. The other link rod from the firewall to the carburetor is also available, either from Brian or from Packard Twin Six or both, though I don't know if it's the same rod you need given your conversion to downdraft. I believe I see the Bijur line for the throwout bearing, are you going to keep it active or pinch it off and install a sealed bearing? When I replaced my throwout bearing I decided to go with a sealed bearing and pinched the line off. With the correctly sized drip plug there shouldn't be a problem but I wanted to avoid the potential of excess oil getting on my nice new clutch.
Posted on: 2016/2/1 10:07
|
|||
|
||||


.jpg")


