Re: burned up ammeter 1941 160 coupe
Posted by Joe Santana On 2019/7/5 13:04:29
This may not help very much because it's from a '40 160 . . . I know the '41 dash seems very different . . .
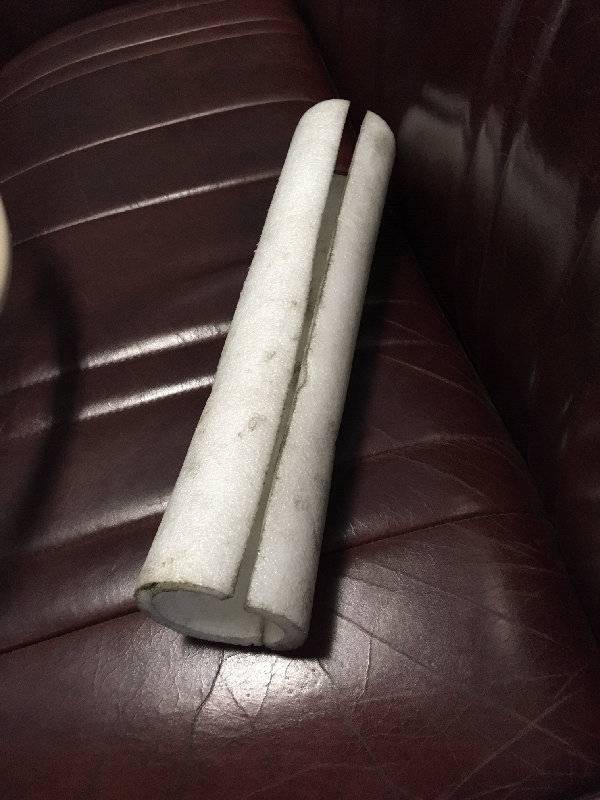
but when I work under the dash, for which I know I will spend a few extra days in purgatory for, I first remove the bottom seat cushion. I place a 2 ft section of pipe insulation over the forward section of the seat frame to cushion my back with a pillow on top. I stick 2 old pillows against the firewall to cushion my head and help keep it propped up. I lie across the floor looking up at the underside of the dash. My feet go out the passenger door, or sometimes up with my legs against the upper seat cushion.
This works well dealing with the glove box area, wipers or center section items such as light switch.
Other items like the starter switch, I remove the center/radio cover panel by pulling out the ashtray to access the nuts holding it on in its upper corners. I pull off the radio knobs and unscrew the radio retaining nuts. I push the radio toward the firewall and up. Then I can see the front row switches.
Trying to access the backside of the instrument panel from underneath is more of a challenge because of the steering wheel, column, and support being in the road, not to mention the brake and clutch pedal behind your head.
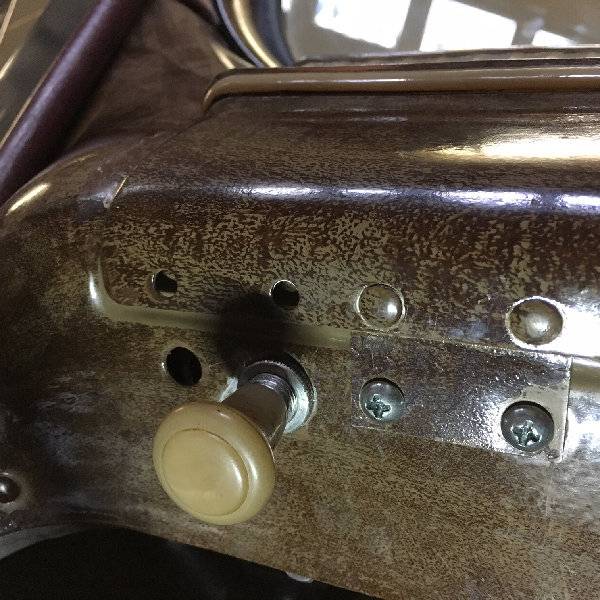
Coming home from my recent trip, the gas gauge needle was bouncing. Yesterday I inspected for a short, got my fingers on the gas gauge wire and wiggled them which made the needle flip and flop. Loose connection. I had to loosen the nuts retaining the instrument panel section of the dash. On my car there are 2 sets of 2 screws along the bottom edge of the dash. These can be easy to get out, but a bear for me to get back in. I replaced them with 1" screws I could push up and feel the ends of, so I could get the nuts on easily after. A little more twisting, but fewer days you know where.
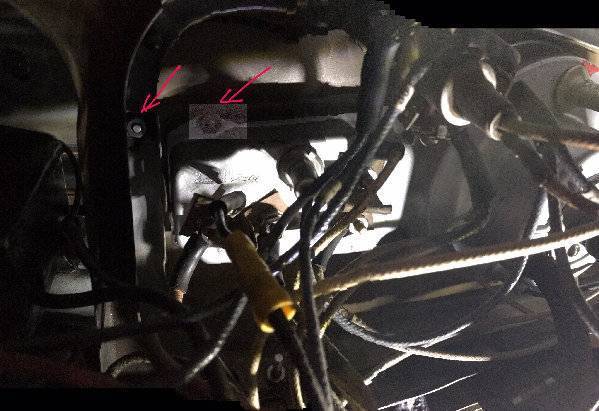
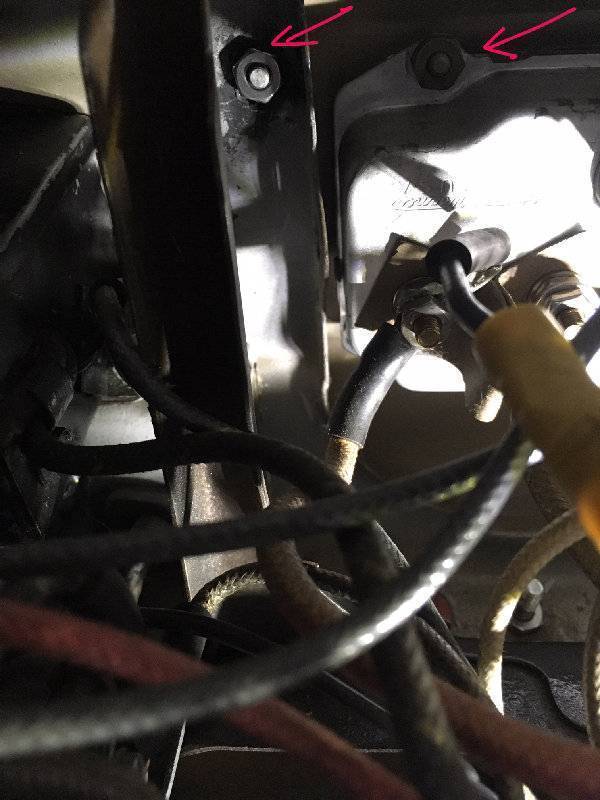
I only have two other retaining nuts ( I may have given up trying to replace others), one on left, which I can feel by putting a knee on the running board and reaching up above the handbrake handle, to the left of the upper left temp/oil gauge nut. The other I can reach by putting a 3/8" wrench on a diagonal down through the ash tray hole with my right hand, then sticking my fingers through the leftmost open segment where the radio and maplight go. The nut is just to the left of that at radio level and I use my fingers to hold the backside of the wrench against that nut. In the photos, one arrow points at one of the nuts retaining the actual instrument, which eventually have to come off to remove the instrument completely from the car. The other arrow points to a nut retaining the whole instrument panel...the ones I have to take off to access the instruments.
I also disconnect the overdrive indicator/panel light control by pulling off the top, unscrewing the bezel, and pushing the switch towards the firewall. This may not be absolutely necessary, but it allows the instrument panel to come toward you farther and provides better access to the ammeter/gas gauge.
Sorry I didn't take photos while everything was apart yesterday.
You could PM flackmaster to see if he has one. If not he can recommend someone.
Attach file:
 (183.72 KB)
(244.59 KB)
(294.79 KB)
(226.26 KB)

(232.35 KB)
but when I work under the dash, for which I know I will spend a few extra days in purgatory for, I first remove the bottom seat cushion. I place a 2 ft section of pipe insulation over the forward section of the seat frame to cushion my back with a pillow on top. I stick 2 old pillows against the firewall to cushion my head and help keep it propped up. I lie across the floor looking up at the underside of the dash. My feet go out the passenger door, or sometimes up with my legs against the upper seat cushion.
This works well dealing with the glove box area, wipers or center section items such as light switch.
Other items like the starter switch, I remove the center/radio cover panel by pulling out the ashtray to access the nuts holding it on in its upper corners. I pull off the radio knobs and unscrew the radio retaining nuts. I push the radio toward the firewall and up. Then I can see the front row switches.
Trying to access the backside of the instrument panel from underneath is more of a challenge because of the steering wheel, column, and support being in the road, not to mention the brake and clutch pedal behind your head.
Coming home from my recent trip, the gas gauge needle was bouncing. Yesterday I inspected for a short, got my fingers on the gas gauge wire and wiggled them which made the needle flip and flop. Loose connection. I had to loosen the nuts retaining the instrument panel section of the dash. On my car there are 2 sets of 2 screws along the bottom edge of the dash. These can be easy to get out, but a bear for me to get back in. I replaced them with 1" screws I could push up and feel the ends of, so I could get the nuts on easily after. A little more twisting, but fewer days you know where.
I only have two other retaining nuts ( I may have given up trying to replace others), one on left, which I can feel by putting a knee on the running board and reaching up above the handbrake handle, to the left of the upper left temp/oil gauge nut. The other I can reach by putting a 3/8" wrench on a diagonal down through the ash tray hole with my right hand, then sticking my fingers through the leftmost open segment where the radio and maplight go. The nut is just to the left of that at radio level and I use my fingers to hold the backside of the wrench against that nut. In the photos, one arrow points at one of the nuts retaining the actual instrument, which eventually have to come off to remove the instrument completely from the car. The other arrow points to a nut retaining the whole instrument panel...the ones I have to take off to access the instruments.
I also disconnect the overdrive indicator/panel light control by pulling off the top, unscrewing the bezel, and pushing the switch towards the firewall. This may not be absolutely necessary, but it allows the instrument panel to come toward you farther and provides better access to the ammeter/gas gauge.
Sorry I didn't take photos while everything was apart yesterday.
You could PM flackmaster to see if he has one. If not he can recommend someone.
Attach file:
(183.72 KB)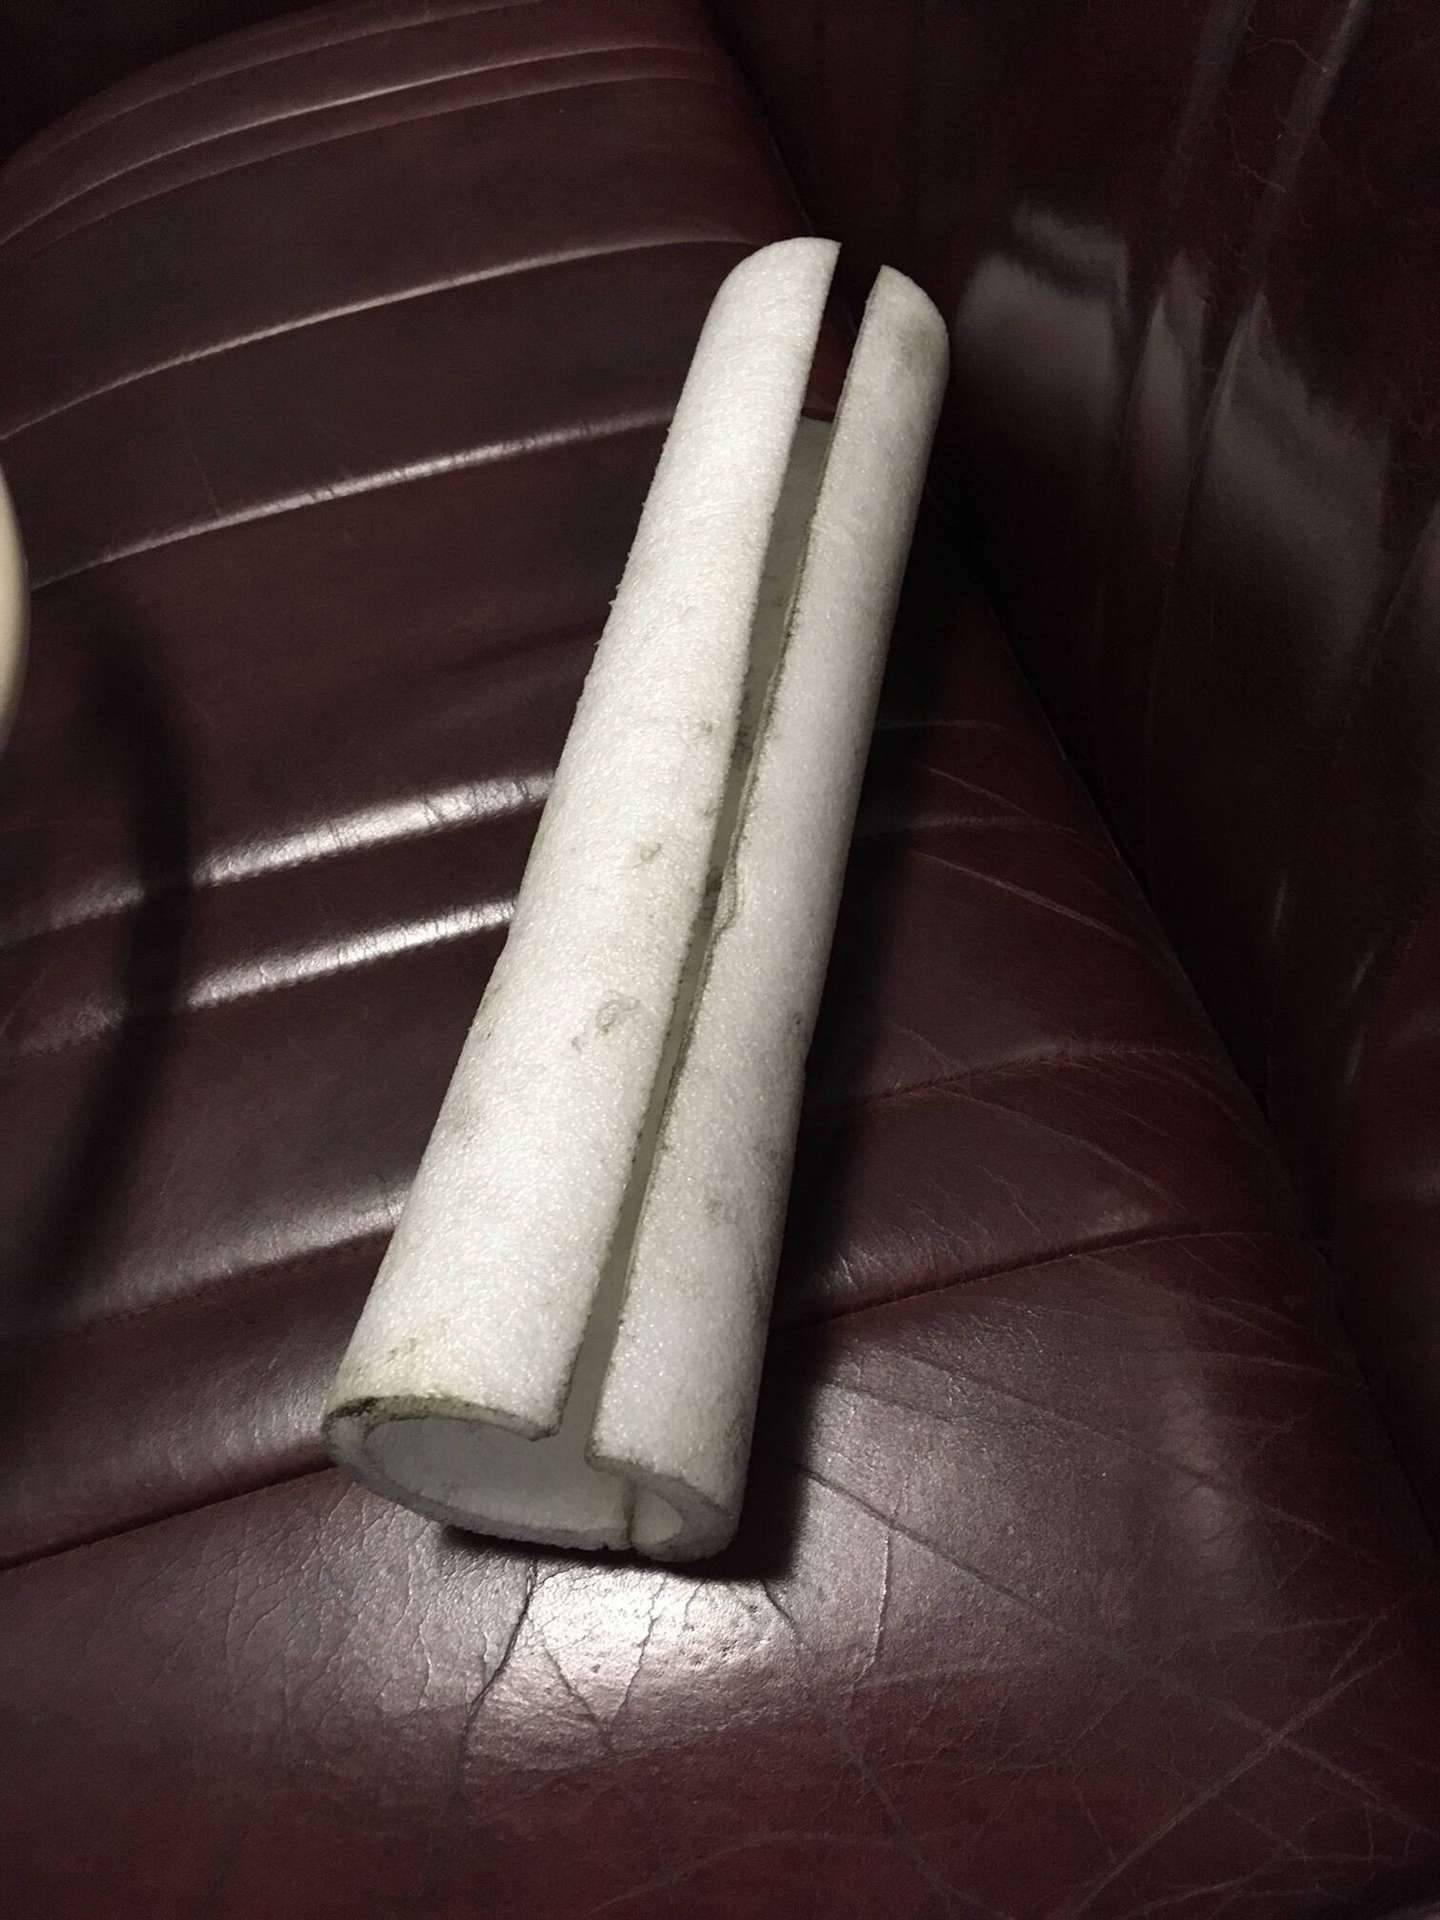 (244.59 KB)
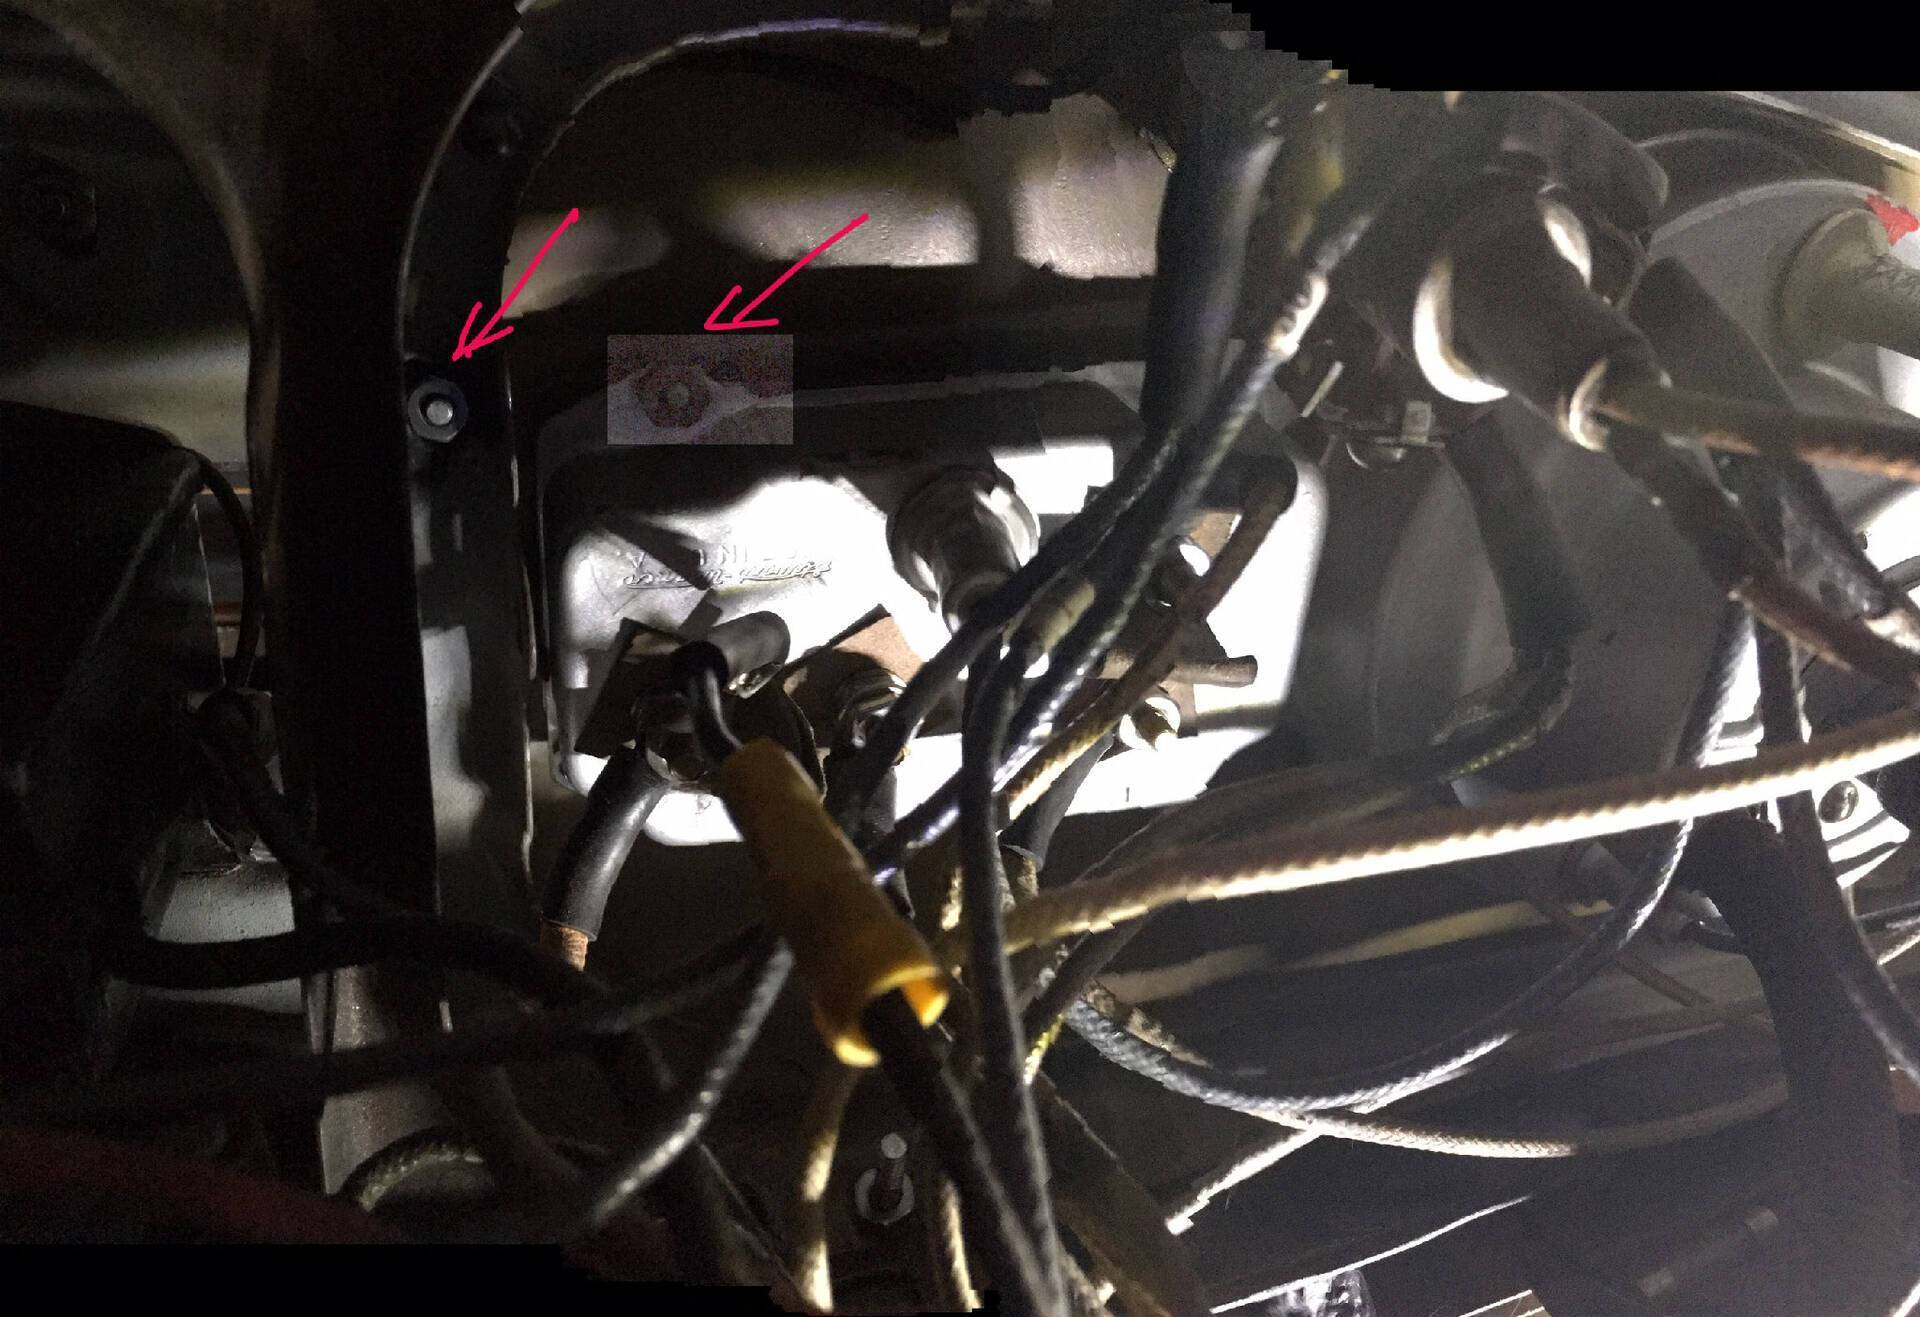 (294.79 KB)
 (226.26 KB)
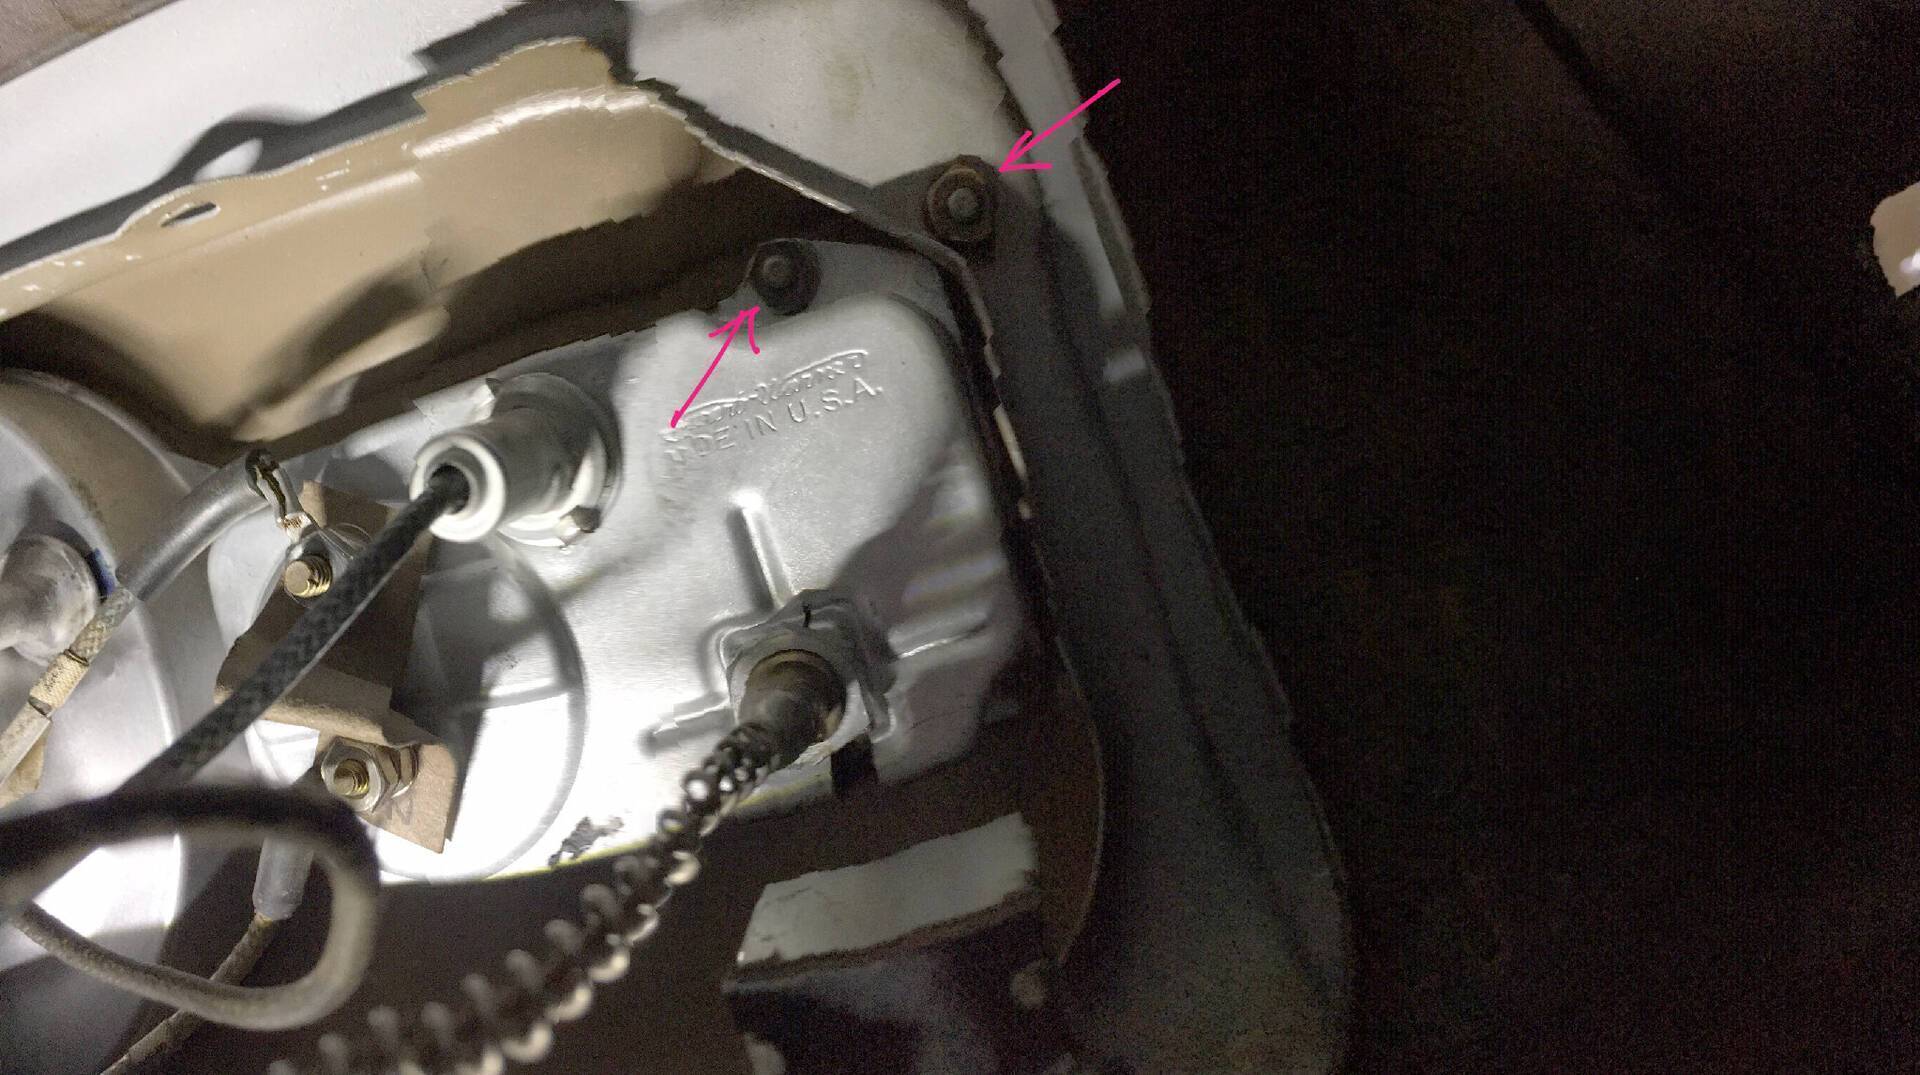 (232.35 KB)
This Post was from: https://packardinfo.com/xoops/html/modules/newbb/viewtopic.php?post_id=213115