Re: Howard's 47 Custom project
Posted by HH56 On 2013/11/3 15:41:24
To the originality guys, I'm sorry to report that I have not yet come to my senses and am still muddling around with the AC. Car may never move from it's present spot but as long as it has AC, things can't be all bad.  Anyway, made a few more decisions on the mounting and air path so have been working to implement them.
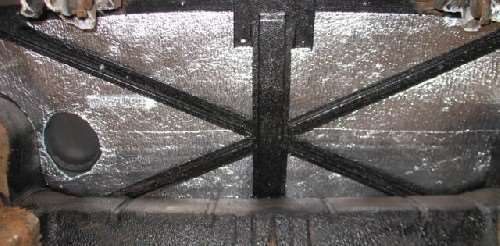
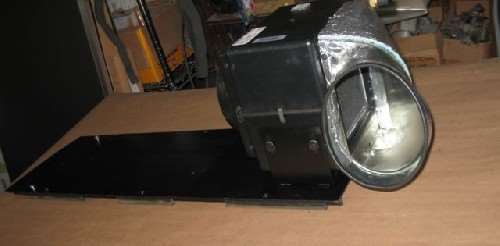
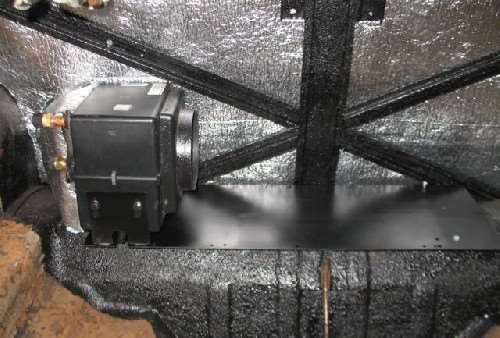
The spare tire created a bit of an issue in that the narrowest modern unit I could find is wider than the trunk shelf and would have covered a substantial portion of the tire well. The vertical body structure in the middle is sloped and prevented the complete unit from going any more toward the front. Decided to split the unit and put evaporator on one side of the structure and blower on the other connected by a large but narrower duct. That way the bulk of those items can fit into the space between the structural X channels without the vertical piece interfering. That lets the unit move forward and will allow the spare tire to be in it's regular place -- although it will be vertical instead of slightly tilted forward.
Made things so the entire assy is on a plate which will bolt in position and also support the 3 sided repro looking evaporator case a poster on another forum is making for me. Hopefully, when all is done, this AC will essentially resemble a Packard unit with very little if any modern to be seen. Once the false case arrives, will decide what else needs to be fabricated in the trunk.
I did have to make a substantial change in return air flow from the original to what is needed for this unit. The original had a duct setup which was under the evaporator and went down in front of the trunk shelf to open under the rear seat. To make that work here, I would have had to substantially rework the structural pieces behind the seat as well as figure out how to get air to the return side of the modern unit. As a consideration for the originality guys and the next owner, like all my mods, aside from a few small screw holes there will be no cutting or modifying done on the car and anything added can be easily removed with minimal traces left over.
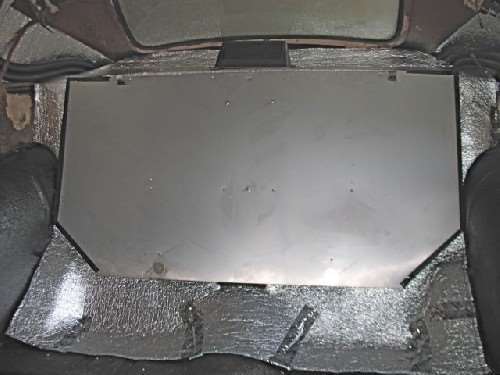
To that end, decided to make a thin plenum which fits behind the seat back. It will pull air from the top via two narrow grills at the front of package shelf on either side of the center outlet. The entire bottom of plenum is open to continue to pull air from under the seat. The evaporator return side fits into the plenum to complete the connection. The seat back is approx 7/8" forward of it's normal position but doesn't appear to be too noticeable. Bottom will be raised slightly for the air flow and may also move forward if comfort dictates -- but so far it seems to fit. Time will tell how effective the setup is.
At present I'm going with a single outlet in back and air is also ducted over the headliner to front. The single rear outlet for now is modern but the same gentleman is also working on a repro of the original style duct. If that duct should become available, have made things so it could be accommodated. Also have made sure a second rear duct could be added if I decide not to cut the headliner for the front air outlet and just live with the rear duct only setup.
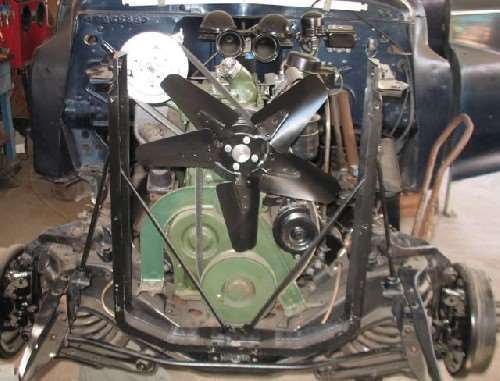
The compressor mount is the one thing that is not living up to expectations. I had wanted to use the original prewar bracket but am now thinking it is too bulky for the Sanden. That neat mount Ross came up with is looking better by the day and am seriously considering scrapping this mount and going with a version of his.
Attach file:
 (35.16 KB)
(18.34 KB)
(42.84 KB)
(30.46 KB)
(42.86 KB)
Anyway, made a few more decisions on the mounting and air path so have been working to implement them.The spare tire created a bit of an issue in that the narrowest modern unit I could find is wider than the trunk shelf and would have covered a substantial portion of the tire well. The vertical body structure in the middle is sloped and prevented the complete unit from going any more toward the front. Decided to split the unit and put evaporator on one side of the structure and blower on the other connected by a large but narrower duct. That way the bulk of those items can fit into the space between the structural X channels without the vertical piece interfering. That lets the unit move forward and will allow the spare tire to be in it's regular place -- although it will be vertical instead of slightly tilted forward.
Made things so the entire assy is on a plate which will bolt in position and also support the 3 sided repro looking evaporator case a poster on another forum is making for me. Hopefully, when all is done, this AC will essentially resemble a Packard unit with very little if any modern to be seen. Once the false case arrives, will decide what else needs to be fabricated in the trunk.
I did have to make a substantial change in return air flow from the original to what is needed for this unit. The original had a duct setup which was under the evaporator and went down in front of the trunk shelf to open under the rear seat. To make that work here, I would have had to substantially rework the structural pieces behind the seat as well as figure out how to get air to the return side of the modern unit. As a consideration for the originality guys and the next owner, like all my mods, aside from a few small screw holes there will be no cutting or modifying done on the car and anything added can be easily removed with minimal traces left over.
To that end, decided to make a thin plenum which fits behind the seat back. It will pull air from the top via two narrow grills at the front of package shelf on either side of the center outlet. The entire bottom of plenum is open to continue to pull air from under the seat. The evaporator return side fits into the plenum to complete the connection. The seat back is approx 7/8" forward of it's normal position but doesn't appear to be too noticeable. Bottom will be raised slightly for the air flow and may also move forward if comfort dictates -- but so far it seems to fit. Time will tell how effective the setup is.
At present I'm going with a single outlet in back and air is also ducted over the headliner to front. The single rear outlet for now is modern but the same gentleman is also working on a repro of the original style duct. If that duct should become available, have made things so it could be accommodated. Also have made sure a second rear duct could be added if I decide not to cut the headliner for the front air outlet and just live with the rear duct only setup.
The compressor mount is the one thing that is not living up to expectations. I had wanted to use the original prewar bracket but am now thinking it is too bulky for the Sanden. That neat mount Ross came up with is looking better by the day and am seriously considering scrapping this mount and going with a version of his.
Attach file:
(35.16 KB)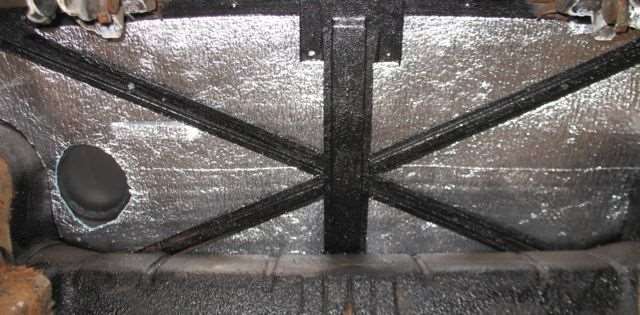 (18.34 KB)
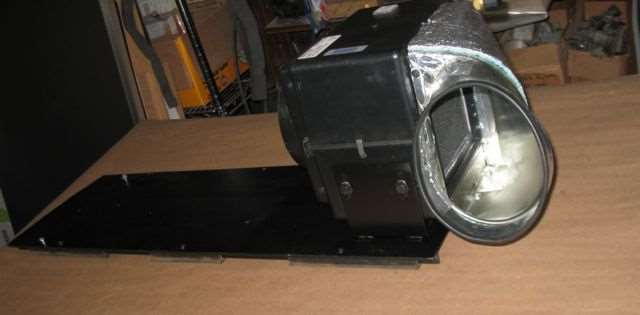 (42.84 KB)
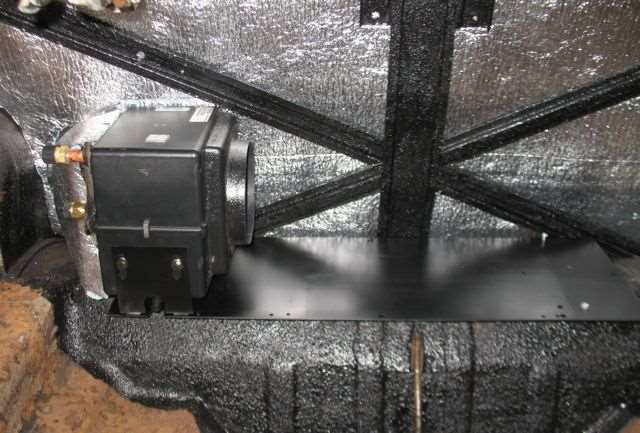 (30.46 KB)
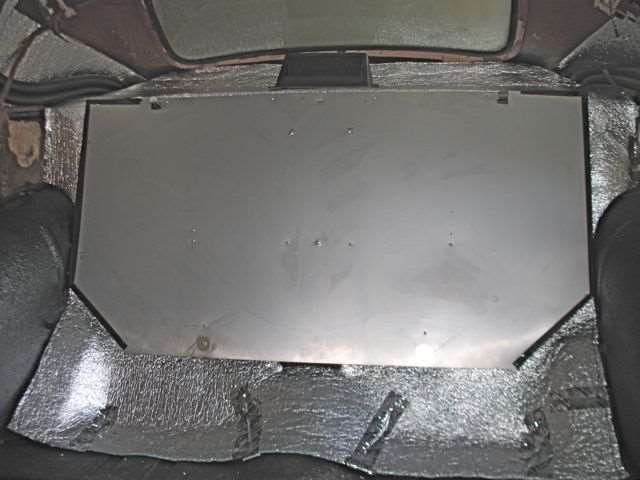 (42.86 KB)
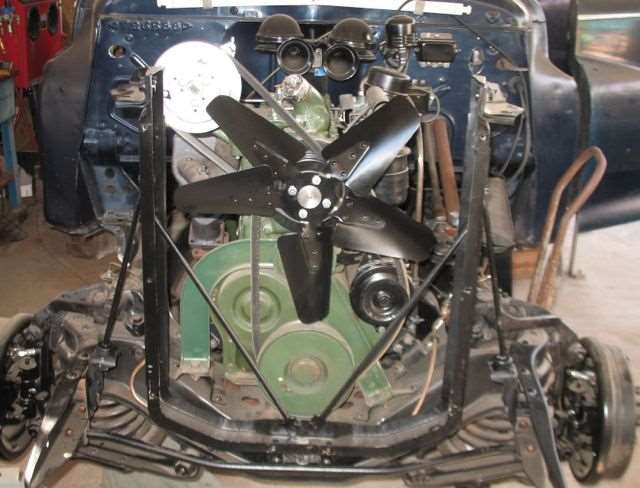
This Post was from: https://packardinfo.com/xoops/html/modules/newbb/viewtopic.php?post_id=134374