Re: Henry's 55 Constellation
Posted by Cli55er On 2009/3/23 23:10:27
text to go with above pictures i posted earlier:
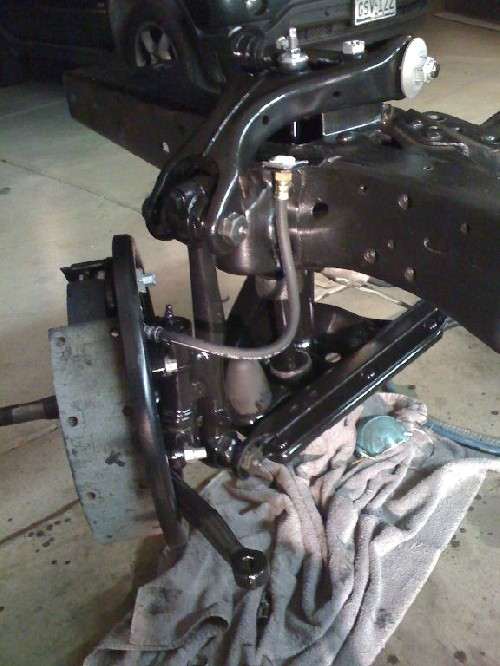
pressed the bushings in, which was harder to do on the lowers. i took out the old bushings with my air hammer. the lowers were harder to get out also. except on the side that was facing the motor as they were covered in oil and slide right out. the others were rusty and harder to get out. almost didn't get them out without breaking them up bad. no pictures of that process, sorry. i used the arm for leverage and hammered on the lip of the bushing and rotated from side to side and it rocked it right out.
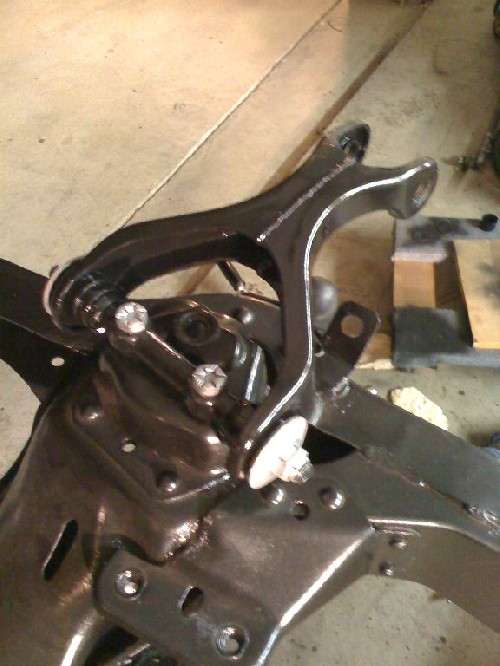
to get the new bushing into the lower arms, i had to find a way to keep the inner washer away from the arm. the reason was because it was resting on the base of the arbor and when i pressed the bushing wouldn't go any further as the inner washer wouldn't let it. so i wedge a spanner wrench i had for my Z3 between the inner washer and the body of the lower arm. the opening of the wrench was just enough to let the bushing pass through and the outside diameter of the wrench was just the right size of the inner washer. it still bent the washer a bit when i pressed, but i couldn't help that with what i had to work with. a little hammering afterwards bent it back. bit of advise, grease the bushings....i forgot to on the first lower a arm and it was a PITA to press in. the other one went much smoother. the upper arms were easy, luckily i had that HUGE socket that fit over the bushing perfect and still allowed the inner pin to move up past the bushing.
cleaned and painted the upper arms and lower arms and spindles. the king pins seemed to be okay, so i just greased them and let them be. i also reused my old outer bushings as they looked good too. i just used the rubber seals from the ones i got from MAX. there was so much grease on them before i cleaned them i just assumed they were bad i guess and went ahead and ordered new ones. probably see about returning the ones i got since i didn't use them.
i messed up the threads on the end of one of the upper a arm pins and had to go buy a big tap and die set to fix it, which worked great...but cost alot of money. oh well, maybe i will need them again some day.
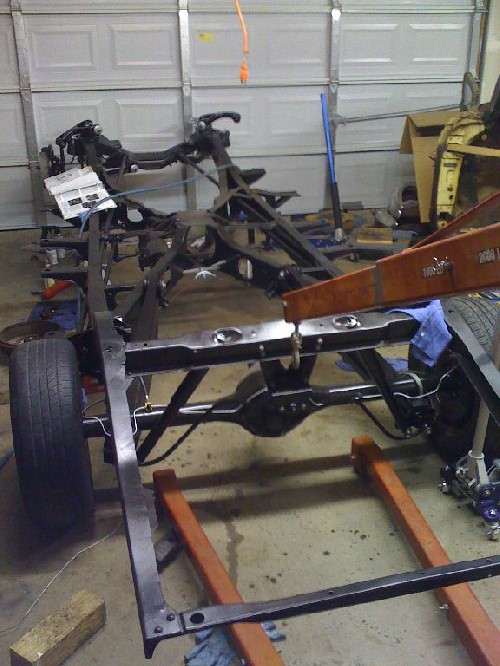
as you can see in the pictures, i pretty much spent the whole weekend winding the bars, cleaning parts, painting, and putting things together. which you wouldn't think was so bad, but honestly sand blasting wears me down bad, especially all those small pieces to do. it sux, but it is still better than the old way.
right now i am letting the passenger's side lower a arm soak along with spindle and steering arm. they are pretty caked in nasty dirty grease. worse than the driver's side. i already have the upper a arm mounted for the passenger's side and since, the storms are sorta rolling in the humidity went up and it is taking FOREVER for my paint to dry on all my parts, which sux. they dried much much faster this last weekend when it was warmer.
i got the front brakes done on the driver's side, which at one point when putting one of the springs on i decided to let go and punch myself in the face, which felt awesome!
this after accidently putting my hand in the air and almost cutting off my fingers in my metal bladed ceiling fan i have in the garage. again awesome and then while taking out the driver's side innner bearing seal decided it would be awesome to let it fly up into my face and bust my nose up. again super awesome! no worries i am still going
tomorrow will continue the excitement for me.....cleaning the lower arm up and more sand blasting, etc..
i can tell you this i will be taking off a while after this.
also if you buy the front brake lines from MAX you will need to dremmel out the holes that they mount to on the frame otherwise you wont get the clip on as they wont poke up through the hole high enough. they work, but you just need to make the hole a bit wider to let the brake hose rest on its circlip so you can get the upper circlip on. no biggie, just a heads up.
i was also told that the shock in the above photos seems to be an original design as it has the spiral in it. it is a delco shock. might be original i guess. thought that was kinda cool.
so now that you have read my novel, enjoy tonight's pictures.
later,
Hank
p.s. BigKev...if you want more silver cad, i found an pretty good equivalent at autozone by duplicolor and it cost about 3 times less than the stuff from eastwood and personally i like it better. it also seems to dry way faster too.
Attach file:
 (59.82 KB)

(55.80 KB)
(45.96 KB)
(59.98 KB)
pressed the bushings in, which was harder to do on the lowers. i took out the old bushings with my air hammer. the lowers were harder to get out also. except on the side that was facing the motor as they were covered in oil and slide right out. the others were rusty and harder to get out. almost didn't get them out without breaking them up bad. no pictures of that process, sorry. i used the arm for leverage and hammered on the lip of the bushing and rotated from side to side and it rocked it right out.
to get the new bushing into the lower arms, i had to find a way to keep the inner washer away from the arm. the reason was because it was resting on the base of the arbor and when i pressed the bushing wouldn't go any further as the inner washer wouldn't let it. so i wedge a spanner wrench i had for my Z3 between the inner washer and the body of the lower arm. the opening of the wrench was just enough to let the bushing pass through and the outside diameter of the wrench was just the right size of the inner washer. it still bent the washer a bit when i pressed, but i couldn't help that with what i had to work with. a little hammering afterwards bent it back. bit of advise, grease the bushings....i forgot to on the first lower a arm and it was a PITA to press in. the other one went much smoother. the upper arms were easy, luckily i had that HUGE socket that fit over the bushing perfect and still allowed the inner pin to move up past the bushing.
cleaned and painted the upper arms and lower arms and spindles. the king pins seemed to be okay, so i just greased them and let them be. i also reused my old outer bushings as they looked good too. i just used the rubber seals from the ones i got from MAX. there was so much grease on them before i cleaned them i just assumed they were bad i guess and went ahead and ordered new ones. probably see about returning the ones i got since i didn't use them.
i messed up the threads on the end of one of the upper a arm pins and had to go buy a big tap and die set to fix it, which worked great...but cost alot of money. oh well, maybe i will need them again some day.
as you can see in the pictures, i pretty much spent the whole weekend winding the bars, cleaning parts, painting, and putting things together. which you wouldn't think was so bad, but honestly sand blasting wears me down bad, especially all those small pieces to do. it sux, but it is still better than the old way.
right now i am letting the passenger's side lower a arm soak along with spindle and steering arm. they are pretty caked in nasty dirty grease. worse than the driver's side. i already have the upper a arm mounted for the passenger's side and since, the storms are sorta rolling in the humidity went up and it is taking FOREVER for my paint to dry on all my parts, which sux. they dried much much faster this last weekend when it was warmer.
i got the front brakes done on the driver's side, which at one point when putting one of the springs on i decided to let go and punch myself in the face, which felt awesome!
this after accidently putting my hand in the air and almost cutting off my fingers in my metal bladed ceiling fan i have in the garage. again awesome
and then while taking out the driver's side innner bearing seal decided it would be awesome to let it fly up into my face and bust my nose up. again super awesome! no worries i am still going tomorrow will continue the excitement for me.....cleaning the lower arm up and more sand blasting, etc..
i can tell you this i will be taking off a while after this.
also if you buy the front brake lines from MAX you will need to dremmel out the holes that they mount to on the frame otherwise you wont get the clip on as they wont poke up through the hole high enough. they work, but you just need to make the hole a bit wider to let the brake hose rest on its circlip so you can get the upper circlip on. no biggie, just a heads up.
i was also told that the shock in the above photos seems to be an original design as it has the spiral in it. it is a delco shock. might be original i guess. thought that was kinda cool.
so now that you have read my novel, enjoy tonight's pictures.
later,
Hank
p.s. BigKev...if you want more silver cad, i found an pretty good equivalent at autozone by duplicolor and it cost about 3 times less than the stuff from eastwood and personally i like it better. it also seems to dry way faster too.
Attach file:
(59.82 KB)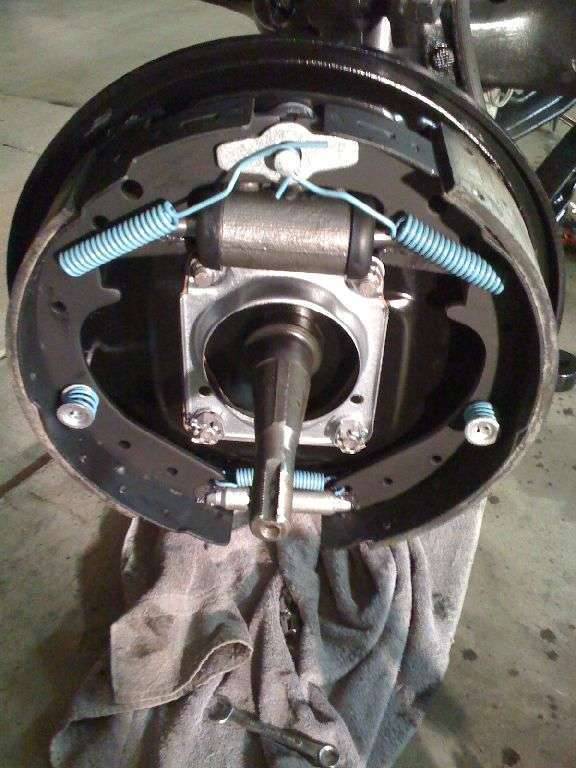 (55.80 KB)
 (45.96 KB)
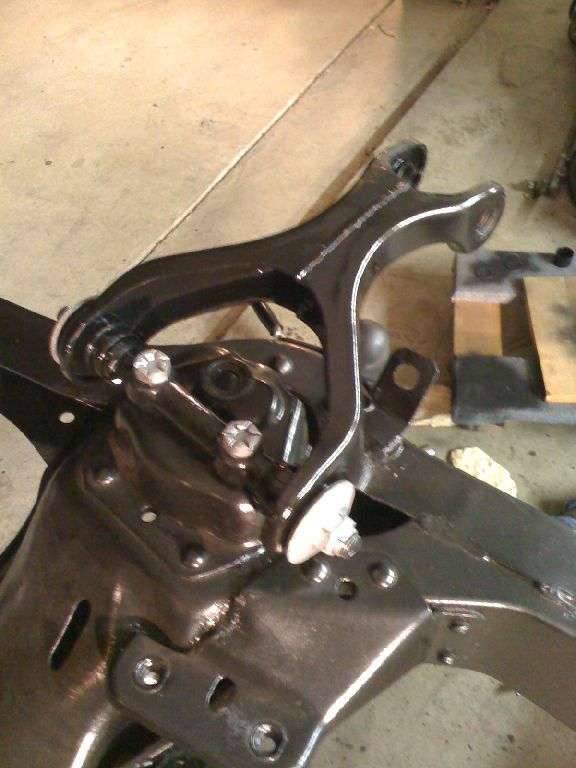 (59.98 KB)
This Post was from: https://packardinfo.com/xoops/html/modules/newbb/viewtopic.php?post_id=24480