Re: KPack
Posted by kevinpackard On 2023/4/9 14:34:17
Door panels are done, and nearly ready to go on the car. Once the last few bits are figured out then I can mount them. I also need to figure out a vapor barrier to put behind the door panels.
What follows is a lengthy diatribe on how I went about doing the upholstery. It may be of use to someone who is crazy enough to do it themselves. The photos are numbered according to the steps.
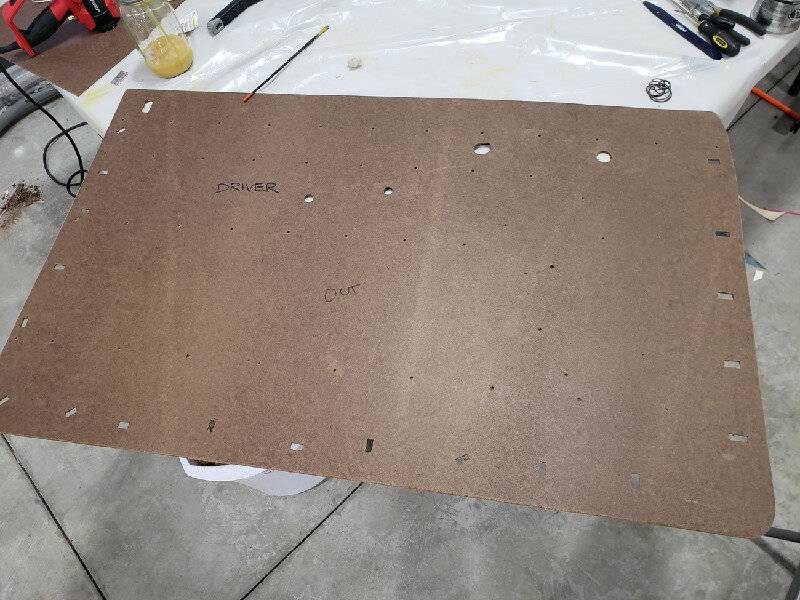
1.) I made the replacement panels out of 1/8 hardboard, readily available at Lowe's or Home Depot. It would have been better to use ABS or PVC plastic sheeting, but it's $100 a sheet vs $20 for the hardboard. This car required two 4x8 sheets. I used an old panel as a template, then tried it on the car and made adjustments.
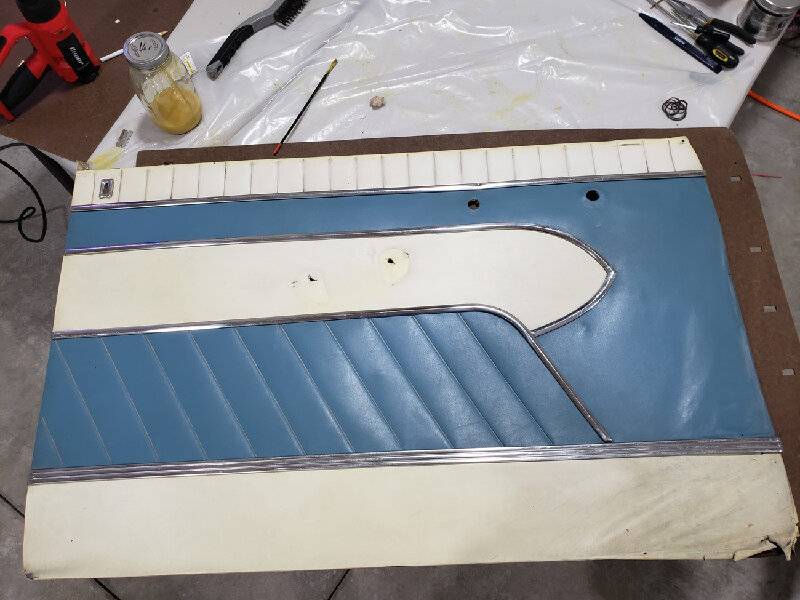
2.) The original panel was heavily faded, warped, and water damaged vinyl. This was the best panel I had out of the four. The stainless pieces will be reused.
3.) To remove the stainless trim, flip the panel over and carefully pry up on the tabs until they are all free. Some of them will be heavily rusted and will break. There isn't much you can do about that.
4.) Once all the trim is removed, straighten all the tabs out, then test fit on the new panel. Adjust holes as necessary.
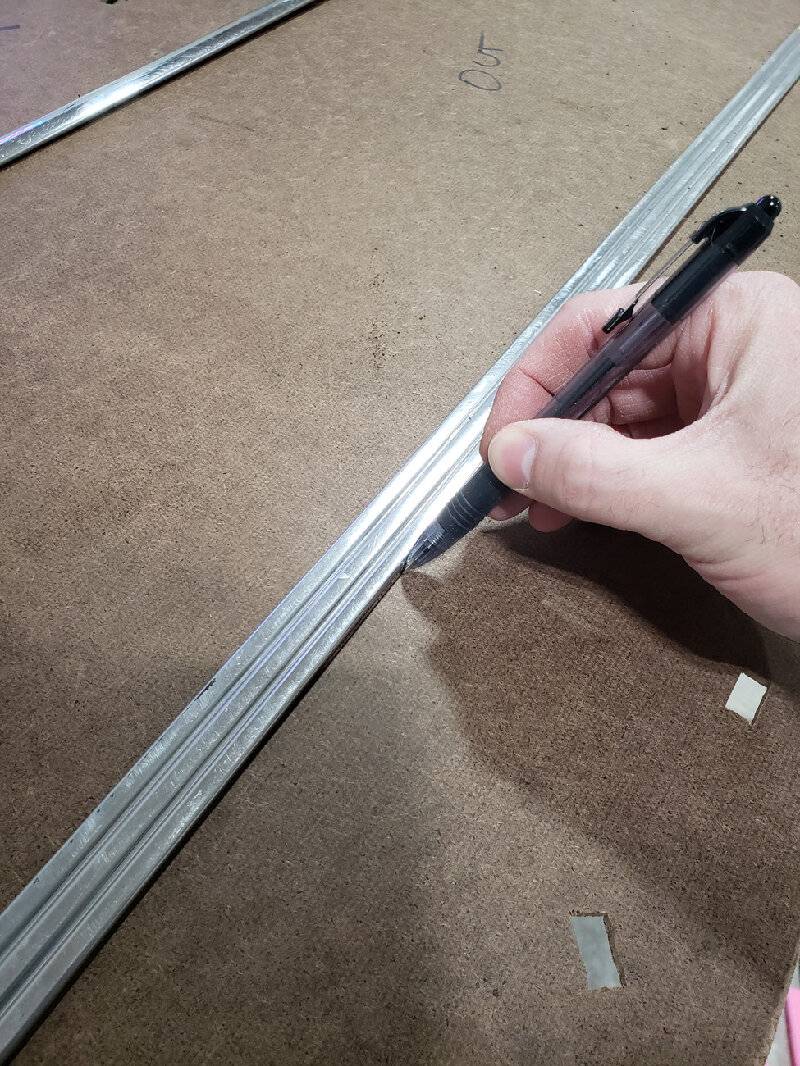
5.) The stainless trim hides all the junctions between the vinyl panels. It helps tremendously to mark where the stainless covers so that the vinyl and foam can be trimmed to fit within that space. I marked with a pen while the trim was in place. Then remove the trim.
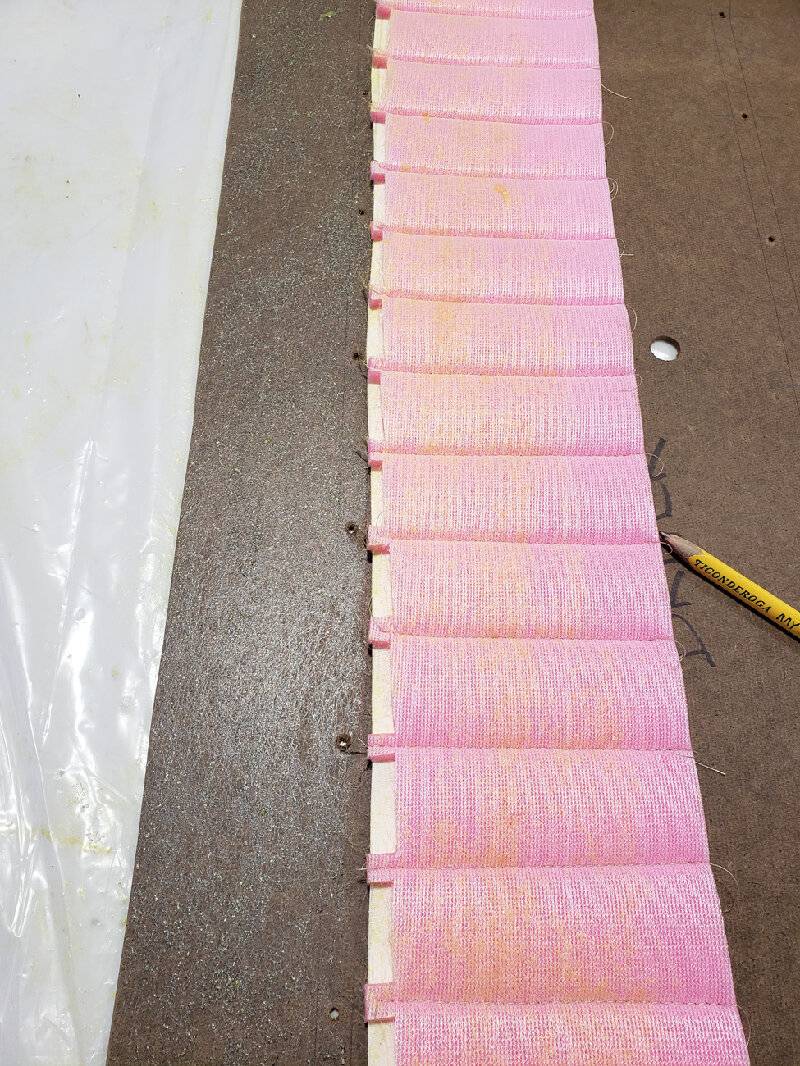
6.) The door panel has two panels that are pleated. I had an upholsterer sew those for me with a professional machine. The uppermost vinyl panel is pleated and will be the first one to mount to the board. To prepare the panel, a band of scrim foam needs to be removed so that it can sit under the stainless trim. Carefully use a razor to trim some off. Do not cut the sewn seams.
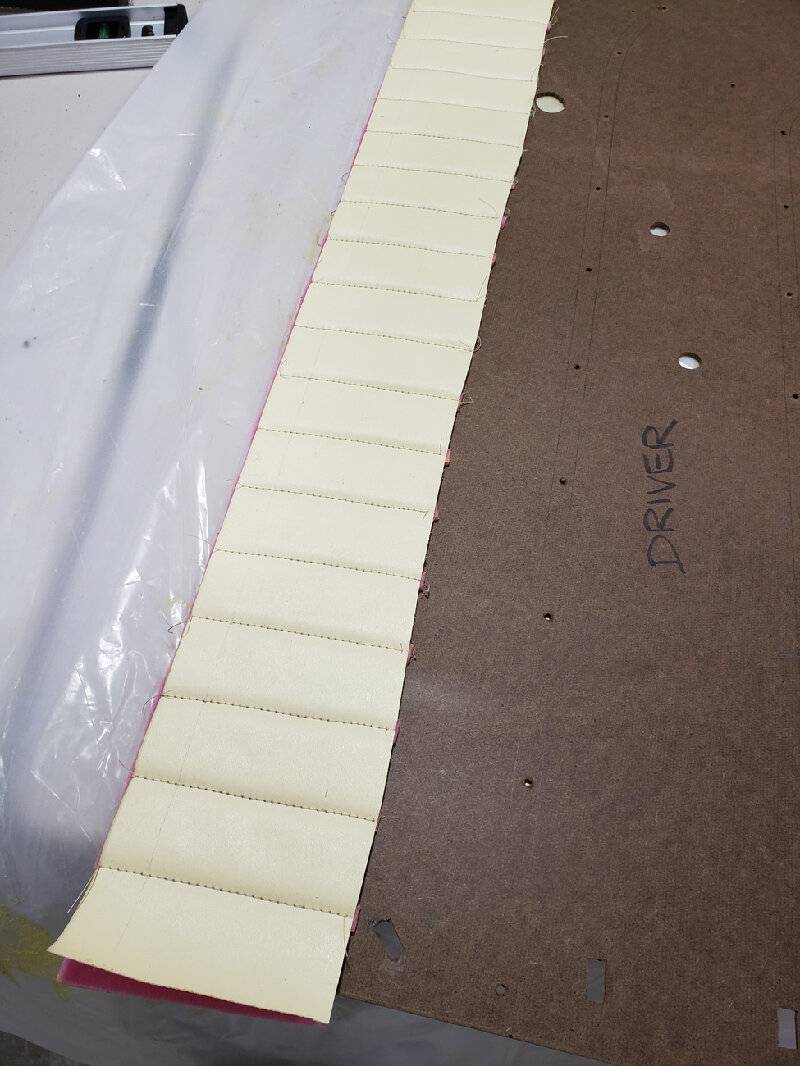
7.) Also prep the scrim foam for the other panels. The foam is 1/4" scrim, which has a cloth binding on one side to aid in sewing. It makes it easy to handle for gluing as well.
8.) Next spray contact adhesive on the door panel and on the foam/vinyl panel to be mounted. The best stuff to use is Weldwood's Landau Top and Trim adhesive. I used a cheap Harbor Freight sprayer to spray it. Somewhere between 30-40 PSI is what I used.
9.) Let the glue flash off for a few minutes then put the panel on the board. The adhesive will bond to itself. You can reposition a bit if needed.
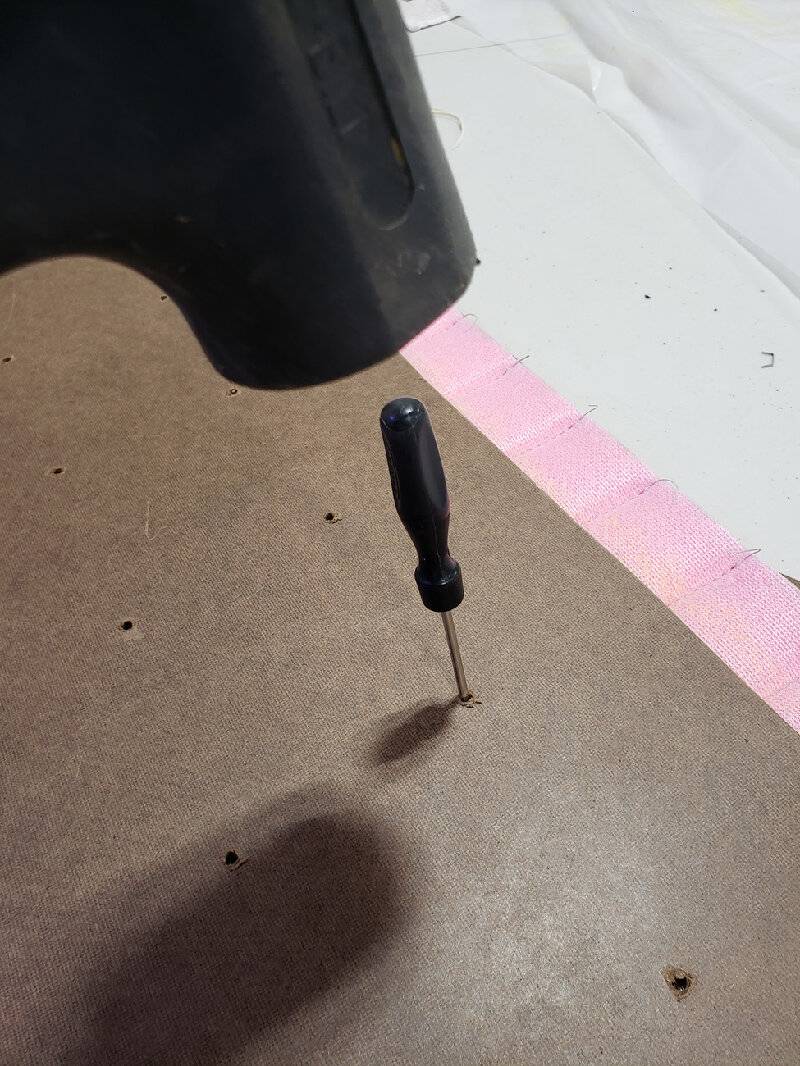
10.) Here's the best tip I can offer. This little trick made everything easier. Flip the door panel over, then find a small screwdriver or punch that fits in the holes for the stainless trim. Take a hammer and punch right through the holes. This will leave a small hole/mark on the front of the vinyl.
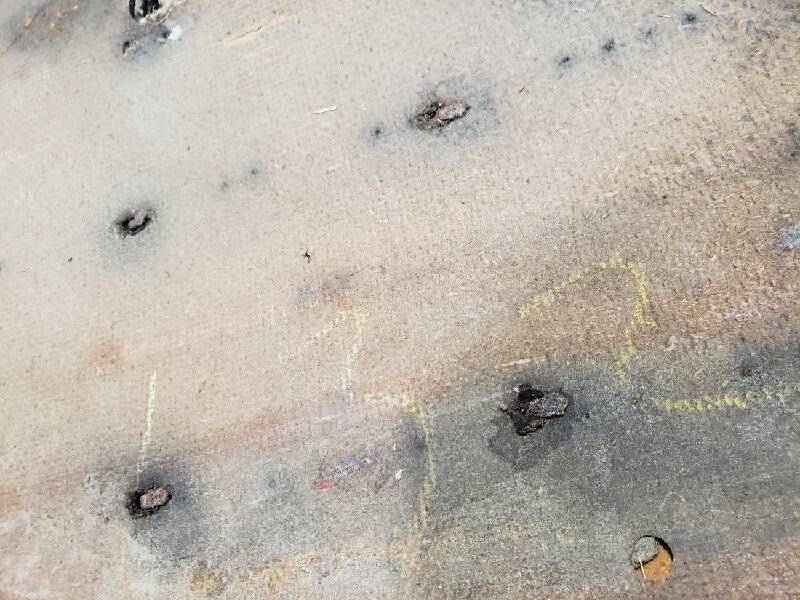
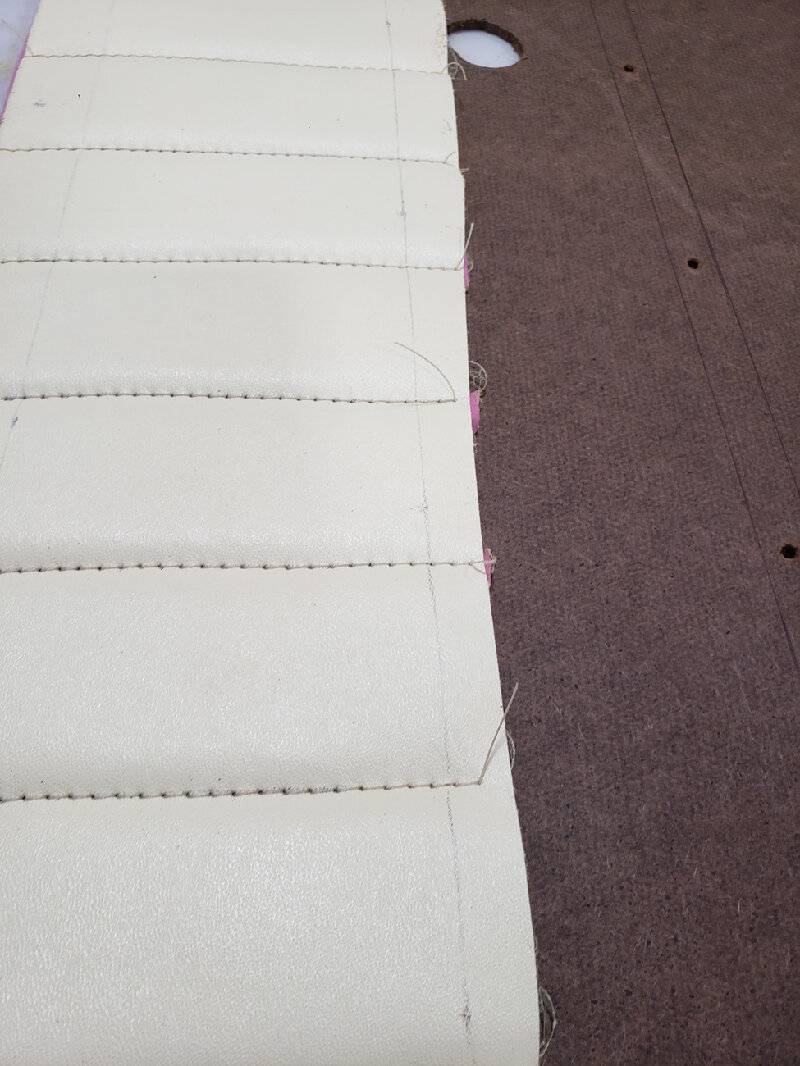
11.) Here's the mark seen from the front side. This marks the center point of the stainless trim.
12.) Mark a line through all the trim holes. This is the center of the stainless trim. Staples and edges of vinyl need to kept very close to this line so the stainless hides them.
Part 2 up next....
Attach file:
 1 - Replacement panel cut and tested.jpg (169.89 KB)
2 - Original panel.jpg (133.05 KB)
3 - Stainless trim tabs.jpg (222.35 KB)
4 - Test fitting stainless trim on new panel.jpg (162.96 KB)

5 - Trace outline of stainless trim.jpg (194.21 KB)
6 - Trim scrim foam on upper panel.jpg (177.64 KB)

7 - Trim foam to size.jpg (143.26 KB)

8 - Spray adhesive applied.jpg (215.56 KB)
9 - Upper panel glued in place.jpg (116.24 KB)
10 - Flip panel over and tap a punch through the trim holes.jpg (178.98 KB)
11 - Stainless trim holes marked.jpg (164.99 KB)

12 - Trim centerline marked.jpg (120.41 KB)
What follows is a lengthy diatribe on how I went about doing the upholstery. It may be of use to someone who is crazy enough to do it themselves. The photos are numbered according to the steps.
1.) I made the replacement panels out of 1/8 hardboard, readily available at Lowe's or Home Depot. It would have been better to use ABS or PVC plastic sheeting, but it's $100 a sheet vs $20 for the hardboard. This car required two 4x8 sheets. I used an old panel as a template, then tried it on the car and made adjustments.
2.) The original panel was heavily faded, warped, and water damaged vinyl. This was the best panel I had out of the four. The stainless pieces will be reused.
3.) To remove the stainless trim, flip the panel over and carefully pry up on the tabs until they are all free. Some of them will be heavily rusted and will break. There isn't much you can do about that.
4.) Once all the trim is removed, straighten all the tabs out, then test fit on the new panel. Adjust holes as necessary.
5.) The stainless trim hides all the junctions between the vinyl panels. It helps tremendously to mark where the stainless covers so that the vinyl and foam can be trimmed to fit within that space. I marked with a pen while the trim was in place. Then remove the trim.
6.) The door panel has two panels that are pleated. I had an upholsterer sew those for me with a professional machine. The uppermost vinyl panel is pleated and will be the first one to mount to the board. To prepare the panel, a band of scrim foam needs to be removed so that it can sit under the stainless trim. Carefully use a razor to trim some off. Do not cut the sewn seams.
7.) Also prep the scrim foam for the other panels. The foam is 1/4" scrim, which has a cloth binding on one side to aid in sewing. It makes it easy to handle for gluing as well.
8.) Next spray contact adhesive on the door panel and on the foam/vinyl panel to be mounted. The best stuff to use is Weldwood's Landau Top and Trim adhesive. I used a cheap Harbor Freight sprayer to spray it. Somewhere between 30-40 PSI is what I used.
9.) Let the glue flash off for a few minutes then put the panel on the board. The adhesive will bond to itself. You can reposition a bit if needed.
10.) Here's the best tip I can offer. This little trick made everything easier. Flip the door panel over, then find a small screwdriver or punch that fits in the holes for the stainless trim. Take a hammer and punch right through the holes. This will leave a small hole/mark on the front of the vinyl.
11.) Here's the mark seen from the front side. This marks the center point of the stainless trim.
12.) Mark a line through all the trim holes. This is the center of the stainless trim. Staples and edges of vinyl need to kept very close to this line so the stainless hides them.
Part 2 up next....
Attach file:
1 - Replacement panel cut and tested.jpg (169.89 KB) 2 - Original panel.jpg (133.05 KB)
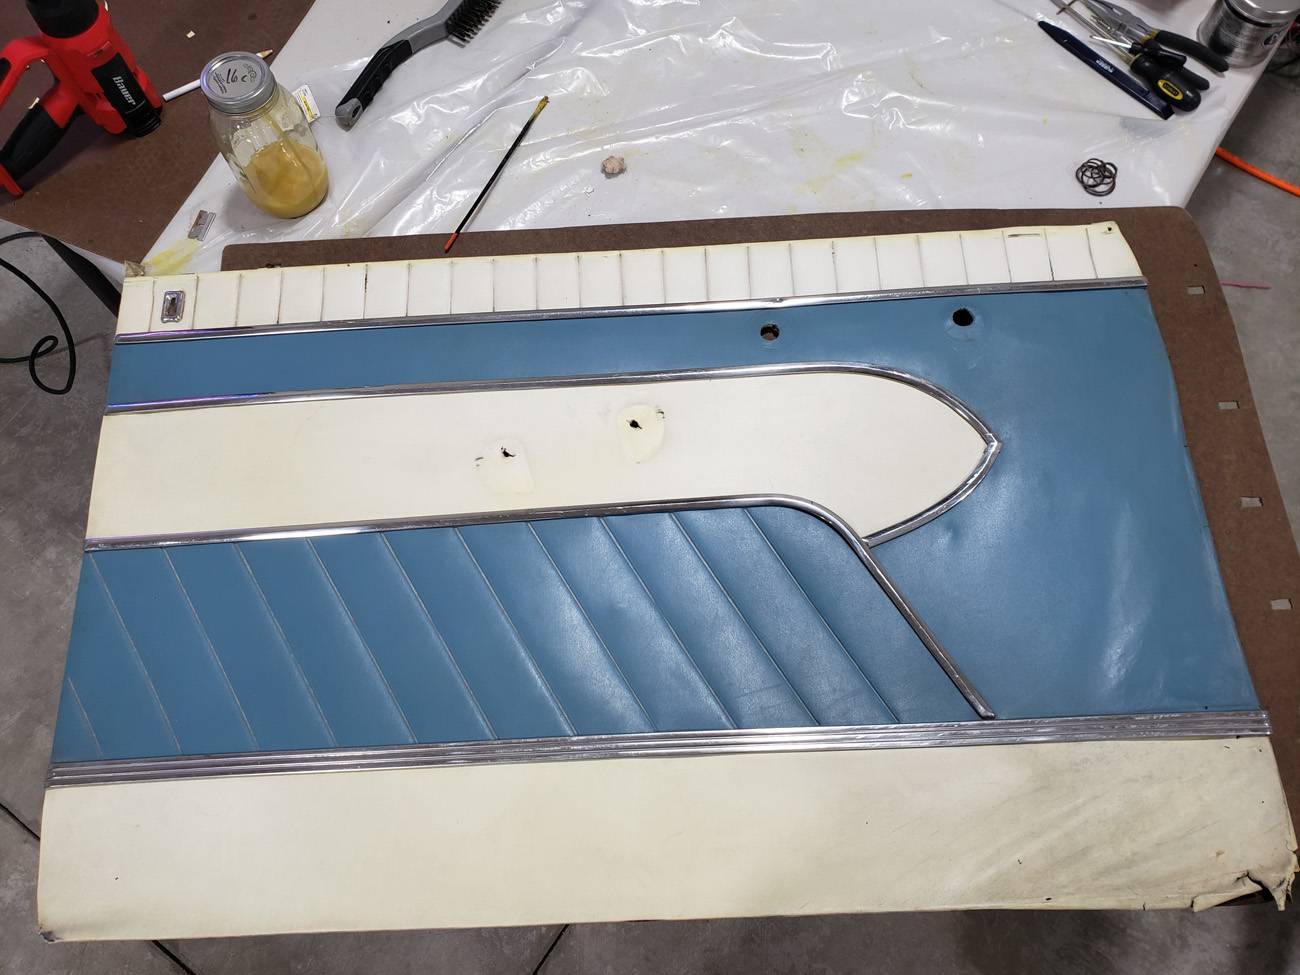 3 - Stainless trim tabs.jpg (222.35 KB)
 4 - Test fitting stainless trim on new panel.jpg (162.96 KB)
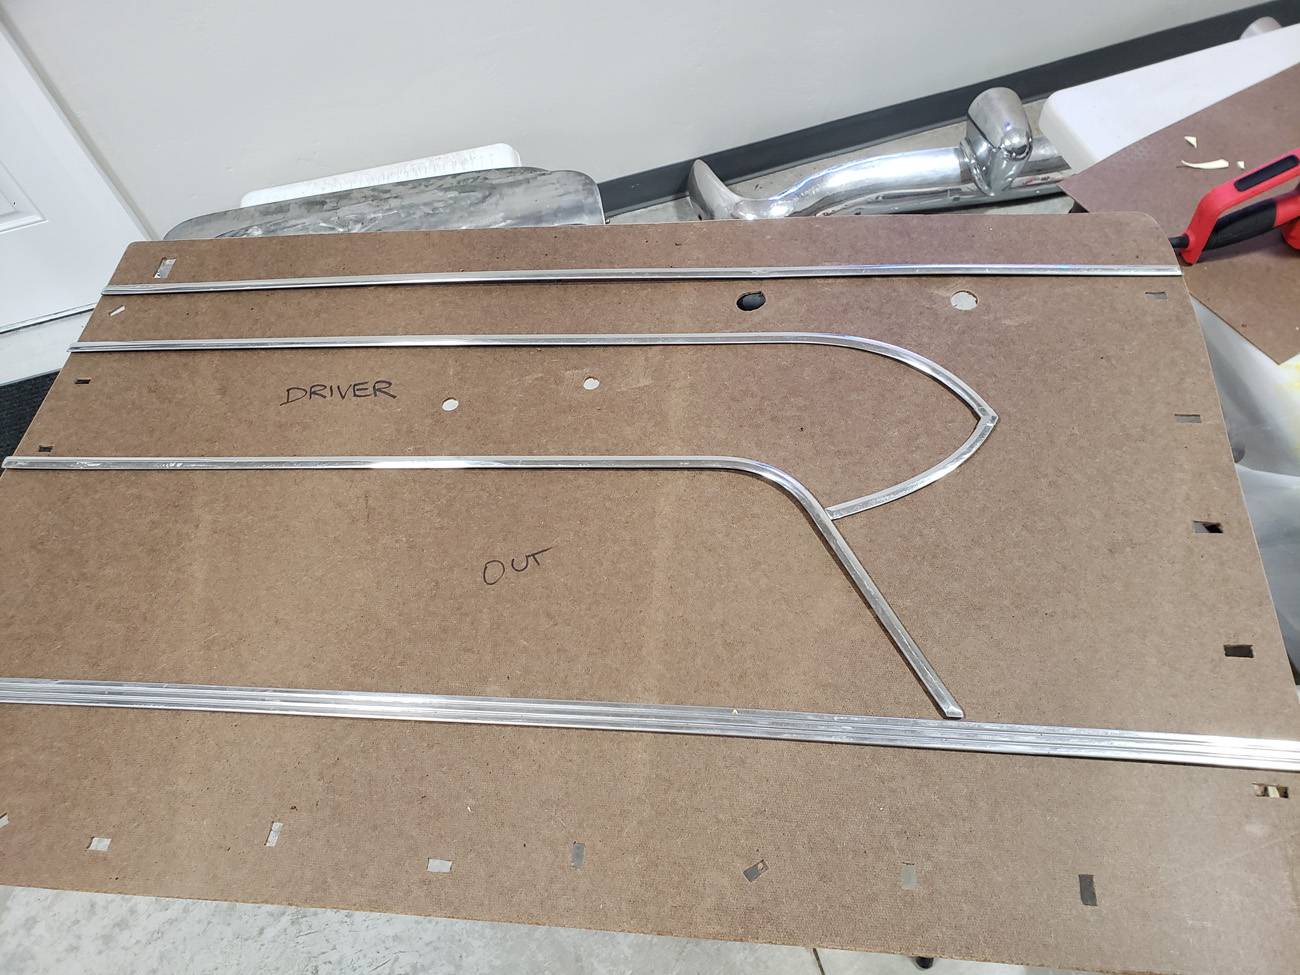 5 - Trace outline of stainless trim.jpg (194.21 KB)
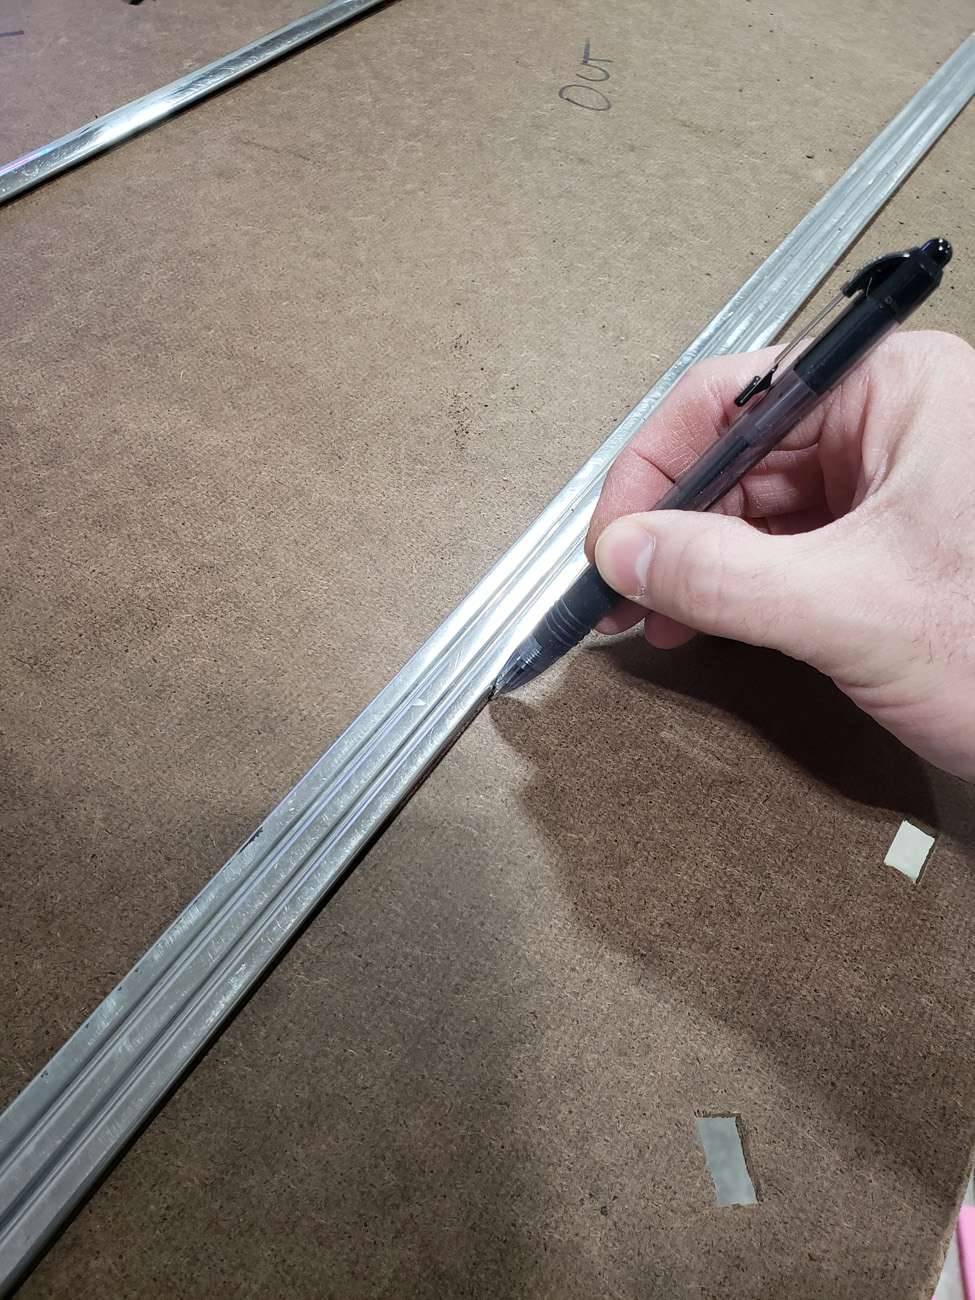 6 - Trim scrim foam on upper panel.jpg (177.64 KB)
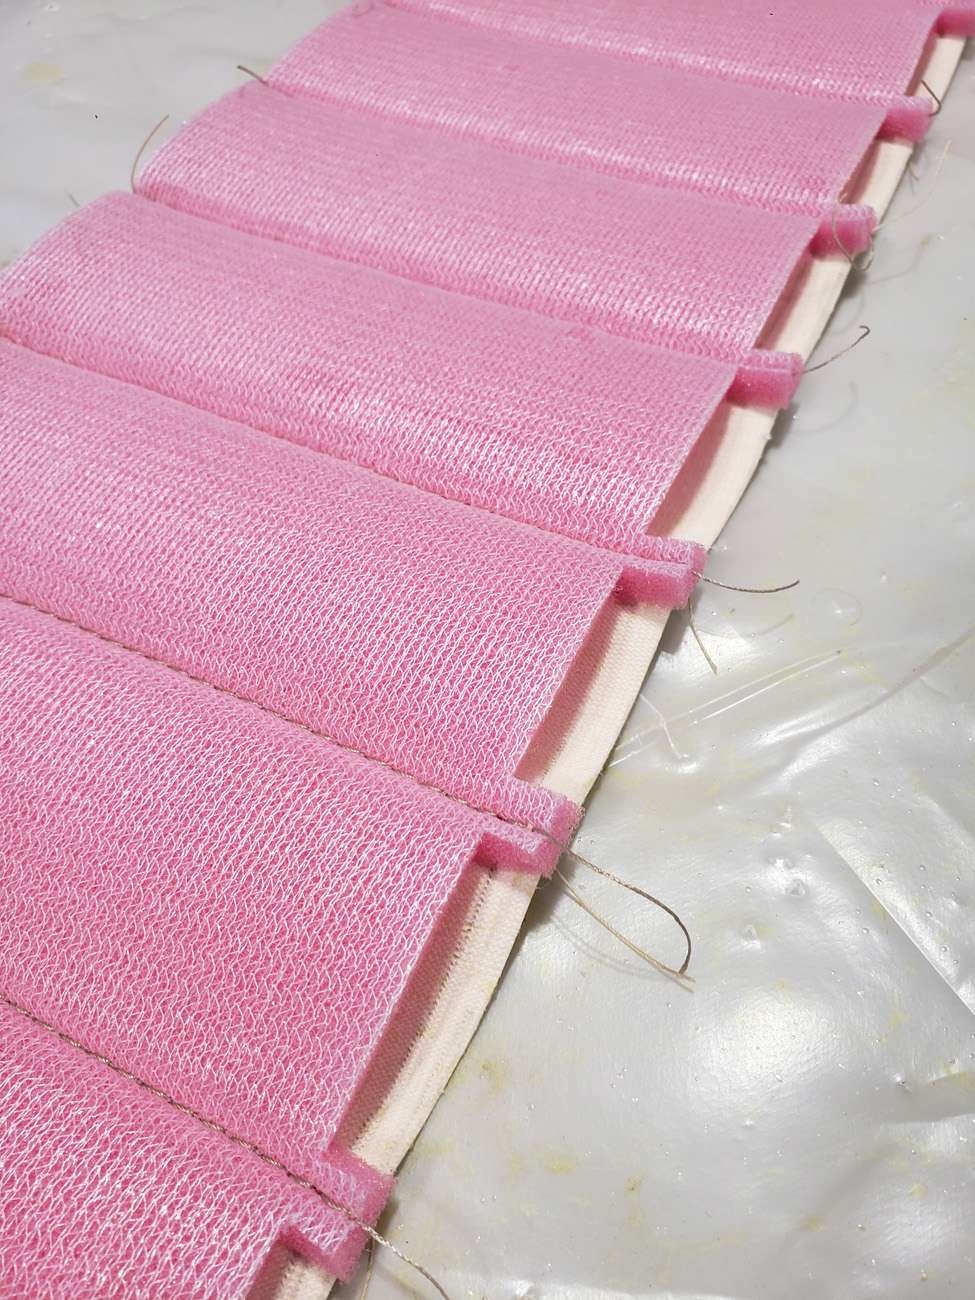 7 - Trim foam to size.jpg (143.26 KB)
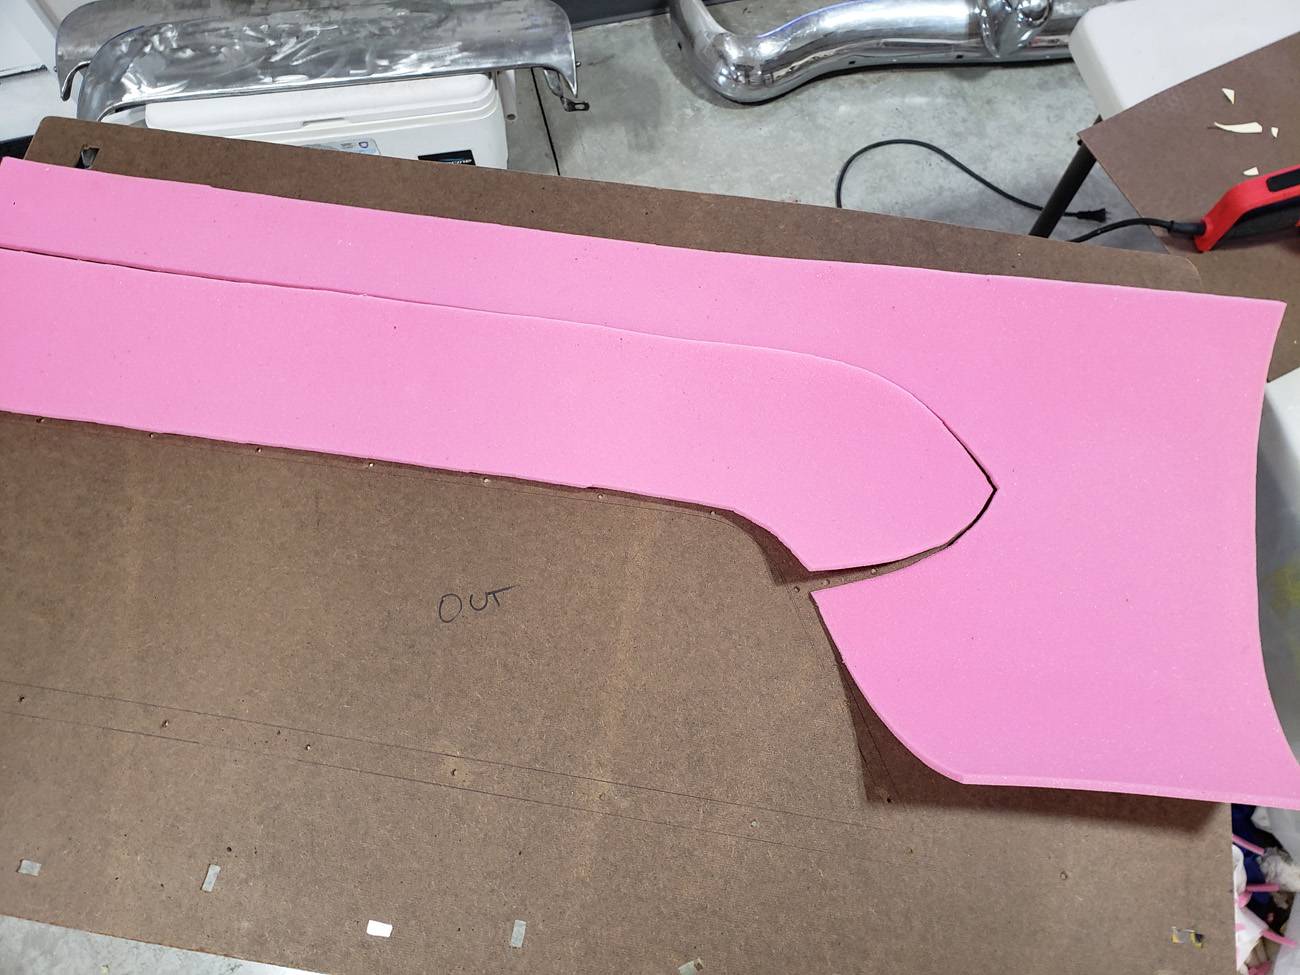 8 - Spray adhesive applied.jpg (215.56 KB)
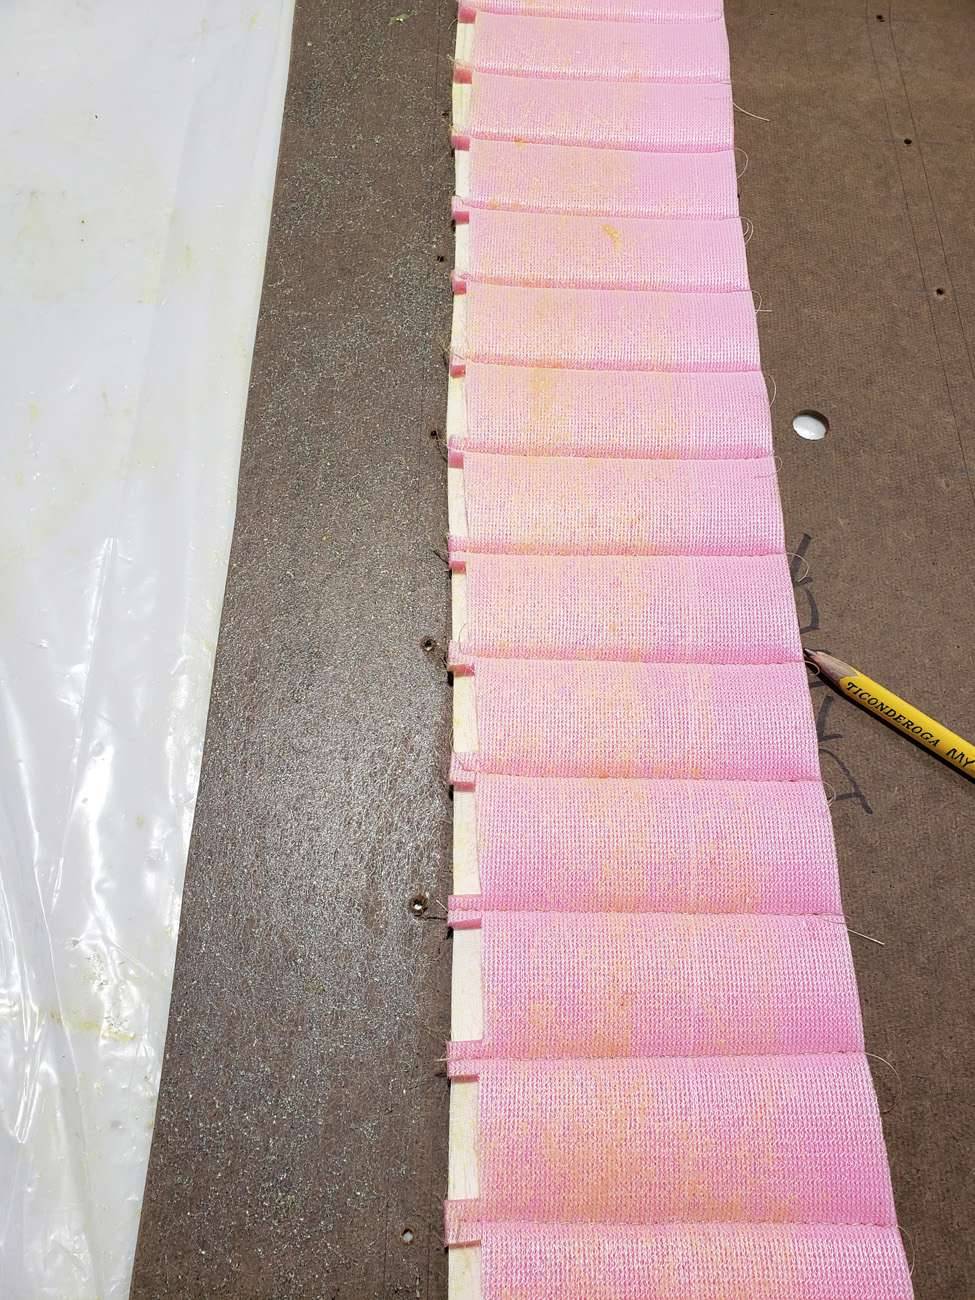 9 - Upper panel glued in place.jpg (116.24 KB)
 10 - Flip panel over and tap a punch through the trim holes.jpg (178.98 KB)
 11 - Stainless trim holes marked.jpg (164.99 KB)
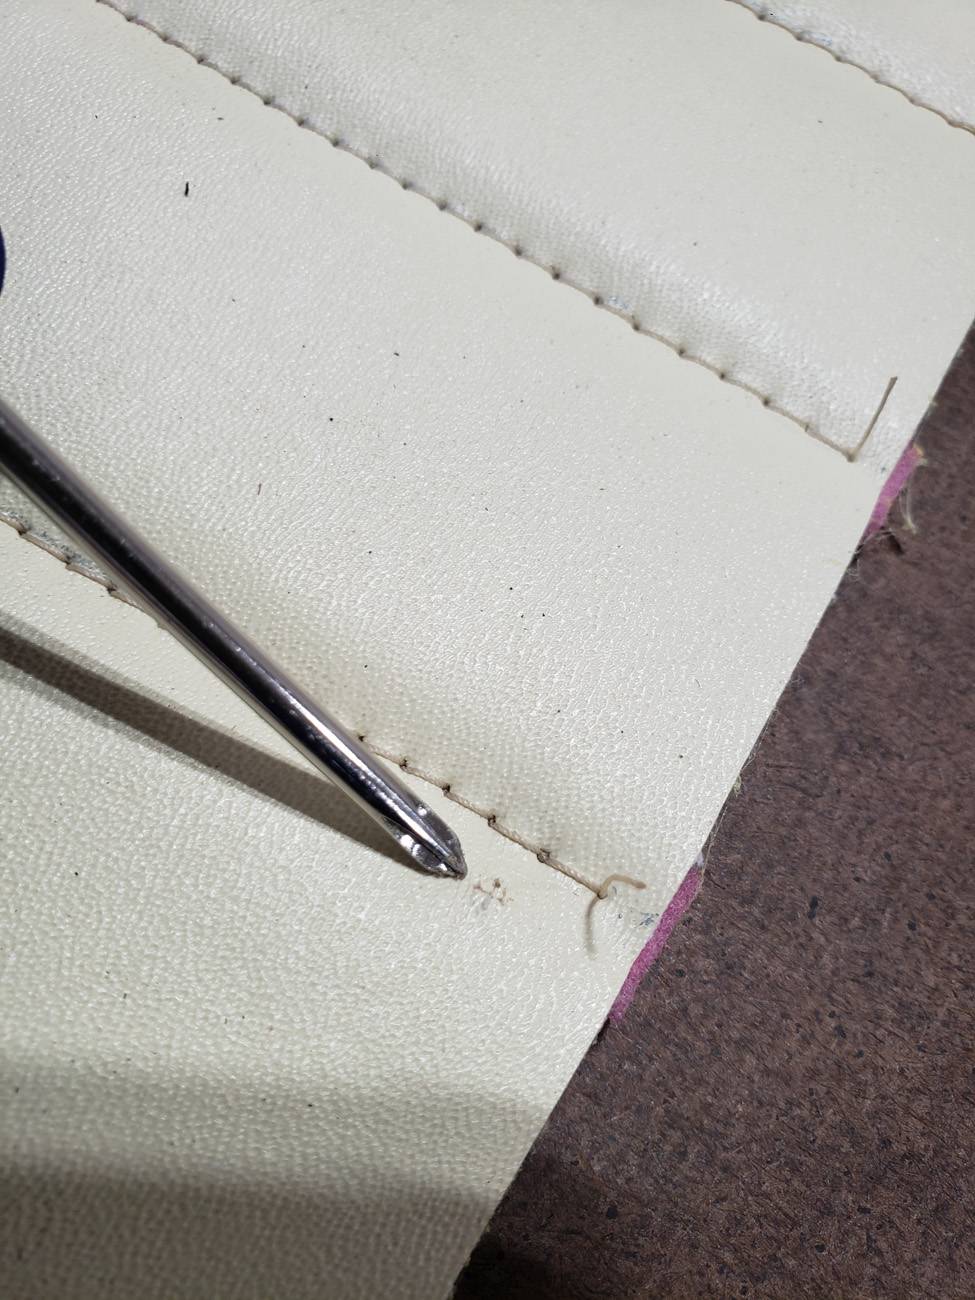 12 - Trim centerline marked.jpg (120.41 KB)
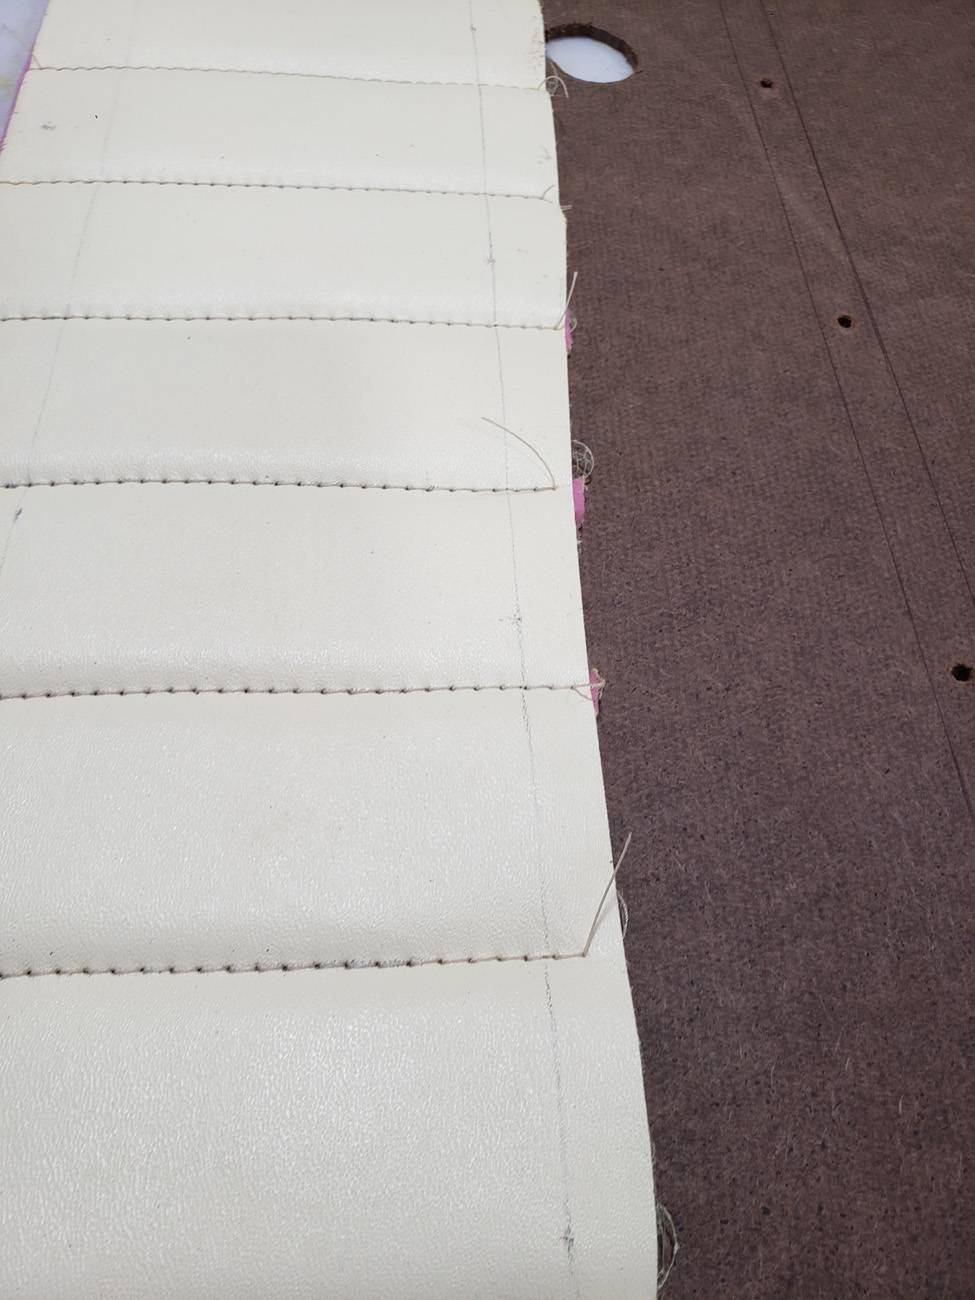
This Post was from: https://packardinfo.com/xoops/html/modules/newbb/viewtopic.php?post_id=255727