Re: KPack
Posted by kevinpackard On 2023/4/9 15:02:48
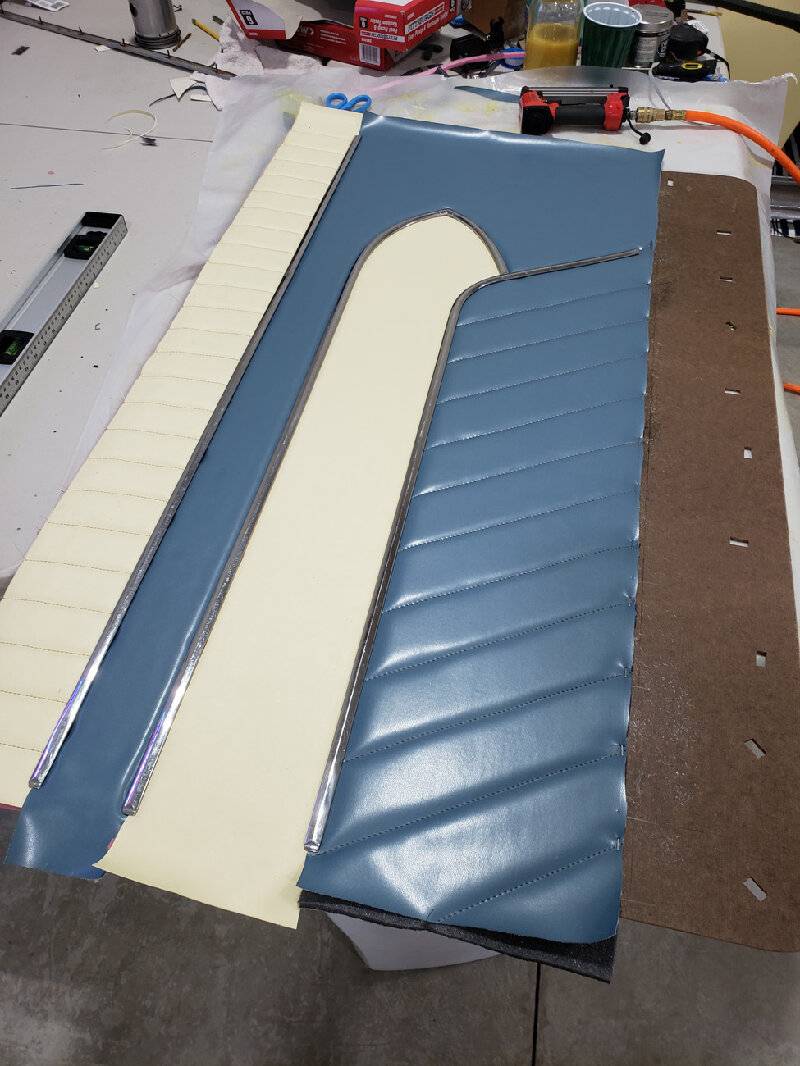
22.) The same steps are taken for the next vinyl panel. Glue, mark mounting holes, staple, trim, mount the stainless.
23.) The curved area at the front of the stainless took special attention to make sure the contours of the vinyl matched the stainless. You can see how the stainless tucks in nicely when mounted tightly, giving a pleasing slightly puffed look.
24.) The second pleated panel is next. Again glue the panel as before but stretch the panel end-end in order to make the pleats tight. Mark the mounting holes as before. Staple on each seam right on the stainless center line. Pull tightly on the seams while stapling.
25.) Trim the excess foam and vinyl then install the next trim as before.
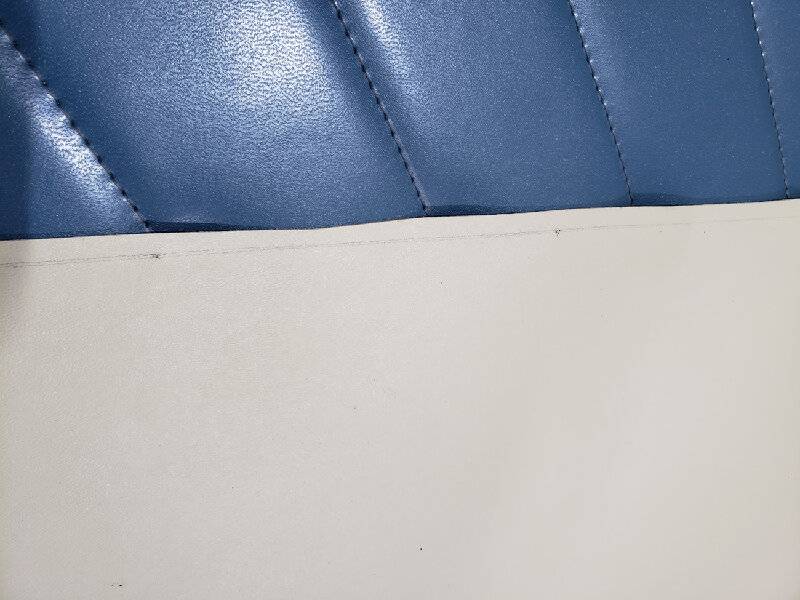
26.) Now we do the lower panel. Glue the foam and vinyl as before, mark the holes and draw the centerline. Trim the excess as before.
27.) Mount the lower stainless. The front of the door panel is now completed.
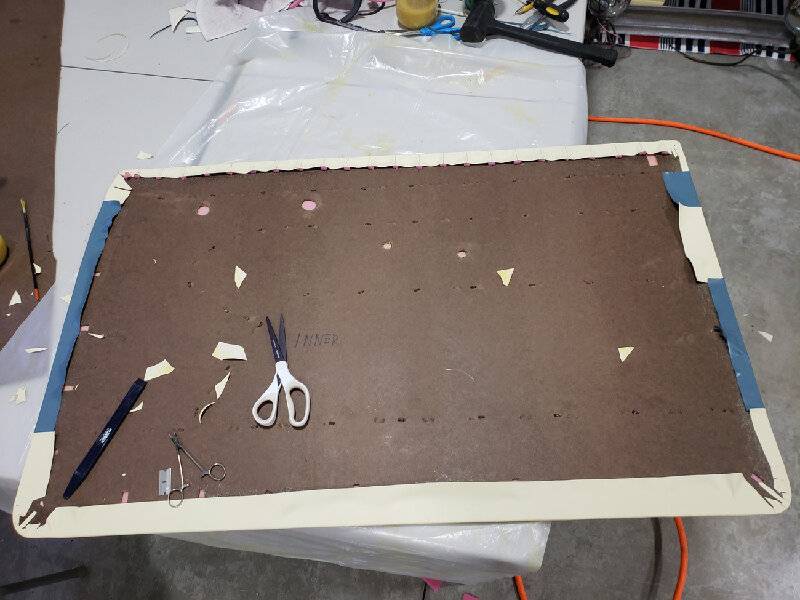
28.) Time for the back of the panel. Flip the panel over and you will see all the excess foam sticking out.
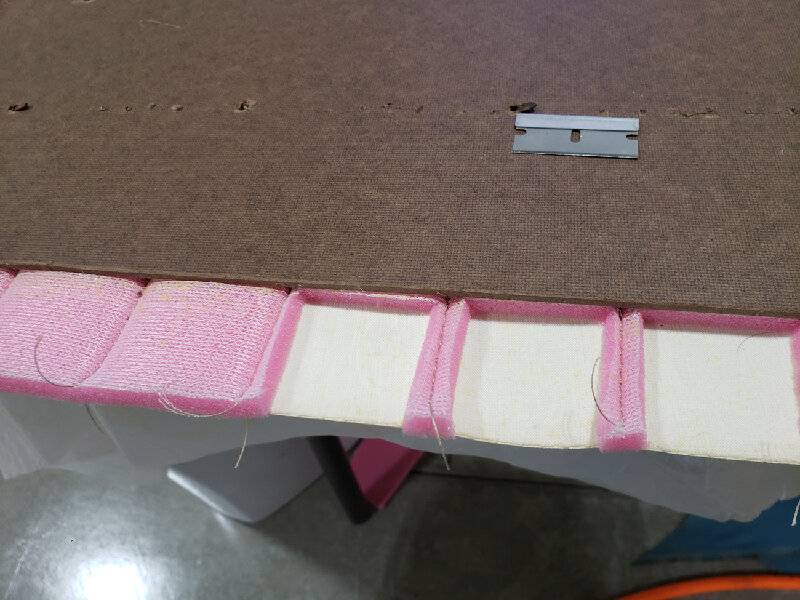
29.) Now trim the excess foam off. On the upper pleated panel the pleats will continue over to the back. Trim the scrim foam as before without touching the stiches. Trim all the other foam to the edge of the hardboard.
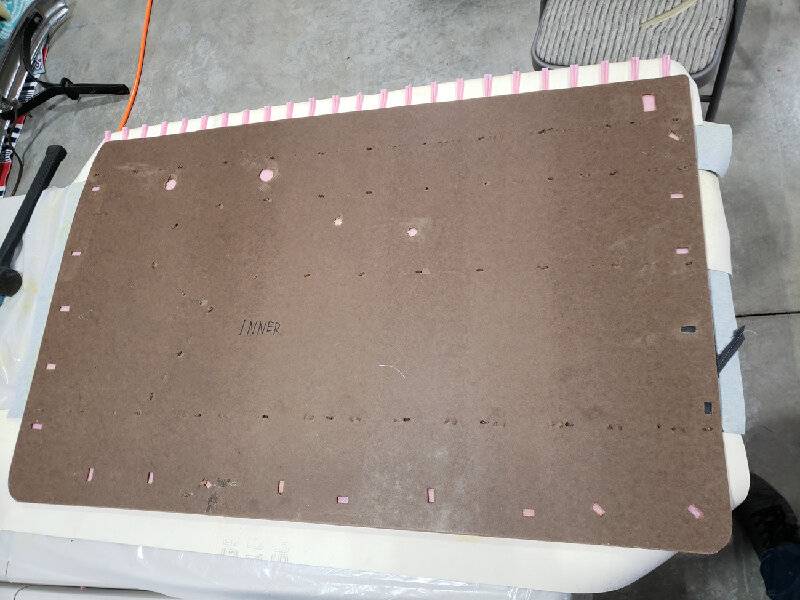
30.) With all the foam trimmed off, we are ready to glue the edges. Spray glue on the excess vinyl and the inside 1-1.5" of the hardboard. Let flash then pull hard on the vinyl and wrap it around the edges. Start at the center of the panel and work outward. Do the corners last. My corners are mediocre, but acceptable. I recommend watching YouTube videos of professionals doing it.
31.) Staple the critical areas (corners, stitches, and seams between vinyl layers. Then trim the excess vinyl with a razor blade to make everything even.
32.) The panel is now done (besides marking and mounting the lock trim). Side by side vs the old panel the difference is easy to see. The new panel looks much nicer. The pleats on the new one mirror the original nicely and the colors are good. The new panel is thicker due to the foam, but still looks right.
Attach file:
 22 - Next panel and trim installed.jpg (80.69 KB)

23 - Close up of curved trim.jpg (118.82 KB)

24 - Blue pleated panel glued, marked, and stapled in place.jpg (90.46 KB)

25 - Excess trimmed off and next stainless trim installed.jpg (134.97 KB)
26 - Final vinyl panel glued, trim holes marked.jpg (130.61 KB)
27 - Front of door panel completed.jpg (127.12 KB)

28 - Flip door panel over and begin trimming excess foam.jpg (142.45 KB)

29 - Excess scrim foam trimmed.jpg (148.03 KB)
30 - All foam trimmed, ready for glue.jpg (134.94 KB)
31 - Vinyl folded over and glued in place.jpg (127.26 KB)
32 - excess vinyl trimmed on the rear of the panel, staples placed in critical areas.jpg (153.20 KB)

33 - Completed, comparison to the old faded panel.jpg (124.11 KB)

23.) The curved area at the front of the stainless took special attention to make sure the contours of the vinyl matched the stainless. You can see how the stainless tucks in nicely when mounted tightly, giving a pleasing slightly puffed look.
24.) The second pleated panel is next. Again glue the panel as before but stretch the panel end-end in order to make the pleats tight. Mark the mounting holes as before. Staple on each seam right on the stainless center line. Pull tightly on the seams while stapling.
25.) Trim the excess foam and vinyl then install the next trim as before.
26.) Now we do the lower panel. Glue the foam and vinyl as before, mark the holes and draw the centerline. Trim the excess as before.
27.) Mount the lower stainless. The front of the door panel is now completed.
28.) Time for the back of the panel. Flip the panel over and you will see all the excess foam sticking out.
29.) Now trim the excess foam off. On the upper pleated panel the pleats will continue over to the back. Trim the scrim foam as before without touching the stiches. Trim all the other foam to the edge of the hardboard.
30.) With all the foam trimmed off, we are ready to glue the edges. Spray glue on the excess vinyl and the inside 1-1.5" of the hardboard. Let flash then pull hard on the vinyl and wrap it around the edges. Start at the center of the panel and work outward. Do the corners last. My corners are mediocre, but acceptable. I recommend watching YouTube videos of professionals doing it.
31.) Staple the critical areas (corners, stitches, and seams between vinyl layers. Then trim the excess vinyl with a razor blade to make everything even.
32.) The panel is now done (besides marking and mounting the lock trim). Side by side vs the old panel the difference is easy to see. The new panel looks much nicer. The pleats on the new one mirror the original nicely and the colors are good. The new panel is thicker due to the foam, but still looks right.
Attach file:
22 - Next panel and trim installed.jpg (80.69 KB)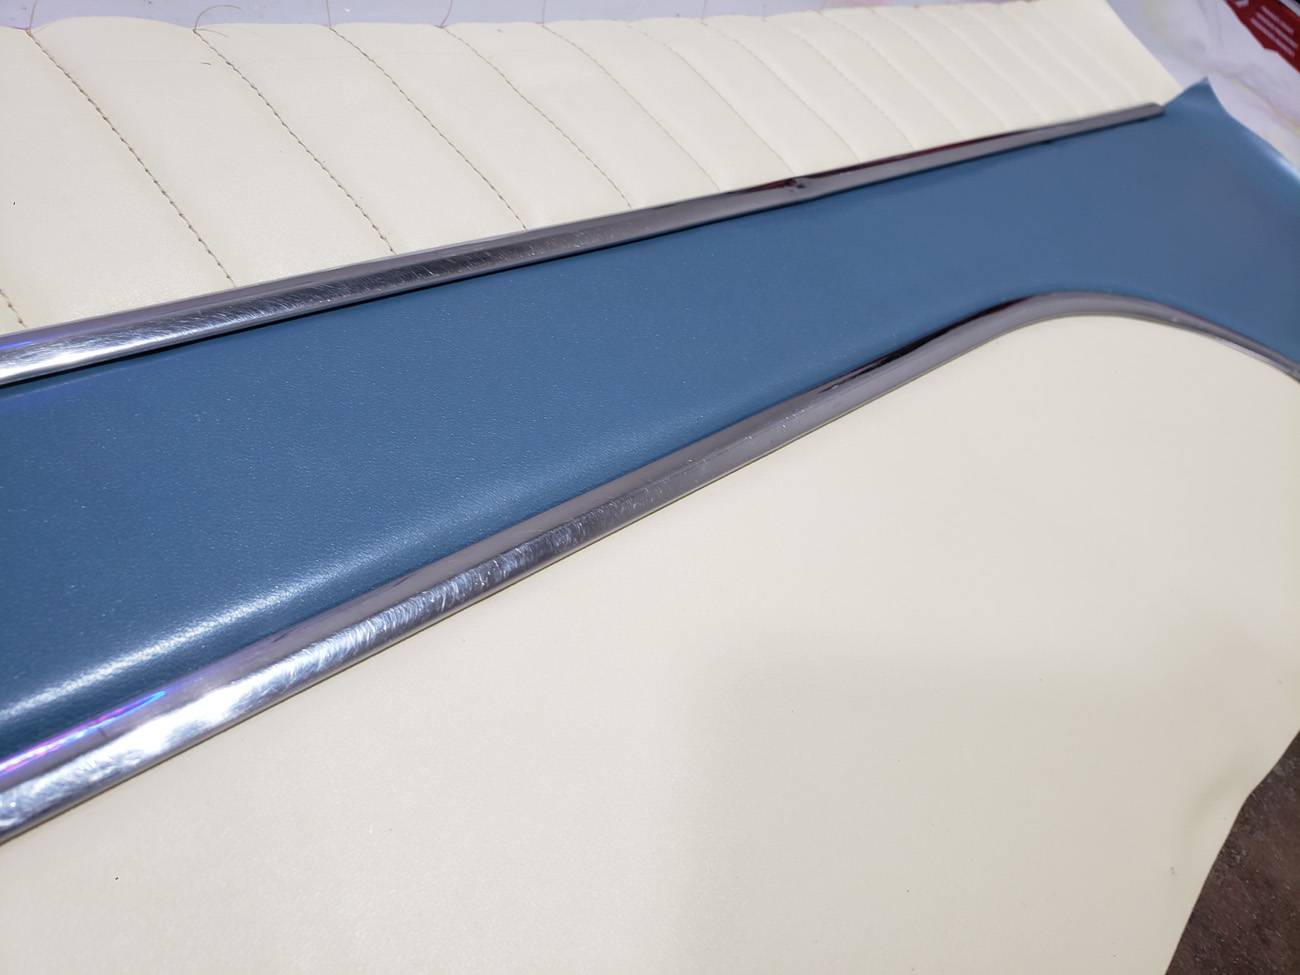 23 - Close up of curved trim.jpg (118.82 KB)
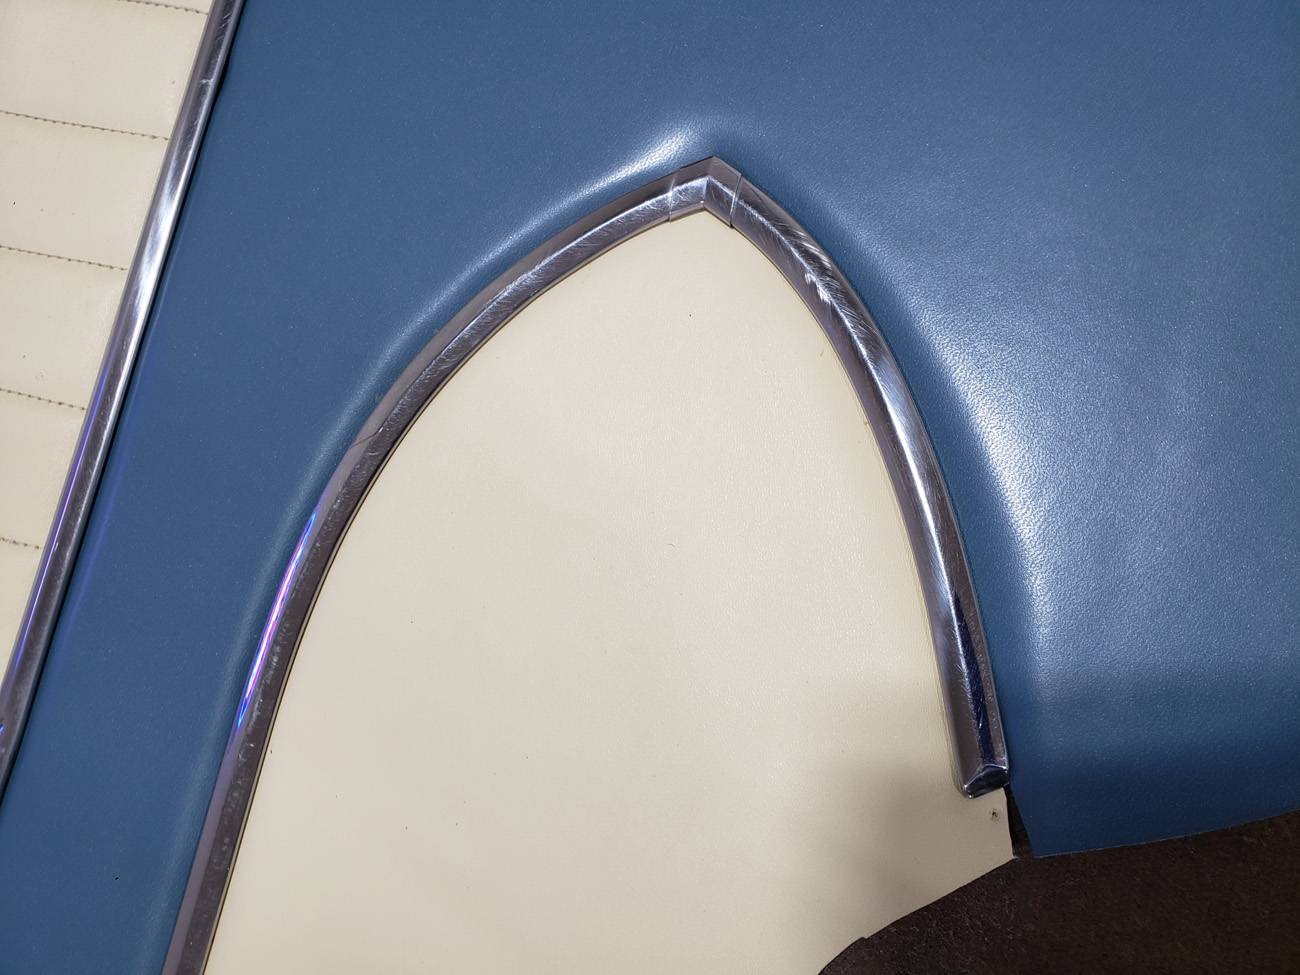 24 - Blue pleated panel glued, marked, and stapled in place.jpg (90.46 KB)
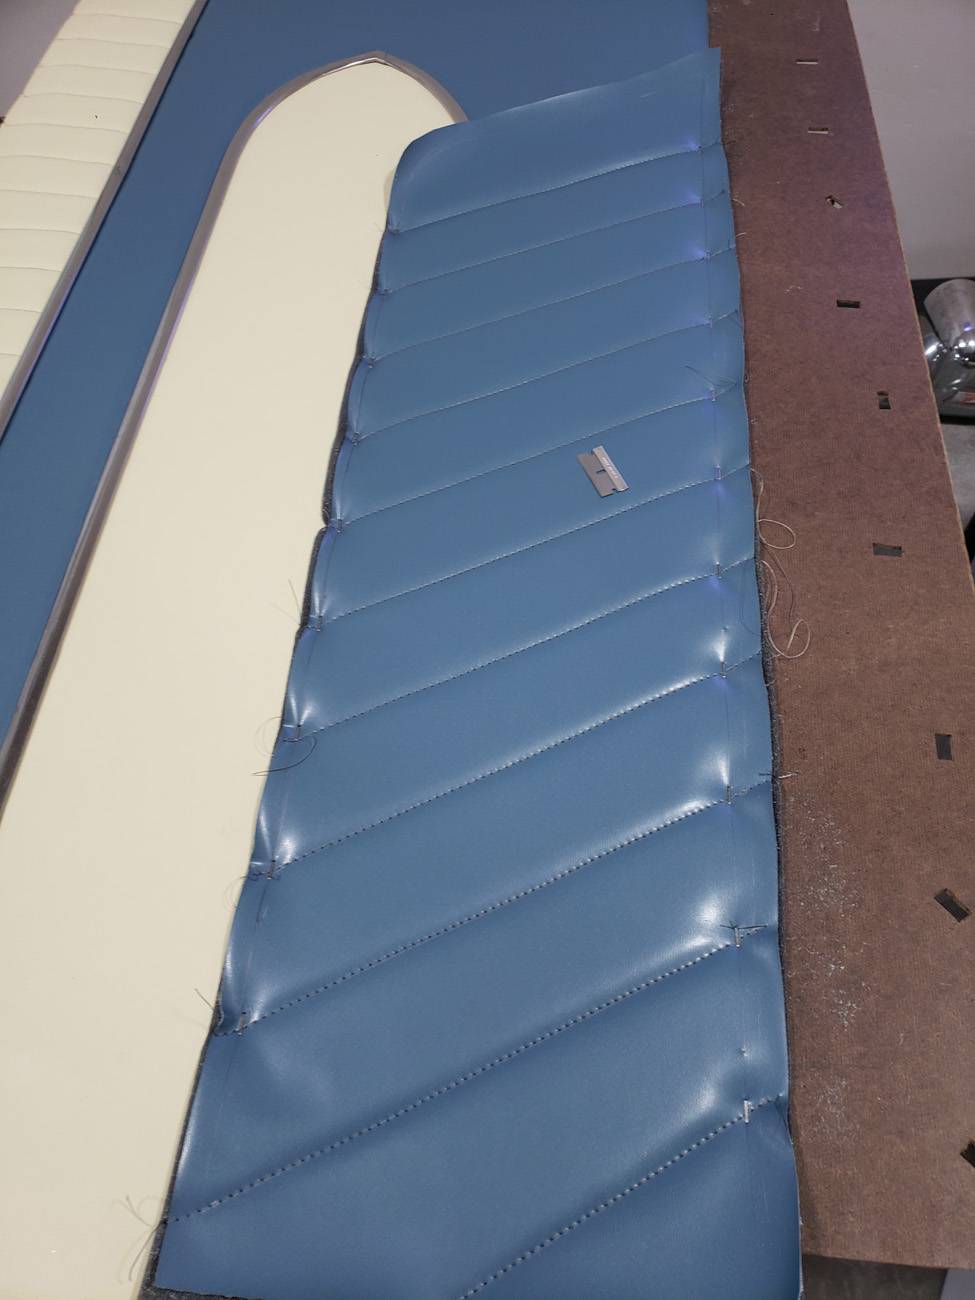 25 - Excess trimmed off and next stainless trim installed.jpg (134.97 KB)
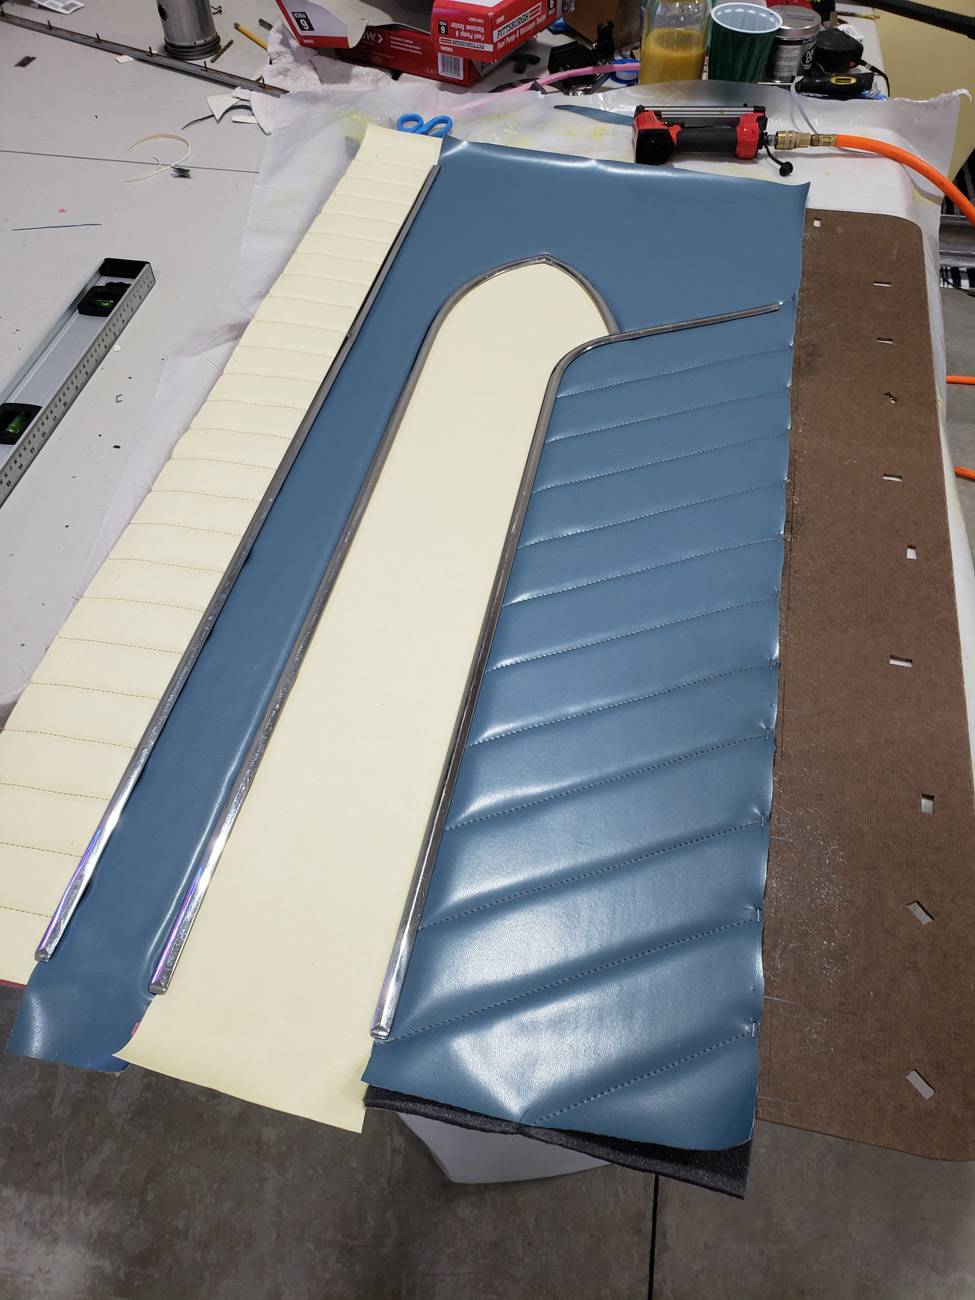 26 - Final vinyl panel glued, trim holes marked.jpg (130.61 KB)
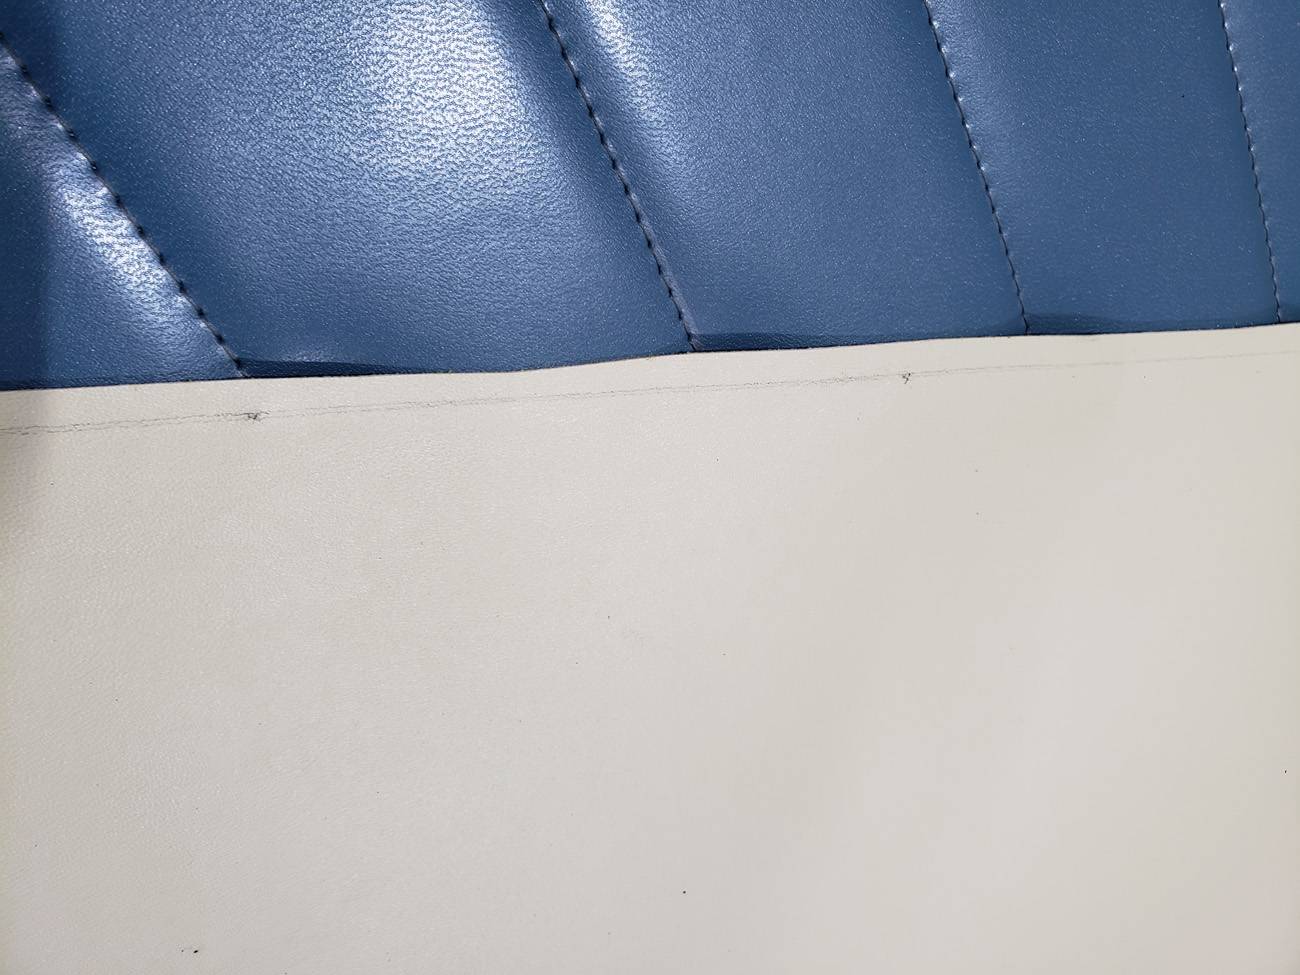 27 - Front of door panel completed.jpg (127.12 KB)
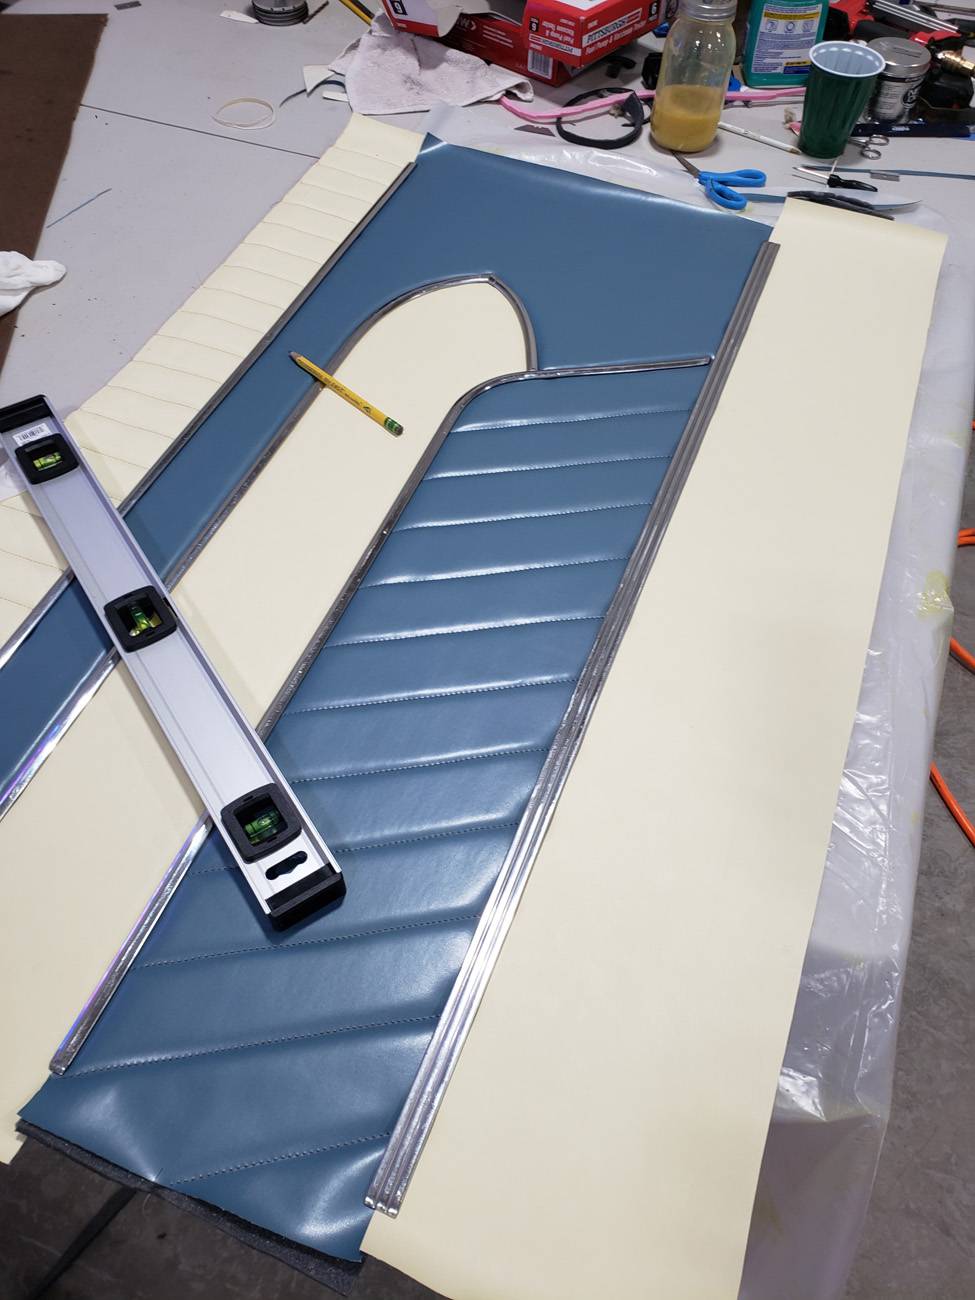 28 - Flip door panel over and begin trimming excess foam.jpg (142.45 KB)
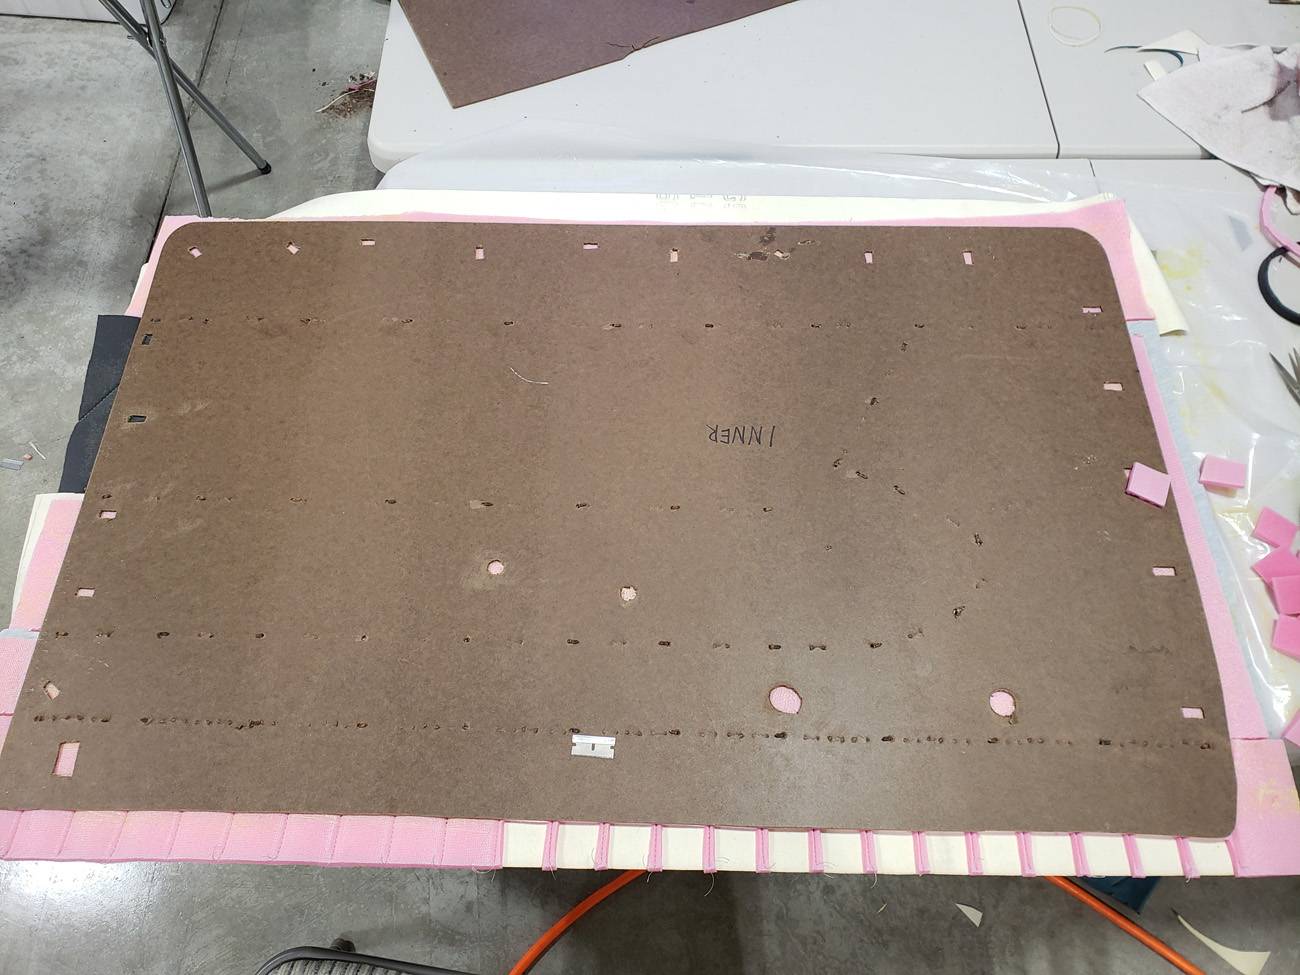 29 - Excess scrim foam trimmed.jpg (148.03 KB)
 30 - All foam trimmed, ready for glue.jpg (134.94 KB)
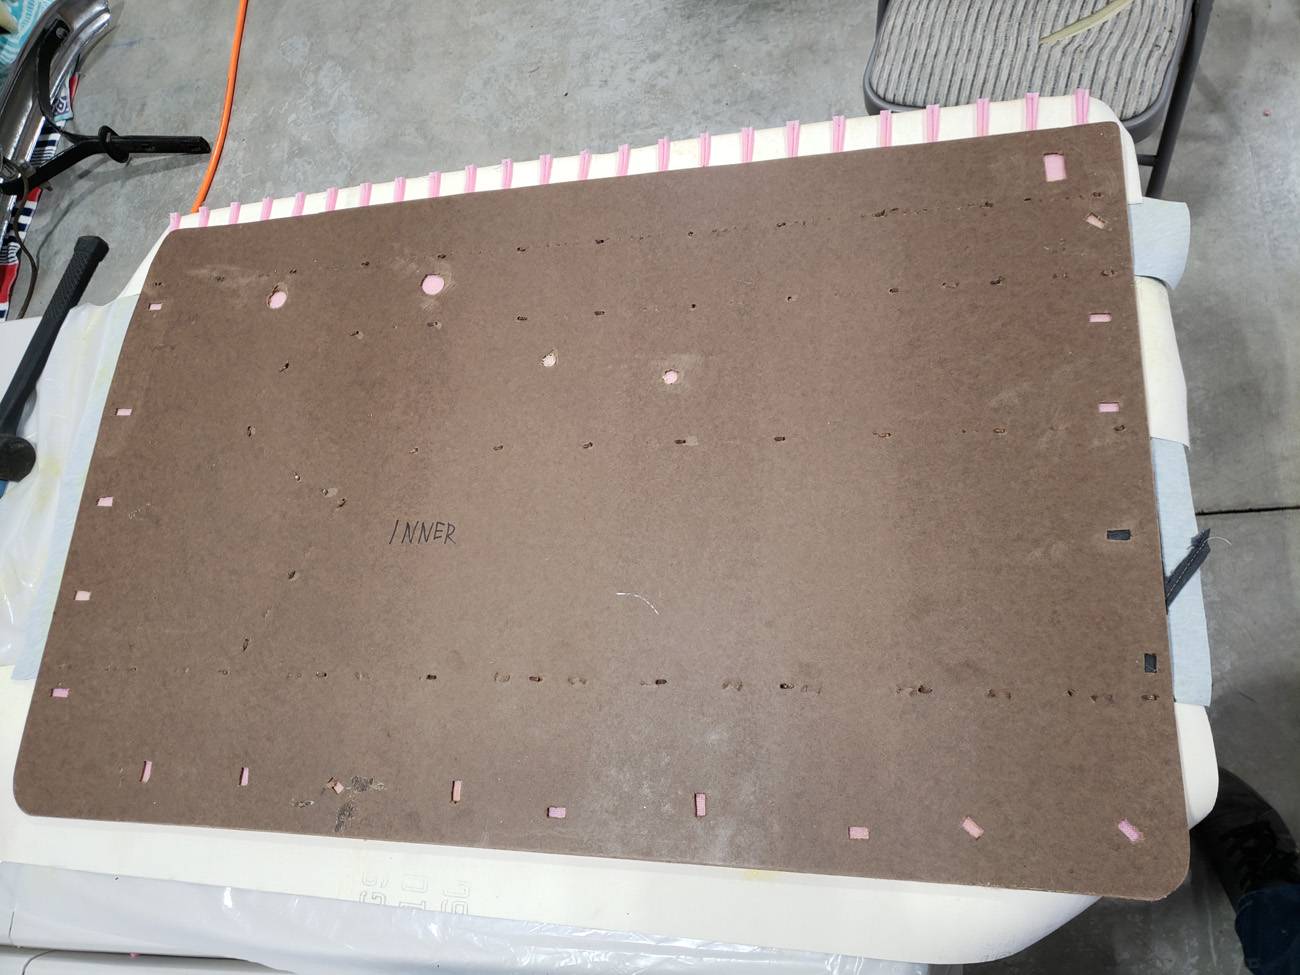 31 - Vinyl folded over and glued in place.jpg (127.26 KB)
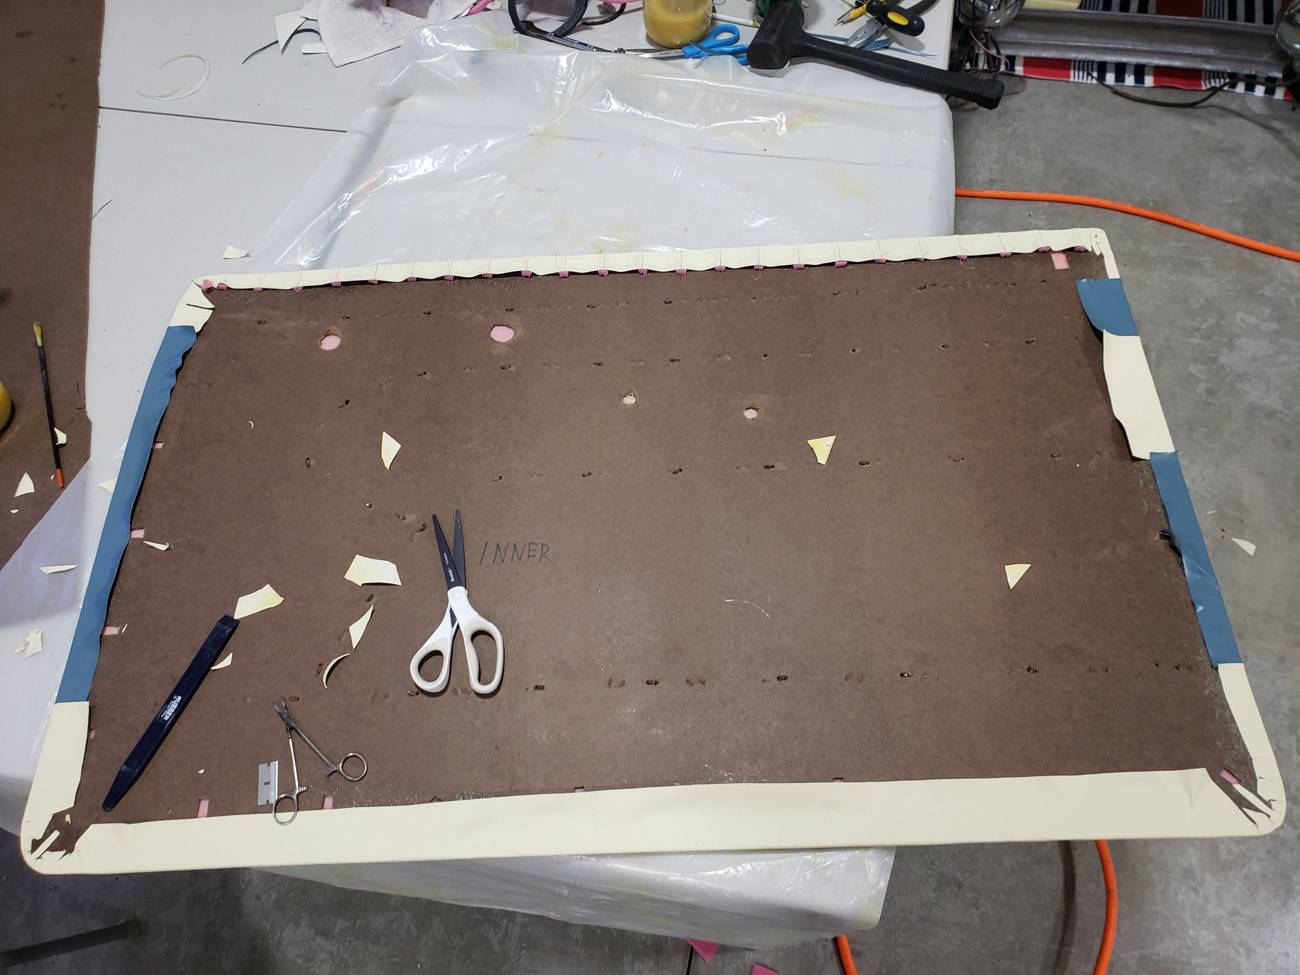 32 - excess vinyl trimmed on the rear of the panel, staples placed in critical areas.jpg (153.20 KB)
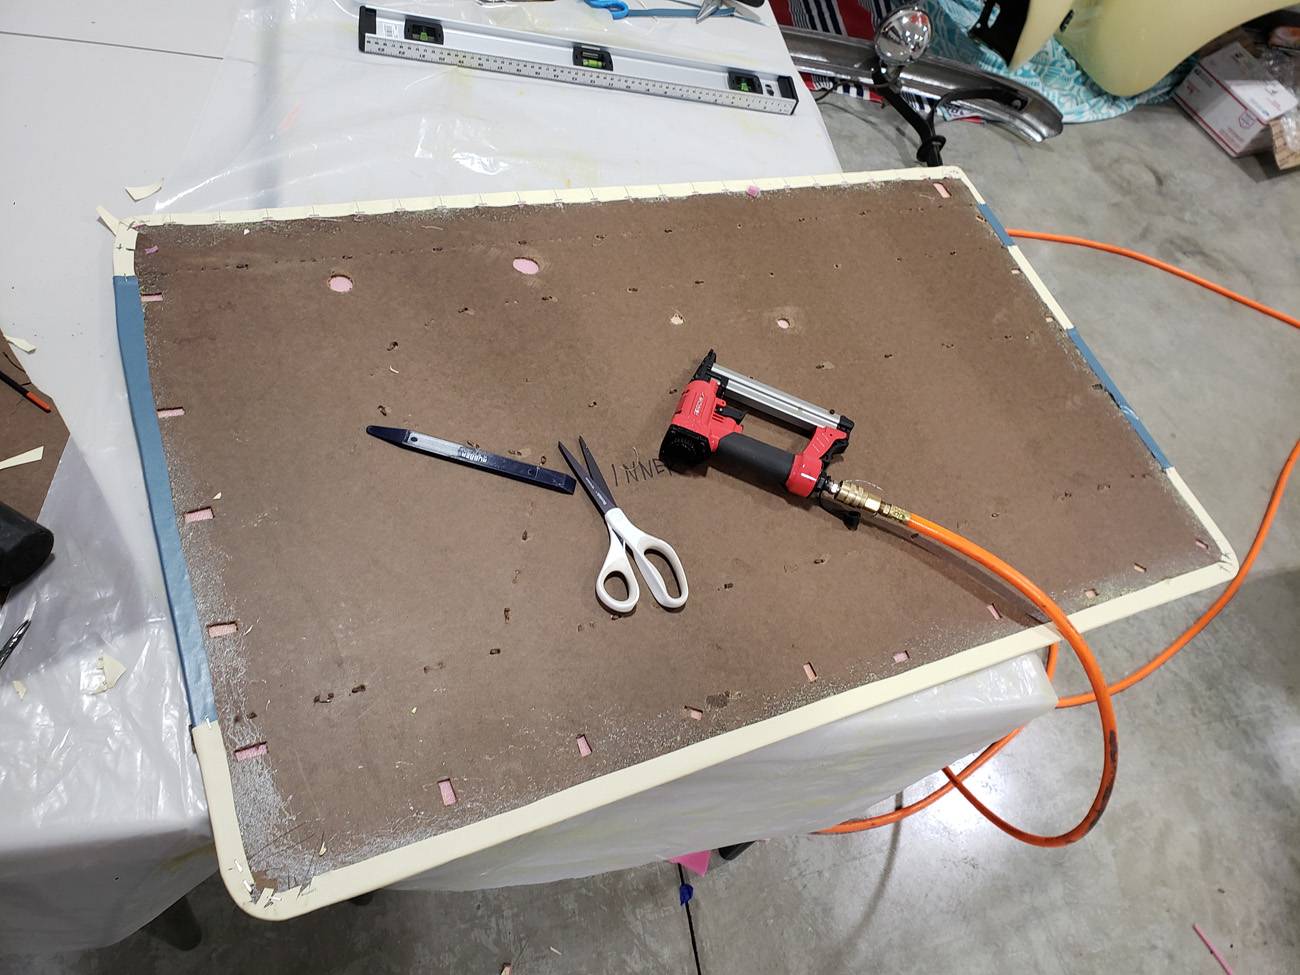 33 - Completed, comparison to the old faded panel.jpg (124.11 KB)
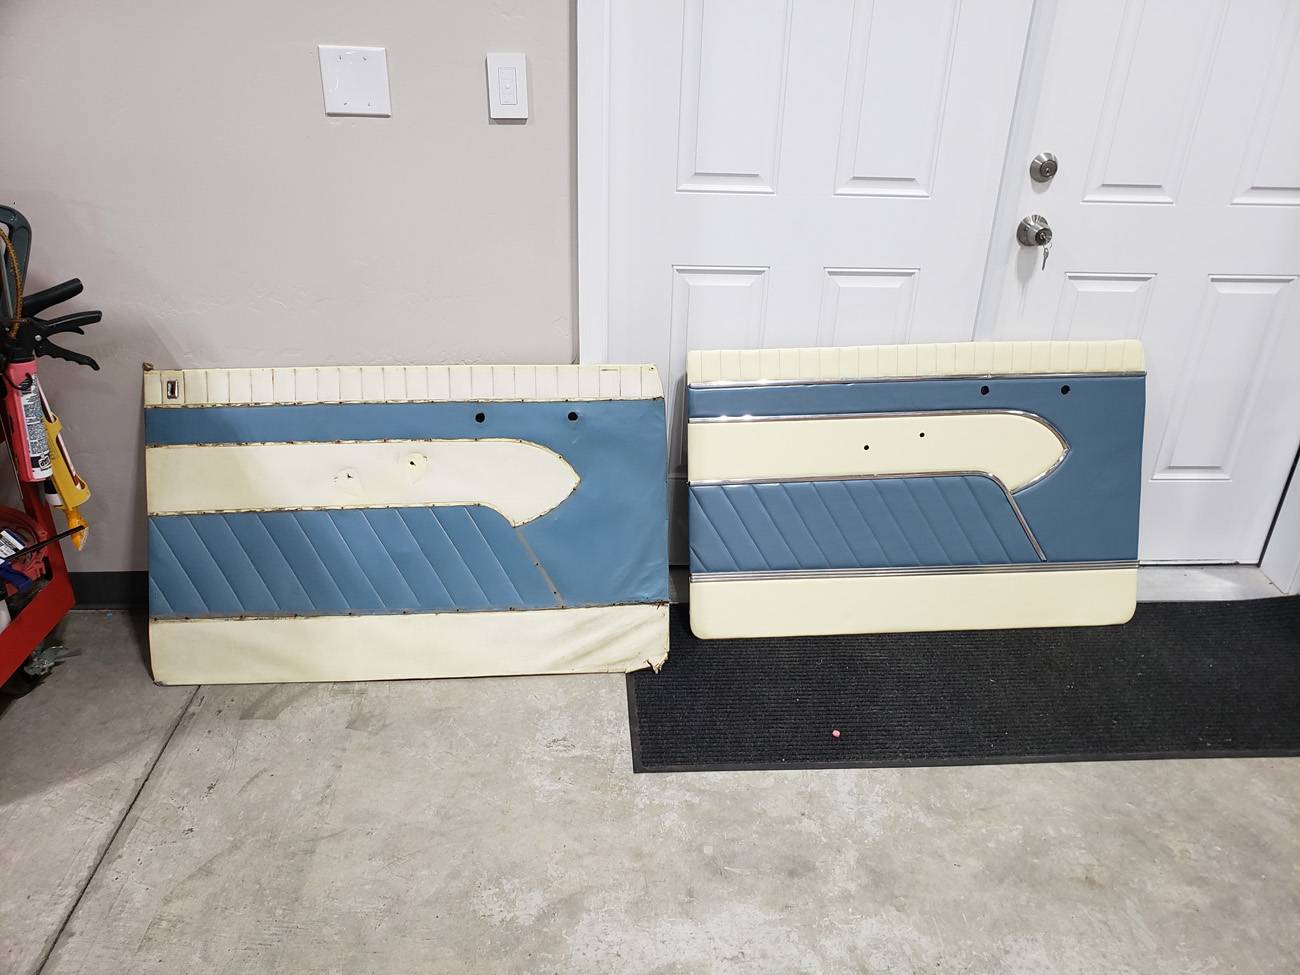
This Post was from: https://packardinfo.com/xoops/html/modules/newbb/viewtopic.php?post_id=255729