Re: Adventures with a 1955 Clipper
Posted by JWL On 2011/6/8 10:54:57
Hello All,
I got a little ahead of the story in the previous garage session description. These sessions are being done after the fact, and I must try harder to keep them in the correct order. Much progress was made in this garage session. Assemblying clean and repainted parts is much more fun than removing, cleaning, and painting them.
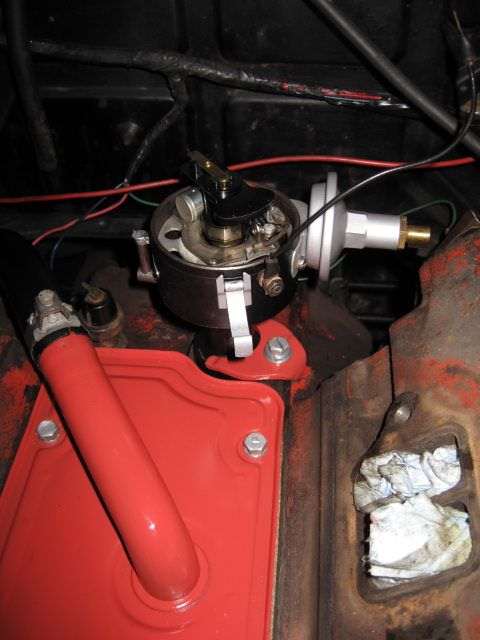
Before installing the water pump on the front of the engine, I wanted parts on the top and back of the engine to go on first. The first to go back on was the lifter valley cover and crankcase vent tube. I needed to get the large hole on the top covered before I dropped something into it. Next to go on/in was the distributor. The distributor had been overhauled by Ross Miller as part of the work he did. A Delco Remy distributor with a Petronic solid-state breaker kit was on the Clipper. I wanted the original type Auto Lite distributor with breaker points and condenser as the car came with. The previous owner had it and Ross exchanged units and installed new parts in the Auto Lite. Like the Carter fuel system components, I am most pleased that I now have the proper Auto Lite electrical equipment on the car.
I disassembled the distributor and cleaned it mostly to see what I had. I used the new parts Ross had installed as they were not worn. A squirt or two of rattle can black paint and it looks good as new.
Then I mounted a couple of items on the newly cleaned firewall. I worked on doing more cleaning of the painted sheet metal in the engine compartment. I found that Meguiar's Cleaner and Wax did a good job of restoring the finish.
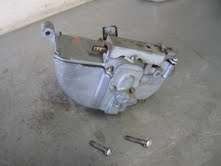
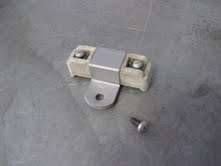
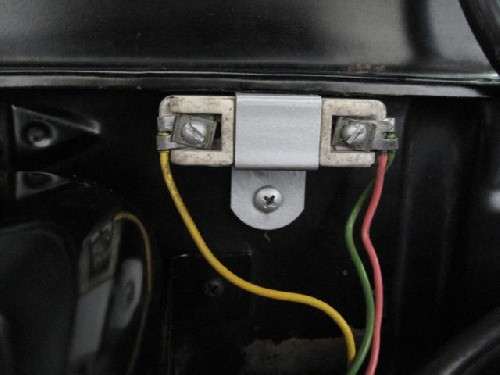
The windshield wiper motor and the ballast resistor for the ignition coil were then attached to the firewall. Nothing too exciting about the Trico vacuum windshield wiper motor, except it does not have the compensator unit and seems to function. The ballast resistor reduces the voltage supply to the ignition coil from 12-volts to around 7-volts to prolong breaker point life. Delco and Auto Lite resistors are different. I have the correct Auto Lite resistor.
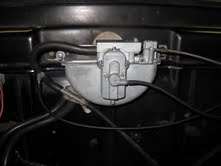
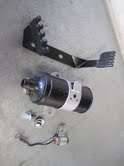
Then intake manifold, coil, and carburetor were installed in that order. I wanted to get these hard to reach items installed before too much other stuff got in the way. The coil is a used one I found from Echo Hills Packard, a parts supplier in Lafayette, California (my old stomping grounds). The coil that came with the car is a high performance one to go with Petronic solid-state conversion system for the old Delco distributor. Also, it had a home made bracket. I wanted original type ignition system and needed to replace the coil and bracket with an appropriate Auto Lite unit. Whether it will work or not is yet to be discovered, but it looks nice.
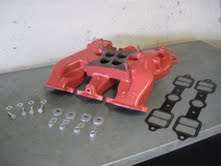
The intake manifold was installed on the engine with new gaskets. The gaskets are a shim metal type with embossed areas around the ports. The embossing is crushed when the manifold is torqued down and provides the seal. These type of gaskets cannot be reused because once the embossing has been crushed it will no longer reseal. I installed the gaskets dry, that is with no cement or other sealing agent, and with squeaky-clean surfaces on the cylinder heads and manifold. Once the manifold was on I installed the refinished oil filler tube and crankcase breather.
The paint I am using for the engine is Krylon's Gloss Tomato. The accessories and equipment are painted a Krylon Gloss or Satin Black. The Tomato comes close to the orange-red color Packard painted these 320 cu. in. engines.
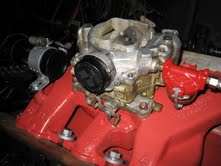
The carburetor is a Carter WCFB four barrel, basically two carburetors in one body. It looks to be in remarkably good condition and even has its brass identification tag. The manufacturer, to identify the specific unit, attached a brass tags to the carburetor. In the old days some "mechanics" would keep the brass tags as souvenirs thereby leaving the next person to service the carburetor without critical information. The fuel filter is also an original type Carter unit. These filters use a ceramic element to filter the gasoline. Not seen any more, but were the best in the day. The ceramic filter elements are still available and I installed a new element and gasket.
In the next garage session I will attach the Clipper to the generator.
Take care.
(o{I}o)
Attach file:
 (31.25 KB)

(32.98 KB)
(3.72 KB)
(3.06 KB)
(4.46 KB)
(29.93 KB)
(4.42 KB)
(4.05 KB)

(4.54 KB)

(2.92 KB)
(5.94 KB)
I got a little ahead of the story in the previous garage session description. These sessions are being done after the fact, and I must try harder to keep them in the correct order. Much progress was made in this garage session. Assemblying clean and repainted parts is much more fun than removing, cleaning, and painting them.
Before installing the water pump on the front of the engine, I wanted parts on the top and back of the engine to go on first. The first to go back on was the lifter valley cover and crankcase vent tube. I needed to get the large hole on the top covered before I dropped something into it. Next to go on/in was the distributor. The distributor had been overhauled by Ross Miller as part of the work he did. A Delco Remy distributor with a Petronic solid-state breaker kit was on the Clipper. I wanted the original type Auto Lite distributor with breaker points and condenser as the car came with. The previous owner had it and Ross exchanged units and installed new parts in the Auto Lite. Like the Carter fuel system components, I am most pleased that I now have the proper Auto Lite electrical equipment on the car.
I disassembled the distributor and cleaned it mostly to see what I had. I used the new parts Ross had installed as they were not worn. A squirt or two of rattle can black paint and it looks good as new.
Then I mounted a couple of items on the newly cleaned firewall. I worked on doing more cleaning of the painted sheet metal in the engine compartment. I found that Meguiar's Cleaner and Wax did a good job of restoring the finish.
The windshield wiper motor and the ballast resistor for the ignition coil were then attached to the firewall. Nothing too exciting about the Trico vacuum windshield wiper motor, except it does not have the compensator unit and seems to function. The ballast resistor reduces the voltage supply to the ignition coil from 12-volts to around 7-volts to prolong breaker point life. Delco and Auto Lite resistors are different. I have the correct Auto Lite resistor.
Then intake manifold, coil, and carburetor were installed in that order. I wanted to get these hard to reach items installed before too much other stuff got in the way. The coil is a used one I found from Echo Hills Packard, a parts supplier in Lafayette, California (my old stomping grounds). The coil that came with the car is a high performance one to go with Petronic solid-state conversion system for the old Delco distributor. Also, it had a home made bracket. I wanted original type ignition system and needed to replace the coil and bracket with an appropriate Auto Lite unit. Whether it will work or not is yet to be discovered, but it looks nice.
The intake manifold was installed on the engine with new gaskets. The gaskets are a shim metal type with embossed areas around the ports. The embossing is crushed when the manifold is torqued down and provides the seal. These type of gaskets cannot be reused because once the embossing has been crushed it will no longer reseal. I installed the gaskets dry, that is with no cement or other sealing agent, and with squeaky-clean surfaces on the cylinder heads and manifold. Once the manifold was on I installed the refinished oil filler tube and crankcase breather.
The paint I am using for the engine is Krylon's Gloss Tomato. The accessories and equipment are painted a Krylon Gloss or Satin Black. The Tomato comes close to the orange-red color Packard painted these 320 cu. in. engines.
The carburetor is a Carter WCFB four barrel, basically two carburetors in one body. It looks to be in remarkably good condition and even has its brass identification tag. The manufacturer, to identify the specific unit, attached a brass tags to the carburetor. In the old days some "mechanics" would keep the brass tags as souvenirs thereby leaving the next person to service the carburetor without critical information. The fuel filter is also an original type Carter unit. These filters use a ceramic element to filter the gasoline. Not seen any more, but were the best in the day. The ceramic filter elements are still available and I installed a new element and gasket.
In the next garage session I will attach the Clipper to the generator.
Take care.
(o{I}o)
Attach file:
(31.25 KB)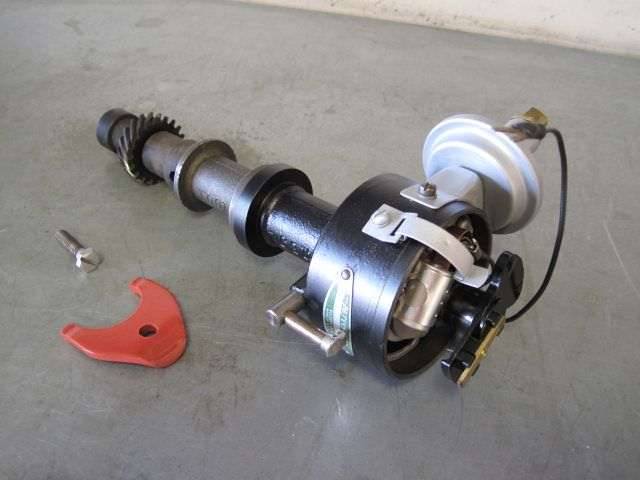 (32.98 KB) (3.72 KB) (3.06 KB) (4.46 KB) (29.93 KB)
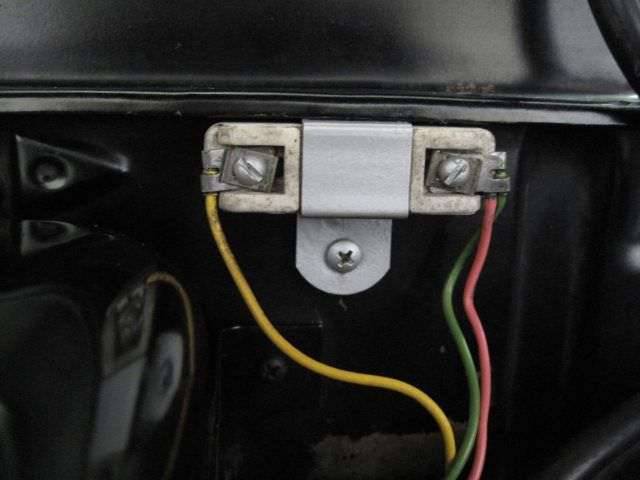 (4.42 KB) (4.05 KB) (4.54 KB) (2.92 KB) (5.94 KB)
This Post was from: https://packardinfo.com/xoops/html/modules/newbb/viewtopic.php?post_id=78748