Re: Adventures with a 1955 Clipper
Posted by JWL On 2011/6/13 11:52:40
Hello All,
Lots of progress in my last garage session. I did some wiring work and got most of the parts back on the Clipper. Because so much was accomplished, I will talk about it in two posts.
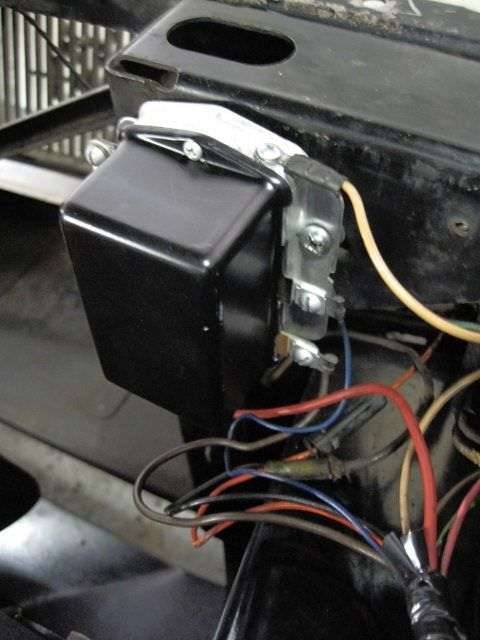
Electrical work consisted of running a new battery wire from the starter switch to the voltage regulator. The starter is on the bottom of drivers side of the engine and the regulator is mounted on the passengers side top front of the compartment. This is about as far apart as you can get. The original wire had burned on the voltage regulator end at some point in the Clipper's past life. A new wire had been run, but it was only run on the outside of the wiring loom, and made with crimp-on terminals. I cut off the ends of the old wire and left it in the loom. I then soldered some proper terminals on the new wire and ran it from the starter switch to the voltage regulator following the wiring loom route.
I re-wrapped the loom to secure the new wire with some non-adhesive vinyl tape. The loom looks undisturbed. The tape I used matches the original loom tape. I decided to use this tape rather than the often used adhesive backed vinyl electrical tape as this type is stiff and does not look authentic. There are other types of wiring loom wrapping which do a good job, but again they are not authentic looking. The tape I used is easy to wrap. Tie it at the beginning, wrap the length, and then tie it off at the end. Much easier than trying to handle the sticky conventional type.
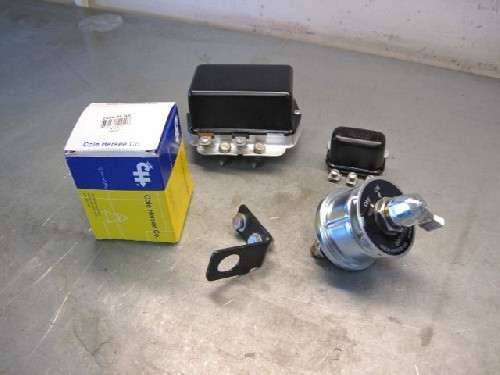
After this, I installed the voltage regulator, horn relay, and battery cut-off switch. The cut-off switch is to provide a way to disconnect the battery from the Clipper's electrical system. The switch is for safety and security
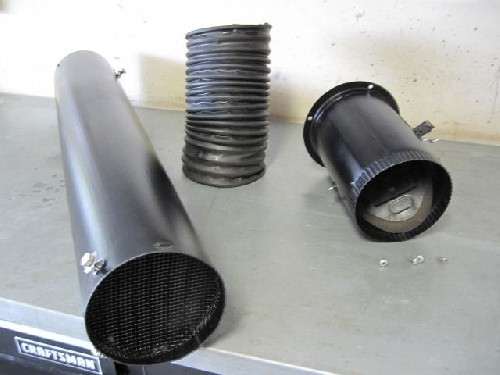
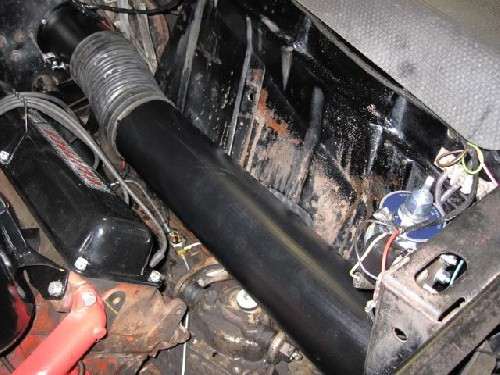
After electrical work I installed the drivers side fresh air vent pipe, flapper valve, and flex hose. The pipe resembles an old-time round stovepipe. The finish was in terrible shape, having spent its life under the battery and subject to spills from its upper neighbor, but the metal was sound. It looks almost new and will contribute to a better looking compartment.
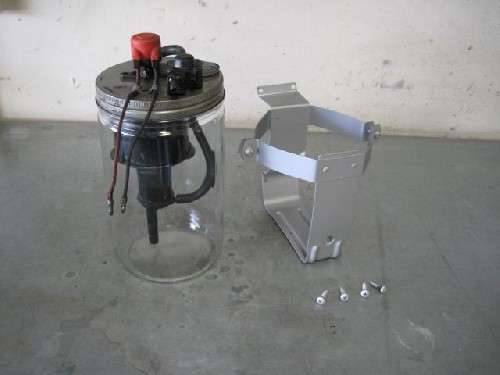
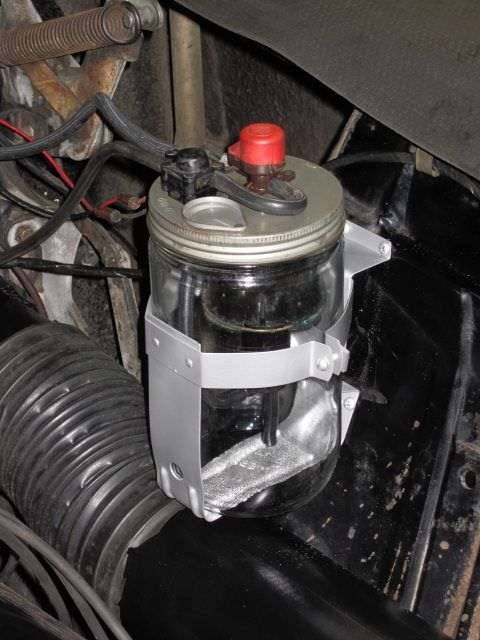
Next on the agenda was the windshield washer jar and bracket. It is a wonder this Mason Jar type container has survived all these years. The bracket was in need of refinishing and the jar needed a good scrubbing. It will squirt fluid on the windshield.
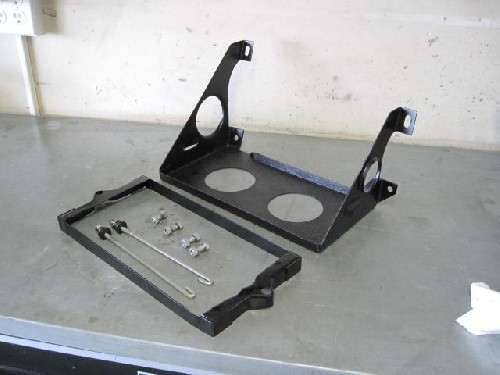
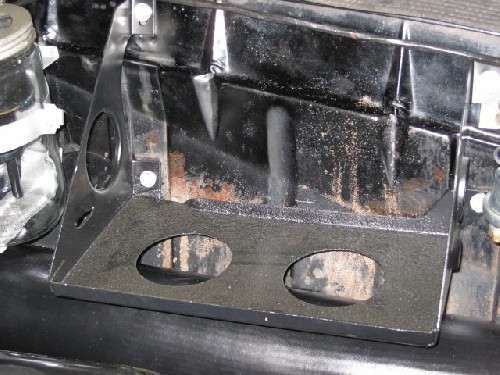
To conclude today's post and the work on this side of the Clipper are some photos of the battery, case, and hold down. All these reattached parts do a good job of covering up the badly stained lower part of the drivers side inner fender panel.
Take care.
(o{I}o)
Attach file:
 (33.50 KB)
(37.63 KB)
(28.25 KB)

(34.22 KB)

(30.78 KB)
(52.45 KB)
(26.33 KB)
(43.25 KB)
(30.03 KB)
(52.23 KB)
(47.62 KB)

Lots of progress in my last garage session. I did some wiring work and got most of the parts back on the Clipper. Because so much was accomplished, I will talk about it in two posts.
Electrical work consisted of running a new battery wire from the starter switch to the voltage regulator. The starter is on the bottom of drivers side of the engine and the regulator is mounted on the passengers side top front of the compartment. This is about as far apart as you can get. The original wire had burned on the voltage regulator end at some point in the Clipper's past life. A new wire had been run, but it was only run on the outside of the wiring loom, and made with crimp-on terminals. I cut off the ends of the old wire and left it in the loom. I then soldered some proper terminals on the new wire and ran it from the starter switch to the voltage regulator following the wiring loom route.
I re-wrapped the loom to secure the new wire with some non-adhesive vinyl tape. The loom looks undisturbed. The tape I used matches the original loom tape. I decided to use this tape rather than the often used adhesive backed vinyl electrical tape as this type is stiff and does not look authentic. There are other types of wiring loom wrapping which do a good job, but again they are not authentic looking. The tape I used is easy to wrap. Tie it at the beginning, wrap the length, and then tie it off at the end. Much easier than trying to handle the sticky conventional type.
After this, I installed the voltage regulator, horn relay, and battery cut-off switch. The cut-off switch is to provide a way to disconnect the battery from the Clipper's electrical system. The switch is for safety and security
After electrical work I installed the drivers side fresh air vent pipe, flapper valve, and flex hose. The pipe resembles an old-time round stovepipe. The finish was in terrible shape, having spent its life under the battery and subject to spills from its upper neighbor, but the metal was sound. It looks almost new and will contribute to a better looking compartment.
Next on the agenda was the windshield washer jar and bracket. It is a wonder this Mason Jar type container has survived all these years. The bracket was in need of refinishing and the jar needed a good scrubbing. It will squirt fluid on the windshield.
To conclude today's post and the work on this side of the Clipper are some photos of the battery, case, and hold down. All these reattached parts do a good job of covering up the badly stained lower part of the drivers side inner fender panel.
Take care.
(o{I}o)
Attach file:
(33.50 KB) (37.63 KB) (28.25 KB) (34.22 KB)
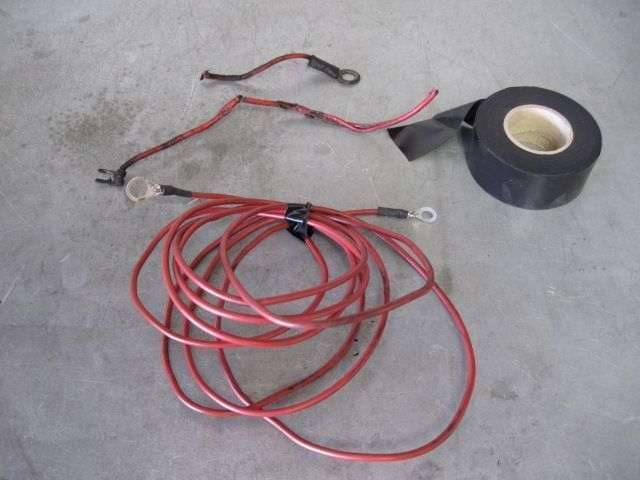 (30.78 KB)
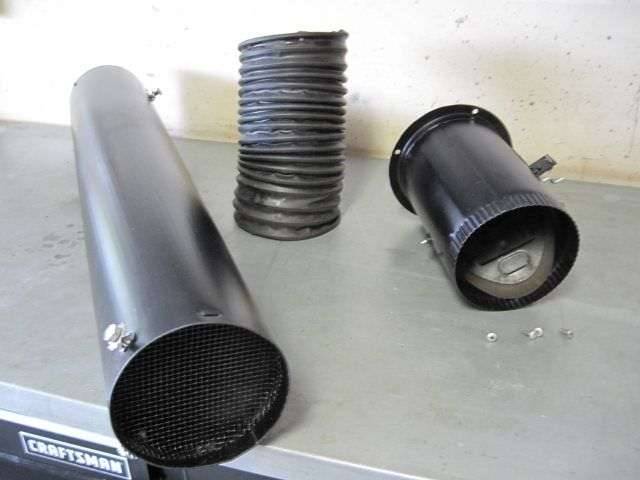 (52.45 KB)
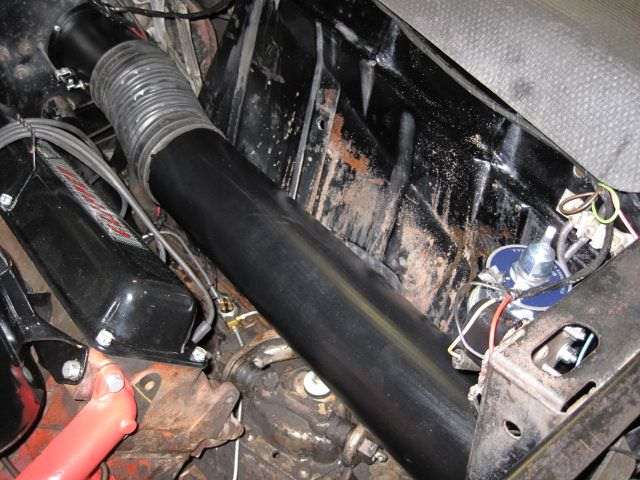 (26.33 KB)
 (43.25 KB) (30.03 KB)
 (52.23 KB)
 (47.62 KB)
This Post was from: https://packardinfo.com/xoops/html/modules/newbb/viewtopic.php?post_id=79098