Re: Adventures with a 1955 Clipper
Posted by JWL On 2011/7/20 11:55:05
Hello All,
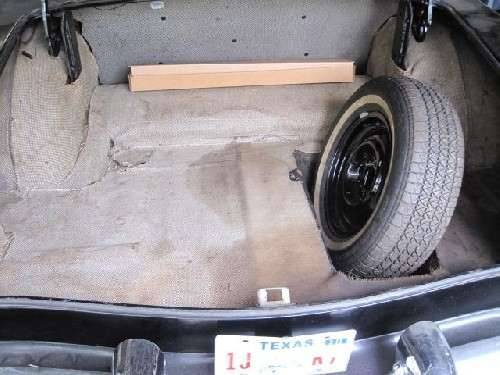
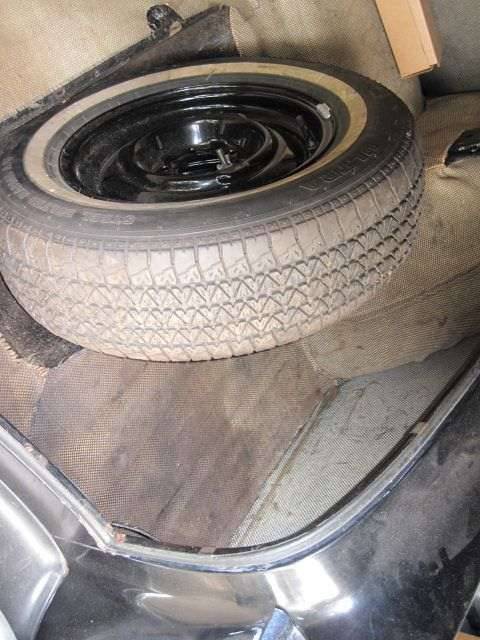
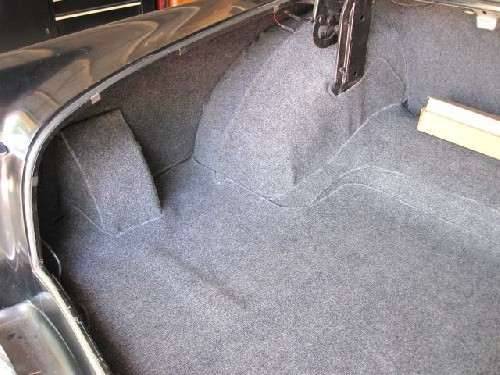
In the last garage sessions I spent a hot Austin weekend redoing the trunk mats and panels. I had been working on the interior and seats, but got distracted by the most unattractive trunk. It was filthy, stained, and worn. It needed something done to make it look better.
I inquired around as to the pattern used on the 1955 mats and panels and found it is no longer available; actually, according to one vendor, it was never reproduced. The 1956 pattern has been reproduced, but would require an entire new set made at a cost of about $750. I understand the vendor does and excellent job, but I am saving the big bucks for the body repair and repainting. I started looking at shops and materials to have it done locally. Not thrilled with the results of this, I got to thinking that this job was within the boundaries of my pay grade.
I found some dark gray indoor/outdoor carpeting at Lowe's and thought it would go nicely with the Clipper's black color, and that it be more attractive than the original material and pattern on the mats and panels. It is flexible and easy to work with and requires no binding so will not ravel at the edges. The trunk lining would not be authentic, but it would be a nice compromise. Even if I had gone with the 1956 pattern replacement pieces, the trunk would not be authentic.
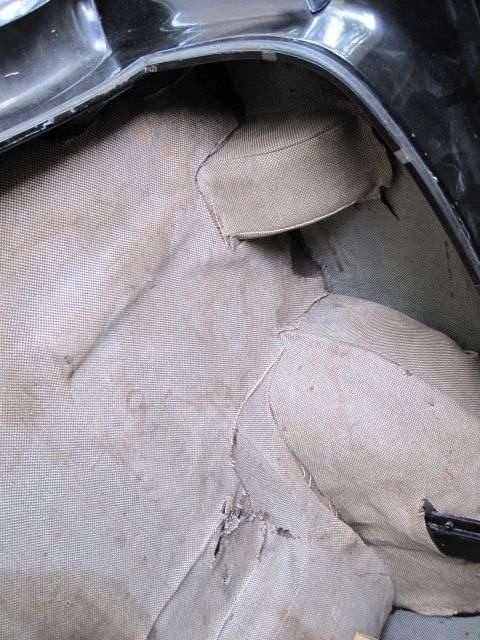
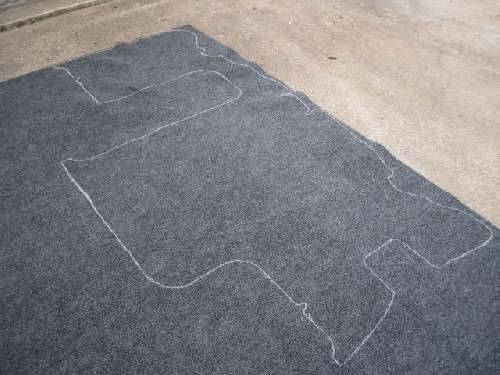
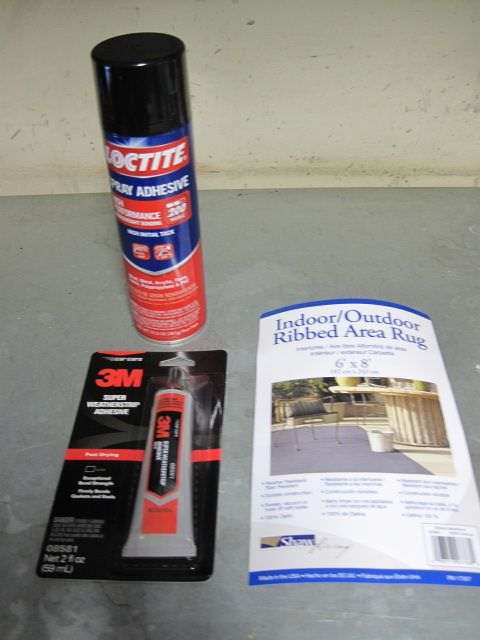
All of the original trunk pieces were there, albeit badly stained and worn. They made good templates or patterns for making the replacements. The mats were easy to make, including the multiple pieced ones. I cut the stitched seams on these pieces and used black 3M trim cement to fasten the new pieces together once they were cut. I laid the old mat pieces on the new carpet material, traced an outline with chalk, and cut. I followed the same method on the cardboard type fender panels and rear seat back panel. The fender panels have been molded with a curve in them, but I was able to get good new pieces cut from them. I then glued the new material on the original cardboard parts and did a final trimming to match the panel. I used a rattle can contact adhesive to glue these pieces together.
I used 2 rolls of the carpeting at $20 per roll, 1 can of the spray adhesive at $6, 1 tube of trim cement at $6, and 11 plastic buttons at $5 for a total materials cost of less than $60.
This was a new kind of job for me as I am usually working with something that is bolted or screwed together, and has grease or oil in, on, or around it. It was a good two days work, and I am most pleased with the results. I hope you think so too keeping in mind that this is not a restoration project but a rejuvenation.
Now it is back to the seats, windlace, package shelf, and carpets. Please stay tuned for these exciting updates.
Take care.
(o{I}o)
Attach file:
 (42.95 KB)
(48.99 KB)
(51.39 KB)
(45.24 KB)
(48.75 KB)

(48.97 KB)

(47.61 KB)
(29.22 KB)
In the last garage sessions I spent a hot Austin weekend redoing the trunk mats and panels. I had been working on the interior and seats, but got distracted by the most unattractive trunk. It was filthy, stained, and worn. It needed something done to make it look better.
I inquired around as to the pattern used on the 1955 mats and panels and found it is no longer available; actually, according to one vendor, it was never reproduced. The 1956 pattern has been reproduced, but would require an entire new set made at a cost of about $750. I understand the vendor does and excellent job, but I am saving the big bucks for the body repair and repainting. I started looking at shops and materials to have it done locally. Not thrilled with the results of this, I got to thinking that this job was within the boundaries of my pay grade.
I found some dark gray indoor/outdoor carpeting at Lowe's and thought it would go nicely with the Clipper's black color, and that it be more attractive than the original material and pattern on the mats and panels. It is flexible and easy to work with and requires no binding so will not ravel at the edges. The trunk lining would not be authentic, but it would be a nice compromise. Even if I had gone with the 1956 pattern replacement pieces, the trunk would not be authentic.
All of the original trunk pieces were there, albeit badly stained and worn. They made good templates or patterns for making the replacements. The mats were easy to make, including the multiple pieced ones. I cut the stitched seams on these pieces and used black 3M trim cement to fasten the new pieces together once they were cut. I laid the old mat pieces on the new carpet material, traced an outline with chalk, and cut. I followed the same method on the cardboard type fender panels and rear seat back panel. The fender panels have been molded with a curve in them, but I was able to get good new pieces cut from them. I then glued the new material on the original cardboard parts and did a final trimming to match the panel. I used a rattle can contact adhesive to glue these pieces together.
I used 2 rolls of the carpeting at $20 per roll, 1 can of the spray adhesive at $6, 1 tube of trim cement at $6, and 11 plastic buttons at $5 for a total materials cost of less than $60.
This was a new kind of job for me as I am usually working with something that is bolted or screwed together, and has grease or oil in, on, or around it. It was a good two days work, and I am most pleased with the results. I hope you think so too keeping in mind that this is not a restoration project but a rejuvenation.
Now it is back to the seats, windlace, package shelf, and carpets. Please stay tuned for these exciting updates.
Take care.
(o{I}o)
Attach file:
(42.95 KB) (48.99 KB) (51.39 KB) (45.24 KB)
 (48.75 KB)
 (48.97 KB)
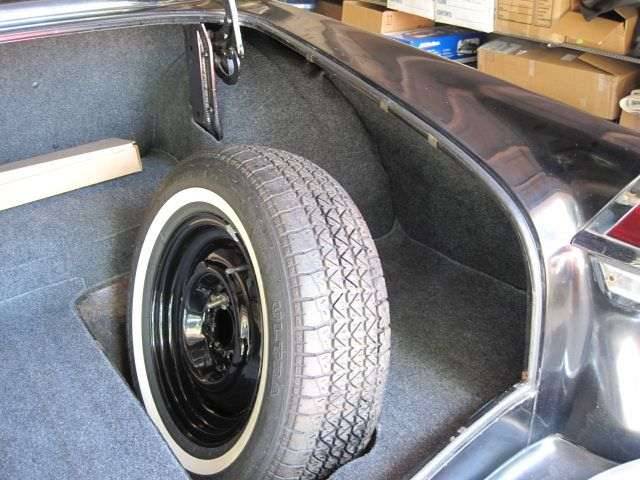 (47.61 KB)
 (29.22 KB)
This Post was from: https://packardinfo.com/xoops/html/modules/newbb/viewtopic.php?post_id=81902