Re: Adventures with a 1955 Clipper
Posted by JWL On 2011/8/15 12:57:46
Hello All,
I made some good progress in the last garage sessions. I got the floorboards painted, the windlaces dyed, and rear carpeting and padding installed. All of this in 100F+ temps. My large fan helps when working in its blast. The problem is I am constantly moving about and the fan will not remotely follow me. May be installing some ceiling fans in the garage.
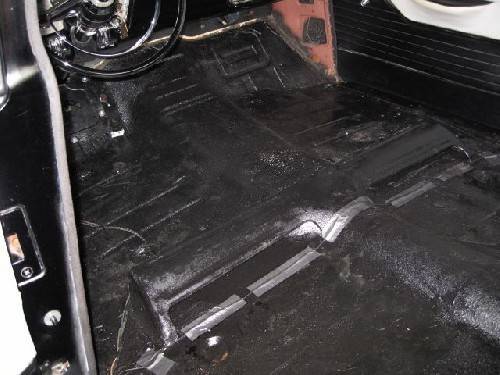
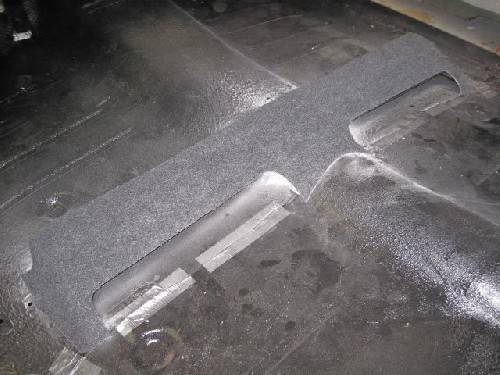
Previously, as described in an earlier post, I used some phosphoric acid to treat the mild surface rust on the floorboards. I then primed these areas. After that, I sprayed on some undercoating on the areas that had been scraped away. I used a rattle can undercoat. It is not as thick as the original undercoating, but it did put a protective surface back on. Lastly, I painted the floorboards with a good oil based satin enamel. It all looks much better than when I first removed the carpets.
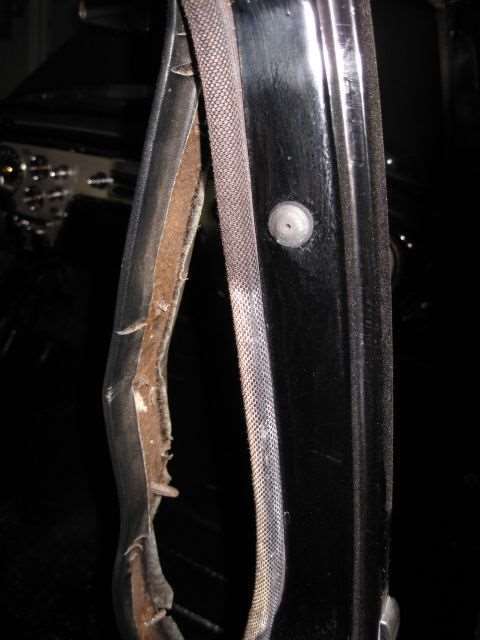
Next was to try and get the windlaces looking better. They were in good shape, overall, but were suffering from severe fading. I carefully applied some leather dye, the same stuff I used on the seat backs. This job went well, and while not new looking, the windlaces are now more black than light tan.
After this, I reattached the windlaces and door post trim. The windlaces are stapled to a tack strip that is encased in the inside of the door openings. I used a heavy-duty stapler for this job.
The doorpost trim was more of a problem. Howard, in a reply to a message in one of the discussion forums, described in good detail how the post trim is attached. He is right on, as usual. Some of the fasteners did not survive being pried out. I used some 3M trim adhesive to fasten the trim to the body where fasteners were missing. I wrapped masking tape around the doorposts to hold the trim in place until the adhesive set. This seems to have worked well. The final thing to fix before installing carpet was to replace the wire going to the right rear door switch. In addition, I taped the rear speaker wire to the rear body wire loom.
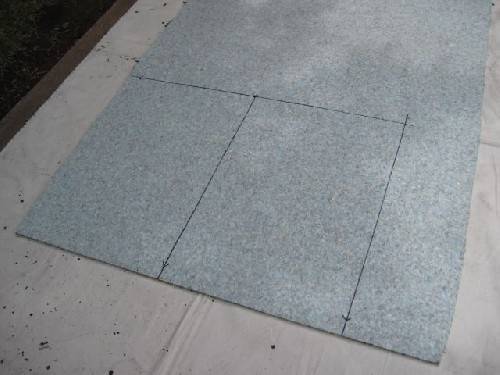
I decided to use the indoor-outdoor carpeting used in the trunk. I like the color and texture, it goes well with the interior colors, and it does not need binding to keep the edges from raveling. The original carpet is a thin material with a rubberized type backing and some fiber padding. I believe the original type carpeting is not available, and has not been reproduced. The replacement carpet resembles the original more than the carpet material now available in auto trim shops, albeit with a bit more texture.
I covered the rear package shelf and the front kick panels with carpeting too. The fiber board these pieces are made of has not survived well over the last 56 years. I think the carpet covering on these pieces makes for a richer looking interior, not original, but nice. No photos on these pieces, yet.
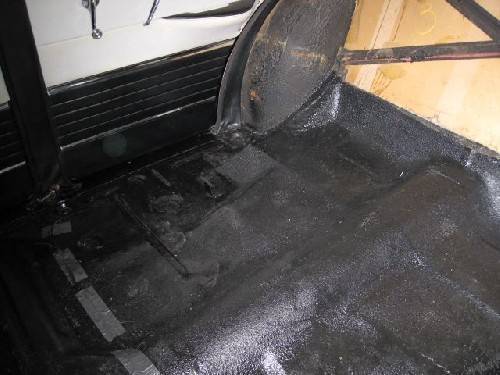
I decided to start with the rear passenger compartment first. The footrest was the first to get covered. This piece was glued down using a Locktite spray contact adhesive.
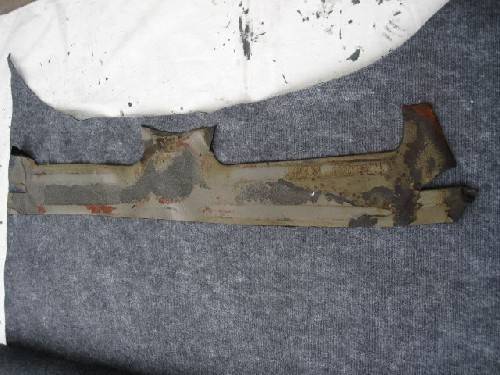
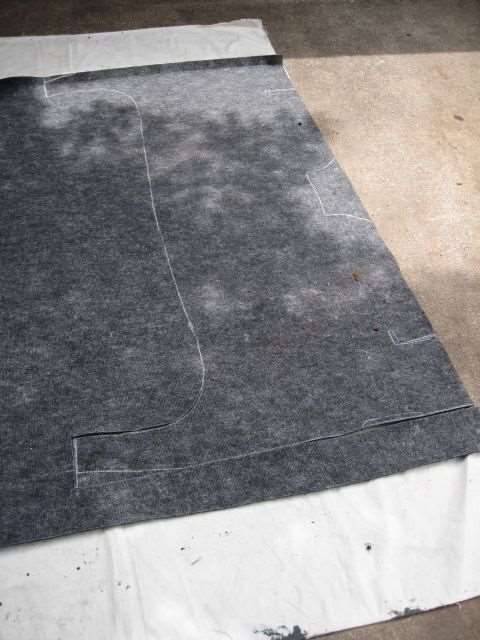
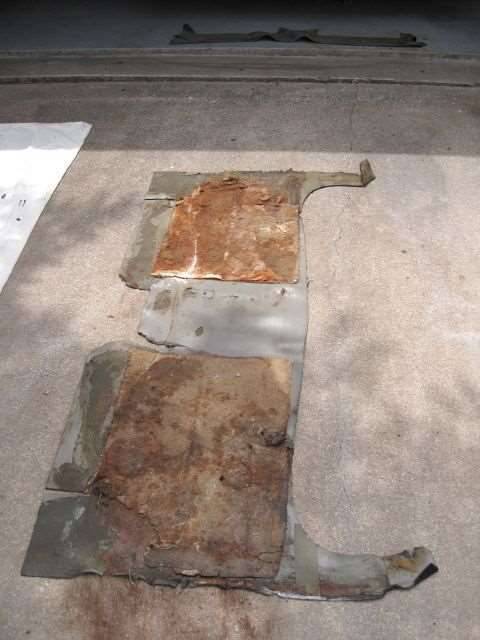
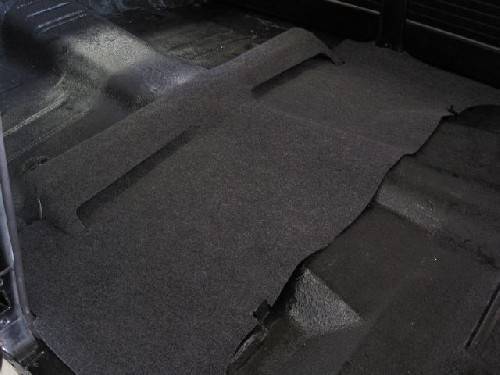
Next was the rear floor carpet. In spite of being misshapen and worn, the original carpet provided a good pattern to cut a new one. The original carpet used a fiber material padding. I used a good quality carpet padding instead of the original type material. I cut two pieces of padding of the same dimensions as the original. After the rear carpet was in place I lifted the back of the carpet and fit the padding in place. Once satisfied everything lined-up I attached the padding to the carpet the spray adhesive. The carpet is not glued to the floorboards. It is held in place by the rear seat cushion and the door threshold plates. It can easily be removed, just like the original.
I am pleased with the results and will next move to the front carpet. This will be a more complicated piece to cut and fit, especially around the pedals area. That is why I am saving it for last. May get to it later this week.
Take care and thanks for your interest.
(o{}o)
Attach file:
 (37.74 KB)
(34.05 KB)
(27.15 KB)
(39.71 KB)
(40.57 KB)

(37.21 KB)
(35.31 KB)
(33.49 KB)
(30.74 KB)
(27.78 KB)
I made some good progress in the last garage sessions. I got the floorboards painted, the windlaces dyed, and rear carpeting and padding installed. All of this in 100F+ temps. My large fan helps when working in its blast. The problem is I am constantly moving about and the fan will not remotely follow me. May be installing some ceiling fans in the garage.
Previously, as described in an earlier post, I used some phosphoric acid to treat the mild surface rust on the floorboards. I then primed these areas. After that, I sprayed on some undercoating on the areas that had been scraped away. I used a rattle can undercoat. It is not as thick as the original undercoating, but it did put a protective surface back on. Lastly, I painted the floorboards with a good oil based satin enamel. It all looks much better than when I first removed the carpets.
Next was to try and get the windlaces looking better. They were in good shape, overall, but were suffering from severe fading. I carefully applied some leather dye, the same stuff I used on the seat backs. This job went well, and while not new looking, the windlaces are now more black than light tan.
After this, I reattached the windlaces and door post trim. The windlaces are stapled to a tack strip that is encased in the inside of the door openings. I used a heavy-duty stapler for this job.
The doorpost trim was more of a problem. Howard, in a reply to a message in one of the discussion forums, described in good detail how the post trim is attached. He is right on, as usual. Some of the fasteners did not survive being pried out. I used some 3M trim adhesive to fasten the trim to the body where fasteners were missing. I wrapped masking tape around the doorposts to hold the trim in place until the adhesive set. This seems to have worked well. The final thing to fix before installing carpet was to replace the wire going to the right rear door switch. In addition, I taped the rear speaker wire to the rear body wire loom.
I decided to use the indoor-outdoor carpeting used in the trunk. I like the color and texture, it goes well with the interior colors, and it does not need binding to keep the edges from raveling. The original carpet is a thin material with a rubberized type backing and some fiber padding. I believe the original type carpeting is not available, and has not been reproduced. The replacement carpet resembles the original more than the carpet material now available in auto trim shops, albeit with a bit more texture.
I covered the rear package shelf and the front kick panels with carpeting too. The fiber board these pieces are made of has not survived well over the last 56 years. I think the carpet covering on these pieces makes for a richer looking interior, not original, but nice. No photos on these pieces, yet.
I decided to start with the rear passenger compartment first. The footrest was the first to get covered. This piece was glued down using a Locktite spray contact adhesive.
Next was the rear floor carpet. In spite of being misshapen and worn, the original carpet provided a good pattern to cut a new one. The original carpet used a fiber material padding. I used a good quality carpet padding instead of the original type material. I cut two pieces of padding of the same dimensions as the original. After the rear carpet was in place I lifted the back of the carpet and fit the padding in place. Once satisfied everything lined-up I attached the padding to the carpet the spray adhesive. The carpet is not glued to the floorboards. It is held in place by the rear seat cushion and the door threshold plates. It can easily be removed, just like the original.
I am pleased with the results and will next move to the front carpet. This will be a more complicated piece to cut and fit, especially around the pedals area. That is why I am saving it for last. May get to it later this week.
Take care and thanks for your interest.
(o{}o)
Attach file:
(37.74 KB)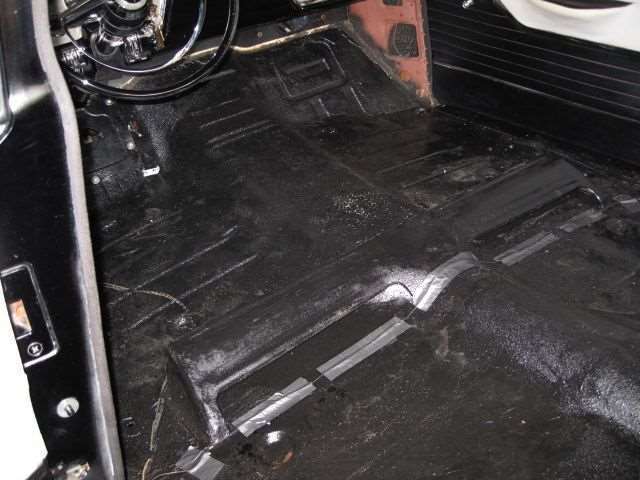 (34.05 KB)
 (27.15 KB) (39.71 KB)
 (40.57 KB)
 (37.21 KB)
 (35.31 KB) (33.49 KB) (30.74 KB)
 (27.78 KB)
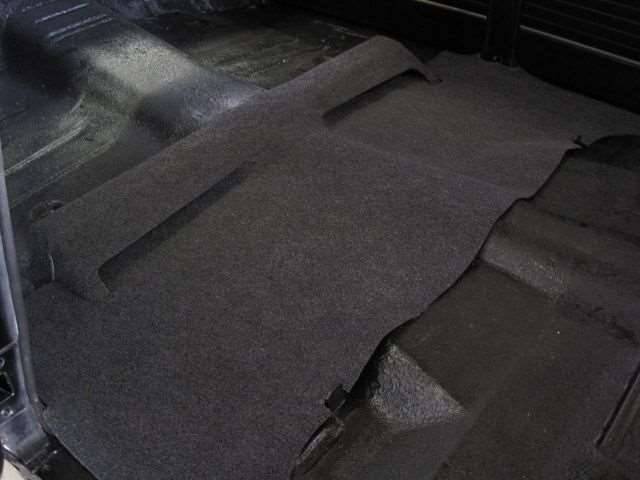
This Post was from: https://packardinfo.com/xoops/html/modules/newbb/viewtopic.php?post_id=83899