Re: The Duchess Project: 1940 Super 8 Convertible Sedan
Posted by Joe Santana On 2011/9/14 0:16:53
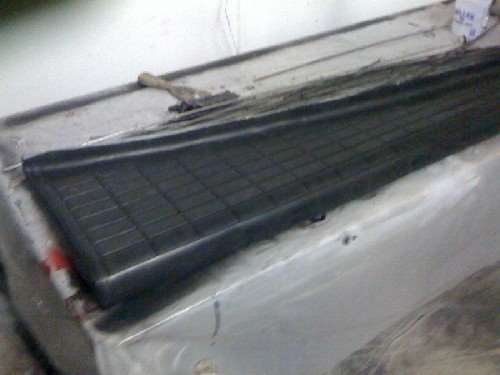
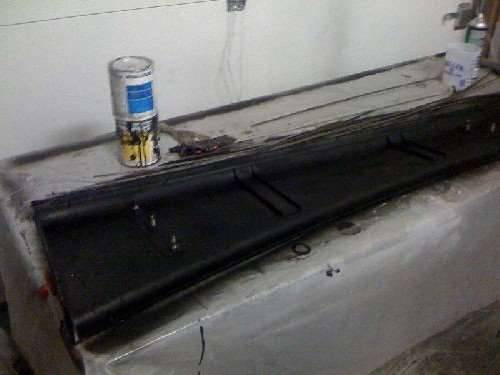
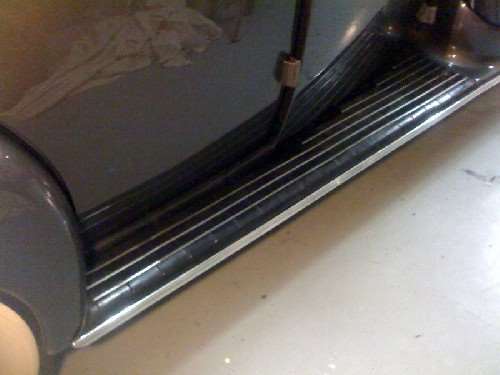
RUNNING BOARDS: Masked and painted the undersides with DAR 9000 black epoxy paint with flattener/hardener added.
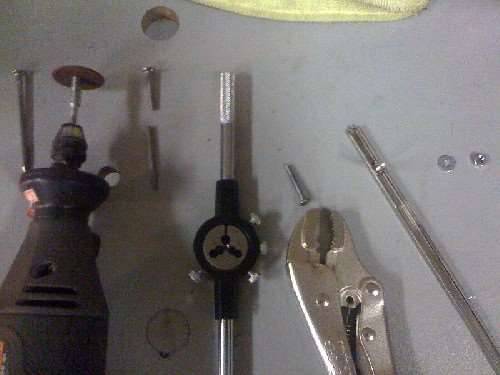
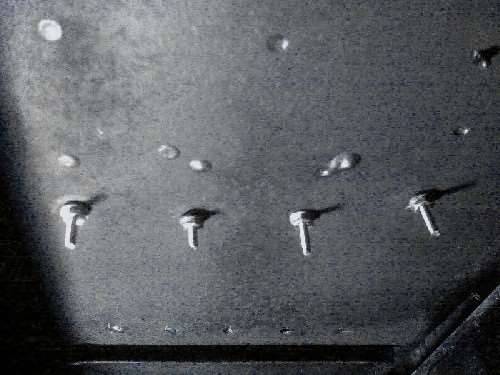
I trimmed off the excess rubber at the rear and added the edging piece and trimmed that. Then made about 20 4-40 screws from nails, cutting the nails with the dremel and threading them. I didn't file the heads first because I needed to grip the head of the nail to thread it and the filed head would be too thin. Then ground the heads and a bit of the edges until the new screw would slide in where the clips go. I used 3 screws and 2-3 clips per strip to fasten them to the running board. I used a 5/32 bit to drill holes in the rubber troughs about ever 4-5 "pillows."
Fastening the side moulding was fairly simple. Follow the instructions that came with the new strips... clamp it in place. I poked an awl through the existing mounting holes in the metal running board, pushed through the new rubber and scratched the inside of the side moulding. Then mounted each wing clip to line up with those scratches, pushed the mounting screws through the rubber and metal holes, added flat washers, lock washers and nuts.
Each of the strips took time to clean. I'd done some earlier. I think it came out well, so closing in on completion with one more step done.
Attach file:
 (41.26 KB)
(46.03 KB)
(52.37 KB)
(37.45 KB)

(66.06 KB)
(46.28 KB)
(44.77 KB)

I trimmed off the excess rubber at the rear and added the edging piece and trimmed that. Then made about 20 4-40 screws from nails, cutting the nails with the dremel and threading them. I didn't file the heads first because I needed to grip the head of the nail to thread it and the filed head would be too thin. Then ground the heads and a bit of the edges until the new screw would slide in where the clips go. I used 3 screws and 2-3 clips per strip to fasten them to the running board. I used a 5/32 bit to drill holes in the rubber troughs about ever 4-5 "pillows."
Fastening the side moulding was fairly simple. Follow the instructions that came with the new strips... clamp it in place. I poked an awl through the existing mounting holes in the metal running board, pushed through the new rubber and scratched the inside of the side moulding. Then mounted each wing clip to line up with those scratches, pushed the mounting screws through the rubber and metal holes, added flat washers, lock washers and nuts.
Each of the strips took time to clean. I'd done some earlier. I think it came out well, so closing in on completion with one more step done.
Attach file:
(41.26 KB)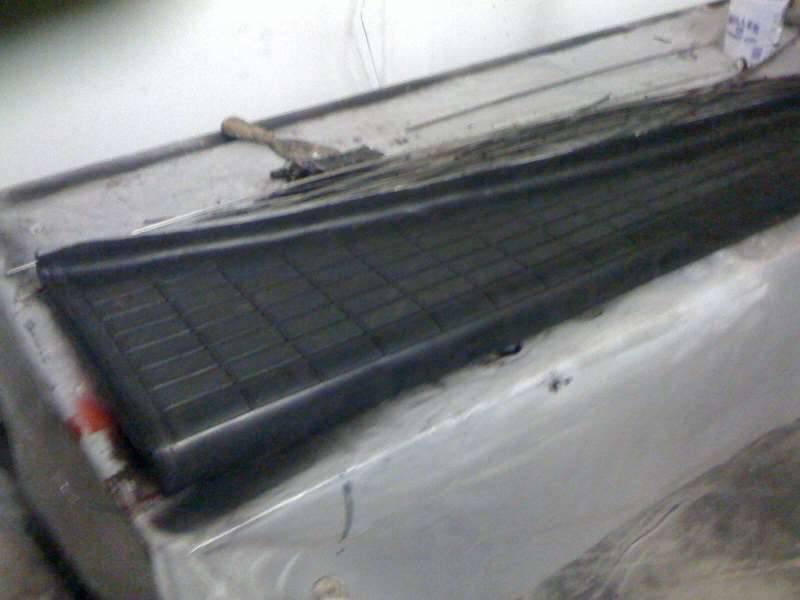 (46.03 KB)
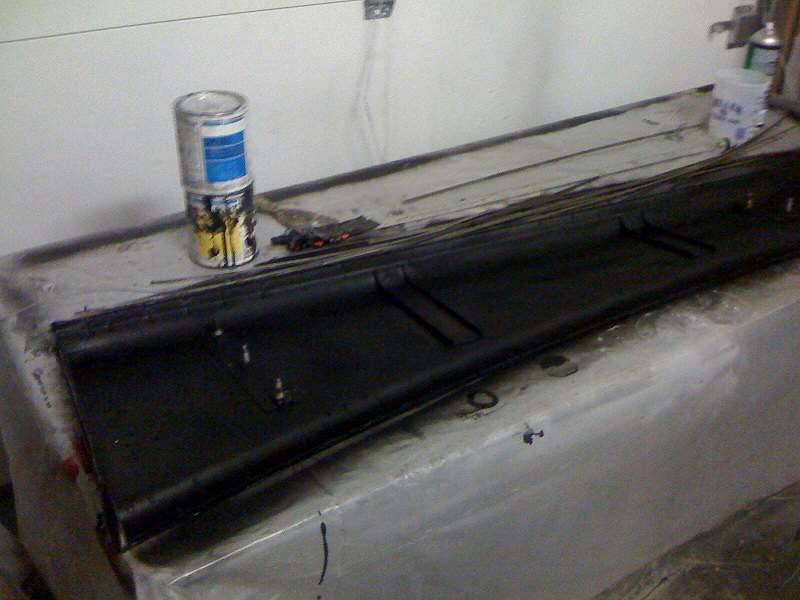 (52.37 KB)
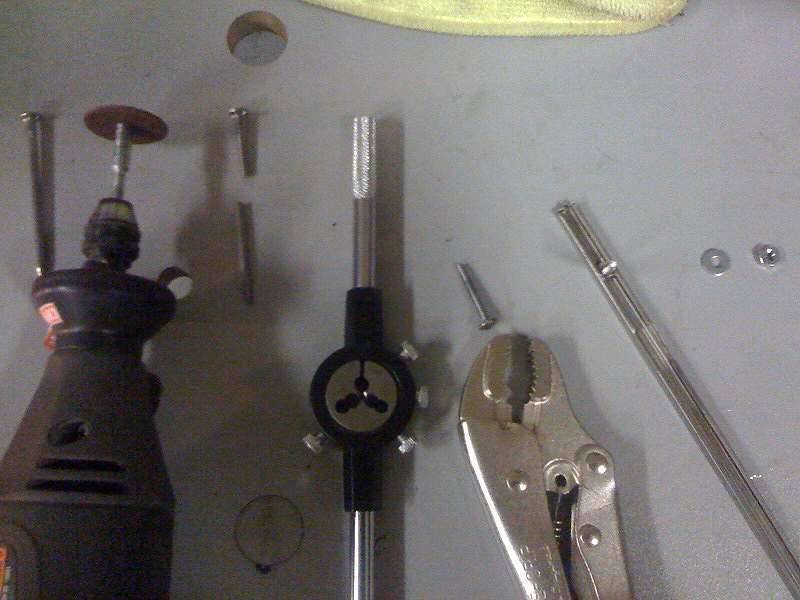 (37.45 KB)
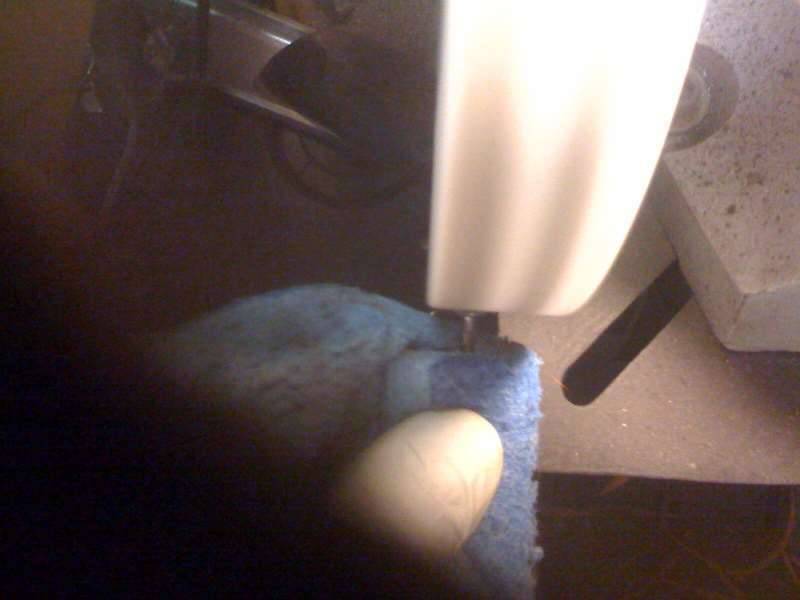 (66.06 KB)
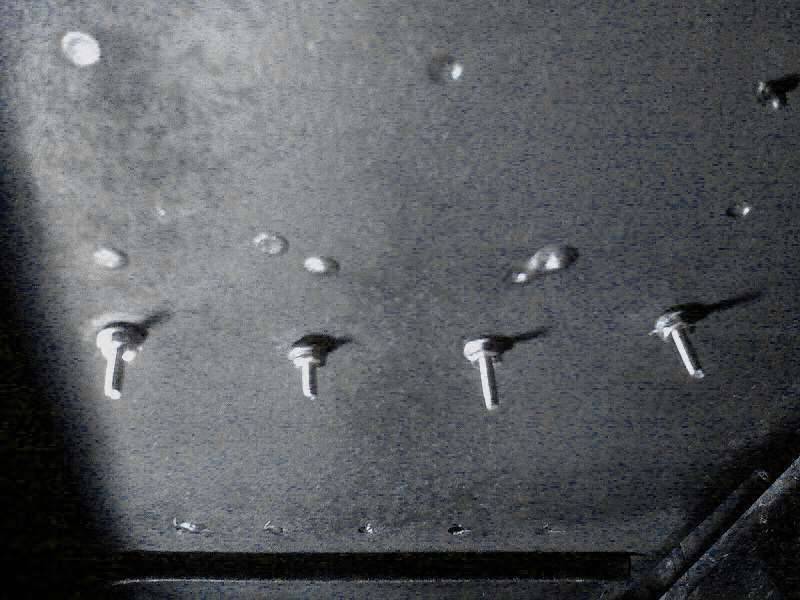 (46.28 KB)
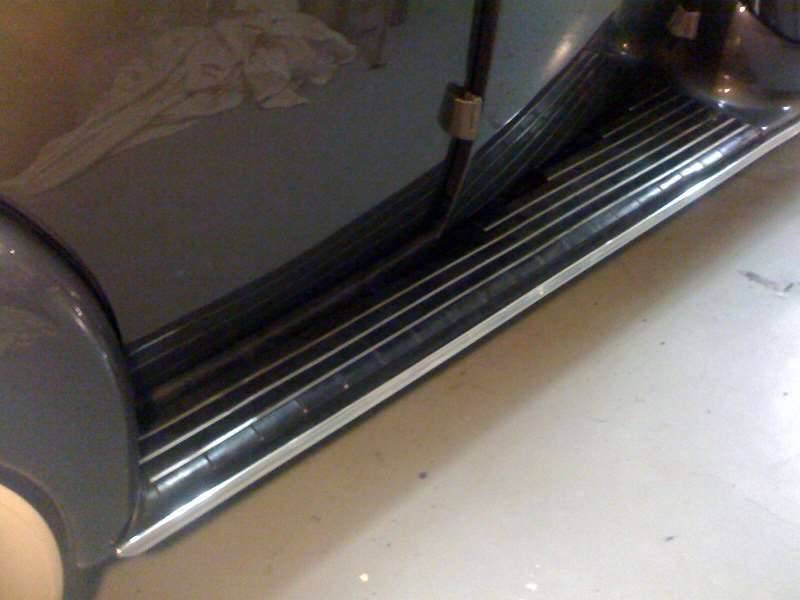 (44.77 KB)
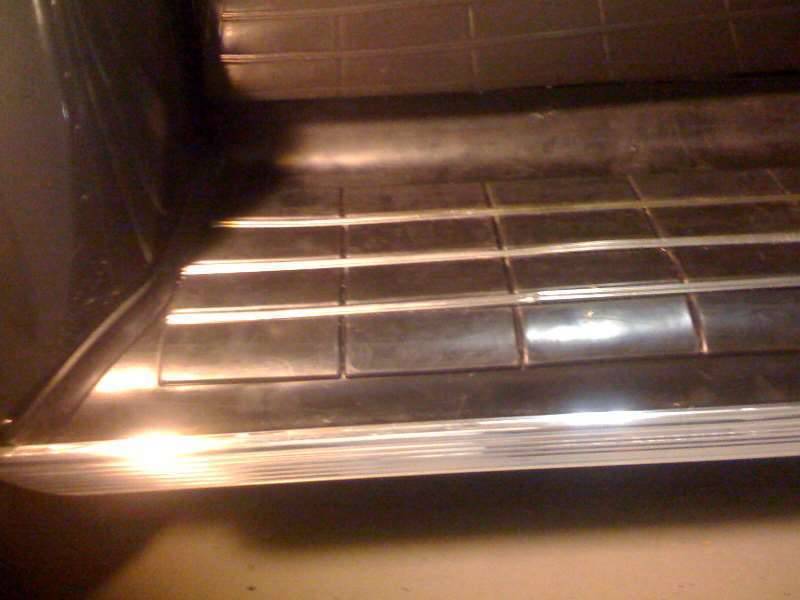
This Post was from: https://packardinfo.com/xoops/html/modules/newbb/viewtopic.php?post_id=85980