Re: Stewart's 1955 Packard 400
Posted by Stewart Ballard On 2013/10/6 17:23:26
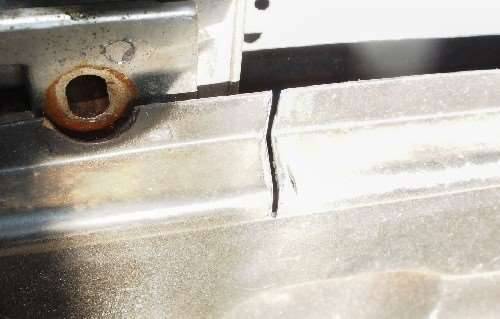
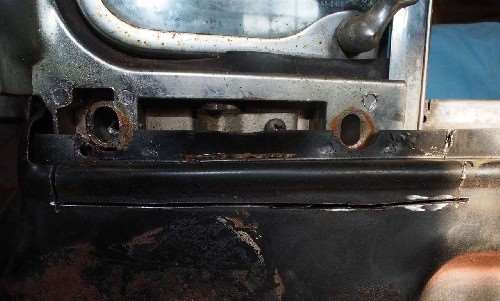
I finally got that wing window removed. I made the cut as I mentioned before (image 1) and it would not budge so, I cut all the way across the bottom of the wing window as seen in image 2. That got the job done. Once the window was removed I could see the piece that was welded below it, image 3. I had no idea that was there. It explains why my first cut wasn't enough.
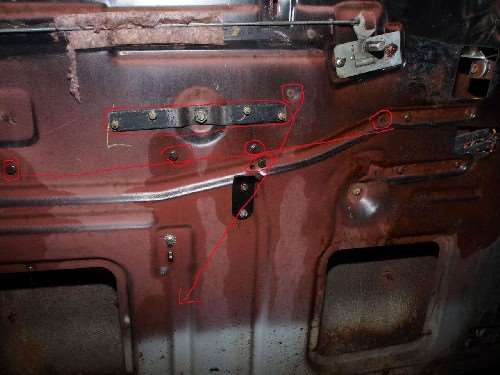
Started working on the driver's side door Saturday. This side was much easier. In two hours I was able to do almost everything that took me 3 weeks on the passenger side door. A couple weeks ago I posted an image of what appeared to be a modification that had been made to that door. I found several more but can't make any since out of them. There were two pieces of angle iron bolted inside the door. Image 4 shows that bolt placement from the outside. I used Photoshop to draw some red lines on the image. In Image 5 I laid the angle iron on top the passenger side door to give you an idea of its location.
None of the original holes or bolts appeared to be damage or out of alignment. Nothing inside the door was attached to the angle iron. It appeared to be an original Packard window regulator. Identical to the one removed from the passenger side door (except reversed).
The door is still attached to the car because of one hinge bolt. That top, inside bolt is so hard to reach and very tight. I'll spray it for a few days and try again. That's the last bolt on the car that I want to break off.
Attach file:
 (87.61 KB)
(98.44 KB)
(81.43 KB)
(111.99 KB)
(106.63 KB)
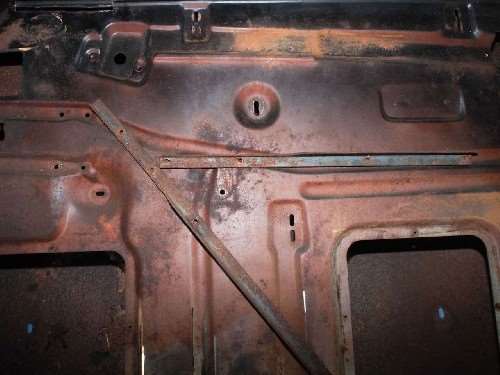
Started working on the driver's side door Saturday. This side was much easier. In two hours I was able to do almost everything that took me 3 weeks on the passenger side door. A couple weeks ago I posted an image of what appeared to be a modification that had been made to that door. I found several more but can't make any since out of them. There were two pieces of angle iron bolted inside the door. Image 4 shows that bolt placement from the outside. I used Photoshop to draw some red lines on the image. In Image 5 I laid the angle iron on top the passenger side door to give you an idea of its location.
None of the original holes or bolts appeared to be damage or out of alignment. Nothing inside the door was attached to the angle iron. It appeared to be an original Packard window regulator. Identical to the one removed from the passenger side door (except reversed).
The door is still attached to the car because of one hinge bolt. That top, inside bolt is so hard to reach and very tight. I'll spray it for a few days and try again. That's the last bolt on the car that I want to break off.
Attach file:
(87.61 KB)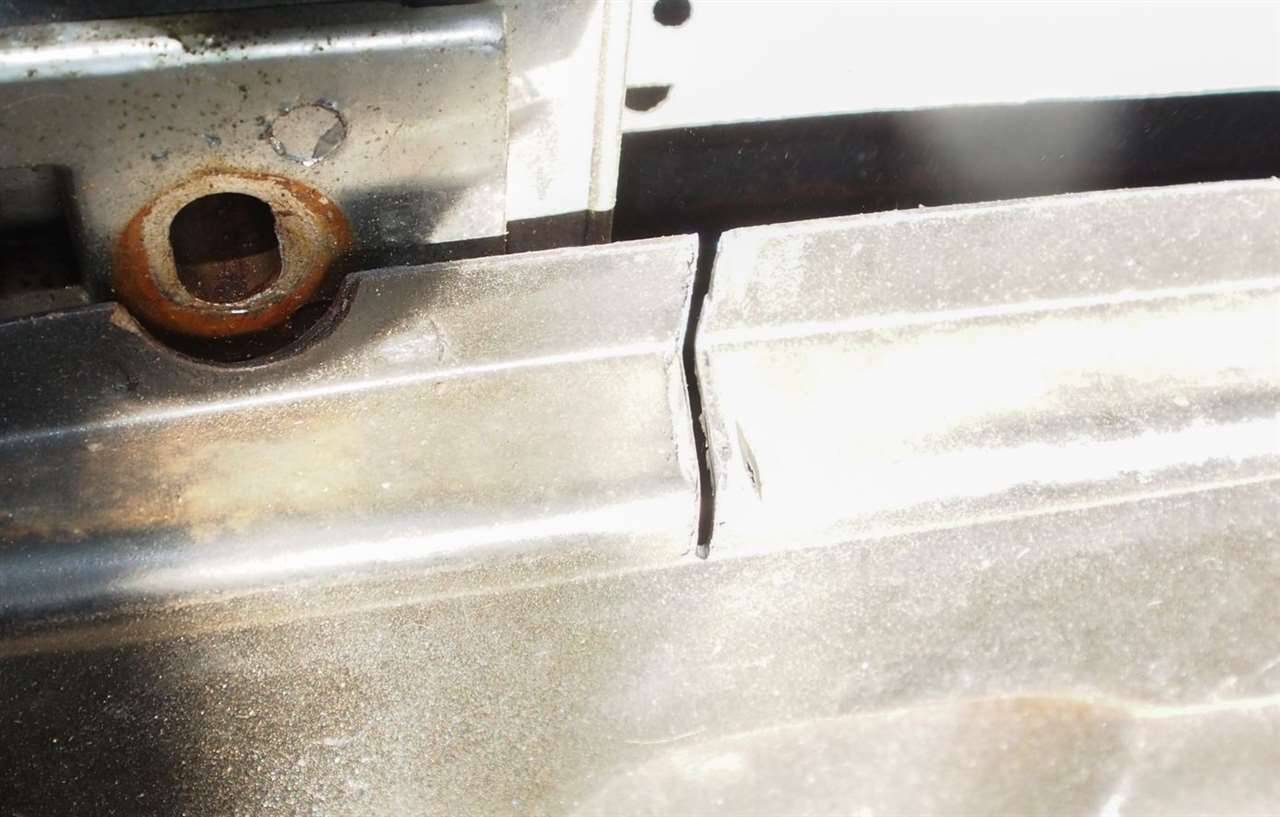 (98.44 KB)
 (81.43 KB)
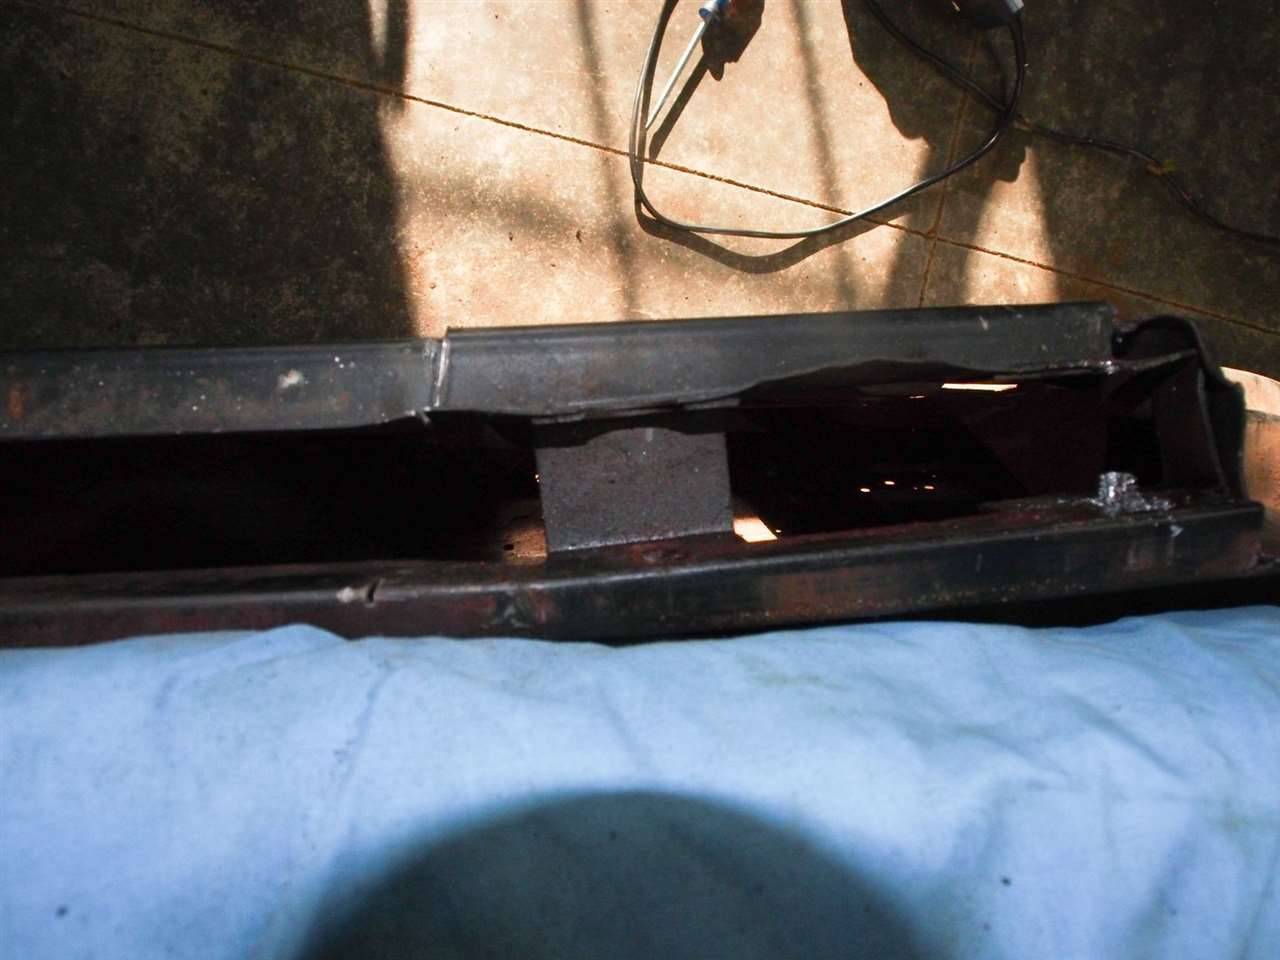 (111.99 KB)
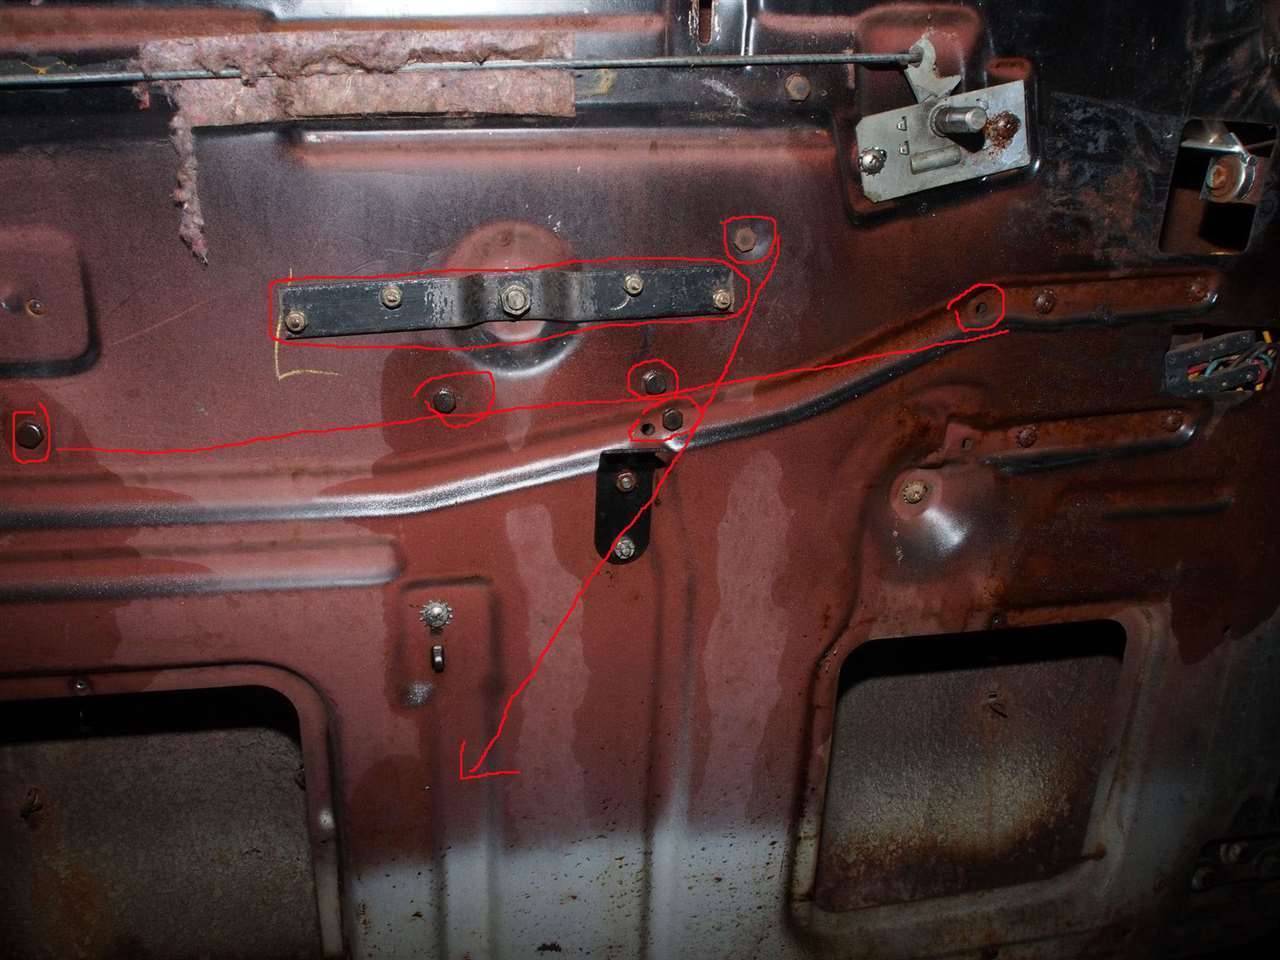 (106.63 KB)
This Post was from: https://packardinfo.com/xoops/html/modules/newbb/viewtopic.php?post_id=132619