Re: Howard's 47 Custom project
Posted by HH56 On 2013/11/24 17:04:00
Not a lot accomplished since the last post. Took the radiator and gas tank in for a check and clean. Both in good condition so that was a pleasant surprise.
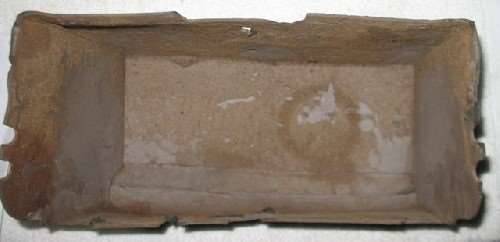
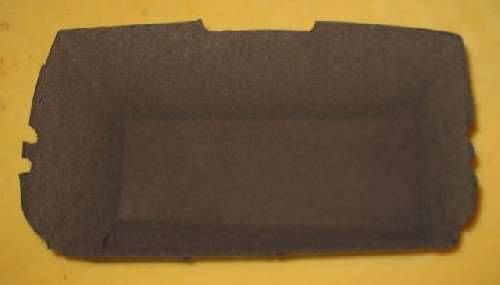
Now that the dash is refinished and somewhat more presentable, dug the glovebox out of storage in preparation for making a new one. Found some interesting scribbles on the old box. Am assuming it was original but not 100% sure. Anyway, if it is it might be option codes -- the OD lettering might be self explanatory and think it might be EMC at the left. H might be heater and RV maybe radio/vac antenna. Not sure on the numbers. At any rate, the new box turned out well. Flocked both it and the glove box door with the nylon feather brown shade from FlockIt. To my thinking it might be just a tad darker than the original but am perfectly satisfied with the outcome.
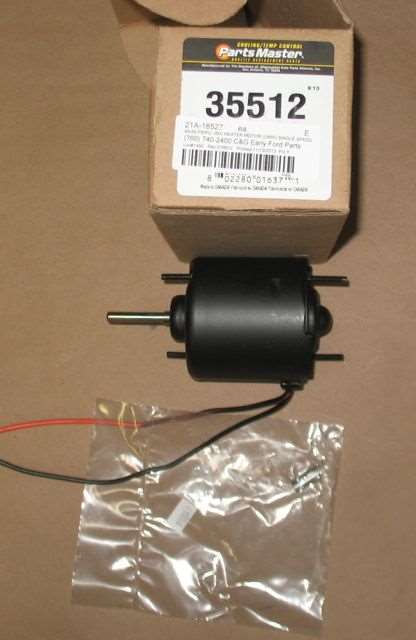
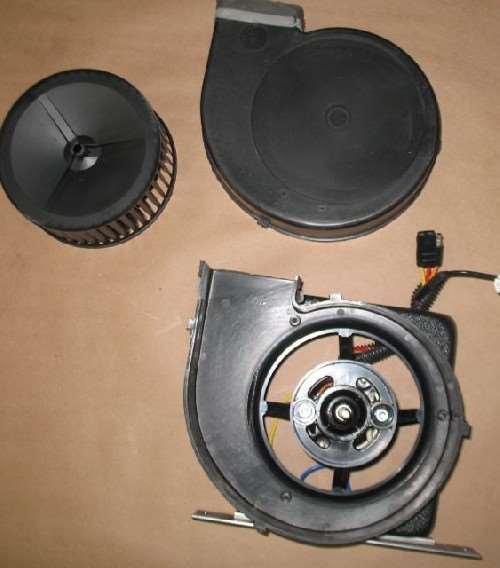
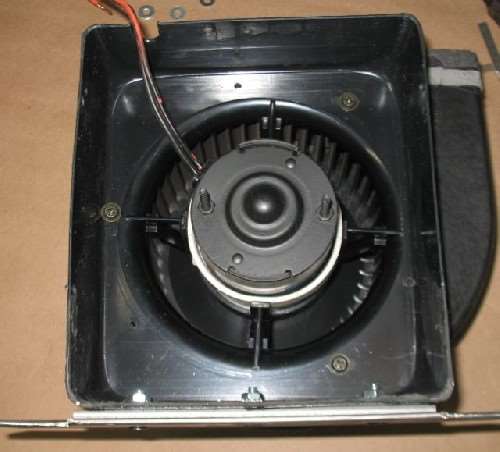
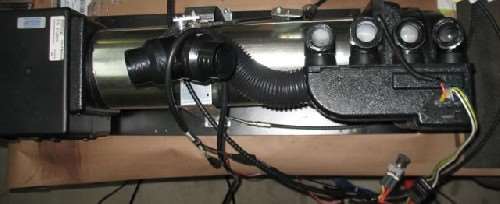
Played around some more with the AC. Decided to put to rest whether a 6v motor would fit and be better than running the 12v motor on 6v. The motor chosen was a universal heater motor. This one came from C&G Early Ford & is a permanent magnet motor so will be polarity dependent. Results are even though it is a slightly smaller motor than the stock AC offering, it does provide about a third more air output. Not quite as much as the original motor on 12v but enough more than running the original on 6v to make it worthwhile. As mentioned, it is just slightly less diameter than the original but fits in the Hurricane unit nicely. No mods to the unit other than to build up the diameter in order to use the side supports properly. That was not a big deal. Whether it would fit in a VintageAir unit is unknown. It WILL NOT work with any 12v unit having electronic controls. I do have some ideas on how to make it work a typical hang on dual shaft setup but would take some experimenting. I won't go to the expense of doing it but if anyone wants to try I will gladly share some thoughts. One downside I did run into is the motor shaft is longer so shaft did have to be shortened 3/8 inch to fit inside the housing. Used a Dremel cut off wheel and it trimmed just fine. The motor has a 1/4" shaft but came with a slip on adapter to enable the use of the stock 5/16 diameter blower wheel hubs. All in all it took about an hour to change and modify the motor and the results are positive.
Electrical did have to be changed slightly. The original motor is the typical modern 3 speed with a separate wire selecting a portion of the winding for each speed. The universal motor is a two wire single speed which utilizes a resistor or rheostat to drop the RPMs. In order to use the stock loom as is I elected to add a resistor bank at the unit and power that with the original switch and wiring. Each speed from the switch now feeds either the full voltage or 2 different value resistors. The output of those resistors or the base voltage goes to the motor to enable the same 3 speeds. The resistor is a regular Napa 12v unit but seems to work nicely. It does need to mount in the air flow for cooling but there was a convenient spot right at the blower output so that went in with no difficulty.
Ignore the looks as we're still in the mockup stage for the entire unit and awaiting the false cover to finalize some of the locations. As to the motor, I've had it running on the bench all day and so far no difficulties. All in all, a worthwhile experiment.
Attach file:
 (18.93 KB)

(19.01 KB)
(14.29 KB)
(24.19 KB)
(31.86 KB)
(35.66 KB)
(22.14 KB)
Now that the dash is refinished and somewhat more presentable, dug the glovebox out of storage in preparation for making a new one. Found some interesting scribbles on the old box. Am assuming it was original but not 100% sure. Anyway, if it is it might be option codes -- the OD lettering might be self explanatory and think it might be EMC at the left. H might be heater and RV maybe radio/vac antenna. Not sure on the numbers. At any rate, the new box turned out well. Flocked both it and the glove box door with the nylon feather brown shade from FlockIt. To my thinking it might be just a tad darker than the original but am perfectly satisfied with the outcome.
Played around some more with the AC. Decided to put to rest whether a 6v motor would fit and be better than running the 12v motor on 6v. The motor chosen was a universal heater motor. This one came from C&G Early Ford & is a permanent magnet motor so will be polarity dependent. Results are even though it is a slightly smaller motor than the stock AC offering, it does provide about a third more air output. Not quite as much as the original motor on 12v but enough more than running the original on 6v to make it worthwhile. As mentioned, it is just slightly less diameter than the original but fits in the Hurricane unit nicely. No mods to the unit other than to build up the diameter in order to use the side supports properly. That was not a big deal. Whether it would fit in a VintageAir unit is unknown. It WILL NOT work with any 12v unit having electronic controls. I do have some ideas on how to make it work a typical hang on dual shaft setup but would take some experimenting. I won't go to the expense of doing it but if anyone wants to try I will gladly share some thoughts. One downside I did run into is the motor shaft is longer so shaft did have to be shortened 3/8 inch to fit inside the housing. Used a Dremel cut off wheel and it trimmed just fine. The motor has a 1/4" shaft but came with a slip on adapter to enable the use of the stock 5/16 diameter blower wheel hubs. All in all it took about an hour to change and modify the motor and the results are positive.
Electrical did have to be changed slightly. The original motor is the typical modern 3 speed with a separate wire selecting a portion of the winding for each speed. The universal motor is a two wire single speed which utilizes a resistor or rheostat to drop the RPMs. In order to use the stock loom as is I elected to add a resistor bank at the unit and power that with the original switch and wiring. Each speed from the switch now feeds either the full voltage or 2 different value resistors. The output of those resistors or the base voltage goes to the motor to enable the same 3 speeds. The resistor is a regular Napa 12v unit but seems to work nicely. It does need to mount in the air flow for cooling but there was a convenient spot right at the blower output so that went in with no difficulty.
Ignore the looks as we're still in the mockup stage for the entire unit and awaiting the false cover to finalize some of the locations. As to the motor, I've had it running on the bench all day and so far no difficulties. All in all, a worthwhile experiment.
Attach file:
(18.93 KB) (19.01 KB)
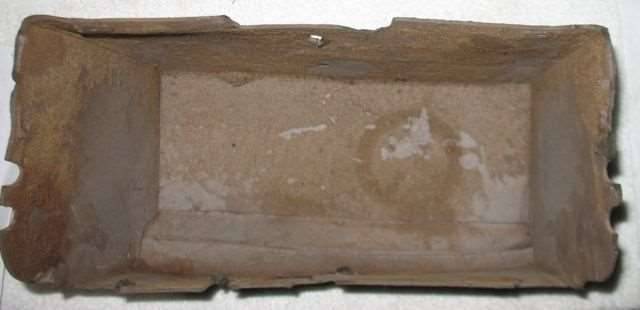 (14.29 KB)
 (24.19 KB) (31.86 KB)
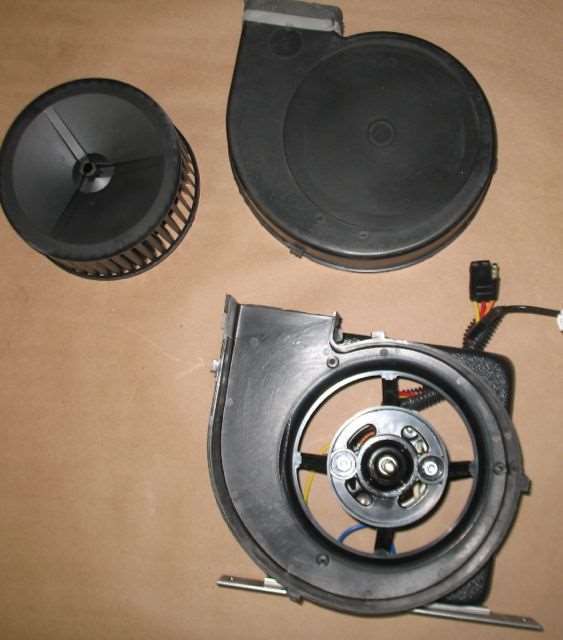 (35.66 KB)
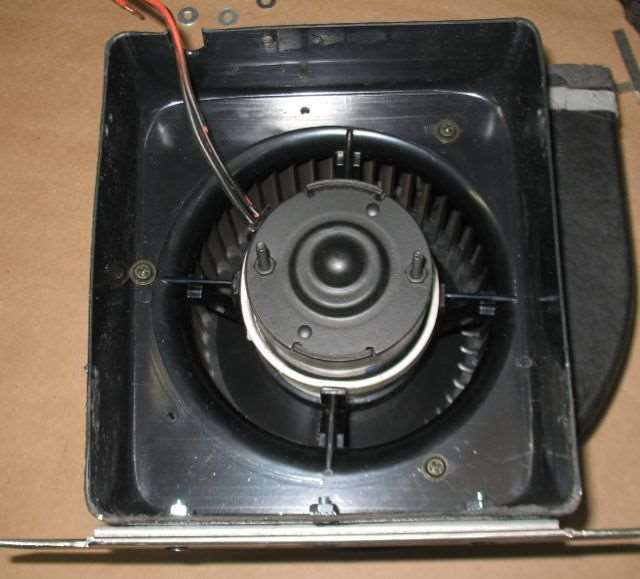 (22.14 KB)
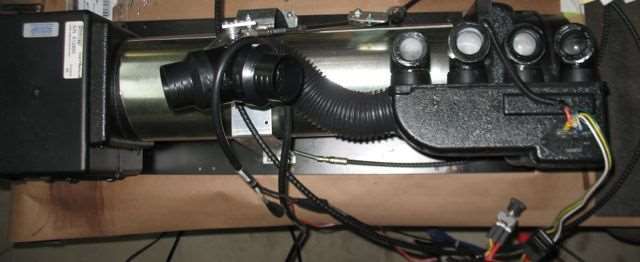
This Post was from: https://packardinfo.com/xoops/html/modules/newbb/viewtopic.php?post_id=135589