Re: Howard's 47 Custom project
Posted by HH56 On 2015/7/26 11:58:00
Other projects are still in progress. AC mechanical and electrical is for the most part done. Reworked the relay module I mentioned earlier so I can keep the car 6v and hopefully not have to worry about maintaining a separate 12v battery. If I could have found some 6v solenoid valves for the vent and temp controls, would have kept it all 6v. To make it work now, have an additional 6v battery and the module located in a box next to the unit in the trunk. That one is normally in parallel with the main battery so it is kept charged. When the AC is turned on the second battery transfers to a series arrangement and feeds the AC unit directly. Probably went overkill on a couple of things but had nothing better to do. I tried to anticipate any contingencies such as the main battery accidentally hooked up in a reverse polarity connection or having the smaller battery in the circuit when starting with too small of wires to carry any starting current. Hopefully I took care of those possibilities but time will tell.
Have also worked on my version of the knobs and the prewar vent. Knobs are also for the most part done and turned out OK. Made a new enlarged pattern to account for the zinc shrinkage so the second set fit better than the first set. I did learn a couple of things by the time the last one of those was done so may redo the bunch again but they are usable as is. That is one nice thing about working in something that can be remelted. PackardV8 was correct in that the zinc polished up quite nicely. Don't think I will need to have them chromed because with just the polishing they seem to match the old originals very well. Not sure how to keep them that way though. Maybe clear lacquer.
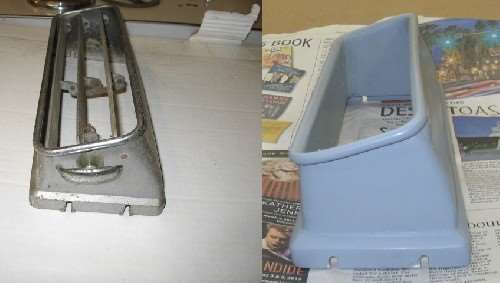
The current project is my version of the prewar vent. With the photo O_D took and some others plus dimensions Joe was kind enough to supply I made a slightly oversized version out of wood of what I thought it looked like. Not being very artistic it is kind of hard for me to judge just by photos.
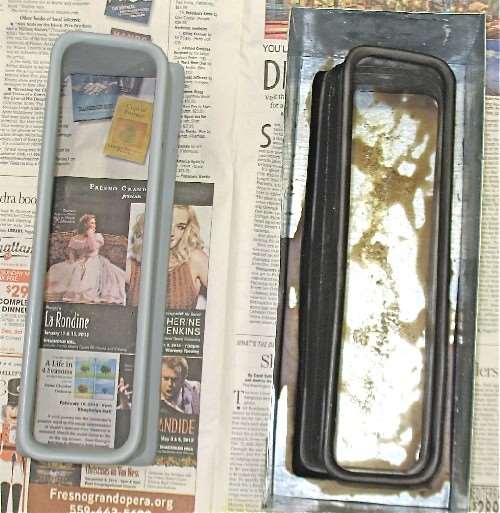
Here are the photos of what I came up with and a wax casting in the container almost ready to have the investment material poured. To my thinking, while not a perfect match to the original it will be satisfactory for my use. I also wanted mine a bit taller than the original so the opening would be above the high seat back a bit more. The photos are not quite at the same angle so hopefully mine is not as much taller as the photos would indicate. Made a silicone mold out of the pattern to cast some duplicates in wax.
Next is to do the zinc so I can see how much shrinkage and if I guessed close enough on the oversize. Trying to figure out now just how to pour that much zinc with my crude and small facilities without burning me or the house. Also thinking I first need to have a filler in the center to make a cavity to keep investment material use down. That should also make the thickness of the investment more even so it will heat equally on both sides of the wax so that will burn out more evenly. After I get an as cast size will work on the louvers.
Attach file:
 (33.72 KB)
(128.32 KB)
Have also worked on my version of the knobs and the prewar vent. Knobs are also for the most part done and turned out OK. Made a new enlarged pattern to account for the zinc shrinkage so the second set fit better than the first set. I did learn a couple of things by the time the last one of those was done so may redo the bunch again but they are usable as is. That is one nice thing about working in something that can be remelted. PackardV8 was correct in that the zinc polished up quite nicely. Don't think I will need to have them chromed because with just the polishing they seem to match the old originals very well. Not sure how to keep them that way though. Maybe clear lacquer.
The current project is my version of the prewar vent. With the photo O_D took and some others plus dimensions Joe was kind enough to supply I made a slightly oversized version out of wood of what I thought it looked like. Not being very artistic it is kind of hard for me to judge just by photos.
Here are the photos of what I came up with and a wax casting in the container almost ready to have the investment material poured. To my thinking, while not a perfect match to the original it will be satisfactory for my use. I also wanted mine a bit taller than the original so the opening would be above the high seat back a bit more. The photos are not quite at the same angle so hopefully mine is not as much taller as the photos would indicate. Made a silicone mold out of the pattern to cast some duplicates in wax.
Next is to do the zinc so I can see how much shrinkage and if I guessed close enough on the oversize. Trying to figure out now just how to pour that much zinc with my crude and small facilities without burning me or the house. Also thinking I first need to have a filler in the center to make a cavity to keep investment material use down. That should also make the thickness of the investment more even so it will heat equally on both sides of the wax so that will burn out more evenly. After I get an as cast size will work on the louvers.
Attach file:
(33.72 KB)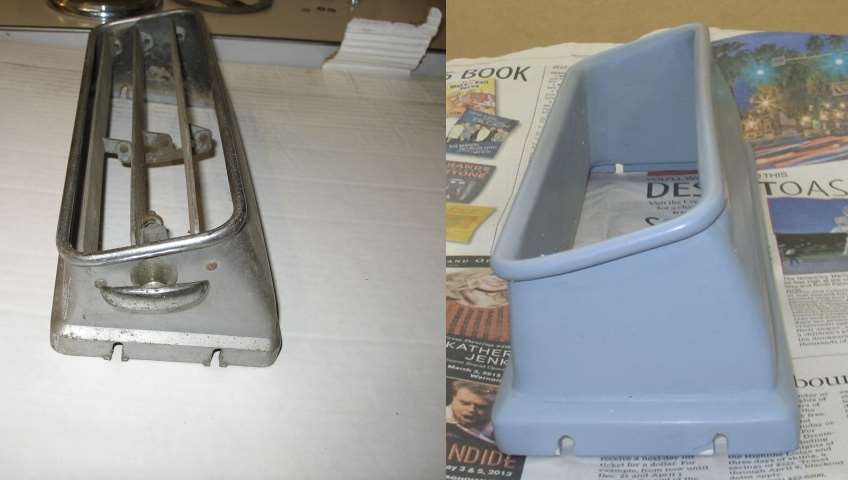 (128.32 KB)
This Post was from: https://packardinfo.com/xoops/html/modules/newbb/viewtopic.php?post_id=164633