Re: Howard's 47 Custom project
Posted by HH56 On 2016/4/22 11:38:12
Haven't wanted to do much physical labor so not a lot to report for the last few weeks. Weather has been decent but the inclination to work hasn't been there. Only minor jobs and projects got any attention.
Decided against keeping the non factory flow thru ventilation feature so fixed the rusted out area below the trunk lid. With my lack of welding skills and definitely not being a threat to any body shop guys figured the worst -- but it turned out much better than I had expected and is fairly presentable. Matches the rest of car so won't win any concours. Still had to use a little body filler but amazingly it did not take the usual gallon and a half per square foot I have come to expect with any body work I do.
Was talking headlight relays with another poster so decided to go ahead and do the ones for this car. Made a small module to hold the relays similar to the way I did the 56. That job is now out of the way.
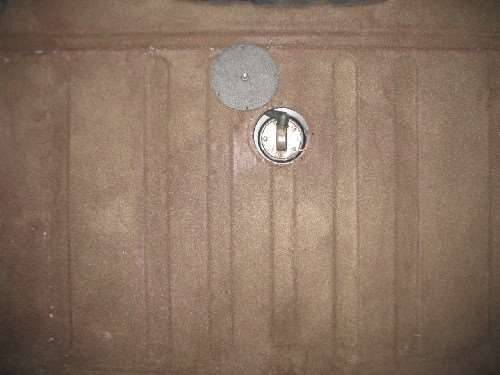
Went ahead and made the opening to access the sender from the trunk as another poster wanted to do with his 23rd series. Can't speak for any other models but this car had a raised spot in trunk floor somewhat over the sender. It is actually offset slightly so the terminal portion is in the bulge not the entire sender. Using a hole saw, a 3 1/2" hole was cut so the hole edge was exactly at the edge of bulge toward the front where it flattens to meet the floor. That put the center of hole just over 1" behind the center of bulge. Perfect centering front to back and as the photo shows right to left is good if I would slide the tank slightly. The edge of hole was depressed using a flanger and cover was made out of heavy sheet metal using a 4 1/4 hole saw. That diameter fits the flange and cover lies flat. The sender is well below the trunk floor but with another poster reporting weight had shorted his sender, used a boot and also added rubber to the bottom of cover. Also used a rubber well nut in the center of cover so the floor can't deflect far enough to hit the terminal before the well nut stops it.
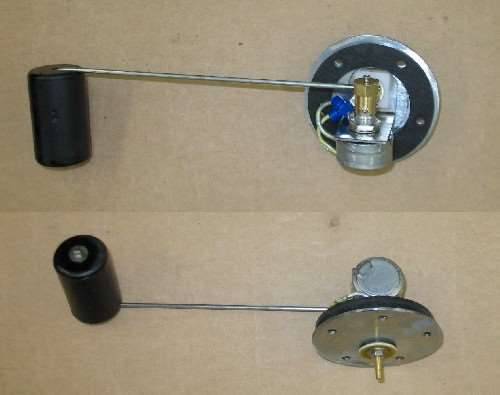
Even after cleaning, found that the original gas sender was temperamental. Since it is the old obsolete 100 - 0 ohm range it needs to be sent in for repair. I had experimented with an aftermarket GM unit but the 0-90 ohms just didn't quite cut it and gauge never read less than 1/8 full. Not good when you want the accurate readings to be when you are nearing fumes. Until I actually get the original repaired decided to make one to fill the hole. Used a wire wound potentiometer of sufficient range so that the length and partial arc of float could be manipulated to give me the 100 ohms empty and 0 full the gauge needs. I soaked potentiometer in gasoline for a couple of weeks with no ill effects but encapsulated the assy in tank sealer anyway since I don't know the long term effects of gasoline on the component. Seems to be working but is just experimental and probably won't be used long term.
Am fairly sure based on scraps of adhesive and old flock found all over the interior that the entire trunk including floor was flocked originally. Customs also had the carpeted interior in addition to flocking. To finish off the trunk I went ahead and flocked the entire trunk since I had ordered plenty of material and had to use it somewhere. At least it presents a somewhat finished look. Definitely needs a mat and or carpet for longevity though.
Attach file:
 (96.21 KB)

(105.58 KB)
(68.14 KB)
Decided against keeping the non factory flow thru ventilation feature so fixed the rusted out area below the trunk lid. With my lack of welding skills and definitely not being a threat to any body shop guys figured the worst -- but it turned out much better than I had expected and is fairly presentable. Matches the rest of car so won't win any concours. Still had to use a little body filler but amazingly it did not take the usual gallon and a half per square foot I have come to expect with any body work I do.
Was talking headlight relays with another poster so decided to go ahead and do the ones for this car. Made a small module to hold the relays similar to the way I did the 56. That job is now out of the way.
Went ahead and made the opening to access the sender from the trunk as another poster wanted to do with his 23rd series. Can't speak for any other models but this car had a raised spot in trunk floor somewhat over the sender. It is actually offset slightly so the terminal portion is in the bulge not the entire sender. Using a hole saw, a 3 1/2" hole was cut so the hole edge was exactly at the edge of bulge toward the front where it flattens to meet the floor. That put the center of hole just over 1" behind the center of bulge. Perfect centering front to back and as the photo shows right to left is good if I would slide the tank slightly. The edge of hole was depressed using a flanger and cover was made out of heavy sheet metal using a 4 1/4 hole saw. That diameter fits the flange and cover lies flat. The sender is well below the trunk floor but with another poster reporting weight had shorted his sender, used a boot and also added rubber to the bottom of cover. Also used a rubber well nut in the center of cover so the floor can't deflect far enough to hit the terminal before the well nut stops it.
Even after cleaning, found that the original gas sender was temperamental. Since it is the old obsolete 100 - 0 ohm range it needs to be sent in for repair. I had experimented with an aftermarket GM unit but the 0-90 ohms just didn't quite cut it and gauge never read less than 1/8 full. Not good when you want the accurate readings to be when you are nearing fumes. Until I actually get the original repaired decided to make one to fill the hole. Used a wire wound potentiometer of sufficient range so that the length and partial arc of float could be manipulated to give me the 100 ohms empty and 0 full the gauge needs. I soaked potentiometer in gasoline for a couple of weeks with no ill effects but encapsulated the assy in tank sealer anyway since I don't know the long term effects of gasoline on the component. Seems to be working but is just experimental and probably won't be used long term.
Am fairly sure based on scraps of adhesive and old flock found all over the interior that the entire trunk including floor was flocked originally. Customs also had the carpeted interior in addition to flocking. To finish off the trunk I went ahead and flocked the entire trunk since I had ordered plenty of material and had to use it somewhere. At least it presents a somewhat finished look. Definitely needs a mat and or carpet for longevity though.
Attach file:
(96.21 KB)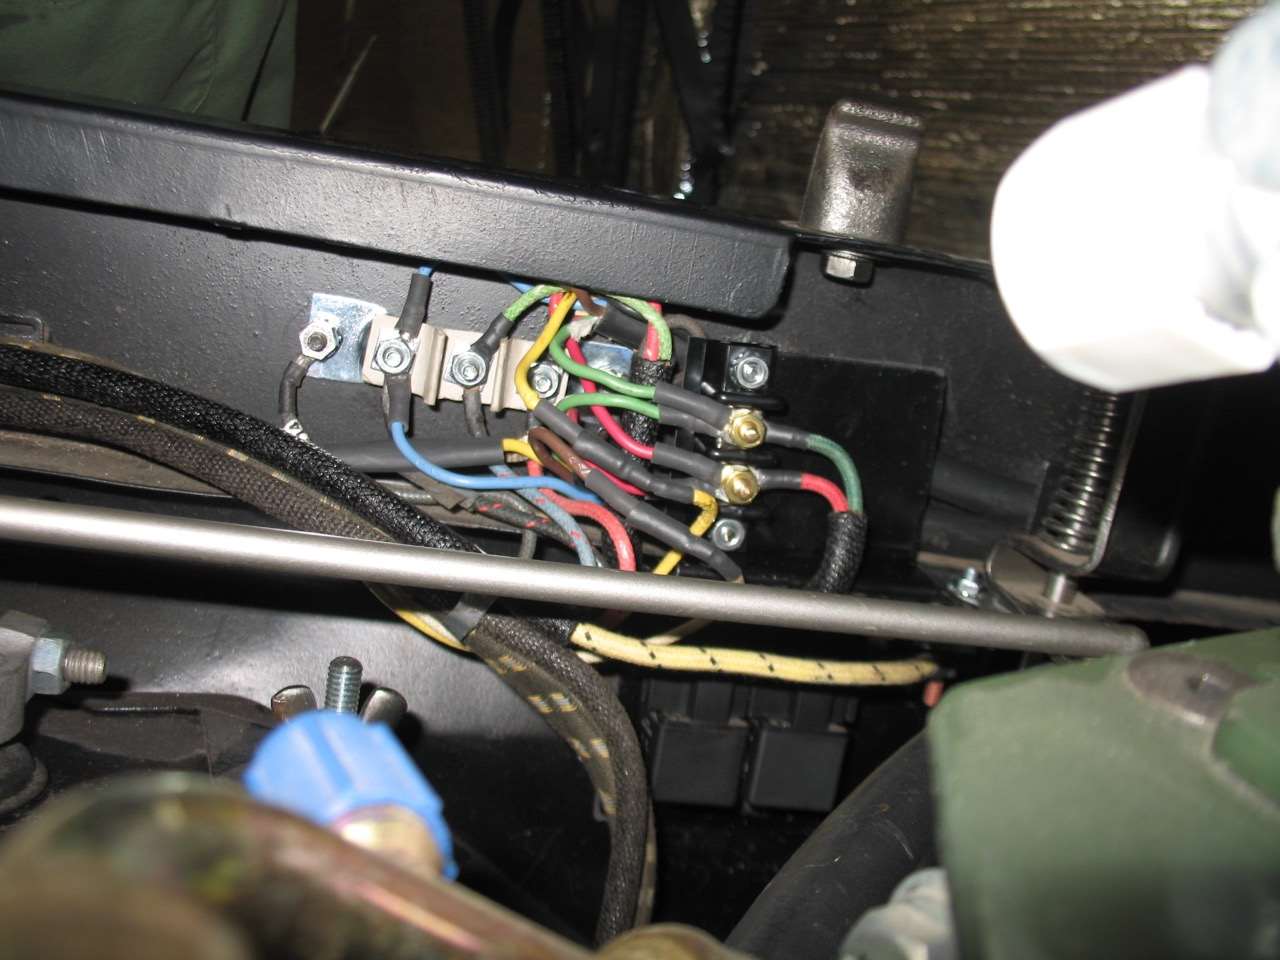 (105.58 KB)
 (68.14 KB)
This Post was from: https://packardinfo.com/xoops/html/modules/newbb/viewtopic.php?post_id=175686