Re: KPack's 1954 Panama
Posted by kevinpackard On 2020/11/14 23:24:44
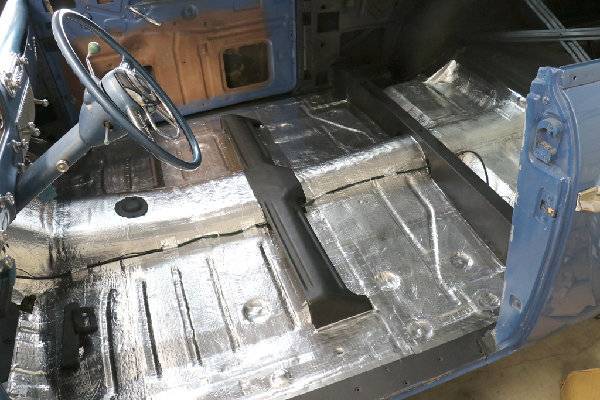
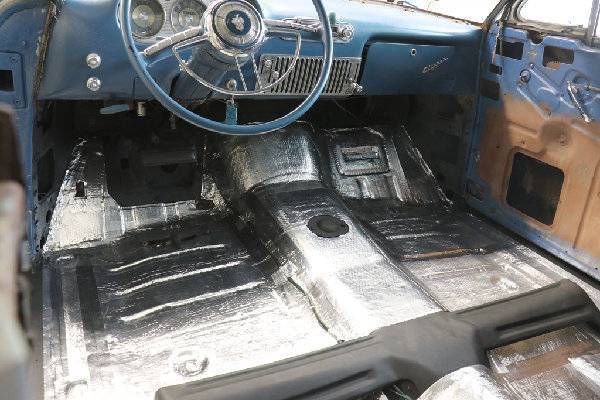
Well that was a job. Not terribly difficult, just time consuming. I spent an hour or so each evening this week, after the kids went to bed, applying sound deadener to the entire floor of the cabin. Finally wrapped it up today. Inside the doors will be done after I clean and paint the inside metal with something to protect it. Currently have used 1.5 boxes of Noico material and almost an entire roll of aluminum tape.
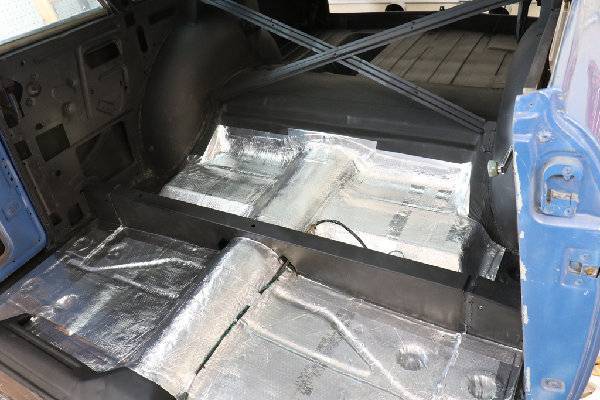
I carried the sound mats back underneath the rear seat. All seams were taped with aluminum tape. I still need to cut out the holes for the seat mounts and front seatbelt mounts.
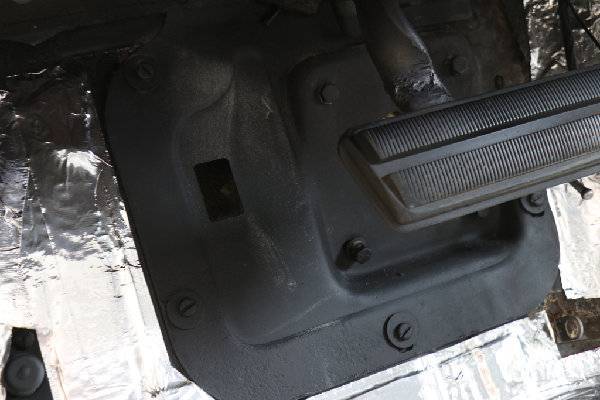
I meant to ask this earlier, but why does my toe plate have a hole for a clutch pedal? It's an automatic, and the plate is made for the Bendix TreadleVac to mount to, so I don't understand the reason for the other hole. I'd like to get it sealed up somehow, but didn't weld it because I wasn't sure.
Also, the mounting spot for the power brakes is currently wide open. I'll likely fab a piece of metal and gasket that will bolt in and block that spot off. At some point I will likely go back to the original power brake set up, but that will come later. Time and money. I have most of the components from the Easamatic that came with the car (pedal, boot, booster cylinder), but I'm missing things like some of the vacuum parts on the booster and the entire master cylinder. Probably better off to just buy a completely rebuilt unit. Then I need to see if I can even still use the factory brake pedal.....there was some weird stuff done when the PO installed the aftermarket (Ford?) dual master cylinder and huge brake pedal.
-Kevin
Attach file:
 (125.12 KB)
(122.99 KB)
(110.38 KB)
(84.23 KB)
I carried the sound mats back underneath the rear seat. All seams were taped with aluminum tape. I still need to cut out the holes for the seat mounts and front seatbelt mounts.
I meant to ask this earlier, but why does my toe plate have a hole for a clutch pedal? It's an automatic, and the plate is made for the Bendix TreadleVac to mount to, so I don't understand the reason for the other hole. I'd like to get it sealed up somehow, but didn't weld it because I wasn't sure.
Also, the mounting spot for the power brakes is currently wide open. I'll likely fab a piece of metal and gasket that will bolt in and block that spot off. At some point I will likely go back to the original power brake set up, but that will come later. Time and money. I have most of the components from the Easamatic that came with the car (pedal, boot, booster cylinder), but I'm missing things like some of the vacuum parts on the booster and the entire master cylinder. Probably better off to just buy a completely rebuilt unit. Then I need to see if I can even still use the factory brake pedal.....there was some weird stuff done when the PO installed the aftermarket (Ford?) dual master cylinder and huge brake pedal.
-Kevin
Attach file:
(125.12 KB) (122.99 KB)
 (110.38 KB)
 (84.23 KB)
This Post was from: https://packardinfo.com/xoops/html/modules/newbb/viewtopic.php?post_id=228001