Re: BigKev's 1954 Packard Clipper Deluxe Sedan
Posted by BigKev On 2008/12/14 21:38:42
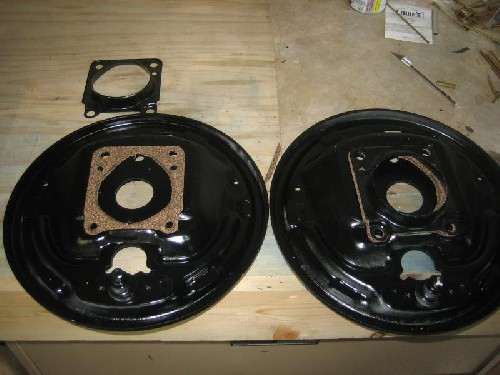
Well today I decided to get the front brake backing plates back on the car. I had to make new gaskets to replace both the backing plate to spindle seal and also the grease shield to backing plate seal. Both of mine were toast when I disassembled the plates last year.
So the first picture shows the new shield gaskets I made. (Gaskets By Kev). So now I was ready to reassembly the plates.
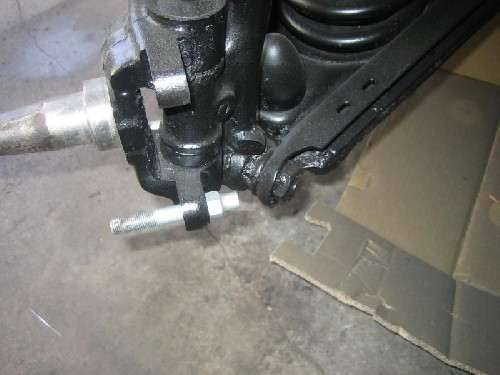
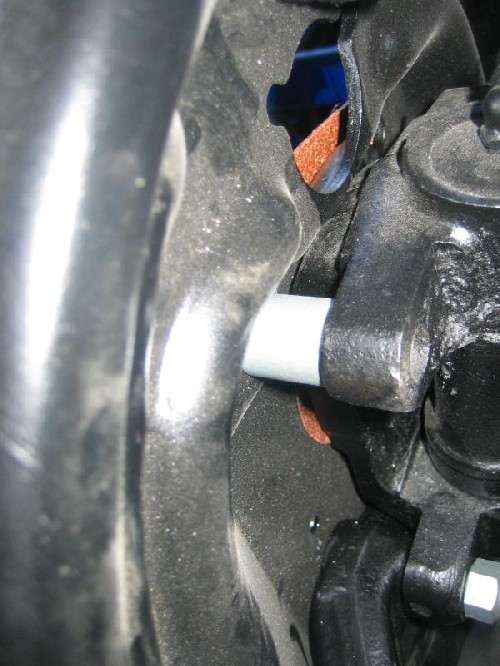
One of the things that needed to be done was reinstall the steering links and arms, as those were off the car to be refinished and the steering arms bolt between the backing plate and the spindle assembly. So I crawled up under the car, and reinstalled the cross-shaft and tie rods back to the steering box. Then back out from under the car to connect the steering arm to the spindle assembly. Then I realized a problem. When I disassembled the steering last year, I had separated the tie rods and the steering arms to replace the tie-rod end dust boots. Somewhere in that process I had swapped the left and right steering arms. CRAP! Live and learn. So out came the steering assembly again, and I had to separate the tie-rods from the steering arm and swap them left to right, and then reassemble everything. Thank god I still had that pickle-fork. In the process of re-separating the tie-rods, I dinged up the paint of the steering assembly from the vise, so I will touch that up after I get it back on the car. Luckily I was able to get them apart without tearing up the new dust boots.
Take 2!
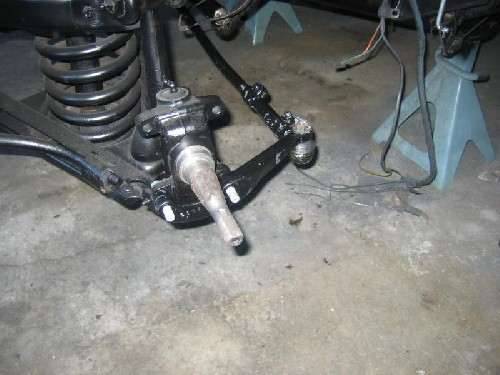
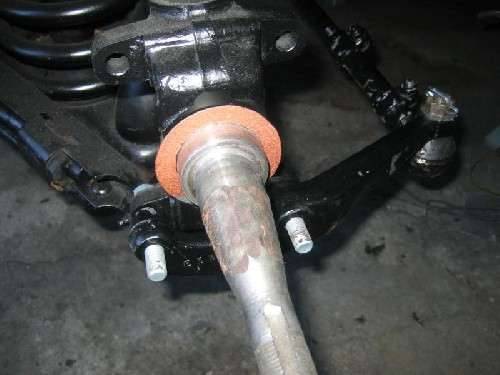
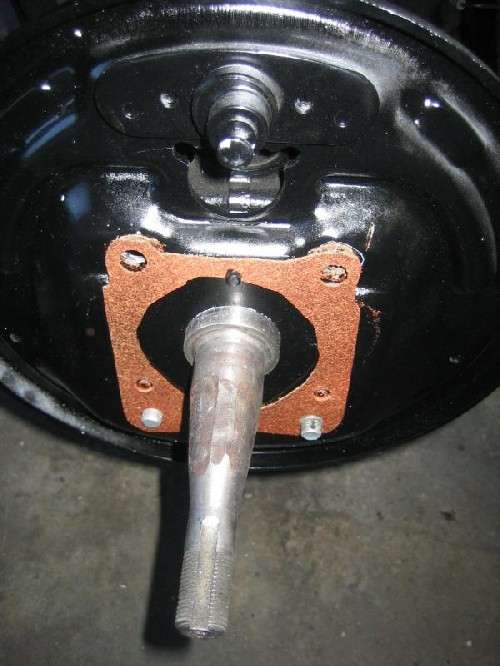
So now with the steering assembly back in, I was ready to reassemble the backing plates. So I installed the lower two bolts. The rear most, lower bolt has an odd-shaped heat which acts as a steering bump stop. With the bolts in, the next thing was to install the spindle seal which I sprayed with some copper gasket sealer. Next the backing plate when on, followed by the grease shield gasket, also coated with copper sealer.
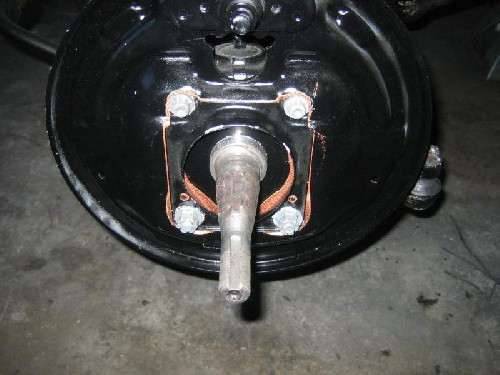
Then the great shield was added, and the lower castle nuts where added thumb tight to hold everything in place. The top two bolts were next, but they require a spacer to be added between the backing plate and the spindle assembly. With the top bolts in place, and went around and tightened all the bolts in a cross pattern. New cotter-pins were added to the castle nuts.
So that was about all the good light I had in the garage before dark. So the remainder of the front brakes will wait for another day. Please excuse all the dust on the parts and frame.
Attach file:
 (50.83 KB)
(45.43 KB)
(55.94 KB)
(48.23 KB)
(57.71 KB)
(59.89 KB)

(58.09 KB)
(52.17 KB)
So the first picture shows the new shield gaskets I made. (Gaskets By Kev). So now I was ready to reassembly the plates.
One of the things that needed to be done was reinstall the steering links and arms, as those were off the car to be refinished and the steering arms bolt between the backing plate and the spindle assembly. So I crawled up under the car, and reinstalled the cross-shaft and tie rods back to the steering box. Then back out from under the car to connect the steering arm to the spindle assembly. Then I realized a problem. When I disassembled the steering last year, I had separated the tie rods and the steering arms to replace the tie-rod end dust boots. Somewhere in that process I had swapped the left and right steering arms. CRAP! Live and learn. So out came the steering assembly again, and I had to separate the tie-rods from the steering arm and swap them left to right, and then reassemble everything. Thank god I still had that pickle-fork. In the process of re-separating the tie-rods, I dinged up the paint of the steering assembly from the vise, so I will touch that up after I get it back on the car. Luckily I was able to get them apart without tearing up the new dust boots.
Take 2!
So now with the steering assembly back in, I was ready to reassemble the backing plates. So I installed the lower two bolts. The rear most, lower bolt has an odd-shaped heat which acts as a steering bump stop. With the bolts in, the next thing was to install the spindle seal which I sprayed with some copper gasket sealer. Next the backing plate when on, followed by the grease shield gasket, also coated with copper sealer.
Then the great shield was added, and the lower castle nuts where added thumb tight to hold everything in place. The top two bolts were next, but they require a spacer to be added between the backing plate and the spindle assembly. With the top bolts in place, and went around and tightened all the bolts in a cross pattern. New cotter-pins were added to the castle nuts.
So that was about all the good light I had in the garage before dark. So the remainder of the front brakes will wait for another day. Please excuse all the dust on the parts and frame.
Attach file:
(50.83 KB)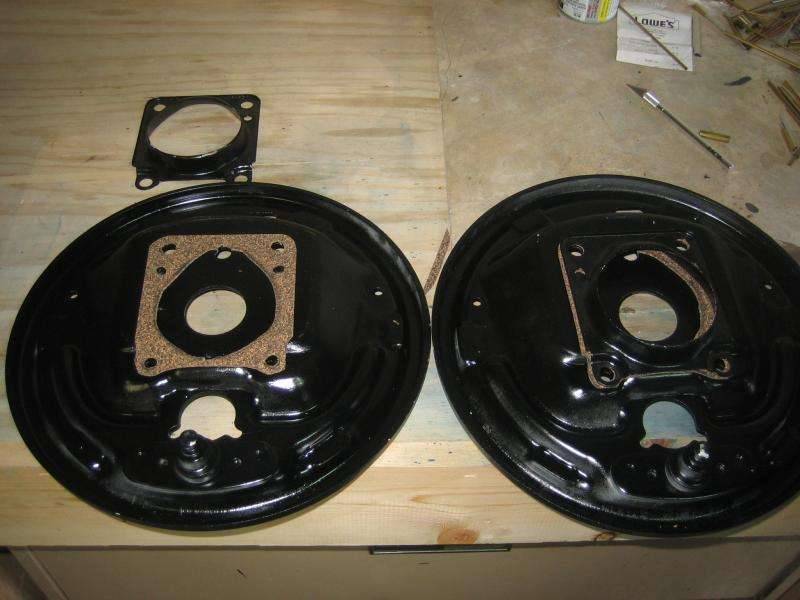 (45.43 KB)
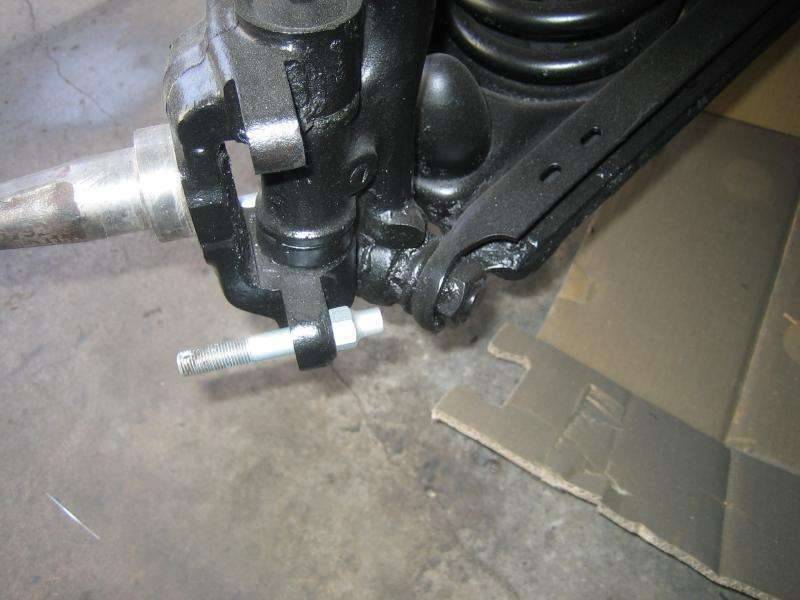 (55.94 KB)
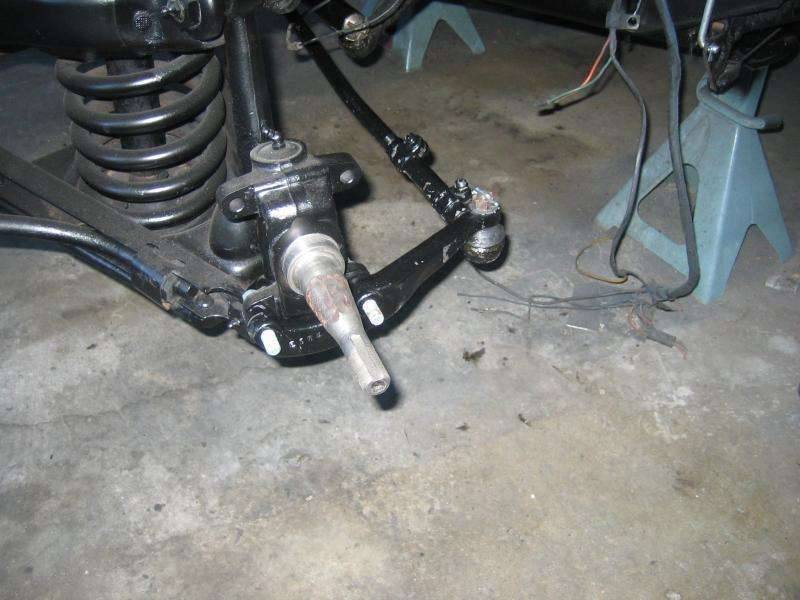 (48.23 KB)
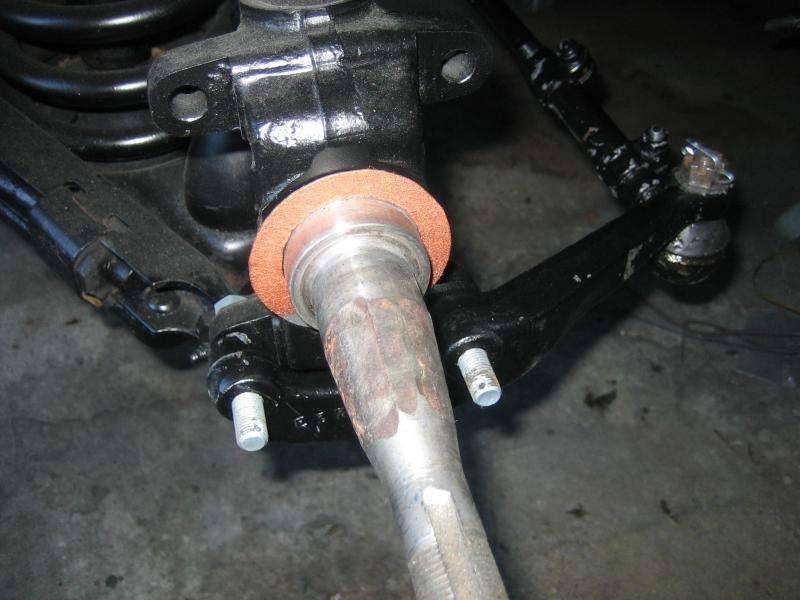 (57.71 KB)
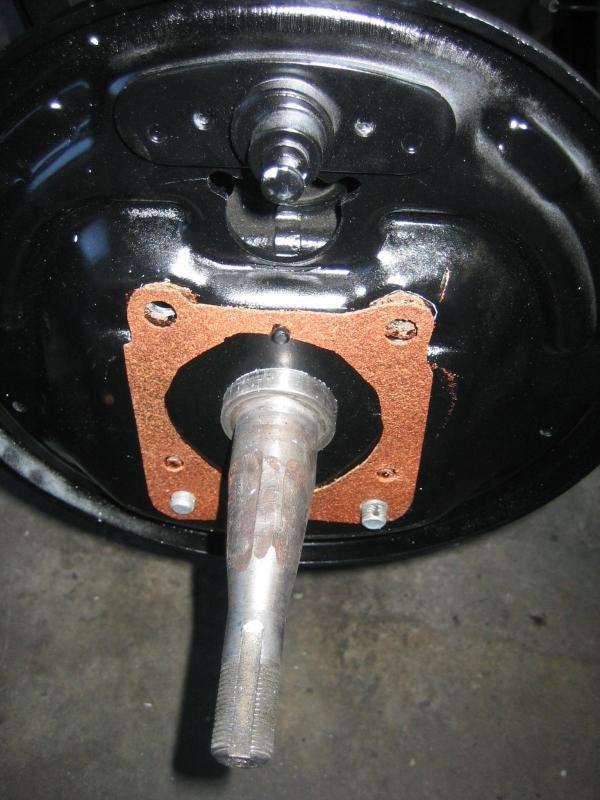 (59.89 KB)
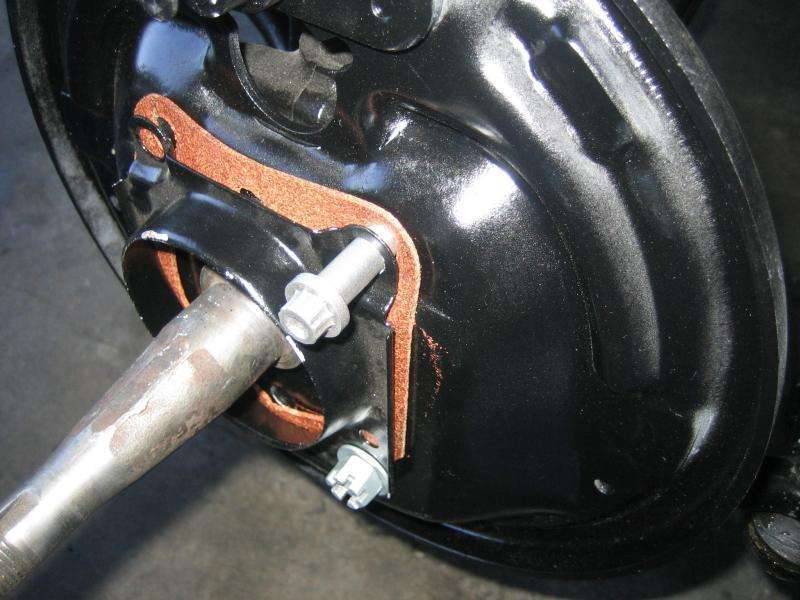 (58.09 KB)
 (52.17 KB)
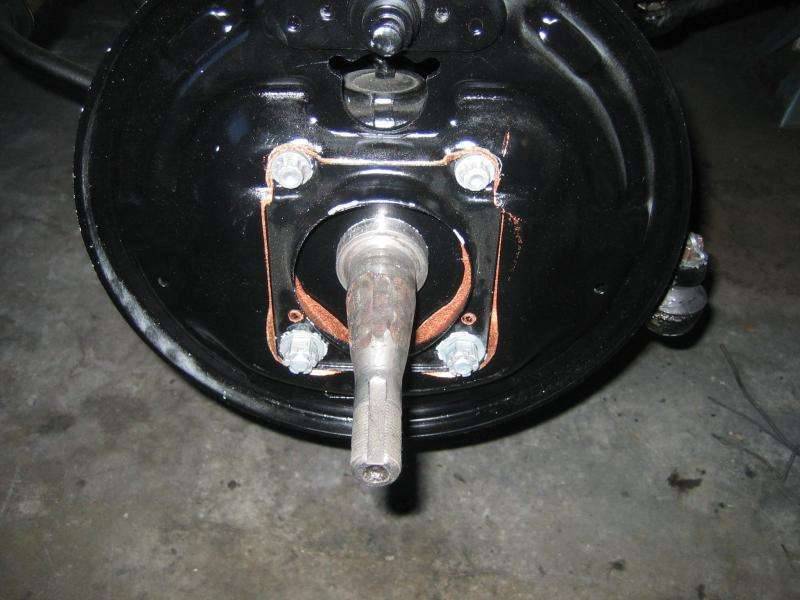
This Post was from: https://packardinfo.com/xoops/html/modules/newbb/viewtopic.php?post_id=17917