Re: BigKev's 1954 Packard Clipper Deluxe Sedan
Posted by BigKev On 2010/8/22 13:51:11
Got back in the garage yesterday to get a few things done. The summer heat is finally on us like a sledgehammer, and the garage turns into a sweat lodge quickly.
The one main thing that is standing between taking the car for a test drive to see if the transmission is functional, is the electrical. It was pretty chewed up from rodent, heat, and time. So out it all is coming. All the wiring was already removed from the engine compartment, and I have been running the motor using a couple of alligator clip jumper wires on the coil.
So today I started the process of getting the new wiring back in. As mentioned before the budget does not allow me to buy a repro 6v harness. Plus as I converted the car to 12v because of the A/C going in, I just ended up buying a 12v GM-coded universal harness. The GM wiring coding is very similar to the Packard one (Packard-Delco ya know).
So first order of business is getting the engine bay wiring in place. This involves a couple of sub-harness that need to be built. There is a sub-harnesses that feeds from the fender junction blocks to the headlights. I already have those in place, and just needed to install the junction blocks on the fenders. The block were media blaster to remove all rust, and then reinstalled. I then installed the terminals on the headlight harnesses and attached them to the junction blocks (sorry for the lousy photo). Next I need to build the junction block crossover harness.
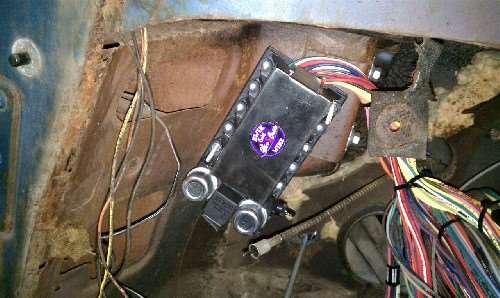
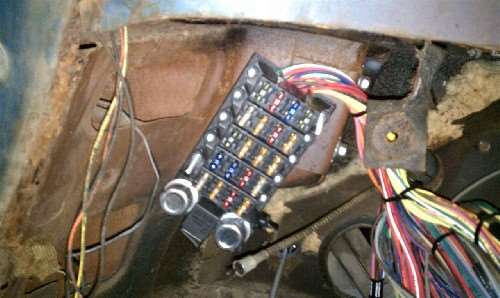
The next big challenge was finding a place for the fusebox. The space behind a 51-54 is pretty tight, so I needed somewhere that I could get to, and wouldn't get in the way of anything else. Also the box is secured the firewall with two bolts, so I didn't want the hardware showing through in the engine bay. So I picked a space that was out of the way, and where the bolts would be hidden by the fender . This is a 21 circuit box, so it has enough capacity for any future things I may want to add later. Right now it is in place for mock up. I still need to cleanup under the dash, and paint to ward of any more rust. There was also rust on the back side of the dash around the defroster vents. So I am imagining this means I have a leaky windshield gasket.
Attach file:
 (52.05 KB)

(53.22 KB)

(120.42 KB)
(94.19 KB)
The one main thing that is standing between taking the car for a test drive to see if the transmission is functional, is the electrical. It was pretty chewed up from rodent, heat, and time. So out it all is coming. All the wiring was already removed from the engine compartment, and I have been running the motor using a couple of alligator clip jumper wires on the coil.
So today I started the process of getting the new wiring back in. As mentioned before the budget does not allow me to buy a repro 6v harness. Plus as I converted the car to 12v because of the A/C going in, I just ended up buying a 12v GM-coded universal harness. The GM wiring coding is very similar to the Packard one (Packard-Delco ya know).
So first order of business is getting the engine bay wiring in place. This involves a couple of sub-harness that need to be built. There is a sub-harnesses that feeds from the fender junction blocks to the headlights. I already have those in place, and just needed to install the junction blocks on the fenders. The block were media blaster to remove all rust, and then reinstalled. I then installed the terminals on the headlight harnesses and attached them to the junction blocks (sorry for the lousy photo). Next I need to build the junction block crossover harness.
The next big challenge was finding a place for the fusebox. The space behind a 51-54 is pretty tight, so I needed somewhere that I could get to, and wouldn't get in the way of anything else. Also the box is secured the firewall with two bolts, so I didn't want the hardware showing through in the engine bay. So I picked a space that was out of the way, and where the bolts would be hidden by the fender . This is a 21 circuit box, so it has enough capacity for any future things I may want to add later. Right now it is in place for mock up. I still need to cleanup under the dash, and paint to ward of any more rust. There was also rust on the back side of the dash around the defroster vents. So I am imagining this means I have a leaky windshield gasket.
Attach file:
(52.05 KB)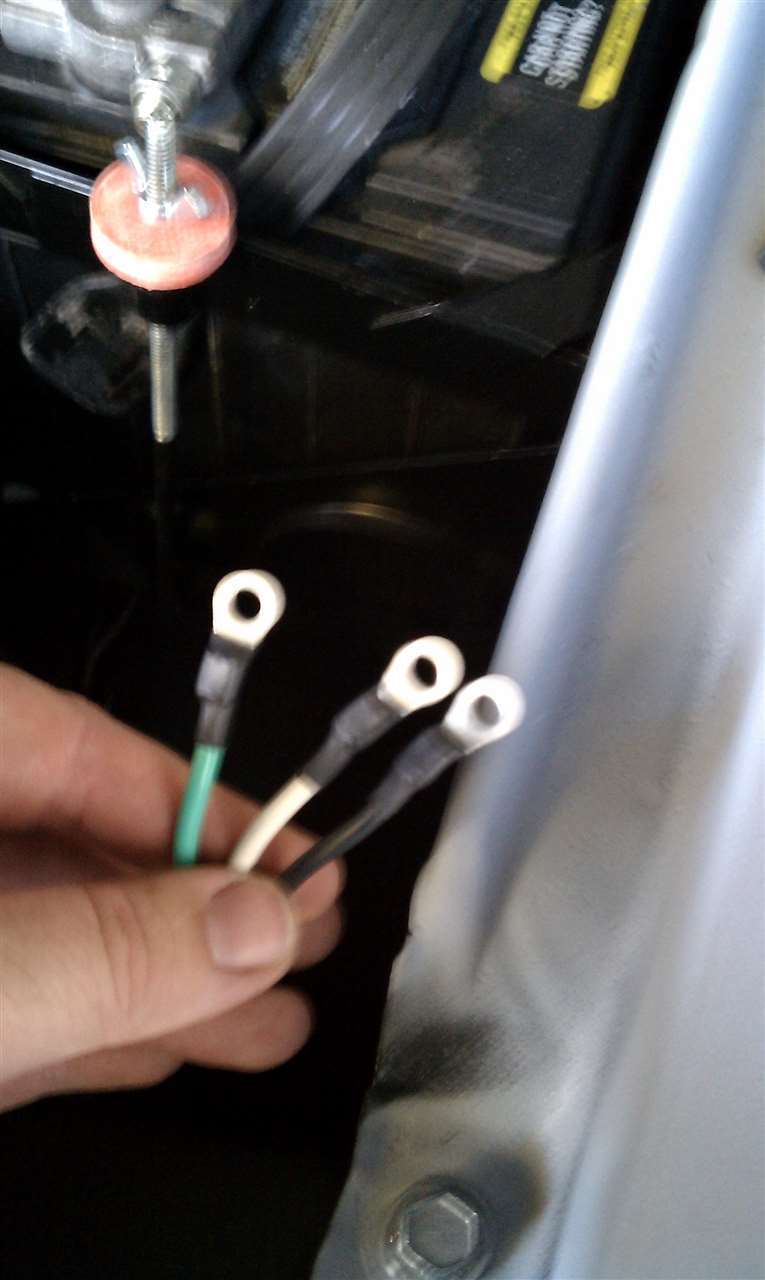 (53.22 KB)
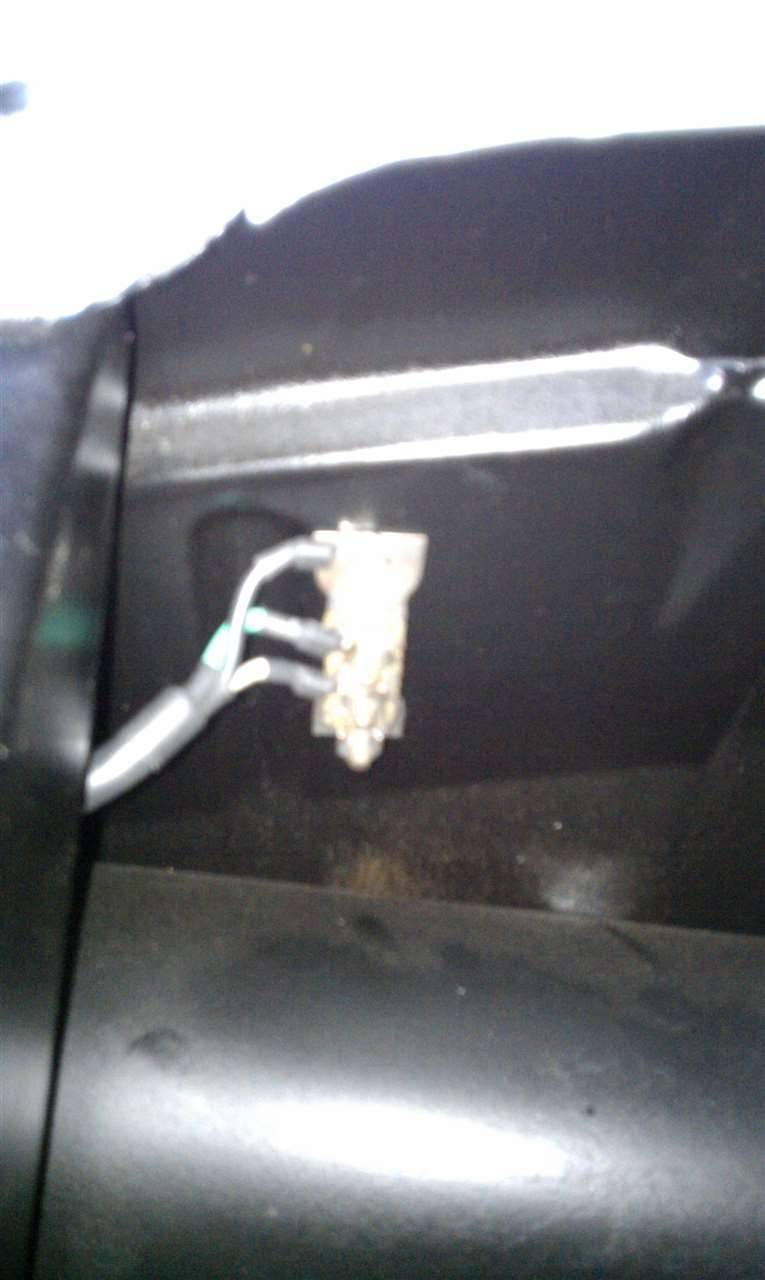 (120.42 KB)
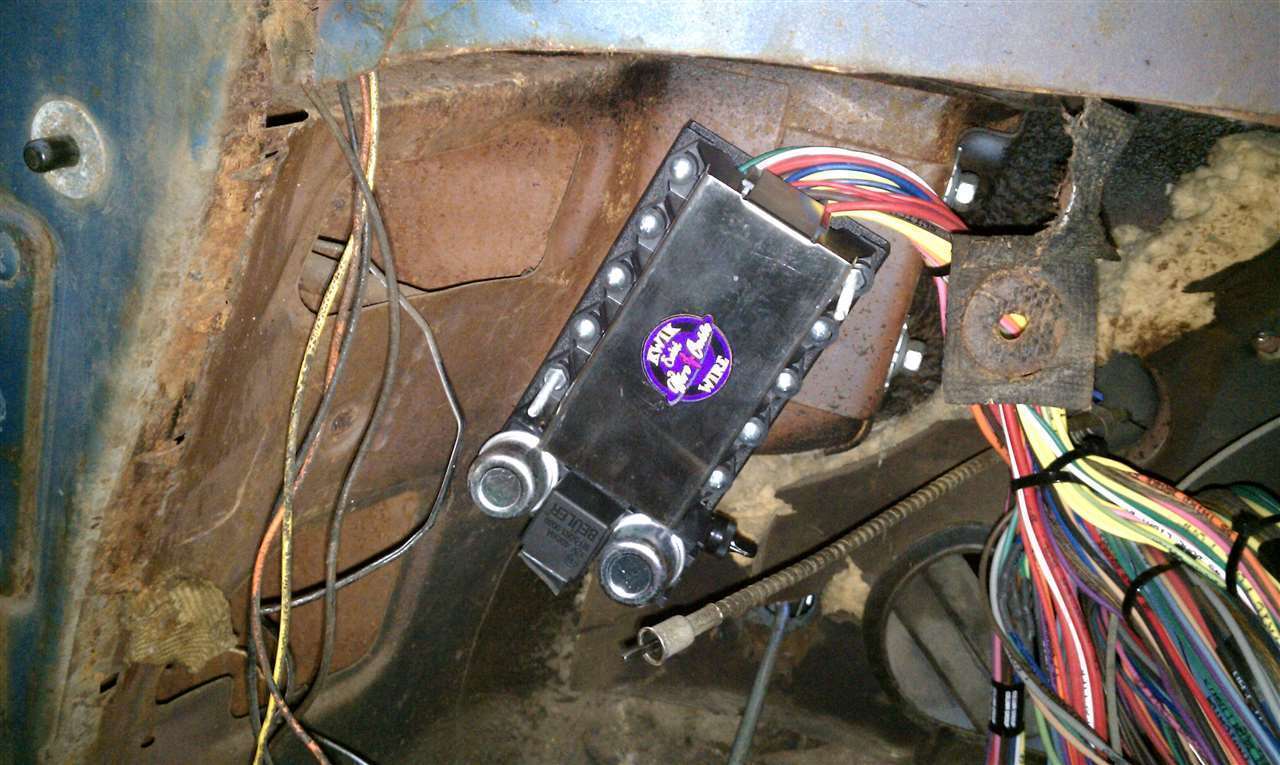 (94.19 KB)
This Post was from: https://packardinfo.com/xoops/html/modules/newbb/viewtopic.php?post_id=58392