Re: The Duchess Project: 1940 Super 8 Convertible Sedan
Posted by Joe Santana On 2011/3/20 23:18:38
HORNS:
Forgot to add the link to the best information I found for redoing the horns besides p.22 of the 1938-39 Shop Manual:http://www.vernco.com/Sparks/id516.htm
While waiting for the carburetor kit from The Carburetor Shop and for Merle to rebuilt it, I've been working on the horns.
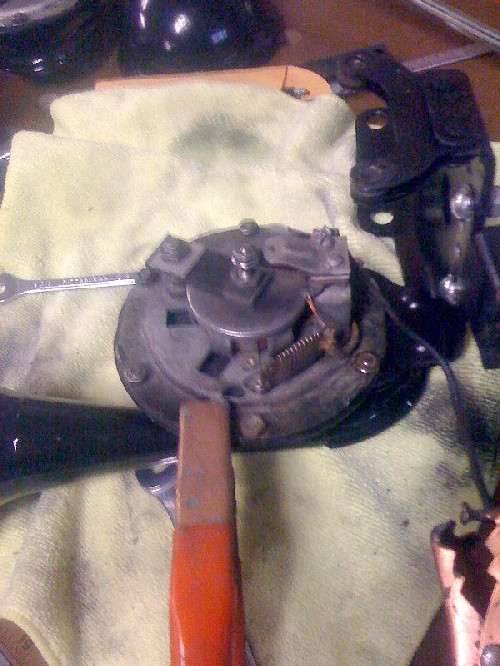
After doing a lot of research trying to find horn info, I couldn't find my Sparton horns, but they generally all work on the same principle. One horn had not honked since the 1970s. I tried to fix it then and broke the long center post screw with the adjusting nuts at the top. You pretty much need another horn for parts in order to fix it, so it wasn't fixed.
When I connected the horns to the car battery with my leads, they barely groaned.
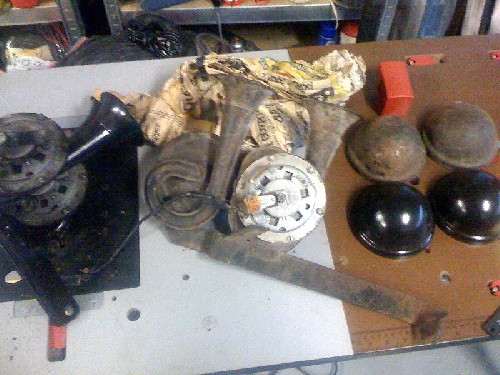
I bought a pair of rusted out horns what I first started working on the car. This week I unwrapped them from 1987 newspaper. They looked like they were in bad shape, but actually the essential electrical and vibration parts were fine. I took one apart and replaced the thin large disc attached to the long center post that had been broken.
I took everything apart and cleaned, blowing air through them with the compressor. I found a note in my 1940 Prelim shop manual that adjusting the horns and settings were in the 1938-39 Shop Manual, which is online here.
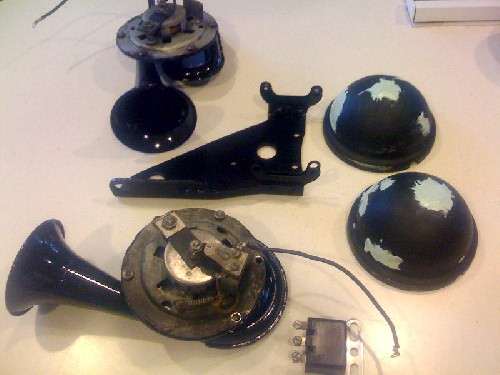
The horns are held to the bracket on springy metal crescents attached to the bracket by very heavy duty 1/4 " rivets. These were also broken, so removed the ones from the crusty horns and reinstalled them on the bracket.
The shell covers were dinged up, so glazed them and painted everything exterior.
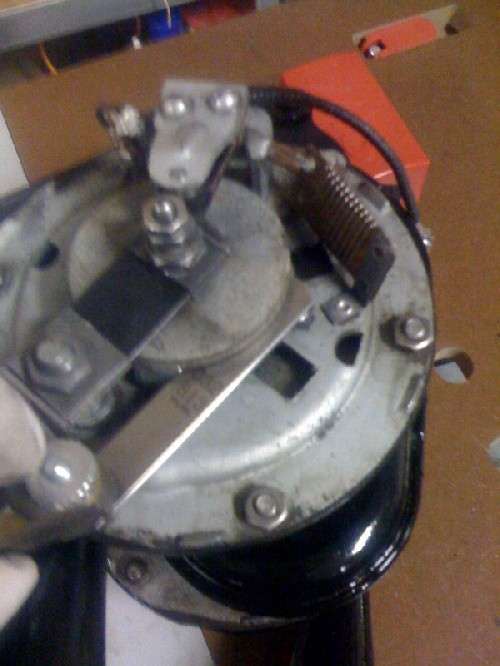
They should toot now, right? They didn't. They wouldn't even groan. I discovered that the insulating tubes surrounding the two very top screws that hold the sandwich of metal plates and insulation, the top layers being the points that open and close, weren't doing their job. I tried to reuse them but in trying to press them back in place I messed them up. I bought some shrink tubing, slipped that around them warmed with a hairdryer. That restored the insulation, but still no toot.
I called Bruce Abbott, Abbott Instruments, even though he had told me he didn't play with horns much. He did a beautiful job restoring all my dash instruments. But I called anyway to see if he would check them out, see if I didn't anything illogical circuit-wise. He suggested, before I bring them over to try a couple more things.
One is to make sure the leads are heavy gauge because horns pull a lot of amps and if the leads aren't heavy enough they won't start vibrating.
Two was to loosen everything up and hit them with a rubber mallet to get them to start vibrating. Taking no chances I used my battery jumper cables as leads. It killed me after fussing over these horns, but I tapped and, when that didn't do any damage, and I started to hear a crackle of noise, I hit them a few times. Wow, I got one genuine honk.
I loosened the nut that holds the armature, that thick cookie-sized disc, and turned it against my feeler gauge, one horn to .028 in. and the other to .034 in. Now I was getting more honking. I turn the adjusting nut at the top and it got better. Now both horns honk, hallelujah!
WHERE ON THE ENGINE? I spend most of today trying to figure out where the horn bracket attaches to the engine. It looks like it should attach to two head studs direct across from one another. I tried re-position the coil, the air cleaner bracket. The heater hose inlets were in the way. The overdrive relay was in the way in another position. I just couldn't figure it out. Putting that question out for help in the pre-war forum.
Attach file:
 (72.98 KB)
(44.44 KB)
(46.72 KB)
(66.65 KB)
Forgot to add the link to the best information I found for redoing the horns besides p.22 of the 1938-39 Shop Manual:http://www.vernco.com/Sparks/id516.htm
While waiting for the carburetor kit from The Carburetor Shop and for Merle to rebuilt it, I've been working on the horns.
After doing a lot of research trying to find horn info, I couldn't find my Sparton horns, but they generally all work on the same principle. One horn had not honked since the 1970s. I tried to fix it then and broke the long center post screw with the adjusting nuts at the top. You pretty much need another horn for parts in order to fix it, so it wasn't fixed.
When I connected the horns to the car battery with my leads, they barely groaned.
I bought a pair of rusted out horns what I first started working on the car. This week I unwrapped them from 1987 newspaper. They looked like they were in bad shape, but actually the essential electrical and vibration parts were fine. I took one apart and replaced the thin large disc attached to the long center post that had been broken.
I took everything apart and cleaned, blowing air through them with the compressor. I found a note in my 1940 Prelim shop manual that adjusting the horns and settings were in the 1938-39 Shop Manual, which is online here.
The horns are held to the bracket on springy metal crescents attached to the bracket by very heavy duty 1/4 " rivets. These were also broken, so removed the ones from the crusty horns and reinstalled them on the bracket.
The shell covers were dinged up, so glazed them and painted everything exterior.
They should toot now, right? They didn't. They wouldn't even groan. I discovered that the insulating tubes surrounding the two very top screws that hold the sandwich of metal plates and insulation, the top layers being the points that open and close, weren't doing their job. I tried to reuse them but in trying to press them back in place I messed them up. I bought some shrink tubing, slipped that around them warmed with a hairdryer. That restored the insulation, but still no toot.
I called Bruce Abbott, Abbott Instruments, even though he had told me he didn't play with horns much. He did a beautiful job restoring all my dash instruments. But I called anyway to see if he would check them out, see if I didn't anything illogical circuit-wise. He suggested, before I bring them over to try a couple more things.
One is to make sure the leads are heavy gauge because horns pull a lot of amps and if the leads aren't heavy enough they won't start vibrating.
Two was to loosen everything up and hit them with a rubber mallet to get them to start vibrating. Taking no chances I used my battery jumper cables as leads. It killed me after fussing over these horns, but I tapped and, when that didn't do any damage, and I started to hear a crackle of noise, I hit them a few times. Wow, I got one genuine honk.
I loosened the nut that holds the armature, that thick cookie-sized disc, and turned it against my feeler gauge, one horn to .028 in. and the other to .034 in. Now I was getting more honking. I turn the adjusting nut at the top and it got better. Now both horns honk, hallelujah!
WHERE ON THE ENGINE? I spend most of today trying to figure out where the horn bracket attaches to the engine. It looks like it should attach to two head studs direct across from one another. I tried re-position the coil, the air cleaner bracket. The heater hose inlets were in the way. The overdrive relay was in the way in another position. I just couldn't figure it out. Putting that question out for help in the pre-war forum.
Attach file:
(72.98 KB) (44.44 KB)
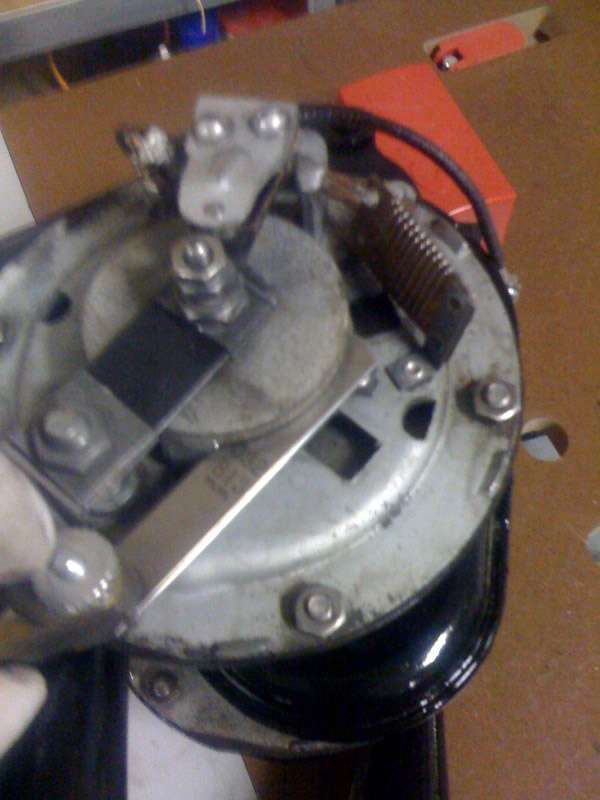 (46.72 KB)
 (66.65 KB)
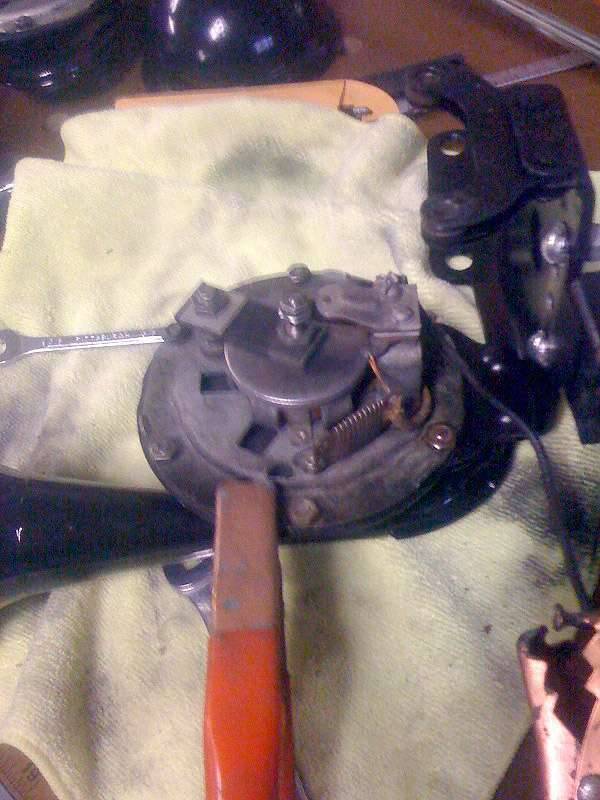
This Post was from: https://packardinfo.com/xoops/html/modules/newbb/viewtopic.php?post_id=72736