Re: Packard instrument board servicing.
Posted by HH56 On 2020/2/4 17:00:38
I don't think there are any special tricks other than a pillow and good light to make it easier when working under the dash so I always went under the assumption that either the older mechanics of that time were made of sterner stuff and just resigned themselves to doing unpleasant jobs or else they had young flexible trainees to supervise while "training" them to do the dirty work.
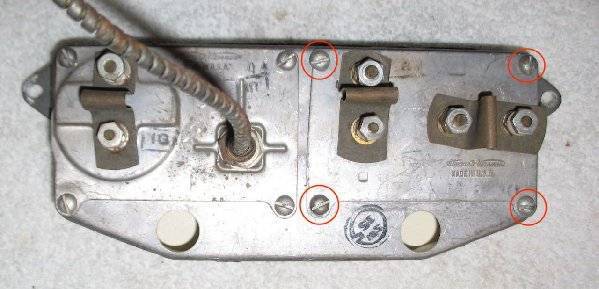
As to removing the ammeter, it is mounted on a plate along with the gas gauge and the plate needs to come out as a unit. After disconnecting the wires from the gauges the plate is held by a screw on each corner (red circles, first photo). Once the 4 screws are off the plate will be free but you may need to slide and/or rotate the plate slightly to get the gauge faces to clear the opening in the cluster as you pull it out. Take care not to slide the gauge faces over or catch the needles on an edge of the opening.
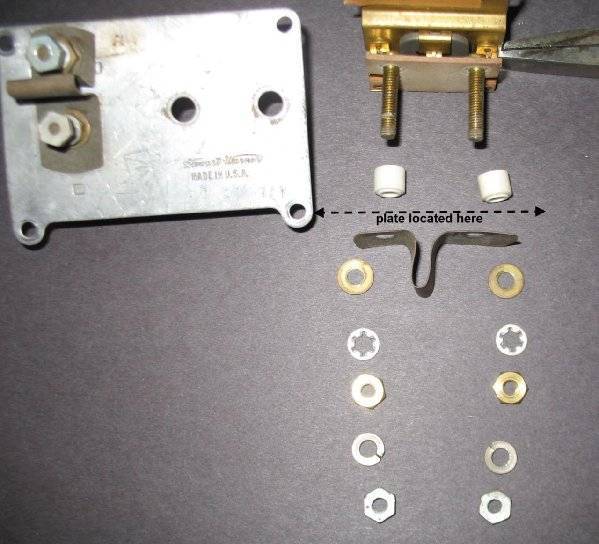
Once the plate is out of the car, the ammeter is held by nuts threaded onto the terminal stems. The stems pass thru a couple of ceramic bushings which provide the support and isolation from the metal plate (third photo). Since almost all of the electrical current in the car goes thru the ammeter make sure the ceramic bushings are in good condition and take note of how all the nuts and washers are placed so you get them back in the correct order. The bushings have shoulders which pass thru holes in the metal to locate them in position so make sure the shoulders are seated in the holes properly before tightening the nuts. If one of the ceramic pieces is broken or cracked am not sure how easy it will be to find a replacement. It may require a parts cluster.
Attach file:
 (95.27 KB)
(97.27 KB)
(145.57 KB)
As to removing the ammeter, it is mounted on a plate along with the gas gauge and the plate needs to come out as a unit. After disconnecting the wires from the gauges the plate is held by a screw on each corner (red circles, first photo). Once the 4 screws are off the plate will be free but you may need to slide and/or rotate the plate slightly to get the gauge faces to clear the opening in the cluster as you pull it out. Take care not to slide the gauge faces over or catch the needles on an edge of the opening.
Once the plate is out of the car, the ammeter is held by nuts threaded onto the terminal stems. The stems pass thru a couple of ceramic bushings which provide the support and isolation from the metal plate (third photo). Since almost all of the electrical current in the car goes thru the ammeter make sure the ceramic bushings are in good condition and take note of how all the nuts and washers are placed so you get them back in the correct order. The bushings have shoulders which pass thru holes in the metal to locate them in position so make sure the shoulders are seated in the holes properly before tightening the nuts. If one of the ceramic pieces is broken or cracked am not sure how easy it will be to find a replacement. It may require a parts cluster.
Attach file:
(95.27 KB) (97.27 KB)
 (145.57 KB)
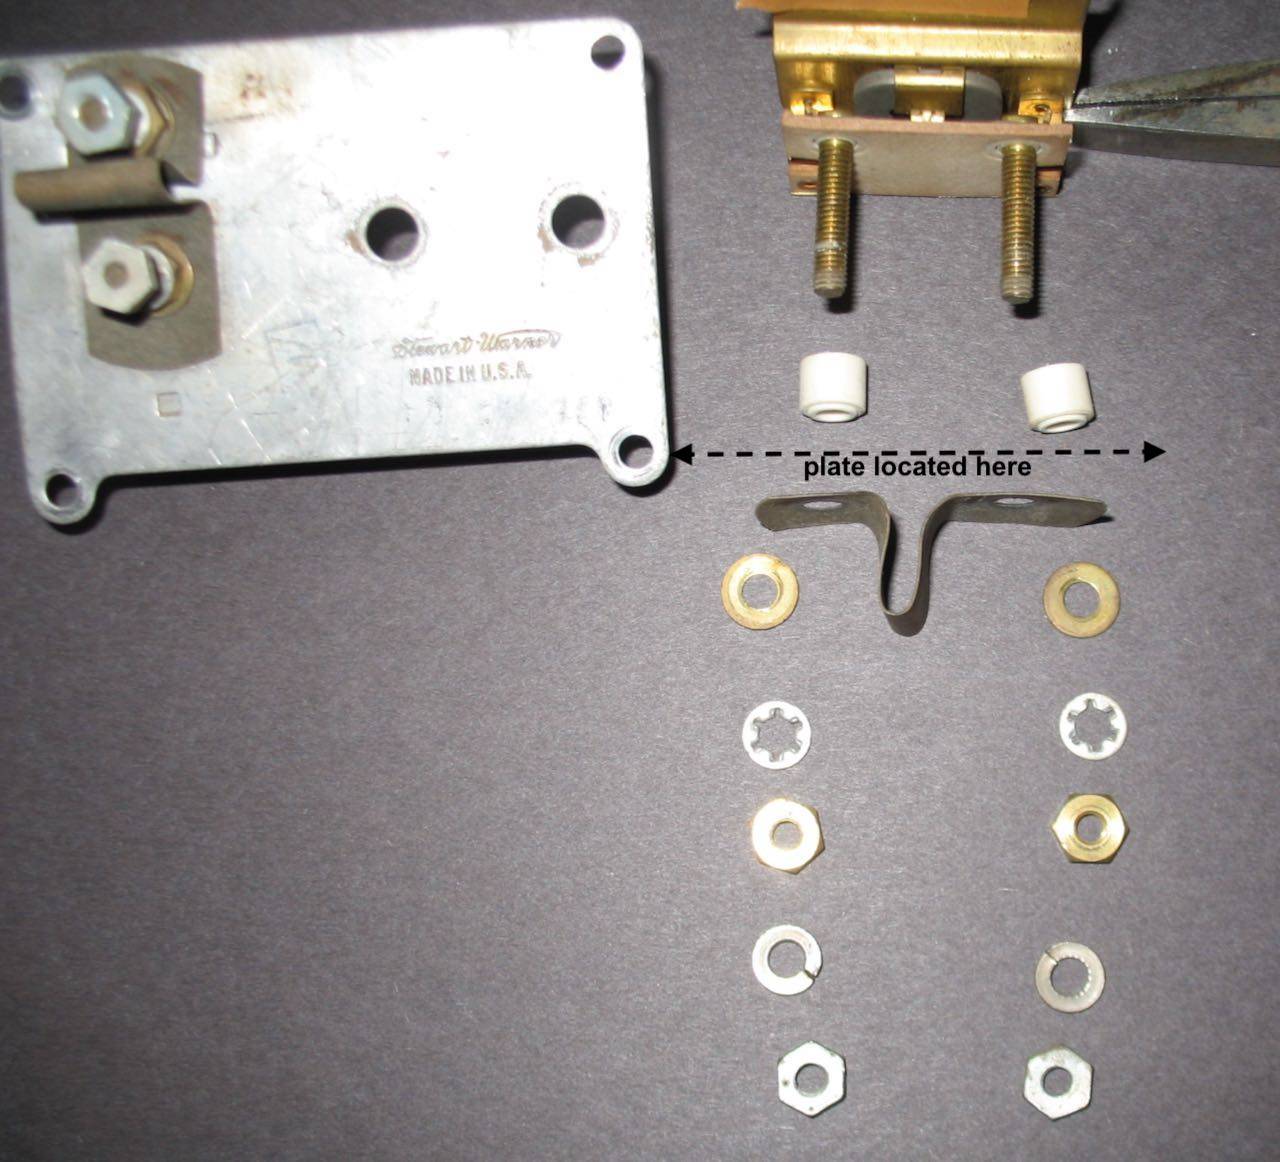
This Post was from: https://packardinfo.com/xoops/html/modules/newbb/viewtopic.php?post_id=218829