Re: Another remote master cylinder reservior
Posted by DavidPackard On 2021/11/28 13:44:16
Sorry Steve the first production run of 10,000 have been spoken for . . .! 
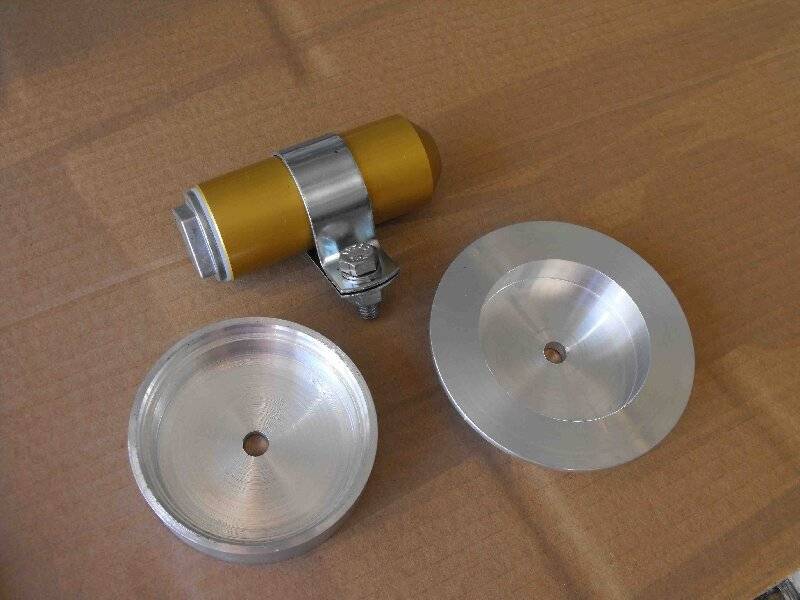
Howard this is a ‘homebrew’, except for the reservoir and ‘P’ clamp. This design started at the 3-inch hole in the battery tray, and grew from there. An aluminum ‘top hat’ fits into the 3-inch hole from the battery side, and is capped with an aluminum cup. Once the center bolt that holds the ‘P’ clamp is torqued the ‘hat and cup’ pinch the battery tray and the whole mess locks-up quite nicely. There is also one other bolt that does double duty. First it provides sufficient pinch to keep the hat and cup from rotating, and second the bolt inhibits the ‘P’ clamp from rotating downward in the event the central bolt loosens.
Photo_1 shows the aluminum ‘top hat’ and ‘cup’. This photo was taken before the second bolt hole was drilled, but it is located essentially at the radius where the ‘P’ clamp is bent to begin the circular portion of the clamp.
Photo_2 shows the reservoir mounted on the battery box. The box was removed for a ‘paint-job’, otherwise the reservoir could be installed with the battery box already installed in the car.
Photo_3 in the first posting shows the final installation.
Parts Used:
The Mico reservoir and remote cap were purchased from Capital Clutch & Brake, West Sacramento, CA, contact ‘ccbvinnie@aol.com for details. The cap and reservoir have same thread geometry as Packard master cylinder.
Mico Cap 30-030-031 Drilled and tapped 1/8 pipe
Mico Reservior 20-920-009
Outlet drilled and tapped 1/8 pipe
Expect a lengthy wait for the Mico parts. You provide the tubing fittings that thread into the 1/8 NPT.
McMaster-Carr EPDM ¼ ID, ½ OD tubing EPDM is compatible with glycol and silicone based brake fluids.
e-Bay Two pieces of 4.25 X 1 aluminum round stock.
Minutia:
The EPDM tubing is provided abrasion protection with split ½ inch plastic loom, with an outer heat shrink cover. Those details are visible in the photo in the first posting. The intent is; if a leak in the EPDM occurs the fluid will be routed away from the under-hood painted surfaces and exit at the master cylinder. However, I have no intention to test this feature.
The ‘P’ clamp is not painted, but was treated with Caswell cold black oxide resurfacing concentrate, with penetrating oil protective coating . . . essentially ‘gun bluing’. The electro-plating applied by Mico was stripped with Lysol toilet bowl cleaner, which works quite well. The aluminum cap was masked where the ‘P’ clamp contacts it, so except for the area where the pinch occurs with the battery tray there is no paint at the interfaces. In the event of the central bolt loosens the anti-rotation pin should inhibit rotation of the reservoir, and the driver’s side air duct keeps the reservoir from exiting straight-down. After the unit was installed I believe the hose alone will keep the reservoir from rotating, so the business of an anti-rotation bolt might be a concept only.
Since the ’51-’54 battery tray has enough room to hold two six volt Optima batteries I carry an extra as a back-up . . . just in case. I might be the only six volt car at the Saturday night car show, so getting a ‘jump’ from that crowd might be a challenge. The battery cables were made to reach either battery, so ‘swapping’ batteries involves only ‘swapping’ cables. The hold-down was fabricated from standard band stock purchased from Home Depot. A simple outer cover tries to hide the Optima ‘six-pack’ look, and pretend the car is equipped with a Willard unit.
When I was installing this stuff I was reminded, again, on how infrequently I check the master cylinder fluid level . . . it was on the low side. It took a while for the bubbles to subside as the fluid transferred from the upper reservoir to the master cylinder, but the bubbles finally stopped and the level stabilized. That alone is enough evidence to suggest that everything below the new reservoir was leak free, that is, if an air leak existed, say at the master cylinder cover plate, then the fluid level would have gone down without a lot of air bubbles coming to the surface.
My first plan was to fabricate this mount out of sheet stock welded into the basic shape of the hat and cup, but my welding skills haven’t been refined to a point there that was a viable option.
Attach file:
 Photo_2.JPG (233.43 KB)

Photo_1.JPG (151.15 KB)
Howard this is a ‘homebrew’, except for the reservoir and ‘P’ clamp. This design started at the 3-inch hole in the battery tray, and grew from there. An aluminum ‘top hat’ fits into the 3-inch hole from the battery side, and is capped with an aluminum cup. Once the center bolt that holds the ‘P’ clamp is torqued the ‘hat and cup’ pinch the battery tray and the whole mess locks-up quite nicely. There is also one other bolt that does double duty. First it provides sufficient pinch to keep the hat and cup from rotating, and second the bolt inhibits the ‘P’ clamp from rotating downward in the event the central bolt loosens.
Photo_1 shows the aluminum ‘top hat’ and ‘cup’. This photo was taken before the second bolt hole was drilled, but it is located essentially at the radius where the ‘P’ clamp is bent to begin the circular portion of the clamp.
Photo_2 shows the reservoir mounted on the battery box. The box was removed for a ‘paint-job’, otherwise the reservoir could be installed with the battery box already installed in the car.
Photo_3 in the first posting shows the final installation.
Parts Used:
The Mico reservoir and remote cap were purchased from Capital Clutch & Brake, West Sacramento, CA, contact ‘ccbvinnie@aol.com for details. The cap and reservoir have same thread geometry as Packard master cylinder.
Mico Cap 30-030-031 Drilled and tapped 1/8 pipe
Mico Reservior 20-920-009
Outlet drilled and tapped 1/8 pipe
Expect a lengthy wait for the Mico parts. You provide the tubing fittings that thread into the 1/8 NPT.
McMaster-Carr EPDM ¼ ID, ½ OD tubing EPDM is compatible with glycol and silicone based brake fluids.
e-Bay Two pieces of 4.25 X 1 aluminum round stock.
Minutia:
The EPDM tubing is provided abrasion protection with split ½ inch plastic loom, with an outer heat shrink cover. Those details are visible in the photo in the first posting. The intent is; if a leak in the EPDM occurs the fluid will be routed away from the under-hood painted surfaces and exit at the master cylinder. However, I have no intention to test this feature.
The ‘P’ clamp is not painted, but was treated with Caswell cold black oxide resurfacing concentrate, with penetrating oil protective coating . . . essentially ‘gun bluing’. The electro-plating applied by Mico was stripped with Lysol toilet bowl cleaner, which works quite well. The aluminum cap was masked where the ‘P’ clamp contacts it, so except for the area where the pinch occurs with the battery tray there is no paint at the interfaces. In the event of the central bolt loosens the anti-rotation pin should inhibit rotation of the reservoir, and the driver’s side air duct keeps the reservoir from exiting straight-down. After the unit was installed I believe the hose alone will keep the reservoir from rotating, so the business of an anti-rotation bolt might be a concept only.
Since the ’51-’54 battery tray has enough room to hold two six volt Optima batteries I carry an extra as a back-up . . . just in case. I might be the only six volt car at the Saturday night car show, so getting a ‘jump’ from that crowd might be a challenge. The battery cables were made to reach either battery, so ‘swapping’ batteries involves only ‘swapping’ cables. The hold-down was fabricated from standard band stock purchased from Home Depot. A simple outer cover tries to hide the Optima ‘six-pack’ look, and pretend the car is equipped with a Willard unit.
When I was installing this stuff I was reminded, again, on how infrequently I check the master cylinder fluid level . . . it was on the low side. It took a while for the bubbles to subside as the fluid transferred from the upper reservoir to the master cylinder, but the bubbles finally stopped and the level stabilized. That alone is enough evidence to suggest that everything below the new reservoir was leak free, that is, if an air leak existed, say at the master cylinder cover plate, then the fluid level would have gone down without a lot of air bubbles coming to the surface.
My first plan was to fabricate this mount out of sheet stock welded into the basic shape of the hat and cup, but my welding skills haven’t been refined to a point there that was a viable option.
Attach file:
Photo_2.JPG (233.43 KB)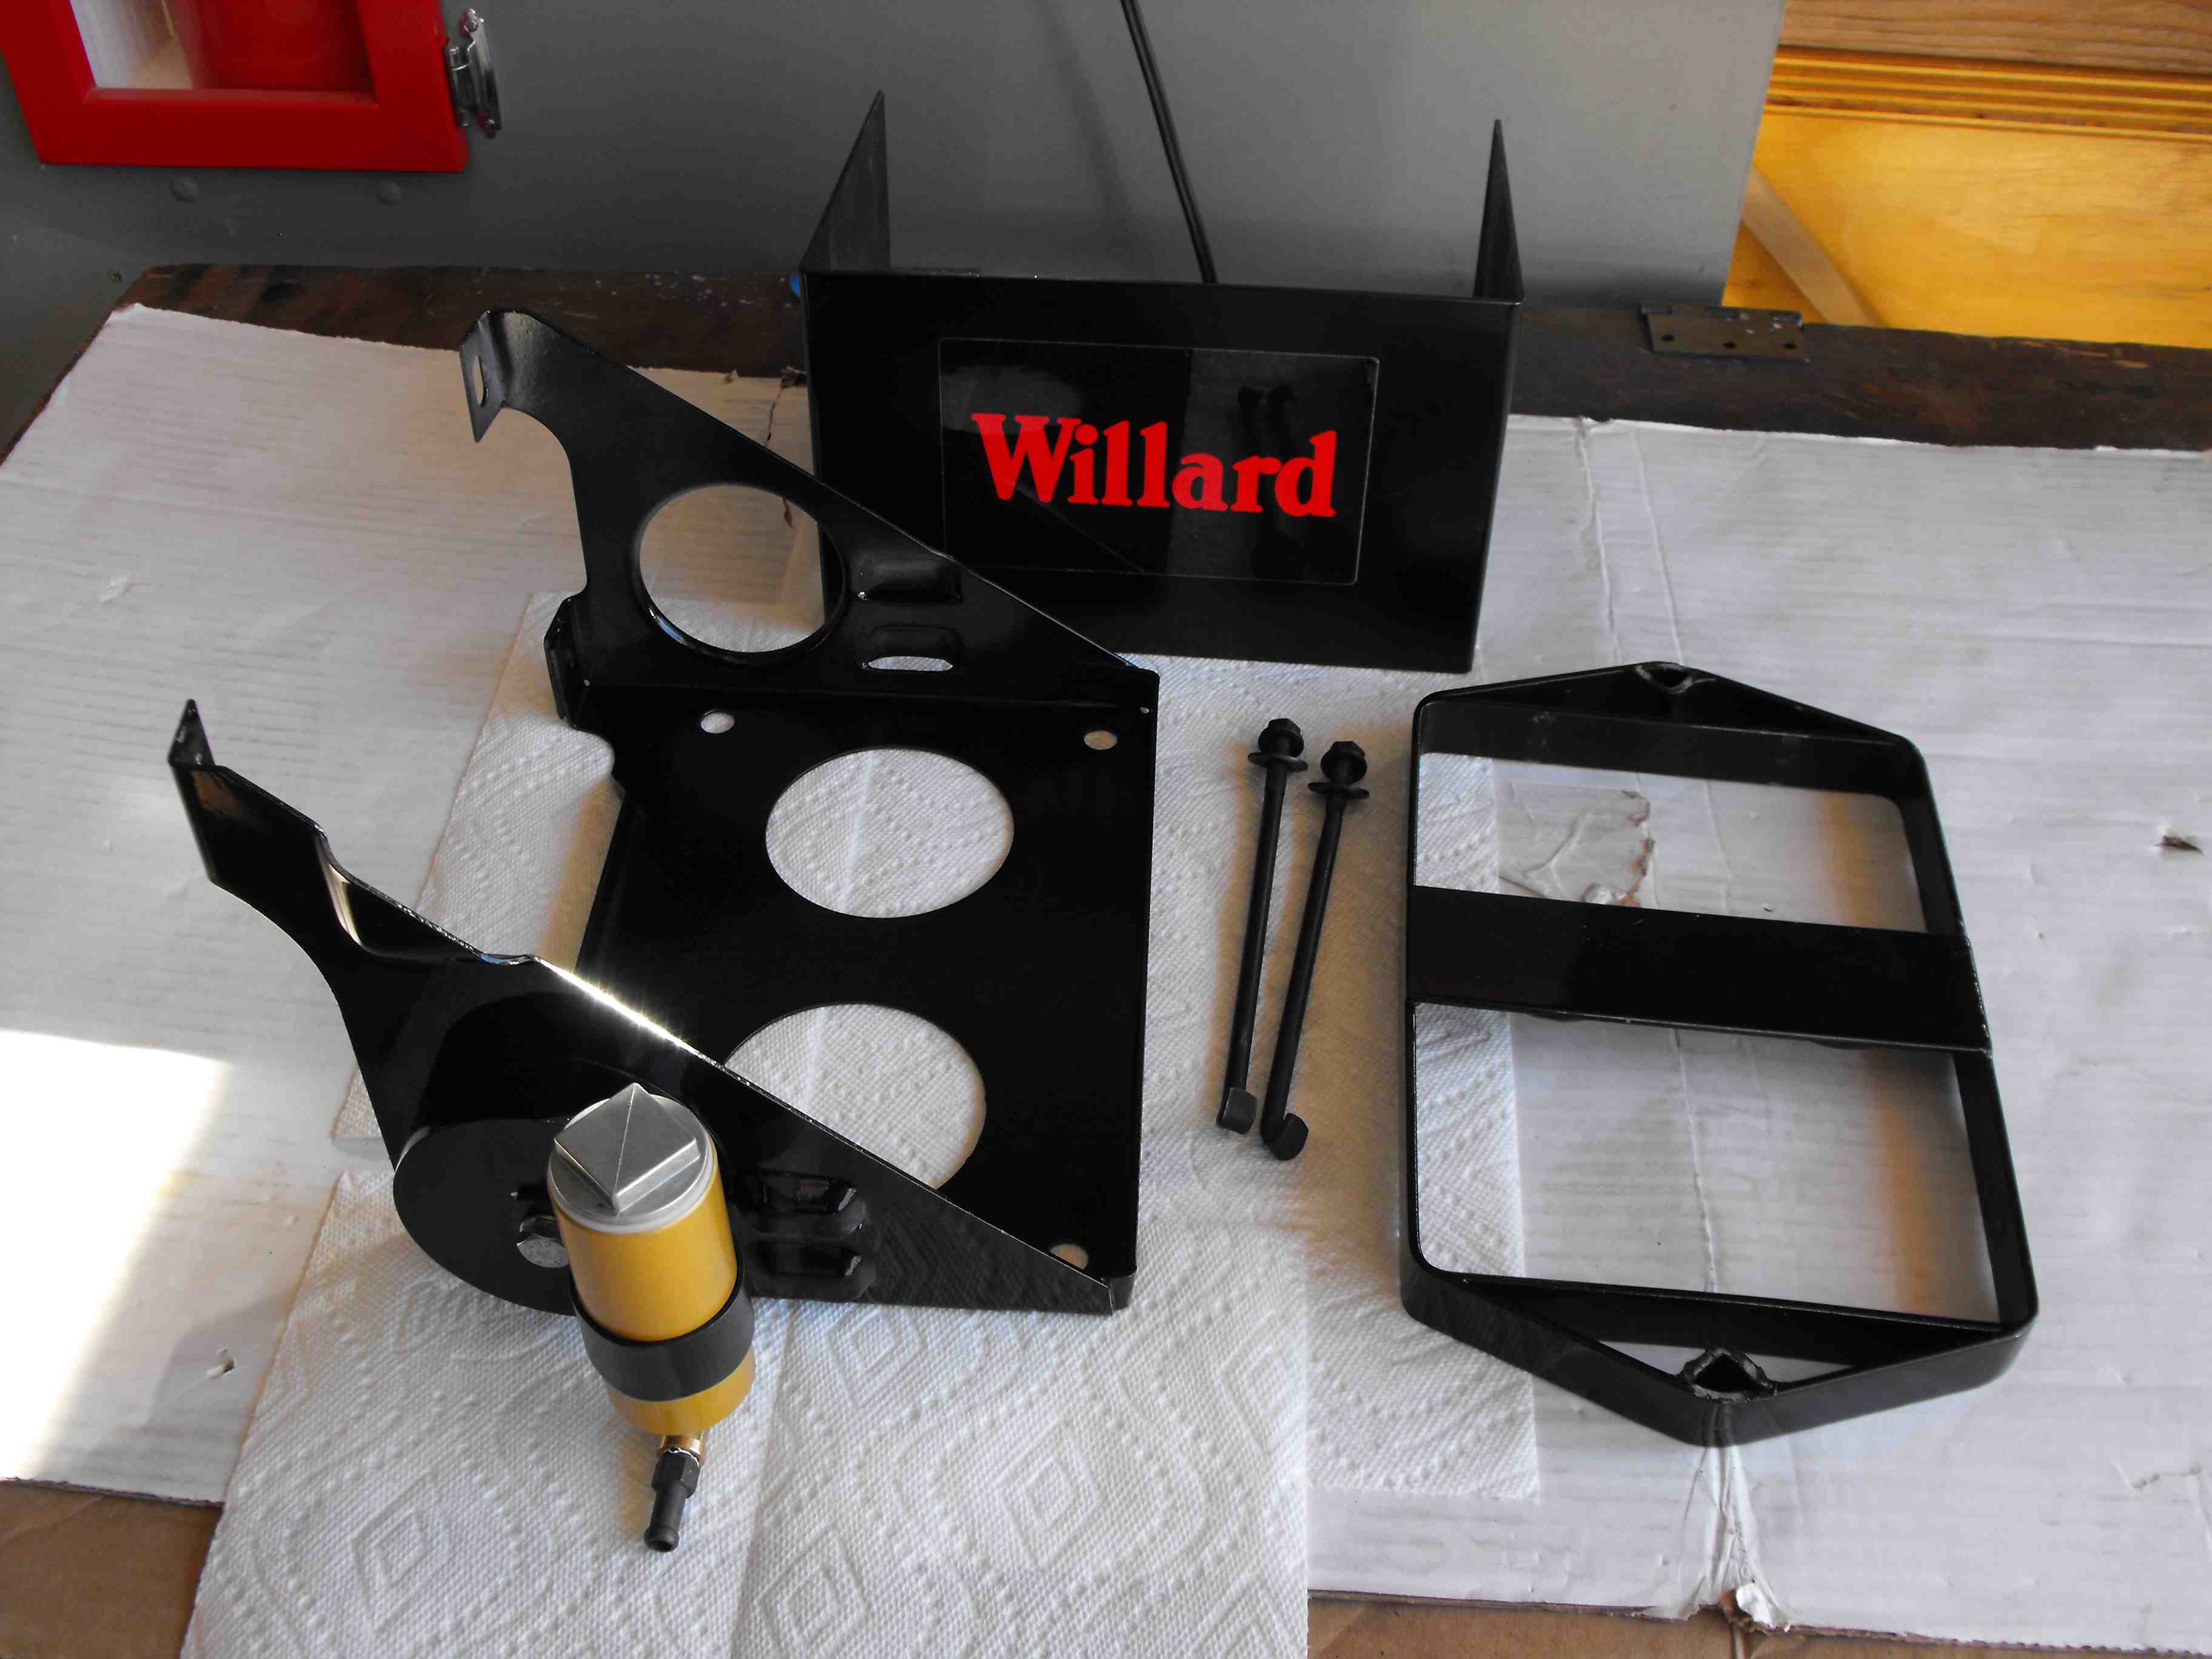 Photo_1.JPG (151.15 KB)
This Post was from: https://packardinfo.com/xoops/html/modules/newbb/viewtopic.php?post_id=239058