Re: Another remote master cylinder reservior
Posted by DavidPackard On 2022/3/5 14:11:24
I finally finished the remote master cylinder reservoir for my ’48. While I would have liked to install this item without drilling any holes, that didn’t happen. Somehow, I went from drilling no holes to justifying 4 holes in the forward leg of the battery tray to mount the sheet metal bracket. I think when I found a large section of my original tray had been cut out, presumably to remove battery acid damage, my opinion of battery trays changed.
Photo 1 – Shown are the ‘new’ EBay battery tray (without a big cut out), the Mico reservoir, and the 3 pieces of sheet metal that ultimately attach to the forward tray leg (in this view the left side of the tray). The piece with 5 lightening holes attaches to the leg, with the piece with 4 lightening holes bolted to that part of the bracket. The final piece (3 lightening holes) is a brace that stiffens the structure . . . a bunch.
Photo 2 – Showing the 3 pieces of sheet metal assembled and attached to the battery tray. To stiffen the sheet stock the lightening holes were dimpled. I would have liked to mount this bracketry off of the aft leg of the tray, but, much to my surprise, the steering column and steering box occupied that space . . . darn. There are two 3/16 holes in the forward fold of the bracket . . . those are to mount a safety tab that is shown in the next photo.
Photo 8 – Showing the bracket and reservoir installed. Much like my ’54, the hose was protected from abrasion with a piece of plastic split wire loom and shrink tubing. By ‘zooming-in” a bit the abrasion covering can be seen, as well as the safety tab that inhibits the reservoir from falling out of the ‘P’ clamp in case the pinch bolt loosens. The tab is rubber coated where the reservoir might touch it, and uses 10 X 24 rivet-nuts . . . that makes it a bit easier to R&R if the bracket and reservoir are installed.
Also in photo 8: Just forward of the battery is the disconnect switch I bought that from Del City. It is rated at 400 A continuous, 2000 A for 5 seconds . . . I looked-up the current price ($250), and found that the price has just about doubled since I bought mine . . . wow . . . why?
Also shown is the headlight relay set-up. Just above the negative battery post is a set of 30A circuit breakers, one for high beam and one for low beam. Above the center battery filler cap are the two relays . . . again one high and one low. The wiring came from Rhode Island Wiring, and is standard modern insulation primary wire over-braided with fabric. The OEM color-coding was maintained.
This car has a PowerMaster PowerGEN (6V+) alternator, so the power is first routed to the buss bar connecting the two circuit breakers and then to the firewall mounted (now dummy) voltage regulator. That results in the shortest circuit length for the headlight power . . . they are the first load that the alternator ‘sees’, and when the next high current load is added (I’m thinking a cooling fan) the pole on the other circuit breaker is available.
After reading a few of the postings about using a reservoir with a bladder seal, I found many motorcycle items such as this one; Amazon.com: MC Motoparts Black Reservoir Front Oil Fluid Tank Compatible with YZF R1 R6 Speed Triple 1050 R GSX-R 750 Monster 1200 S : Automotive have bladders. This is one of many, and I guess if they can survive on a motorcycle they won’t be much of a problem on a Packard. I bought a silver one of these, but will need to fold a piece of stainless to mount it.
I guess the next project should be giving the cylinder head some touch-up paint.
dp
Attach file:
 Photo_1.JPG (233.86 KB)

Photo_2.JPG (226.70 KB)
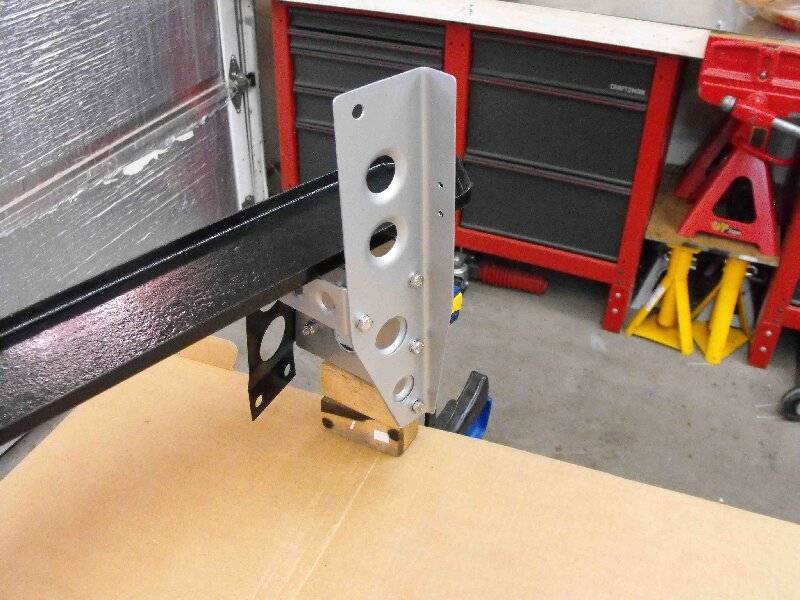
Photo_8.jpg (361.55 KB)

Photo 1 – Shown are the ‘new’ EBay battery tray (without a big cut out), the Mico reservoir, and the 3 pieces of sheet metal that ultimately attach to the forward tray leg (in this view the left side of the tray). The piece with 5 lightening holes attaches to the leg, with the piece with 4 lightening holes bolted to that part of the bracket. The final piece (3 lightening holes) is a brace that stiffens the structure . . . a bunch.
Photo 2 – Showing the 3 pieces of sheet metal assembled and attached to the battery tray. To stiffen the sheet stock the lightening holes were dimpled. I would have liked to mount this bracketry off of the aft leg of the tray, but, much to my surprise, the steering column and steering box occupied that space . . . darn. There are two 3/16 holes in the forward fold of the bracket . . . those are to mount a safety tab that is shown in the next photo.
Photo 8 – Showing the bracket and reservoir installed. Much like my ’54, the hose was protected from abrasion with a piece of plastic split wire loom and shrink tubing. By ‘zooming-in” a bit the abrasion covering can be seen, as well as the safety tab that inhibits the reservoir from falling out of the ‘P’ clamp in case the pinch bolt loosens. The tab is rubber coated where the reservoir might touch it, and uses 10 X 24 rivet-nuts . . . that makes it a bit easier to R&R if the bracket and reservoir are installed.
Also in photo 8: Just forward of the battery is the disconnect switch I bought that from Del City. It is rated at 400 A continuous, 2000 A for 5 seconds . . . I looked-up the current price ($250), and found that the price has just about doubled since I bought mine . . . wow . . . why?
Also shown is the headlight relay set-up. Just above the negative battery post is a set of 30A circuit breakers, one for high beam and one for low beam. Above the center battery filler cap are the two relays . . . again one high and one low. The wiring came from Rhode Island Wiring, and is standard modern insulation primary wire over-braided with fabric. The OEM color-coding was maintained.
This car has a PowerMaster PowerGEN (6V+) alternator, so the power is first routed to the buss bar connecting the two circuit breakers and then to the firewall mounted (now dummy) voltage regulator. That results in the shortest circuit length for the headlight power . . . they are the first load that the alternator ‘sees’, and when the next high current load is added (I’m thinking a cooling fan) the pole on the other circuit breaker is available.
After reading a few of the postings about using a reservoir with a bladder seal, I found many motorcycle items such as this one; Amazon.com: MC Motoparts Black Reservoir Front Oil Fluid Tank Compatible with YZF R1 R6 Speed Triple 1050 R GSX-R 750 Monster 1200 S : Automotive have bladders. This is one of many, and I guess if they can survive on a motorcycle they won’t be much of a problem on a Packard. I bought a silver one of these, but will need to fold a piece of stainless to mount it.
I guess the next project should be giving the cylinder head some touch-up paint.
dp
Attach file:
Photo_1.JPG (233.86 KB)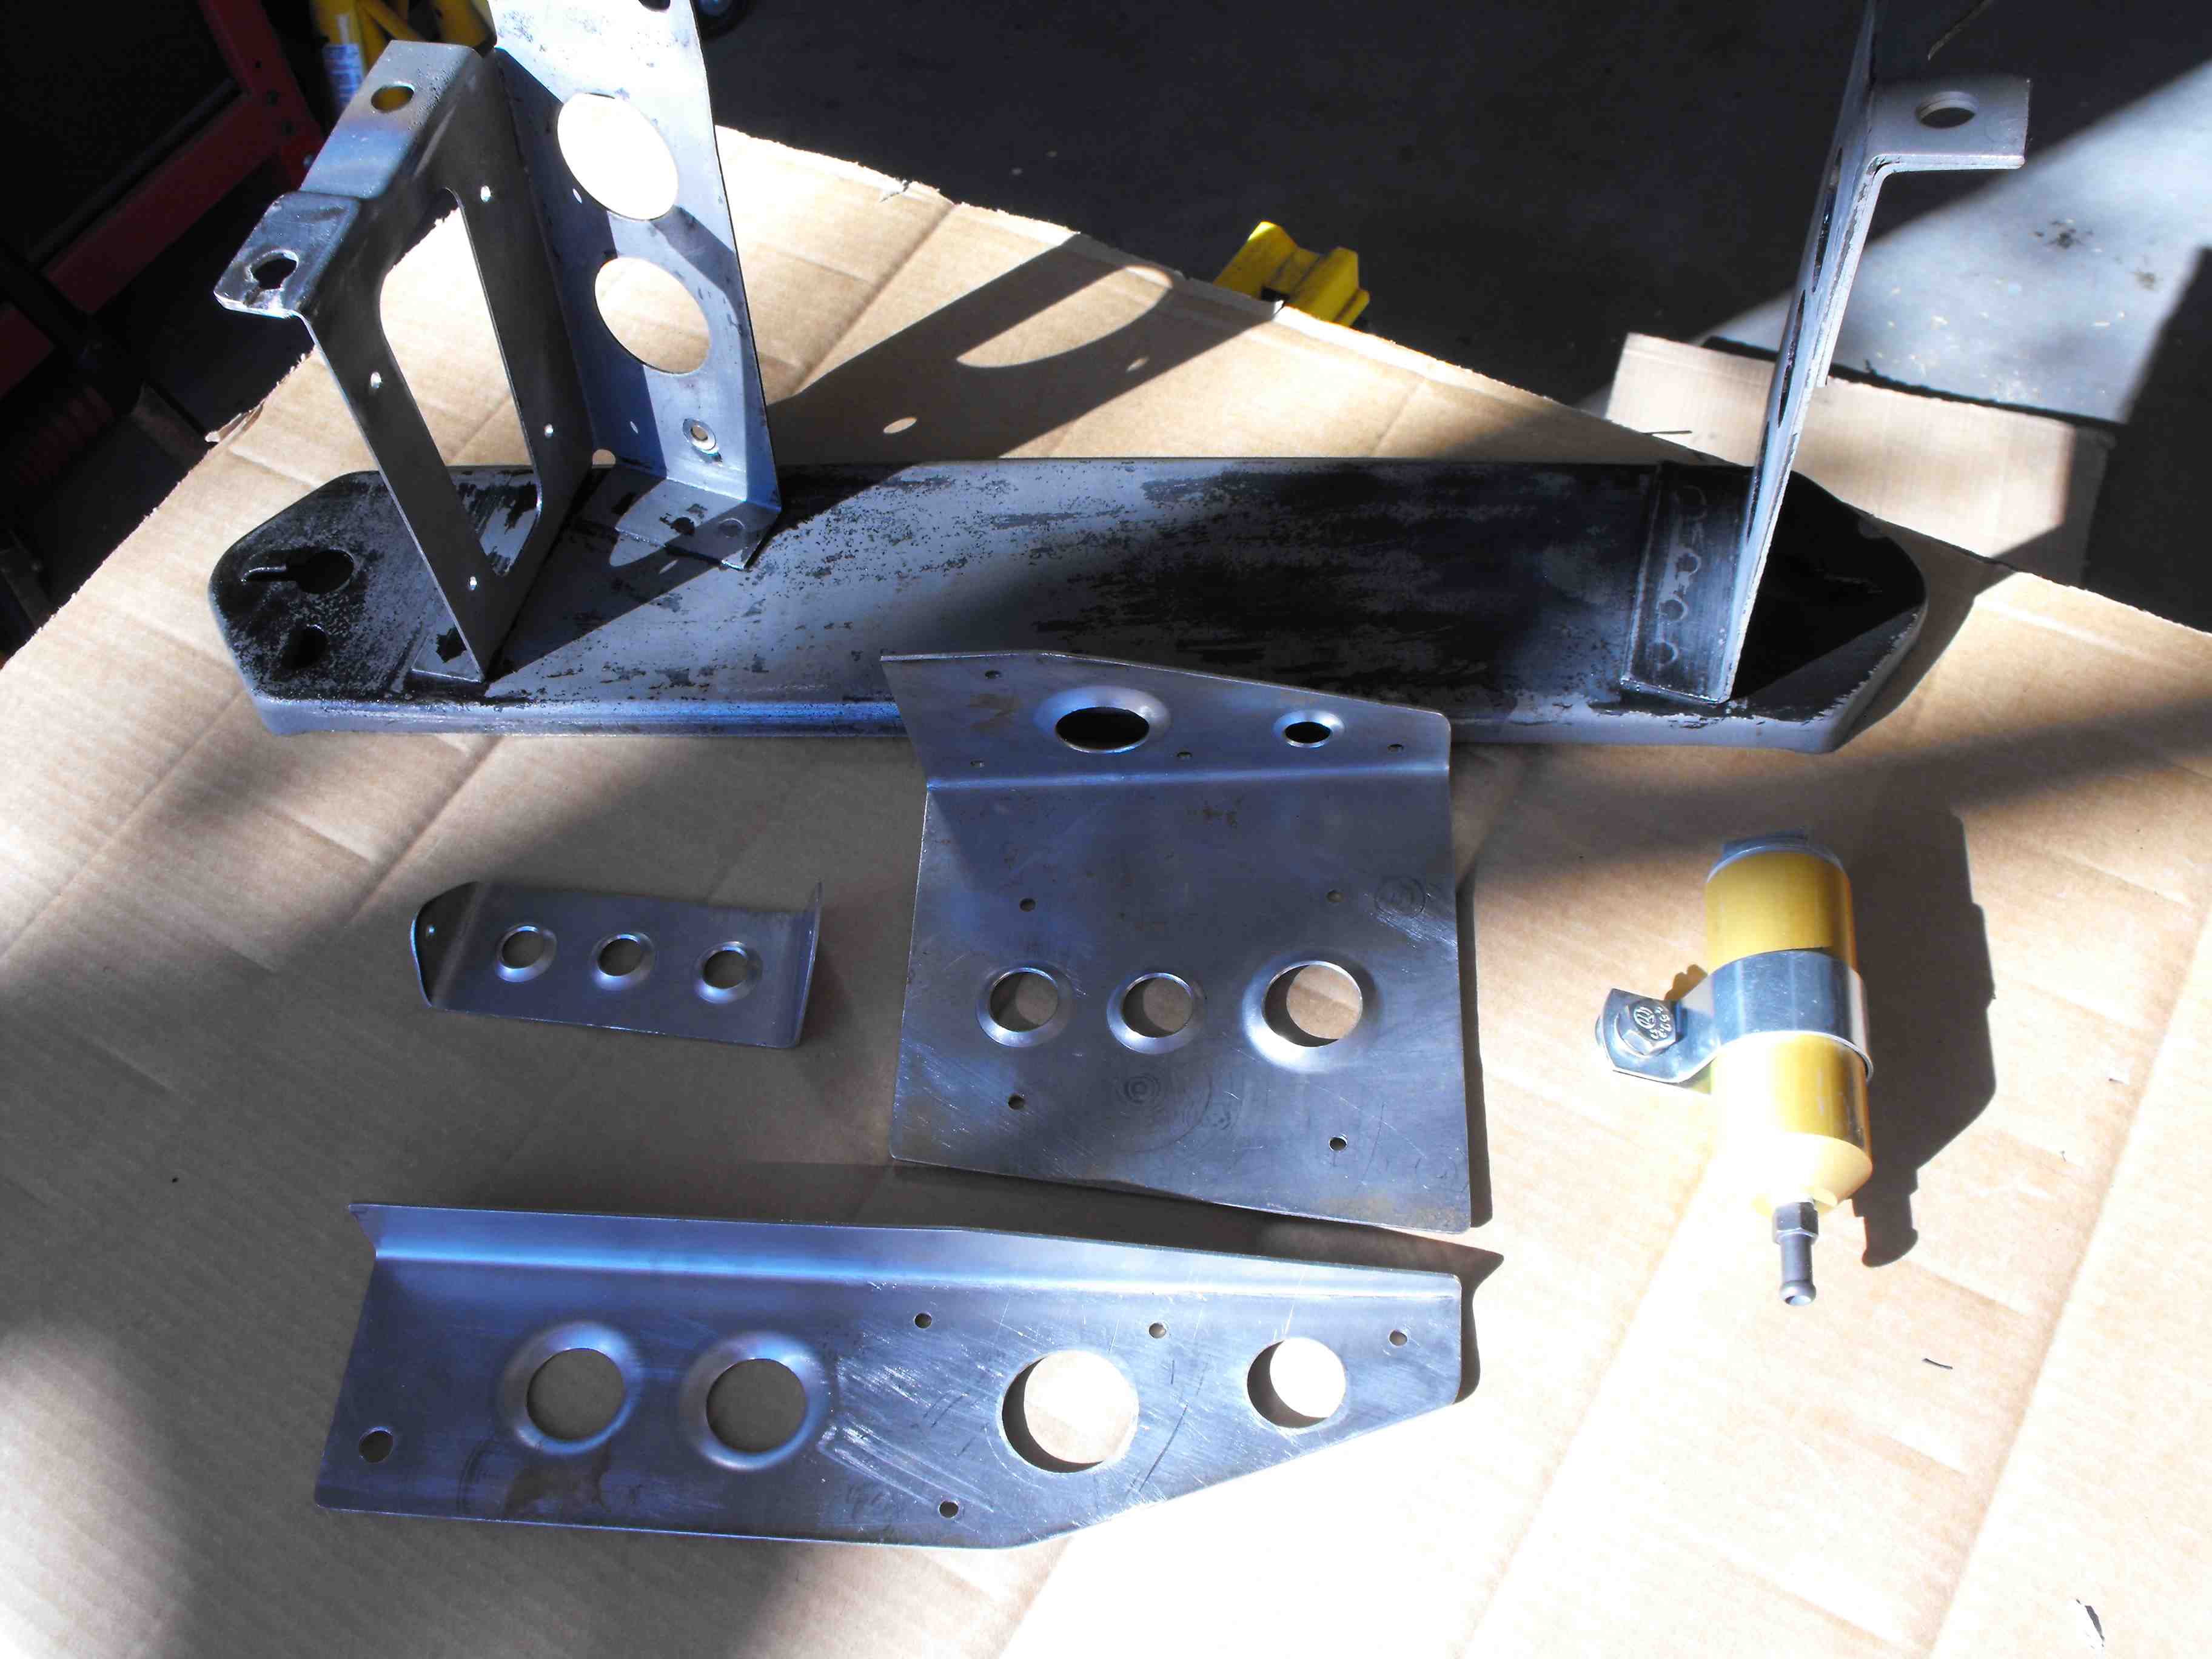 Photo_2.JPG (226.70 KB)
 Photo_8.jpg (361.55 KB)
This Post was from: https://packardinfo.com/xoops/html/modules/newbb/viewtopic.php?post_id=241626