Re: 1954 Packard Pacific | back up light switch/ Ultramatic vs GM 700R4 / reverse position
Posted by HH56 On 2021/7/30 10:36:28
You are not going to be able to use the stock straight plunger type switch with the GM transmission setup because the plunger switch is designed for activation at a complete limit of travel. With the reverse position being sort of in the middle of the travel range it will need to be something the linkage can control via sliding or rotating to be activated within only a few degrees of the reverse position and then smoothly drop out on either side. It appears GM used a switch mounted on the steering column with that particular transmission -- like Packard did with the introduction of the GS and later TU transmissions. With your older column, trying to mount one of those column type switches would be difficult.
Probably the simplest option would be to convert to a roller plunger micro switch or maybe a roller ball operated plunger switch. Ball plunger selection is very limited but there are a few used in cars. Most of those have a limited operating range of only a fraction of an inch and might be very fussy with position or not be suitable for use with exposed linkage. Roller micros are much easier to find, mount and come in different shapes, roller orientation, prices and current capacities. You do need a sturdy switch to stand up to the rigors of car use and location as well as have a decent current capacity. One downside to a roller microswitch is they need to have a smooth rounded cam like action to operate them so no damage is done to the switch by anything catching on the roller and forcing it.
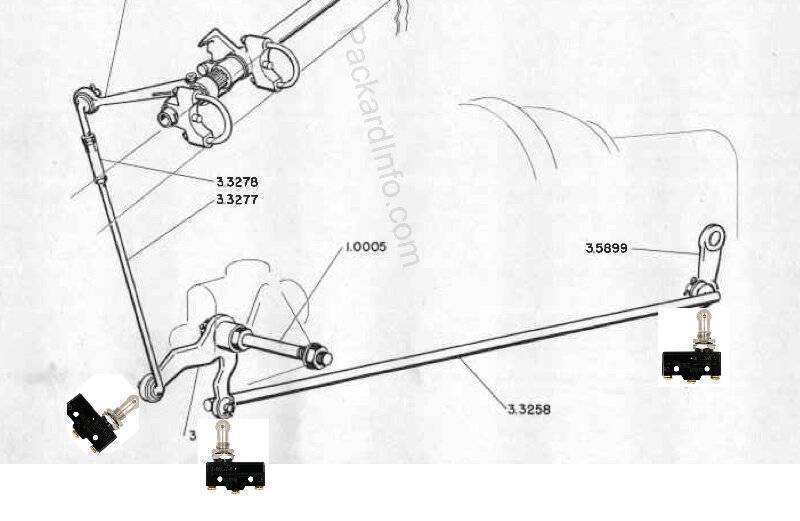
For any switch -- microswitch or ball -- you will need to make your own bracket and it needs to be sturdy so the assy does not flex. I would use 1/8" steel flat stock because that is fairly easy to find at most decent hardware or home center stores. McMaster also has a wide assortment of 1/8 flat and sheet stock. Even with the limitations of the Packard linkage there are some possibie places I believe a nice rounded and stable cam like area would work well to activate a microswitch. No idea if any of them would have a convenient or easy spot to do what is needed to mount the bracket at precisely the place when the linkage is in the reverse position though. There might be other places but not being able to see the linkage and surrounding objects first hand it is just a guess. If there is enough room possibly you could mount a switch in the same general area as the current switch only higher and have it operated by one side of the main lever as it passes instead of the bottom of the lever pushing the current switch plunger in. You would need to fabricate some kind of wedge affair and mount it on the side of the lever that would provide a gentle ramp to push the plunger in yet let the roller rotate freely as the lever passes.
Attaching something for a ramp and using the long rod is maybe possible but not a great idea -- although it depends on the geometry of the bellcrank and maybe the transmission lever. If those two levers are equal length the rod might stay in the same plane but the vertical rod looks like it could shift near or farther away from the switch as the bellcrank moves thru the various gears. That could make using a fixed position mount difficult.
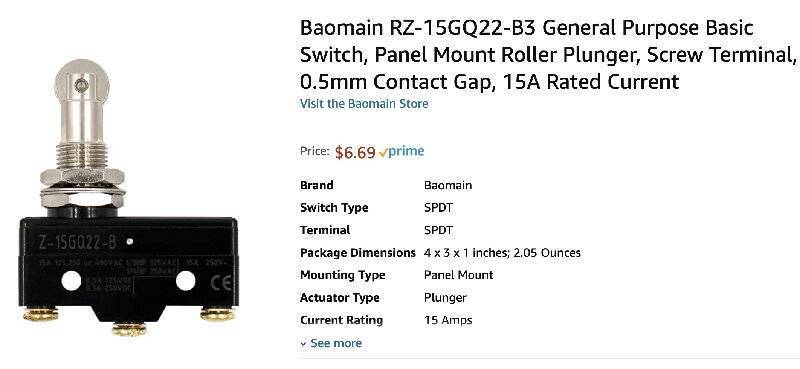
Here is a decent size microswitch with a parallel roller. Amazon has dozens of switches in all sorts of configurations and prices including some ball types used in transmissions that are designed to use that type switch. If mounting would be easier because of space, the roller microswitch can also be bought with cross rollers which would make the body of the switch turn 90 degrees to the various possible locations I show. You could mount using the nuts on the stem thru a large hole in the bracket like the original switch or by using a wider bracket and placing screws thru the holes in the switch body. If you do use a microswitch it would be a good idea to provide some water and dirt protection. Amazon also has vinyl covers for some of the microswitches.
Once you have the new switch in position remove and extend the wires from the stock switch but keep it in position for looks.
Attach file:
 microswitch.jpg (88.41 KB)
backup sw location.jpg (176.44 KB)
cover.jpg (114.48 KB)

Probably the simplest option would be to convert to a roller plunger micro switch or maybe a roller ball operated plunger switch. Ball plunger selection is very limited but there are a few used in cars. Most of those have a limited operating range of only a fraction of an inch and might be very fussy with position or not be suitable for use with exposed linkage. Roller micros are much easier to find, mount and come in different shapes, roller orientation, prices and current capacities. You do need a sturdy switch to stand up to the rigors of car use and location as well as have a decent current capacity. One downside to a roller microswitch is they need to have a smooth rounded cam like action to operate them so no damage is done to the switch by anything catching on the roller and forcing it.
For any switch -- microswitch or ball -- you will need to make your own bracket and it needs to be sturdy so the assy does not flex. I would use 1/8" steel flat stock because that is fairly easy to find at most decent hardware or home center stores. McMaster also has a wide assortment of 1/8 flat and sheet stock. Even with the limitations of the Packard linkage there are some possibie places I believe a nice rounded and stable cam like area would work well to activate a microswitch. No idea if any of them would have a convenient or easy spot to do what is needed to mount the bracket at precisely the place when the linkage is in the reverse position though. There might be other places but not being able to see the linkage and surrounding objects first hand it is just a guess. If there is enough room possibly you could mount a switch in the same general area as the current switch only higher and have it operated by one side of the main lever as it passes instead of the bottom of the lever pushing the current switch plunger in. You would need to fabricate some kind of wedge affair and mount it on the side of the lever that would provide a gentle ramp to push the plunger in yet let the roller rotate freely as the lever passes.
Attaching something for a ramp and using the long rod is maybe possible but not a great idea -- although it depends on the geometry of the bellcrank and maybe the transmission lever. If those two levers are equal length the rod might stay in the same plane but the vertical rod looks like it could shift near or farther away from the switch as the bellcrank moves thru the various gears. That could make using a fixed position mount difficult.
Here is a decent size microswitch with a parallel roller. Amazon has dozens of switches in all sorts of configurations and prices including some ball types used in transmissions that are designed to use that type switch. If mounting would be easier because of space, the roller microswitch can also be bought with cross rollers which would make the body of the switch turn 90 degrees to the various possible locations I show. You could mount using the nuts on the stem thru a large hole in the bracket like the original switch or by using a wider bracket and placing screws thru the holes in the switch body. If you do use a microswitch it would be a good idea to provide some water and dirt protection. Amazon also has vinyl covers for some of the microswitches.
Once you have the new switch in position remove and extend the wires from the stock switch but keep it in position for looks.
Attach file:
microswitch.jpg (88.41 KB)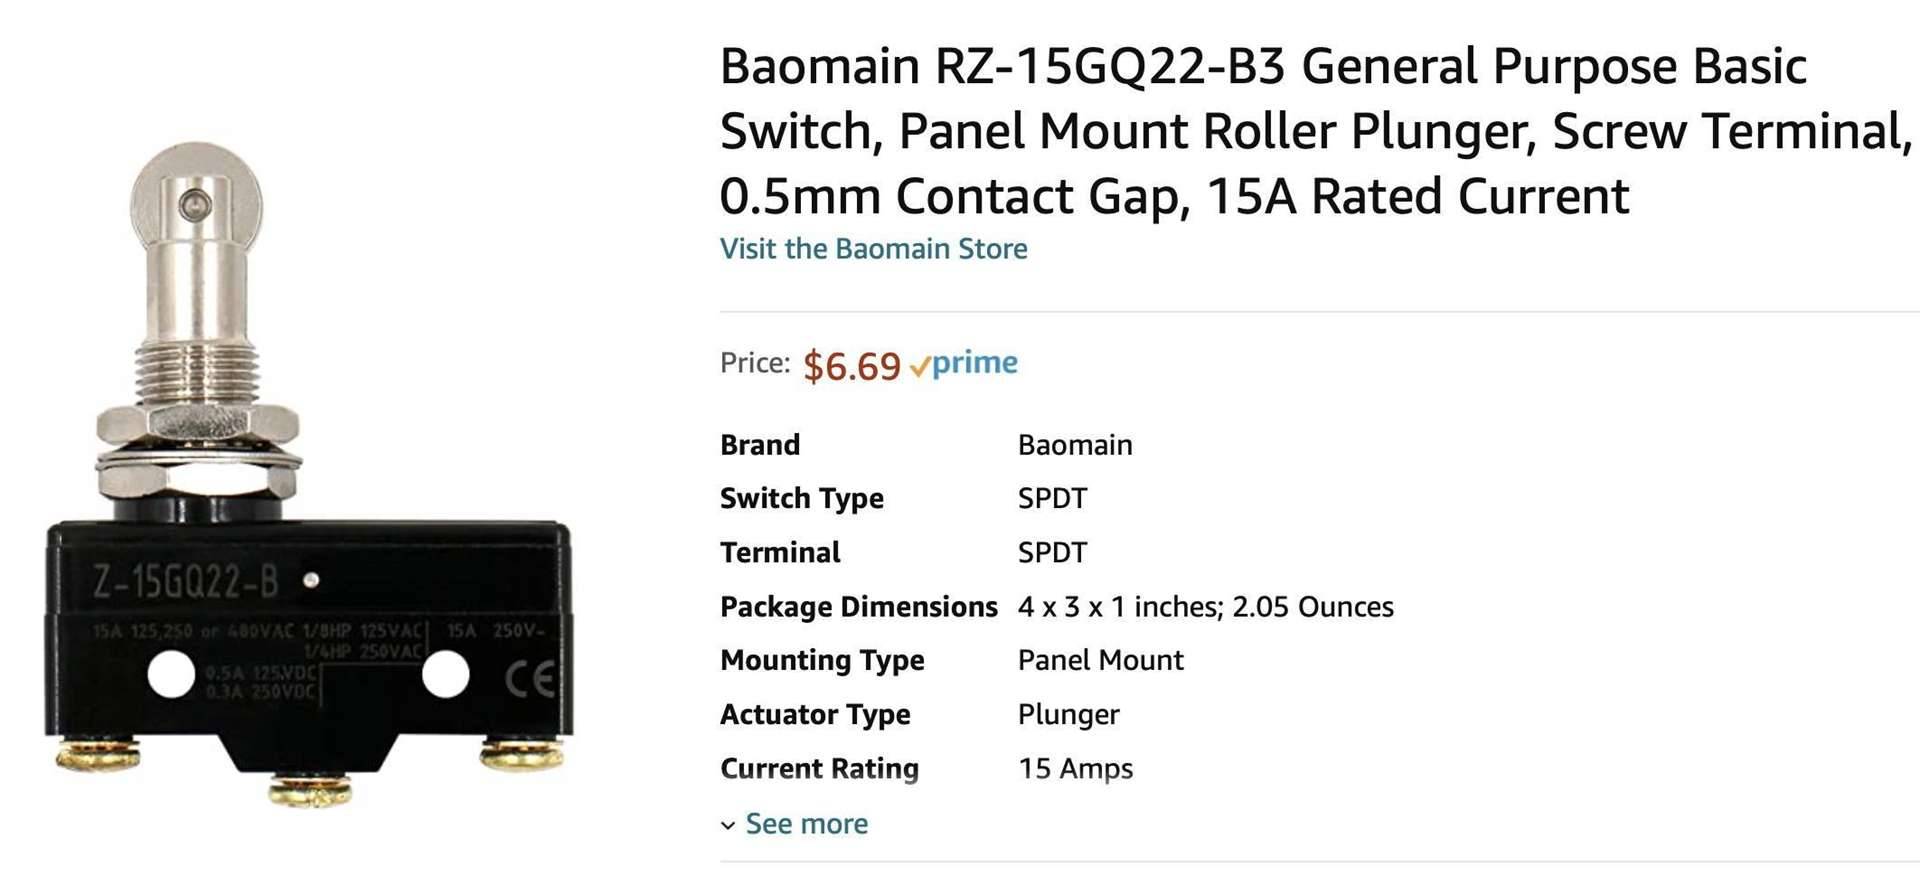 backup sw location.jpg (176.44 KB)
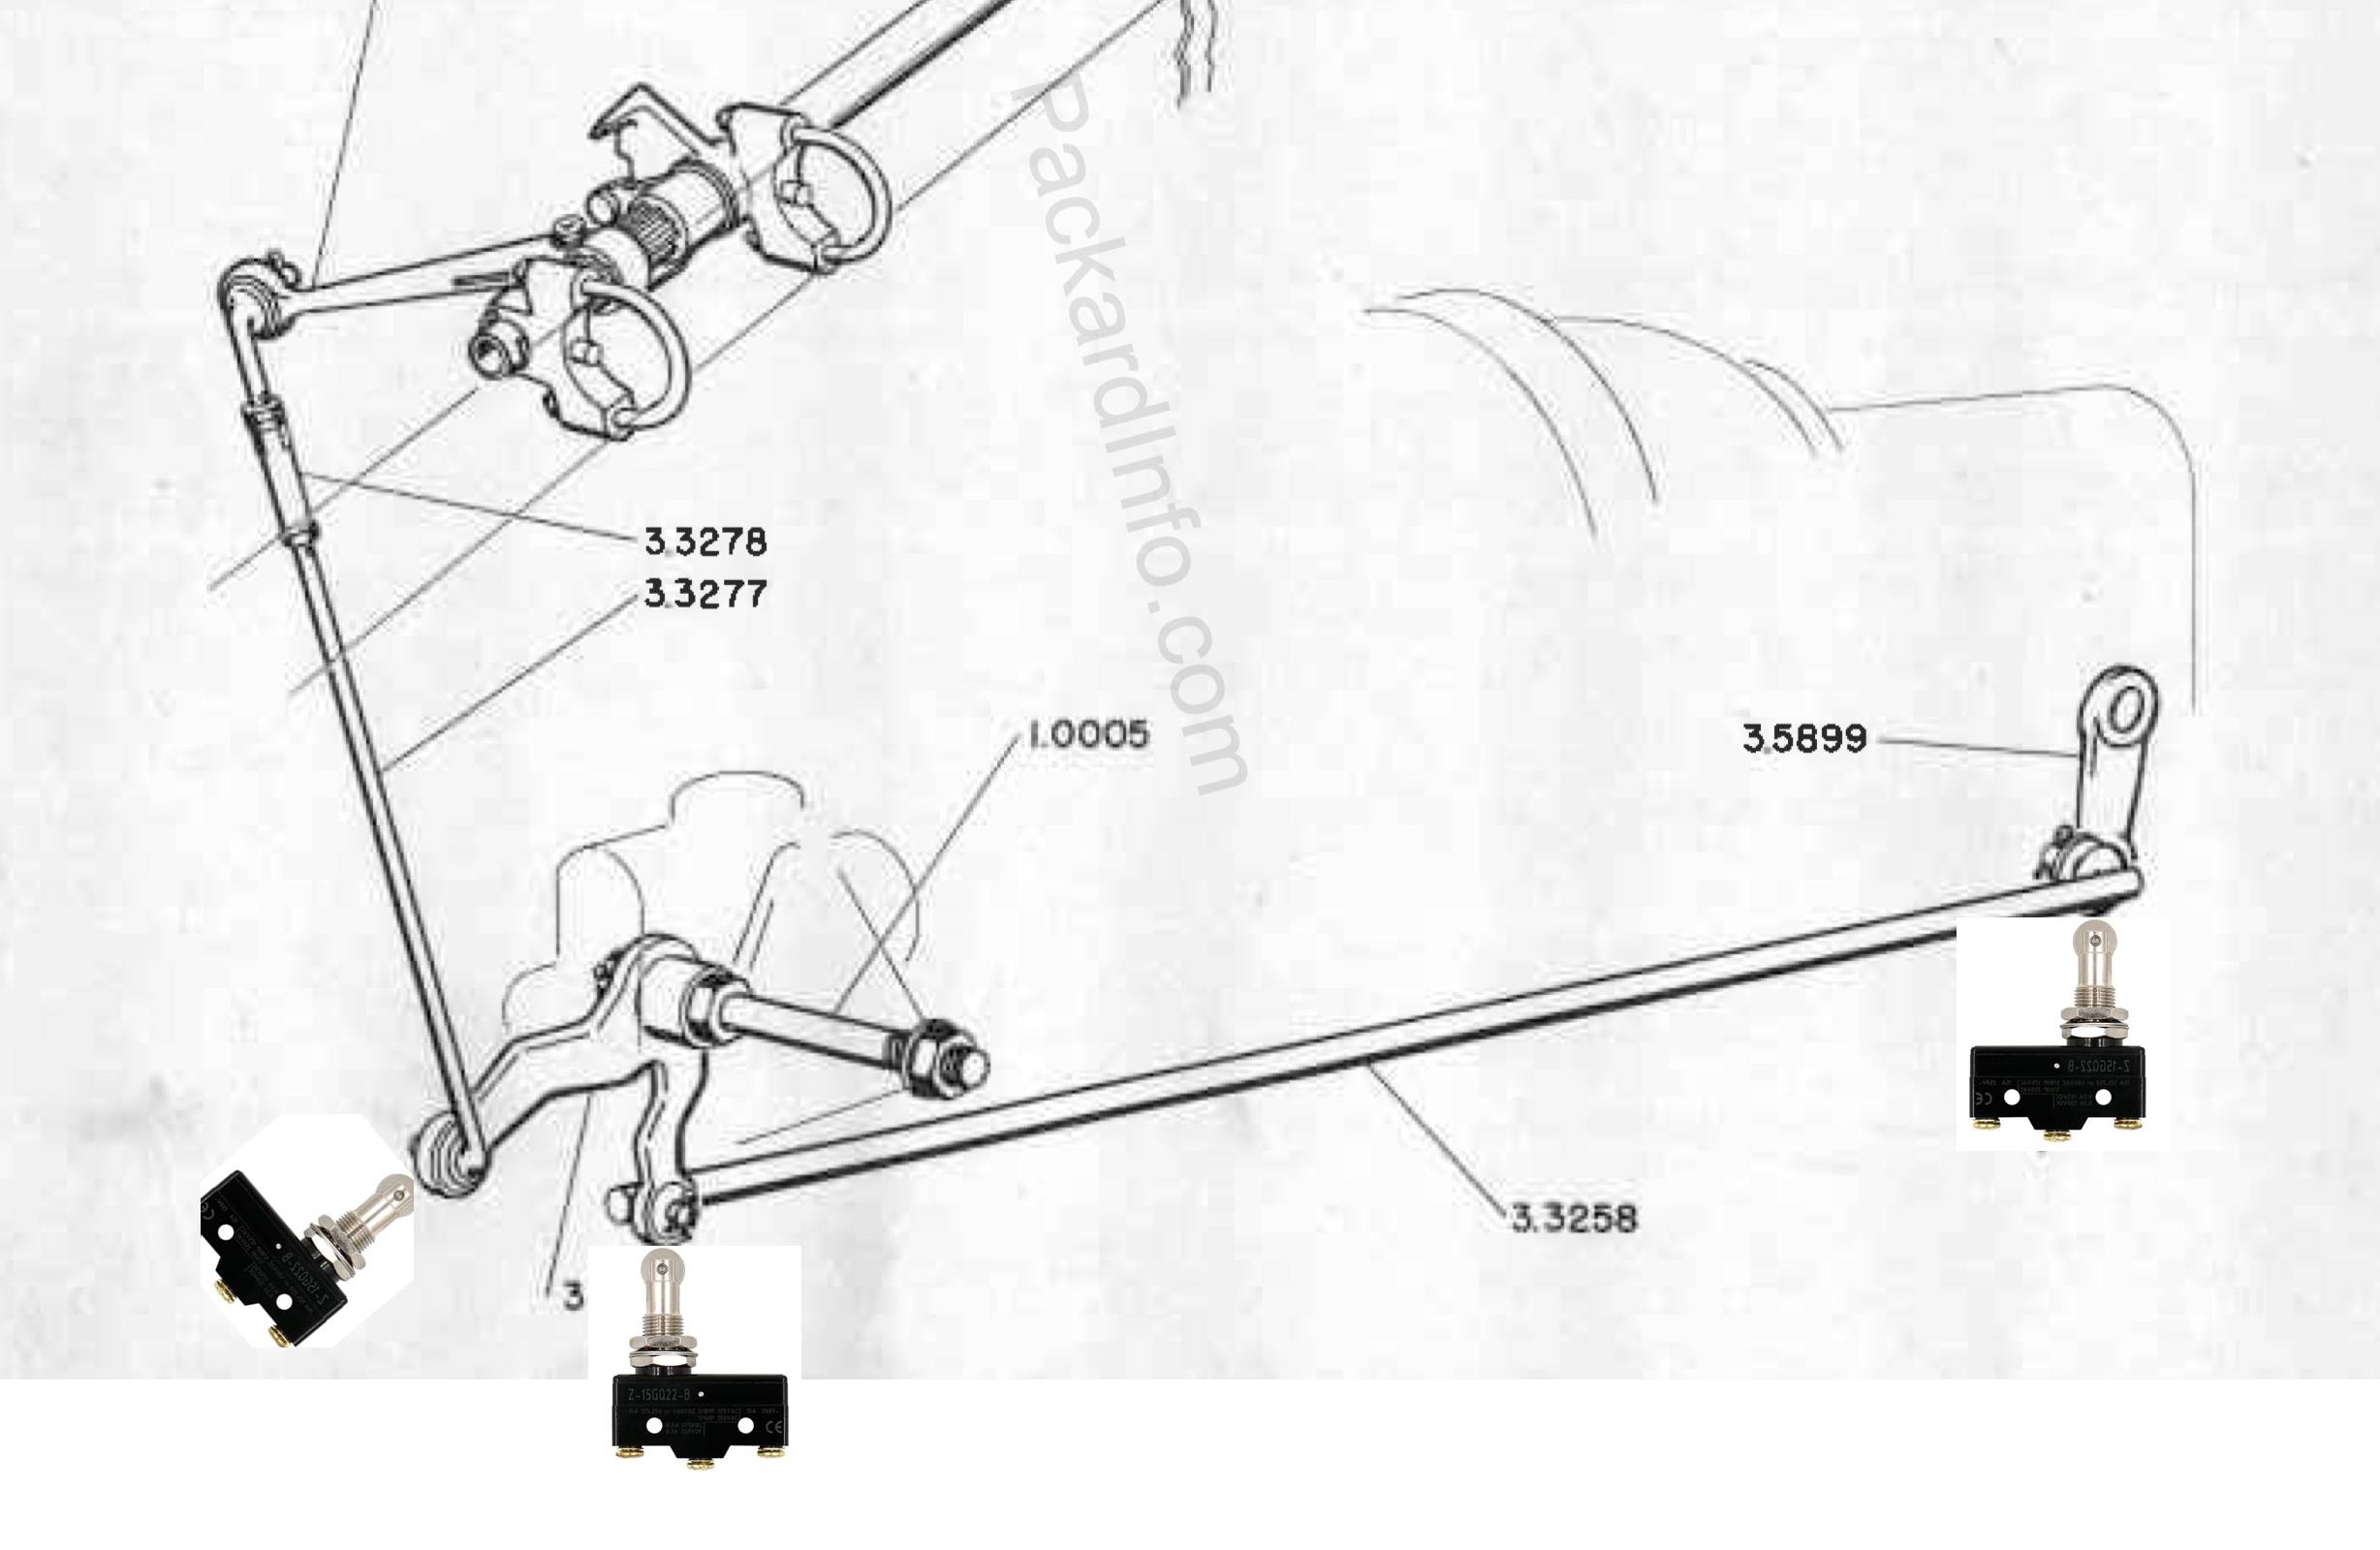 cover.jpg (114.48 KB)
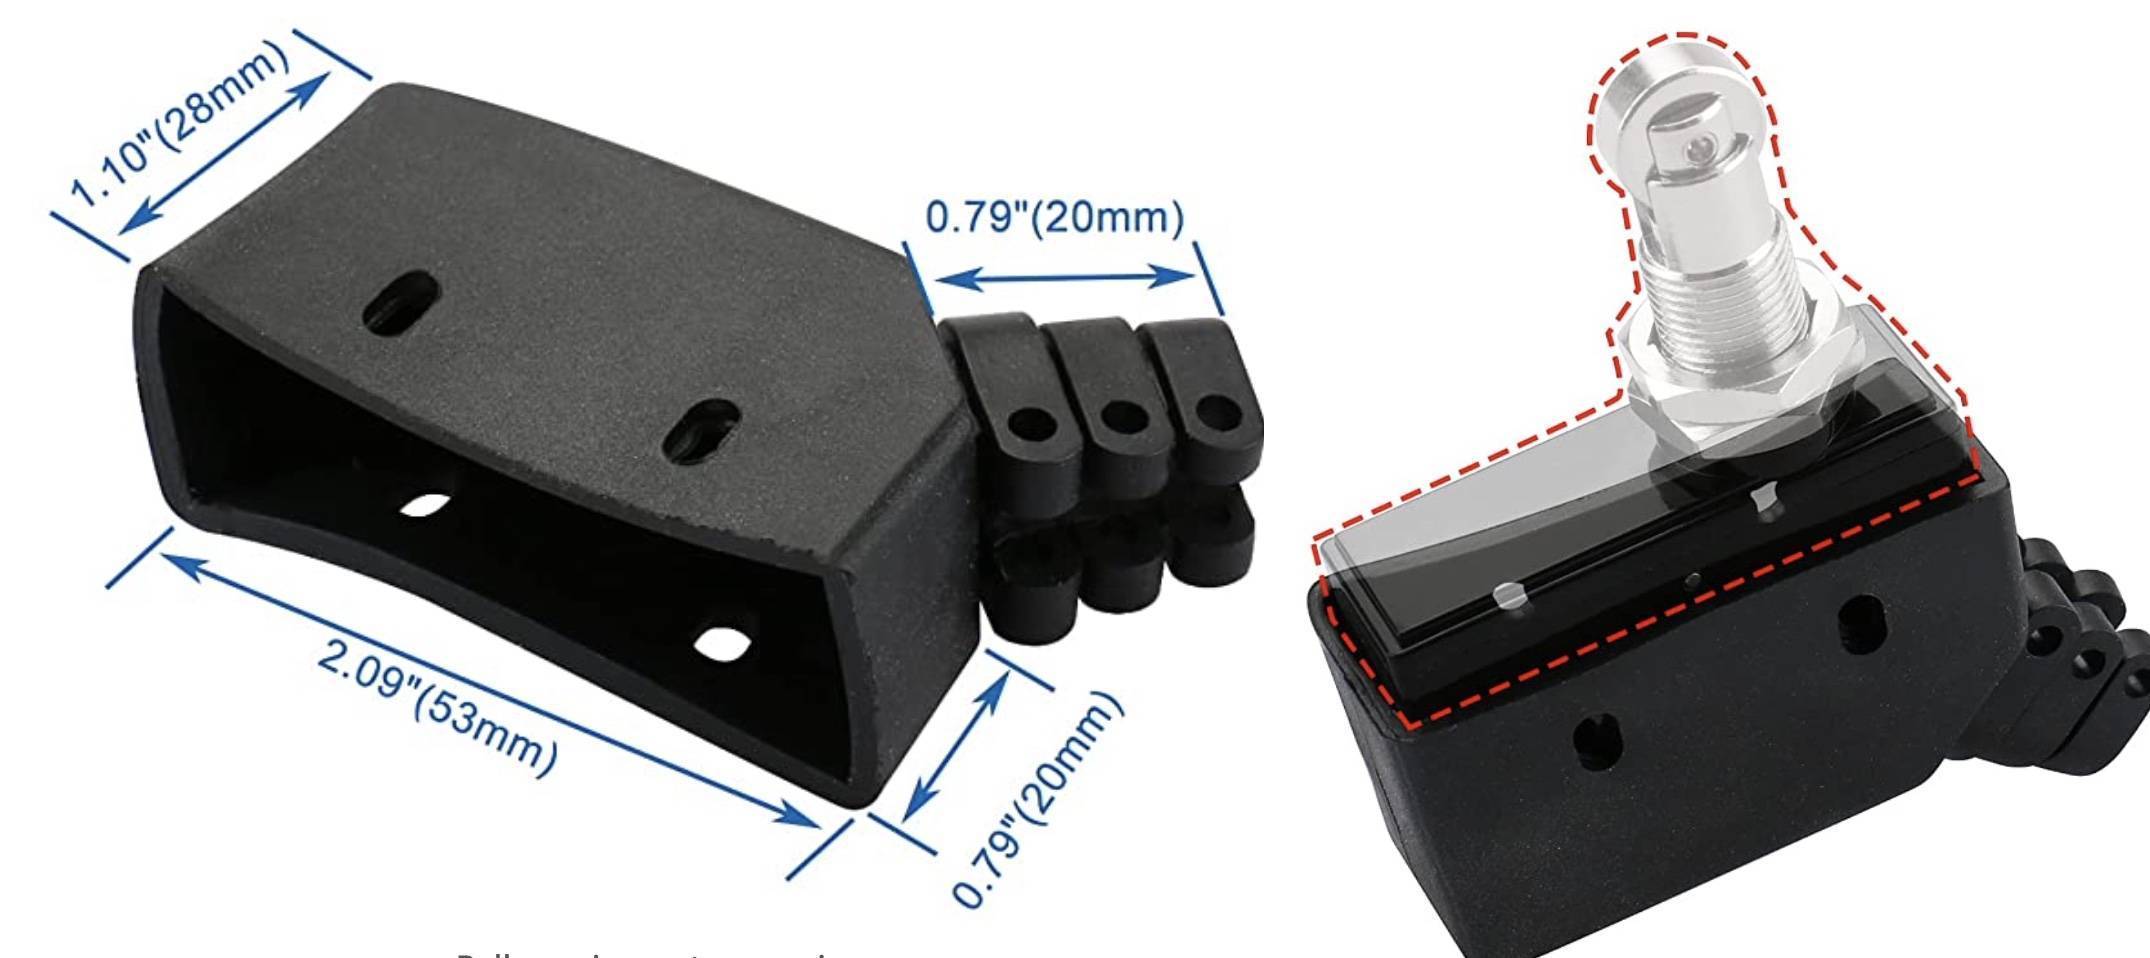
This Post was from: https://packardinfo.com/xoops/html/modules/newbb/viewtopic.php?post_id=235557