BTV replacement
Posted by Dave Harrison On 2010/10/24 12:38:31
Due to BTV problems which have stopped me from driving my car at all this year I decided to experiment with a different alternative. This is still a single circuit system and has not yet been proven with me running out of time before having to return to work. I will now be away from home until late November when I hope weather permitting to continue and eventually road test the car. I just thought meantime you guys might be interested in what I have done so far. Parts used were as follows:
5/8'' (0.625) manual master cylinder.
Remote mounted fluid reservoir.
3:1 ratio remote mounting booster.
10 psi residual pressure valve
T-piece connection.
The master cylinder is mounted on a fabricated plate bolted to the existing floor plate this has left the pedal in its original position connected via a home made machined linkage. The fluid reservoir is mounted on the firewall above the steering column on a bracket and connected to the master cylinder with 5/16'' tubing.
The 3:1 ratio remote mounting booster is fitted in the inner fender area above the vacuum tank which I have retained but had to move lower down from its original location.
The master cylinder outlet is connected to the remote booster inlet, the outlet of the remote booster is connected through the 10 psi residual valve to the front and rear brake lines via the new t-piece.
The vacuum boost is connected as previously to the BTV but with longer hose connection to the new booster.
I was initially concerned that there wouldn't be enough volume of fluid moved from the small 5/8'' master cylinder which I chose being the same diameter as the BTV and thought it may bottom out but the system bled easily and a firm pedal was obtained.
I have tried moving the car back and forth a few yards and the brakes do work though at first seem a bit aggressive and I suspect maybe are requiring adjustment at the shoes to balance which I intend to do before road testing. I just hope the standard pedal ratio is enough.
Some pics are attached to more easily see what has been done and I will post my findings again when I manage to road test the car...
Regards,
Dave.
Attach file:
 (125.42 KB)

(181.03 KB)

(161.93 KB)

(155.25 KB)

(139.84 KB)

(205.98 KB)

5/8'' (0.625) manual master cylinder.
Remote mounted fluid reservoir.
3:1 ratio remote mounting booster.
10 psi residual pressure valve
T-piece connection.
The master cylinder is mounted on a fabricated plate bolted to the existing floor plate this has left the pedal in its original position connected via a home made machined linkage. The fluid reservoir is mounted on the firewall above the steering column on a bracket and connected to the master cylinder with 5/16'' tubing.
The 3:1 ratio remote mounting booster is fitted in the inner fender area above the vacuum tank which I have retained but had to move lower down from its original location.
The master cylinder outlet is connected to the remote booster inlet, the outlet of the remote booster is connected through the 10 psi residual valve to the front and rear brake lines via the new t-piece.
The vacuum boost is connected as previously to the BTV but with longer hose connection to the new booster.
I was initially concerned that there wouldn't be enough volume of fluid moved from the small 5/8'' master cylinder which I chose being the same diameter as the BTV and thought it may bottom out but the system bled easily and a firm pedal was obtained.
I have tried moving the car back and forth a few yards and the brakes do work though at first seem a bit aggressive and I suspect maybe are requiring adjustment at the shoes to balance which I intend to do before road testing. I just hope the standard pedal ratio is enough.
Some pics are attached to more easily see what has been done and I will post my findings again when I manage to road test the car...
Regards,
Dave.
Attach file:
(125.42 KB)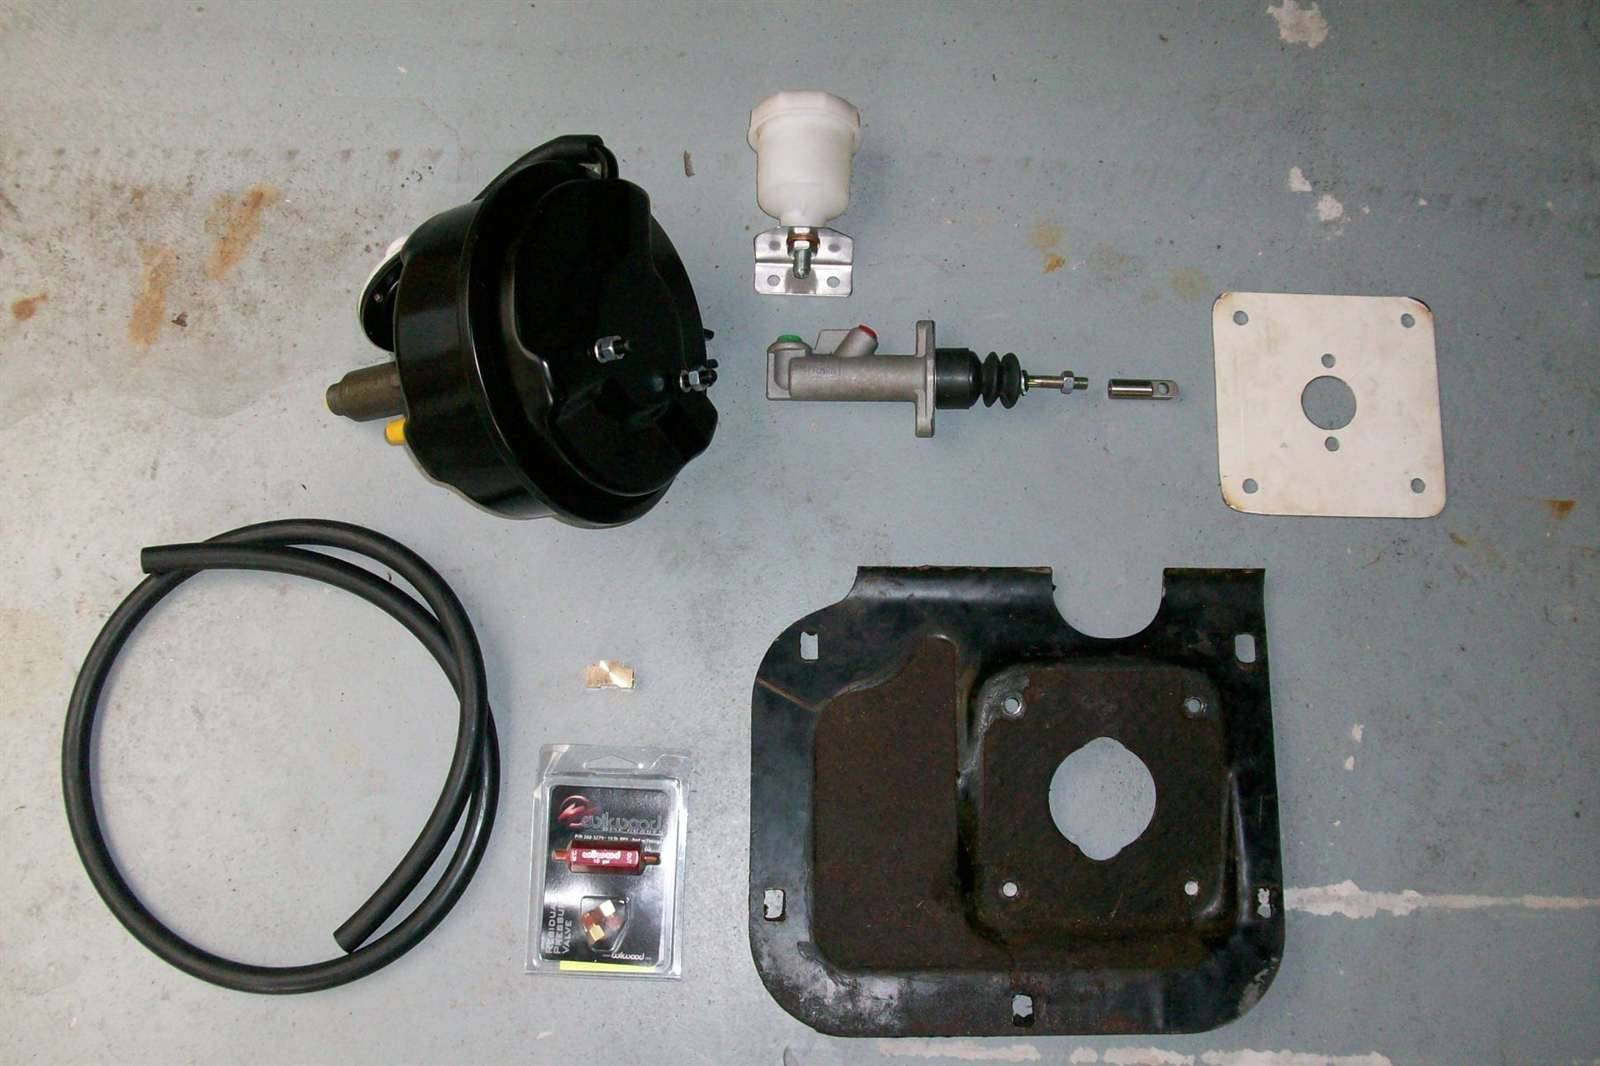 (181.03 KB)
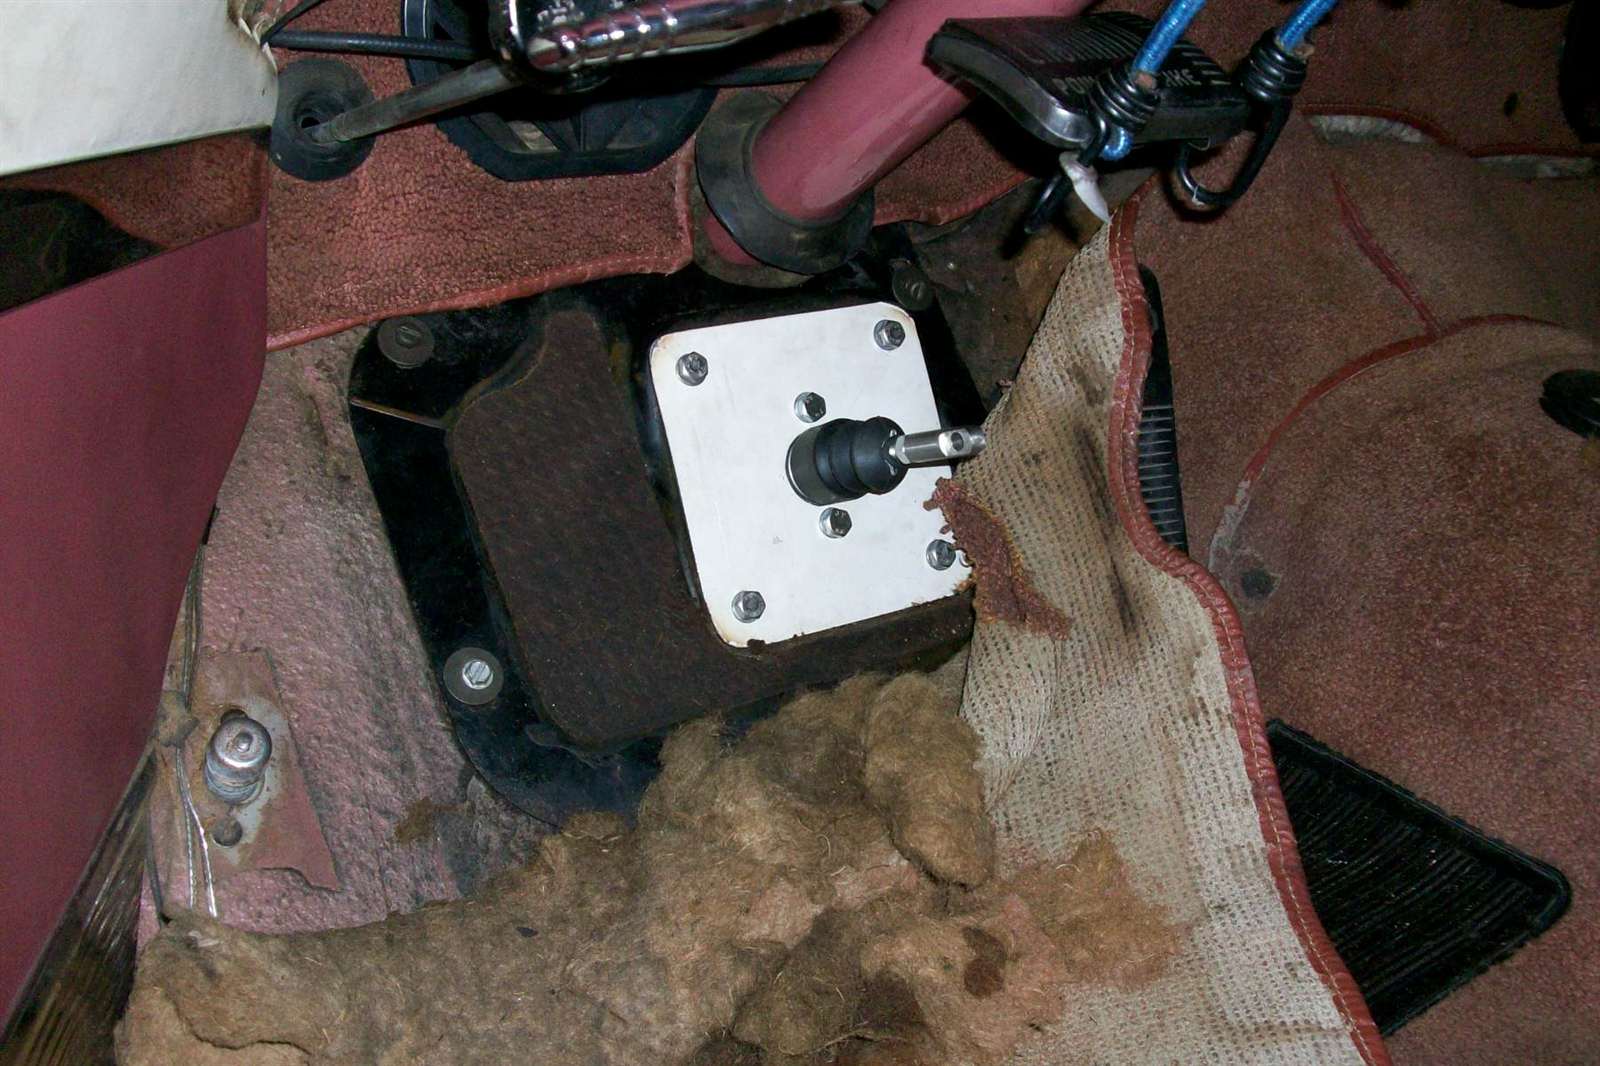 (161.93 KB)
 (155.25 KB)
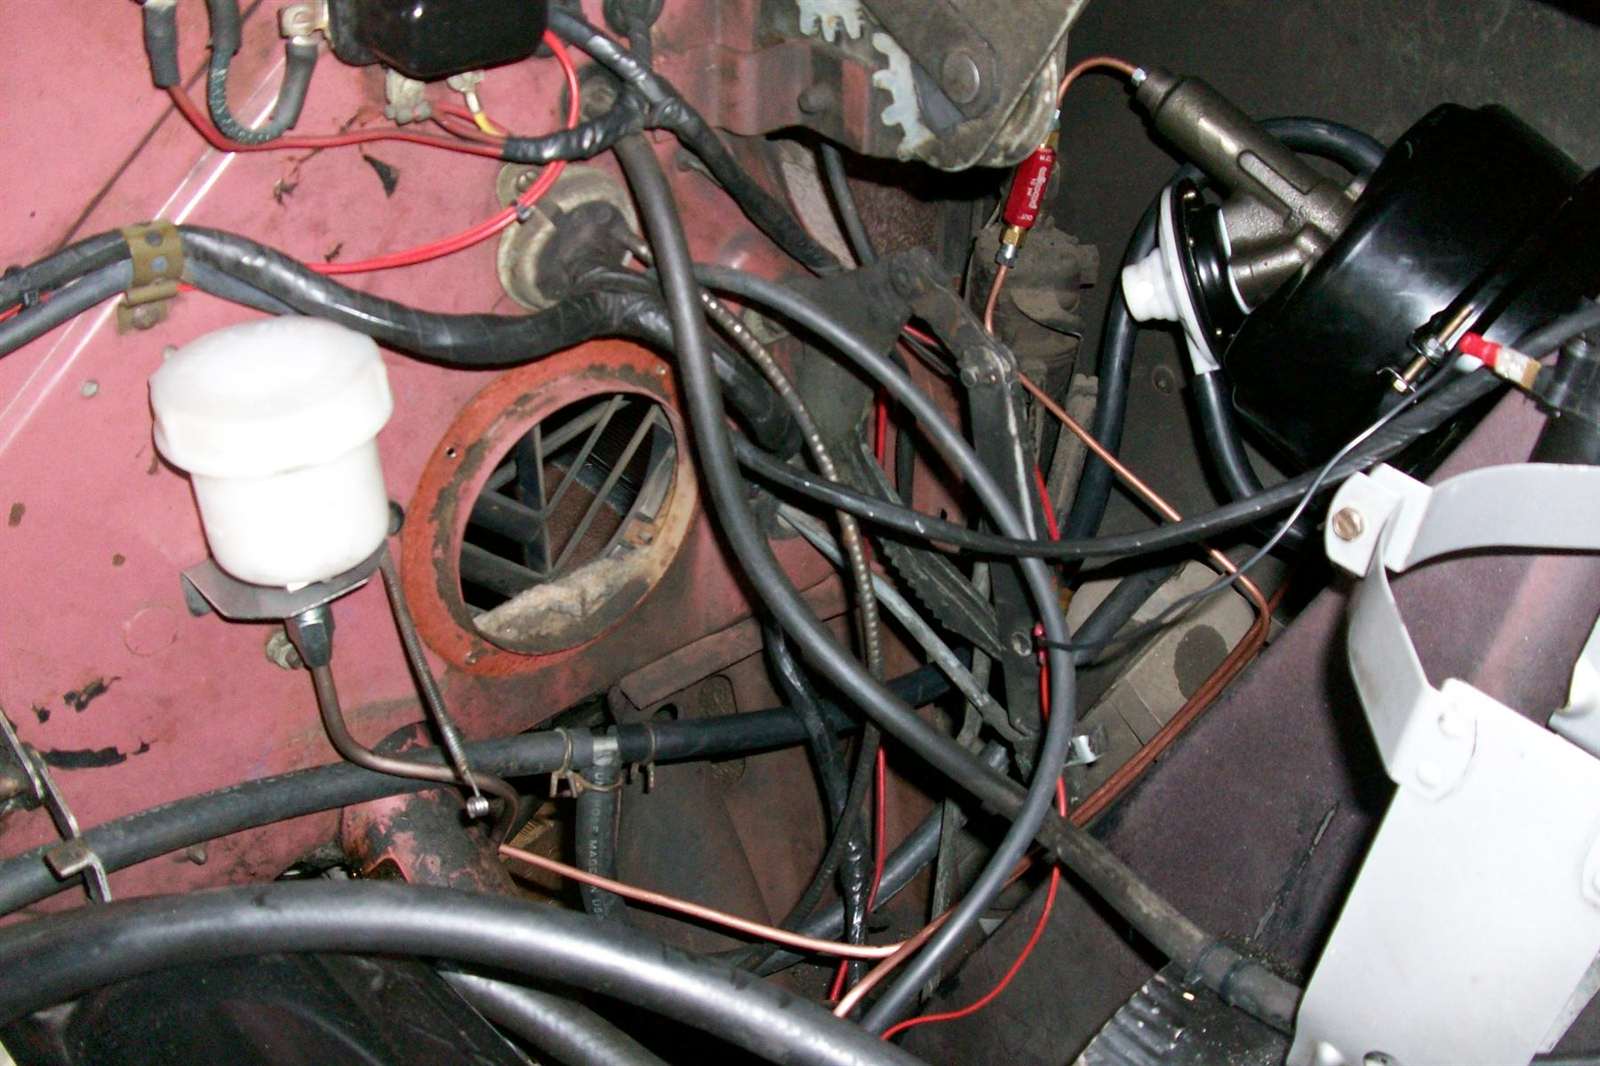 (139.84 KB)
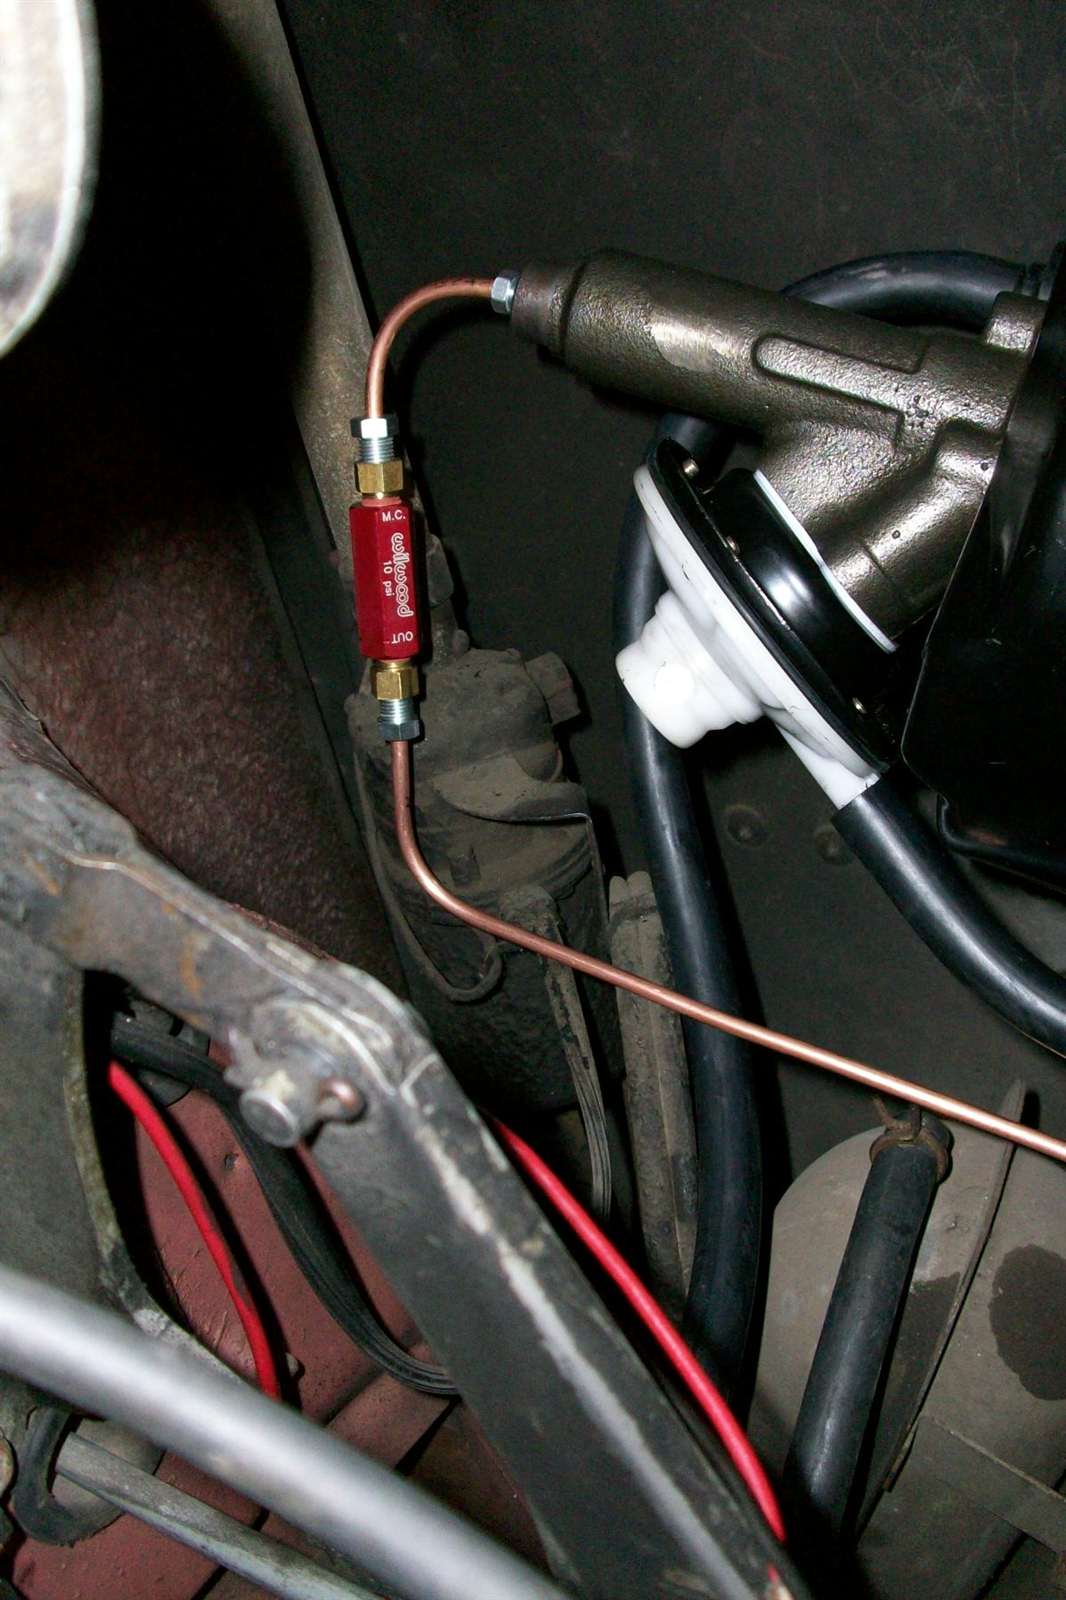 (205.98 KB)
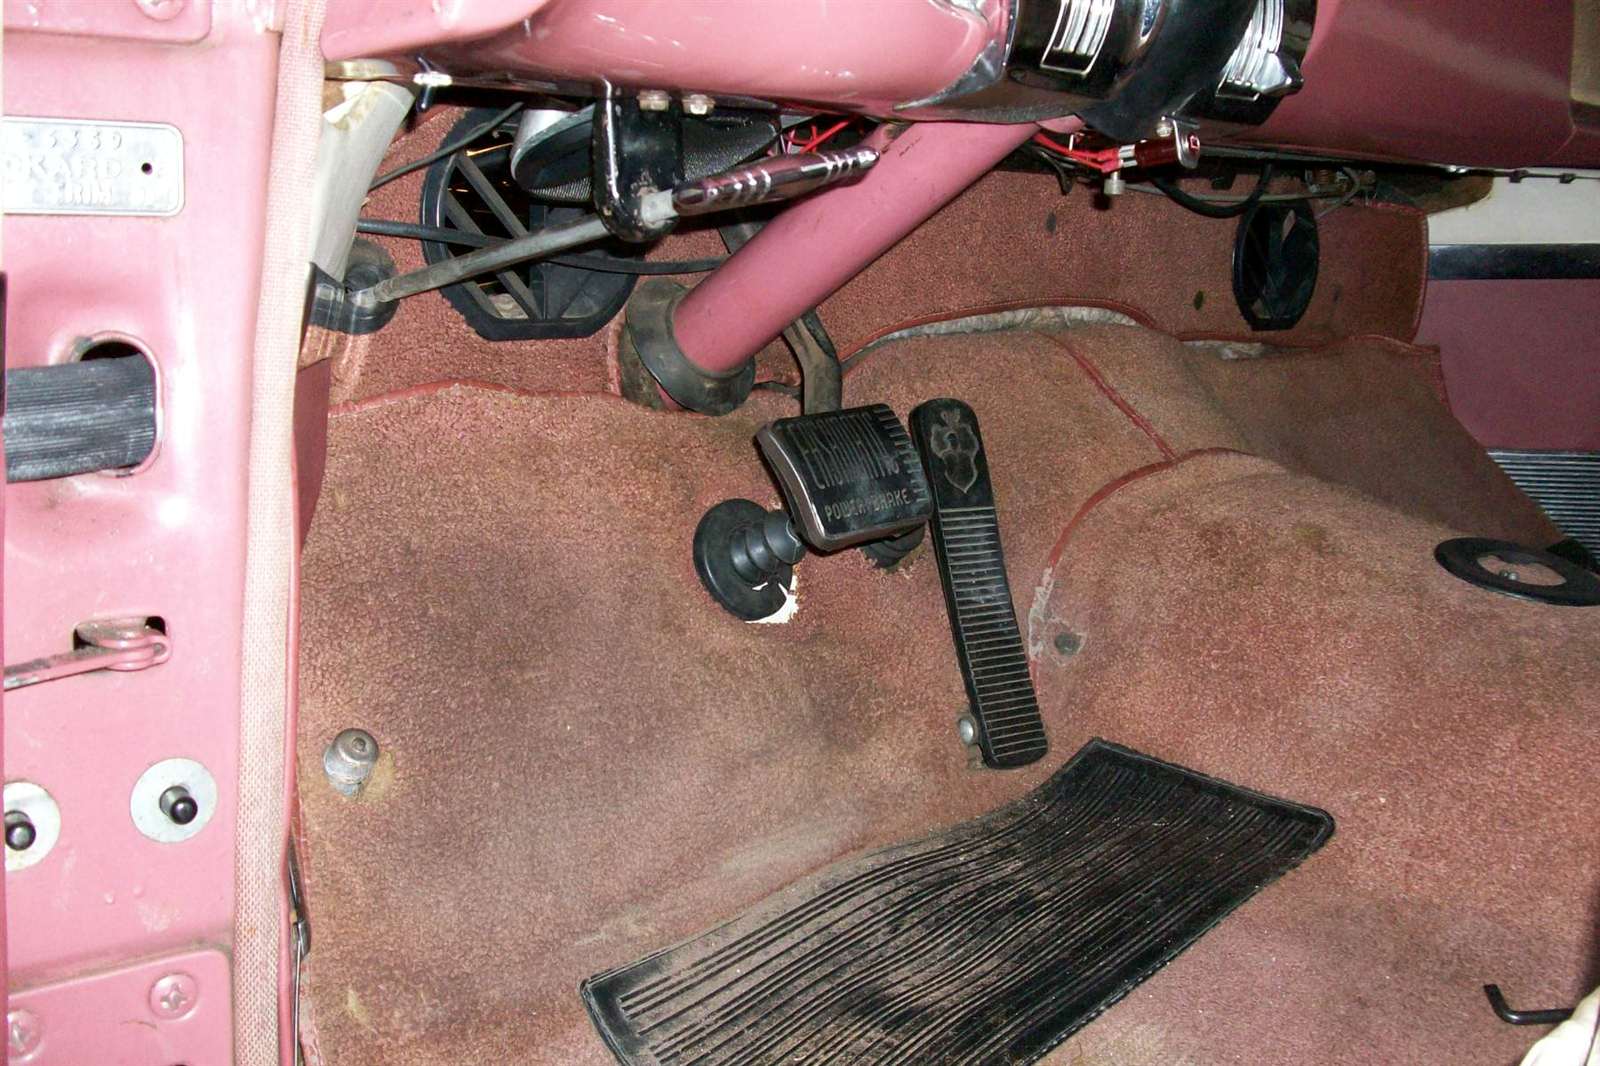
This Post was from: https://packardinfo.com/xoops/html/modules/newbb/viewtopic.php?post_id=62739