|
Re: piston slap
|
||||
|---|---|---|---|---|
|
Home away from home

|
.0005 must be an error. I dont think you could fit any piston that tightly. Read the Packard manual very carefully.
If your noise is indeed piston sap in one cylinder, then replacing that piston & ring set with a new one identical to the others should eliminate it. That would involve removing the oil pan and the head, and measuring the bore to be sure it is in reasonable shape, which it probably is. Piston clearance and ring gap should be at least what Packard recommended. Check ring gap about halfway down the bore. If you can't obtain one new piston & ring set that is identical to the others, I'd get a full set of new pistons & rings. (All 8 bores would need to be checked carefully for size and for any excessive wear, and light honing would be necessary, whether replacing one piston or all of them. An engine with significant wear might require ridge reaming prior to removing any piston. If the pistion slap is minor and transient, it might be best to tolerate it if the engine has high mileage and no other issues.
Posted on: 2023/6/15 11:48
|
|||
|
||||
|
Re: 288 Head Gasket Planning
|
||||
|---|---|---|---|---|
|
Home away from home
|
I would bypass the heater before doing anything else. It could be leaking.
If you're losing water, look everything over very carfefully. External water leaks can be very sneaky. If you have an internal leak, it could be a crack or you may still have a gasket issue. If the studs are clean, the gasket should slip down over them without much trouble. The studs need to be totally clean right down to the block and there should be no crud or rust around the base of the studs. It can be tedious to get the studs and the gasket surface of the block completely clean. It might be helpful to make a dummy head out of 3/4" plywood to install the gasket. Lay the head on a straight, clean piece of quality plywood, clamp it, and drill through the head stud holes and plywood with a drill bit 1/32 smaller than the bolt holes in the head. Then re-drill the plywood with a bit 1/32 larger than the head stud holes . Then use the plywood to help get the gasket down over the studs. If the plywood jams, look to see where it is hanging up, and see if the stud is bent or has scale on it. Check for water in the oil.
Posted on: 2023/6/15 11:31
|
|||
|
||||
|
Re: Rebuilding distributor
|
||||
|---|---|---|---|---|
|
Home away from home

|
FJ offers some good information on these distributors. Some of them used a grease cup on the side of the body to lubricate the bushing and shaft. Many people do not understand what these are and how to service them. This inattention can lead to wear on the bushing and shaft.
Posted on: 2023/6/15 11:26
|
|||
|
We move toward
And make happen What occupies our mind... (W. Scherer) |
||||
|
||||
|
Re: 1941 120 Sedan parts car for sale on ebay
|
||||
|---|---|---|---|---|
|
Home away from home
|
Looks more like 700-1200 USD to me. It has some trim parts, and may have a rebuildable engine, etc. Or maybe not. It appears to have a front sway bar, which I'd like to have. I'd go for the Dodge Power Wagon at 2500, if it was nearby.
Posted on: 2023/6/15 11:20
|
|||
|
||||
|
Re: Rebuilding distributor
|
||||
|---|---|---|---|---|
|
Home away from home

|
This used to be local parts store stuff, but they haven't sold for decades, since electronics. (pet peeve)
If the cam & drive gears in good shape, shaft OK, I think you can still buy Delco dist. bushing(s)/shims, try Brillman. Not sure about the other parts, they may have too. We're somewhat spoiled by reliability of modern conveniences and progress when dealing with these old cars. These were "oiled" though a side arm cup, so the oil has to flow/seep into the bushing space, can't be too tight. When you see those little snap caps on the end, they're for oil. Every household had oil cans about, but rarer today. If grease is in it, something is wrong and maybe why it failed or wasn't lubed/incorrect. Oilite bushings are porous and made/come impregnated with oil. There are several distributor rebuilders around, I'd contact one of those to see what they can do. They deal with this all the time. Without the machine and the right specs/ parts, you'd be taking a chance of failure DIY, if it's wobbling much, not running good. If it's been running OK, U R just curious/want to learn, then maybe not so much an issue here. They don't wear to much if maintained. But U did not state that info, only asked how to? Sounds like the (growing) lack of knowledge with points vehicles. Condensers are usually just changed with points not tested.(Capacitance tester req'd.) Inexpensive item and somewhat fragile material under charge.
Posted on: 2023/6/15 11:06
|
|||
|
||||
|
Re: Gas gauge wire path on a 1950 Series 2300 Custom-8
|
||||
|---|---|---|---|---|
|
Forum Ambassador

|
The tank sender wire is part of the body loom. I believe 23rd series body looms still followed the older path above the headliner rather than across the floor. If not someone will say so but if it does go above, that loom starts at an opening under the left half of the windshield. There will be some inline connectors at that location to join most of the body loom wires to the main loom. IIRC, the gas sender wire and a power wire called body feed are longer and will connect directly. Sender to the fuel gauge and body feed to a circuit breaker.
At any rate, if going above the loom runs up the windshield pillar and then in a channel above the doors rearward to the left side of the package shelf where it drops down into the trunk. It then is carried by clips follows the lid opening to an area by the left tail light. There are inline connectors near the tail light which join the body loom to the tail light and to another short continuing portion of the loom that crosses over below the trunk lid opening to the right tail light. No matter how the incoming body loom enters the trunk, once in the trunk it joins other wires via inline connectors near the left tail light. To connect to the sender, somewhere along that short loom continuation from the left tail light over to the right side will be a grommeted hole where two other lengths of wire -- one from the gas tank sender and the other being a license lamp wire will come up into the trunk. There will be more inline connectors that join those two wires to wires either in the body loom or in the short continuation loom. If the hole is nearer the left tail light, probably directly to the body loom. If the hole is nearer the middle, to wires carried in the continuation portion of the loom. On some cars the inline connectors for the sender or license lamp could have wound up positioned underneath the car very near the hole. On the horn ring it should just release as you said you tried.. Since you are pushing against a sponge rubber piece that acts as both a spring and anti vibration control there is every possibility the sponge rubber has deteriorated and either turned hard as a rock or else turned into a gooey mass which is acting like glue. All I can suggest is keep trying gently because there is no easy solution that does not risk damage to the emblem if either has occurred. Here is a bit from the parts manual showing the horn ring assy. Attach file:  horn ring.jpg (122.17 KB) horn ring.jpg (122.17 KB)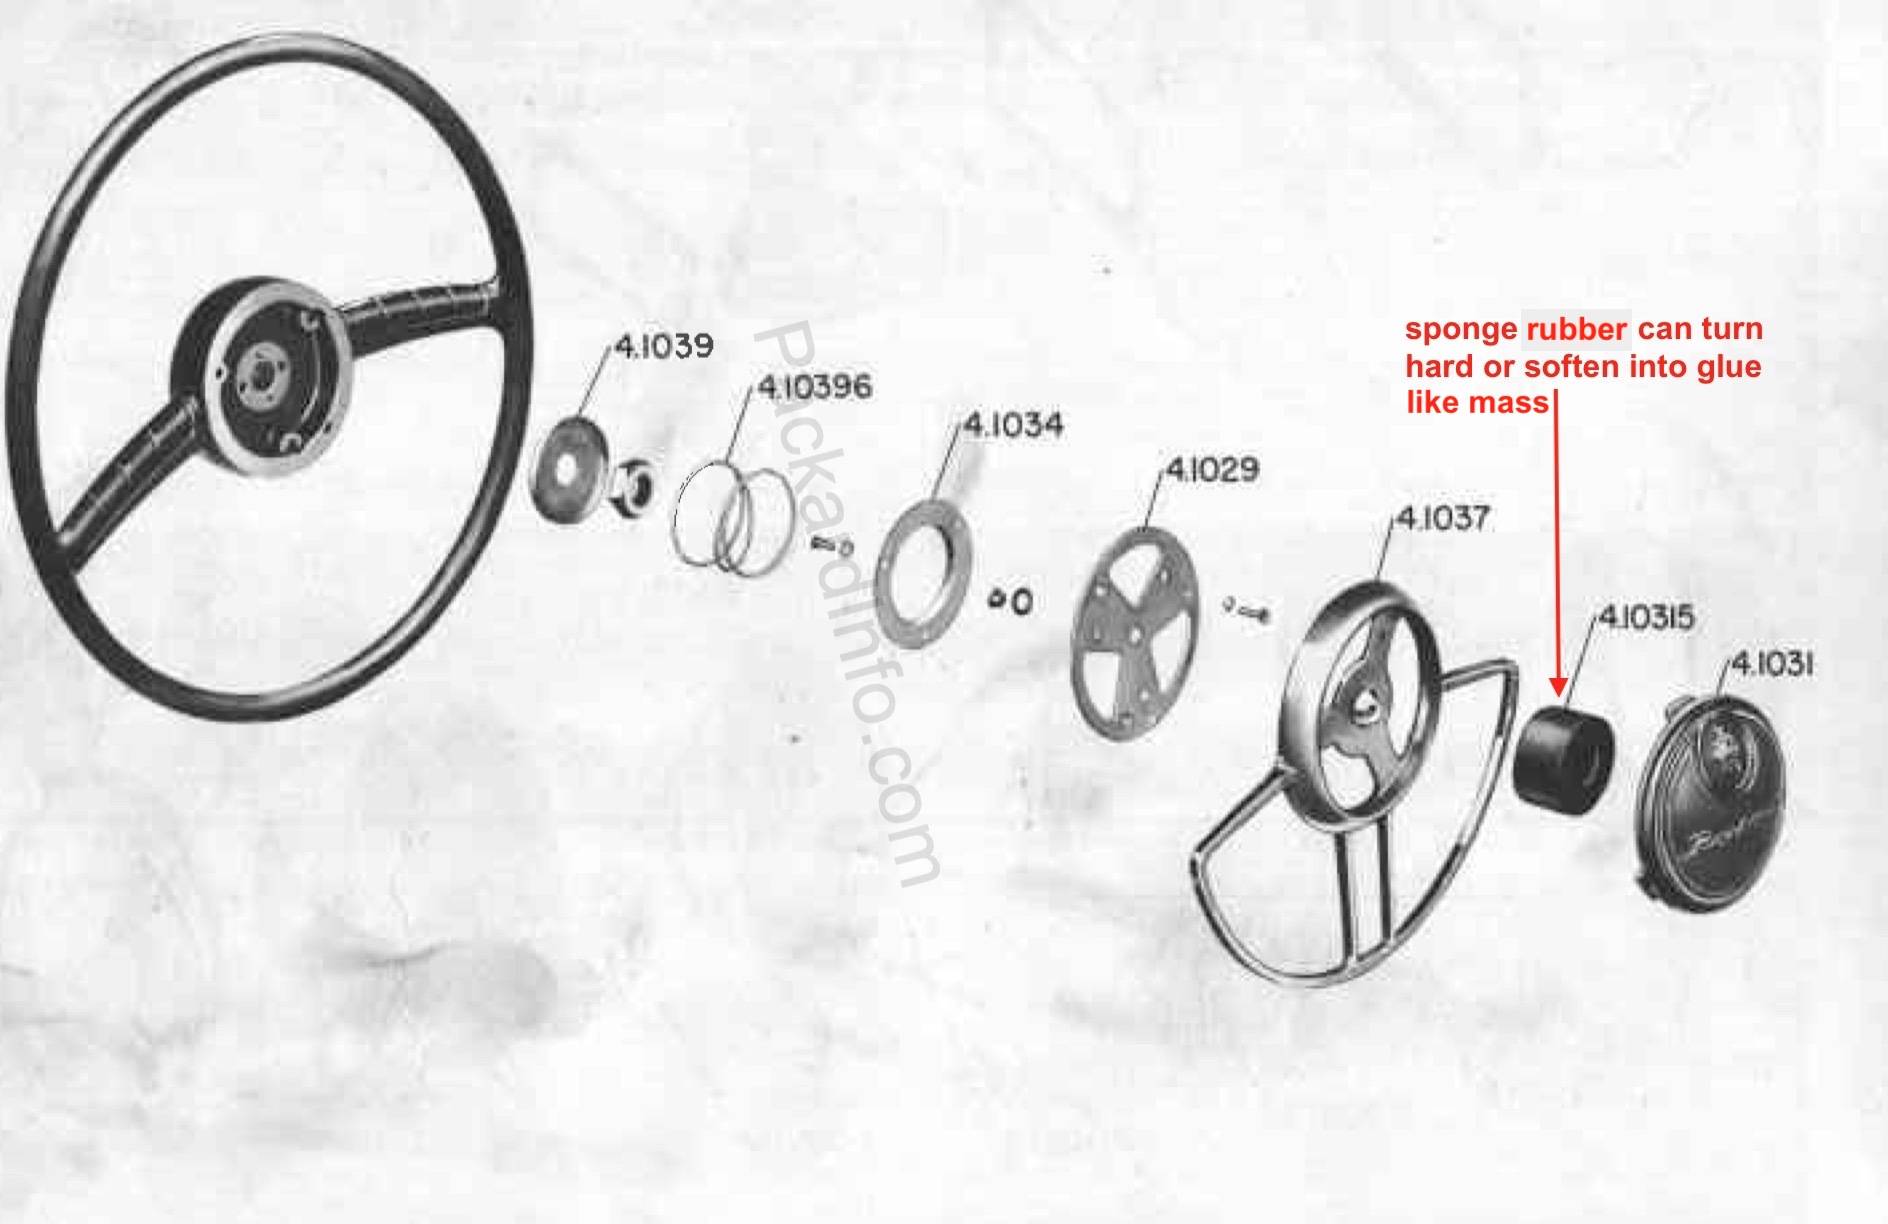
Posted on: 2023/6/15 10:26
|
|||
|
Howard
|
||||
|
||||
|
1941 120 Sedan parts car for sale on ebay
|
||||
|---|---|---|---|---|
|
Home away from home
|
Ran across this posting today and just had to share with the forum. Either this is a gag posting or seller is somewhat delusional. I don't see very much that would even be salvageable on this car. Years ago, I sold some photographs of junked and abandoned vintage cars to Hemmings Motor news for use in one of their calendars. Some of those cars I photographs actually look good in comparison to this one.
https://www.ebay.com/itm/311698165262?campid=5338967980&mkevt=1&mkcid=1&toolid=10050&customid=&mkrid=711-53200-19255-0&campid=5338967980&mkevt=1&mkcid=1&toolid=10050&customid=826aff754c04199006c69bfe67e8090f&mkrid=710-53481-19255-0
Posted on: 2023/6/15 10:25
|
|||
|
||||
|
Re: piston slap
|
||||
|---|---|---|---|---|
|
Home away from home

|
Has anyone had piston slap and known how much "extra" clearance it took to cause it? I'm pretty sure I'm dealing with piston slap on #4.
I was talking to an older mechanic (opened his shop in 1967) and he said piston slap could start to develop around .005"-.006", and he was referring to a normal piston, not a pre-exapanded Packard Thermostrut piston. What I'm getting at is, that if piston slap on a normal piston can show up around .005"-.006", and the typical clearance should be around .002 to allow for expansion, then piston slap for a Packard with Thermostrut pistons could show up at maybe .004" as the clearance for them is only .0005". Obviously Thermostrut pistons, that only have .0005" clearance, expand very very little when they are warm compared to a more typical piston. Thoughts???
Posted on: 2023/6/15 10:23
|
|||
|
||||
|
Re: 288 Head Gasket and Block Issues
|
||||
|---|---|---|---|---|
|
Home away from home

|
Hi all, so thank you for the replies, I was able to get it all cleaned and together. The good news is that the head gasket seems to be working well, the car has some more pep and seems a bit smoother/better overall in that department. I followed Dave's article on the process and retorquing, just waiting for the final post 100 miler now but no leaks there. The car is movable and that's good at least. Some things I experienced about the reassembly that I'll say in case it helps others:
-I got to a point where I had to call it when it came to cleaning the block itself and the pistons because I was likely not cleaning it any more and just repeatedly wiping it down with no further benefit. The head, being out of the car, I did first and was able to get it ready to eat off of. -I didn't realize the gasket would need some convincing to get over the studs, particularly the large one next to the thermostat housing. This made it bend all around but I avoided kinks or any major damage... still unexpected I guess in my head I naively pictured it sliding right on. Paired with the tacky copper spray, being outside in the driveway, and the heft of getting the head back on by myself, it felt a little like I prepped for surgery then had to crawl into the room on my hands and knees. -I forgot that the stud behind the thermostat neck is super close to the neck flange itself which presents challenges, to the point where mine actually interfered with getting a seal on the neck flange gasket. Rather than untorque the head nut and reorient the washer (which had a side cut flat), I decided to grind a bit at the neck flange to get enough clearance, it looked like someone previously poorly did the same type of thing so I did a bit of a better cleanup and also tried to get the sealing surfaces of the bottom aligned a bit better too (without removing too much strength). Next I also needed gasket sealer like a permatex to really get that neck gasket to hold the water again, I knew this from when I replaced the thermostat before but just forgot and it cost me another day because you don't really find out until you get everything filled up and ready to start. Unfortunately today I did need to refill the water after the heat started to build and I checked to find it low, so I might have a thirsty crack in the block. Still have some hope that it's the system working out air bubbles and filling the heater. But, given I did an initial refill after the short run before the final retorque, I think today's fill is most likely something else. Major bummer. Plan from now, pick one of these "chemical magic" block sealers as a Hail Mary to buy more time. Long term is hoping a rebuildable good engine/block surfaces here in the NE. Here are my new questions: -Does anyone have a positive experience with irontite or something similar? (I know they all have failures, but I'm trying to identify which ones have actually had some success). -Does it make sense to bypass the heater for this sealing? I've heard they can be negatively impacted
Posted on: 2023/6/15 9:51
|
|||
|
||||
|
Re: Battery isolation switch
|
||||
|---|---|---|---|---|
|
Quite a regular
|
My thanks to each of you for your advice. I’m considering both approaches. I really like Howard’s approach and will see if I can design and fabricate something similar for my car. For my car, it would be less obvious to the casual observer than mounting a switch to the back of the battery box, as my car does not have a side mounted spare.
Mounting the switch to the back of the battery box is a far easier approach and won’t tax my engineering skills nearly as much. One possibility is to buy a switch similar to the one shown in the attachment and replace the nut with a knurled ring. If painted the same color as the battery box, it shouldn’t be too obvious. I’ll have to give it some more thought , but one of these approaches should work nicely. Thanks very much for your help. Phil Attach file:  Cole Hersey.png (857.56 KB) Cole Hersey.png (857.56 KB)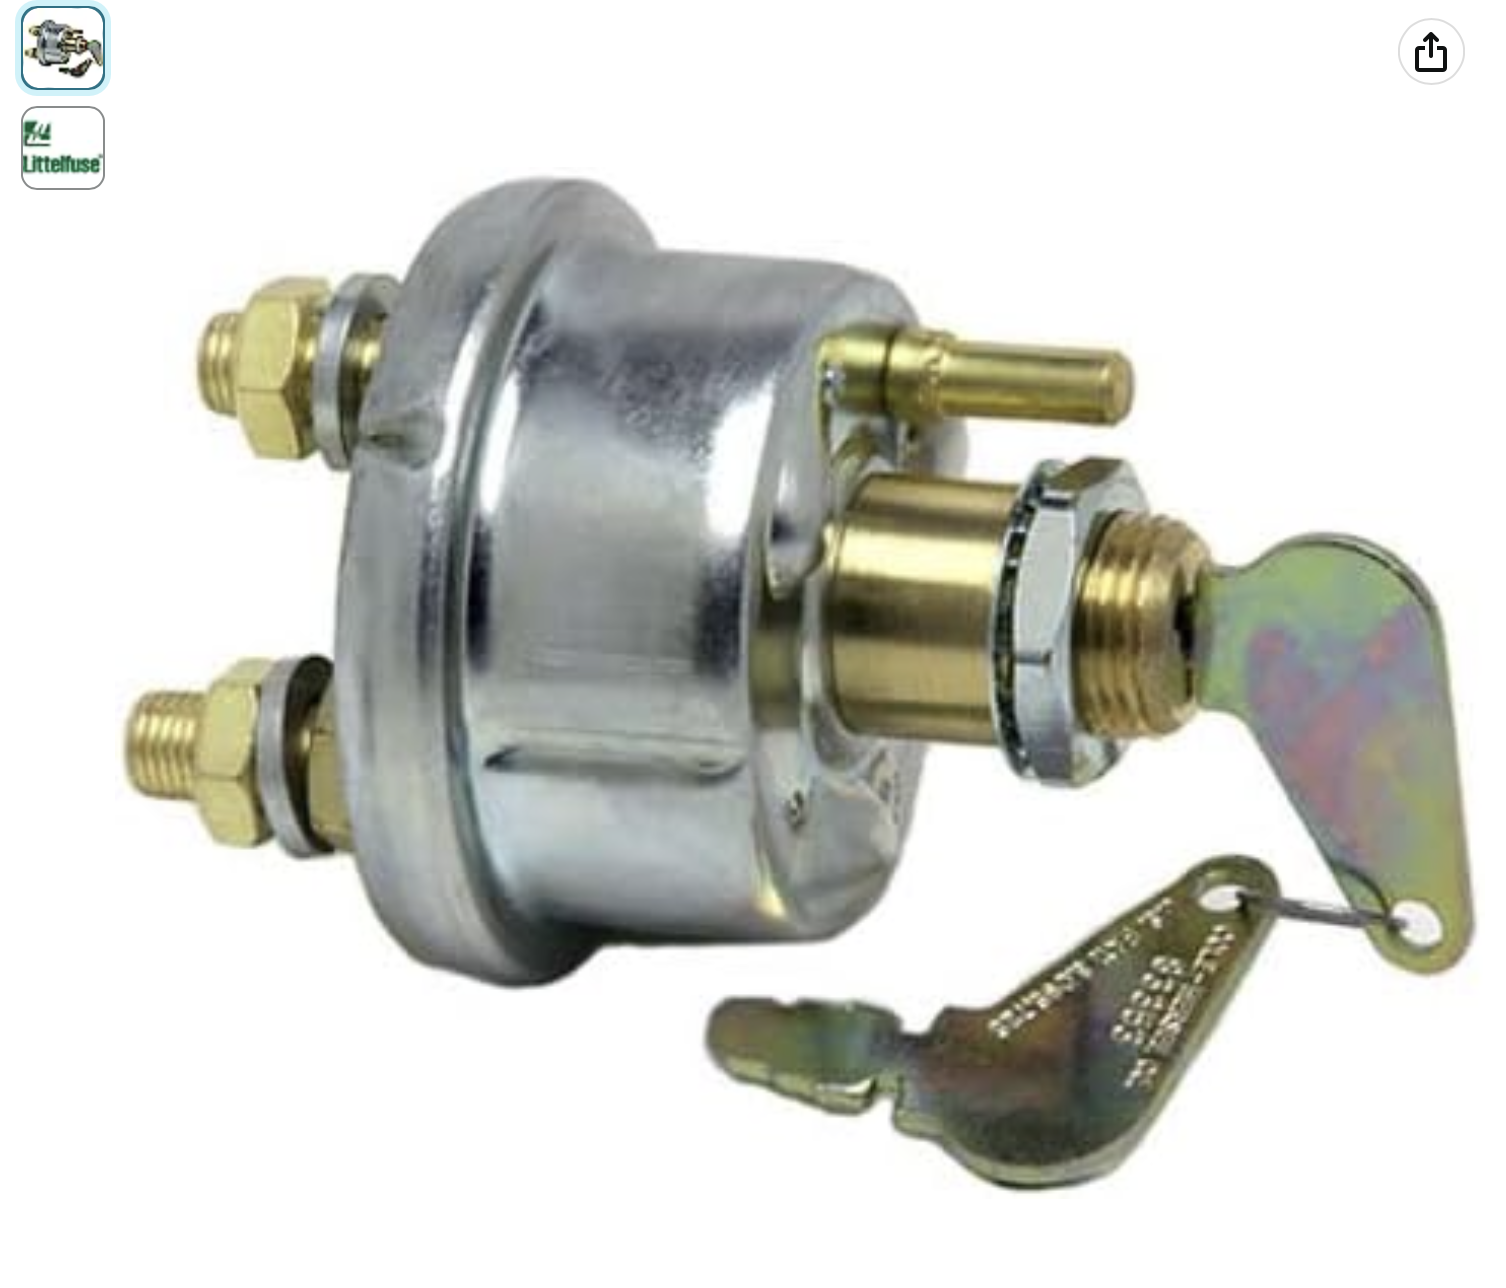
Posted on: 2023/6/15 9:41
|
|||
|
Phil
|
||||
|
||||


