|
Re: The Duchess Project: 1940 Super 8 Convertible Sedan
|
||||
|---|---|---|---|---|
|
Home away from home

|
I bought a few packs of 10 gauge and 12 gauge connects and 3 packs of LuBanSir 35-Pack Velcro Cable Labels, as you see in most photos.
I also bought Avery Presta T00-13V .5”x1.25” weatherproof film labels for laser printer, 60 labels per sheet to stick on the cable labels. Ok, it’s a bit obsessive, but remember I need a lot of help remember which wire is which. Attach file:  24AveryLabels.jpg (142.98 KB) 24AveryLabels.jpg (142.98 KB)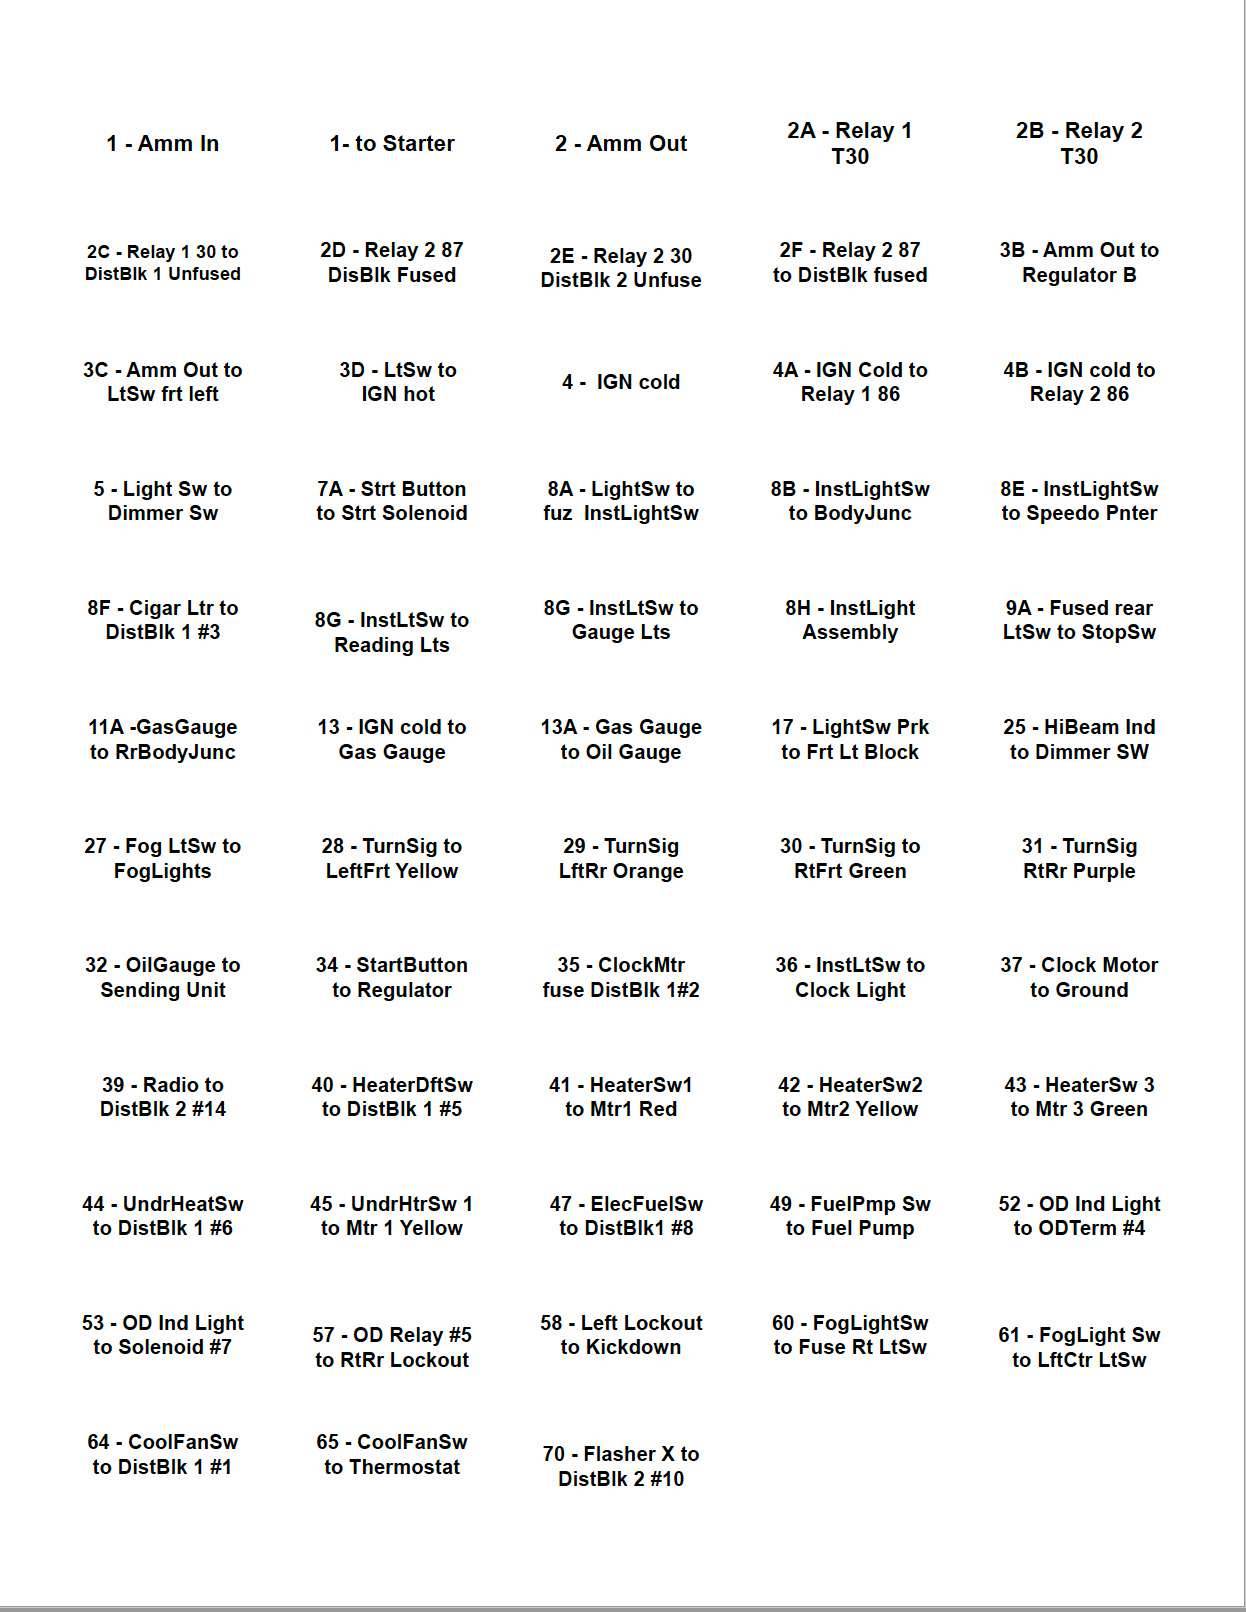
Posted on: 2023/5/25 9:58
|
|||
|
||||
|
Re: New to Group!
|
||||
|---|---|---|---|---|
|
Quite a regular

|
I'm in Eastern, WA.
Posted on: 2023/5/25 9:38
|
|||
|
||||
|
Re: The Duchess Project: 1940 Super 8 Convertible Sedan
|
||||
|---|---|---|---|---|
|
Home away from home
|
With the help and patience of Howard Hanson HH56 and Big Kev, I learned about relays and how to wire them to fused distribution boards. Howard had my back through the whole process answering lots of dumb questions thoroughly for which I am very grateful. I have to give him credit. He never screamed at me in CAPITAL LETTERS!
I used 2 relays and 2 distribution boards. All devices would be wired to the terminals of the distribution boards. The distribution boards are like fuse boxes on a modern car. The relay takes the pressure off the wiring that originally went to the light switch and the ignition switch. The power goes straight to the relays from the ammeter for devices Always Powered, which typically have a fuse and a switch, like the radio, or from the ignition switch, for those that are Only Powered if the Ignition is On. Big Kev’s concise explanation is post #1140. Basically, the whole concept made me dizzy. Two of the essential parts I needed came from the flackmaster, David Flack. May I say, Thank God, he saves old stuff? 1940 160 Battery Gauge and a 1940 160 Ignition switch . The gas gauge needle was caught on a little tab outside the gauge window that prevents it from going too far left (and another on the right side from too far right). That was an easy fix. My battery meter (I was calling it an ammeter, but it doesn’t give readings like an ammeter, just indications of whether the battery is discharging or being charged), on the other hand, was fried. I gently pried apart the gas/battery gauge casing, removed the nuts holding the battery gauge and installed the working one in my case restored by Bruce Abbott Instruments in Tigard, Oregon, then snapped it back together. Voila! A working gauge. Attach file: 20GasBatteryGauges.jpg (220.29 KB)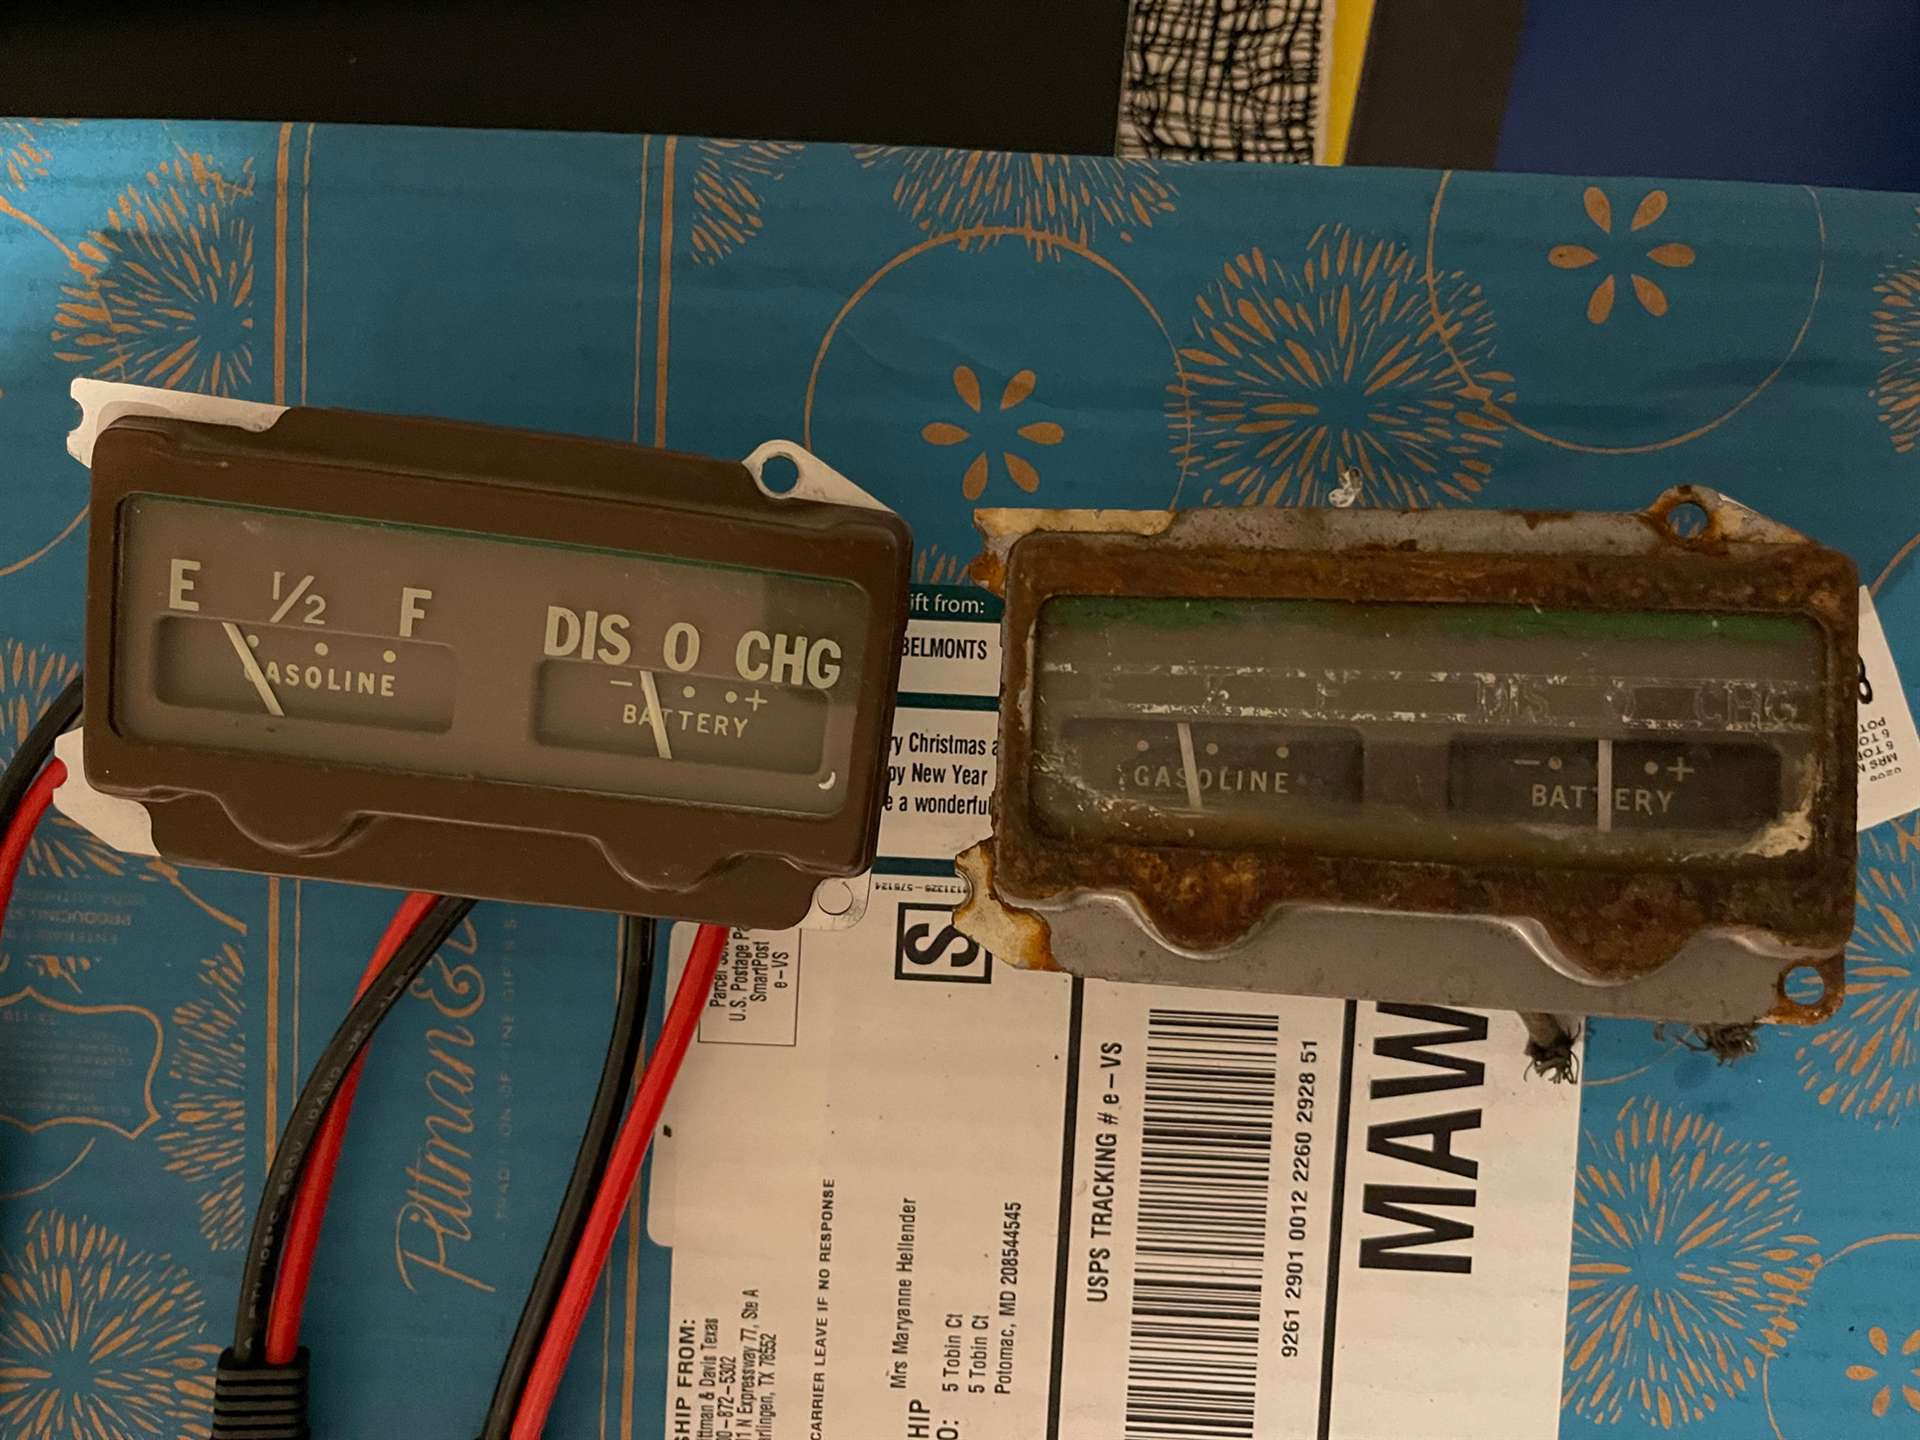 21AmmeterBacks.jpg (267.19 KB) 21AmmeterBacks.jpg (267.19 KB) 22ReplaceBatteryGauge.jpg (398.69 KB) 22ReplaceBatteryGauge.jpg (398.69 KB)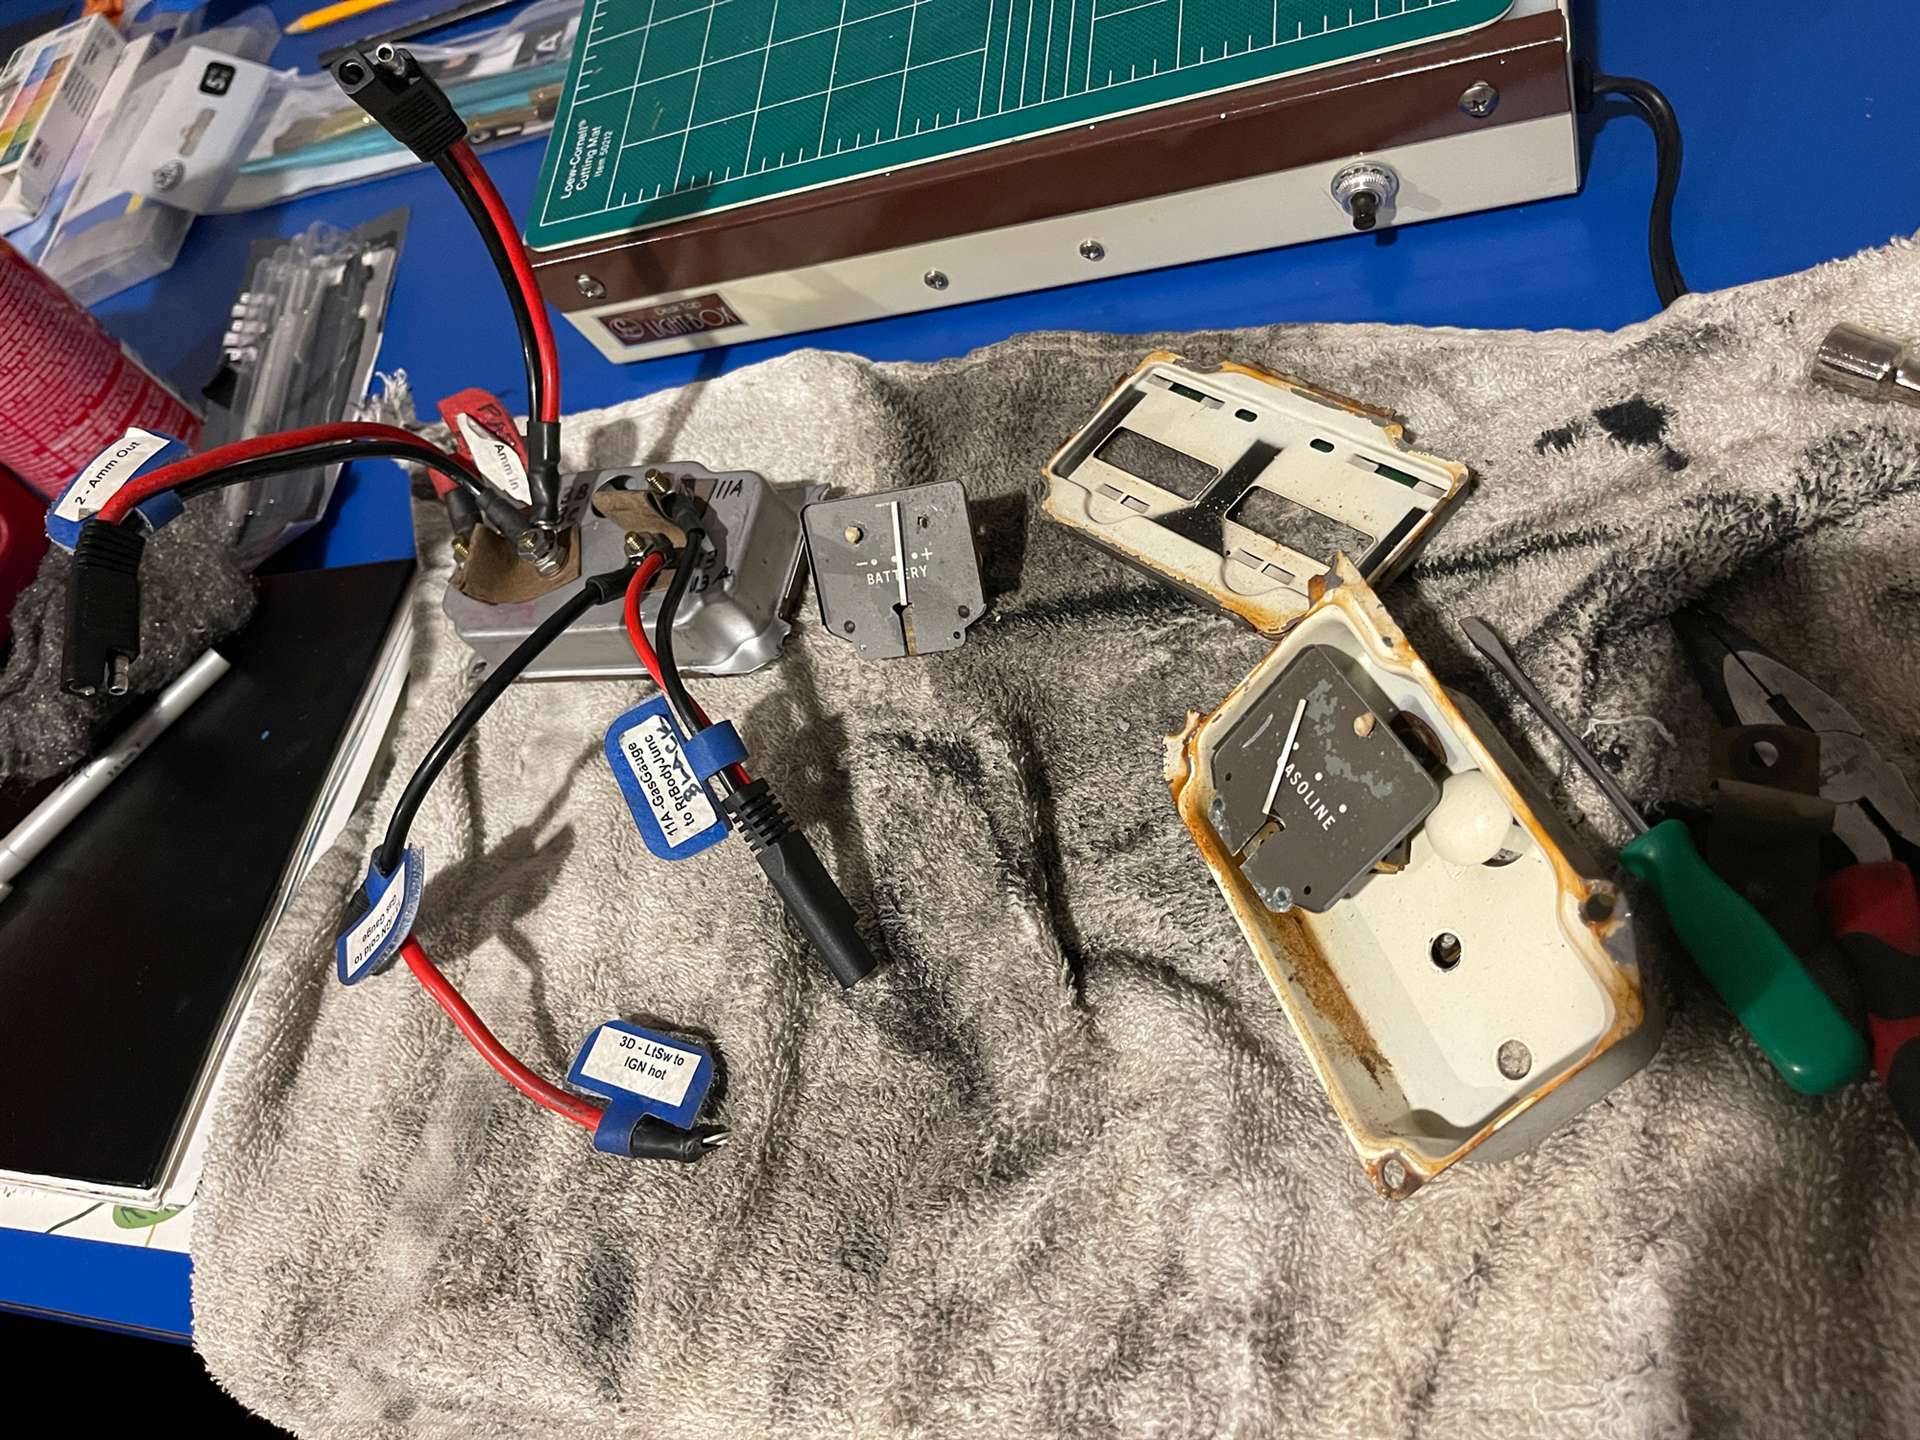
Posted on: 2023/5/25 9:32
|
|||
|
||||
|
Re: The Duchess Project: 1940 Super 8 Convertible Sedan
|
||||
|---|---|---|---|---|
|
Home away from home
|
Below is a screen capture of the diagram. The pdf is posted here:http://www.mktx.com/packard/PackardOrigWiring3.pdf When the original drawing was done, I used a copy to make a new drawing with the modifications resulting from adding relays and distribution boards.
Attach file: 19OrigWiringDiagram.jpg (219.39 KB)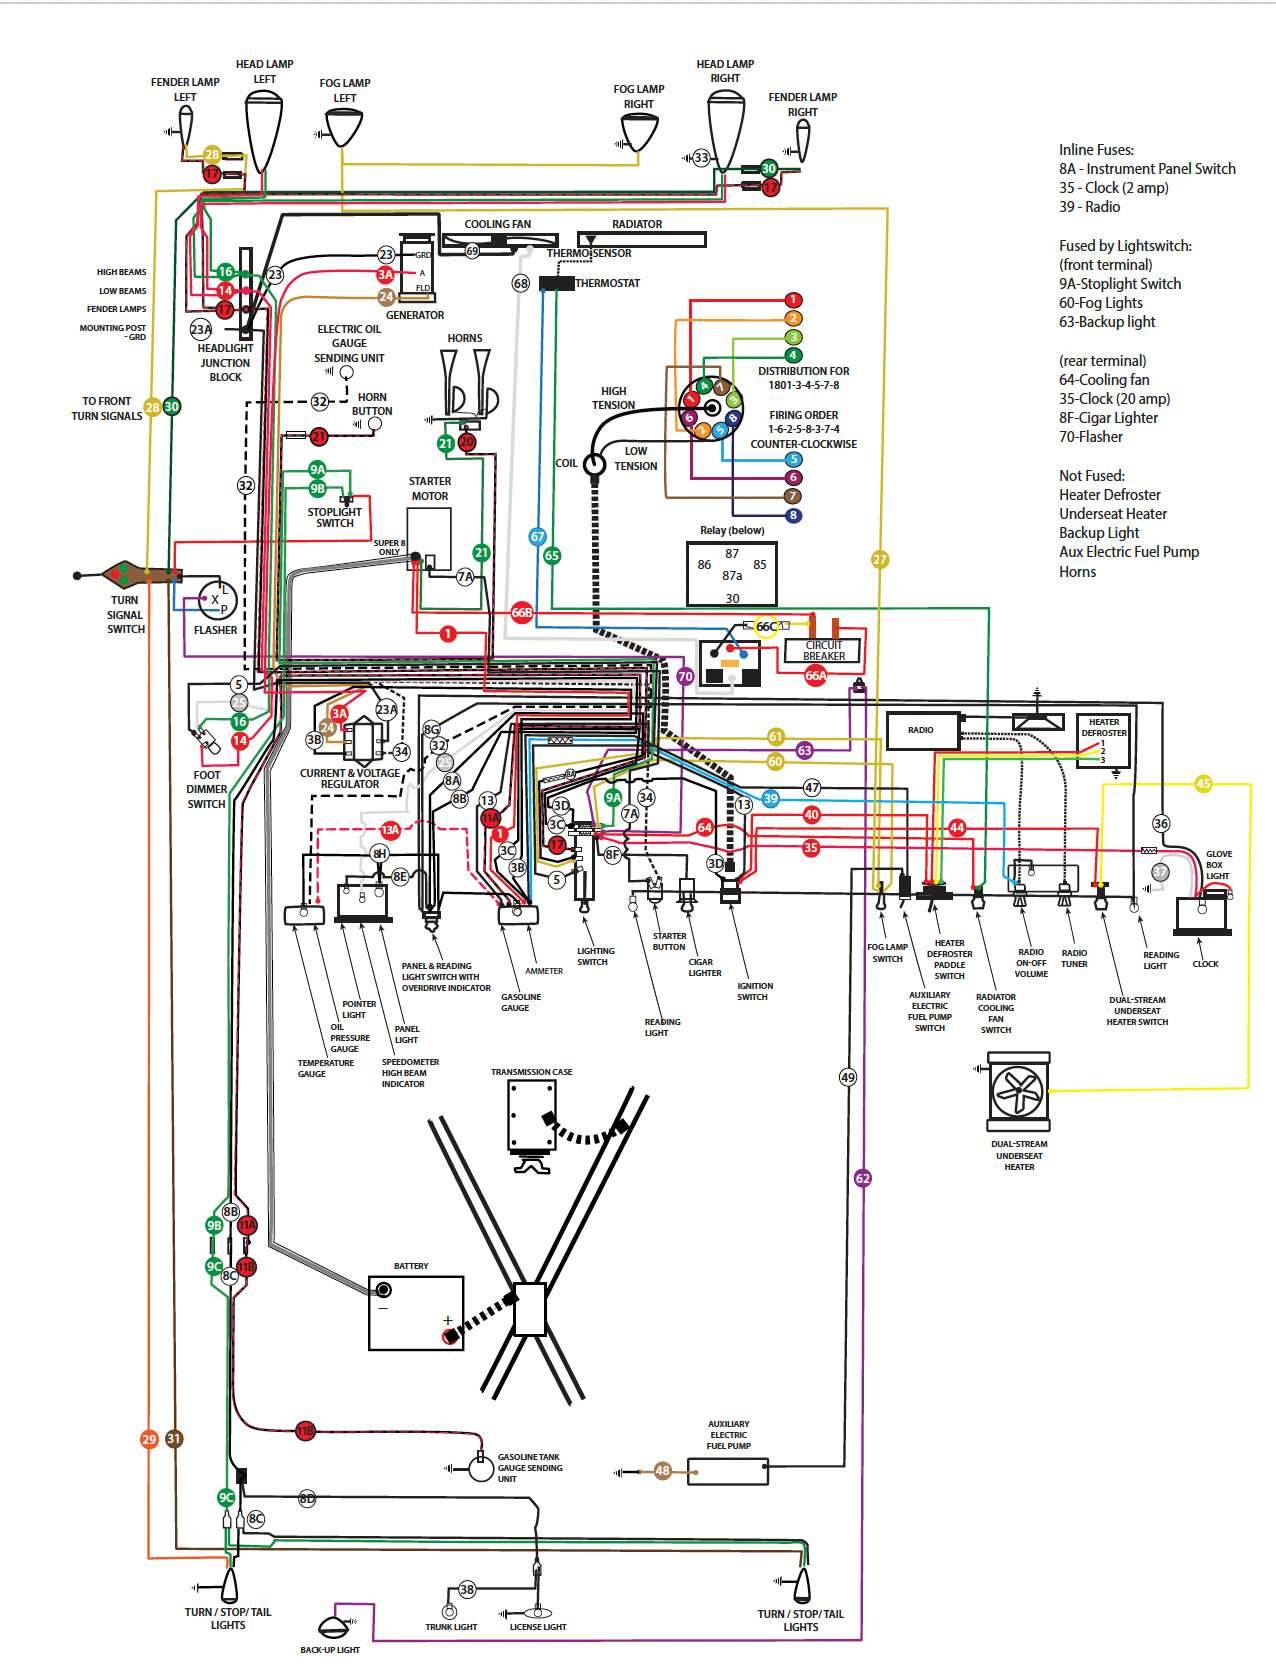
Posted on: 2023/5/25 9:30
|
|||
|
||||
|
Re: The Duchess Project: 1940 Super 8 Convertible Sedan
|
||||
|---|---|---|---|---|
|
Home away from home
|
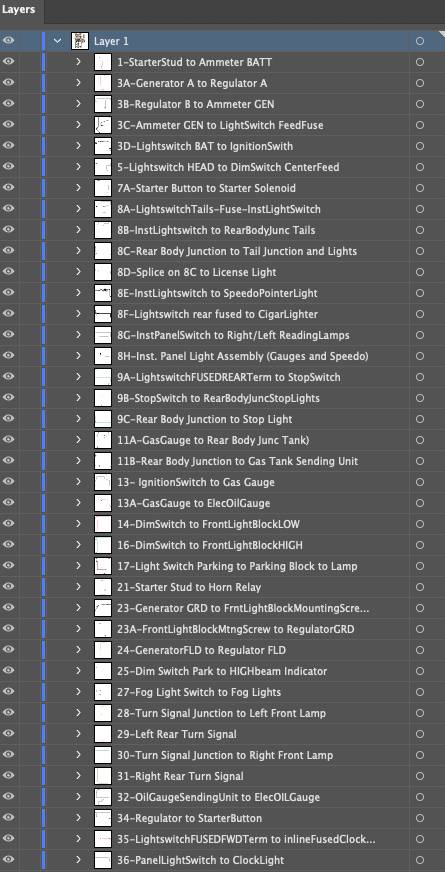
The beauty of having a vector PDF file is that you can scale it to any size without losing any resolution. I’m posting a link to the PDF which could be downloaded and added to Wiring Diagrams, if Big Kev choses. I also recorded the path of each wire by number. So, for over 70 wires, I have a listing that says, for example, “7A – Starter Button to Starter Solenoid”
Posted on: 2023/5/25 9:29
|
|||
|
||||
|
Re: Various CL Pickings
|
||||
|---|---|---|---|---|
|
Home away from home
|
Packard Club has an ad up for a 1947 2103 maroon sedan out of long-term storage for $14K. Says it needs a good going through but is "priced accordingly." Wat's Wager: it could be gotten for a fair bit less.
It's in CA and I'm not going this month. Next, either. Funny, there was one last fall for $9K in the same condition. That was the one that flipped twice. I suspect that it went to the last buyer for about 12 five. I saw that car and it looked decent. https://packardclub.org/?fbclid=IwAR1en5t7m1l3J3MXgsLTrvREKDg8Hbvx88A1Bv-pGybUVGyloFn0pv2ZzfM
Posted on: 2023/5/25 9:25
|
|||
|
If you're not having fun, maybe it's your own damned fault.
|
||||
|
||||
|
Re: The Duchess Project: 1940 Super 8 Convertible Sedan
|
||||
|---|---|---|---|---|
|
Home away from home
|
I removed the window trim, the two nuts at the bottom left and right of the back side of the dash, and the screws across the top edge of the dash. I disconnected the radio cables, the accessory switches, overdrive lockout cable, two hex screws holding the steering column, and popped out the dash. Only the Temperature/Oil gauge was left in the car. I removed wires from the back side of the dash, I used Velcro labels on each wire I disconnected. I moved the dash and instruments to the basement and took everything off the dash. My big idea was to use disconnects on the dash itself with matching sets for wires from the wiring harness. Thus I could ensure that all terminals had eyelet wire ends instead of sliders that sometimes work their way out if the terminal screw vibrates a little loose. These could be fastened up tight with new nuts and lock washers; then, when it was time to reinstall, I’d just push the mating disconnects togethers. I’m a concept guy and that was the concept. Easy peasy. Haha. (See previous posts for photos of some of these items.)
I ordered new 160 plastic from LaVine. It took a while, but the result was worth it, and I was fully occupied in the meantime because things got confusing with all these wires. I also read some posts about using electronic relays and decided they could be a good addition for reliability. I didn’t understand anything about them. Before I set out to modify the wiring, I thought I better get a thorough understanding of the original wiring scheme. The wiring schematic in the 1940 160 180 Owner’s Manual is so tiny, I scanned it, scaled it up to be readable without a magnifying glass and proceeded to redraw it using Adobe Illustrator. I numbered each wire per the manual, and if no number, I used Harnesses Unlimited numbers (They had changed all the original wire numbers, but I stayed with the original numbers unless they were missing. Then I added new numbers for items like my cooling fan which were not included in either source. I changed the location of some of the accessory switches, then prepped them in the car since they would be the last items added to the dash. Attach file: 12NottomCornerBolt.jpg (41.70 KB)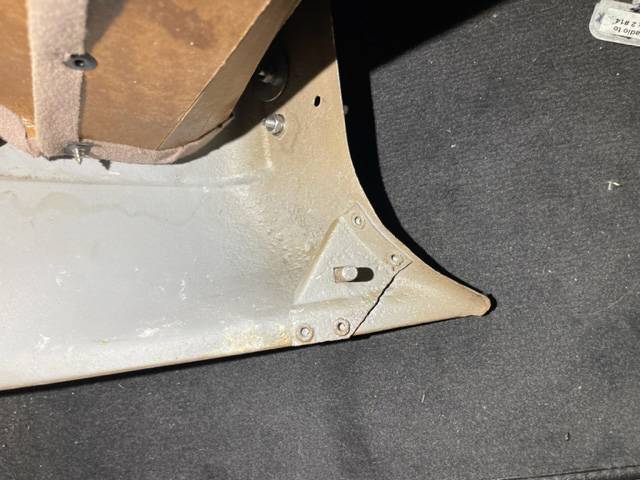 13HoleInDashUnderstructure.jpg (22.25 KB) 13HoleInDashUnderstructure.jpg (22.25 KB)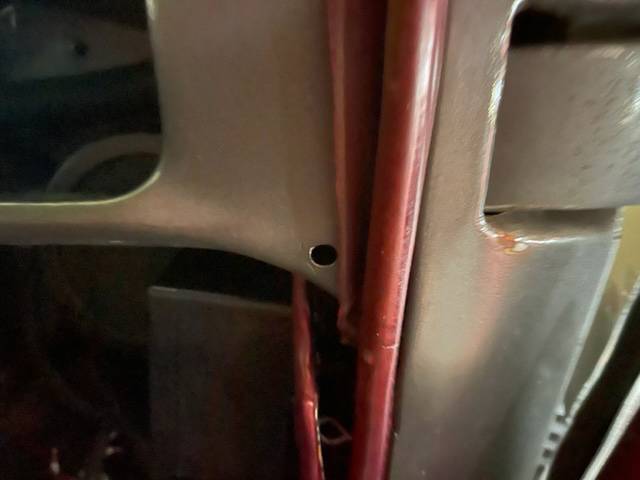 14LabelsAndTags.jpg (278.06 KB) 14LabelsAndTags.jpg (278.06 KB)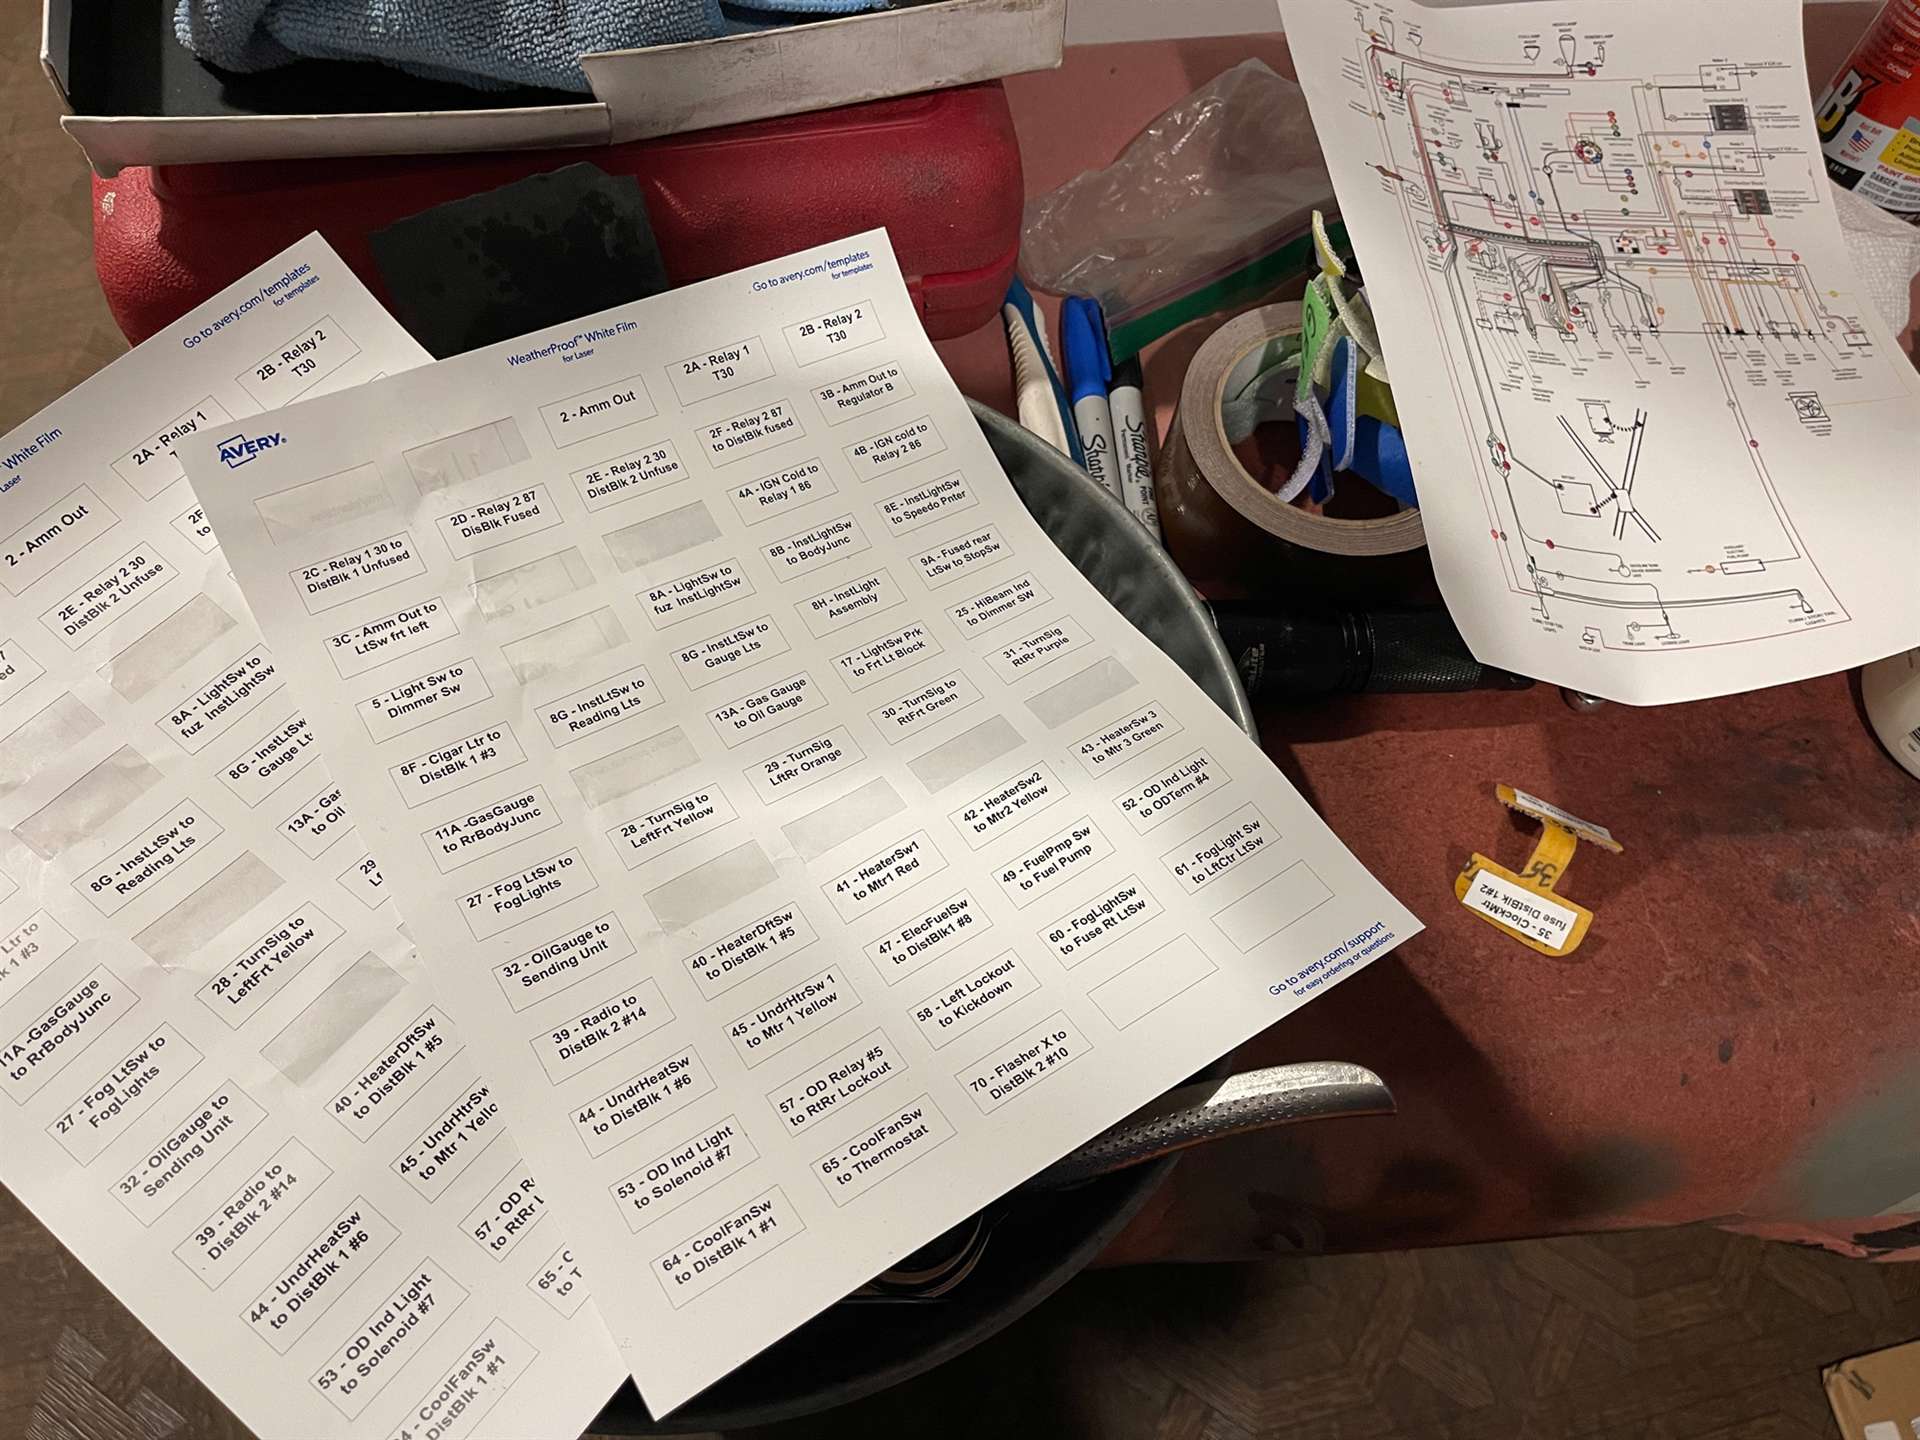 15PreppedSwitches.jpg (246.49 KB) 15PreppedSwitches.jpg (246.49 KB)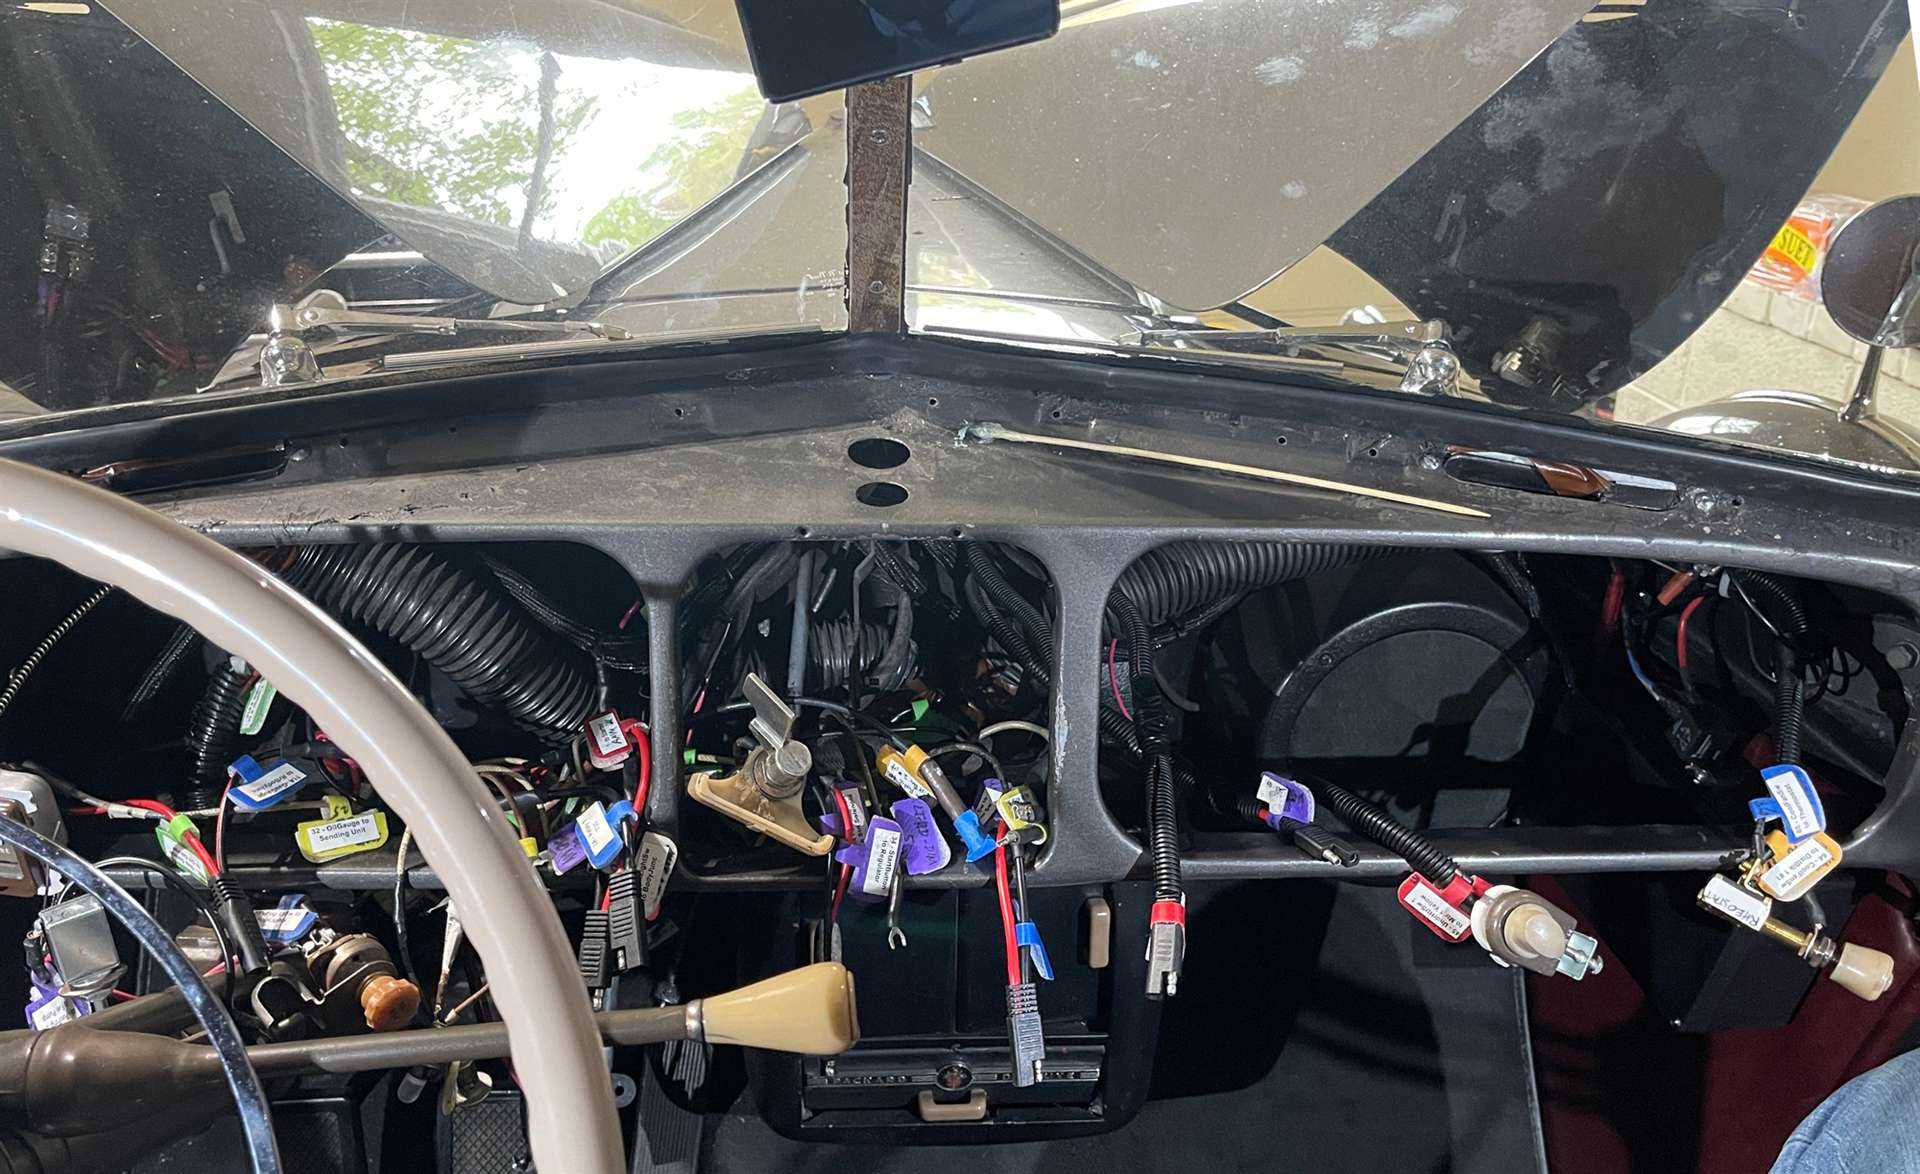 15SwitchPrepping.jpg (293.47 KB) 15SwitchPrepping.jpg (293.47 KB)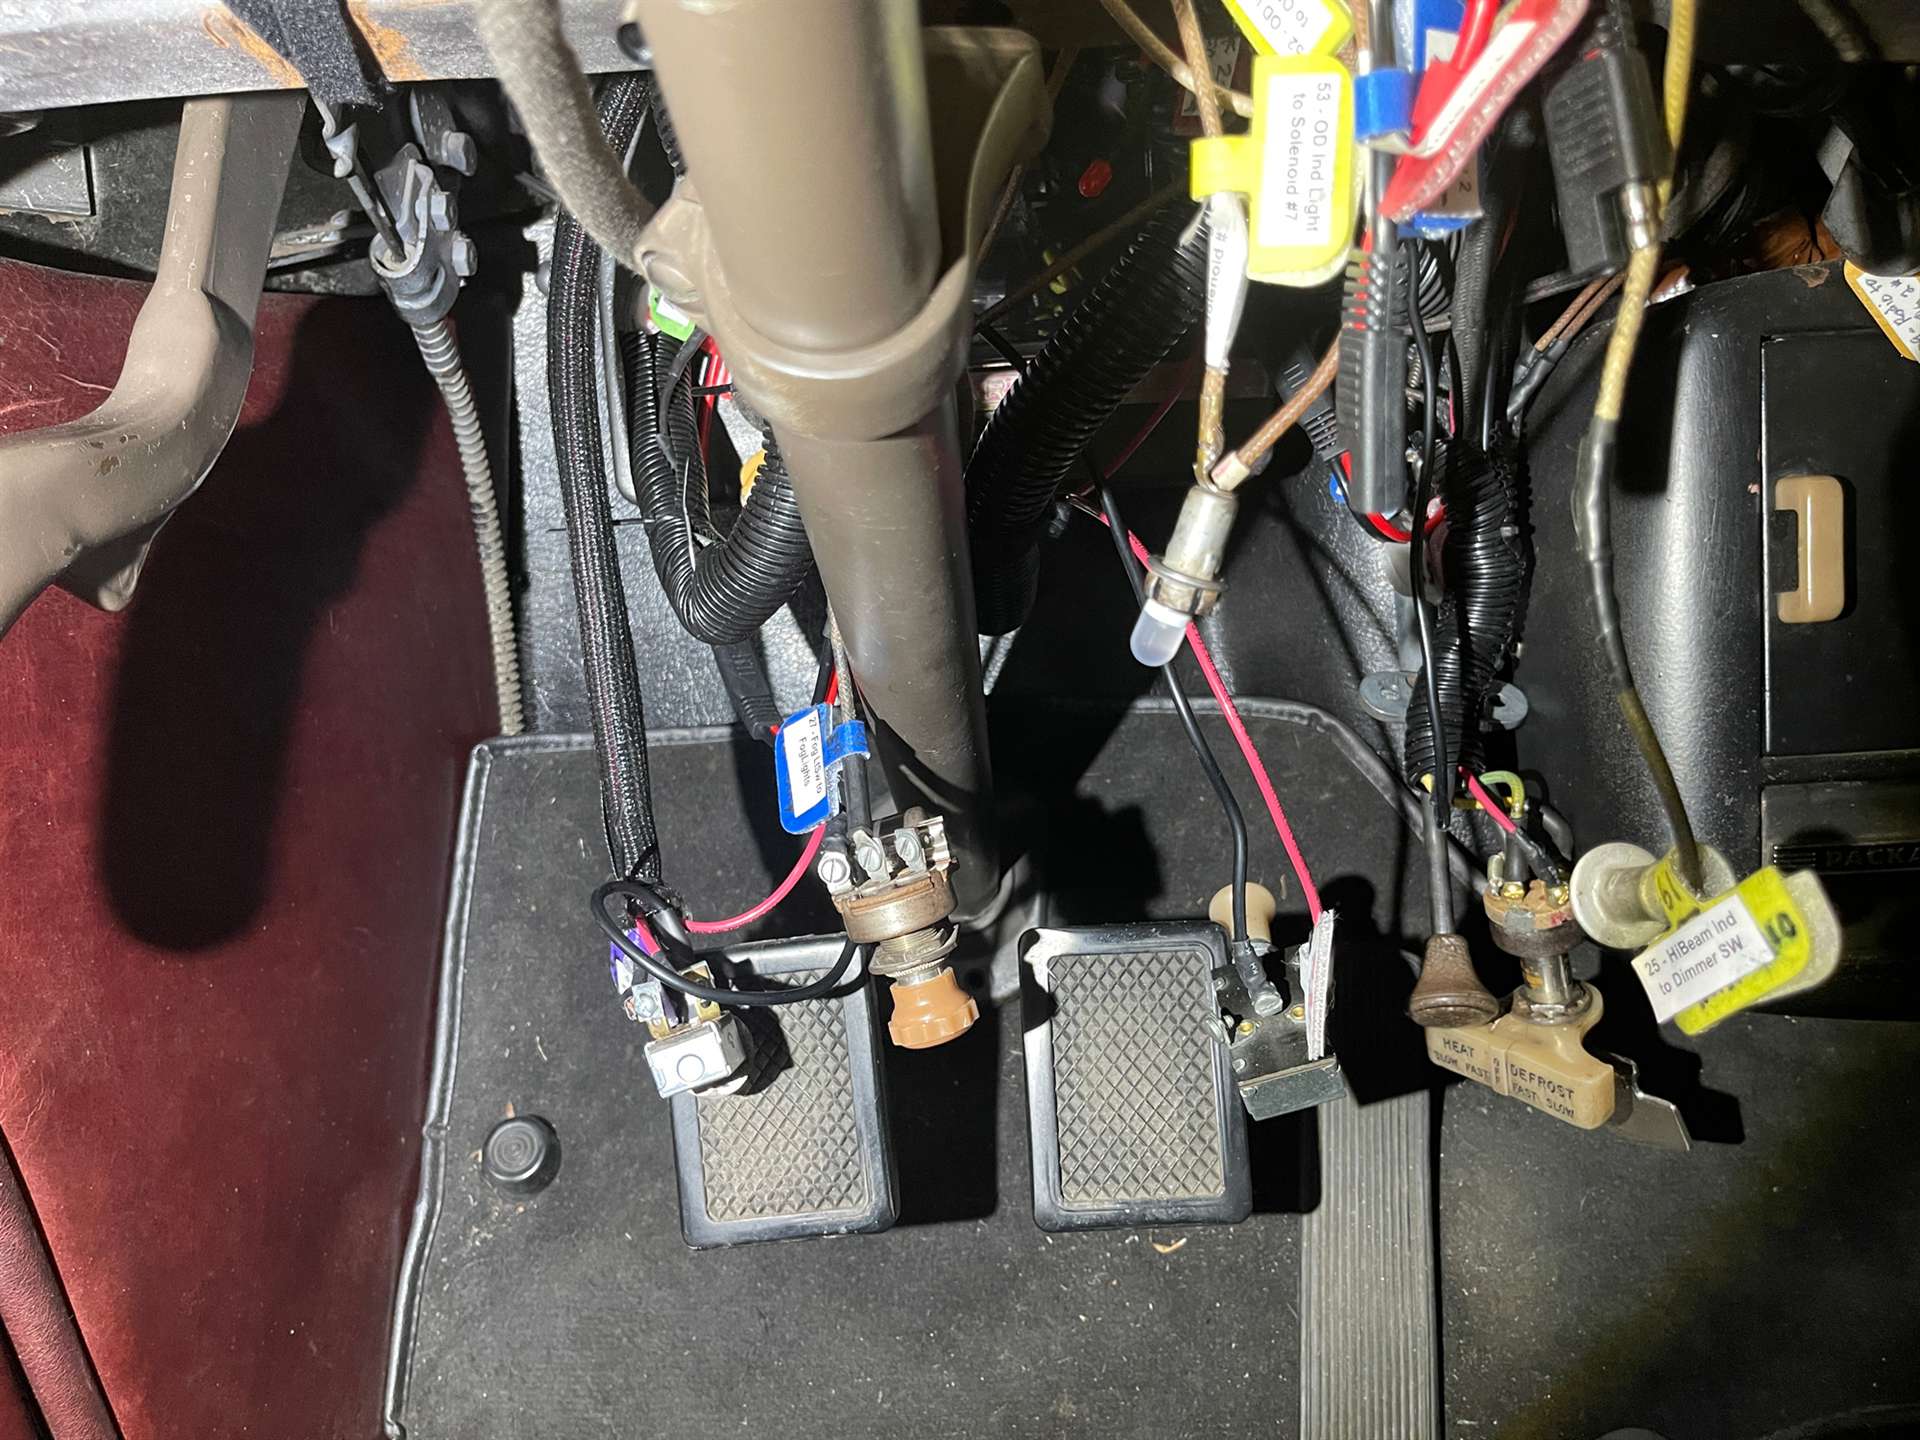
Posted on: 2023/5/25 9:25
|
|||
|
||||
|
Re: The Duchess Project: 1940 Super 8 Convertible Sedan
|
||||
|---|---|---|---|---|
|
Webmaster

|
It's looking good!
I use one of these. They are very bright and run for a few hours on a single charge. https://www.harborfreight.com/845-lumen-led-rechargeable-underhood-work-light-63990.html They also work great under the hood and under the car. Still works great after 7 years.
Posted on: 2023/5/25 9:23
|
|||
|
-BigKev
1954 Packard Clipper Deluxe Touring Sedan -> Registry | Project Blog 1937 Packard 115-C Convertible Coupe -> Registry | Project Blog |
||||
|
||||
|
Re: The Duchess Project: 1940 Super 8 Convertible Sedan
|
||||
|---|---|---|---|---|
|
Home away from home
|
There were quite a few items that had been neglected over the years, none as critical as a non-functional ignition switch. The gas gauge was stuck on Empty, the battery gauge on DIS, the heater/defroster switch wanted to swivel (even when tightened), the radio 5-station push button mechanism did not work, the clock hour hand would slip out of position after 3 months running, several of the 160 dash plastic pieces were warped from too much heat and UV exposure (Check out the clock surround and glove box plastic), the glove box was warped from windshield or wiper-mount leaks, the trip odometer cable was broken, and the vent handle and overdrive knob still had the original ‘marble fudge’ plastic, and several dash lights didn’t work even with new bulbs. The whole dash needed refreshing. To add the new overdrive cable knob and the vent handle, the old ones had to be removed. I didn’t know what to expect. The overdrive cable rod had to be threaded to accept a new knob.
Attach file: 04ODKnobMarble.jpg (203.89 KB)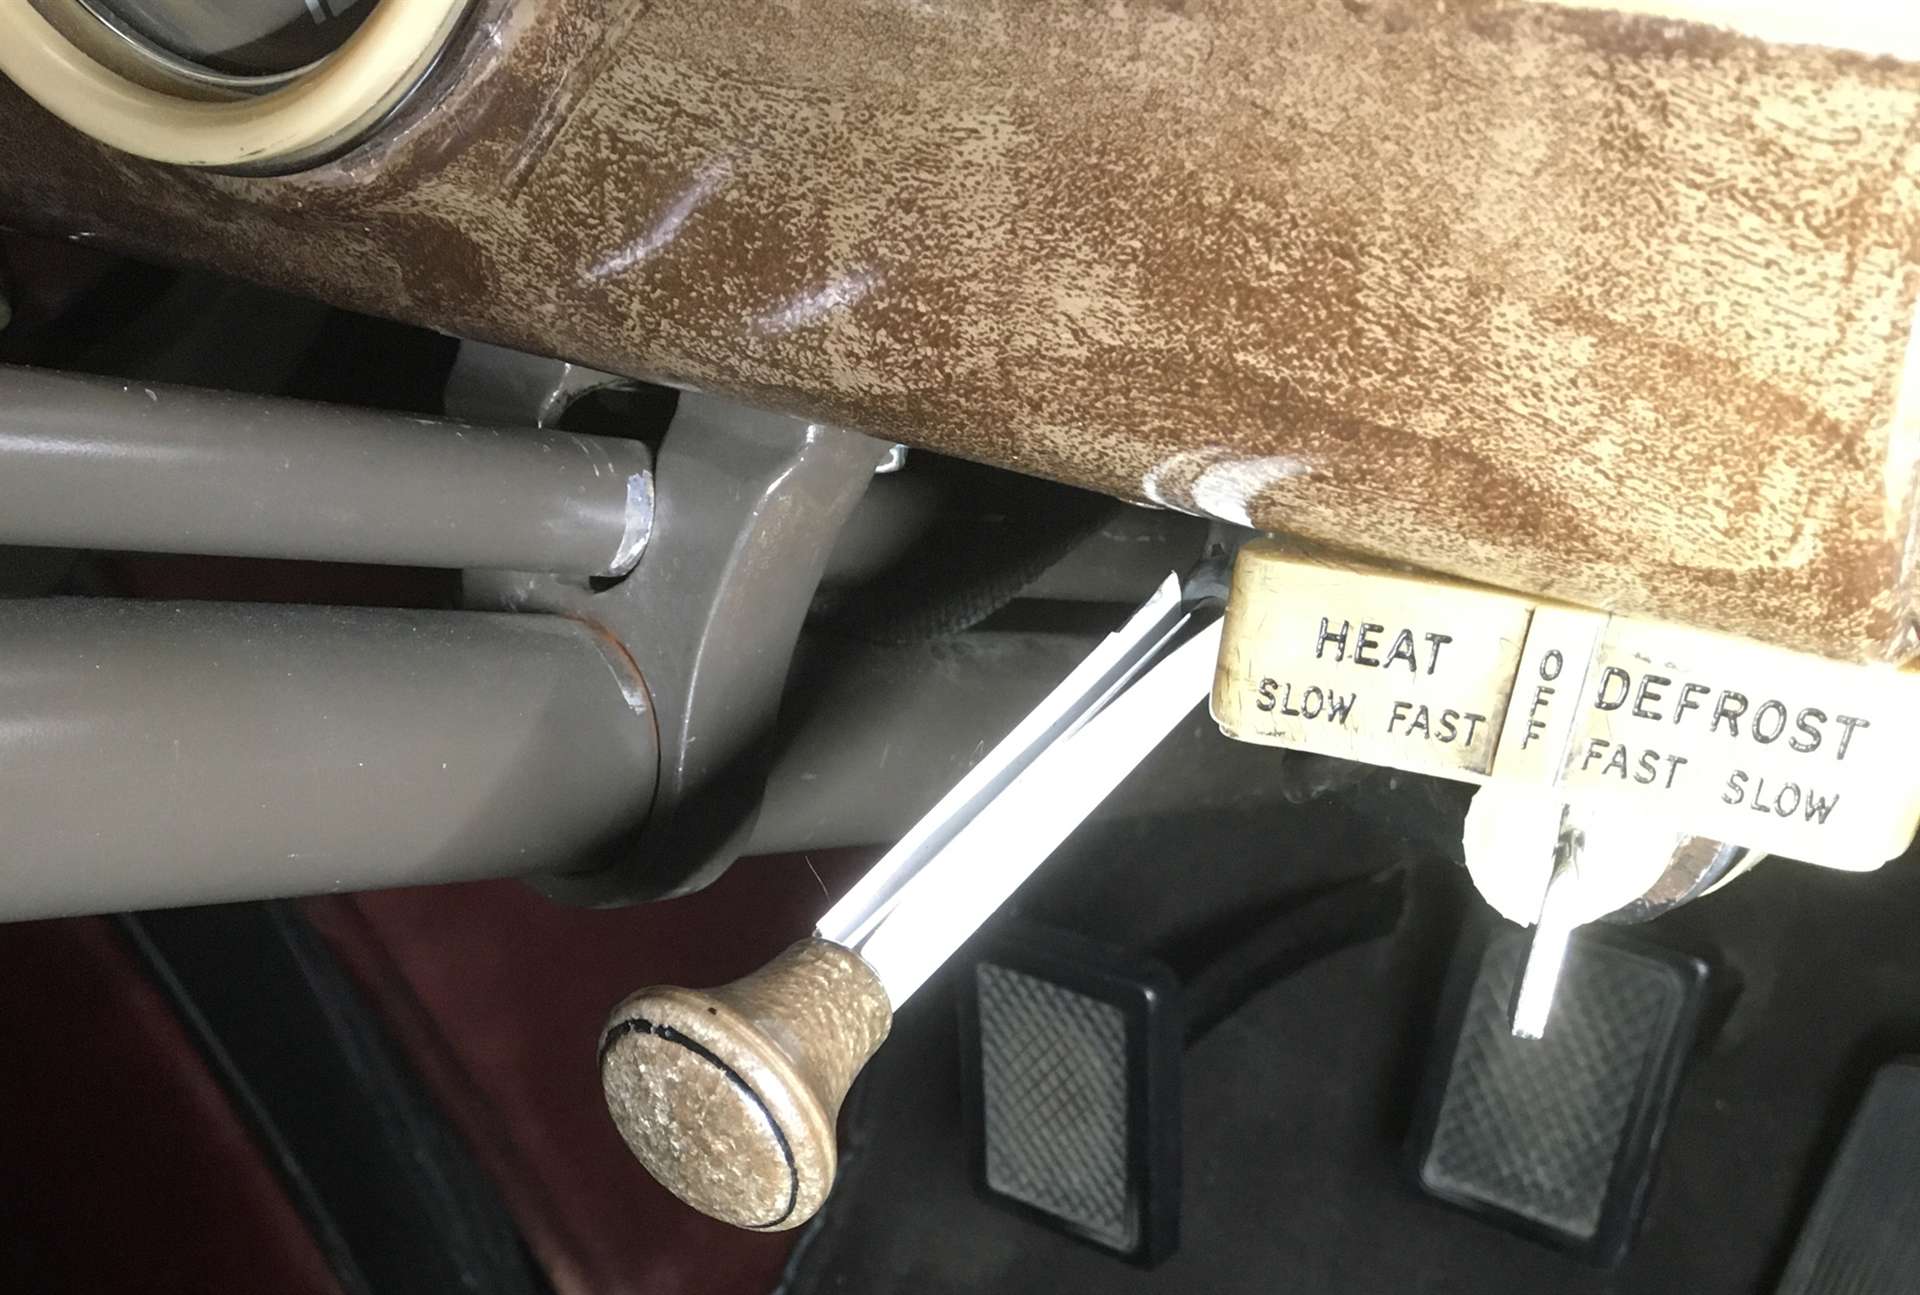 05ODKnobs.jpg (168.45 KB) 05ODKnobs.jpg (168.45 KB)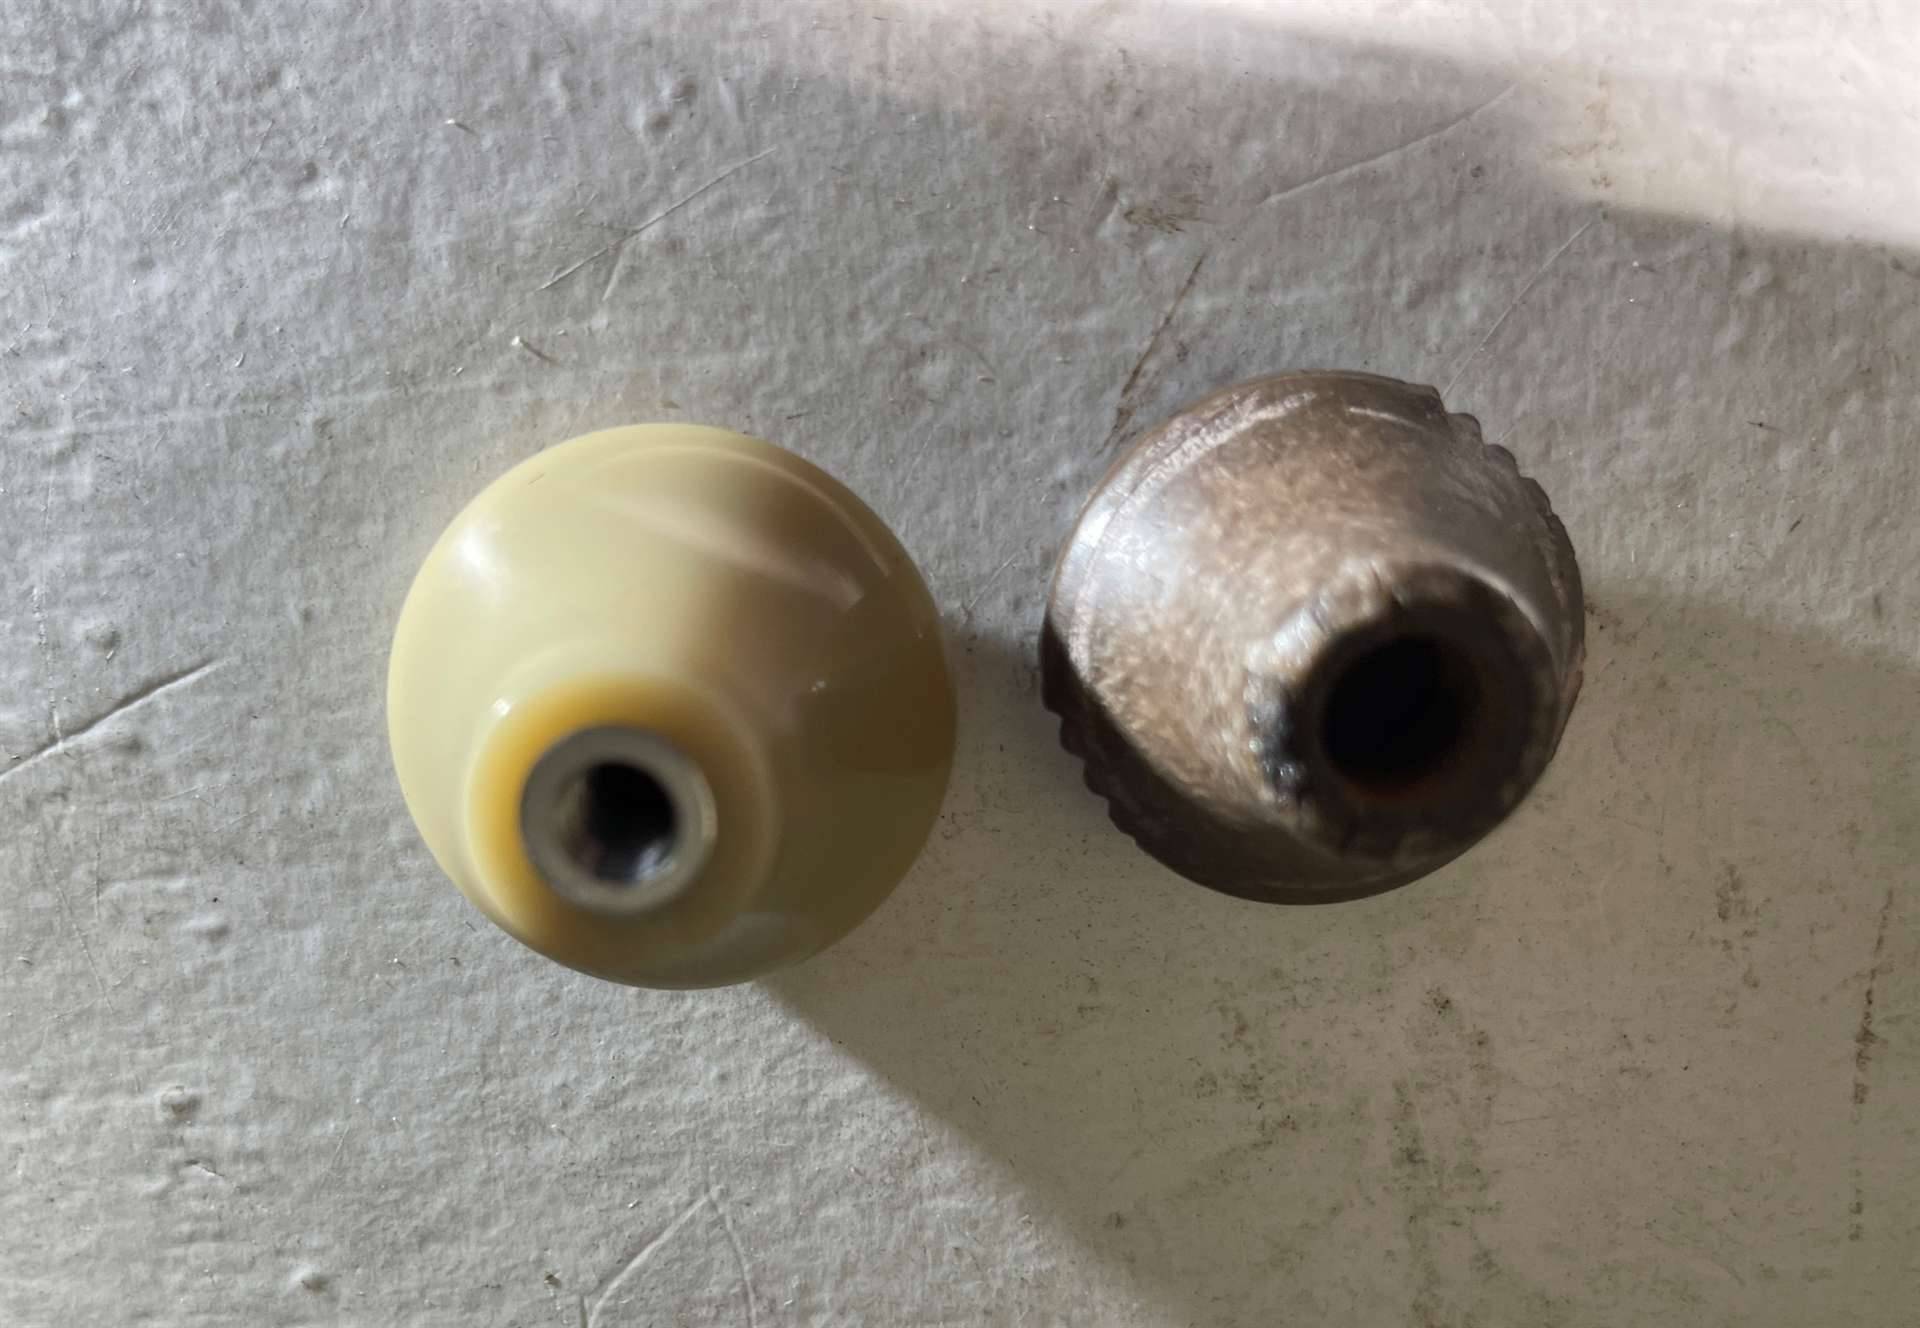 06ODRodNeededThreads.jpg (148.62 KB) 06ODRodNeededThreads.jpg (148.62 KB)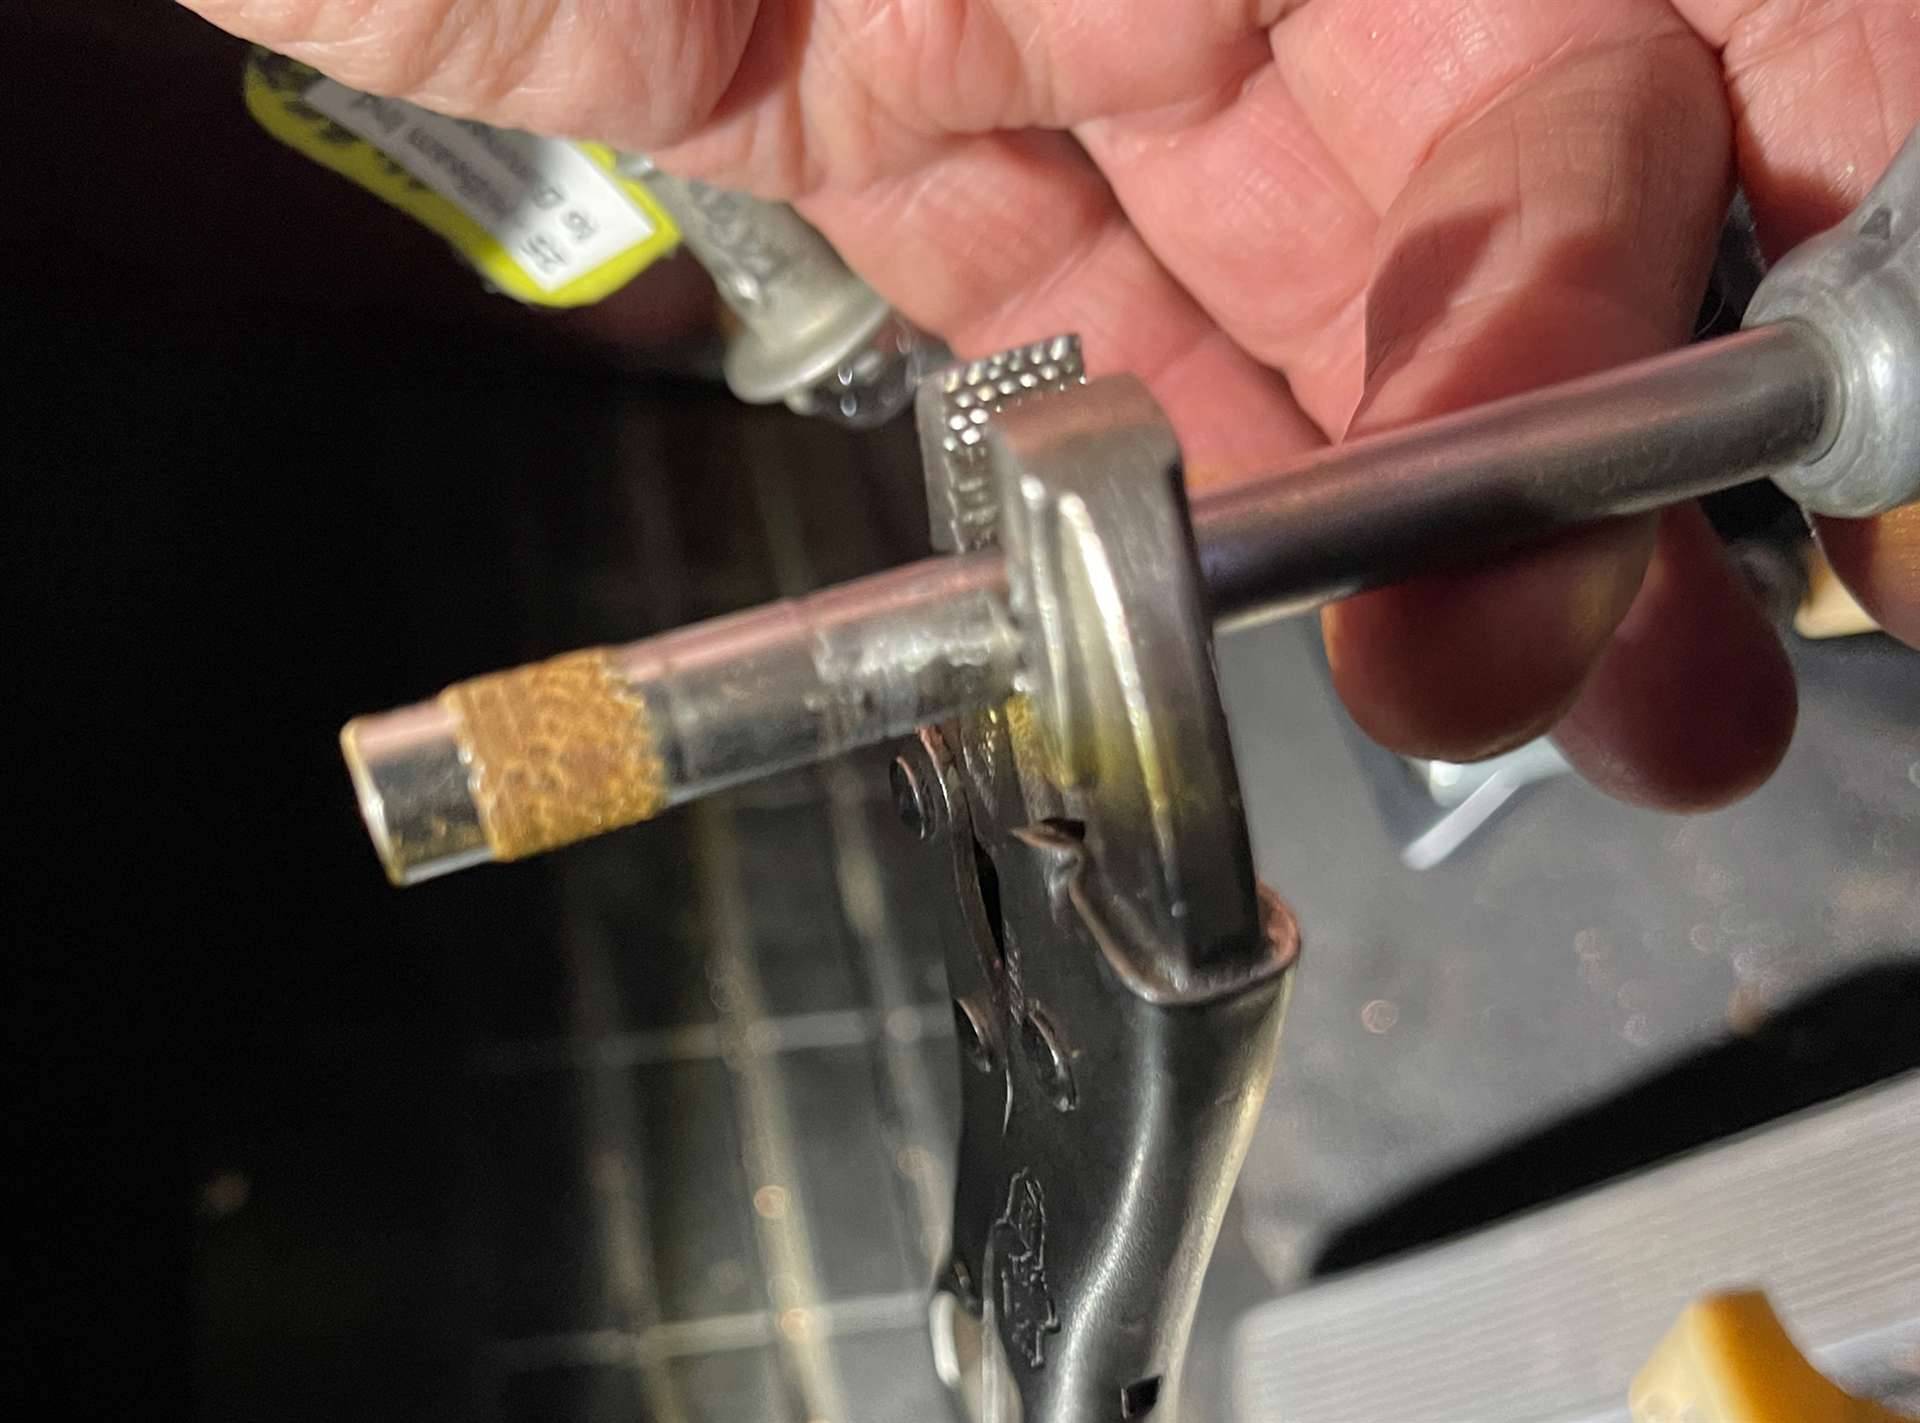 07NewODKnob.jpg (145.22 KB) 07NewODKnob.jpg (145.22 KB)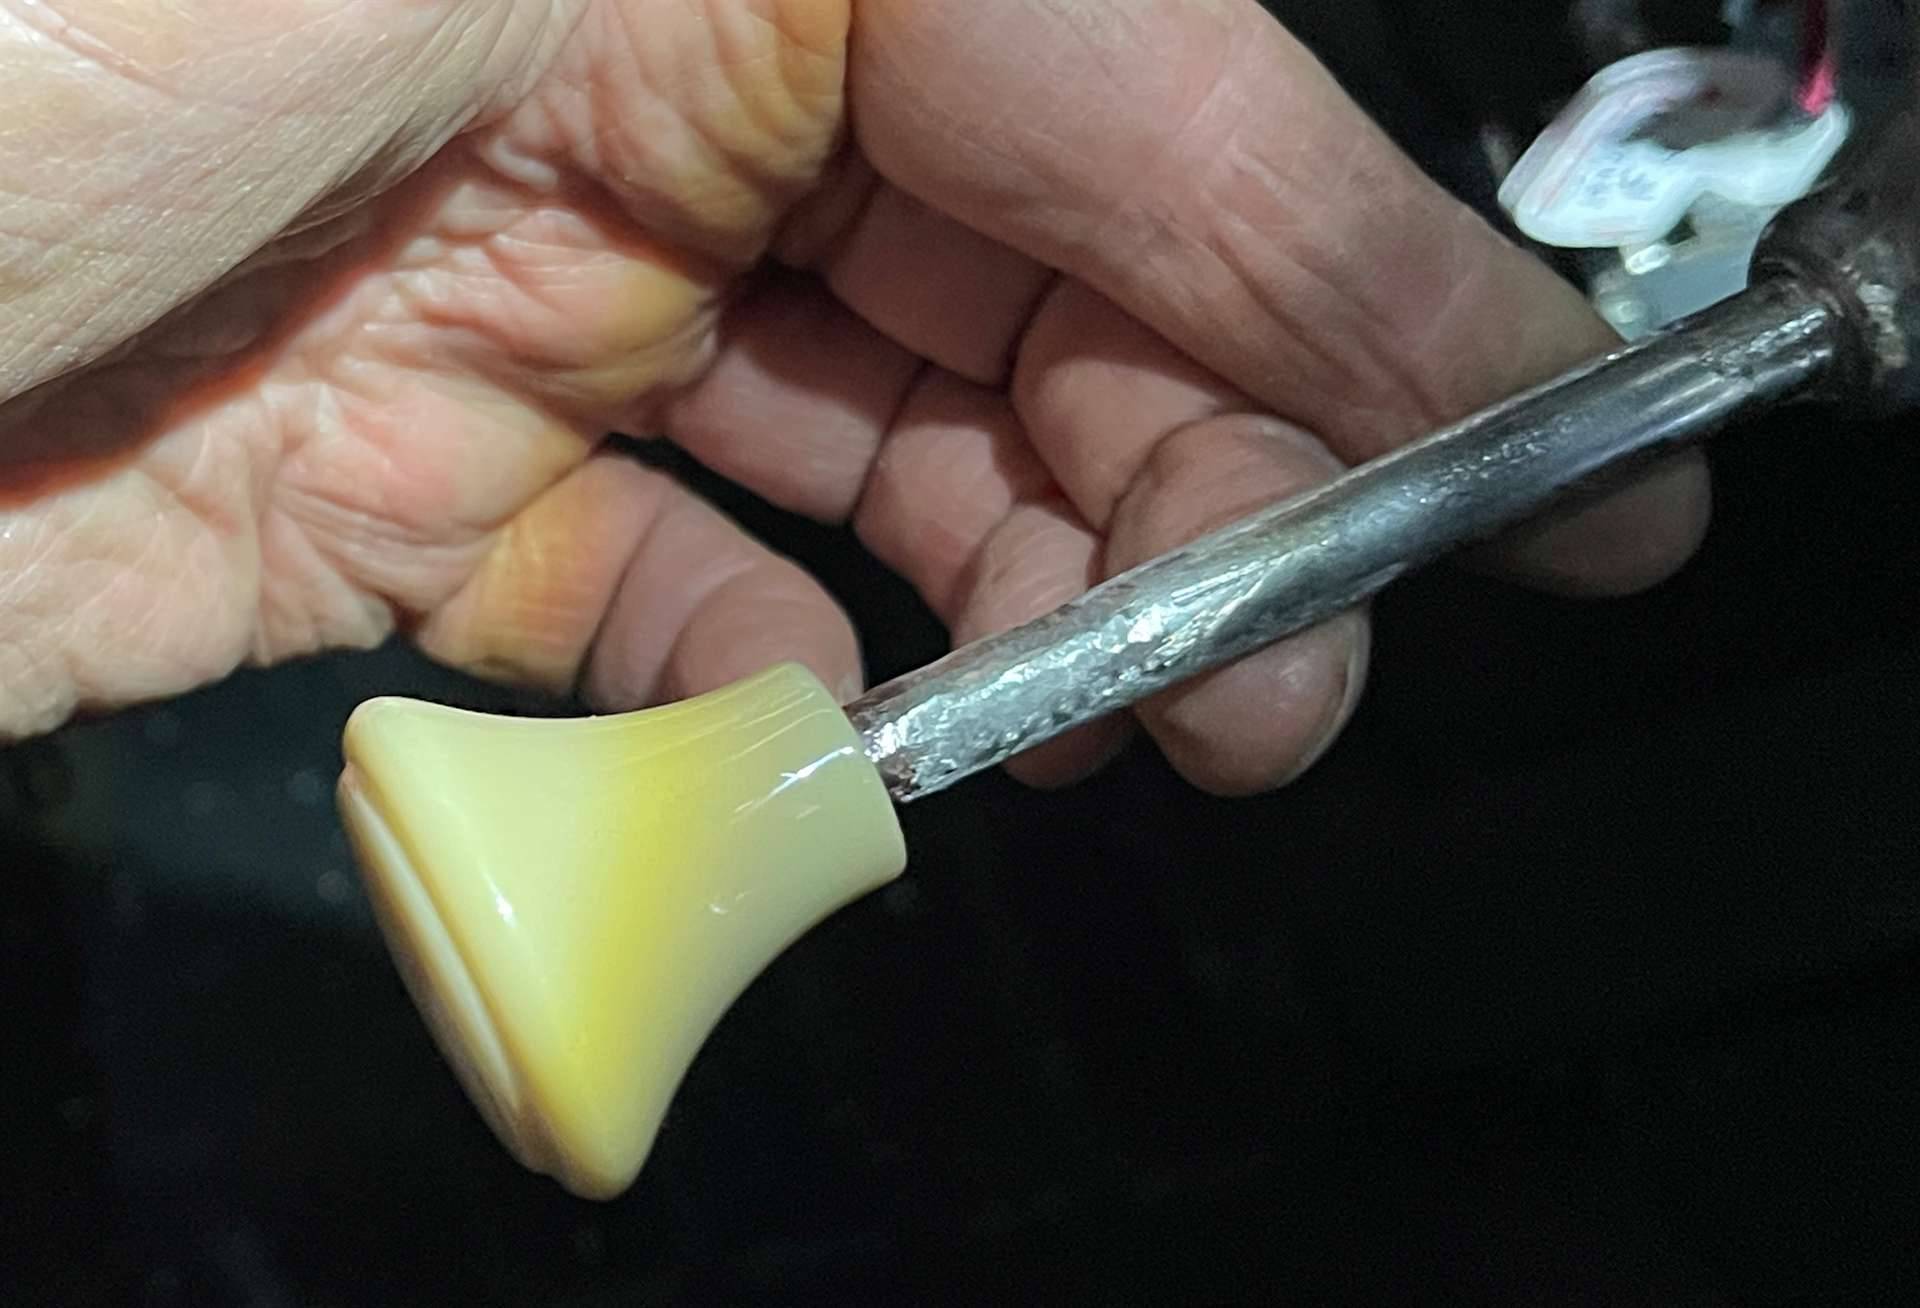 08BareVentHandle.jpg (217.63 KB) 08BareVentHandle.jpg (217.63 KB)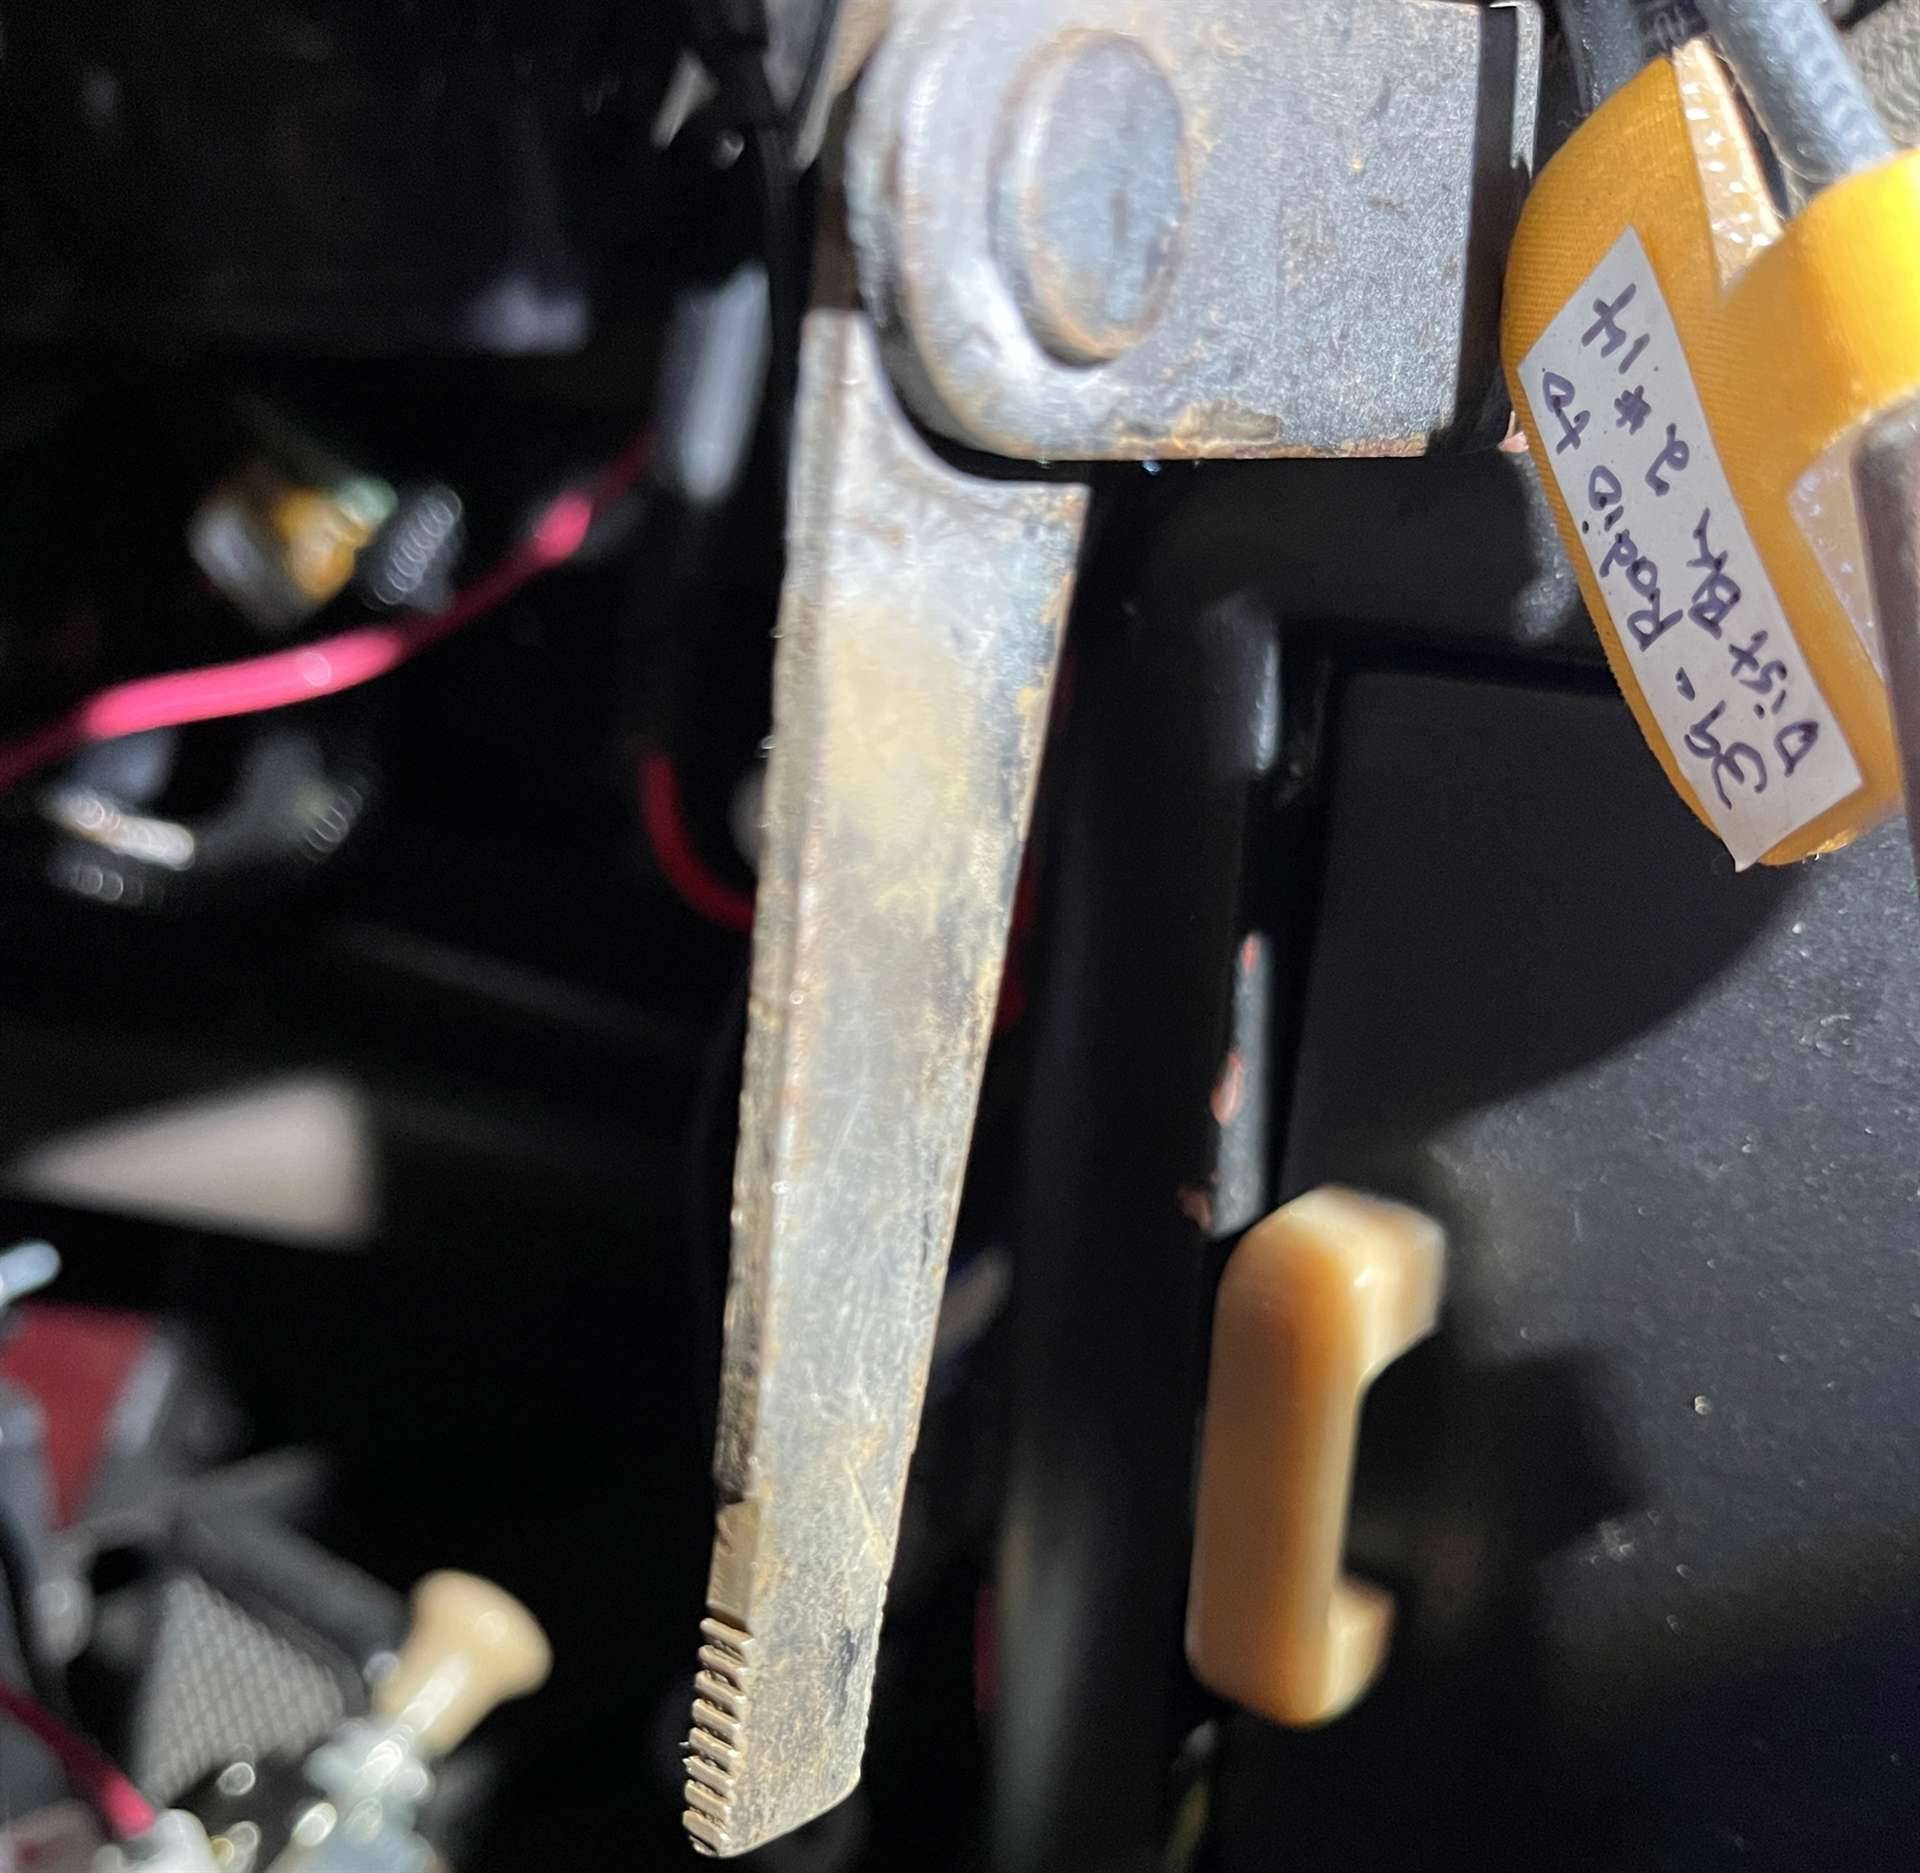 09WarpedPlasticPieces.jpg (105.98 KB) 09WarpedPlasticPieces.jpg (105.98 KB)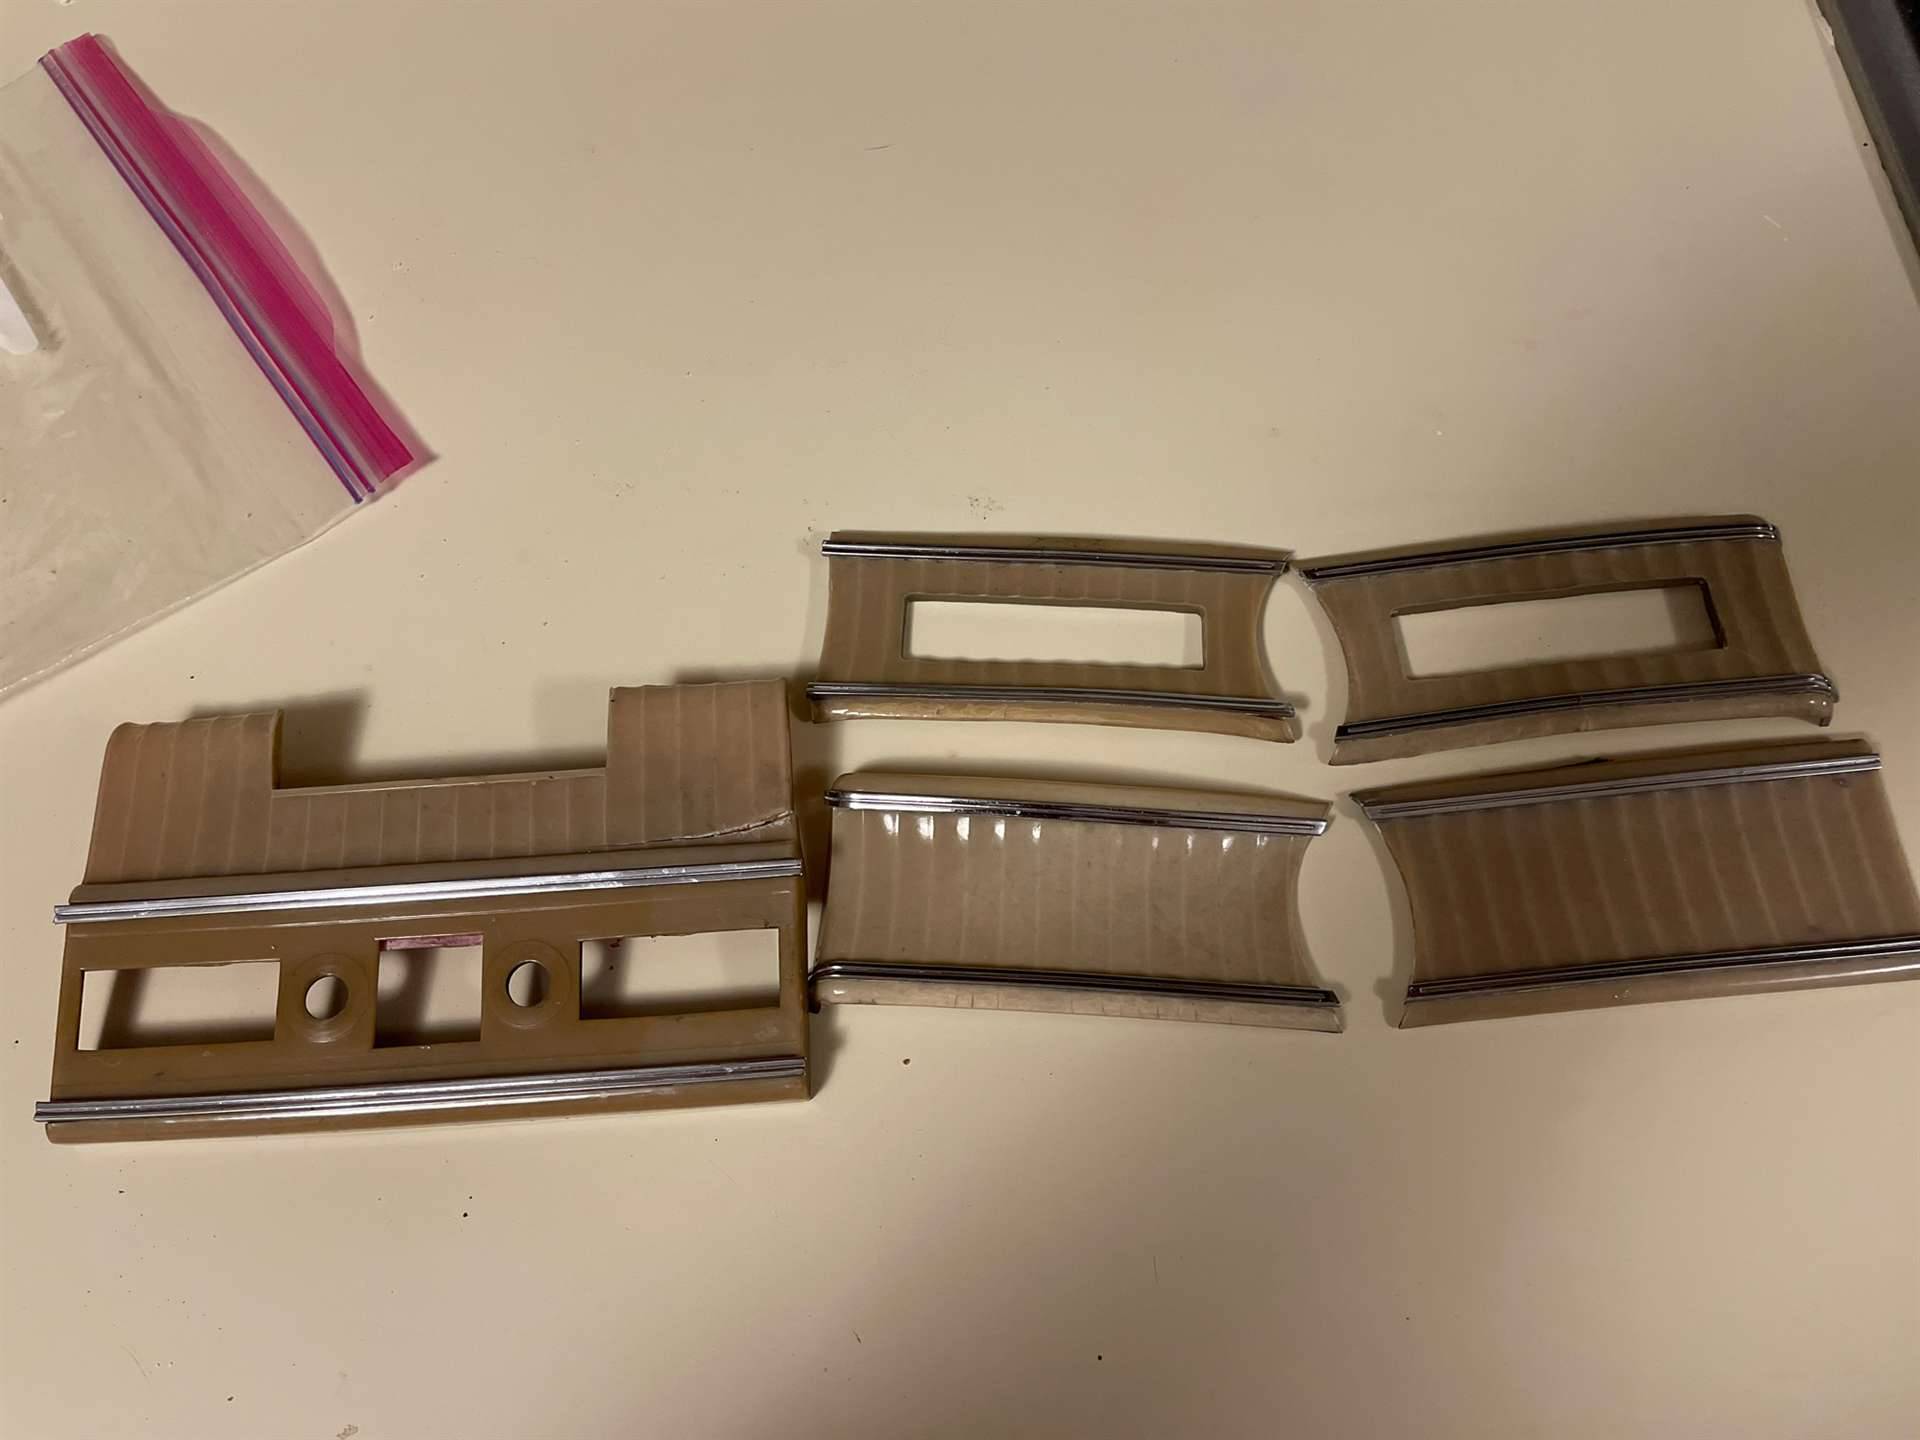 10WarpedGloveBox.jpg (230.71 KB) 10WarpedGloveBox.jpg (230.71 KB)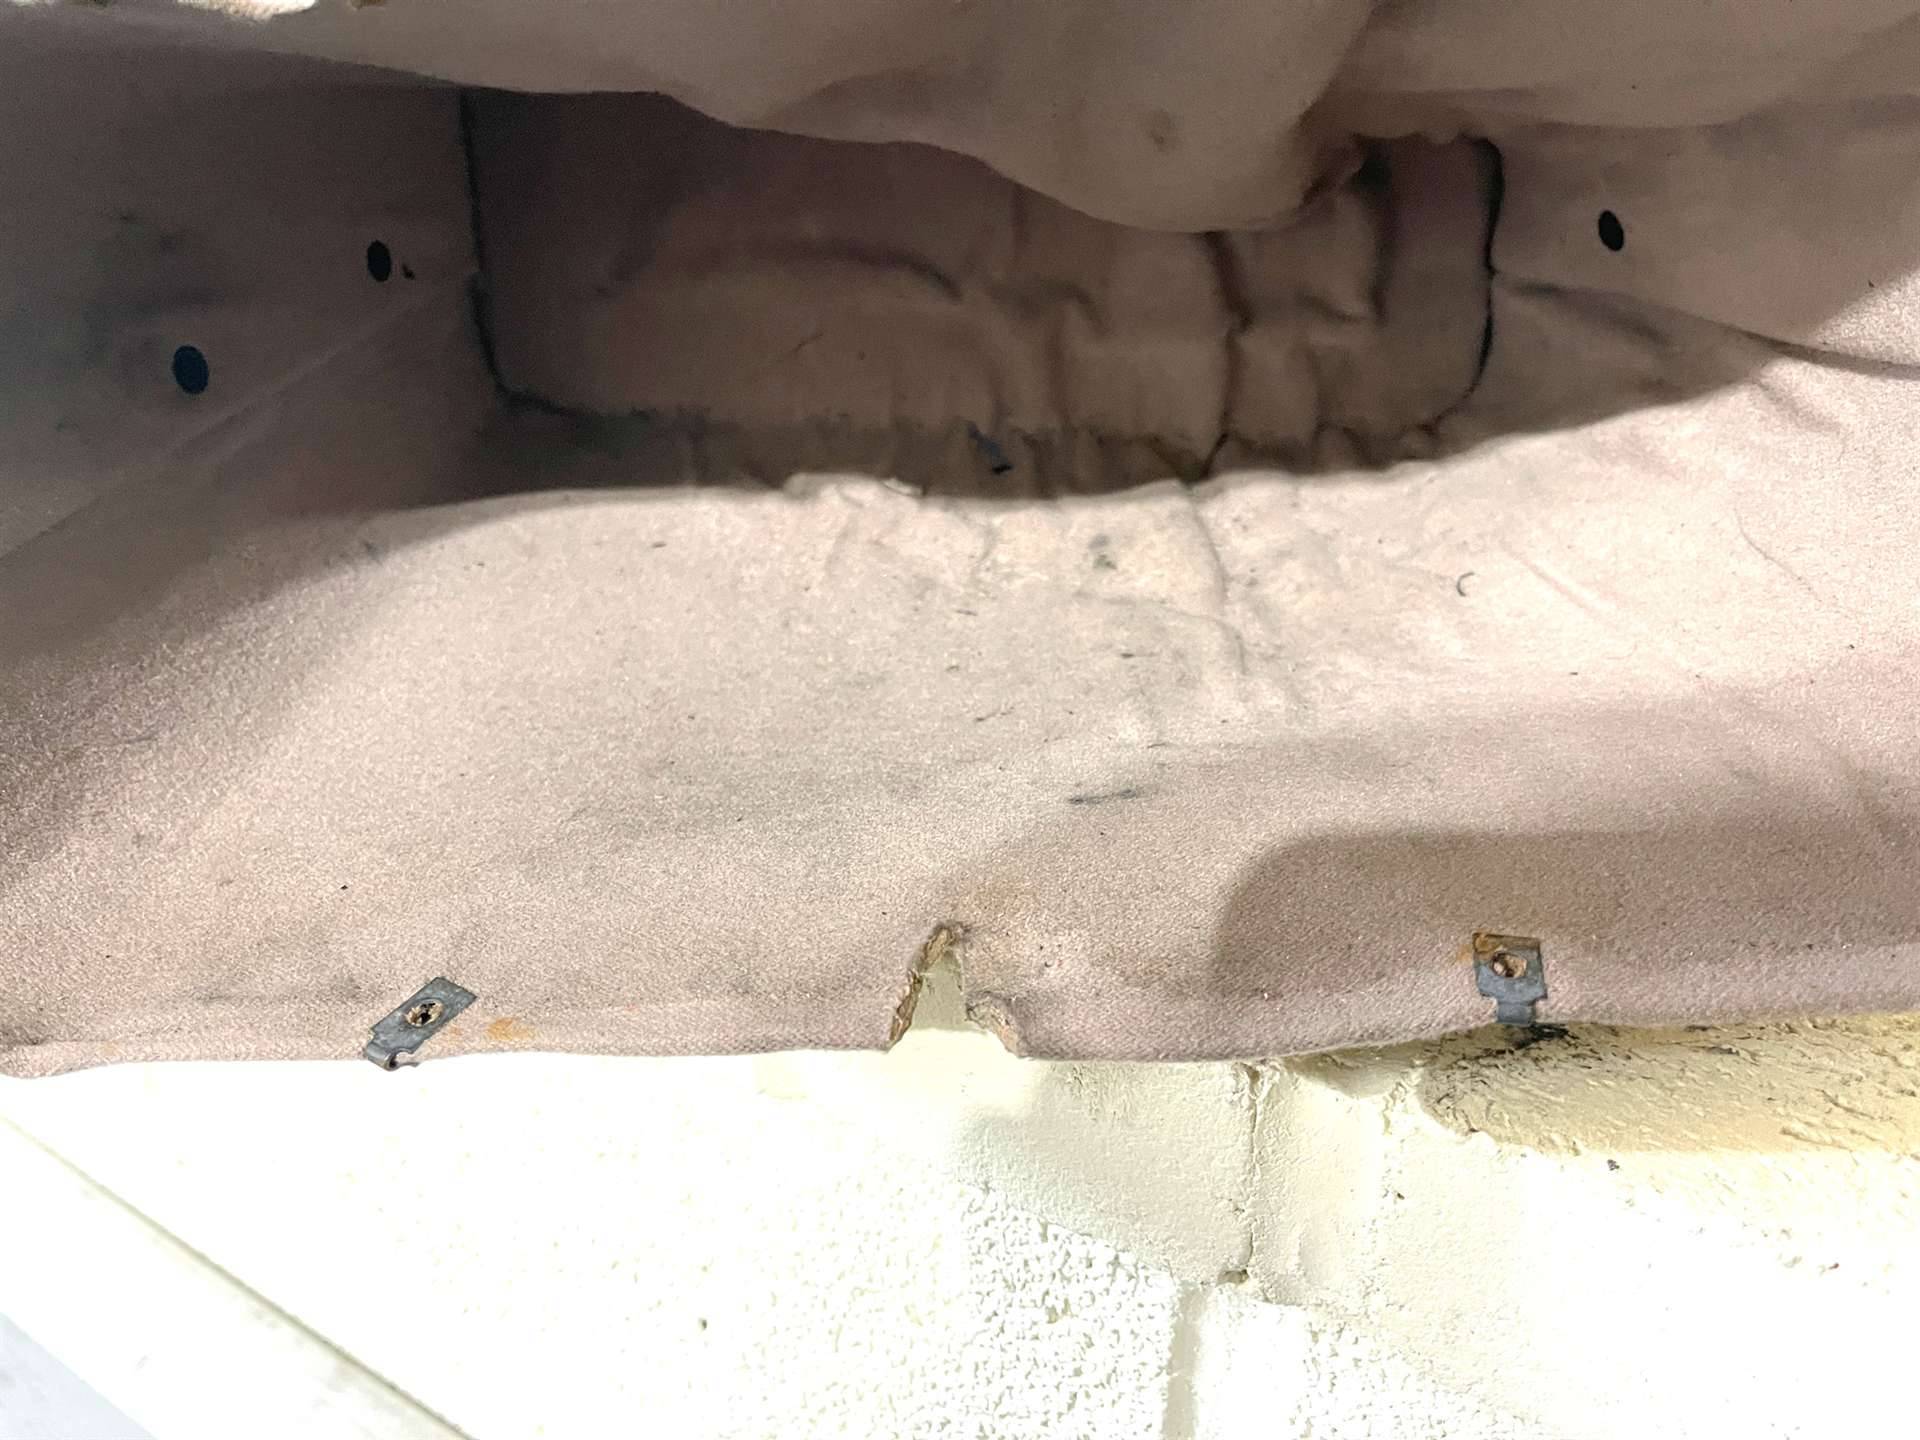
Posted on: 2023/5/25 9:22
|
|||
|
||||
|
Re: Exhaust flange nuts
|
||||
|---|---|---|---|---|
|
Webmaster
|
Even on the later car (51-54), that support is present and runs between connects to a bolt off neat the front side of the transmission.
The only picture I could find when working on my '54 that shows the supports. The Yellow arrow points at the bracket that mounts off the transmission case. The Orange arrow shows the bracket that mounts to the frame. It may not be the exact same for your car, but at least it should give you a point of reference. Attach file: ExhaustBrace.jpg (147.71 KB)
Posted on: 2023/5/25 9:17
|
|||
|
-BigKev
1954 Packard Clipper Deluxe Touring Sedan -> Registry | Project Blog 1937 Packard 115-C Convertible Coupe -> Registry | Project Blog |
||||
|
||||


