|
Re: Website
|
||||
|---|---|---|---|---|
|
Home away from home

|
Unfortunately internet ads have been like that pretty much since the beginning of time...
Posted on: Yesterday 11:35
|
|||
|
1955 400 | Registry | Project Blog
1955 Clipper Deluxe | Registry | Project Blog 1955 Clipper Super Panama | Registry |
||||
|
||||
|
Re: Website
|
||||
|---|---|---|---|---|
|
Home away from home

|
There are two types of ads showing. One is locked at the bottom and the other at the bottom too but floats on top of the site’s content. On a mobile device which is the way I generally view the site, it takes up much of the screen.
Also, one ad that keeps popping up seems to be a legitimate warning that those unfamiliar to the site might not understand and think they need to clock it. It’s very misleading. Attach file:  IMG_0508.jpeg (685.45 KB) IMG_0508.jpeg (685.45 KB)
Posted on: Yesterday 11:22
|
|||
|
||||
|
Re: Don’s 1937 (120) 138CD Deluxe Touring Limo
|
||||
|---|---|---|---|---|
|
Home away from home

|
Got the driver’s side wing window gear replaced. Works great. I also went back and lubed all the window regulators and door locks. They all work really well, now. But, the window tracks are rough and two of the windows get cocked to one side and bind up. Once the tracks are replaced, they should work great.
Anyway, it’s progress.
Posted on: Yesterday 10:54
|
|||
|
||||
|
Re: Bolt pattern for '49 custom 8?
|
||||
|---|---|---|---|---|
|
Quite a regular
|
Quote:
Car came missing drums and wheels/tires from one side. It looks like the previous owner was in the middle of doing a brake job when something happened. I found a new master cylinder and brake cylinders in the trunk. My guess is he took the drums to a shop to be turned and never came back for them.
Posted on: Yesterday 10:42
|
|||
|
He who is without oil shall throw the first rod
Compressions 8.7:1 '49 Custom Eight |
||||
|
||||
|
Re: Fender Fun
|
||||
|---|---|---|---|---|
|
Home away from home

|
Right!?!? One Rabbit hole will lead to another, to another, to another, etc......It will be like the movie Inception! I may not find my way back out!

Posted on: Yesterday 10:40
|
|||
|
||||
|
Re: Bolt pattern for '49 custom 8?
|
||||
|---|---|---|---|---|
|
Quite a regular
|
Quote:
I'm in Greensboro, NC
Posted on: Yesterday 10:38
|
|||
|
He who is without oil shall throw the first rod
Compressions 8.7:1 '49 Custom Eight |
||||
|
||||
|
Re: Fender Fun
|
||||
|---|---|---|---|---|
|
Home away from home

|
Good luck going down that rabbit hole 😜
Posted on: Yesterday 10:26
|
|||
|
1956 Packard Executive 2 door hard top (5677A)
1956 Clipper Deluxe Touring Sedan (5622)(parts car) |
||||
|
||||
|
Re: Bolt pattern for '49 custom 8?
|
||||
|---|---|---|---|---|
|
Webmaster

|
When I got my car it had 4 non-Packard wheels on it. Two were 14" and the other two 15". But, were on opposite corners! You can't make this stuff up.
Posted on: Yesterday 9:52
|
|||
|
-BigKev
1954 Packard Clipper Deluxe Touring Sedan -> Registry | Project Blog 1937 Packard 115-C Convertible Coupe -> Registry | Project Blog |
||||
|
||||
|
Fender Fun
|
||||
|---|---|---|---|---|
|
Home away from home
|
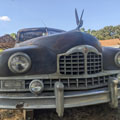
My car had some scruffy repairs done to it in the past. All 4 fenders, and the rockers, had a panel layered over the rust. Fortunately they just screwed these panels on, so they're easy to remove.
I have some donor fenders, which also need some repairs, but not nearly as bad as mine. I'll see what I can get done before I need to put the car away for the winter............which in Alberta will be soon! Don't be fooled, this is the before picture!    
Posted on: Yesterday 9:33
|
|||
|
||||


