|
Re: I never see any reference to the HEATER or parts
|
||||
|---|---|---|---|---|
|
Home away from home
|
The hardest part of working on the heater in my series 23 Deluxe 8 was installing the fresh air flexible hose on the rectangular metal barb. My hose was broken and old so I bought one to replace it. The hose supplied by a Packard parts source was round and had to the shaped and forced onto the rectangular barb. For an old guy with arthritis in the hands the job was impossible. I finally hired a mechanic to install the hose and after lots of attempts he finally got it on.
I suggest you try to install the square end of the hose before putting the unit back in the car if the hose needs replacing.
Posted on: 2018/3/30 12:14
|
|||
|
Fred Puhn

|
||||
|
||||
|
Re: Starting issue 49 288
|
||||
|---|---|---|---|---|
|
Home away from home
|
I had similar cold starting issues with my 1950 Series 23 288 engine. After checking and fixing everything I could think of I finally solved the problem. I installed an electric fuel pump controlled by a switch on the dash. The pump is installed in front of the radiator core support where it is cool and does not show. The fuel line is in parallel with the mechanical pump so a regulator is not needed. To start cold I turn on the electric pump and wait a few seconds to let the carburetor fill up. Then with the key off I pump the gas 6 or 7 times to set the choke and pump some gas into the manifold. Then I turn on the ignition and the engine starts right away. Then I turn off the electric pump and drive away.
This method only works when cold. If the engine is hot it floods with too much fuel due to pumping the throttle. When hot I use the Packard instructions with no pumping. When driving the car on a hot day the electric pump fixes vapor lock.
Posted on: 2018/2/11 13:22
|
|||
|
Fred Puhn
|
||||
|
||||
|
Re: 1950 288 Intake Manifold
|
||||
|---|---|---|---|---|
|
Home away from home
|
I have a manifold for a 1949-1950 Series 23 288 engine. The intake and exhaust manifolds are bolted together. You can have both for $200. The parts are very heavy so shipping might be an issue. They are used parts taken off a complete engine that I obtained as a spare. The condition is unknown so before buying you should inspect or send someone you could use to inspect. I live in the San Diego area. Fred Puhn (619)475-1155.
Posted on: 2018/2/2 12:31
|
|||
|
Fred Puhn
|
||||
|
||||
|
Series 23 2-tone
|
||||
|---|---|---|---|---|
|
Home away from home
|
The colors on my Series 23 Packard are factory colors. The top is the original Maumee Maize and the dark is Packard Blue. The color break is around the rear of the top, which was copied from the publicity photos of the Series 23 2-tone. Most people at car shows comment on the color scheme so I guess it was well worth it.
Posted on: 2018/1/1 13:56
|
|||
|
Fred Puhn
|
||||
|
||||
|
Re: new member
|
||||
|---|---|---|---|---|
|
Home away from home
|
The paint colors are authentic factory colors. The 2-tone design is copied from factory publicity photos I found on this website. However apparently Packard never produced 2-tone Series 23 cars, probably because they realized the 2-tone costs more than they could sell the option for.
The wire wheels are reproduction Packard wheels. However they are cheap Chinese chrome and the rusted within a couple years. I recently had them black powder coated and that solves the rust problem. Attach file:  (162.90 KB) (162.90 KB)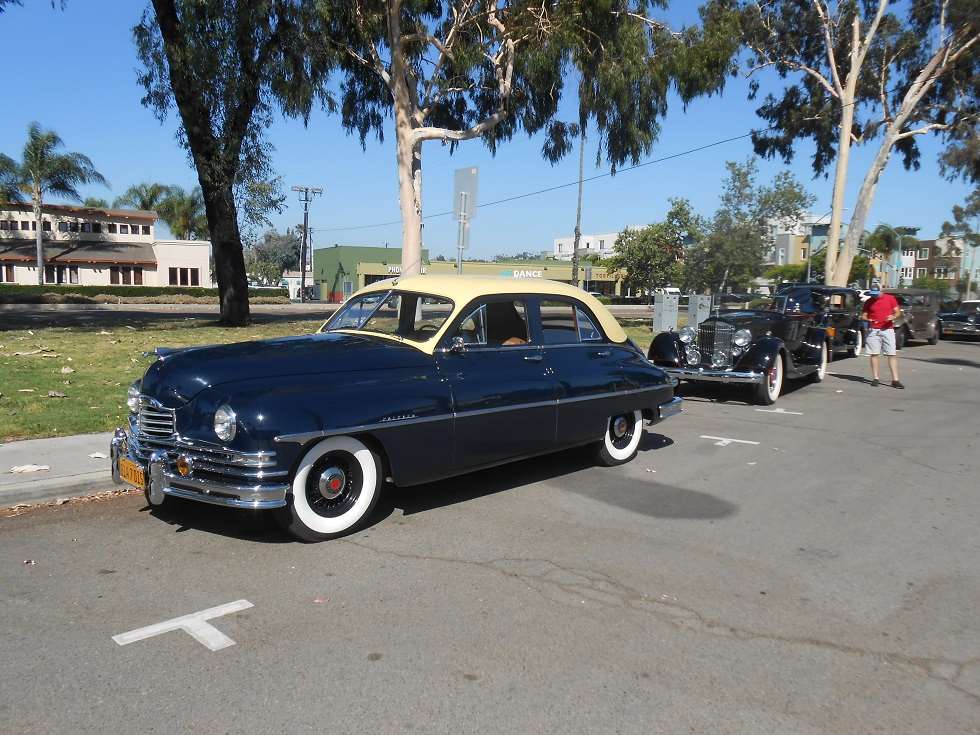
Posted on: 2017/12/29 16:26
|
|||
|
Fred Puhn
|
||||
|
||||
|
Re: new member
|
||||
|---|---|---|---|---|
|
Home away from home
|
Hi. I have a 1950 Series 23 Deluxe 8 Touring Sedan. One of the big items I had was related to electrical issues such and draining battery for no reason. I found shorts in the loom by measuring the current draw on the battery cable with everything shut off. I bought an original looking repro harness from a good vendor. Then I spent about 6 months installing the harness. Also I installed a kill switch to avoid draining the battery when the car is parked (and also an anti-theft device). I also got a 'Genernator' to produce a charging system that looks correct and works like an alternator.
Based on this experience I was amazed at how much work it takes to install a complete loom. If you choose to do this make sure you list every task that would be made easier if you combined it with the rewiring. I suggest looking at the following: 1. Replace every bulb and fuse during rewiring 2. Buy and install a Genernator 3. If the headliner needs replacing remove it first and install it after rewiring is complete 4. Overhaul and restore every electrical device that you may want to do later 5. Pull the heater and restore it, including testing the core and the temperature controller 6. Restore the lights front and rear 7. If you want to add electrical accessories such as fog lights, backup light, an auxiliary cooling fan, etc. do it along with the rewiring and get the necessary extra wires put into the new loom. Best of luck with your Packard. It is a great cruiser. If someone calls it a 'bathtub' tell them its a 'streamliner'. Attach file: (136.04 KB)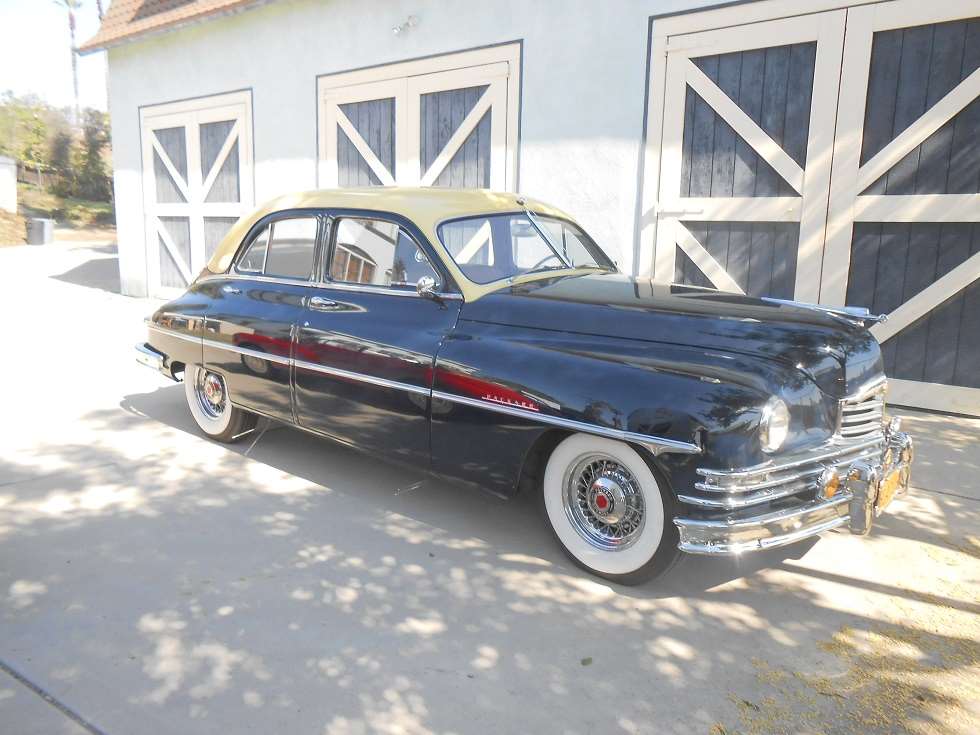 (136.04 KB) (136.04 KB)
Posted on: 2017/12/28 13:00
|
|||
|
Fred Puhn
|
||||
|
||||
|
Re: 49 tank sending unit
|
||||
|---|---|---|---|---|
|
Home away from home
|
Wow! Now I know why I have trouble with my fuel gage on my 1950 Packard. Here is a wonderful example of a solution looking for a problem. Does anyone know why Packard needed to reinvent the fuel gage and sender?
On my 1950 Packard the fuel gage decided to stop working so I did the sure-fire solution. I sent my sending unit away to one of the usual Packard parts sources and got it back totally rebuilt. I hired a local electrical repair shop that has a great reputation to install the sending unit. They dropped the tank, had it cleaned and leak tested and put in the new sending unit. During this they found a bad wire and fixed that too. Everything worked well as expected for about a year. On a short trip to a local show the Packard died. The gage was reading 3/4 full so I did not suspect running out of gas. I had it towed home. At home I found the car would run fine if I put gas in it. I took it to a station and filled it up, but the gage read the same. I started using the odometer to refuel the car and closely watched the gage. One day the gage decided to read full, right after I did fill the tank. Next time I drove it the gage went back to 3/4 full reading, but this was obviously wrong because the tank was full. Now that I can see the details of how the sending unit works I see the solution is not simple. Does anyone have a good suggestion? I will not worry what the cost is because I already have many hundreds of dollars in this 'fix'. I just want the car reliable. If I replace the sender again does anyone have advice on the best place to get another one?
Posted on: 2017/5/26 11:42
|
|||
|
Fred Puhn
|
||||
|
||||
|
Series 23 Deluxe steering wheel
|
||||
|---|---|---|---|---|
|
Home away from home
|
Does anyone know what the optional Deluxe steering wheel looks like that was offered as an option in a Series 23 sedan? The steering wheel in my 1950 Deluxe 8 touring sedan is a bit shabby and cracked and I want a restored one. My Packard is restored and the steering wheel is the worst part of the interior now. I saw a really pretty steering wheel on a Packard at the AACA show last weekend but the owner did not know what was the optional "Deluxe" steering wheel. The one at the show was ivory color, matching the ivory knobs in the interior.
Posted on: 2017/4/2 10:04
|
|||
|
Fred Puhn
|
||||
|
||||
|
Re: Dashboard wiring
|
||||
|---|---|---|---|---|
|
Home away from home
|
I rewired my Series 23 sedan a few years ago. It was a monster job for an old guy and I would not like to do it again.
The latest tool that would be a big help is the small LED lights. I just bought a couple of them at Harbor freight and they work great under the dash. I wish they were available when I did my rewiring. The things I really like are: 1. Bright light (there are a number of choices) 2. Small size 3. Does not get hot enough to burn you 4. A small magnet built in to help hold it in position 5. A small spot light on the tip if needed to light up a deep dark place (like the ignition switch wiring or the hidden screws attaching the dash). If I was doing this job now I would give the lighting my highest priority. I would buy several different types. They are quite low cost.
Posted on: 2017/2/19 12:56
|
|||
|
Fred Puhn
|
||||
|
||||
|
Re: Map light bulb replacement
|
||||
|---|---|---|---|---|
|
Home away from home
|
These issues were the same ones I got on my Series 23 with original wiring. After developing wire to wire shorts in the big bundle thru the firewall I decided to replace all the wires. I got an excellent harness from Rhode Island Wiring. I did the rewiring myself. The installation is a major job which takes months..
A couple things I did while the wiring was in work: 1. I added a 50 amp kill switch that cuts off all the power except the battery cables. 2. I could not rewire the turn signal wiring in the steering column, but it works OK. 3. I did not rewire the overhead wires inside the car because it would require removing the brand new headliner. 4. I did not rewire the fuel tank sending unit and later I had to. This means dropping the tank. 5. I added fog lights, cooling fan, backup lights, and some other electrical accessories and used original type wires that I got the from Restoration Supply Co. 6. I bought a 'genernator' to finally fix the lack of current from the original generator. My added accessories caused this problem. 7. I restored the heater while it was out of the car. 8. A big help during installation was removing the old wiring complete and labeling all the terminals. 9. Before starting take lots and lots of photos that show how the original wires were routed. Rewiring the Packard was a huge job. It would be multiple thousands of dollars if you paid a shop to do it. Patching up old wiring is possible but be ready for trouble inside the big bundle of wires. The wires are nice, but the insulation gets brittle and crumbles.
Posted on: 2017/2/16 14:03
|
|||
|
Fred Puhn
|
||||
|
||||


.jpg")


