|
Re: Convertible top kit for convertible sedan
|
||||
|---|---|---|---|---|
|
Home away from home

|
Dislexia strikes again. This is cut and paste safe.
E-Z ON Auto Tops Since 1989, E-Z On Auto Tops has been providing the industry with premier fabric and vinyl convertible tops. Over 30 years of combined market experience manufacturing convertible tops with patterns dating back to the 1920's. Commitment to innovations, state-of-the art equipment and quality goes into each convertible top for domestic, import and vintage convertible automobiles. EZ ON Auto Tops, Inc. P.O. Box 130 Iva, SC 29655 (800) 345-2886
Posted on: 2011/5/2 15:57
|
|||
|
||||
|
Re: Convertible top kit for convertible sedan
|
||||
|---|---|---|---|---|
|
Home away from home
|
I love the Internet. I wonder how cars were properly restored without it, though years ago some of these items were widely available.
Case in point, tops for a 1940 convertible sedan. At OD's suggestion, in speaking directly with Bill Hirsch this morning, he thought that perhaps in the 70s he did supply my top through Arrow or Standard or Crown top manufacturers, for whom he was a distributor, but all are out of business now. Also he carries different shades of "tan" material and I'm trying to get as close to khaki as possible. He's sending samples of his tan stock. I kept on searching and reached Randy, the technical expert at EZ ON Auto Tops, Inc., Ivon, SC, 800 345-2886. They have the pattern for the 1803 1377. They sell through distributors. The nearest to me is in LA, Vic's Upholstery, 800 624-4470. Vic himself answered the phone and figured a price on the spot. I'm thrilled (1) That the pattern is not lost and (2) the significant cost it will save in materials and labor. Tenacity, what it took to get Bin Laden. Go Navy!
Posted on: 2011/5/2 15:47
|
|||
|
||||
|
Convertible top kit for convertible sedan
|
||||
|---|---|---|---|---|
|
Home away from home
|
Do you know of anyone who makes a kit?
I know that today I'm paying 10 times what I paid for a cup of coffee in 1971, and 20 times what I paid in 1960, but does that hold true for convertible tops, too? In 1960, I had a custom top made for $125 in San Jose. In 71, about $350. Now I'm looking at something sililar to coffee nflation for a custom top for the 1940 Duchess 160 conv sedan. In 1971, the shop that put the last new top on her bought a pre-cut kit from someone, (I thought Bill Hirsch, but they don't make them or don't make them anymore I was told). I remember it was a kit because the snaps were a couple inches off on one side from where they should have been and the shop drilled holes in the top frame rails to use the incorrect positions. I recently checked with Kanter and Kepich. No luck there. The shop said checked with Hirsch. If I have to bite the bullet, so be it. Labor of love as you know. Do you know of anyone who makes a kit?
Posted on: 2011/5/2 9:52
|
|||
|
||||
|
Re: The Duchess Project: 1940 Super 8 Convertible Sedan
|
||||
|---|---|---|---|---|
|
Home away from home
|
Thanks OD. I did buy my firewall from Quiet Ride and it looks nice, but the texture and the finish is different from the original. Just saying, a little more research. Rubbery dull and pigskin bumpy versus the one they sent me which was shiny and grained like rough-hewn wood.
As far as pre-drilling, I had requested that, but it wasn't done when it arrived. I drilled little 1/8-in. holes from the engine compartment after I installed the firewall using the existing holes in the cowl as the guide, which I'd already verified by temporarily installing my radio, heater, speaker. The insulation wraps around the drill bit a little, but when I drilled with the larger size from inside the car my holes were spot on. I really think it's more of a customer service issue than a product quality. The actual materials and workmanship are very good. Just not the same as original. Just prodding for quality (i.e. fitness for use, which in this application includes authentic appearance as well as function). If I ever get an answer from Quiet Ride, I will buy their floor insulation kit. But I want to know the steps involved and the possible pitfalls. Instructions come with the kit, but I prefer fewer surprises. Attach file:  (49.49 KB) (49.49 KB)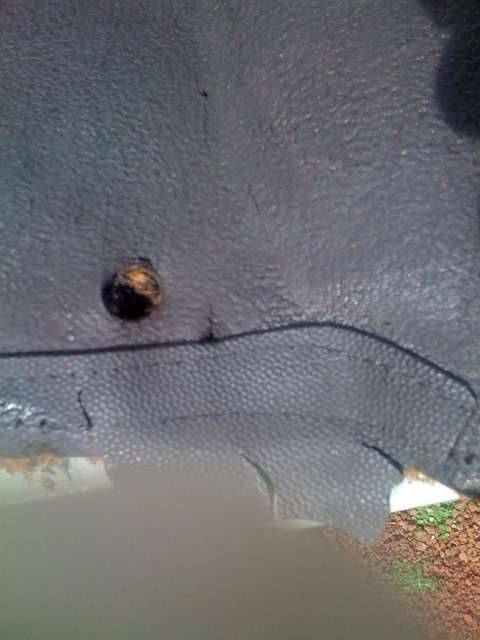 (63.66 KB) (63.66 KB) (54.48 KB) (54.48 KB)
Posted on: 2011/4/26 13:26
|
|||
|
||||
|
Re: The Duchess Project: 1940 Super 8 Convertible Sedan
|
||||
|---|---|---|---|---|
|
Home away from home
|
I hate to disillusion you, JW.
The truth is in 1986, anticipating a completed car in no time, ha ha, I ordered a firewall from Armands to replace my very holey, but thick bumpy leathery rubber firewall. The replacement was a great disappointment. One thin piece of molded plastic barely 3/32nds with a pin-point finish and a couple of slots cut out of the top. It had no insulation. It had no edging. It looked like it came out of the cheapest pick-up imaginable. It required you to make a big paper pattern from your existing firewall. Then use that to mark it for holes for heater, radio, speaker etc. (I'm sure this method would create a lot of double-hole installations.) Mark for notches, tab, etc.. Drill the holes. Trim as needed with tin snips to get it to fit. Cut insulation as needed...use the pattern and cut some more. Glue on the insulation with contact cement. Install. I still have it. Every time I look at it I growl. The QuietRide people while somewhat rude* and non-responsive (after I called and complained, they promised someone knowledgeable would contact me, but never did), the product was better. I don't think it would take much to improve it and make it appear more authentic, but it looks pretty good and much better than the old battleship one I had in there that survived holes for a lot of inauthentic items over the years. A lot of vendors have a sort of hot rod mentality, meaning this new material is an improvement over the style, texture, etc of what was used originally. Either that, or I'm just getting grouchier as I get older. Which is a possibility. Lower tolerance setting in. That was then, and I'm sure Armand's does a better job, perhaps a superior job today per your recommendation. *They first said they had a floor kit for my car, but only after probing did I find out that the kit for may car is the universal kit. Since I'm a neophyte in all this I asked what the process was that I'd have to do if I ordered that kit. I was told that if I didn't know how to do it I should contact an upholstery shop. After I called they promised someone would call or email me to tell me the steps. I think the floor kit is $200. BUt no one has yet and it's been a couple months.
Posted on: 2011/4/26 11:34
|
|||
|
||||
|
Re: The Duchess Project: 1940 Super 8 Convertible Sedan
|
||||
|---|---|---|---|---|
|
Home away from home
|
Thanks, OD, that comes as a big compliment.
AUTHENTICITY, TEXTURE MATTERS: I don't want to sound ungrateful, because people who support the hobby with parts are a god-send, BUT... It seems a minor amount of research would yield a more authentic replacement product. Case in point, the firewall from one vendor has a sort of vinyl leatherette pattern and the edging is plain. The original is bumpy like pigskin, like a football....and you know today's footballs only mimic pigskin, so the pattern is available. Of course, the replacement hides in the dark under the dash and looks far better than my beta up original. Just saying. Likewise the glove compartment of a 1940 is that taupe brown with a leatherette texture. The replacement I bought is flocked. Flocked? Well, when I run out of things to do on the Duchess I'll use the replacement to cut a pattern for something more authentic. (And I have visions of using the back half of the glove box to ditch all the digital gear, not very authentic, either. ) DOOR FRAME WOOD: The wood behind the rear doors was mostly solid. It appears to be laid in in 1/4 in. tongue in groove (vertically up the middle) layers. The right side screw holes were shot. The screws that hold the dove tail and strikers, totally shot. The big wood screws that hold the rear side metal panels alongside the rear seat rusted and did their share of damage. I read the thread here on drilling them out clean and filling them with dowel. I drilled holes with appropriate size bits and took the bits to Home depot for matching dowel. The left side was too weak, but it was only the top 1/4-in. layer which pulled off easily. I cut a piece of plain floor moulding, because the profile from thick to slim matched the old piece. I notched it and used a dremel router attachment to make the 1/8" groove down the center. But that's all the wood I actually replaced. I also soaked everything in Minwax wood hardener. Maybe in another 70 years someone will still have something to work with. DOOR HANDLES: Again with help from a thread on this site, I bought some 1/6th pins [edit: 1/16th-in.] 3/8" long and took my handles to my son's, John. He used his drill press to drill those tiny holes and we re-assembled the handles which had been disassembled for chroming. We also installed the bobby pins that John Ulrich's website explains are nearly always broken by the time a car is 25-30 years old. These help to the handle level. Mine are so used that they need to be reset. It was suggested that the shaft be heated and twisted, but I should have done that before it went for chrome. On the latch there is a disk that's pressed when the handles are set. If I can release it with my dremel, we'll reset it and tack it. So is our hope against droopy door handles. FIREWALL CABLING. I've been staring at and transferring that piece of rubber I bought from Steele Rubber from receptacle to receptacle designed to seal around the cables and wire conduit on the firewall. Finally tackled that and it came out well. I also added the drain hose from the fresh air vent gutter. I couldn't find any black rubber hose the right size that had the ID matching the OD of the metal vent outlet tube and the OD to fit through the hole in the firewall, except for clear tubing. I bought that and sanded it a bit to dull the sheen, then painted it with black plastic lawn items paint. PARTS TO PAINT SHOP At long last I took two loads of fenders and hood parts, misc items to begin their final stage of prep and painting. The shop uses water-based basecoat (Envirobase PPG) under urethane clear. The color is Blackhawk Gray Metallic, a dark warm (brownish) gray. UPHOLSTERY I also have the upholstery job out to bid. The fellow who started it 5 years ago is too busy to start it right now. So hoping to have prices this week or next. Some of the work done was to make new panels for the front and rear doors, kick panels, rebundle the front seat springs. I don't know if I mentioned this earlier, but no points are taken off for replacing the springs with synthetic foam rubber, but new foam rubber isn't cheap either. And springs feel a lot different than foam because they travel with the weight of the sitter for a more comfortable, easy chair sensation. These seats were made like furniture. I think staying with the springs, even though re-bagging them is more labor. The original foam rubber on top of the springs is real rubber and is still resilient, so it's going back in. I'm sending my vacuum wiper motor to the WiperMan. Attach file: (49.49 KB) (63.66 KB) (63.66 KB)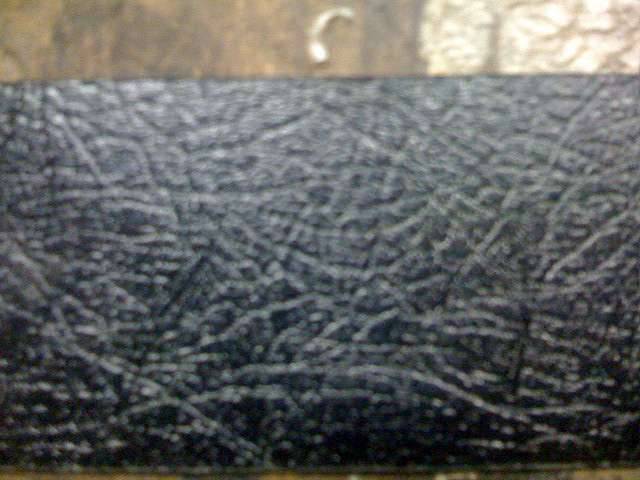 (220.90 KB) (220.90 KB)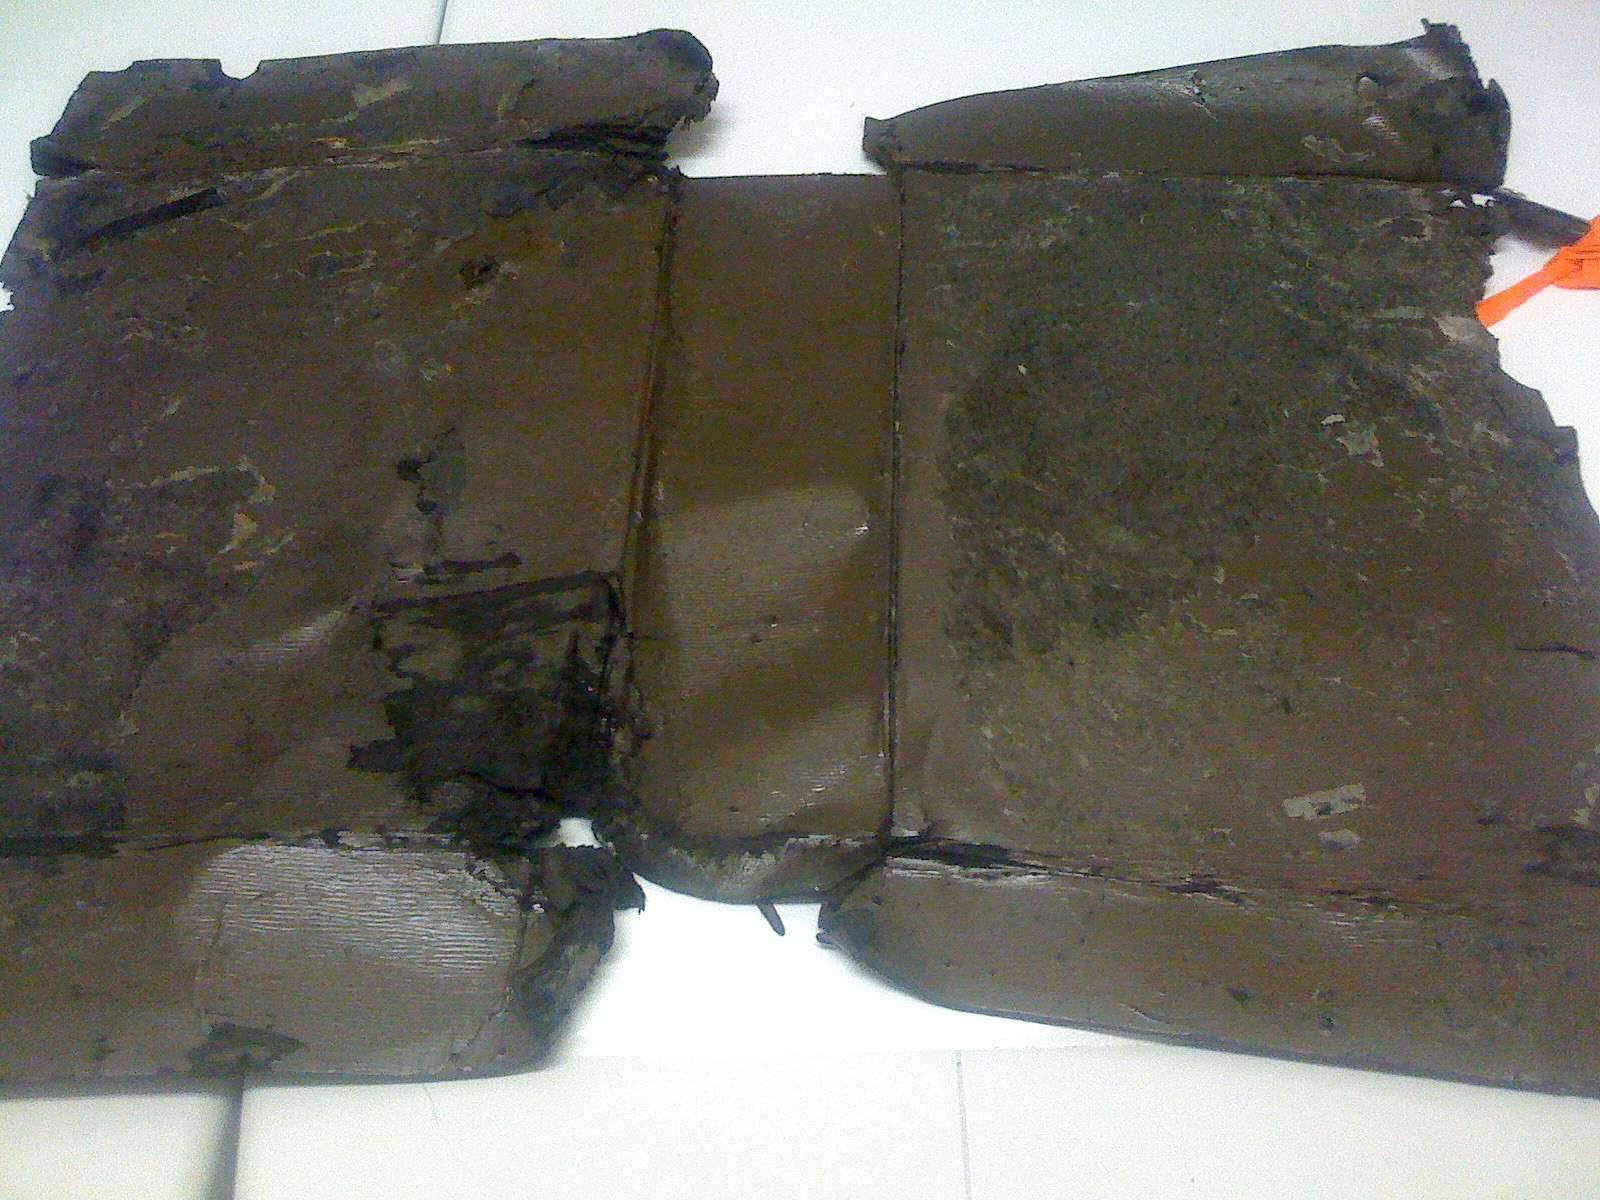 (62.96 KB) (62.96 KB)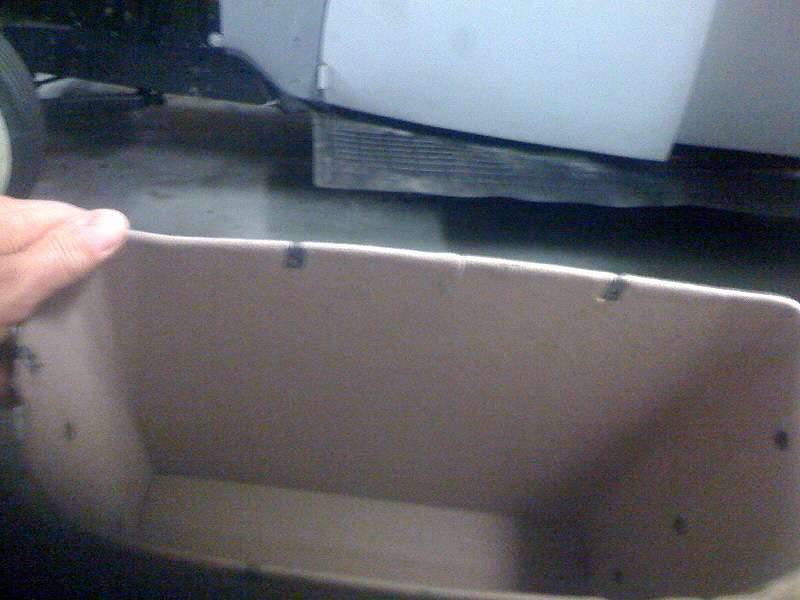 (53.51 KB) (53.51 KB)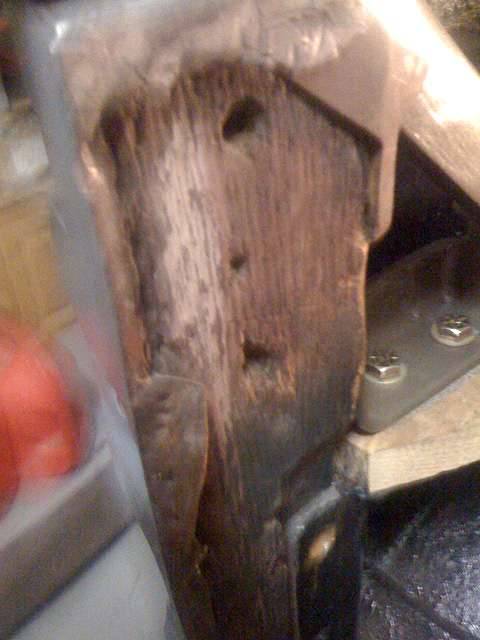 (46.36 KB) (46.36 KB)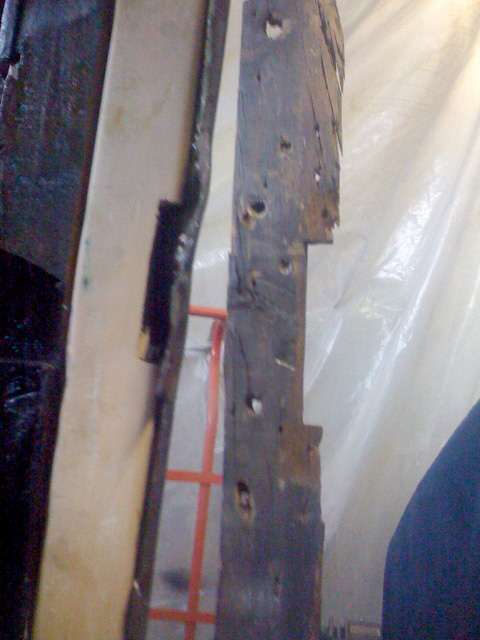 (54.67 KB) (54.67 KB)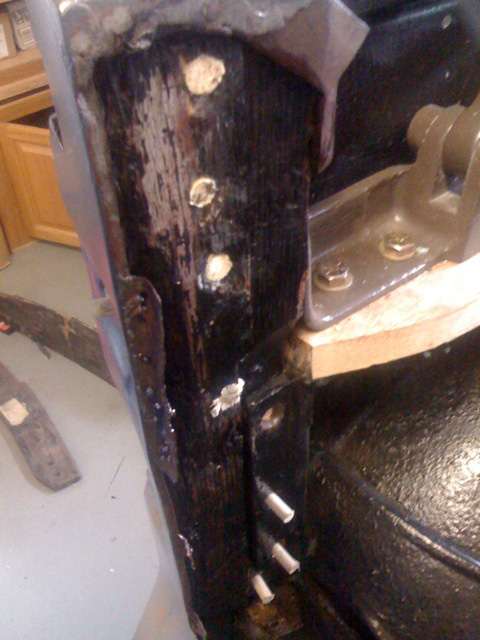 (44.83 KB) (44.83 KB)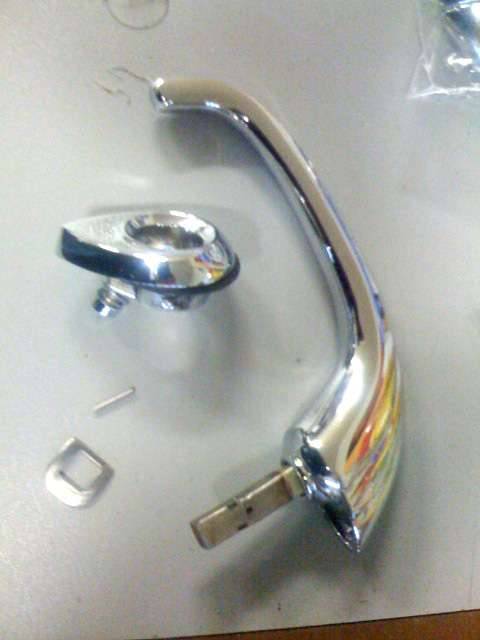 (50.75 KB) (50.75 KB)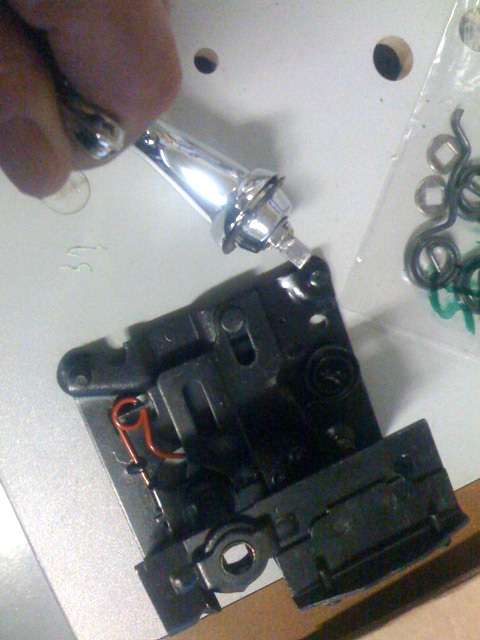 (96.33 KB) (96.33 KB)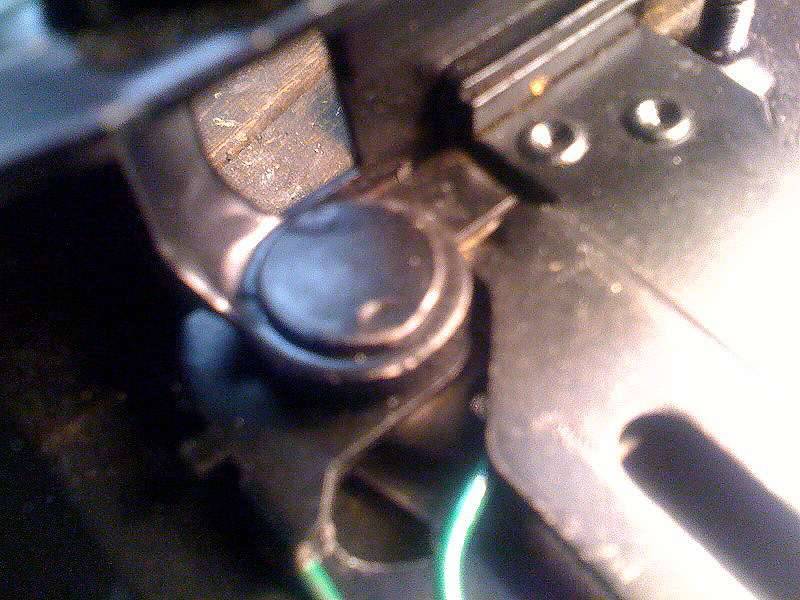 (48.74 KB) (48.74 KB)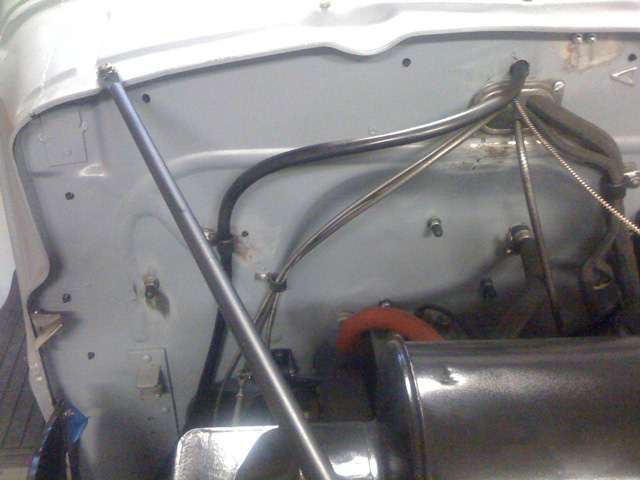 (59.35 KB) (59.35 KB)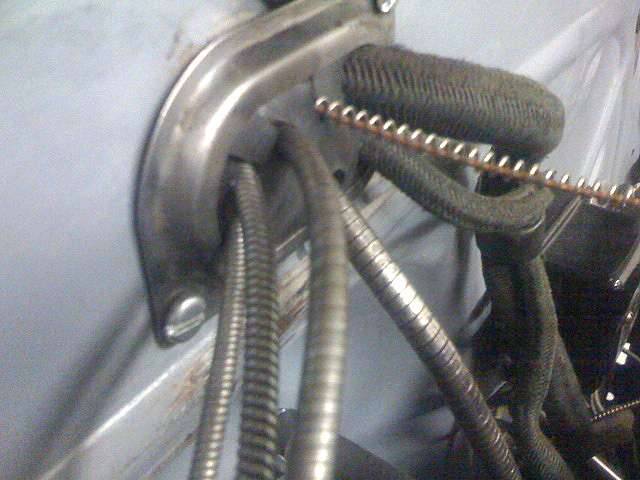 (36.65 KB) (36.65 KB)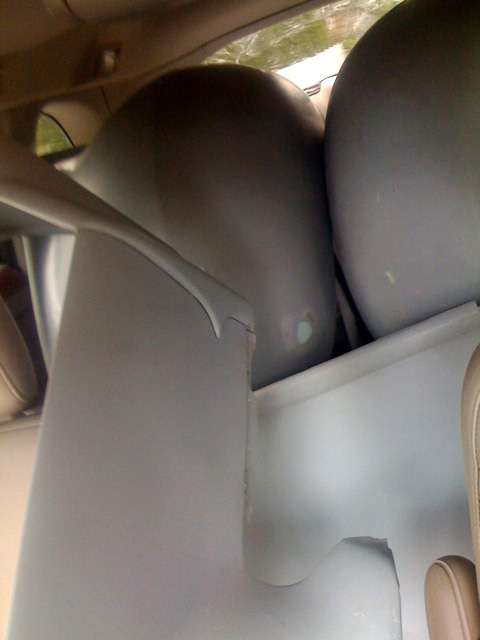 (45.23 KB) (45.23 KB)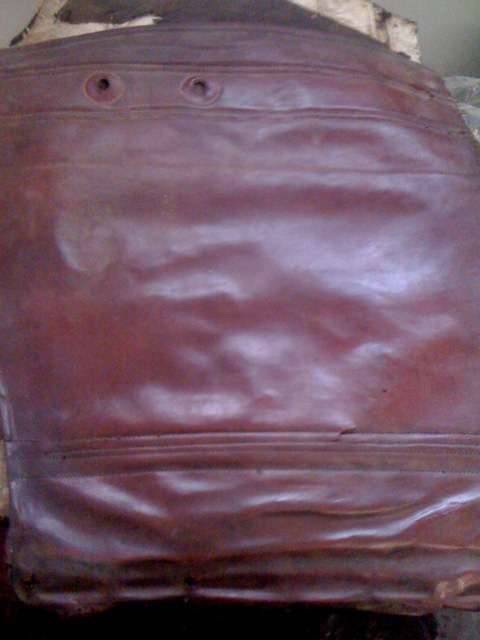 (65.30 KB) (65.30 KB) (63.95 KB) (63.95 KB)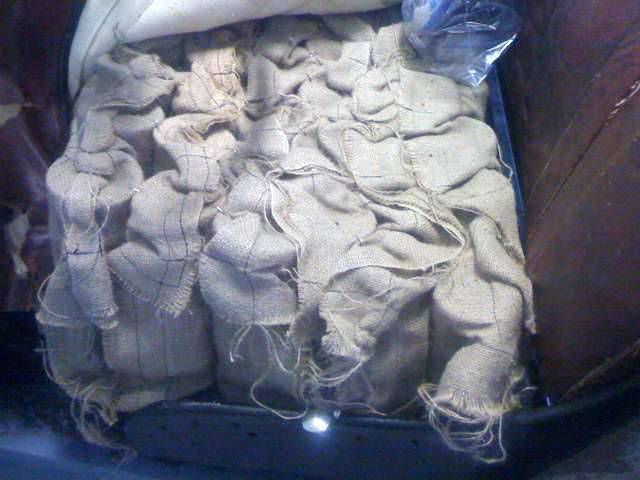 (46.09 KB) (46.09 KB)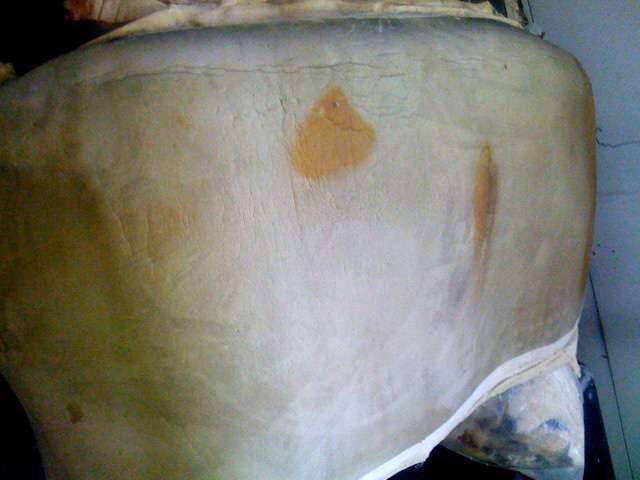 (36.62 KB) (36.62 KB)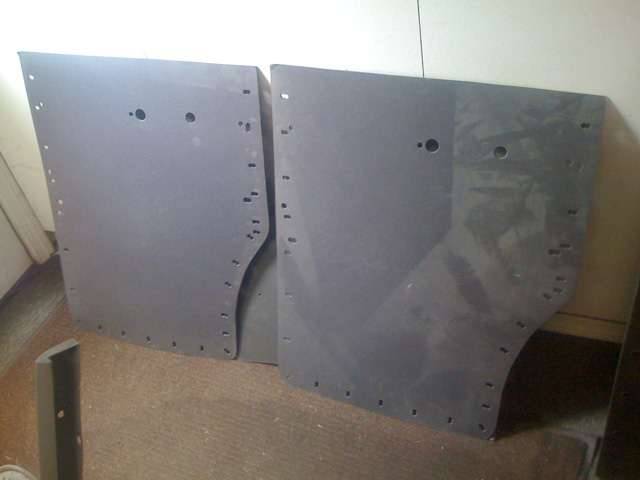 (35.97 KB) (35.97 KB)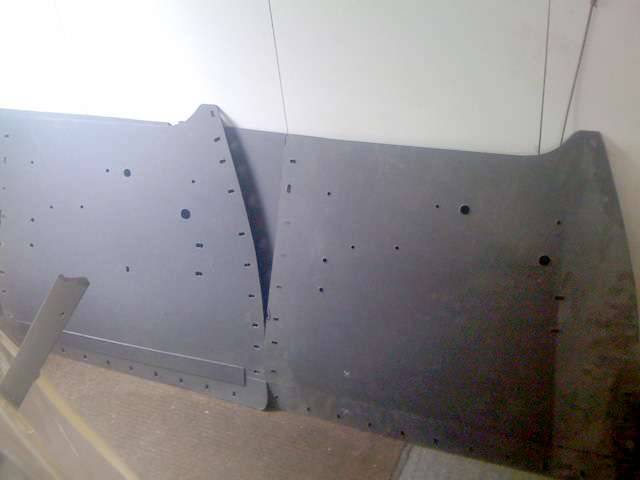
Posted on: 2011/4/25 23:14
|
|||
|
||||
|
Re: Packard data/vin plate on firewall
|
||||
|---|---|---|---|---|
|
Home away from home
|
Packards International sells them for $45. www.packardsinternational.com
My 1940 has always been registered by engine number, beginning in California, though that engine long ago expired. The VIN was stamped on the plate, so I have that, too. When I removed the plate (mine was riveted), I forgot to note which direction it reads from. It's square, so it fits any direction. From the front of the car or from the side (which seems to make the most sense for ease of reading)? But I don't want to rivet my new plate on the cowl until I know which direction is correct (and until the Duchess is painted, which is happening soon).
Posted on: 2011/4/19 14:21
|
|||
|
||||
|
Re: Locking door handle cylinder removal 1940
|
||||
|---|---|---|---|---|
|
Home away from home
|
Yes, Owen,
I'm a PI and PAC member, but off and on. On both currently. I'm missing a few issues. Still after several hours tonight, I still couldn't get the handle with the good lock to release the cylinder. It's a darn good lock. I went back to my original one and tried to piece it together and put it back in there. A number of problems. I'll post some photos in a minute. But I feel like I'm making a mountain out of a molehill. I put the spring in after the retainer and then the old cylinder. It went in, but didn't hold. I think the groove that the nub slides into is shot, too worn. I may have to go to a jeweler. Hey, It's a Packard. A Duchess at that. But I would feel much better if I could get that other one out that I had the keys made for. Then I could see the exact order of each piece, how it's oriented, etc. I will probably have to have the groove restored. Perhaps Harold, the guy who took my old one apart will be back from vacation and can take the other one apart with the good lock. Tomorrow I'm "working from home" to take the Duchess apart and take the parts to the paint shop. Thanks for the help. I understand it better. Attach file: (49.14 KB)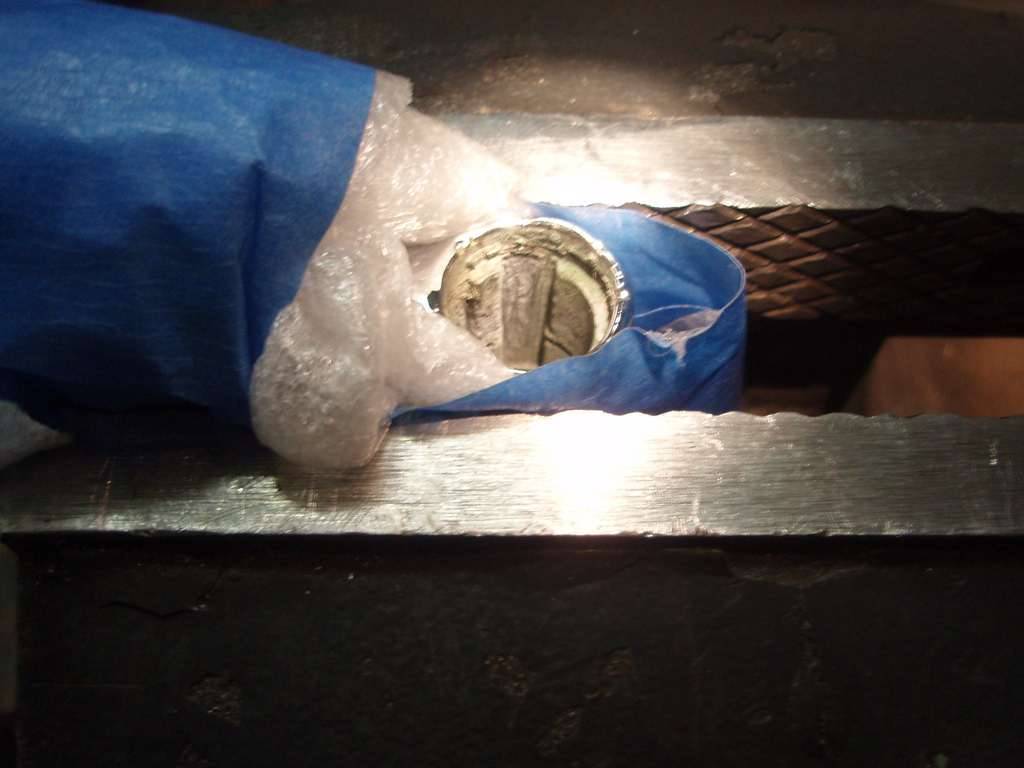 (117.53 KB) (117.53 KB)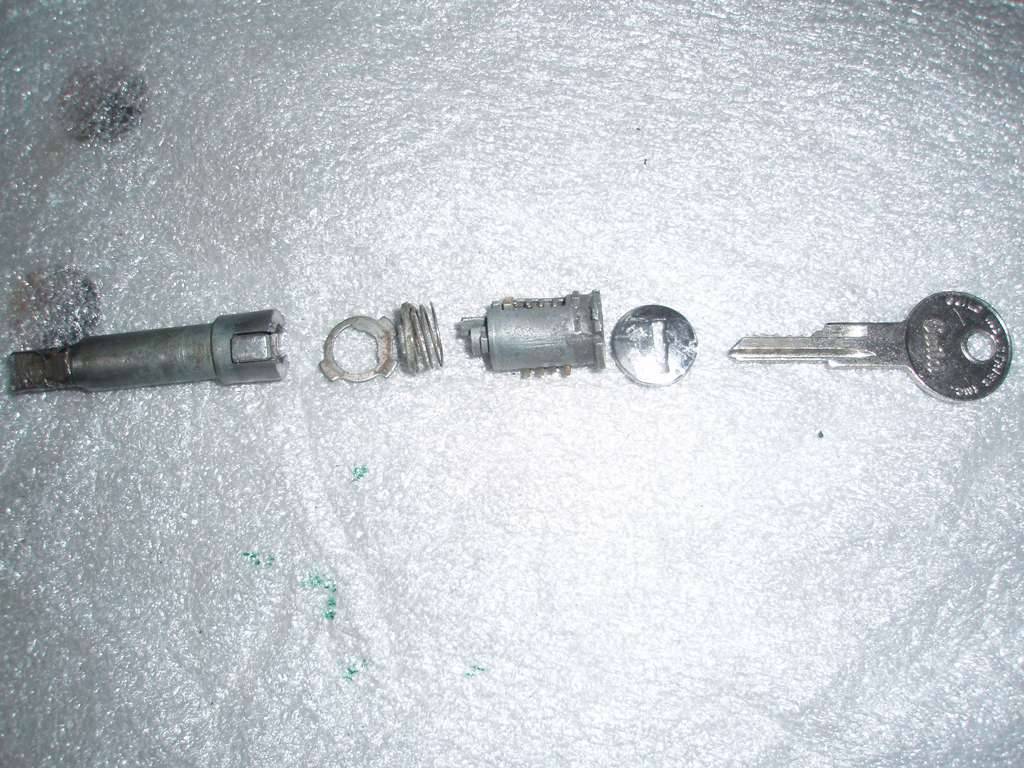 (52.41 KB) (52.41 KB)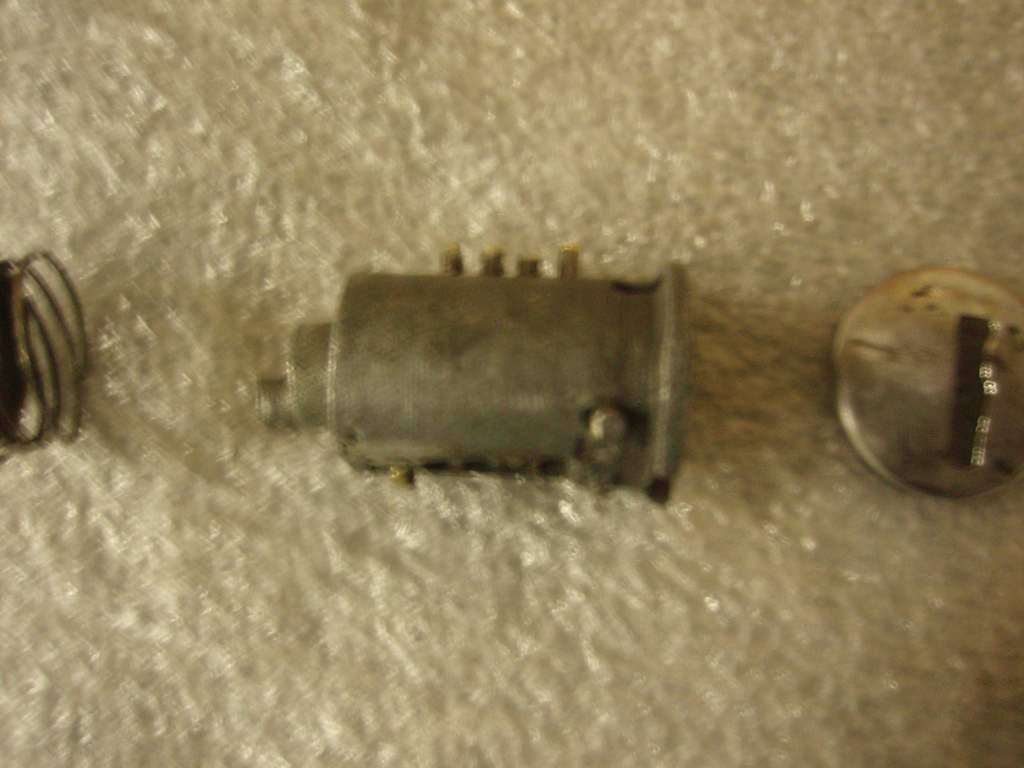 (46.13 KB) (46.13 KB) (52.08 KB) (52.08 KB)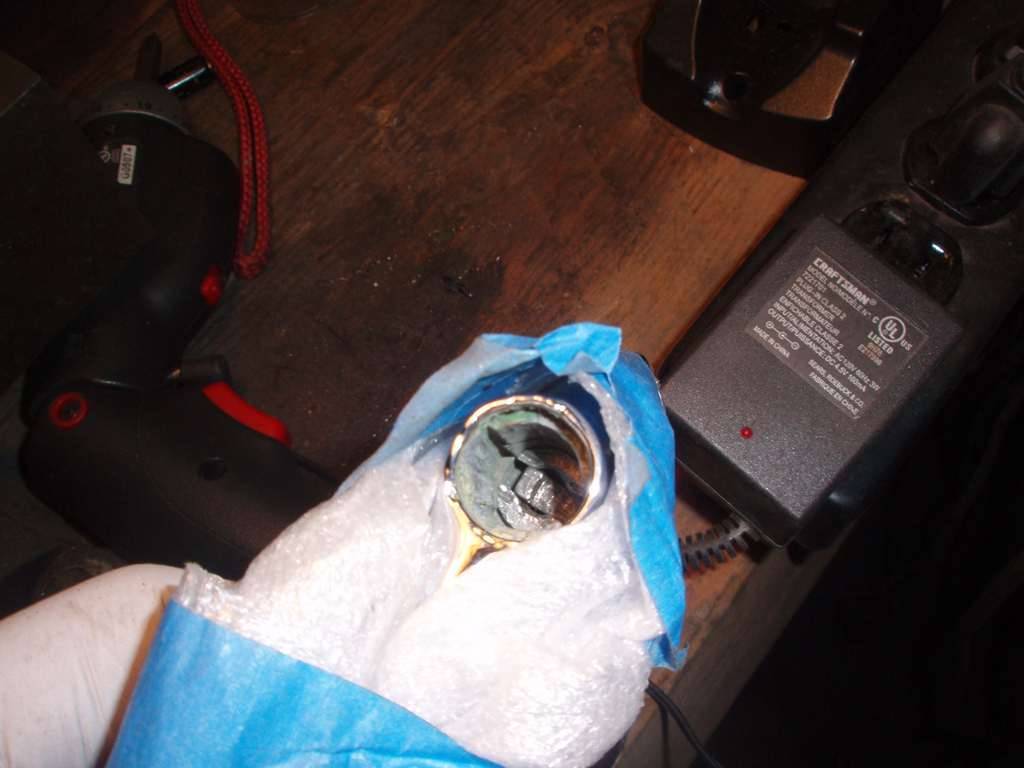 (50.68 KB) (50.68 KB)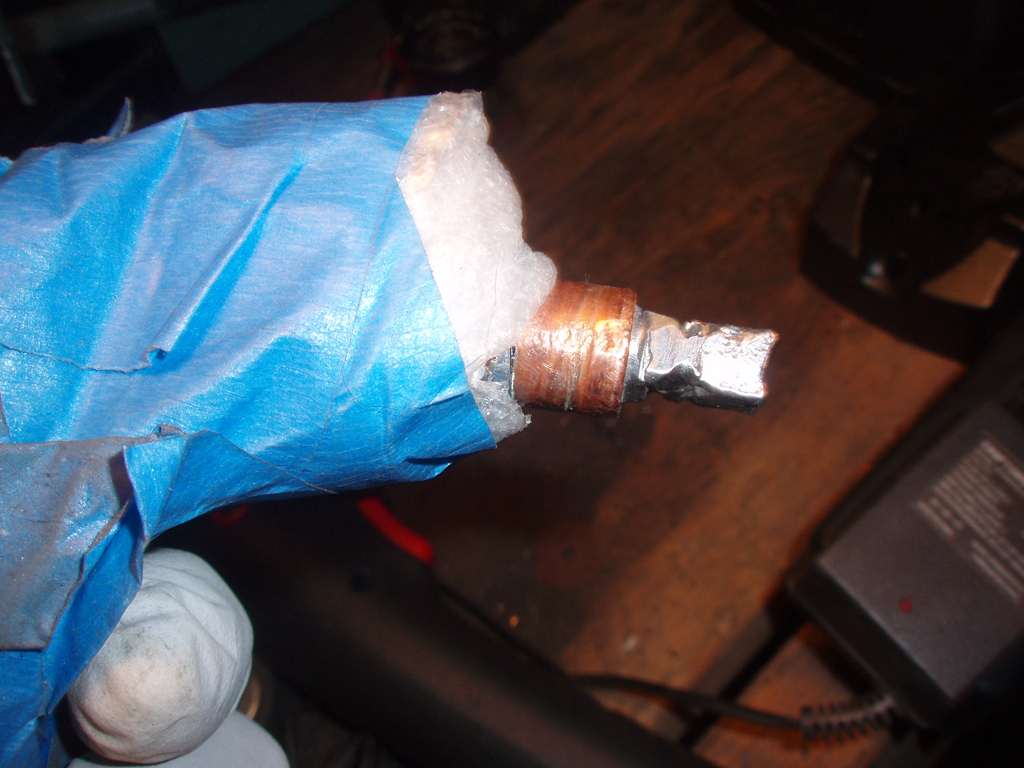 (47.09 KB) (47.09 KB)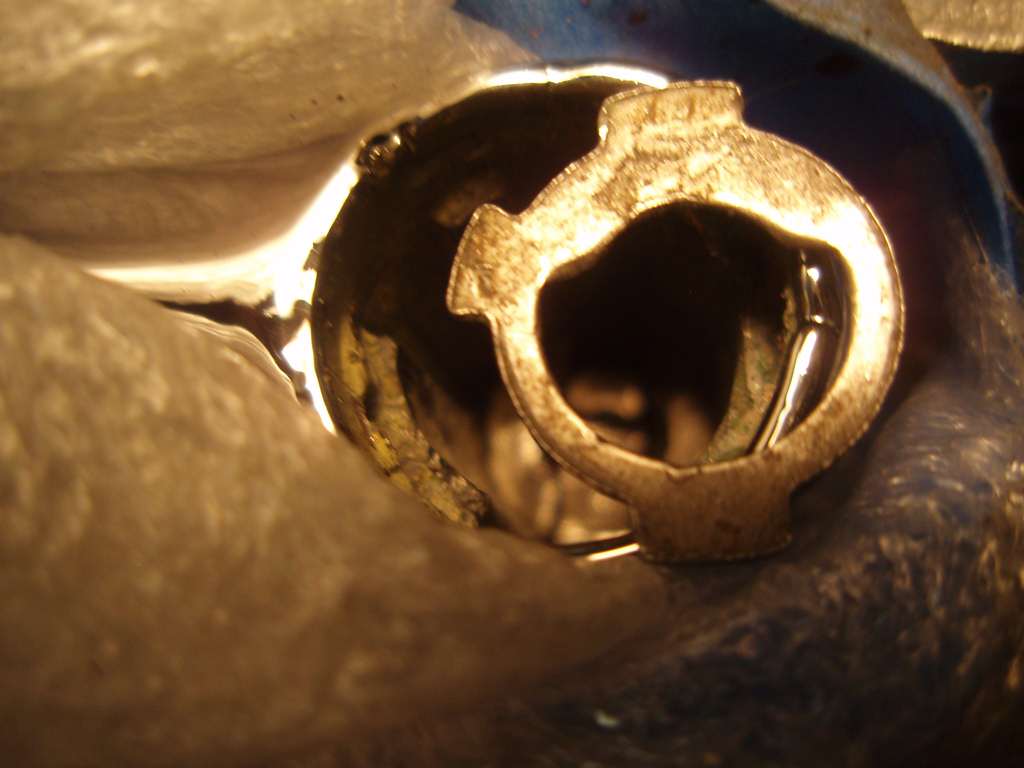
Posted on: 2011/4/11 23:39
|
|||
|
||||
|
Re: Locking door handle cylinder removal 1940
|
||||
|---|---|---|---|---|
|
Home away from home
|
Great article. I'm getting the picture. Also, I now know what to do to reassemble my handles. I expected I would need some machinery to pinch and dimple the stem back together. But first I have to get that darn lock out.
Thanks, Owen The name Owen Dyneto is some kind of generator. Thanks for generating that article. EDIT: One mistake I was making was pushing down but not pushing in.
Posted on: 2011/4/11 18:12
|
|||
|
||||
|
Re: Locking door handle cylinder removal 1940
|
||||
|---|---|---|---|---|
|
Home away from home
|
Will look for a fat paperclip at the office and take it home...liberate it.
And I can turn the key to 3 positions, start, 90, and 180 degrees. Something to do when I watch the news. Thanks, Howard. Joe
Posted on: 2011/4/11 16:45
|
|||
|
||||


