|
Re: 1936 Junior 120B
|
||||
|---|---|---|---|---|
|
Quite a regular
|
Thanks turbopackman for the comment on the engine color. I just don't like green and in my opinion, its not a color that coordinates with all body colors (i.e. maroon body and green engine :)
Also not into concours competitions these days, and driving myself crazy trying to meet originality standards right down to the required paint. I have to wake up each morning and enjoy the color choices.....as often repeated by many, the car is yours, do what you enjoy. Its like buying a house and fixing it for easy resale....the modified guys know this full well...modifying or ignoring OEM can often mean less resale value, Unless you find a buyer who is after what you did. Years of discussion will keep us all divided on this...but I appreciate those who are willing to take the time (and money) to restore a car to impeccable originality.
Posted on: 2009/10/29 8:22
|
|||
|
||||
|
Re: 1936 Junior 120B
|
||||
|---|---|---|---|---|
|
Quite a regular
|
John> I am interested in the oil filter and where it is mounted. It looks as if it will interfere with the starter in that location. It also looks to be too long to fit in the conventional location at the front of the engine over the generator.
We had a thread a while back about how the oil filter was an option (for $6 in the 30s?) and afterwards I started searching Ebay for some. Unless you ask for specific measurements, I had no idea it was that long until received. Live and learn. I have since removed and given to a 57 ford truck guy; that filter had a nice Fram insignia in gold on the orange paint background. I have since found a Packard original that needs blasting. You are correct, after restoring the starter and installing, the filter interferes..so I need to find another place, although there are 2 nice 3/8 holes at that location for something? Any idea what would have been mounted there? Thanks to all for your comments, always.
Posted on: 2009/10/29 8:11
|
|||
|
||||
|
Re: 1936 Junior 120B
|
||||
|---|---|---|---|---|
|
Quite a regular
|
The tread pattern on the tyre in the pic below is interesting, presume it's a period thing
Those were the tires that came on the car and although they seem to hold air,can't recall the maek, they are history after I buy new cokers.
Posted on: 2009/10/29 8:08
|
|||
|
||||
|
Re: 1936 Junior 120B
|
||||
|---|---|---|---|---|
|
Quite a regular
|
this is my first body-off venture...it goes pretty slow when you work a full-time job. Luckily I have the space for everything. Not bad for an old computer data analyst/insurance auditor, "geezer" who is having fun with this wonderful car.
Attach file:  (75.72 KB) (75.72 KB)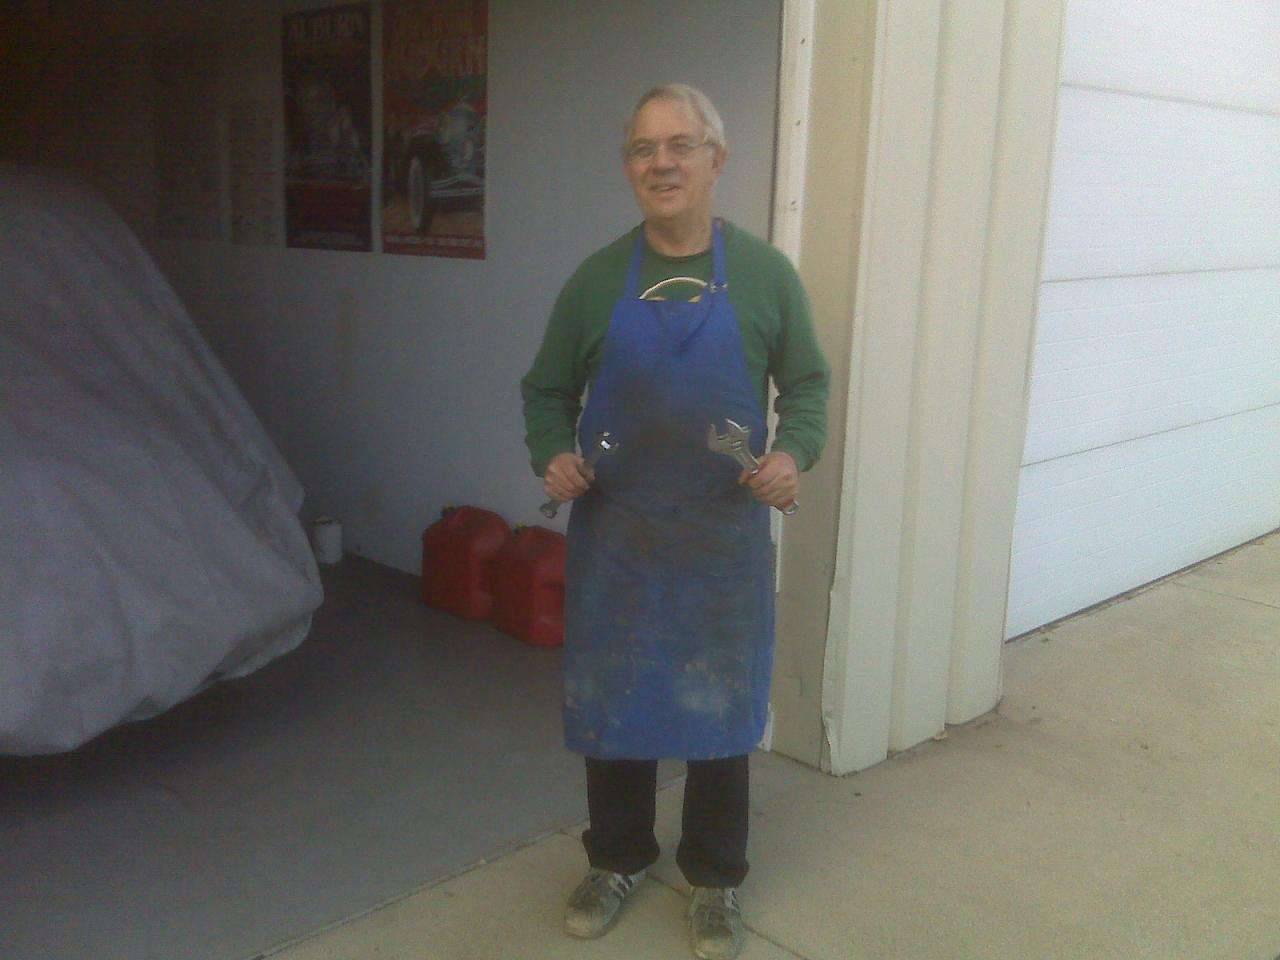
Posted on: 2009/10/28 6:08
|
|||
|
||||
|
Re: 1936 Junior 120B
|
||||
|---|---|---|---|---|
|
Quite a regular
|
I do a lot of non OEM stuff, whatever I prefer, as upgrades, probably comes from 20 years of trying to find mercedes parts in Germany. This winter I'll build a new wiring harness and insert an line reachable fuse box. Have no idea on the engine miles (as the car sat 40 years), but all indicators of condition, pistons, walls, valves, appears it should run fine. I believe the previous owner replaced the pistons in the 60s and it is probably in its second overhaul stage. Having the seats redone, new springs, etc.. in a dark cherry vinyl with pleats...the upholsterer cautioned me on the original broadcloth. new glass pieces came with the car at purchase. Fenders are in good shape with almost no dings. We are undercoating; they will be installed last after all mechanicals are working. We removed the doors for body painting and I have reworked the window mechanisms, new rubber on the vent windows....
So when complete, the body will be bonnie grey, with black fenders, dark cherry rims and interior and blue engine. After seeing the shell and door jambs painted, decided also to do the dash same color as the body. Attach file: (105.22 KB)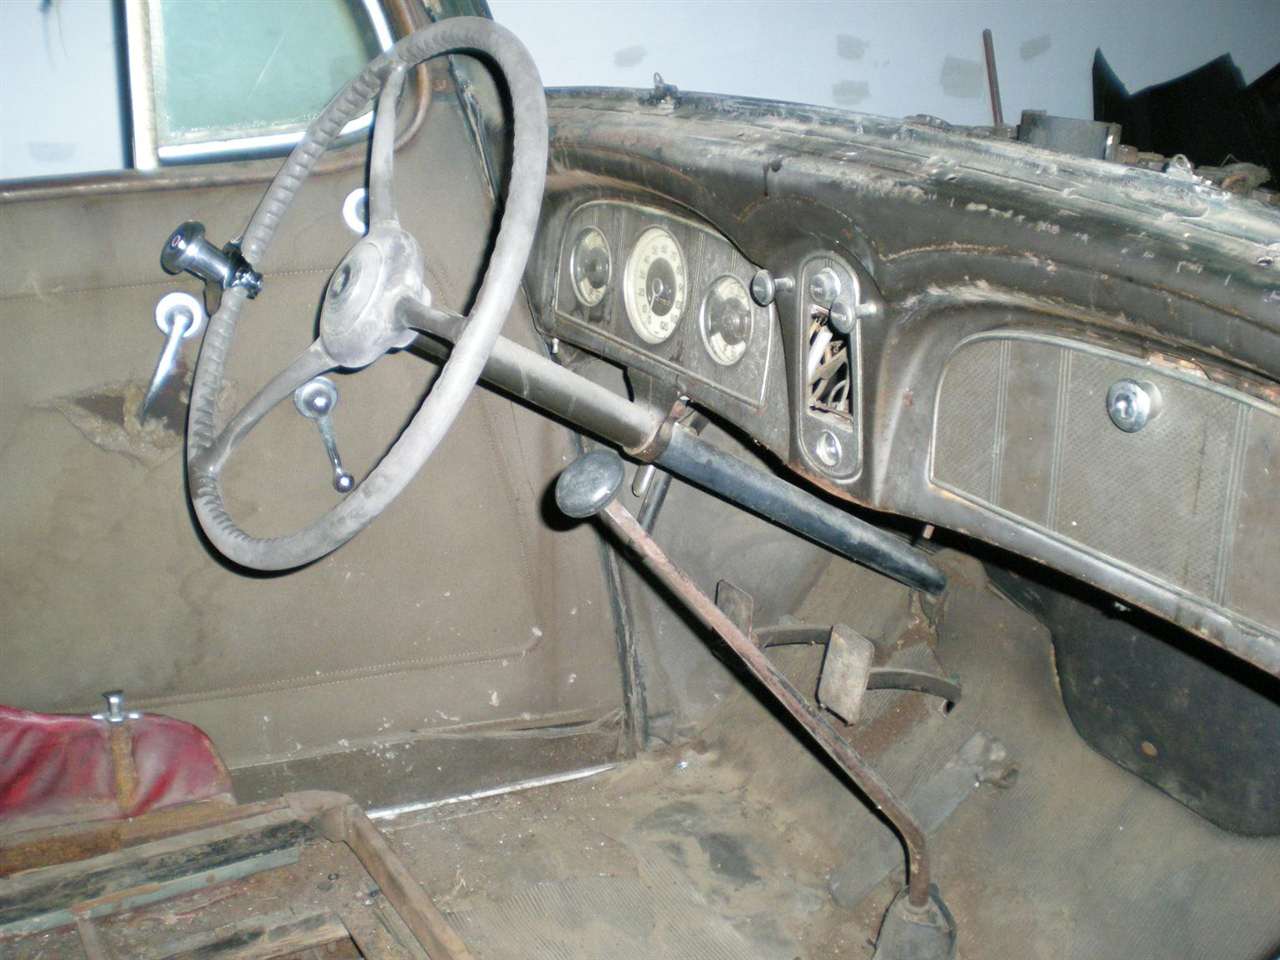 (146.42 KB) (146.42 KB)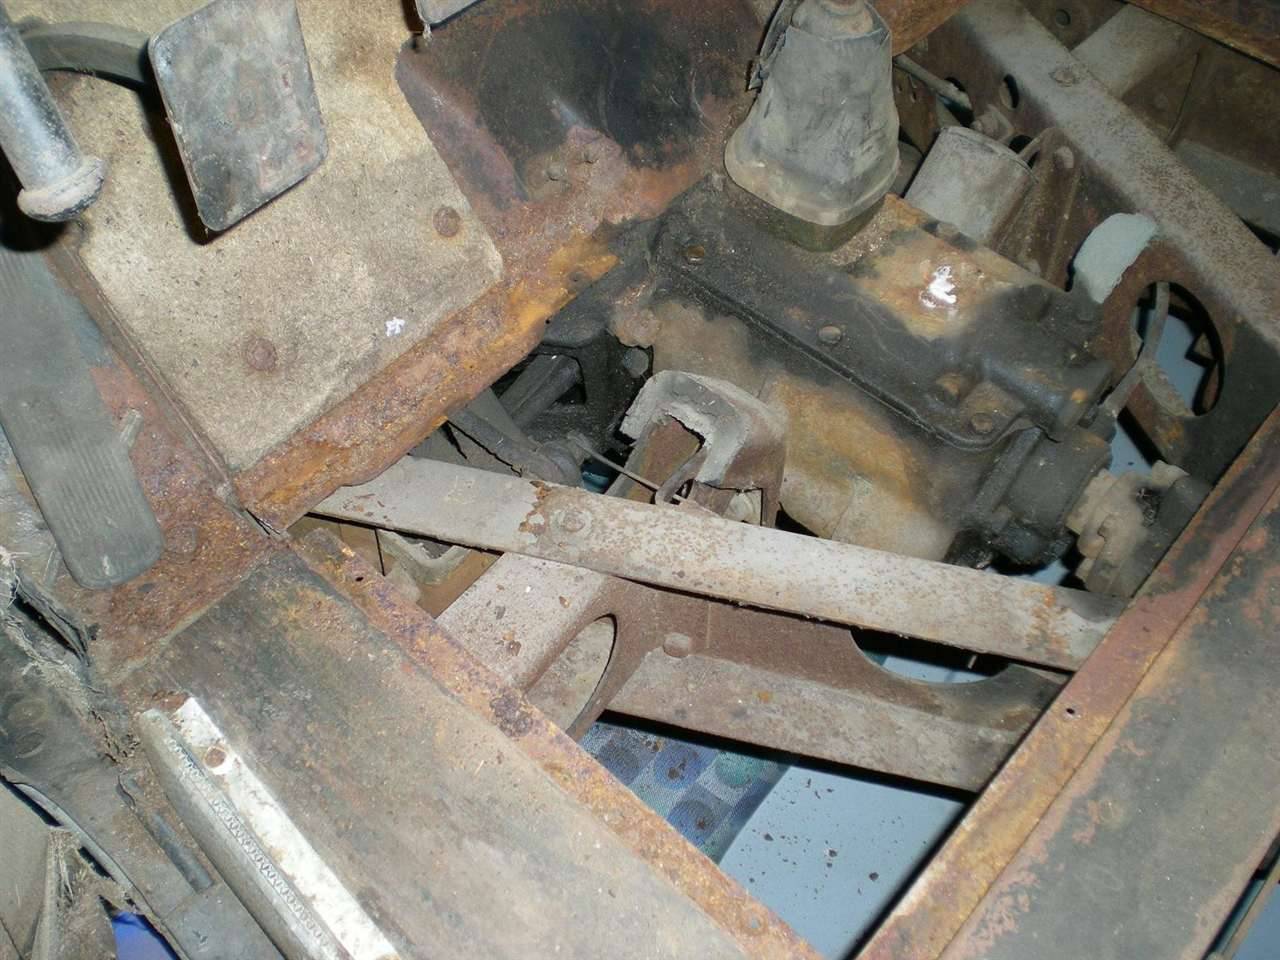 (78.07 KB) (78.07 KB)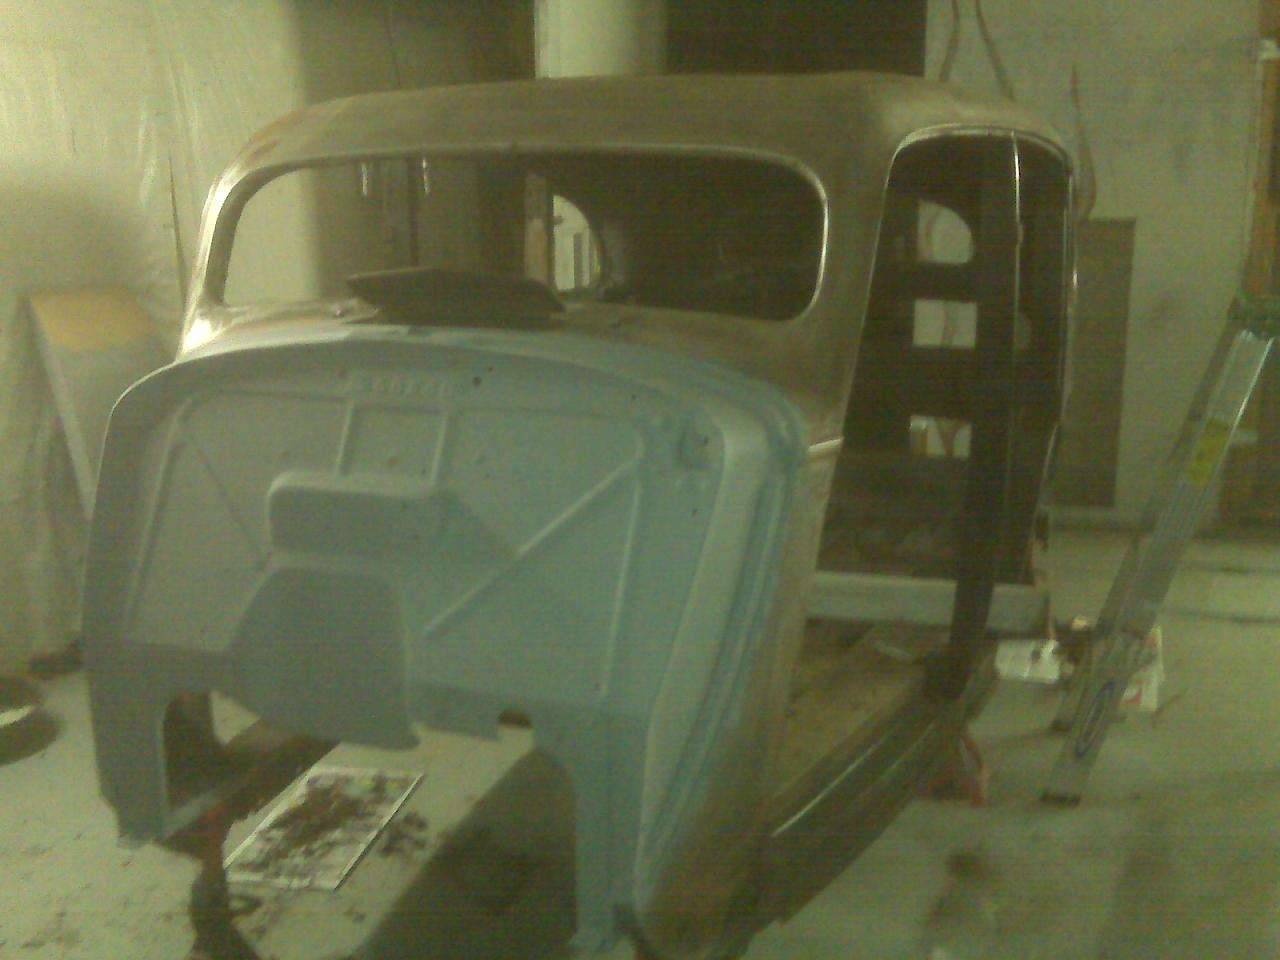 (80.88 KB) (80.88 KB)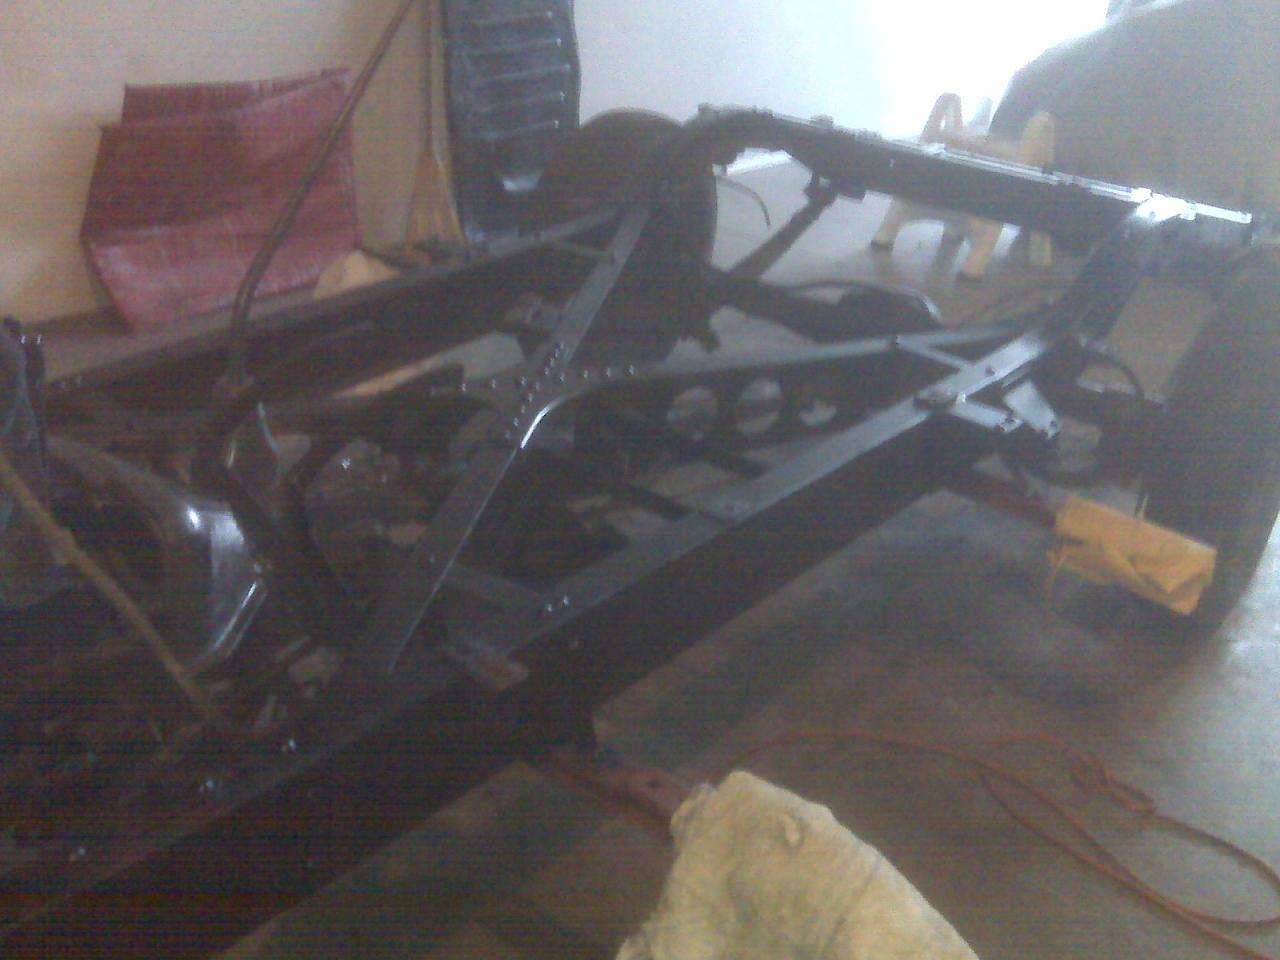
Posted on: 2009/10/28 6:03
|
|||
|
||||
|
Re: 1936 Junior 120B
|
||||
|---|---|---|---|---|
|
Quite a regular
|
the engine turned over when I bought the car, which all I had hoped. After getting it back in Kentucky, I removed the head, side plates, and cleaned up everything, got the pistons clean and the cylinder walls and rings, etc...looked fine and valves working (2 intake/2 exhaust) like they should. haven't fired it up yet, but taking a chance on it when I get the gas lines in and everything back on the engine (even with newly painted body shell back on) we can do a lot of testing. New muffler system coming tomorrow. Replaced the engine gasket, new head nuts, etc...cleaned up the oil pan and gasket, side valve gaskets, pulled the drive shaft and checked the U-joints and regreased. Pulled the water jacket tube and its in great shape.
Attach file: (122.79 KB) (129.12 KB) (129.12 KB) (131.55 KB) (131.55 KB) (115.55 KB) (115.55 KB)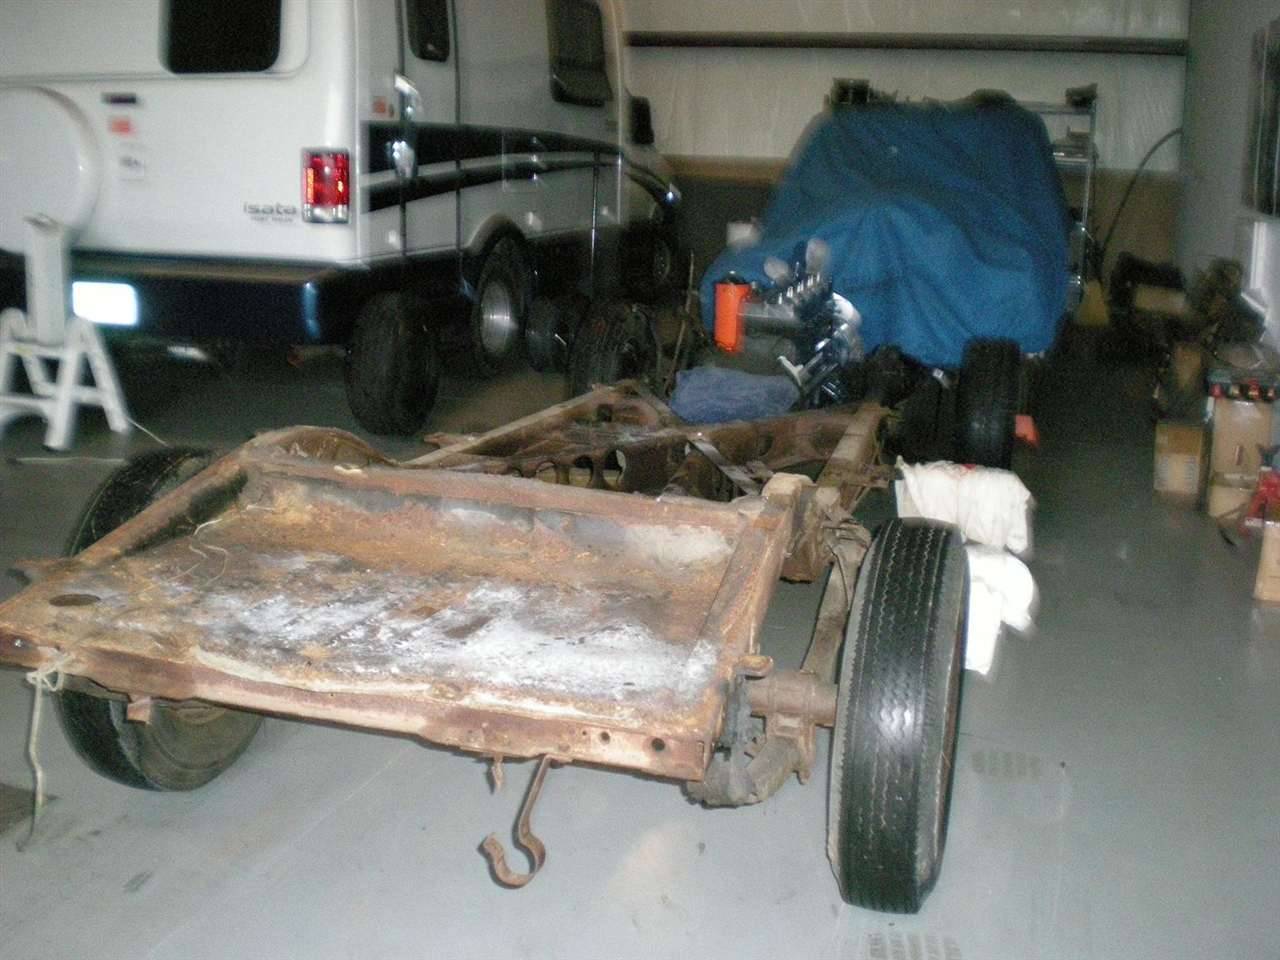 (112.00 KB) (112.00 KB)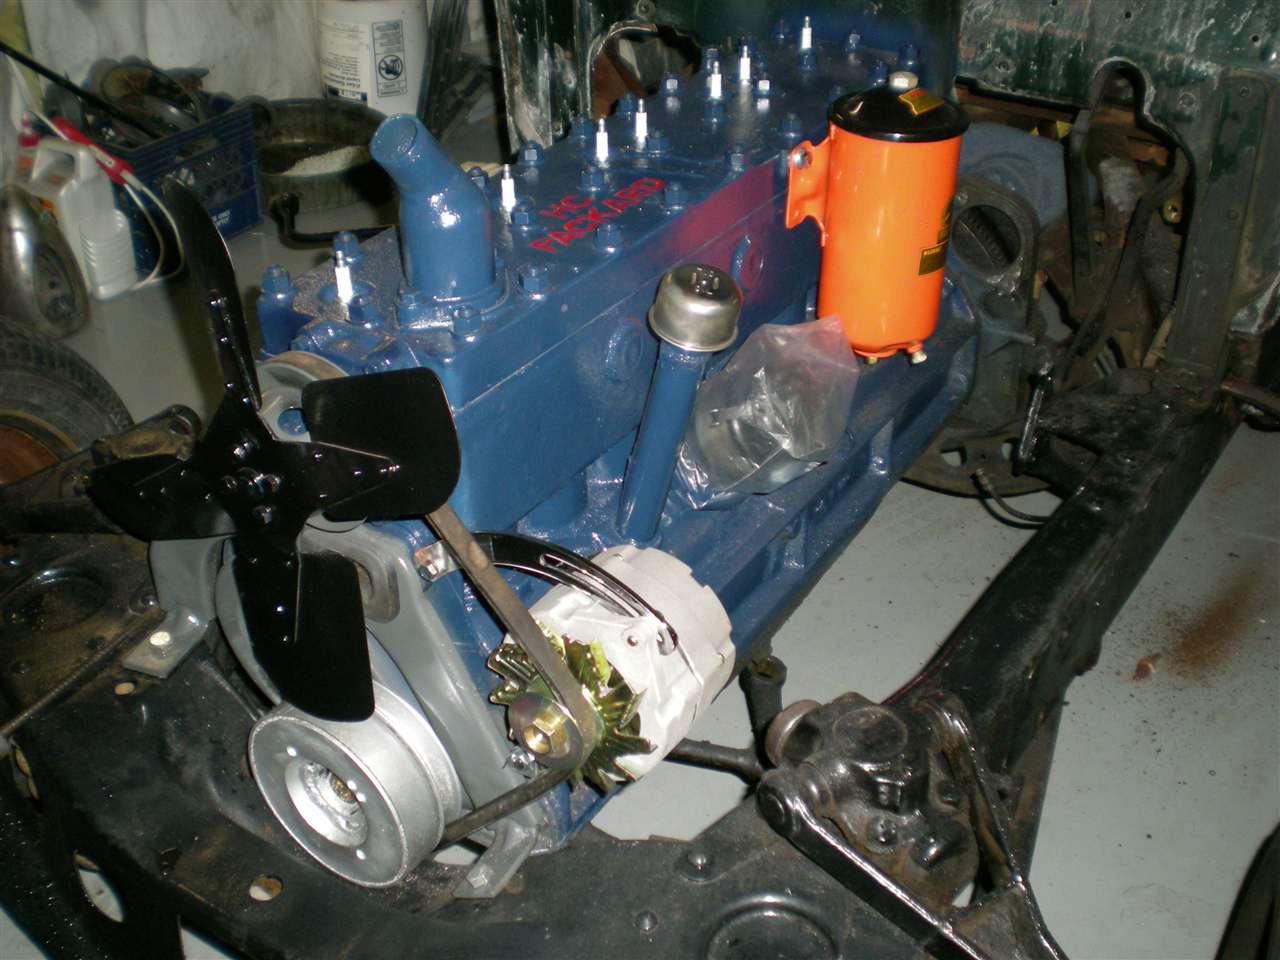
Posted on: 2009/10/28 5:53
|
|||
|
||||
|
Re: 1936 Junior 120B
|
||||
|---|---|---|---|---|
|
Quite a regular
|
A while back I replaced the timing chain for general purposes and timed the engine with the markers inside the bell housing after removing the starter. New engine mounts.
I started originally painting the engine grey, but after we decided on the body color I made a change to an un original blue as a contrast. I'm not found of green so OEM colors were not in my forecast, except the body color which is an original packard formula from mid 30s. The engine blue paint is a Cadillac 1939 color (you don't see it on many cars). I bought lots of new and used parts waiting to be installed at the right time....i.e. new dual action fuel pump (relative similar price to a rebuild kit), 6 volt alternator, I rebuilt the water pump (6 hours), rebuilt the master cylinder, rebuilding the carb, etc.. I bought some 18 gauge floor pans from midland and john (my co-renter) is welding in a new floor for me. Much of it was solid, but rusty and decided it would be nice to start with fresh metal. The Oak (?) base is in excellent shape. Overall the body was in good condition and frame; just needs lots of tlc and elbow grease. Attach file: (92.79 KB)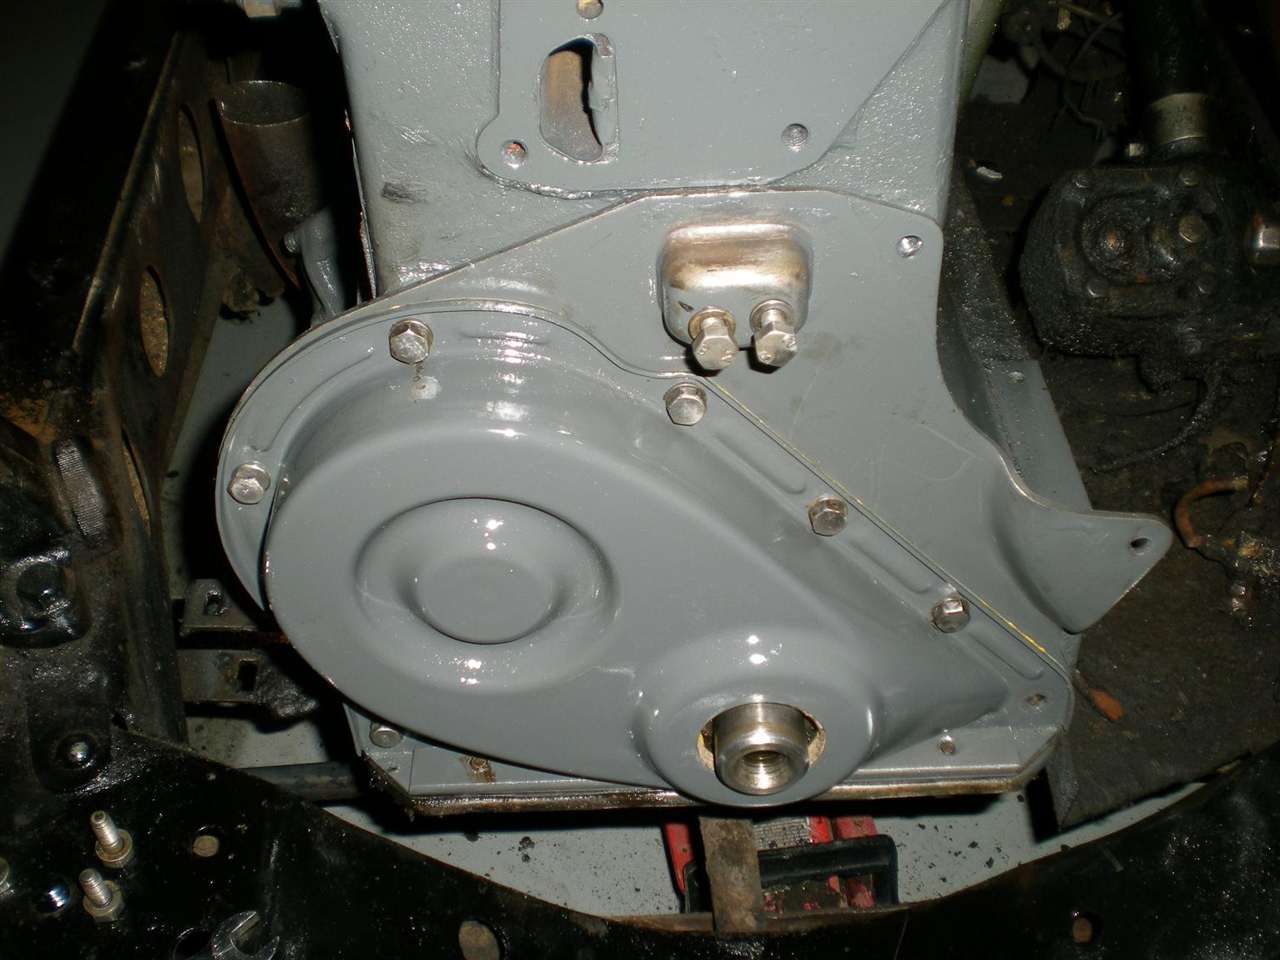 (129.72 KB) (129.72 KB) (102.78 KB) (102.78 KB)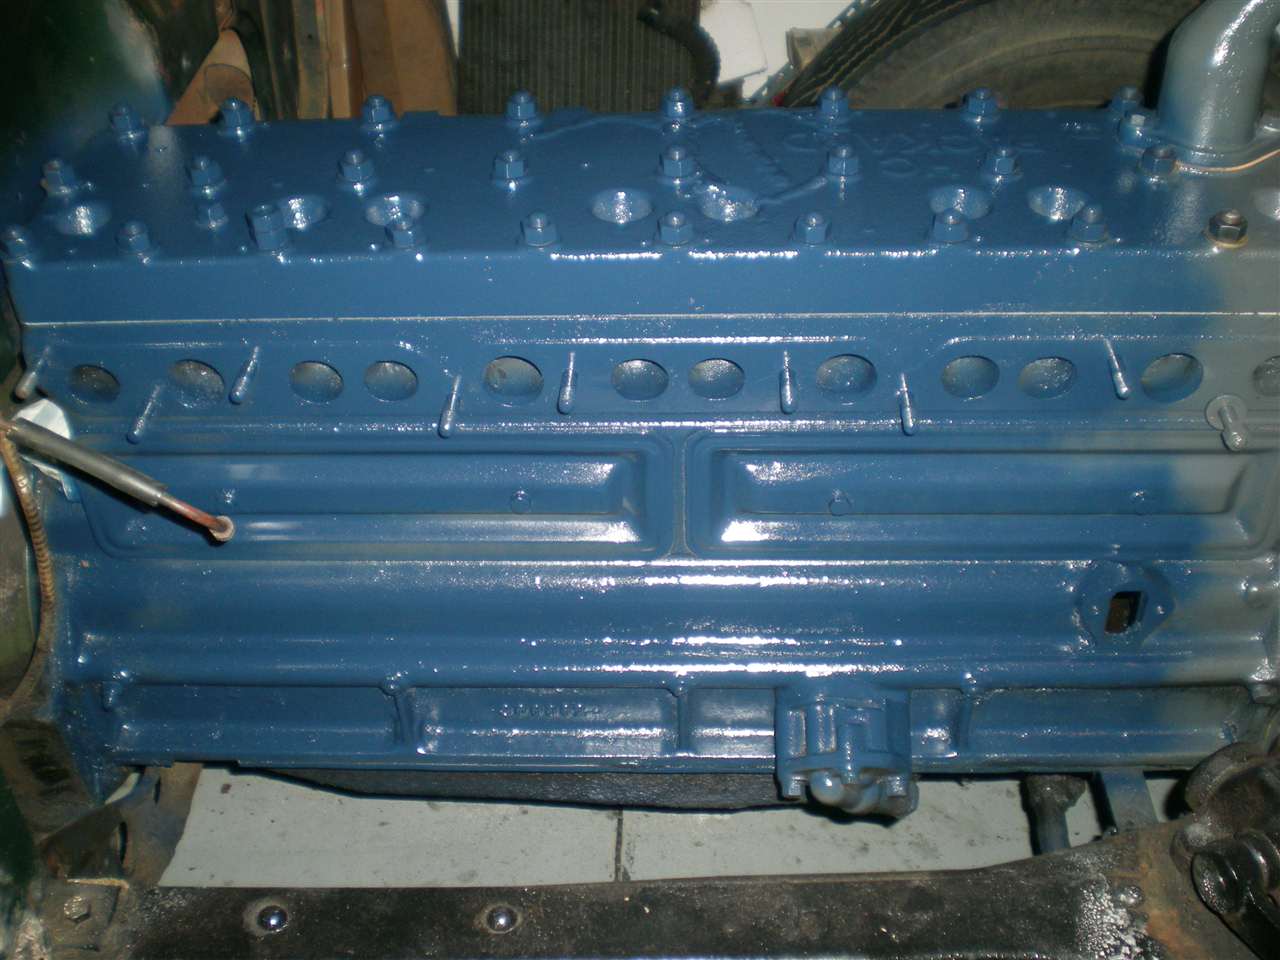 (124.05 KB) (124.05 KB)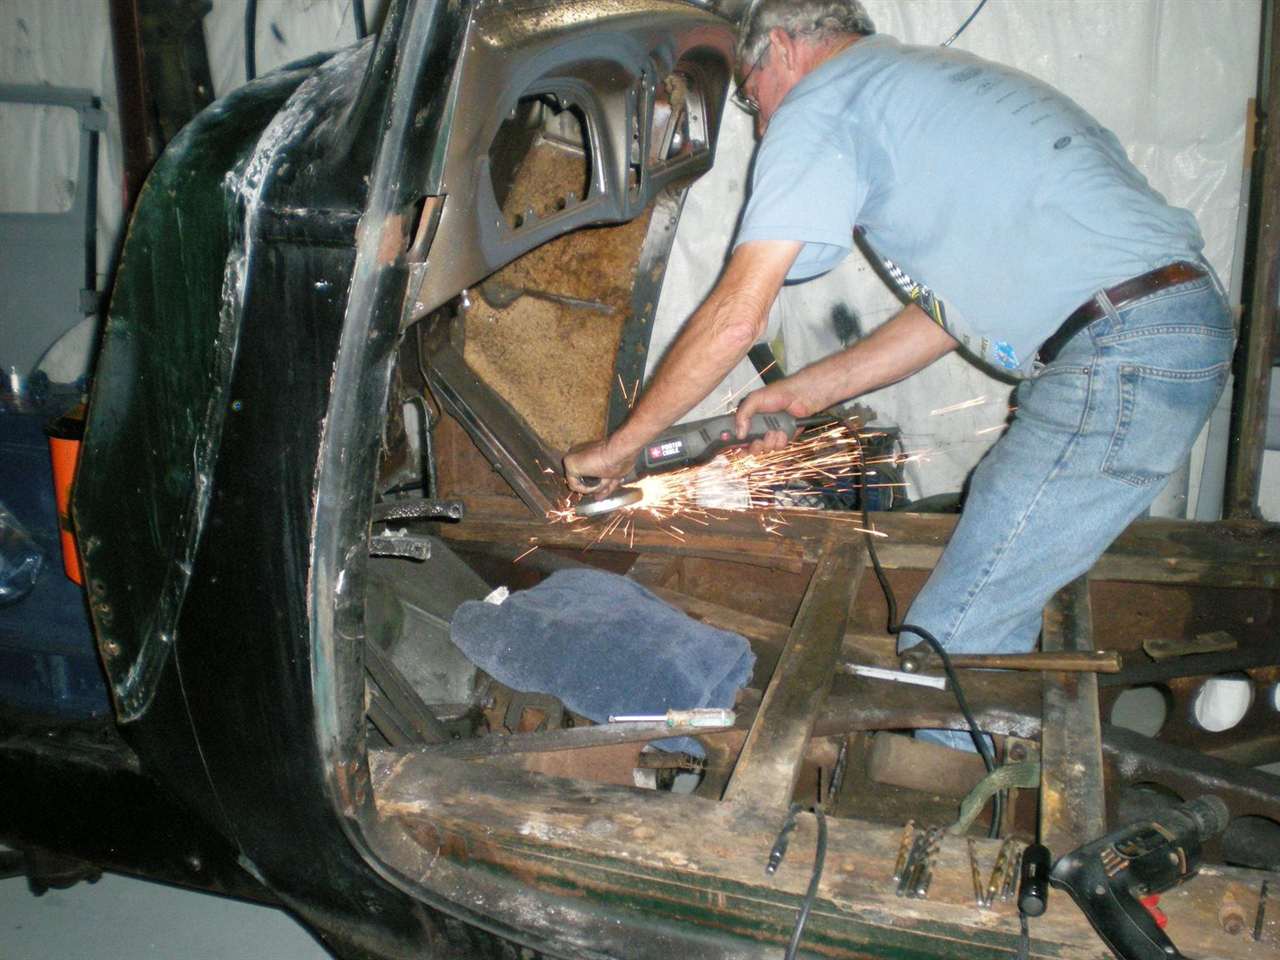
Posted on: 2009/10/28 5:43
|
|||
|
||||
|
Re: 1936 Junior 120B
|
||||
|---|---|---|---|---|
|
Quite a regular
|
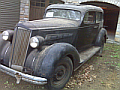
Here's some images, a few taken with a blackberry inside, so not that great, but you get the idea.
I decided on an original "bonnie" grey (a greenish grey) for the body color with black fenders. John, an old mustang guy, who co shares one of my units in kentucky (which has a paint booth) is painting the car for a very reduced price, as a favor to me. I knew he would do a good job taking it down to bare metal, priming, wet sanding, etc....the final coat is being shot tomorrow. Meanwhile I am working on de-rusting and painting the frame, attending to the brakes, new double flare lines, new gas line, new body support rubber. The tank is already clean inside, but the trasmitter needs work. New straps and bolts for the tank. About 2 months ago, after removing doors, and the body bolts, we removed the shell with an engine hoist (putting a 4x4 across the middle door pillar structure. I held up the back end while we rolled it. Its a dirty and dusty job working on the frame, so happy that the shell is in another unit and paint booth. Attach file: (77.91 KB)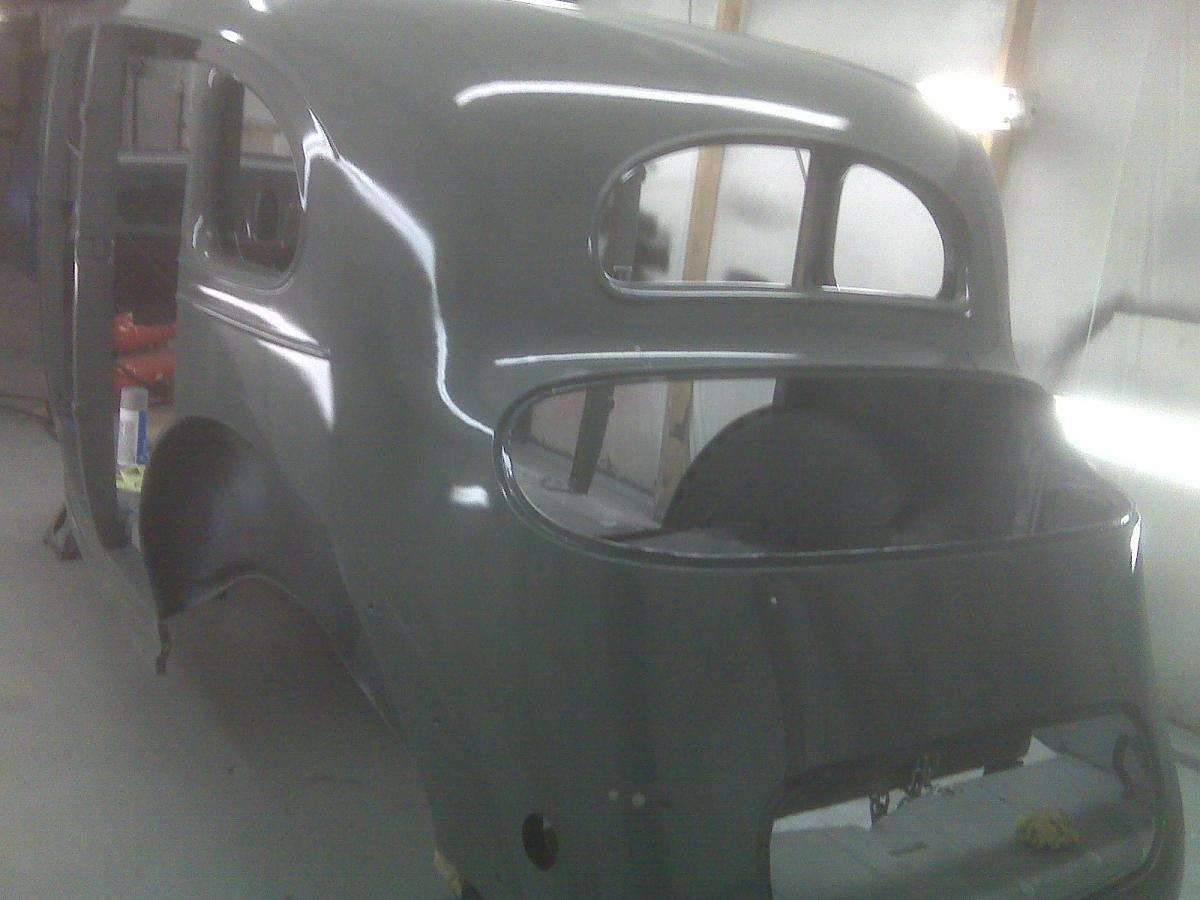 (59.36 KB) (59.36 KB)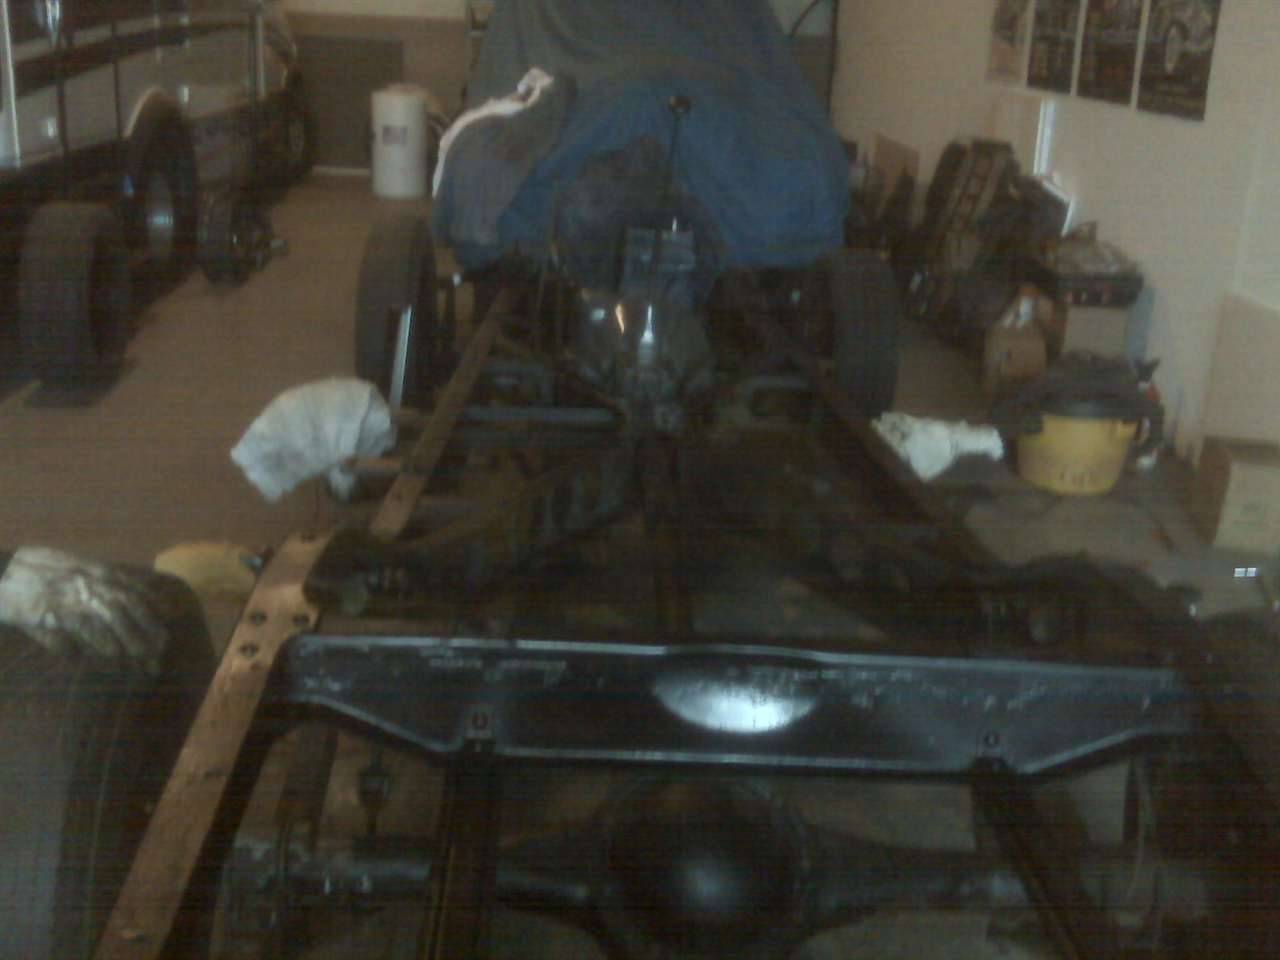 (115.37 KB) (115.37 KB)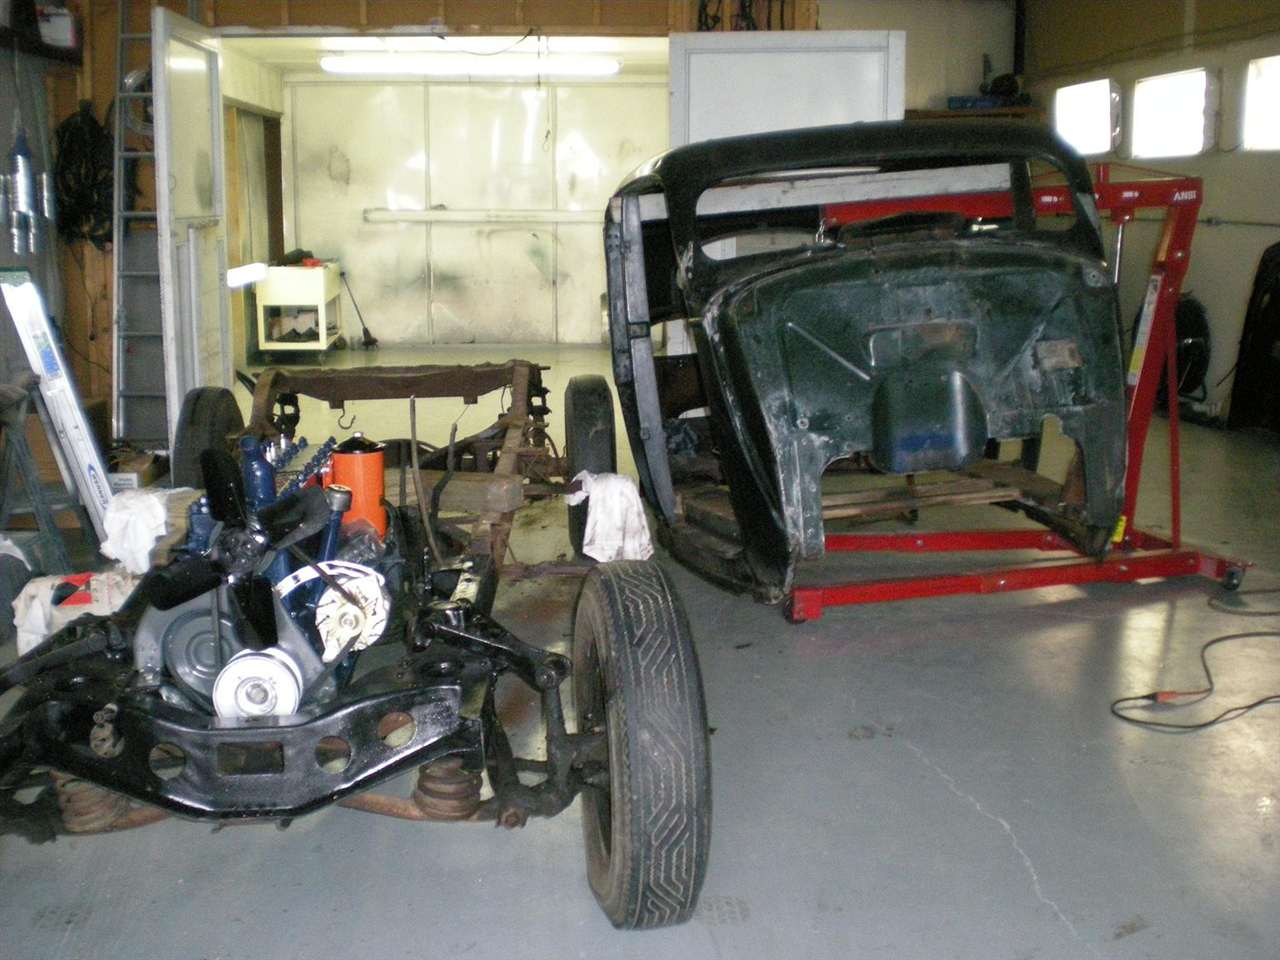
Posted on: 2009/10/28 5:36
|
|||
|
||||
|
Re: What Should Come First
|
||||
|---|---|---|---|---|
|
Quite a regular
|
I think the car's individual needs are a big factor, for example, I bought a car that sat for 40 years in a garage. As I tear into things, I am finding what I suspected (fuel pump totally encrusted), brake cylinders frozen, master cylinder rusted and frozen... yet, the car, because it sat so long has less body wear, suspension parts and steering parts are good, and just surface rust. This is my first ever body-off restoration; As an amateur, I'm doing most of the work and learning in the process. The painting of the shell and various parts is being done by my co-renter and he is keeping me in the loop of every step, bare metal, priming, etc...we removed the shell from the frame, and I'm working on brake lines, muffler system, fuel system, etc...before everything assembled. These are once in a lifetime experiences, so take your time, step by step, don't cut corners....and enjoy yourself :)
Posted on: 2009/10/22 13:45
|
|||
|
||||
|
Re: 1937 Packard Six Light Switch
|
||||
|---|---|---|---|---|
|
Quite a regular
|
To remove the center section of the dash do I just remove the bottom screws or is there something behind the dash as well?
Each section, the gauge cluster and the section with the ignition, start, and light switch, have small bolts behind the dash holder each item (requiring a socket end with ext to bypass other stuff in the way. the nuts are not torque tight so a nut driver will probalby handle it). The light switch with its several fuses serves the function of a fuse box for several items. I realize the switch was probably a new innovation in the 30s over early ones, but it really is convoluted. Since everything on my dash is completely removed for repaint and re-wire, I'm going to put an in-line 6 volt fuse box and separate a new harness accordingly to each item, rather than use the current light switch OEM. This will make tracing problems much easier in the future. Packard used a more simplified switch and separate fuse box later. Really like the 2-tone on your recent purchase. I'm going similar with grey and black.
Posted on: 2009/10/5 14:02
|
|||
|
||||


.jpg")


