|
Re: Connecting Rod Alignment?
|
||||
|---|---|---|---|---|
|
Just can't stay away

|
Update to the Update,
Dave (Owen Dyneto) is correct, using the parts listing from this magnificent web site I found that there are two types of connecting rods used for cylinders #1-3-5-7 and #2-4-6-8. I would think the difference is the side clearances; how much babbitt is on each side face with the basic steel rods being identical. I looked at my bottom end and I don't see the pattern. Some of my rods are evenly centered in the babbitt and some have more babbitt on the back face. This babbitt spacing isn't consistent with even or odd numbered rods. I will have look at which rod (tops) aren't centered in the bushing and see if there is a correlation with the odd even rod theme... Thanks Dave!
Posted on: 2008/4/6 21:27
|
|||
|
||||
|
Re: Connecting Rod Alignment?
|
||||
|---|---|---|---|---|
|
Just can't stay away

|
Guys,
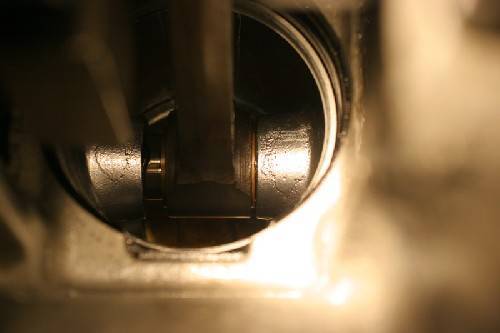
Thanks for all the feedback, here are a few updates -Yes I have the red covered manual, it's mostly worthless. It does show a rod alignment jig that checks the piston, wrist pin and connecting rod as an assembly, with no more details. -My connecting rods are all shimmed, as if the babbitt was machined too tight and somebody hand cut crude .001 or .0015 brass shims to open it up a bit. It's still too tight if I remove them, around .001".0015" by plasti gage. None of my mains have been shimmed but then I haven't checked them all. -I am certain Dave is correct in that the ultimate front to back location of the rod is controlled by the side faces of the connecting rod babbitt. -I haven't checked to see if there are different odd and even rods. Oddly, the odd rod is in the right place... -I don't know who made the pistons but I have posted their photo here, maybe somebody can tell me as they are like most other parts, unmarked. -#2 is the only piston/rod assembly I have removed. I can tell you that it's wrist pin is snug, both in the piston and in the bushing, it takes a little force to push it and it won't slide out on it's own. This engine was running with 40+ psi of oil pressure and none of the bearings looked bad, even the remainder of the cap that failed looked good. The knock was only associated with the clutch. When the engine was cold it would knock the first time you pushed in the clutch. It would knock at a diminished volume after you let up on the clutch and would continue to do so until the engine warmed up. It wouldn't knock again until the engine was stone cold and yes, I have looked at the clutch, pressure plate and throw out bearing. I believe the knock was in the area of #4 or #5 piston. This inside of this engine is tight, and clean. I really don't want to take it further apart than I have to. I'm just looking for a little knowledge on the rod alignment issue. I would prefer to put if back together, and save my pennies for a major rebuild if I can safely drive it for a season or two. Thanks again, Scott PS: PackardV8, if you PM me your E-mail address, I'll send you a digital recording of the knock... Attach file:  (17.23 KB) (17.23 KB)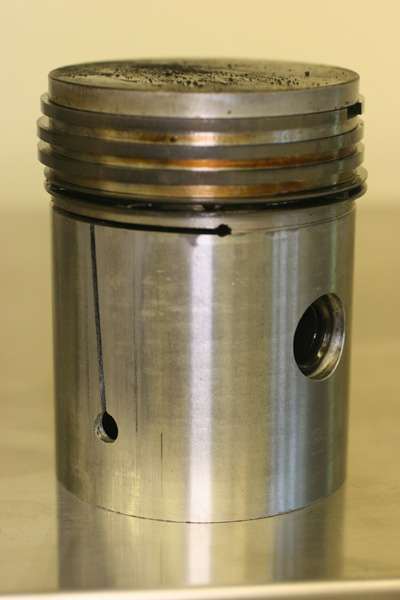  (18.89 KB) (18.89 KB)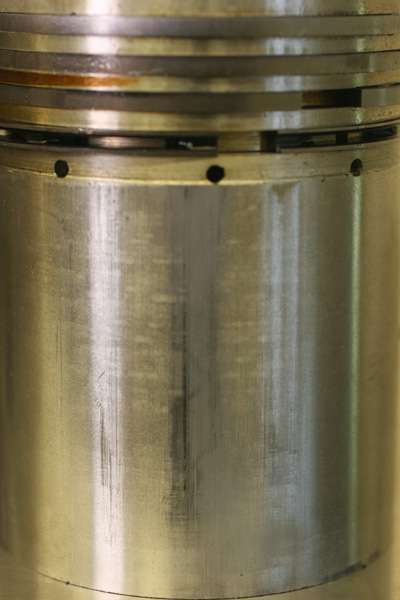
Posted on: 2008/4/6 19:46
|
|||
|
||||
|
Re: Connecting Rod Alignment?
|
||||
|---|---|---|---|---|
|
Just can't stay away

|
I believe the rods to be correctly installed. All eight rods are numbered sequentially 1-8 starting at the front with their number stamped on the driver's side of the cap and rod as they should be. There is one rod that appears to have been "borrowed" from another engine and re-numbered which I would expect in a 78 year old engine.
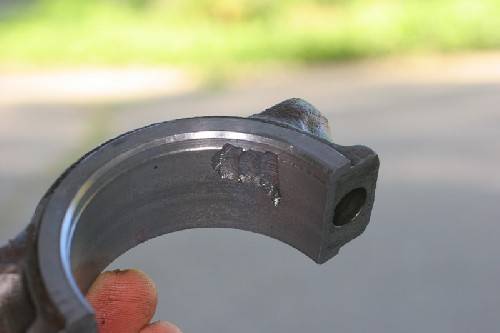
So I guess my best plan of action is to pull the piston with the rod that's farthest off center, check the rod for "true" and the piston for abnormal wear. I suspect the problem stems from where the rod sits relative to the side faces of the babbitt. I had to send the #2 rod off to the shop to repair a babbitt failure in the cap (picture). I am trying to avoid new rings so I am reluctant to disturb too many pistons. This engine has only about 9,300 miles on a fresh rebuild so I was planning to re-use the #2 rings. #2 piston shows only light scuffing on the sides of the skirt and the bore looks great (no ridge at top).
Posted on: 2008/4/6 7:15
|
|||
|
||||
|
Connecting Rod Alignment?
|
||||
|---|---|---|---|---|
|
Just can't stay away

|
Packardites,
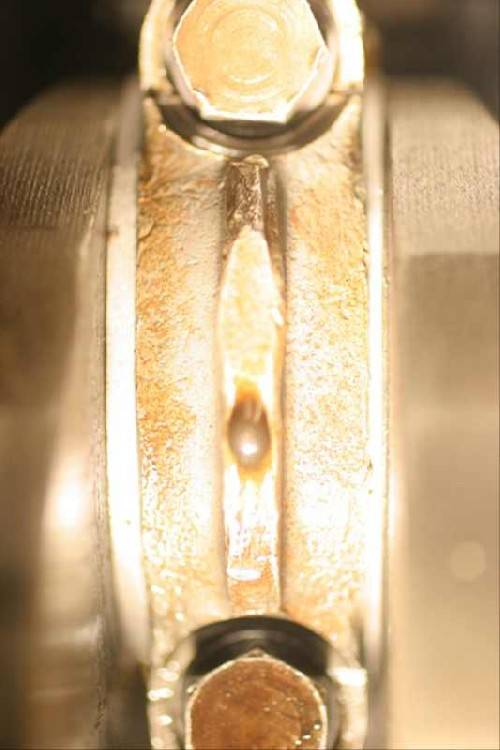
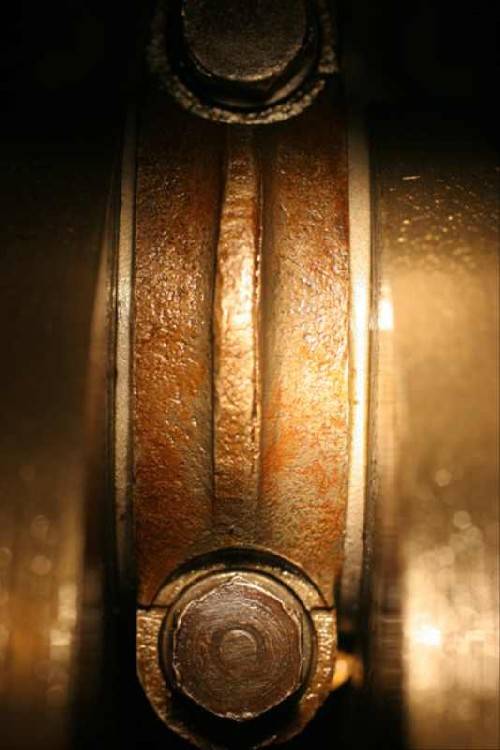
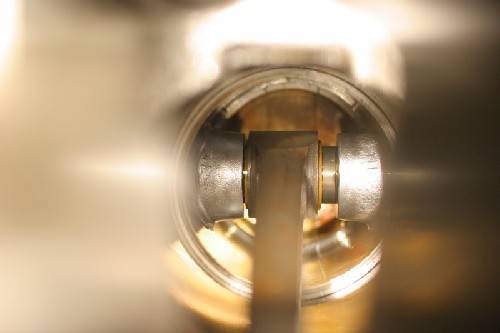
As you can tell from my previous post (crank shaft end play) I have the bottom end opened up on my 30' 726, I'm trying to track down a transient knock. Best as I can tell with the engine together, I think my end play is between .004" and .005". The rod bearings all plasti gage at .002" and everything else on and around the crank shaft generally looks good. Today I discovered a couple of my connecting rods are not centered on the wrist pin (photo). The Packard service manual says that "Mis-alignment produces knocks and vibration." It shows an alignment fixture but not a whole lot else. What's the deal with connecting rod alignment? Is there a specification and who does this kind of work? Thanks in advance, Scott
Posted on: 2008/4/5 20:22
|
|||
|
||||
|
Re: A Good Tool Box?
|
||||
|---|---|---|---|---|
|
Just can't stay away

|
I am watching our local Craigs List for a used 40" Snap On set... There have been some black and blue boxes listed but I really want a red one. If I get impatient, my fall back will be a Waterloo set which will cost about as much as the used Snap On boxes.
Scott
Posted on: 2008/3/19 6:58
|
|||
|
||||
|
Re: Help: Timing Marks on 733
|
||||
|---|---|---|---|---|
|
Just can't stay away

|
Tom,
Sorry to say a 6v fuel pump lurks in my vacuum can so I am of limited help here. If I were to guess, I would say yours is pulling enough of your vacuum to give you "leak" symptoms. No clue on #2. I would have to putz with the idle mixture etc... If I were you I would put an electric pump in at least temporarily so you can rule out some things... Scott
Posted on: 2008/2/25 7:49
|
|||
|
||||
|
Re: Distributor?
|
||||
|---|---|---|---|---|
|
Just can't stay away

|
I am sorry to say I can't help ID your distributor however, I had a similar problem with my 1930 when the voltage regulator went bad and it wasn't charging correctly. Same thing; it would go so fast and it started breaking up. turned out it just didn't have enough juice to charge the coil at the higher rpms. The tip was that it got worse when the headlights were on.
Scott
Posted on: 2008/2/25 7:42
|
|||
|
||||
|
Re: Help: Timing Marks on 733
|
||||
|---|---|---|---|---|
|
Just can't stay away

|
Tom,
I have difficulties putting my finger over the spark plug because I am out in front of the engine cranking so I just make sure the rotor is pointed at the #1 terminal in the distributor. As for the marks. UPDC is the old school version of todays TDC and that looks like yours is pretty well marked. Your spark mark should be 29/32" before the UPDC mark so you can use a piece of paper clipped or folded to 29/32" to see which mark is right. That's my  Scott
Posted on: 2008/2/24 20:51
|
|||
|
||||
|
A Good Tool Box?
|
||||
|---|---|---|---|---|
|
Just can't stay away

|
Hey All,
Does anybody out there have a recommendation for a good, quality made set of roll around tool boxes? I think I need to qualify this... I am sure that Snap-On would fit the bill nicely but I am just a little more budget minded. I am looking for a set of big roll around boxes that will last the rest of my days and not break the bank. The slides on my 25 year old Craftsman boxes are about worn out and I have outgrown them (more tools=good). I appreciate all your input. Scott
Posted on: 2008/2/21 9:38
|
|||
|
||||

