|
Re: Jeff's 48 Custom 8 Victoria Project
|
||||
|---|---|---|---|---|
|
Home away from home

|
The last few days on the Packard have been a bit nerve wracking. It started with the too-short coolant pipe. I got a longer piece of straight hose at Napa to install between the pipe and radiator to make the pipe reach the water pump. Once I got the cooling system filled, little green spots started to appear on the floor. The repop old style clamps weren't strong enough to seal up the stiff hose from Napa. Once they were replaced with worm drive clamps, I could see that the upper connection to the pipe was leaking too. More worm clamps to the rescue. The coolant pipe looks nice, but it doesn't have the bulges at the ends like an original pipe does to help it seal better. It's just stainless exhaust tubing, bent on a pipe bender from Kepich Exhaust.
Next, the generator had to come back off in order to attach the battery ground cable. Some friends of mine run an electrical shop and they partially made up the cables out of 2/0 welding cable. I cut them to length and installed the eyelets. On the convertibles, there's a second cable that runs from the ground connection to the side of the hydraulic pump, along with a braided strap to jump the connection across the rubber insulator to the body. I added an additional 10 GA wire to the ground terminal on the junction block for the lights. After replacing the fuel sender gasket and wires, I put the tank back in the car. I cut a mangled section out of the fuel line and jumped the gap with a piece of rubber line. The clips that hold the line to the frame had rusted apart, and I was able to steal some similar ones off of one of my Chrysler parts cars. I filled the trans and overdrive with non-EP gear oil. Filled the engine with 10W-30. I decided to go with this because I have some pretty tight bearing clearances on the mains. I rounded up a few gallons of fuel and poured it in the tank, reserving a bit to fill the carburetor bowl. The big moment was finally here! I put the key in the ignition and gave it a twist.....silence. That was good, since I was listening for any short circuits sizzling away. Next I pressed down on the gas pedal, and.....silence! That's not good. Some investigating revealed that I didn't have enough linkage travel to engage the starter switch. I decided to jump the switch for now. I jumped the switch and.....The motor turned over! Great so far. I cranked it for a bit, then put some fuel in the carb and gave it a shot of ether for good measure. Crank, crank, crank...no start. After some checking, I found that I had no spark. Turns out that I hooked up the Pertronix incorrectly. I fixed the wires, cranked it over again, and still no spark. I removed the coil secondary lead and plugged one of the plug wires directly into the coil, bypassing the cap and rotor, still no spark. If I wiggled the Pertronix module, I would get a spark. I tried some other tricks to get it working, but could not. I don't know if I fried it by hooking the wires up backwards or if it's just a defective unit. Back in went the points and condenser. I have to say that this style Delco distributor leaves a lot to be desired. The breaker plate riding in the plastic bushings is a real flimsy set-up. I cranked it again, and now we have spark. Put the cap and rotor back on. Crank, crank, crank....still no start. Getting worried now. Decided to check my spark timing...Rookie error!...distributor is 180 out. Spun the rotor 180, another shot of ether, crank, crank, sputter, sputter. Added some more fuel to the bowl. One more shot of ether, crank, crank, crank...nothing. Hmmm, now what? Gave the dizzy a bit of a twist, another shot of ether, crank, crank, crank, sputter, sputter, vroooom, and away she goes! WhoooHoooo! Check situation...fuel leaking from carb, crap!.....grab wrench and tighten big nut on top of carb as much as deemed safe to do. Leak is now down to slight wetness. What's next? Lifters are ticking a bit...will these off-shore repop lifters quiet down? Look outside...Boy that's a lot of smoke bellowing out of the exhaust!....Doesn't seem to be clearing up. Maybe it really did need to be re-bored....20 minutes later, lifters quiet, but still smoking a lot....Getting worried again....10 more minutes, still smoking, cam should be good now, time to drop down the rpm, still smoking....still worried. Another 10 minutes goes by...smoke finally thinning out. 5 minutes...smoke gone, things are looking up...Hey, what's that puddle of oil under the engine! Well, not the smoothest of start-ups. Overall, the engine sounds really good. It's nice and quiet, and smooth running. All is not happy though. I've got a pretty bad oil leak at the front crank seal and oil pressure is not up to spec. I didn't like the looks of the design of the front seal when I first lay eyes on it. There are other 356's out there not leaking, so I probably did something wrong, though not sure what. I used the original seal retainer with the new cork insert that came with the gasket set. I think there's only one company that makes gasket kits for this engine, so parts brand shouldn't be an issue. The set was probably at least ten years old, but seemed to be in good shape. Any words of wisdom would be greatly appreciated. My oil pressure maxes out at 35psi and drops to 15 at warm idle, but I suspect that it goes down close to zero at hot idle. Just after breaking in the cam, the temp was over half way, and when I dropped it down to idle I could hear a bit of lower end noise and picked up a very slight bit of lifter ticking, plus the dash gauge was reading close to zero. I know that my bearing clearances are good, so it looks like the pump must have some wear. I pulled it apart for inspection way back. It didn't look too bad, but I didn't make any measurements since the manual doesn't have any info on pump inspection. I can say that the pickup screen was half blocked with sludge, which probably didn't do the pump any good. I know that oil pumps aren't readily available for the 356, which is why I put the old one back in. This might be a wait and see issue, where it's best to see how it is in real word driving conditions, vs running inside the shop at 2000 rpm for 30 minutes. I will have to address the leak. That has to be fixed, and fixed soon. Attach file:  (59.33 KB) (59.33 KB)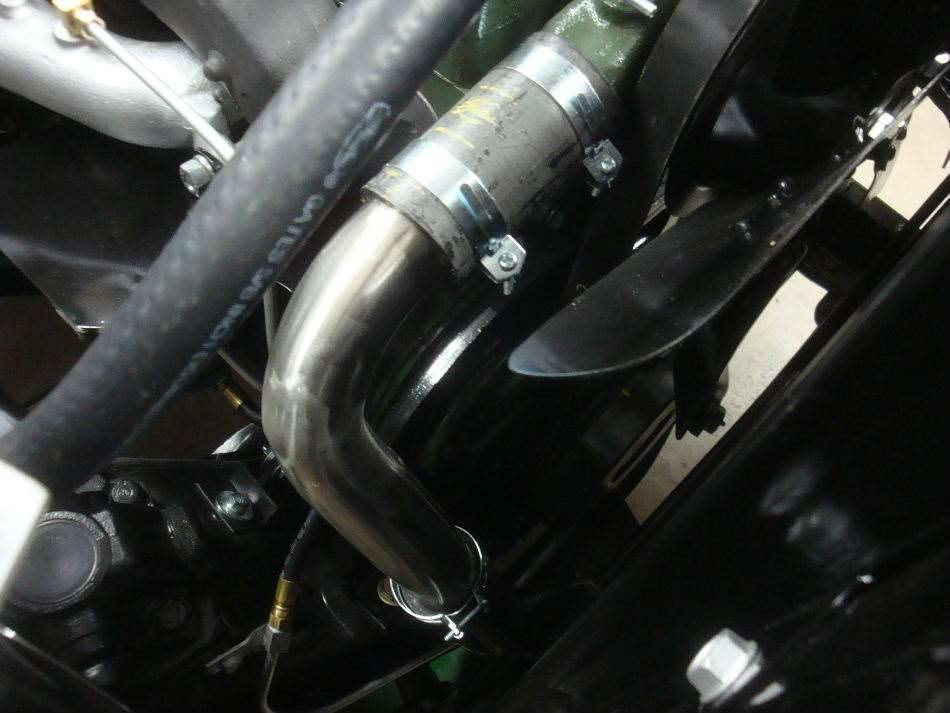 (80.52 KB) (80.52 KB)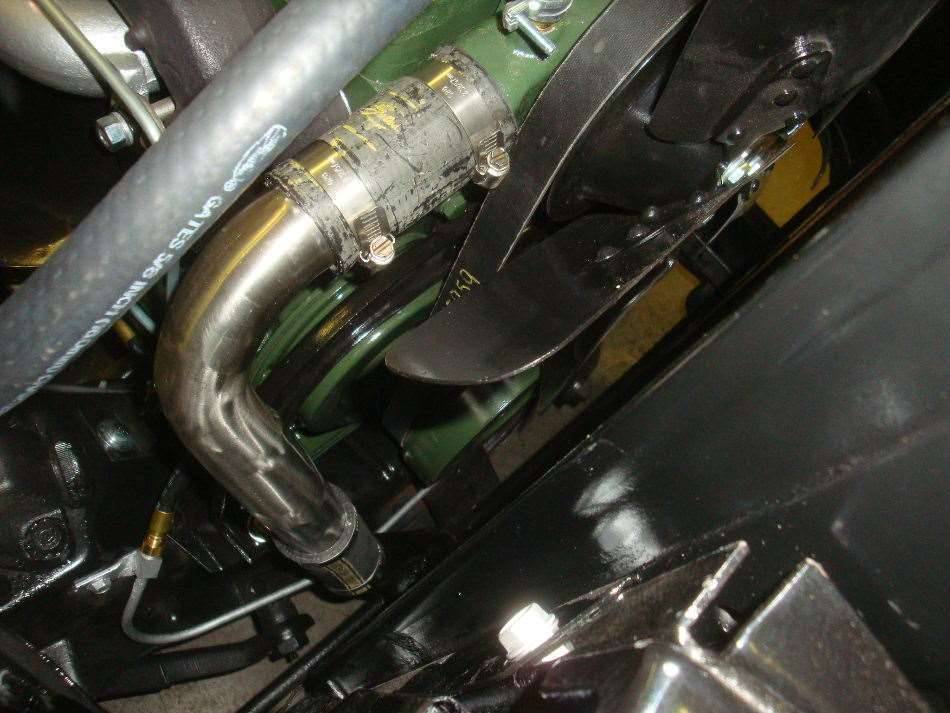 (92.76 KB) (92.76 KB)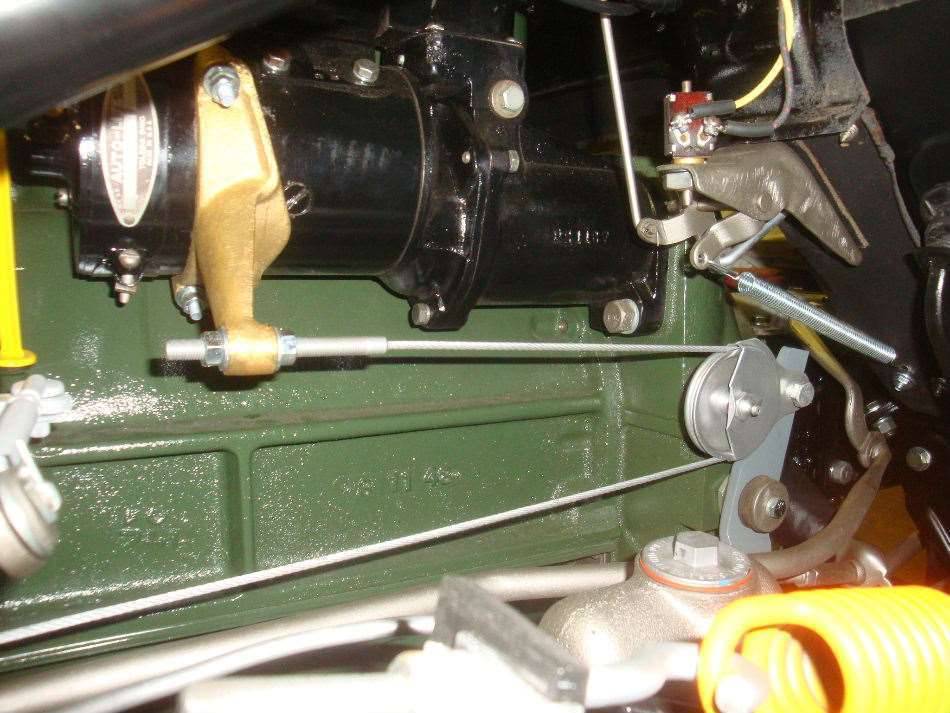 (71.03 KB) (71.03 KB)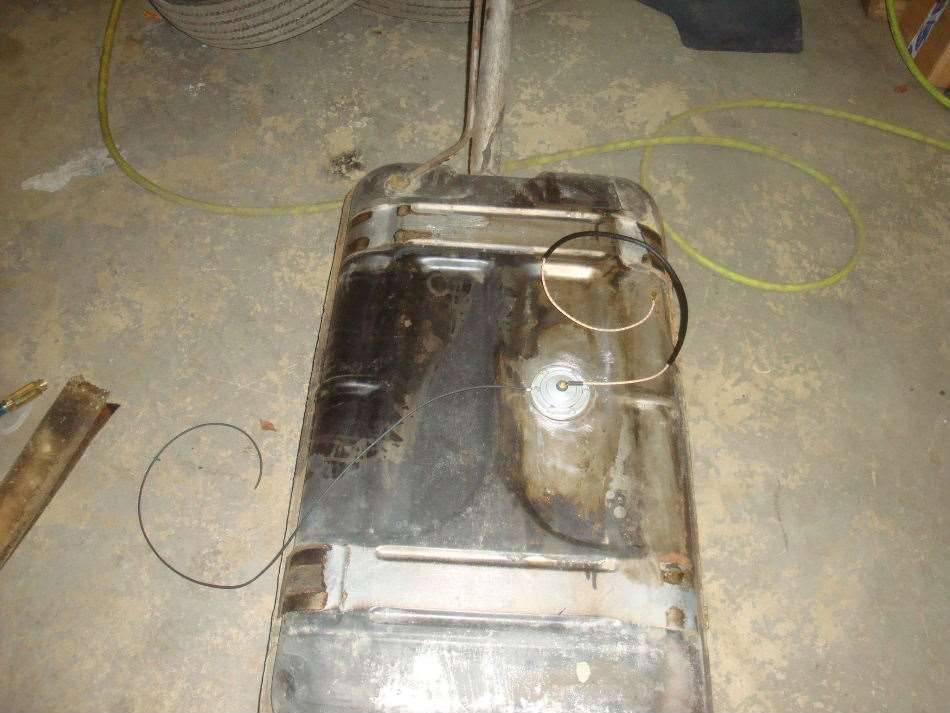 (69.37 KB) (69.37 KB)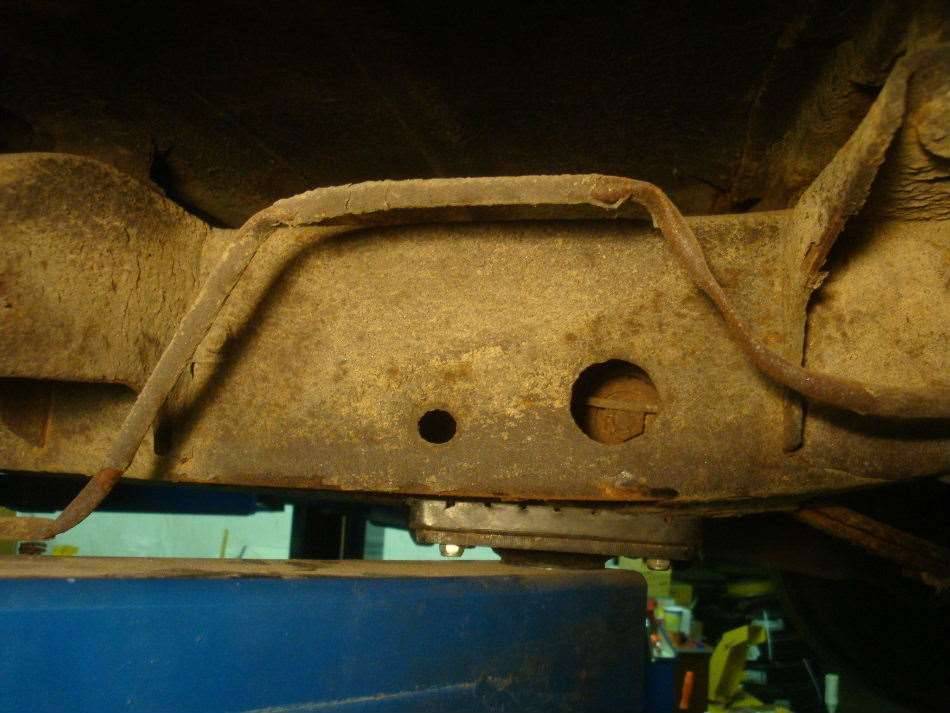 (57.86 KB) (57.86 KB)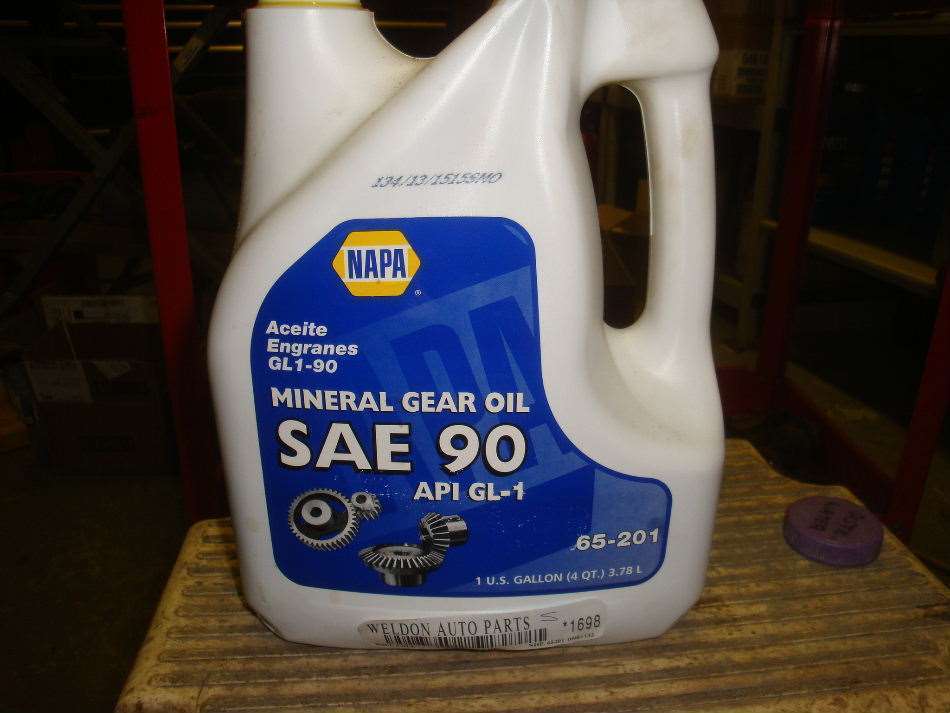 (59.46 KB) (59.46 KB)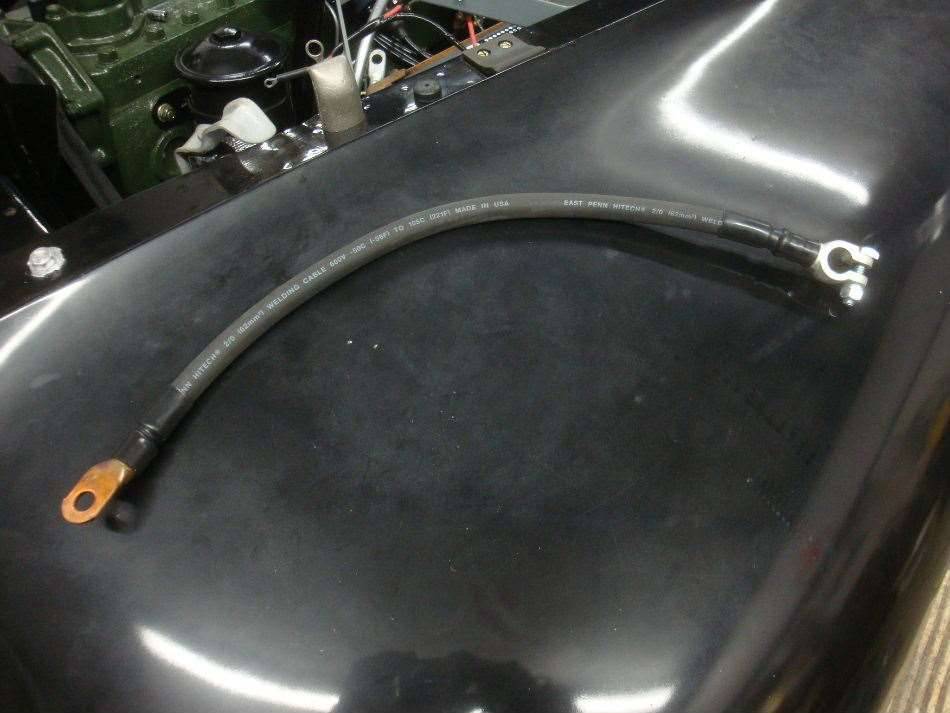 (85.30 KB) (85.30 KB)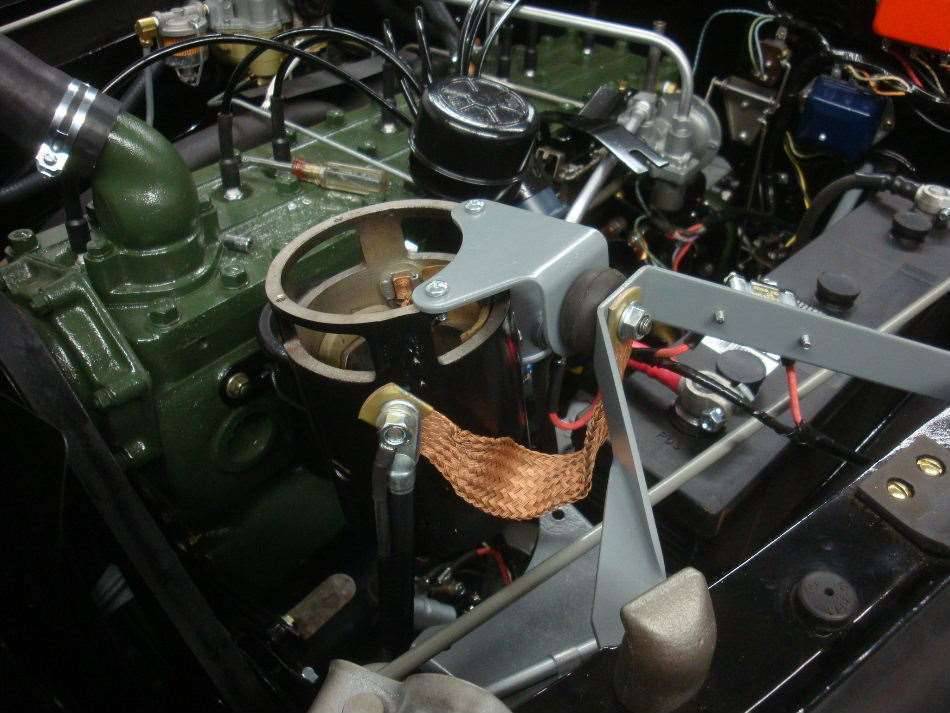 (119.04 KB) (119.04 KB)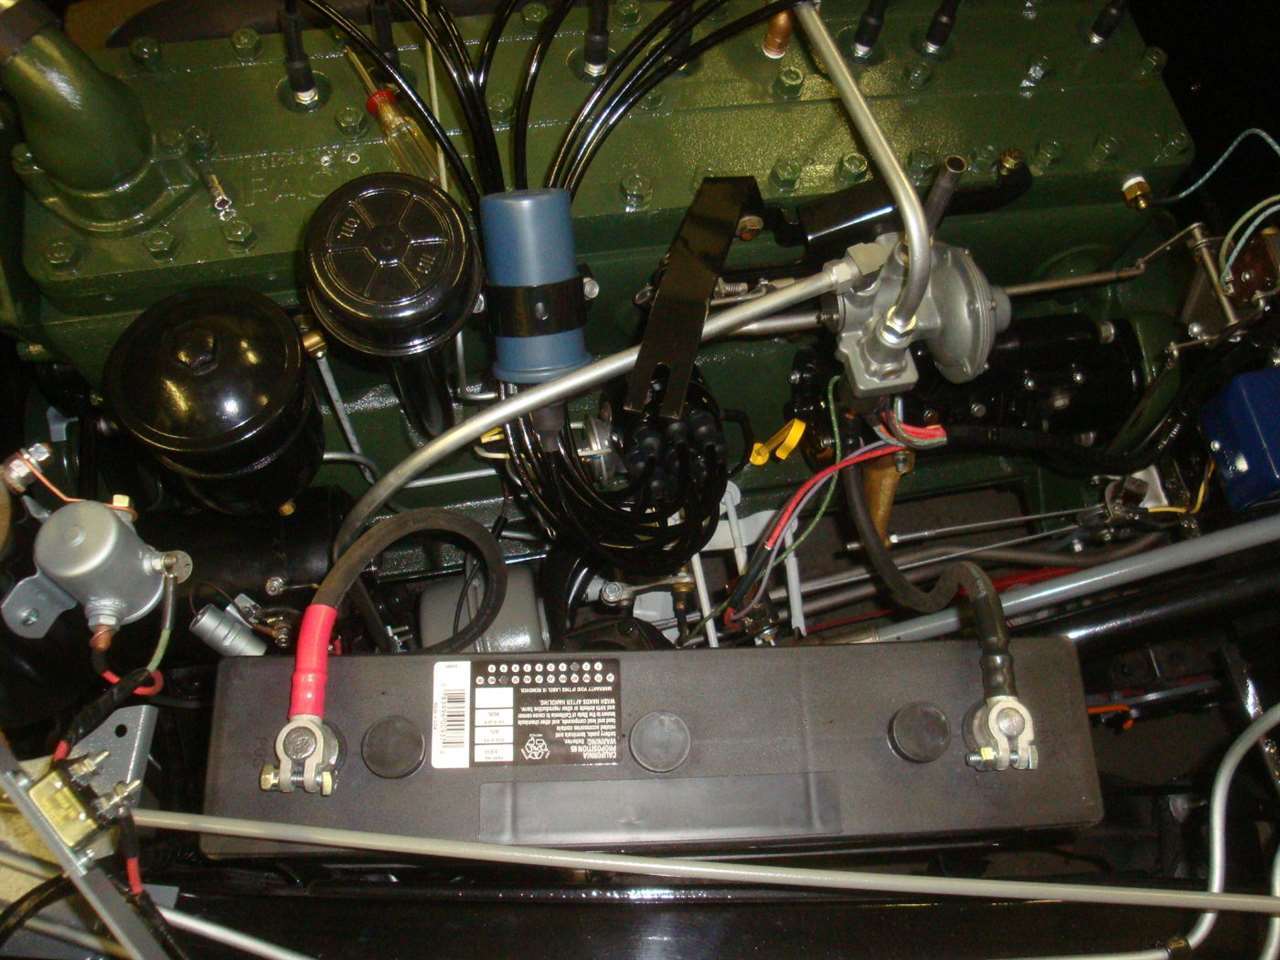 (70.15 KB) (70.15 KB) (66.57 KB) (66.57 KB)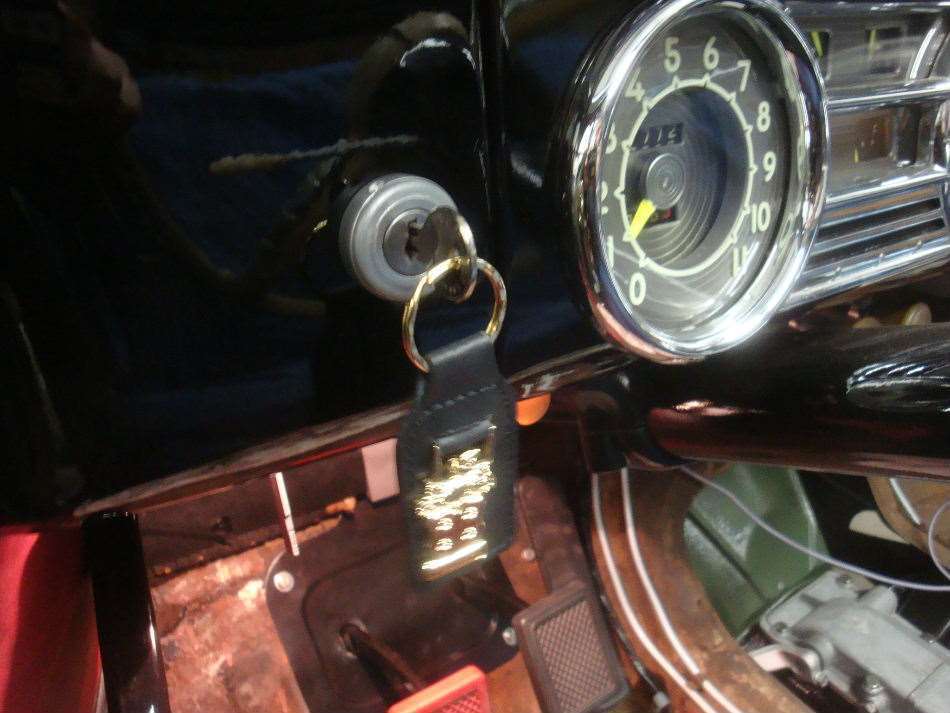 (69.37 KB) (69.37 KB)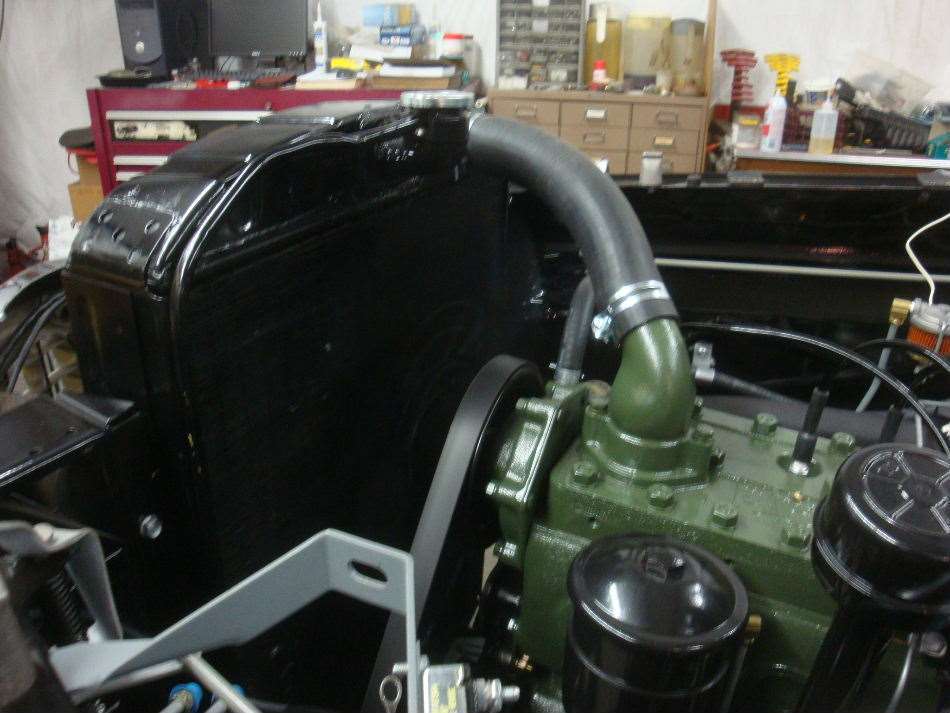 (66.12 KB) (66.12 KB)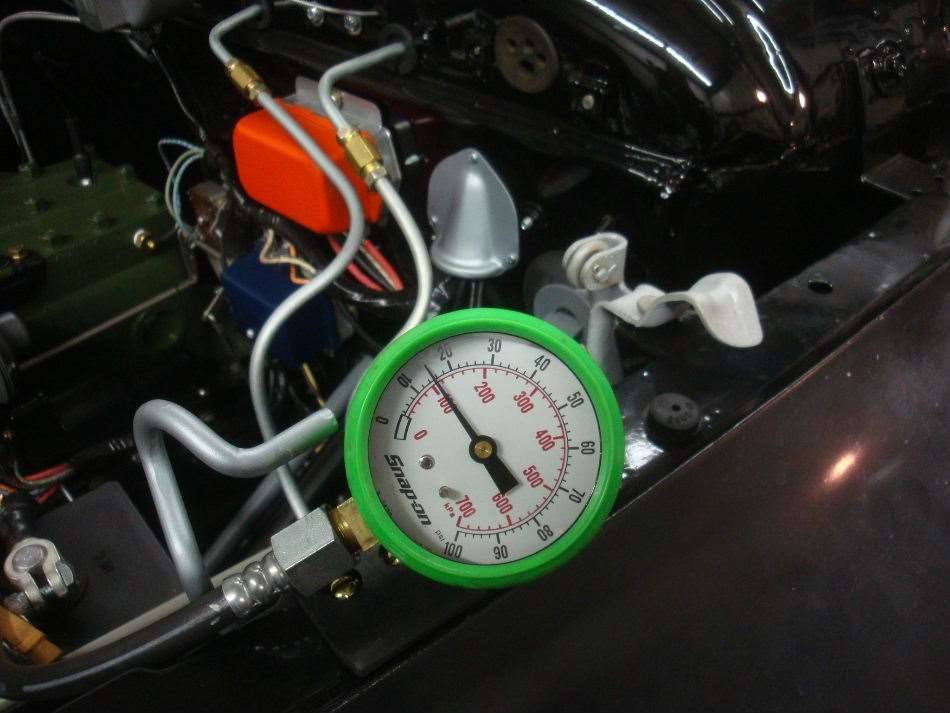 (57.24 KB) (57.24 KB)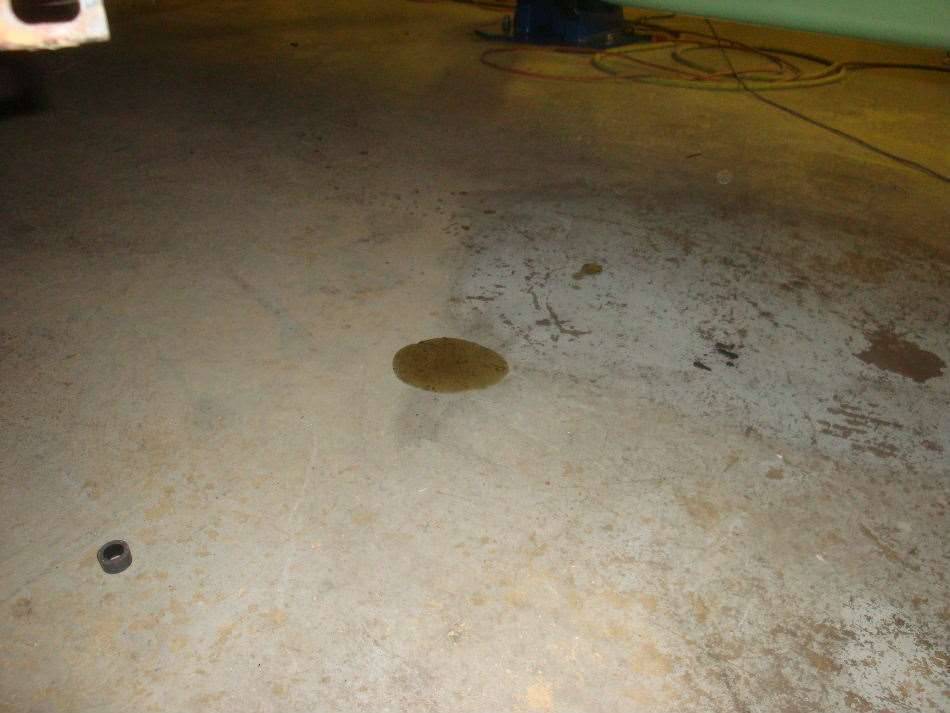 (70.75 KB) (70.75 KB)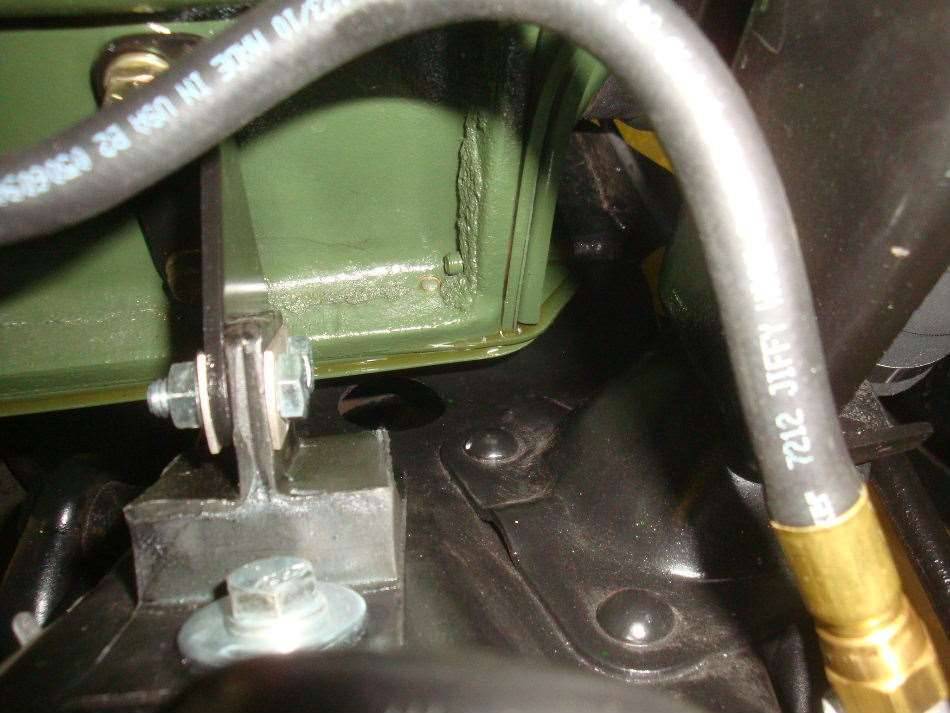
Posted on: 2013/11/14 22:31
|
|||
|
||||
|
Re: Jeff's 48 Custom 8 Victoria Project
|
||||
|---|---|---|---|---|
|
Home away from home
|
Thanks Stephen, The next chapter in the saga is on it's way and should be up soon.
Jeff
Posted on: 2013/11/14 22:27
|
|||
|
||||
|
Re: Jeff's 48 Custom 8 Victoria Project
|
||||
|---|---|---|---|---|
|
Home away from home
|
 Wes WesJeff
Posted on: 2013/11/14 20:55
|
|||
|
||||
|
Re: 22nd series battery ground wire
|
||||
|---|---|---|---|---|
|
Home away from home
|
Thanks John!
I was afraid that the correct spot might be under the generator, requiring at least partial removal of said generator for installation of the cable. Jeff
Posted on: 2013/11/14 20:52
|
|||
|
||||
|
22nd series battery ground wire
|
||||
|---|---|---|---|---|
|
Home away from home
|
Where should the battery ground wire attach to the block? I'm tempted to put it on the bolt above the generator bracket.
Thanks, Jeff Attach file: (67.45 KB)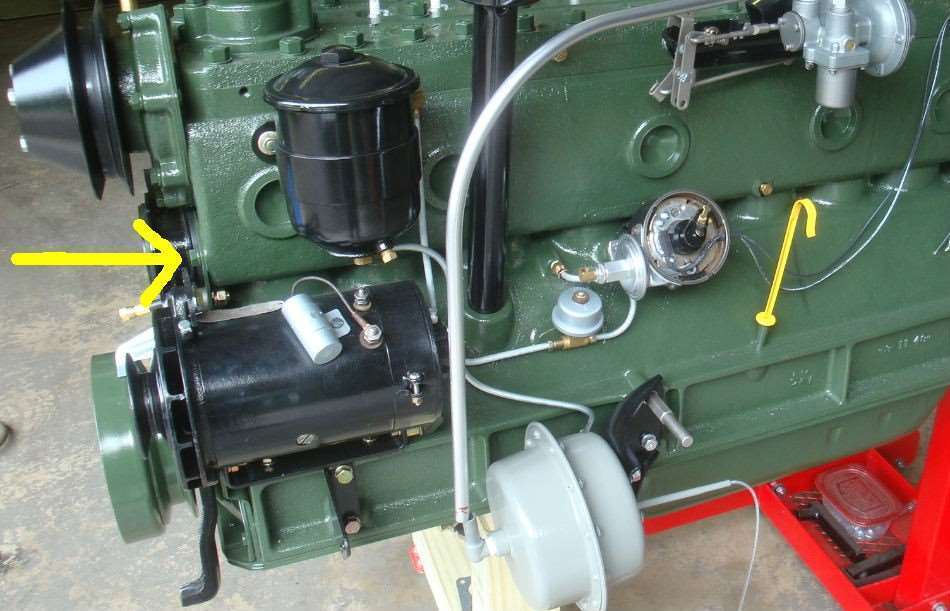
Posted on: 2013/11/13 21:43
|
|||
|
||||
|
Re: Jeff's 48 Custom 8 Victoria Project
|
||||
|---|---|---|---|---|
|
Home away from home
|
Progress over the weekend was painfully slow. That was partly my fault, as I found that I didn't take pictures of a few key items before I took the car apart. To make things worse, one of the pictures in the parts book was misleading, and sent me down the wrong path for a while.
I have to say that the clutch linkage on this car would make Rube Golberg envious of the person that designed it. The way some things are done is truly bizarre, but the final product seems to work nice and smooth. I was moving along pretty good today until it was time to install the metal pipe for the lower radiator hose. I bought a new stainless steel pipe off of ebay a while back. It was listed for a 1940-41, but the seller said it should fit the '48. It would fit perfect if it was 2-1/2 inches longer. I'll have to track down a longer rubber hose for the bottom connection tomorrow. Another item that I'm not happy with is the fan belt that I bought from Kanter. The finish on the belt is spotty, and if I had the correct pulley on the generator, I'd be all the way at the end of the adjustment. Unfortunately, NAPA doesn't list a belt for the 356, just the smaller engines. I really am close to start-up now. I've had quite a few false alarms over the last month, but there isn't much left to do before I can hit the key. In anticipation of a start-up, I turned the car around in the shop so that the exhaust will go out the door. Maneuvering non-running cars by myself can be a pain, and I have to say that the Packard is a lot harder to push around now that the drivetrain is in it. It was so easy when it was 1000 pounds lighter. November 9-12, 2013. Attach file: (103.34 KB)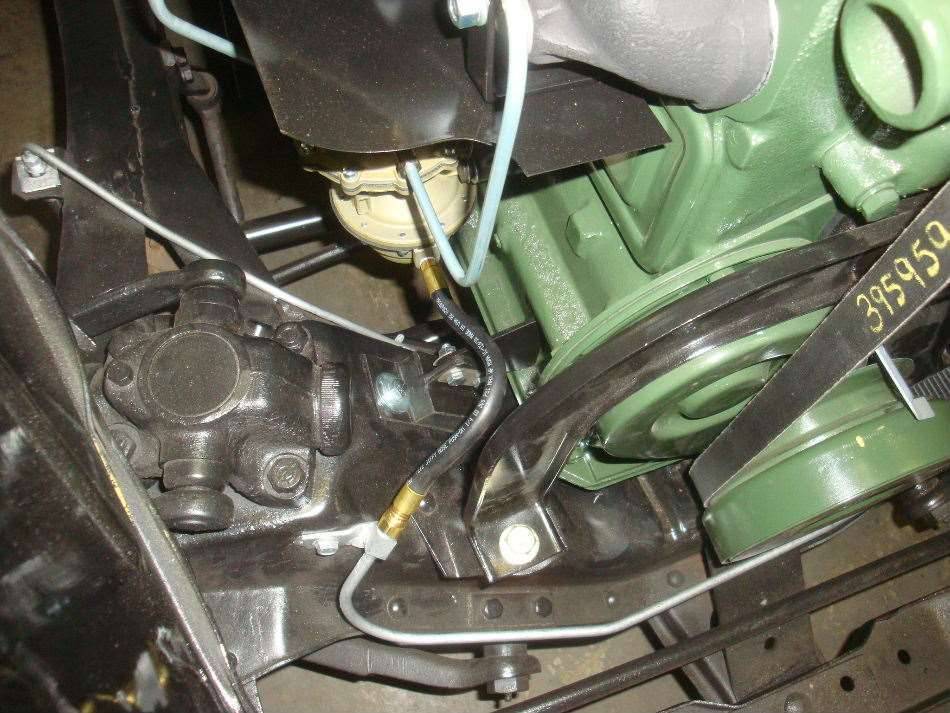 (86.29 KB) (86.29 KB)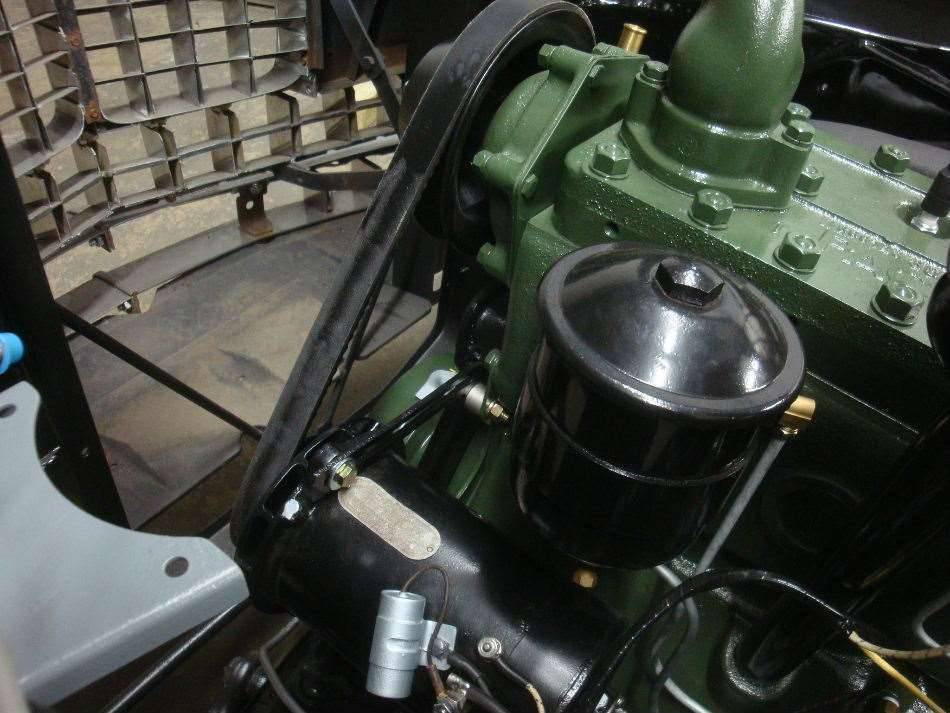 (125.69 KB) (125.69 KB)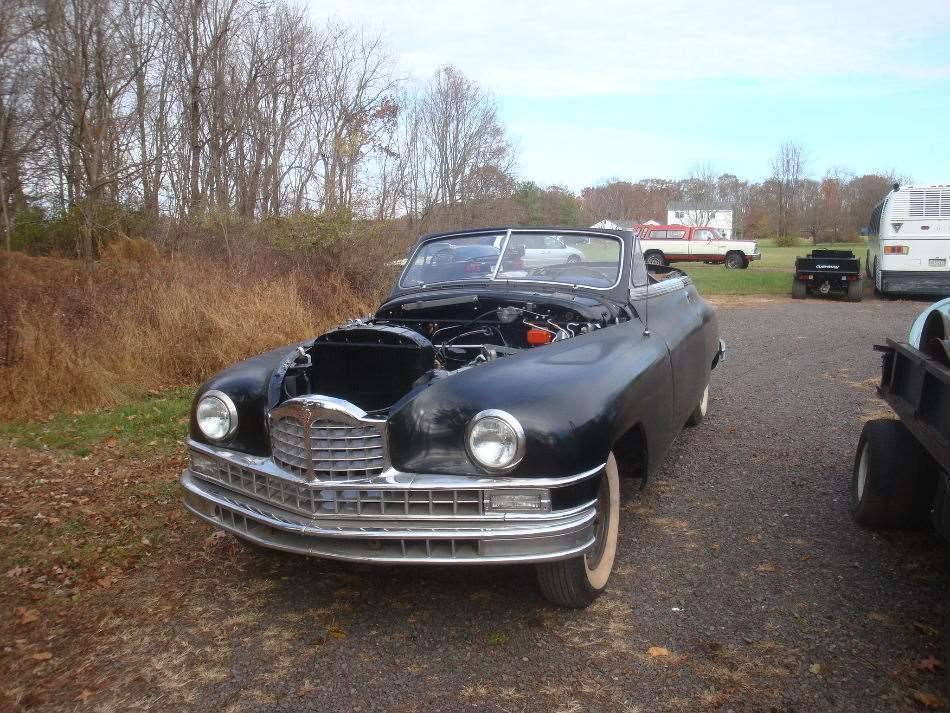 (122.14 KB) (122.14 KB) (73.38 KB) (73.38 KB)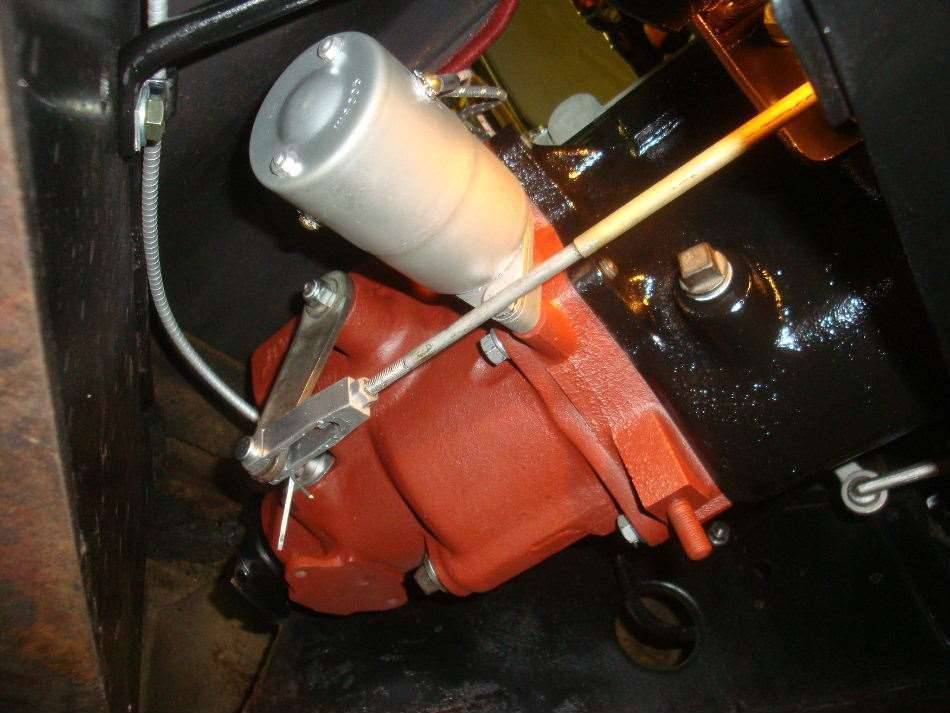 (80.38 KB) (80.38 KB)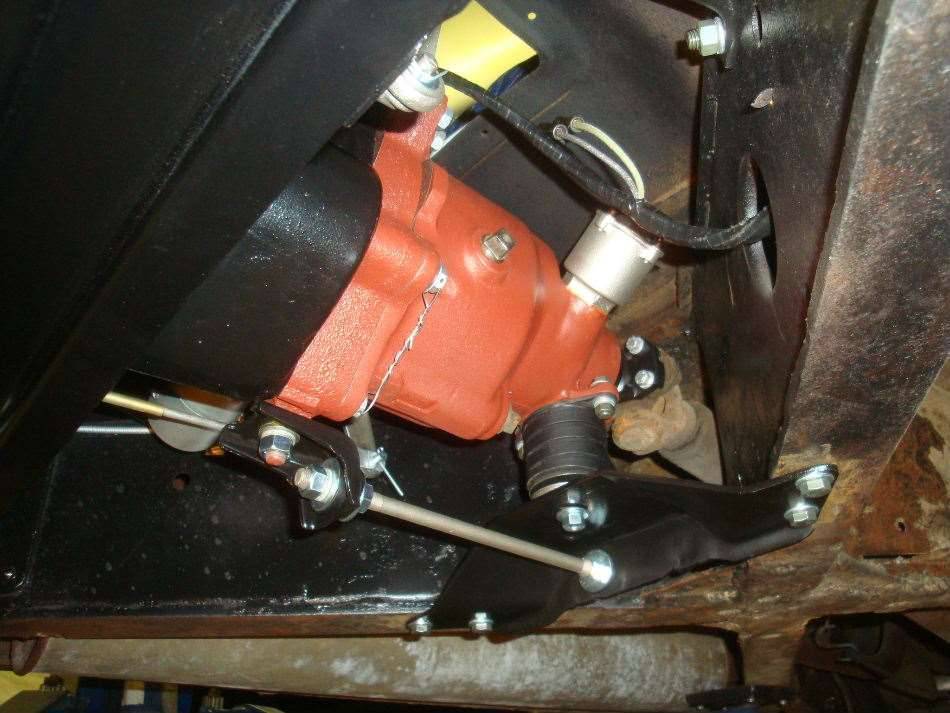 (59.92 KB) (59.92 KB)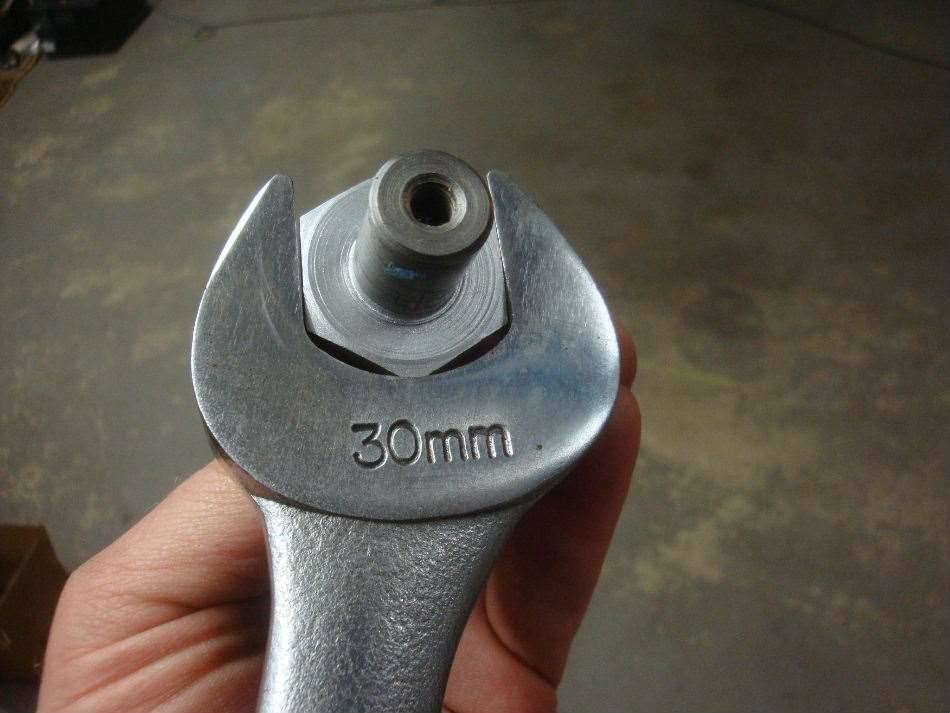 (65.70 KB) (65.70 KB)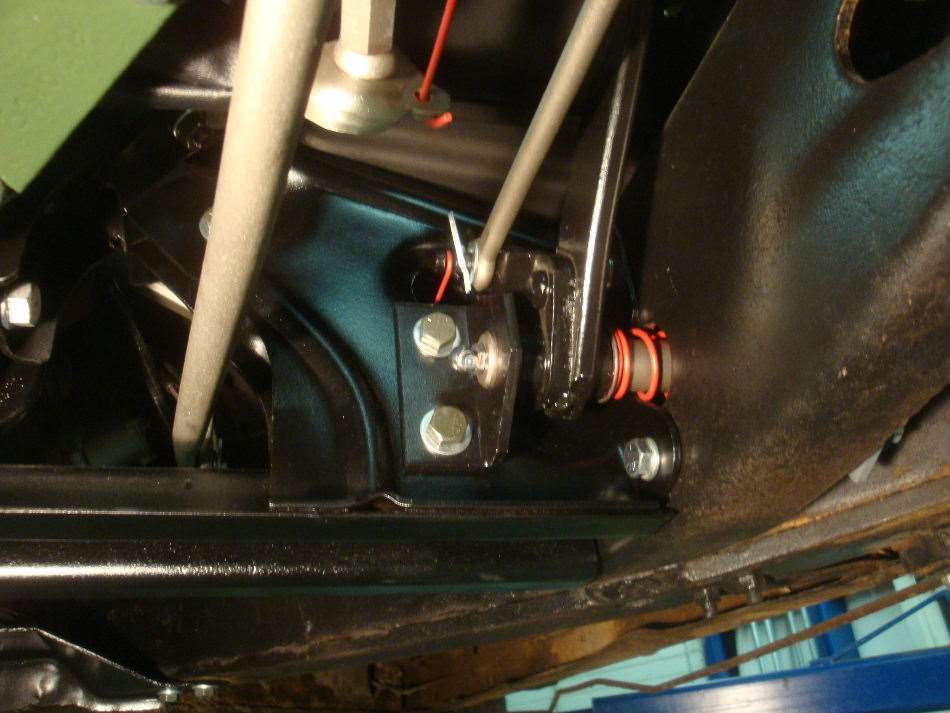 (93.28 KB) (93.28 KB)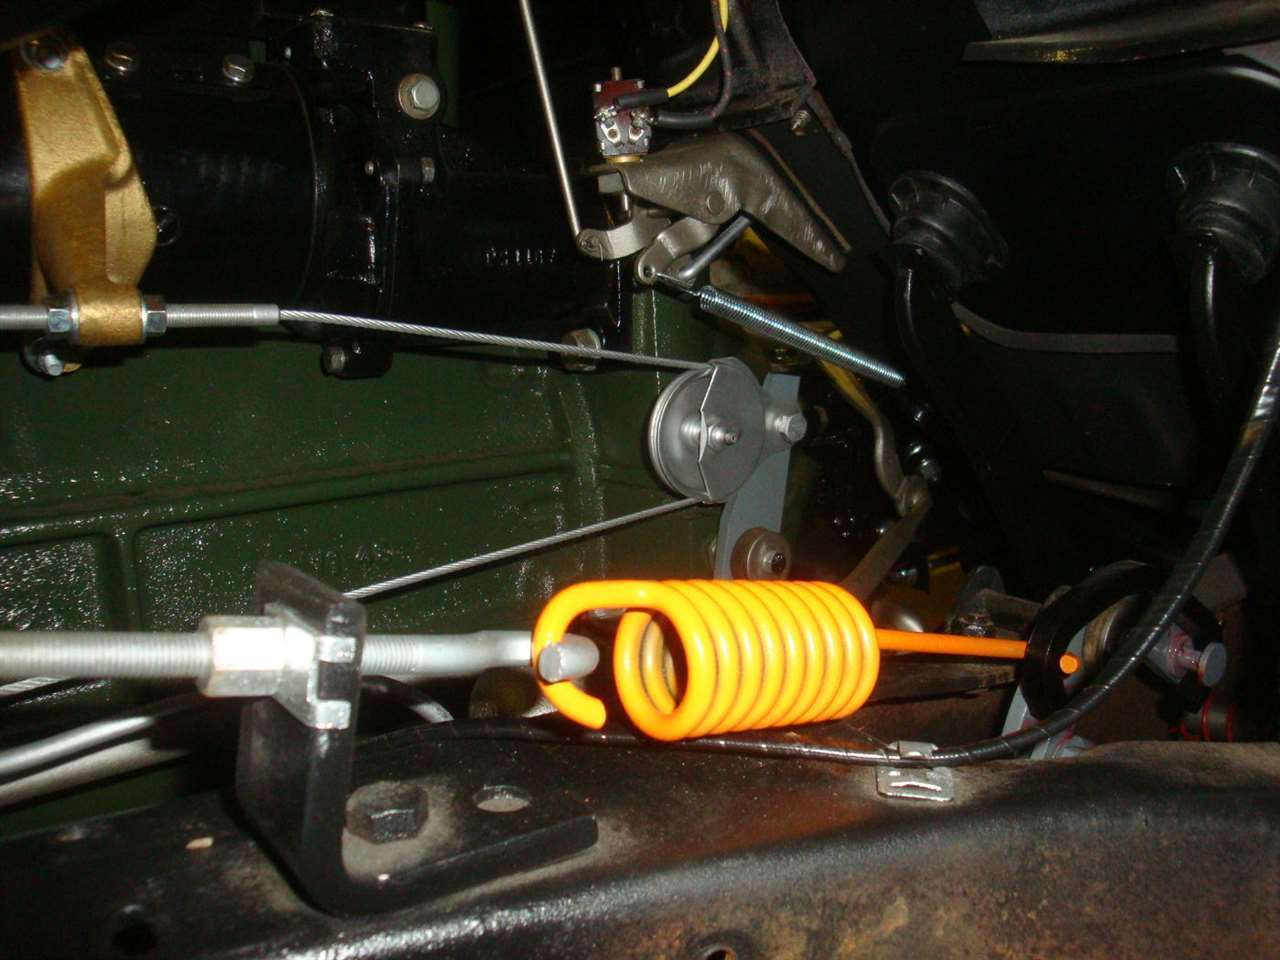 (98.14 KB) (98.14 KB)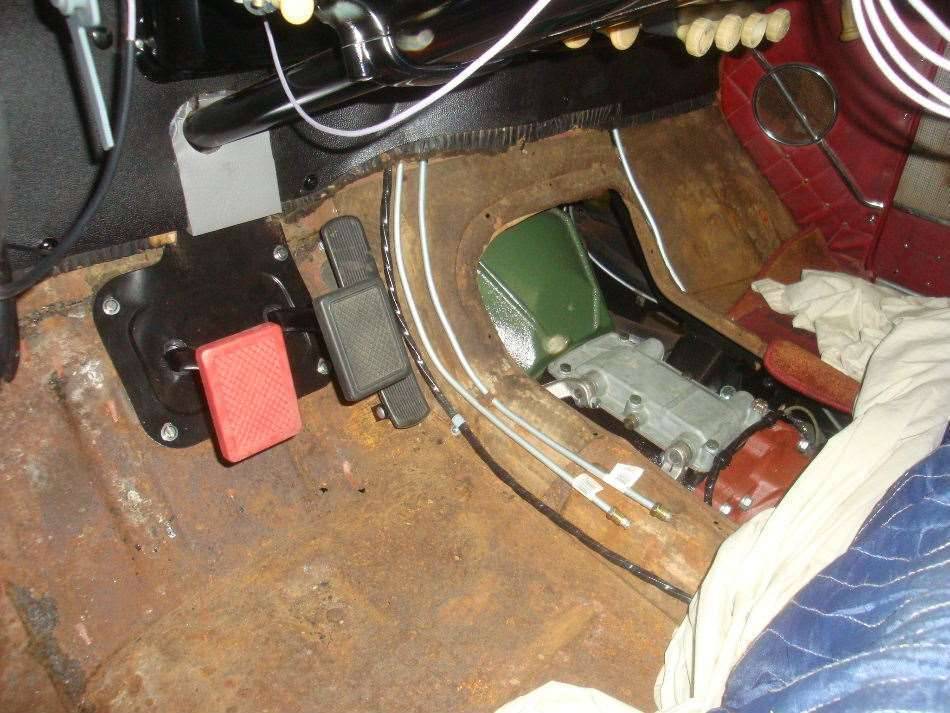 (85.56 KB) (85.56 KB)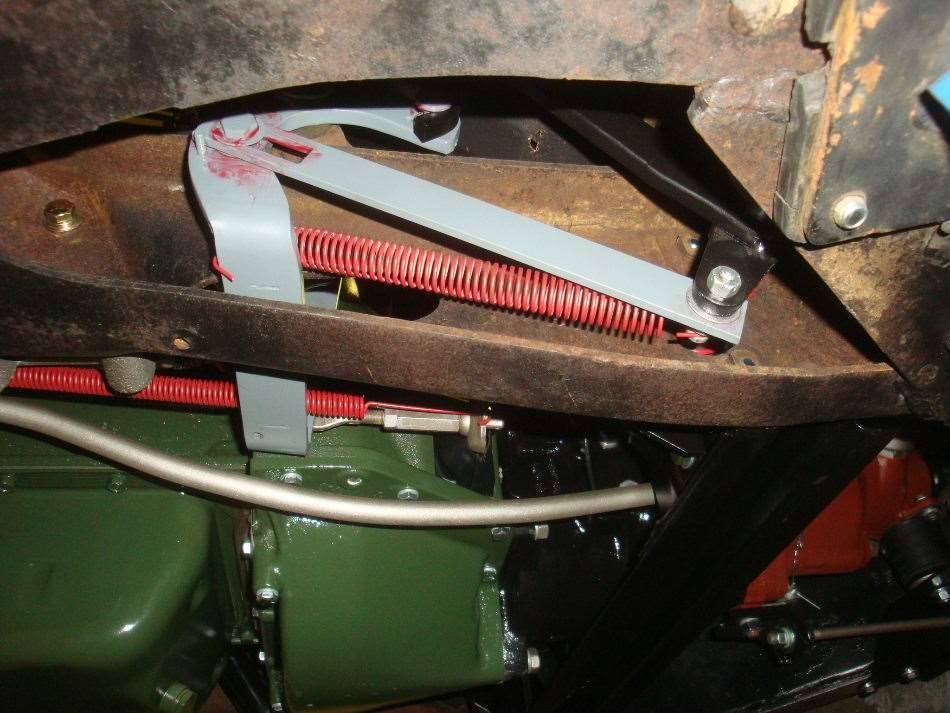 (77.69 KB) (77.69 KB) (62.75 KB) (62.75 KB)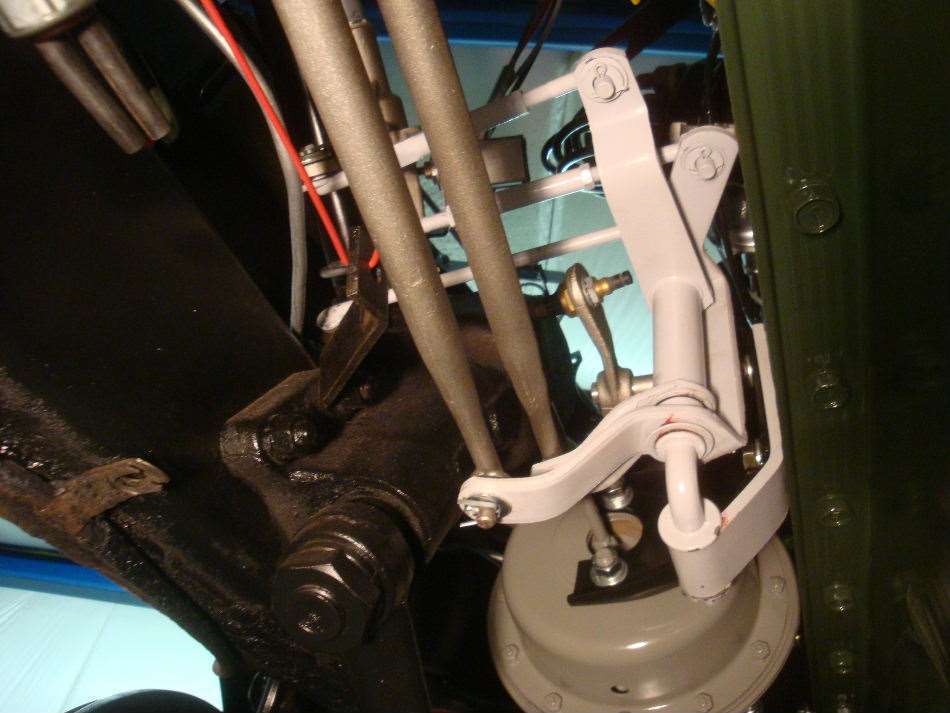 (82.17 KB) (82.17 KB)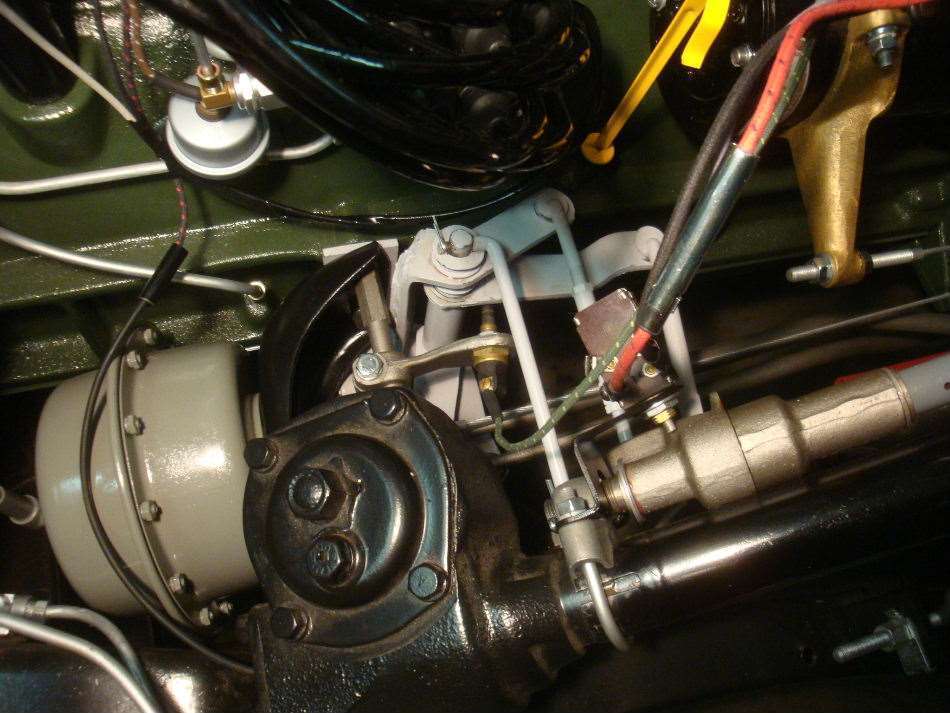 (91.57 KB) (91.57 KB)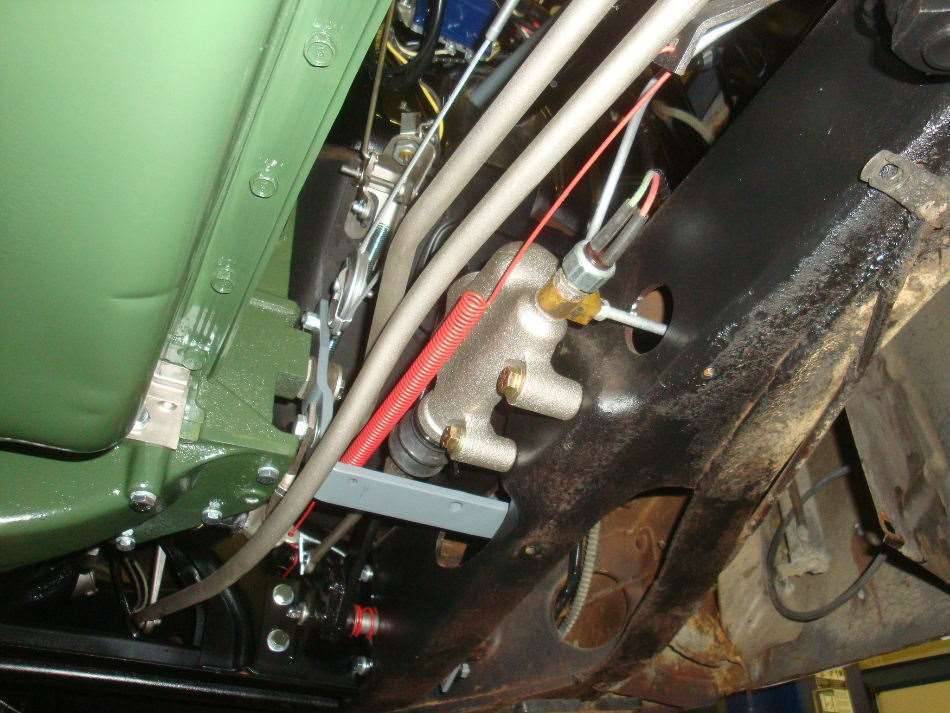 (70.70 KB) (70.70 KB)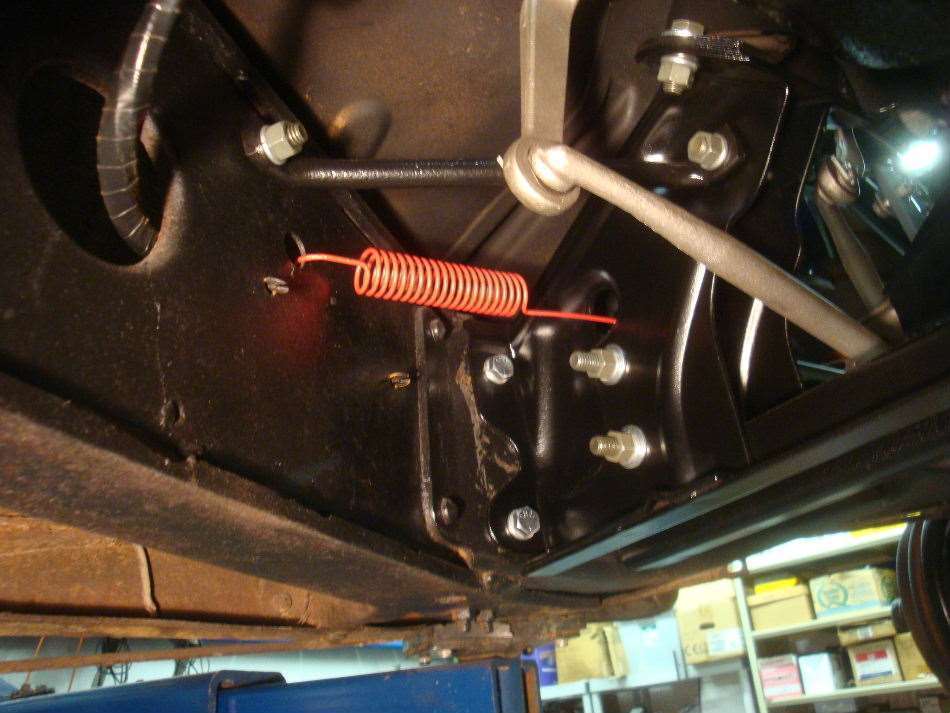 (74.49 KB) (74.49 KB)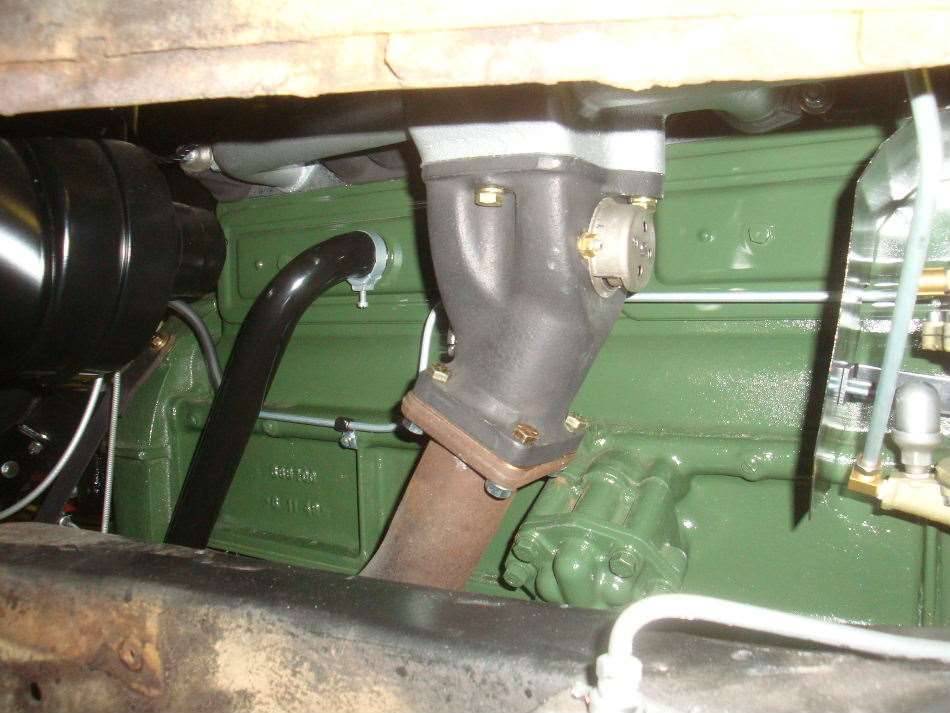 (74.55 KB) (74.55 KB)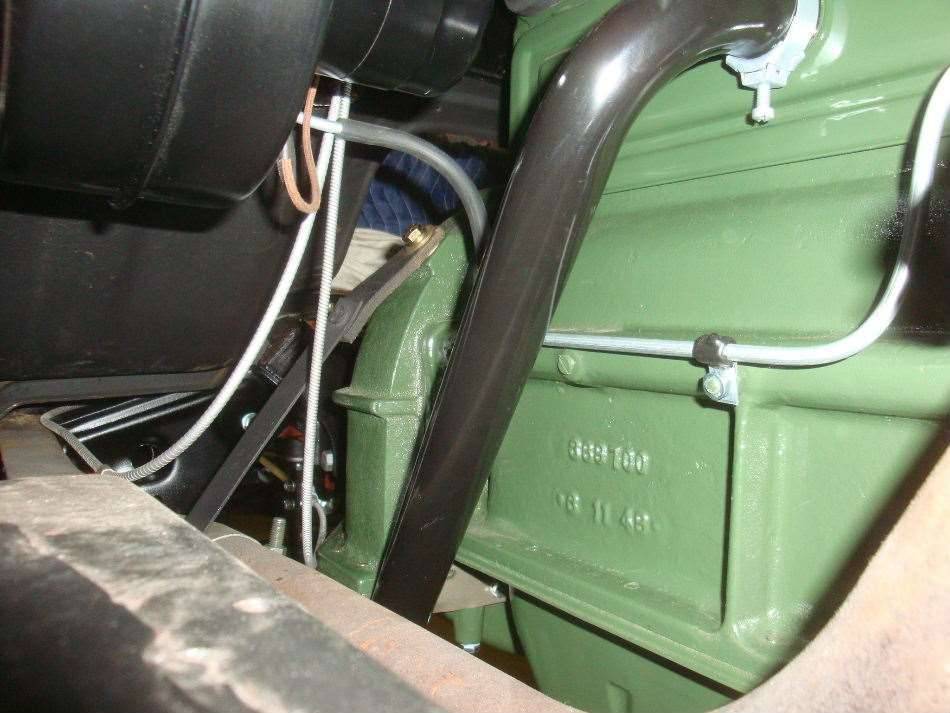 (73.78 KB) (73.78 KB)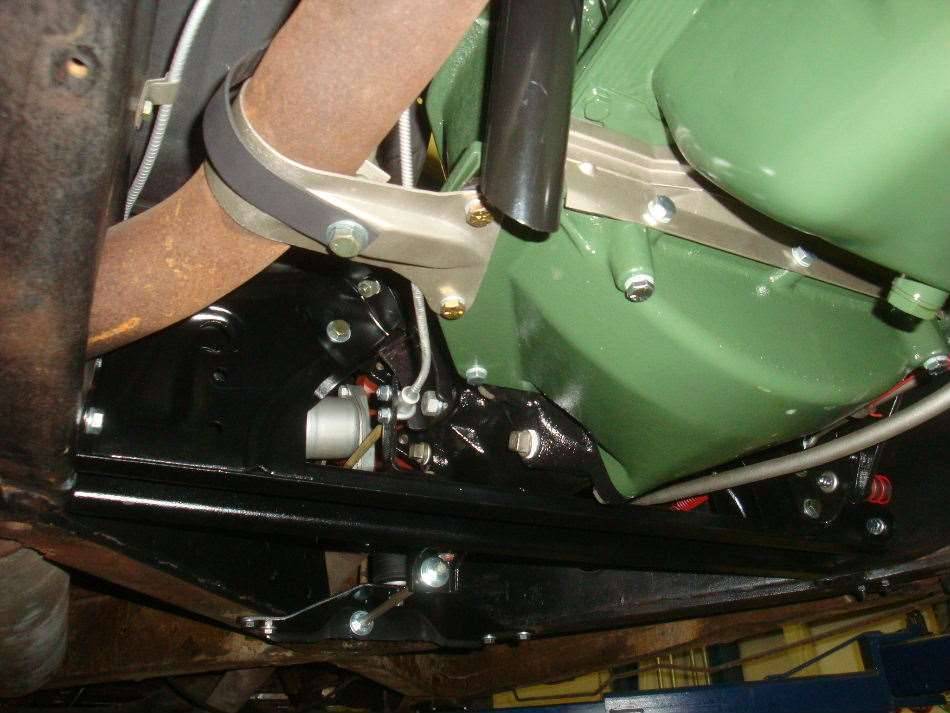 (92.03 KB) (92.03 KB)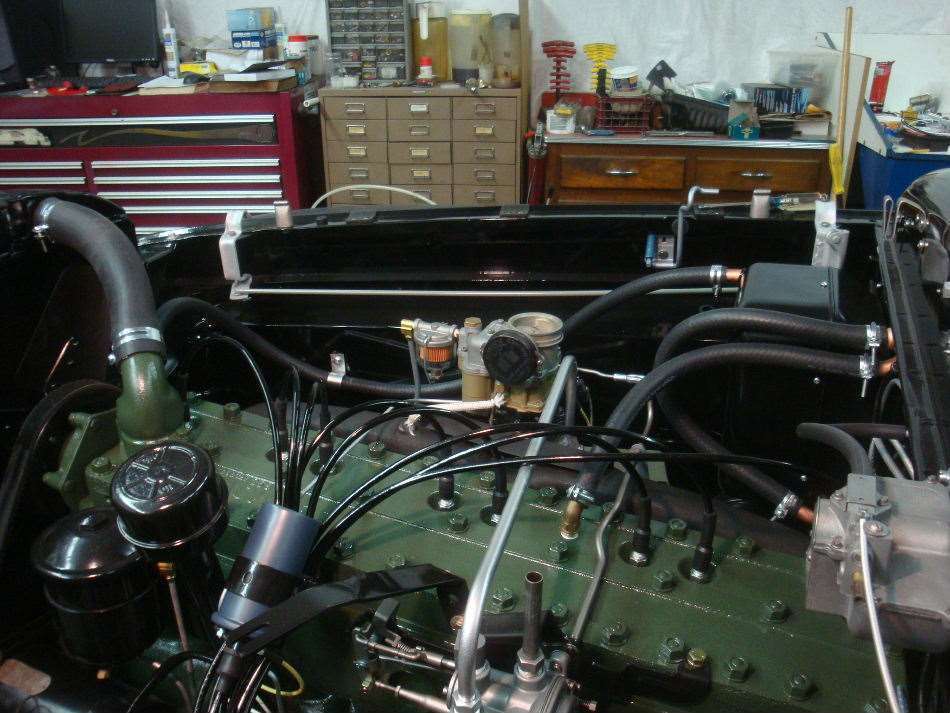 (71.68 KB) (71.68 KB)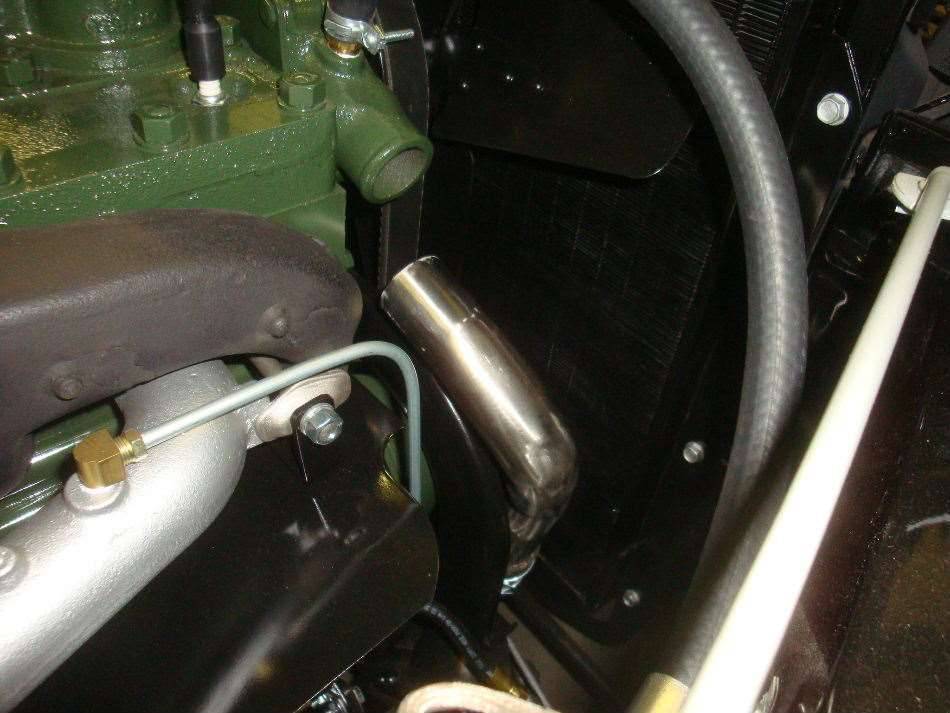 (67.96 KB) (67.96 KB)
Posted on: 2013/11/13 1:28
|
|||
|
||||
|
Re: Trans mount and clutch spring
|
||||
|---|---|---|---|---|
|
Home away from home
|
I do have the Electromatic clutch, and the first thing that popped into my head when I pushed in the clutch was " Boy, that's a light clutch. I wonder if it's supposed to be that way". You've put my mind at ease on that one. Sounds like I'm on the right track with the way I have it assembled.
Jeff
Posted on: 2013/11/12 15:21
|
|||
|
||||
|
Trans mount and clutch spring
|
||||
|---|---|---|---|---|
|
Home away from home
|
Here's my latest round of questions for the 22-23 experts.
I just installed a new rear trans mount, and with the original shims in place I still have over 1/8" gap. Should I make up more shims to take up the space? I'm going to assume that the new mount is shorter than the old one, which I sent in as a core so I can't compare the two. I re-used the original mounts that were on the sides of the trans, so it should be sitting in the same place as before. Any tips on tensioning the big spring on the clutch linkage? Thanks, Jeff Attach file: (65.08 KB)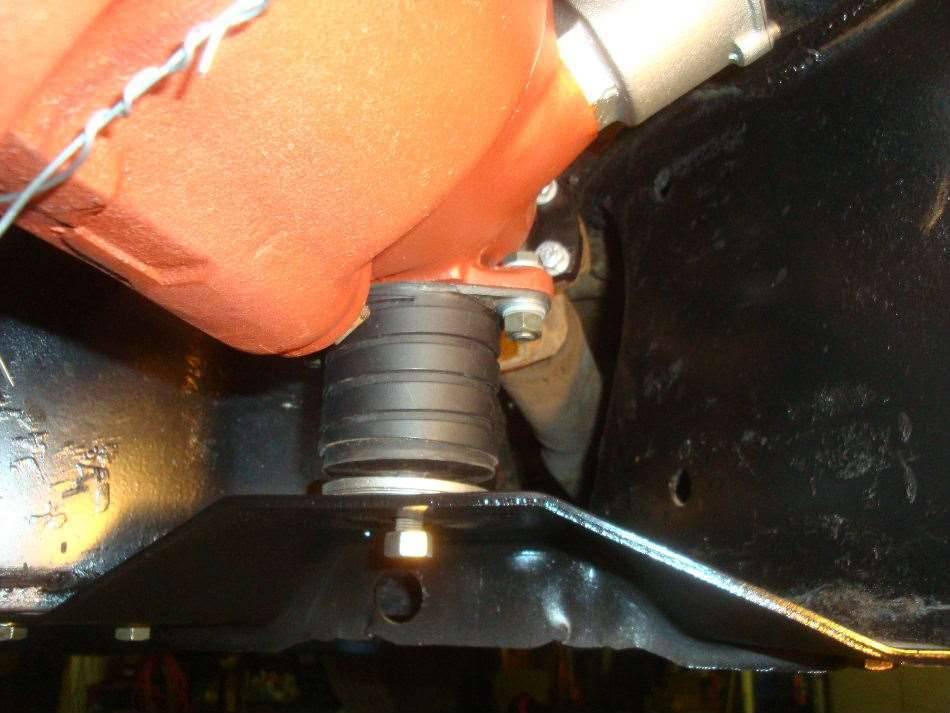 (90.31 KB) (90.31 KB)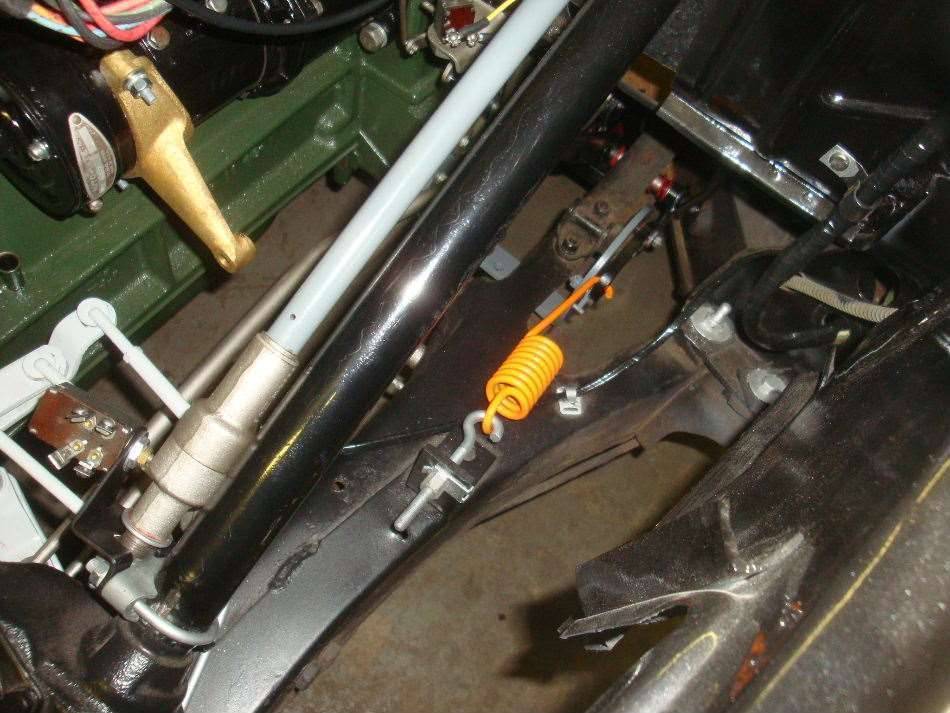
Posted on: 2013/11/12 14:57
|
|||
|
||||
|
Re: Jeff's 48 Custom 8 Victoria Project
|
||||
|---|---|---|---|---|
|
Home away from home
|
Thursday turned out to be less productive than I had hoped. The trans was a bit of a bugger to get in. The input shaft doesn't have much of a chamfer on the pilot or the clutch splines, so you need to have it dead on target before it wants to go in. Kudos to all those who have muscled one of these in without the help of a transmission jack.
The crossmember is installed, along with a few other bits and pieces. I got a late start and my phone was ringing all day long, so I didn't get too much else done on the car. I didn't touch it at all on Friday, but I'll get back on it today. I still hope to have it running on Sunday, but we'll see. There's still so much to be done. And yes, I'll be repainting the clutch cover green. It's only on with a few bolts right now. Not sure why I painted that gray. Thanks go out to Mal for posting pics of the custom clutch alignment tool on his "Wade's Workshop" blog. I took the idea and fine tuned it to fit the 22nd Series Custom 8 clutch. It worked perfect. JeffBTW, It appears that the trans fill plug and overdrive fill plug are at slightly different levels. Any suggestions on which one to go by? Attach file: (85.39 KB)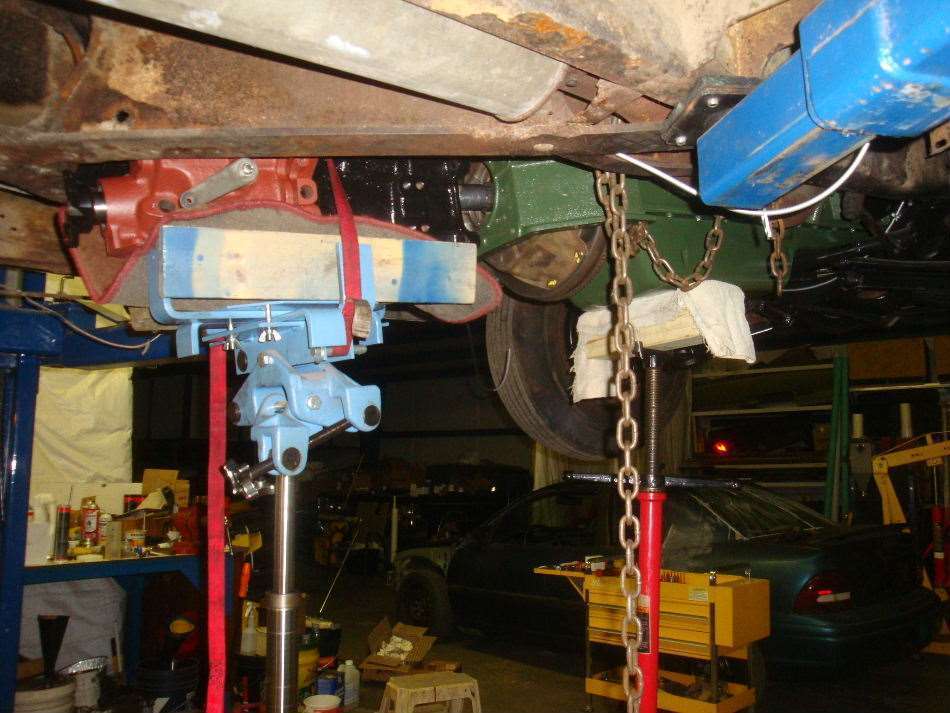 (96.65 KB) (96.65 KB)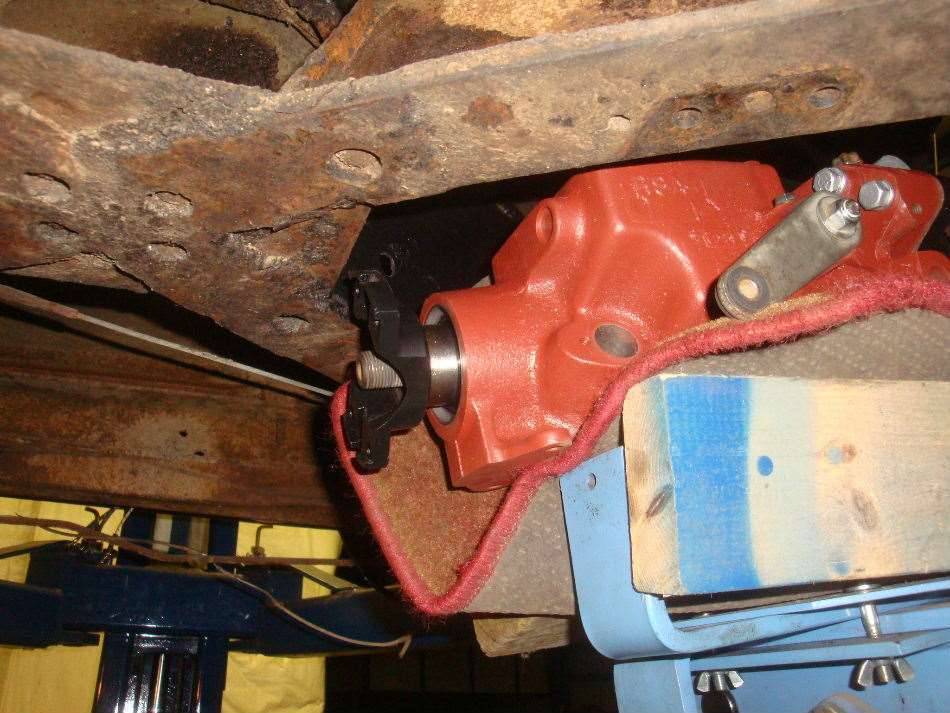 (72.82 KB) (72.82 KB)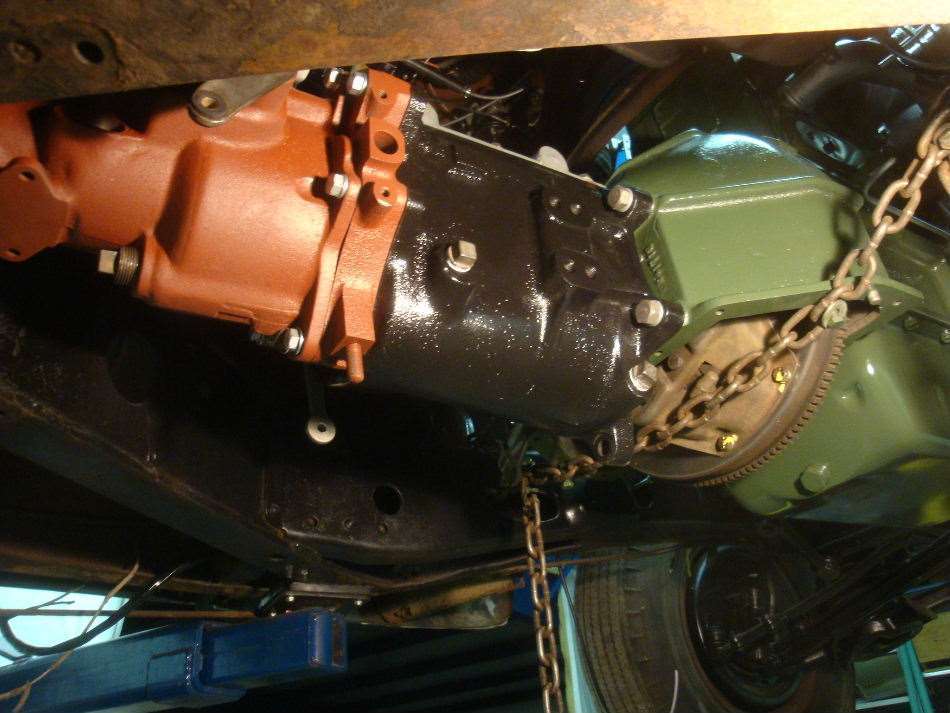 (53.33 KB) (53.33 KB)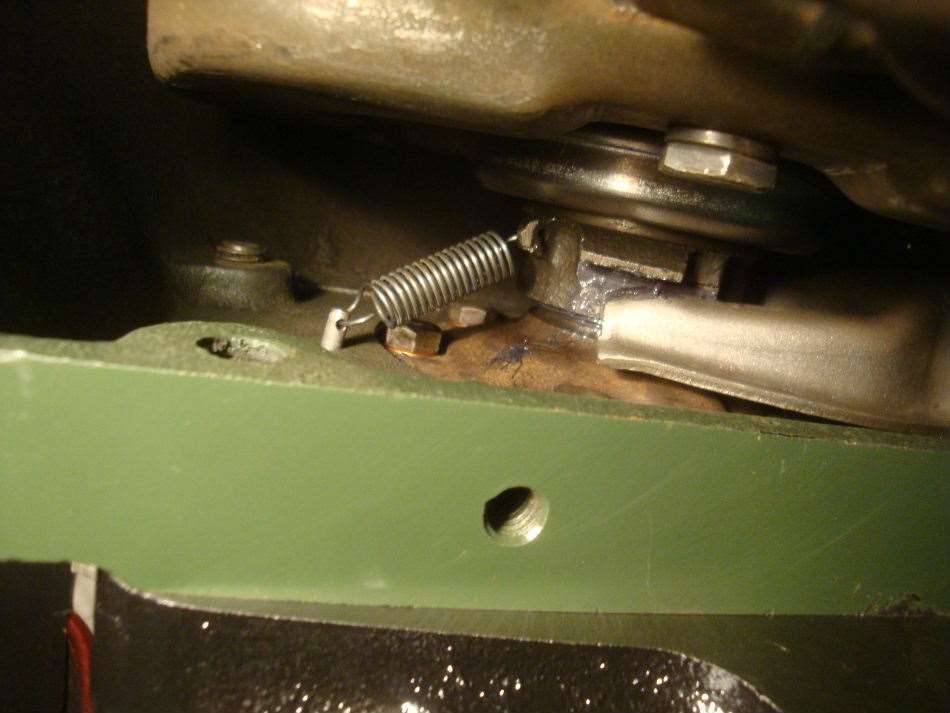 (88.42 KB) (88.42 KB)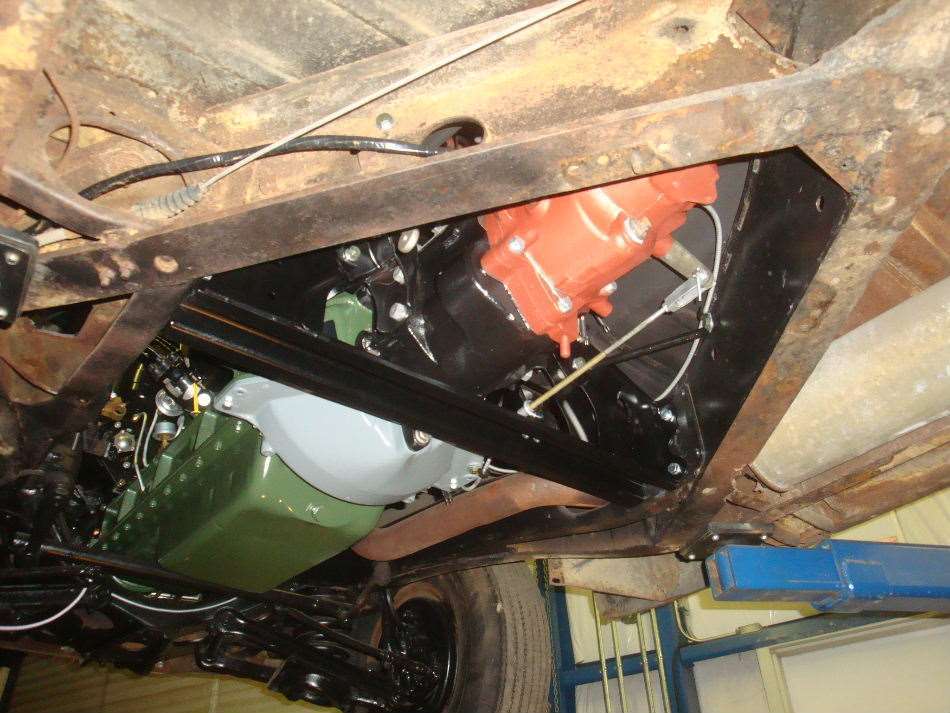 (81.62 KB) (81.62 KB) (94.50 KB) (94.50 KB) (88.22 KB) (88.22 KB)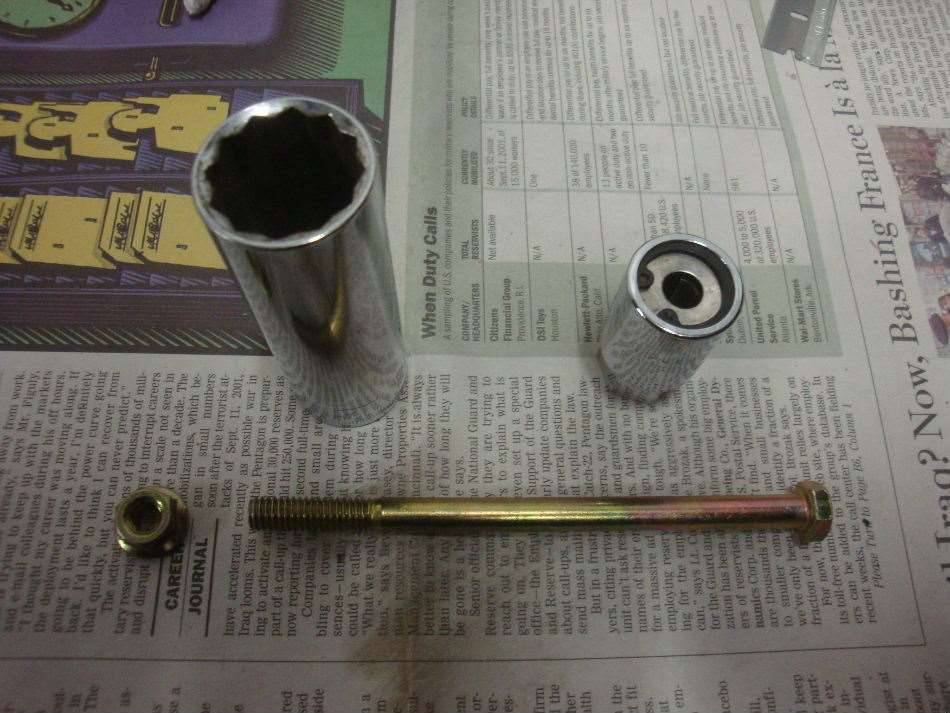
Posted on: 2013/11/9 13:14
|
|||
|
||||
|
Re: Jeff's 48 Custom 8 Victoria Project
|
||||
|---|---|---|---|---|
|
Home away from home
|
I'll check with the owner to see if that will be ok with him. Off the top of my head, I can tell you that the body number is only one digit off from the VIN. Body ends in 54 and VIN ends in 55. I believe the car was built in late March or early April of 1948. The Borg clock is stamped Feb '48 and I think the engine block and head were cast in mid-March.
Jeff
Posted on: 2013/11/9 12:49
|
|||
|
||||


