|
1932 901 Sloppy Steering
|
||||
|---|---|---|---|---|
|
Home away from home

|
There is a lot of play the car's steering so I figured I would adjust worm gear. On page 222 Se it calls for Service Manual under S118, Step 4 calls for "Pillar tube should be adjusted so the worm is just free.
I've looked, but can't find out how to do it. Any help would be appreciated.
Posted on: 2023/10/10 19:02
|
|||
|
||||
|
Re: '32 901 Sedan - Vapor Lock
|
||||
|---|---|---|---|---|
|
Home away from home
|
Based on Dave's description in post #12 I made a heat shield and installed it. I'll be running premium in the car and see how it works out.
I wasn't sure how to anchor it, but decided on a single point using one of the screws on top of the bowl. Easy to do, but not very sophisticated. If vapor lock occurs in again I'll install an electric pump, which I may do anyway. I want to thank everyone for the inputs. Attach file:  HS-1.jpg (207.50 KB) HS-1.jpg (207.50 KB)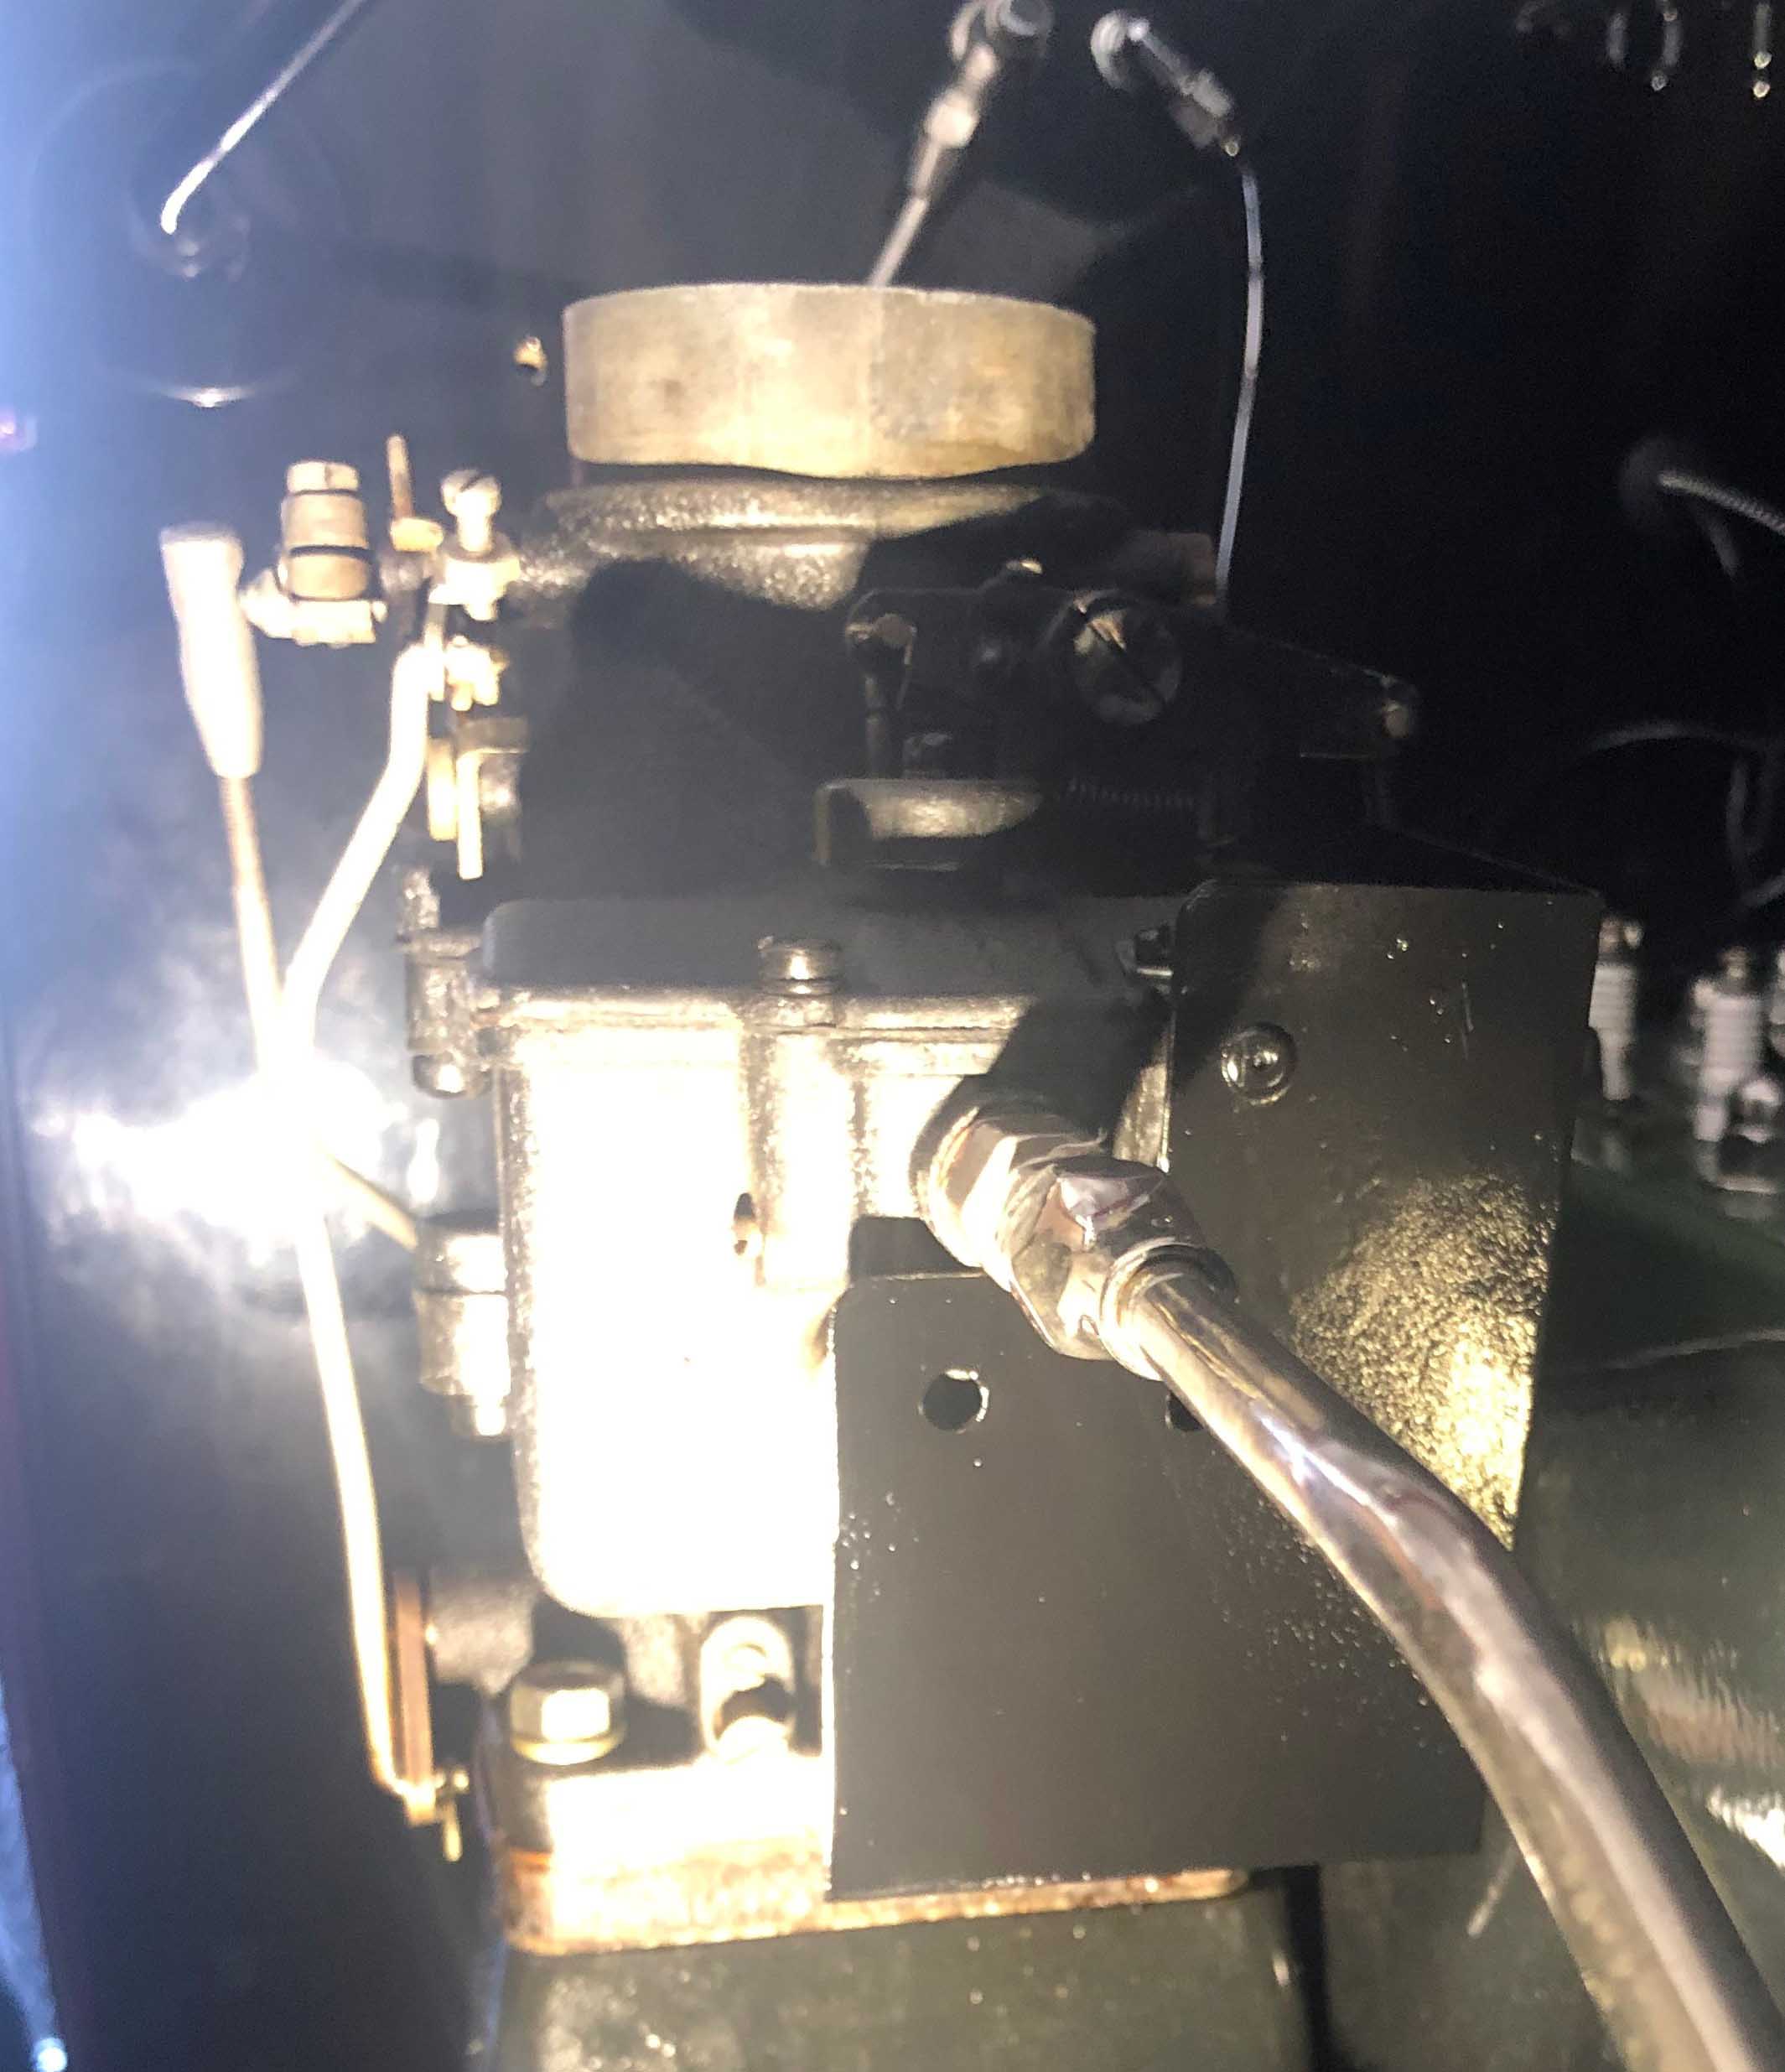 HS-2.jpg (256.06 KB) HS-2.jpg (256.06 KB)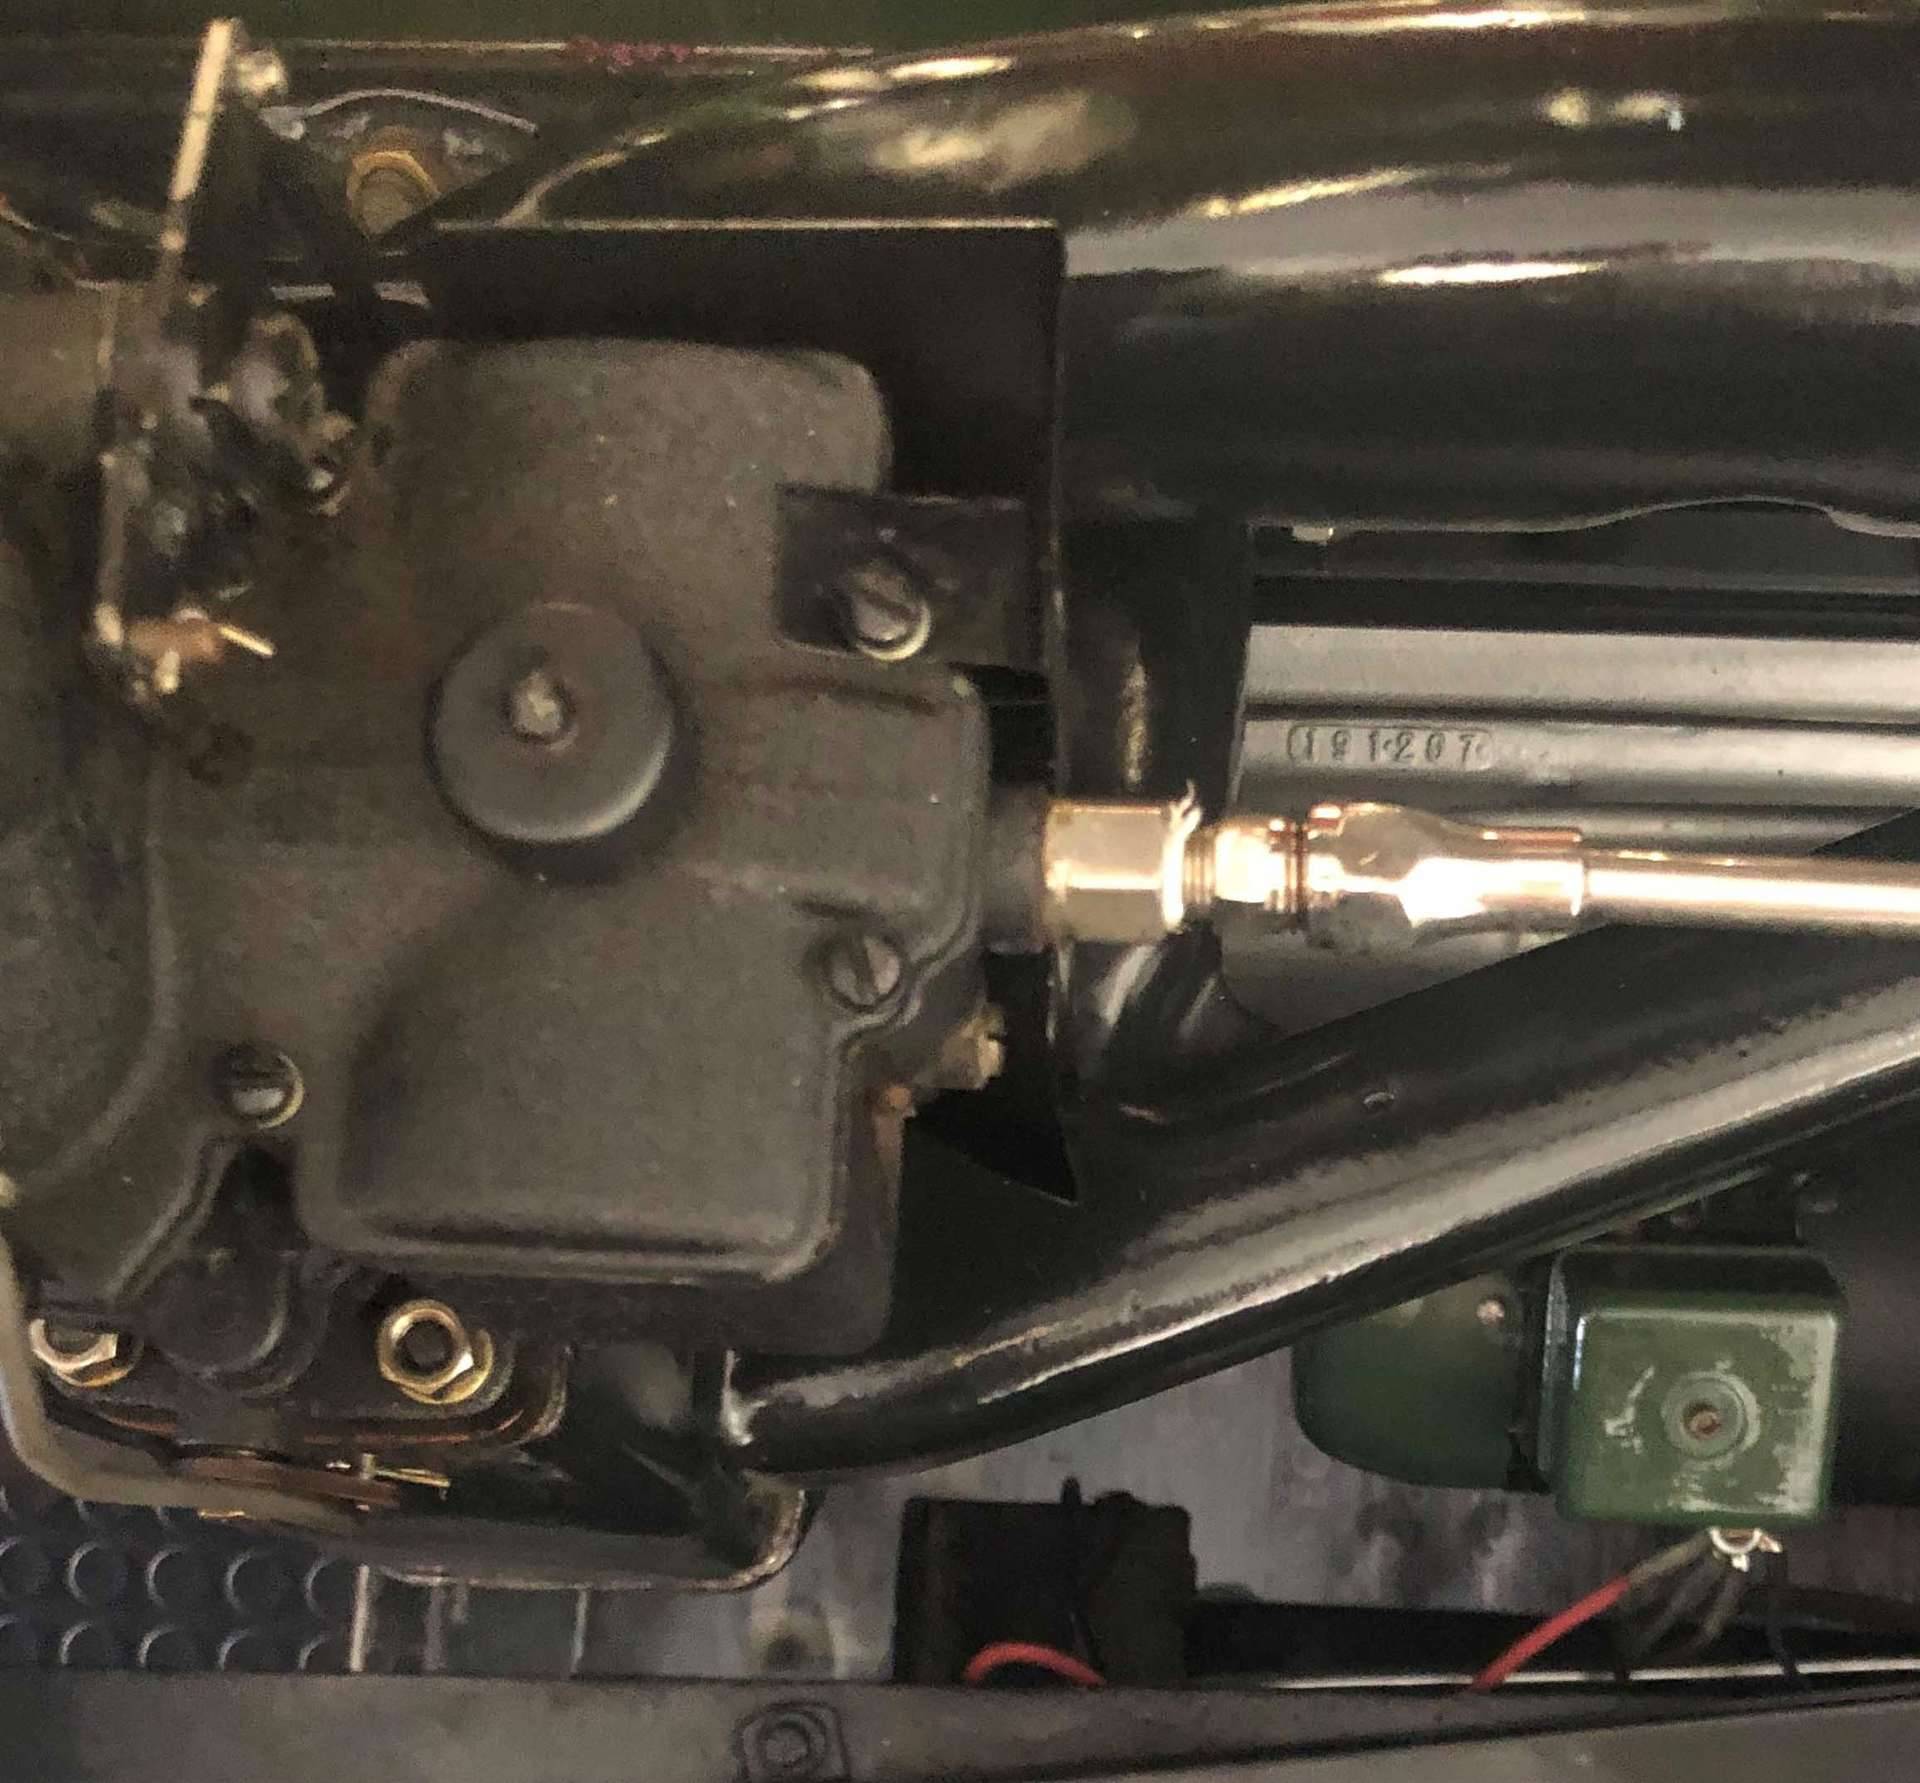
Posted on: 2023/10/10 18:46
|
|||
|
||||
|
Re: '32 901 Sedan - Vapor Lock
|
||||
|---|---|---|---|---|
|
Home away from home
|
Dave:
Thanks Again for the photo in reply #12. Based on your description there should be enough for me to come up with heat shield. When I loosen one of the screws that attached it to the carburetor, I discovered that they go into the bowl. Do you know if that is true of yours? I don't want you to loosen one of your screws to find out because I don't want you to create a leak.
Posted on: 2023/10/6 10:26
|
|||
|
||||
|
Re: '55 Caribbean Power Windows
|
||||
|---|---|---|---|---|
|
Home away from home
|
I got the replacement PW motor and had way too much fun installing it. Not sure if I came up with the best way to do it (probably way to true), but I thought I would record the steps that I finally took to get it installed. Remember that I had detached points A, B, & D in order to get to the clip on C. Since everything was detached from the windows I replaced the leather washers with nylon ones.
1) I attached points B and C as required (Note: In order to ensure that D stayed in its track, I drilled the door panel at both ends where the track ended and screwed sheet metals screw so I couldn’t come loose). 2) I inserted the motor which was attached to spring/gear mechanism 3) Raise the window to the top (I cramped a pair of Vise Grips on the window frame to hold it in place 4) I loosely attached the motor with a single screw to the door at point E 5) Remove the nut on F so the “X” bars can around float 6) At this point you should be able to insert C into the arm by energizing the motor with 12 VDC (one wire is up the other is low) to get the pin near the hole in the arm. Now you can insert it into the hole and clip the hairpin clip in place by moving the motor around a bit 7) Next is inserting pin A into its slot. You will need the flex the metal arm away from the slot. A high window gives more flexibility of the arm but is harder to reach. To lower the window, you will need to energize the motor with 12 VDC. I lower the widow just far enough that I could reach it. I used a 3/4” wide piece of steel bar and inserted it between the slot on the window and the metal arm. By rotating the steel bar 90 or so degrees you can flex the arm away from the slot on the window. By playing with the motor, you should be able to slip the pin in place 8) Place and secure nut F 9) Finish screwing motor to window 10) Clip pin A, which is easier by lowing the window 4 inches or so 11) Test the window operation Thanks to everyone who helped. I ended up buying a package of 100 clips from McMaster. Turns out I did not need any. Anyone who would like 10 can mail me a stamped self-address envelop. PM me for my address Attach file: Parts Plate 20E.jpg (400.39 KB)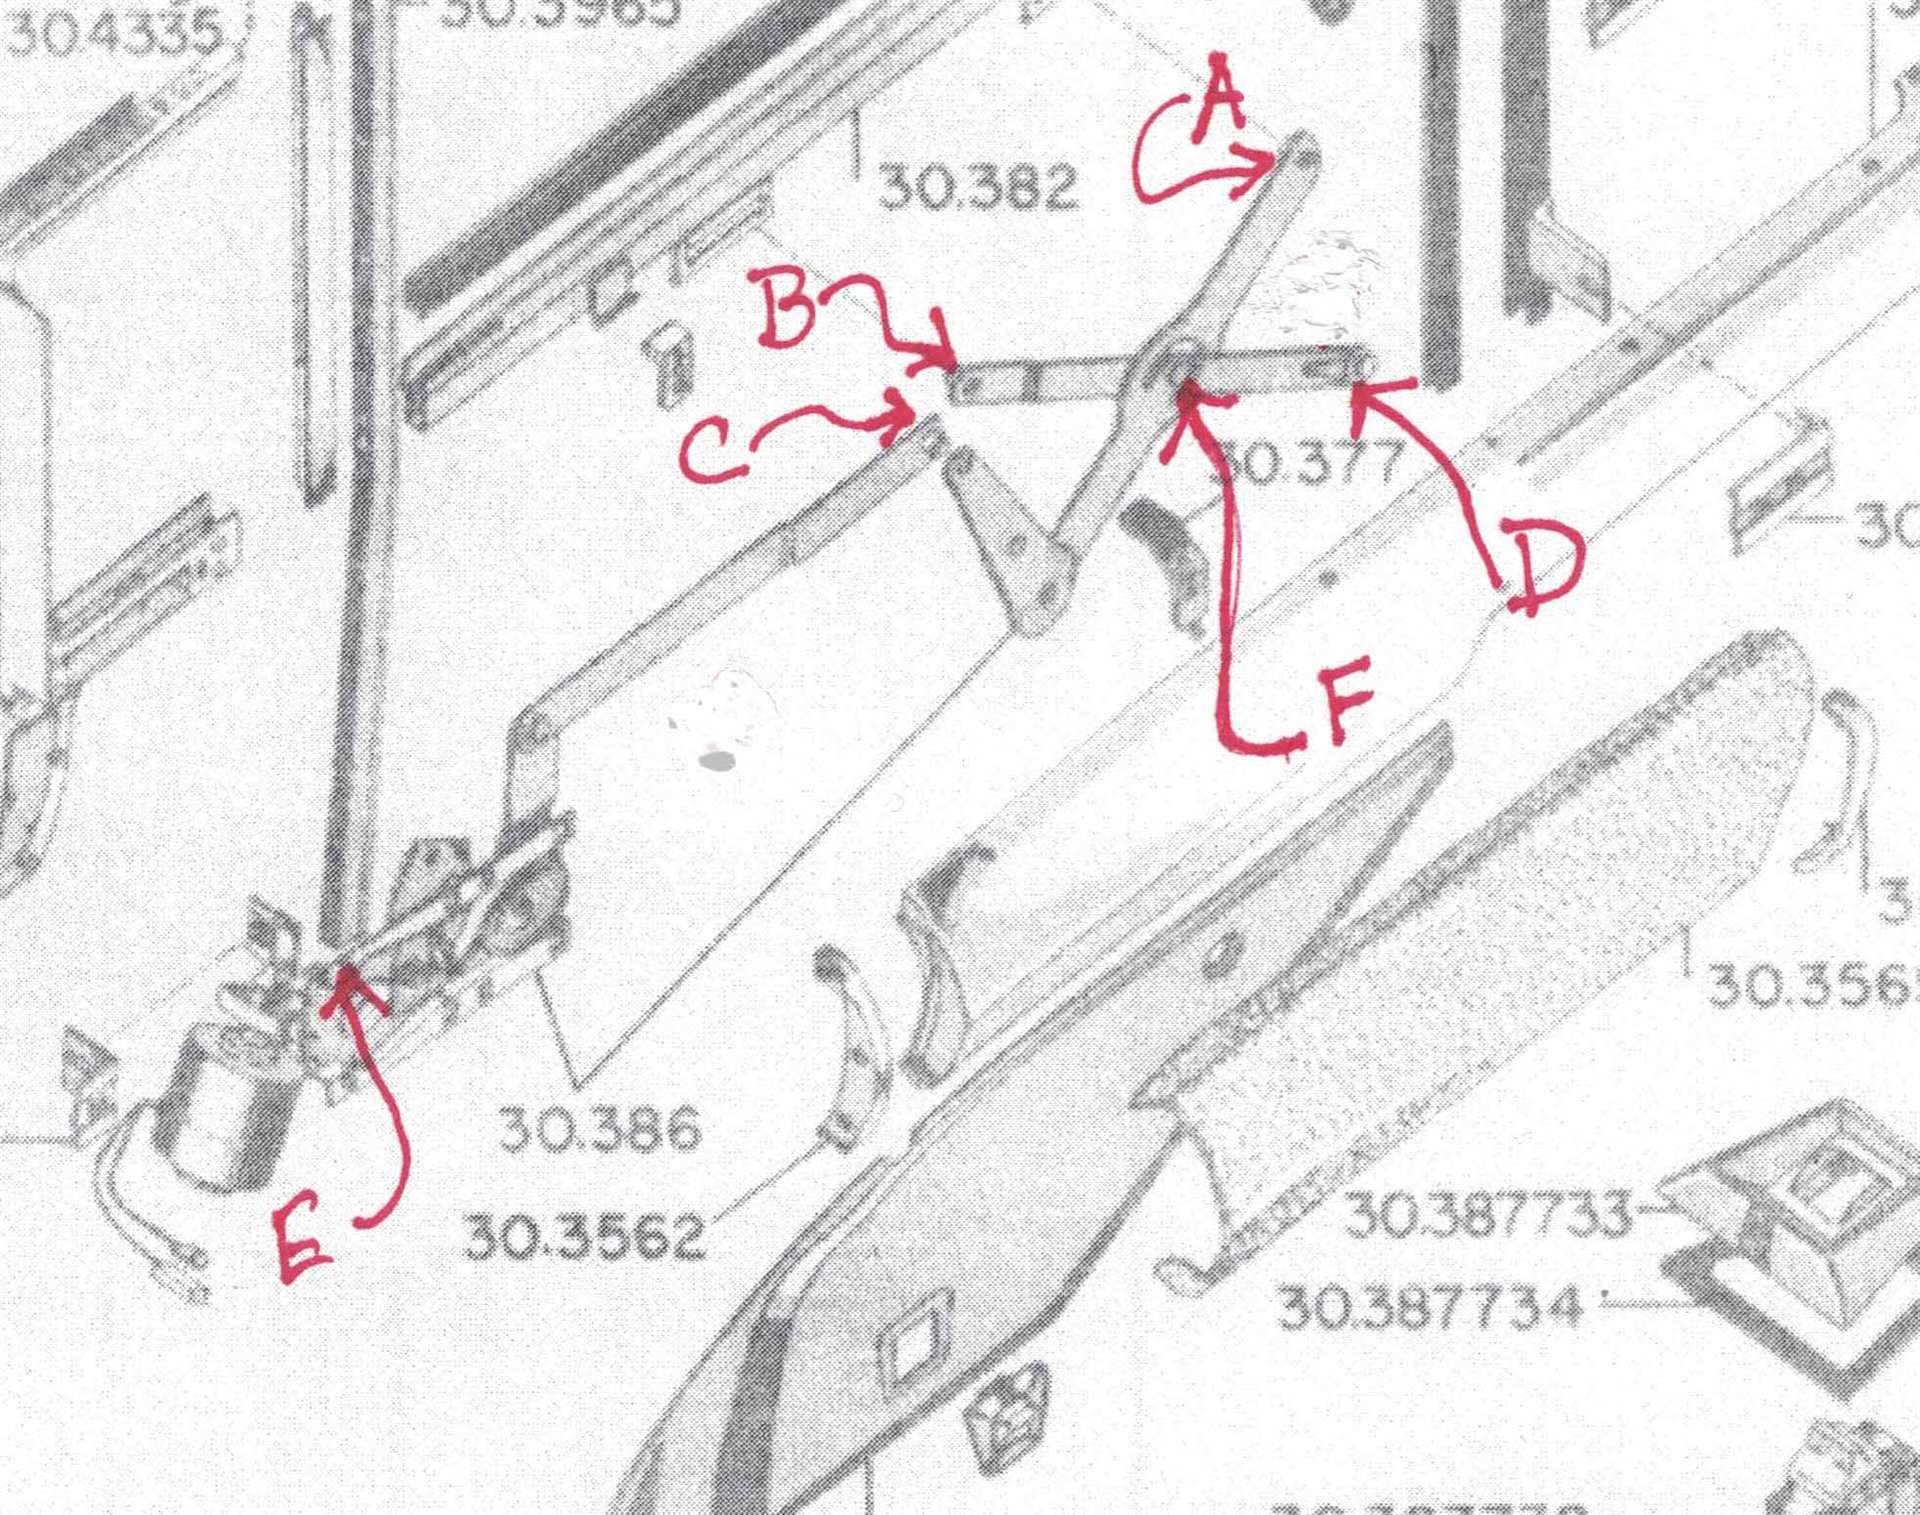
Posted on: 2023/10/4 10:12
|
|||
|
||||
|
Re: '55 Caribbean Power Windows
|
||||
|---|---|---|---|---|
|
Home away from home
|
Got the PW motor yesterday and I'm faced with a bit of a quandary as to how to remove the gear from the original motor.
I'm guessing the two sprockets are pushed together, but any suggestions as to how to separate them would be welcomed. EDIT: Got it figured out after removing all the grease and oil. Gently tapped it out being careful not the damage the shaft. Attach file: Gear-1.JPG (247.04 KB) Gear-2.JPG (213.85 KB) Gear-2.JPG (213.85 KB)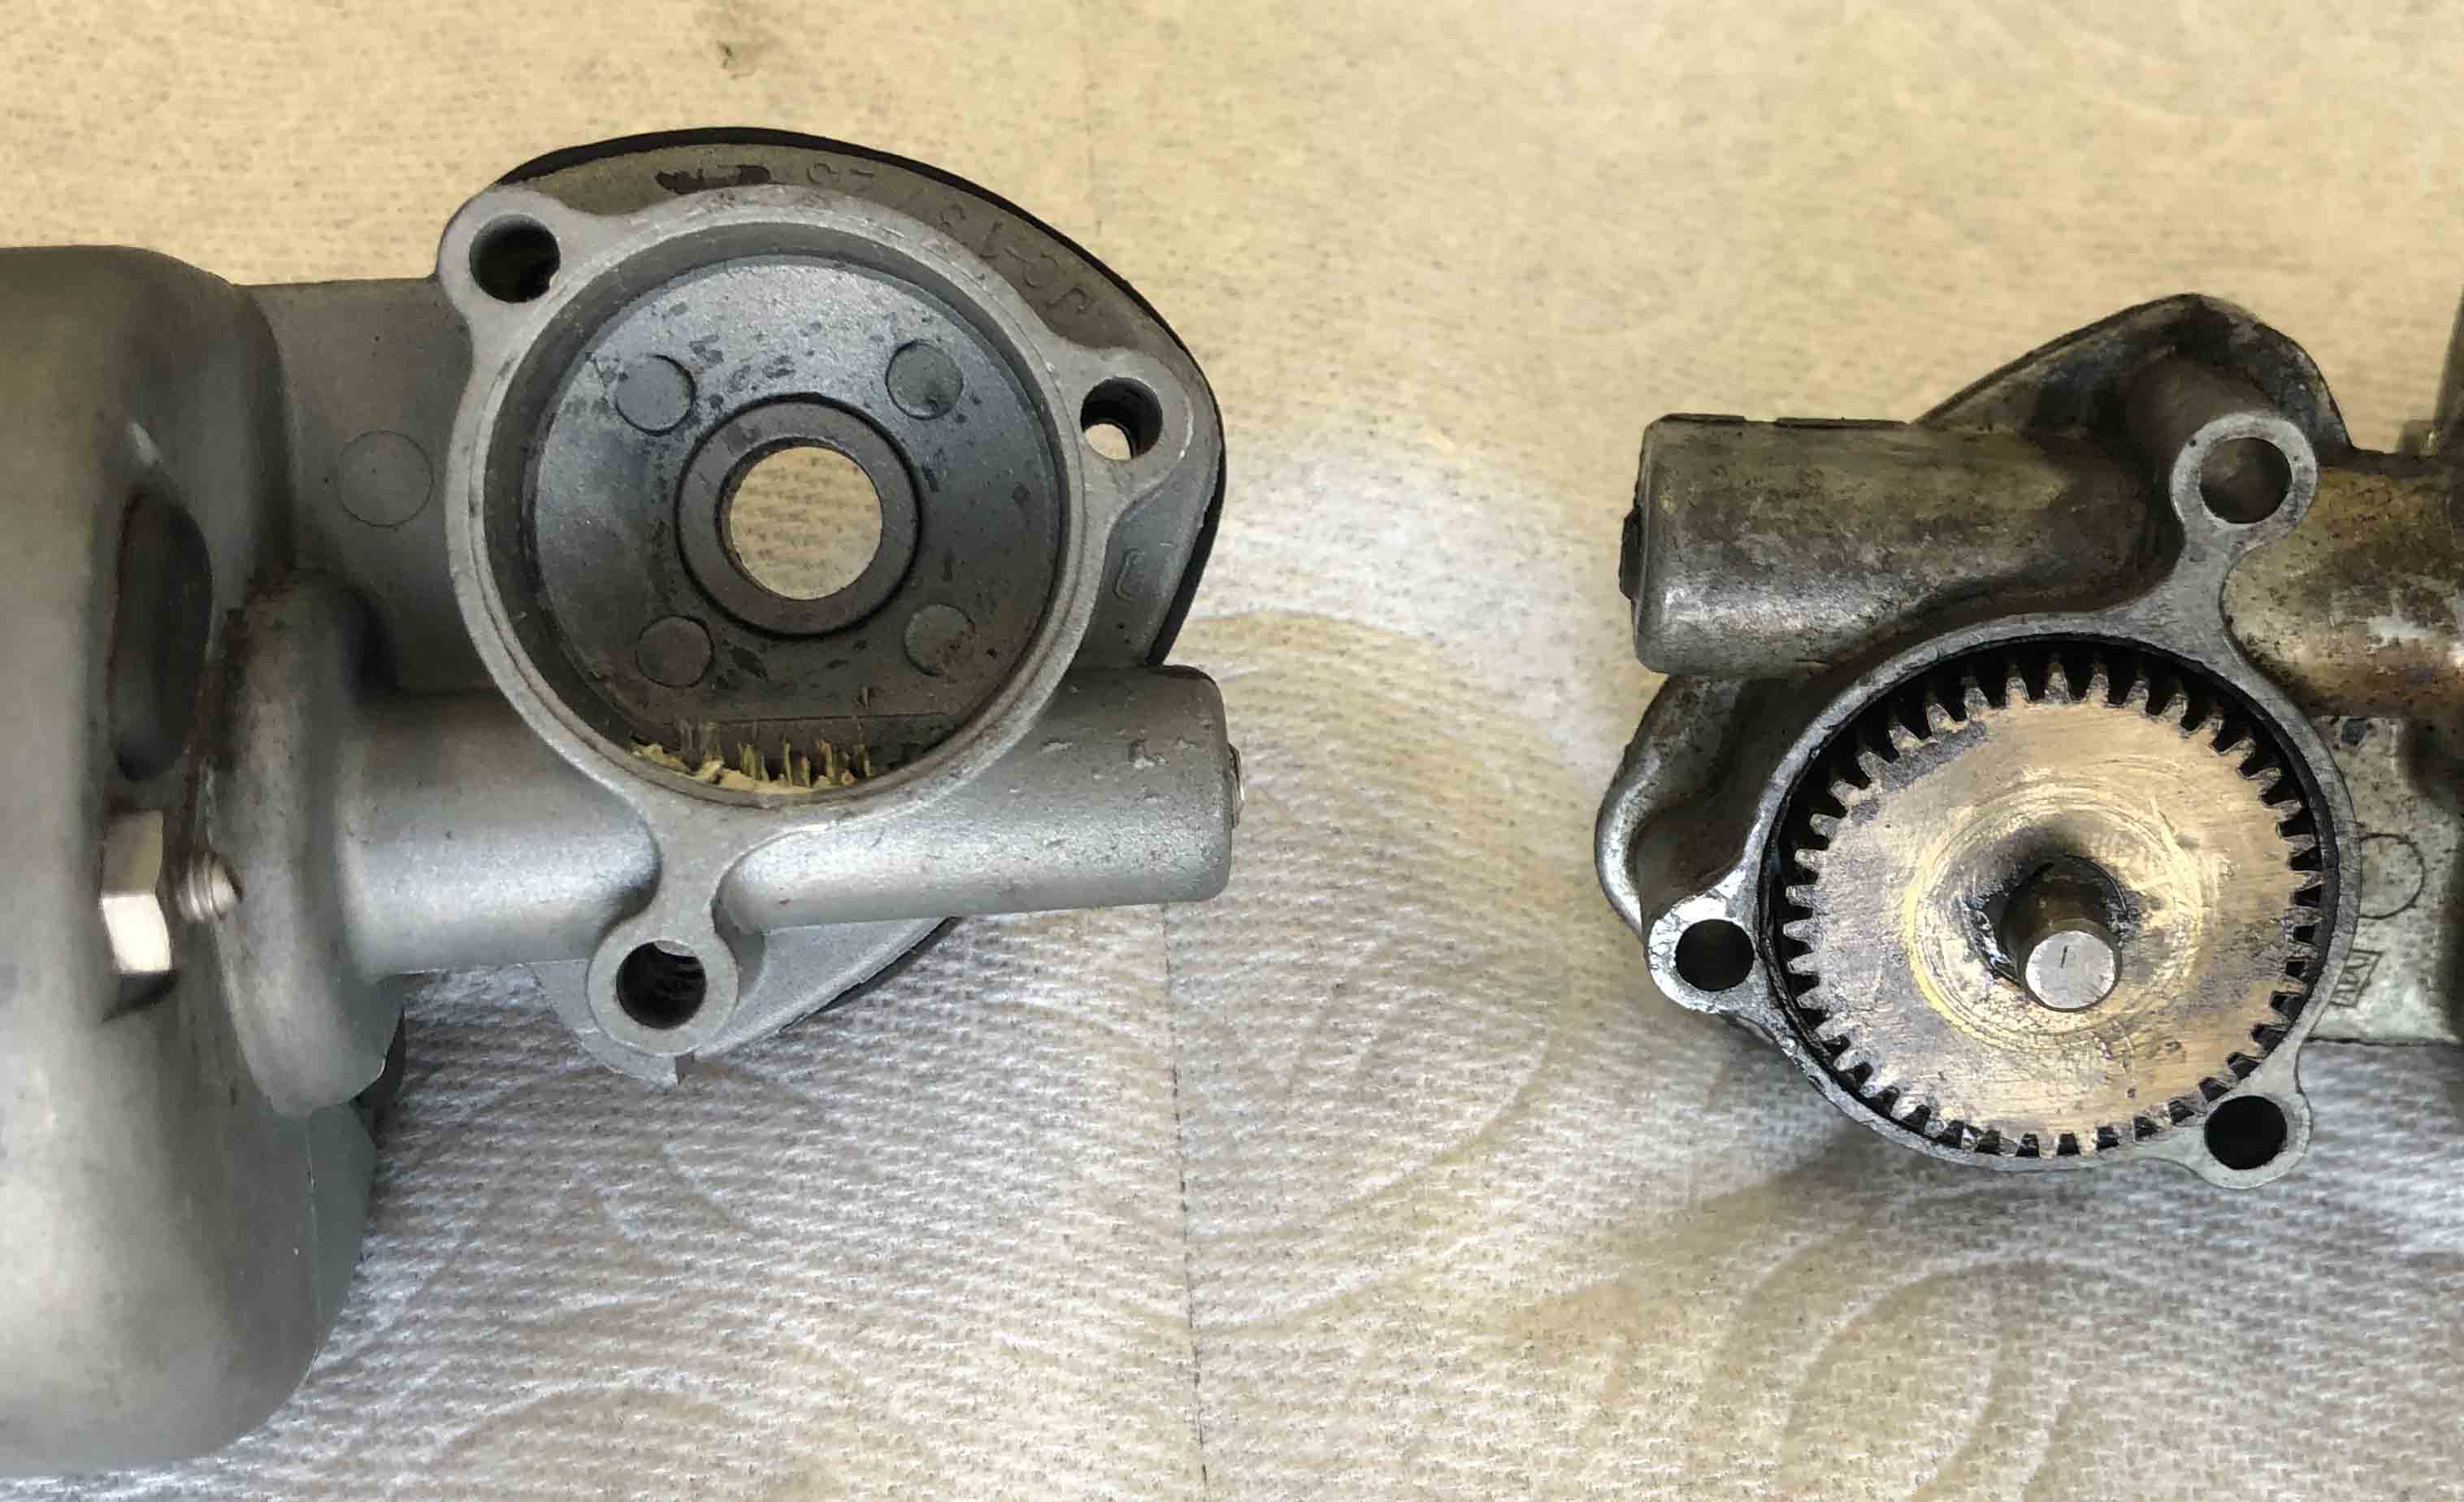
Posted on: 2023/10/1 13:48
|
|||
|
||||
|
Re: '55 Caribbean Power Windows
|
||||
|---|---|---|---|---|
|
Home away from home
|
Howard I thought I had looked at McMaster-Carr, but I guess I didn't. The wire diameter is .007" smaller, but that shouldn't make much difference.
In any case I know that I'll have enough to get the job done. Send me a PM with your address and I'll send you some as a "Finder's Commission".
Posted on: 2023/9/29 17:00
|
|||
|
||||
|
Re: '55 Caribbean Power Windows
|
||||
|---|---|---|---|---|
|
Home away from home
|
Planning for the worse - as in the clip flies off while attempting to install it. I can't seem to find a source for the horseshoe clip (see pic). Any suggestions?
Attach file: Clip.jpg (90.16 KB)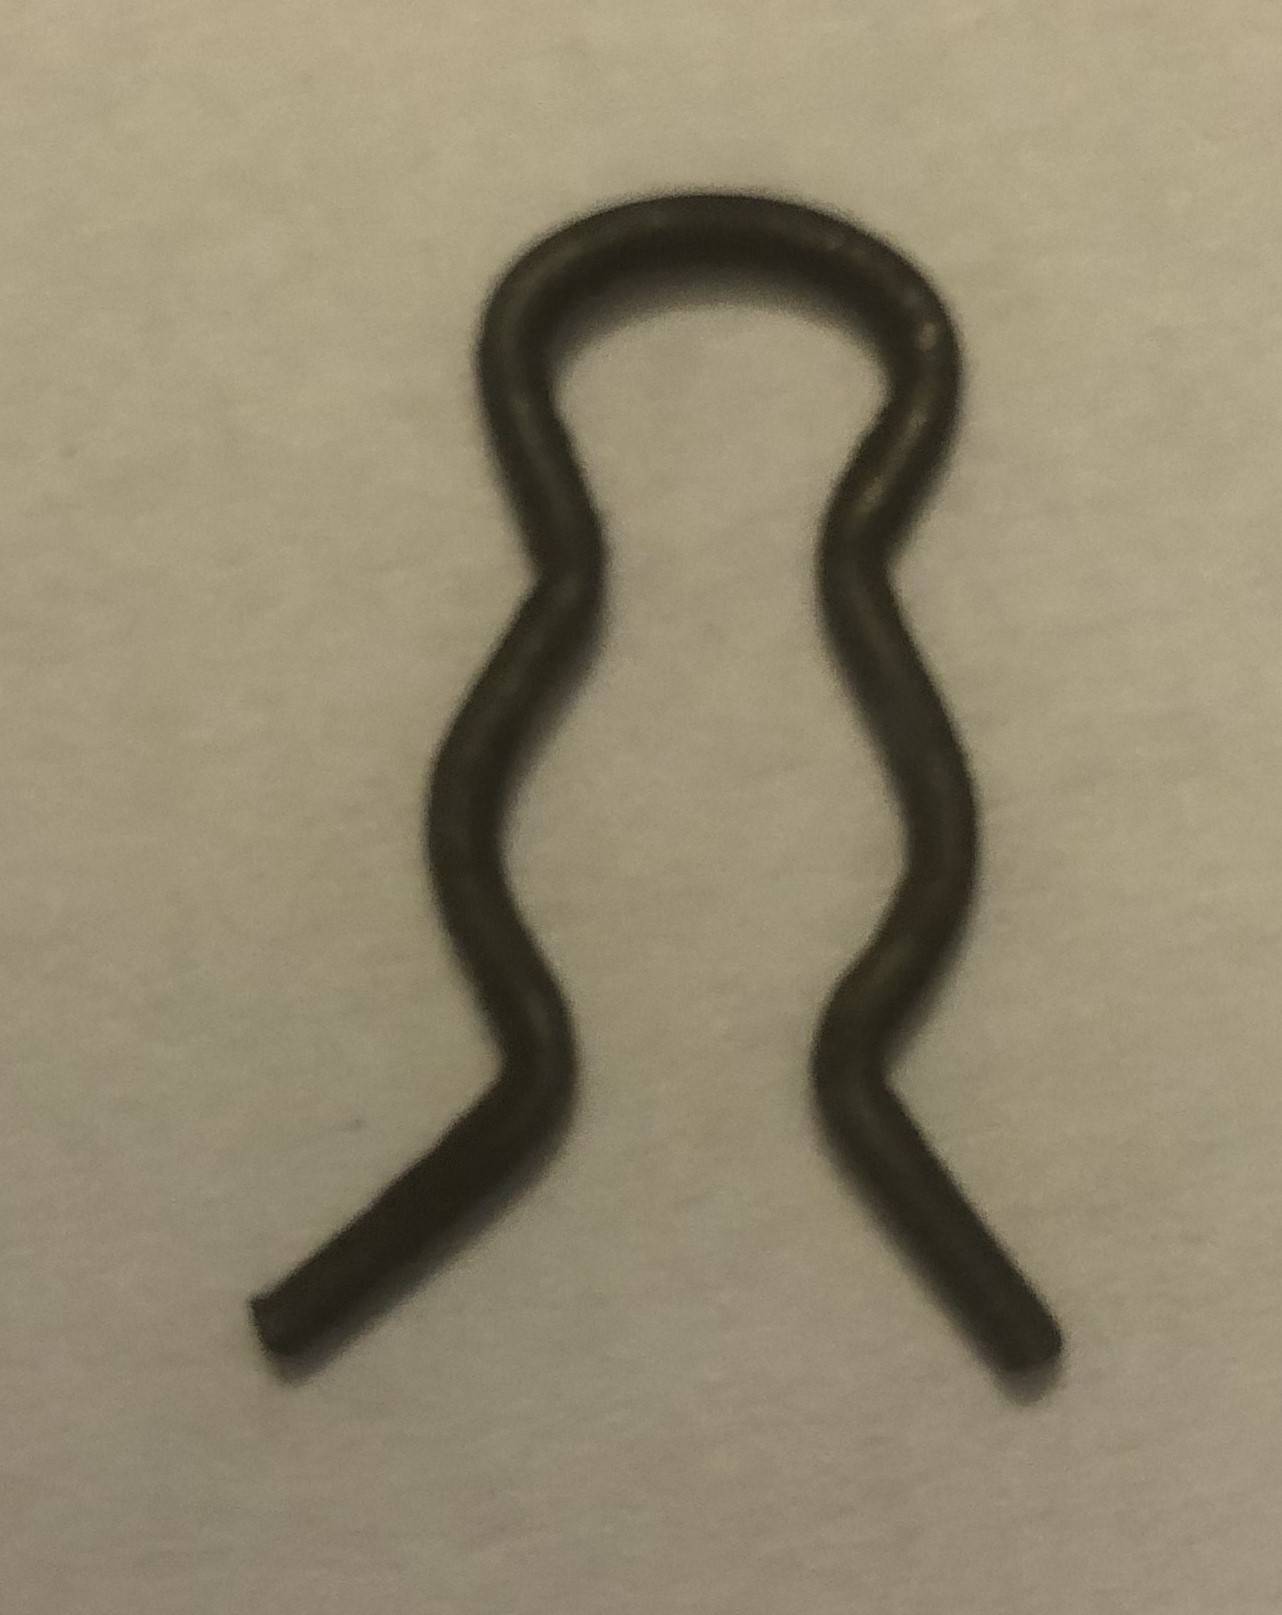
Posted on: 2023/9/29 14:48
|
|||
|
||||
|
Re: '55 Caribbean Power Windows
|
||||
|---|---|---|---|---|
|
Home away from home
|
No problem Howard. When I couldn't find the clip there, I studied the image in post #5 and figured it was there. I wonder why they didn't put the pin/clip where you marked. There is no doubt it would have made things a lot more serviceable.
I have considered drilling it out and putting a pin there with a cotter key. Riki - I'll play around with things based on your suggestions and see what I come up with.
Posted on: 2023/9/29 0:13
|
|||
|
||||
|
Re: '55 Caribbean Power Windows
|
||||
|---|---|---|---|---|
|
Home away from home
|
It turns out that the clip, mentioned in Post #5 was not where the red arrow points was, but at the long end of the arm. With the window all the way up it was impossible to reach and I couldn’t get to it from the top. So I unclipped the two other arms and only with great difficulty was able to reach the one on the long arm. With some struggling I got the PW motor out of the door.
Opening up the motor in an attempt to replace the frayed wires, I discovered the field on one side was fried. I have another motor on the way. I have also reconnected the other two arms to the window and I’m pondering the best way the reconnect the long arm once I get the replacement. Any ideas or suggestions would be appreciated and welcomed.
Posted on: 2023/9/28 20:09
|
|||
|
||||
|
Re: '55 Caribbean Power Windows
|
||||
|---|---|---|---|---|
|
Home away from home
|
Howard an interest bit of info I found on this site Electric Window Motor Circuit Breaker Installation.
Also, I'm still looking for the entire diagram of the hardware linkage that was posted in #5.
Posted on: 2023/9/25 17:06
|
|||
|
||||


