|
Re: Howdy
|
||||
|---|---|---|---|---|
|
Home away from home
|
I paid about $500 to get my Packard tank removed, cleaned, tested, painted, and reinstalled. There was no metal work or repair required on the tank. The job included installing a new fuel gage sensor and fixing the old wiring. I think your low estimate is about what I paid through another shop to the radiator shop.
An old friend had a car with crap in the tank and he had numerous breakdowns because of plugged filters, carbs etc. It is not worth it to go cheap on such a critical job. The dirt in the tank does not go away with time.
Posted on: 2013/10/9 9:19
|
|||
|
Fred Puhn

|
||||
|
||||
|
Re: Fred's Series 23 fuel pump
|
||||
|---|---|---|---|---|
|
Home away from home
|
I considered this, but the line ahead of the fuel pump is under the car and runs at about ambient air temperature. I measured temperature of the fuel line under the hood after a hot drive and the steel line above the exhaust manifold was about 160F. The fuel pump was pretty hot too because it sits in the hot air coming out of the radiator.
Posted on: 2013/10/7 9:41
|
|||
|
Fred Puhn

|
||||
|
||||
|
Re: Fred's Series 23 fuel pump
|
||||
|---|---|---|---|---|
|
Home away from home
|
Step 1 reveals that there may be a better way of putting the electric pump in the system. I originally planned putting the electric pump in line before the mechanical pump. However if you run both pumps at once you get more fuel pressure than the carburetor wants and you may need a fuel pressure regulator. I have had the cheap regulators fail on several cars, and they do not look original. All bad.
After reasearch on the various PI posts I find a strong reccomedation to put the electric pump in parallel with the mechanical pump. That has several advantanges: 1. No chance of pumping the gasoline into the engine through a failed mechanical pump diaphragm. 2. No rubber hoses under the car where they could be damaged. 3. Fuel pressure at the carburator may be low enough to eliminate the fuel pressure regulator (this depends on the electric pump pressure). 4. Electric pump can be mounted in a cool spot near the front of the car where mounting might be easier. 5. It is easy to test the electric pump versus the mechanical pump if a switch is used. I plan to investigate this in more detail before I cut metal. Also I need the mnechanical fuel pump gaskets and the insulating plate between the pump and the block.
Posted on: 2013/10/6 11:55
|
|||
|
Fred Puhn

|
||||
|
||||
|
Fred's Series 23 fuel pump
|
||||
|---|---|---|---|---|
|
Home away from home
|
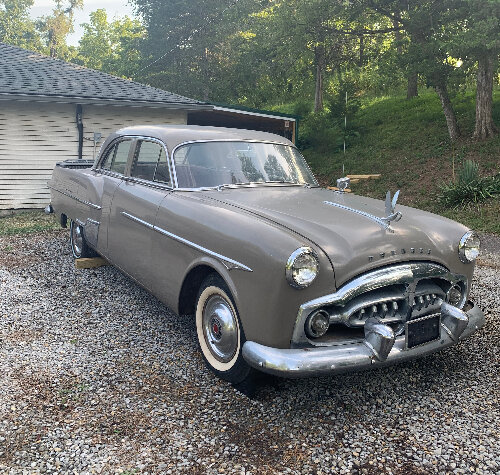
I start out by defining the issues with my 1950 Packard Series 23 Deluxe 8 Touring Sedan:
1. The starter has to crank a long time to get started if the car was driven and sat for 2 or more weeks. It starts easily once I get it going or if it only sat for a day or 2. 2. The car will vapor lock on a hill on the freeway on a hot day. 3. The original heat shield over the fuel pump is missing. I want to car to look original. 4. The insulating sleeves and washers on the fuel pump bolts are mssing. This may be related to a clacking sound I get from the area of the fuel pump. My first job is to plan the job: 1. Install an electric fuel pump near the tank to prime the carburetor for starting and perhaps to fight vapor lock while driving. The pump should be for occasional use so it needs a switch on the dash. 2. Install the original heat shield and insulating parts on the fuel pump. 3. Because of difficult access to the bottom of the engine I will remove the side plate on the engine compartment and work through the wheel well. 4. Since I have access I will check the valve adjustment and clean up that side of the engine. Here is a more detailed list of steps: 1. Research the Packard Information threads to get comments on where and how to mount the fuel pump. 2. Collect all the parts needed for the job. 3. Mount the electric fuel pump on the car. 4. Find a location and mount a toggle switch under the dash. 5. Wire the switch to the pump and test it. 6. Clean and wash off the side of the engine compartment where work will be done. 7. Pull the wheel and side plate from the engine compartment. Paint the side plate and body panels where access permits. 8. Disconnect the fuel line from the pump, drain it, and cut the line near the tank. 9. Install filter and hoses to the fuel line. 10. Remove the fuel pump. Clean and paint the engine where access permits. 11. Fit check the heat shield. If necessary install a stud in the block to replace the rear mounting bolt on the pump. With the heat shield bracket in place this bolt is nearly inaccessable. 12. Install the fuel pump, insulating tubes and washers, and heat shield. Lock the fasteners with wire or use self locking nuts on studs. 13. Remove valve cover plate. Clean and paint it. 14. Check the valve adjustment cold. Adjust if necessary. 15. Install the valve cover plate. 16. Prime the fuel system with electric pump, start engine, and check for fuel leaks. 17. Test drive the car and check for fuel leaks. 
Posted on: 2013/10/4 10:13
|
|||
|
Fred Puhn

|
||||
|
||||
|
Re: Super Clipper Snubber
|
||||
|---|---|---|---|---|
|
Home away from home
|
My 23rd Series Deluxe 8 has Ultramatic and also the simple snubber rod. I got the rubber grommets from Steele. I have no idea why the snubber is necessary on an automatic.
Posted on: 2013/10/3 9:11
|
|||
|
Fred Puhn

|
||||
|
||||
|
Re: Fog IN the windows?
|
||||
|---|---|---|---|---|
|
Home away from home
|
I just did that job on my 1950 Packard. The glass was removed and put back in by my paint shop. The cost was about $75 each to make the new glass and $25 for the wind wing.
Posted on: 2013/9/29 21:43
|
|||
|
Fred Puhn

|
||||
|
||||
|
Re: Howdy
|
||||
|---|---|---|---|---|
|
Home away from home
|
I had the same problem with an old Hudson that had sat for years. The fuel tank was dry so I poured new gas into it. The car would start by pouring gas into the carbs but would only run for a short time. No gas pumped out of my rebuilt fuel pump into my twin rebuilt carbs.
I sold the car showing that issue to the buyer. He played around using new gas and eventually the gas dissolved the gunk in the tank. Then the gunk came through the fuel lines and plugged up both the fuel pump and the carbs. They both had to be rebuilt again. To solve this problem remove the tank and have it cleaned and checked at a radiator shop. Install an inline filter before the fuel pump to protect it. When the tank is out you can check the fuel sending unit and fix it if necessary.
Posted on: 2013/9/29 21:39
|
|||
|
Fred Puhn

|
||||
|
||||
|
Re: scuff plates '49 - 2 dr
|
||||
|---|---|---|---|---|
|
Home away from home
|
I just bought a set for my Series 23 4-door. They do not have the sheet metal so you have to do a bit of engineering to attach them. Also they do not fit perfectly so I had to trim them a bit with a disk sander to get them to lay down properly. The small lines on the part are hardly noticable.
The supplier suggested glueing them down with trim cement. That would work OK until you wanted to remove the chrome strip that covers the edge of the carpet. To allow access to this part I attached the sill plates to the door sill using strips of velcro. I was able to get 1 inch wide strips with adhesive in the back and they were easy to install. The car looks nice. If anyone wants to own some old original sill plates with the sheet metal I would be happy to sell my old ones. $100 plus shipping would buy them all. Some clips are broken and there is some rust on the sheet metal. The edges of the plastic are broken off by the paint shop using a pry bar to try to remove them. The "Packard" lettering portion looks good.
Posted on: 2013/9/29 21:25
|
|||
|
Fred Puhn

|
||||
|
||||
|
Re: Parts info?
|
||||
|---|---|---|---|---|
|
Home away from home
|
When waking up a "sleeping beauty" car you need to change all the fluids (fuel, oil, coolant, brake fluid). The fuel is the worst because it evaporates and leave horrible stuff behind in the tank. In the past I have started an engine with a small clean auxiliary tank and gravity feed to the carb. A small tank can be from a lawn mover or a motorbike. Just hang it above the carb to let the fuel flow down without needing a fuel pump. Keep a fire extinguisher handy just in case.
Before cranking the engine change the oil and filter so you go not run the old gunk through the bearings. Take the spark plugs out, put some light oil in the cylinders. Then turn the engine 2 or more revolutions by hand to make sure it is not stuck. Use a hand crank or wrench on the front pully bolt. If it turns freely then spin it over with the starter and make sure there is oil pressure or at least some oil flow. Without oil flow the engine likely will be ruined if it starts. Then you can put in spark plugs and try to start it. Do not run it long without coolant in it. Also make sure the transmission has oil in it before running the engine. I blew a transmission bearing once by running an engine on a dry transmission with the transmission in neutral. Best of luck on starting her up. On the Packard parts there are several good sources. Start with Max Merrick and Kanter.
Posted on: 2013/9/22 9:57
|
|||
|
Fred Puhn

|
||||
|
||||


