|
Re: Wiring Harness Install ('55 Packard (5587) 400)
|
||||
|---|---|---|---|---|
|
Home away from home

|
Quote:
Hey Mr “The 400” I have one also and I’d love to see some pics of yours. Can you add some detail what you mean 21 vs 28 circuit? Or where you are shopping for one? But first if I were you I would go ahead and start a project blog. These cars are very popular in the Packard community so you’ll get lots of help if you ask. If you answer there I will see it. https://packardinfo.com/xoops/html/modules/newbb/viewforum.php?forum=10
Posted on: 4/23 7:45
|
|||
|
'55 400. Needs aesthetic parts put back on, and electrical system sorted.
'55 Clipper Deluxe. Engine is stuck-ish. |
||||
|
||||
|
Re: Oiling system history recap and update on the Oldsmobile oil pump conversion
|
||||
|---|---|---|---|---|
|
Home away from home
|
One idea to repair excessive gear endplay would be to punch a 1/2” hole in some 1-1/2” disc shims, 0.002 thk then install one above each gear. The only difficult thing to DIY is getting the ID punched exactly in the center… or just use a 5/8 ID punch LOL.
https://www.mcmaster.com/product/2904T62
Posted on: 4/23 7:29
|
|||
|
'55 400. Needs aesthetic parts put back on, and electrical system sorted.
'55 Clipper Deluxe. Engine is stuck-ish. |
||||
|
||||
|
Re: Oiling system history recap and update on the Oldsmobile oil pump conversion
|
||||
|---|---|---|---|---|
|
Home away from home
|
Quote:
The service manual says to dress it down with a surface plate but there is nothing specific in the drawing. That would be covered in the endplay which as I mentioned, contradicts the service manual. I should measure the endplay, and gear & bore lengths on my pumps and see what they actually are. One curiosity is that the assembly in the drawing I have does not have the vacuum pump attached. Instead, it has just a plate held on with cap screws. The one drawing that I asked the Studebaker museum for but that I don't have is the one for body with the late design relief valve, 6492431. I have only the earlier body 440679. When I have a sec I'll cross reference the assembly BOM on my drawing vs. the parts book. Because I have the important component part drawings, I did not ask them if they had 440679, the assembly drawing as given in the parts book. But while searching they stumbled upon the drawing I did order which is a much newer number and was drawn in mid 1956.
Posted on: 4/23 7:06
|
|||
|
'55 400. Needs aesthetic parts put back on, and electrical system sorted.
'55 Clipper Deluxe. Engine is stuck-ish. |
||||
|
||||
|
Re: Oiling system history recap and update on the Oldsmobile oil pump conversion
|
||||
|---|---|---|---|---|
|
Home away from home
|
Quote:
You'll have to tell me as I don't have an earlier pump or drawing to compare.  When I have a sec I'll grab the dwg again and post the dimension. When I have a sec I'll grab the dwg again and post the dimension.The two gears in this pump are the same in all "gear" respects including length.
Posted on: 4/23 6:51
|
|||
|
'55 400. Needs aesthetic parts put back on, and electrical system sorted.
'55 Clipper Deluxe. Engine is stuck-ish. |
||||
|
||||
|
Re: Oiling system history recap and update on the Oldsmobile oil pump conversion
|
||||
|---|---|---|---|---|
|
Home away from home
|
Having picked up some copies of the factory drawings, I'm able to give some data:
Shaft dia was .4930 to .4935 Bore dia was .4950 to .4960 Note that this applies only to the driving shaft. The driven gear was on a dowel pin, 440601, which was a press fit into another .495–.496 hole. You will note that this is a 1.5 to 3 thou drive shaft tolerance from the factory; yet no allowance past 3 was given in the service checks. The two gears were identical except for the obvious differences and bore dia. The gears when mounted in the pump have an end clearance per the factory drawings of 2 to 6 thou, yet strangely the service manual gives no more than 3 thou as acceptable. I have a 1953 and 1956 oil pump body drawing and this was not changed between them. My gear drawing is from 1953. Though both the "1953" drawings were revised through 1955 with no change in this regard. In addition I have another oil pump assembly drawing from 1956 that specifically gives 2 to 6. I can only assume they may have been selectively assembled to keep the gap down, but that would still result in a typical gap of 4. The gear bore is 1.500–1.501 and the gear OD is 1.4945–1.6945. Again, the service manual gives no allowance for wear, specifying no more than 5 thou. Hope someone finds this interesting and that the Studebaker museum enjoys my "donation". Let me know if you have any questions that I could look up for you. I don't have EVERY drawing just the most important drawings.
Posted on: 4/22 19:49
|
|||
|
'55 400. Needs aesthetic parts put back on, and electrical system sorted.
'55 Clipper Deluxe. Engine is stuck-ish. |
||||
|
||||
|
Re: Website
|
||||
|---|---|---|---|---|
|
Home away from home
|
Regarding parts cross reference:
I stumbled upon this ancient thread on the AACA forums for 55-56. I imagine some of the info is still good. I don't have time to dig through it now but it might be useful in the future https://forums.aaca.org/topic/28405-55-56-xref/
Posted on: 4/22 18:36
|
|||
|
'55 400. Needs aesthetic parts put back on, and electrical system sorted.
'55 Clipper Deluxe. Engine is stuck-ish. |
||||
|
||||
|
Re: hph's 55 Clipper Project
|
||||
|---|---|---|---|---|
|
Home away from home
|
Also, here is how I removed my vibration damper. First, remove the bolt and washer then screw the bolt back in about half way. Get a deep well 1-1/16 socket and, very important, fill it almost all the way up with washers. For me, 3/16 washers happened to have the right OD. Then just press with the C-clamps.
Eventually once it’s mostly out, flip the socket around and loosen the bolt to be only about 1/4 threaded. This will give the reach necessary. Even more than that and you can tap LIGHTLY with a dead blow on alternating sides to bump it out. Attach file:  CE09505F-BC20-47E8-BD73-DD8CAA8EB785.jpeg (481.51 KB) CE09505F-BC20-47E8-BD73-DD8CAA8EB785.jpeg (481.51 KB)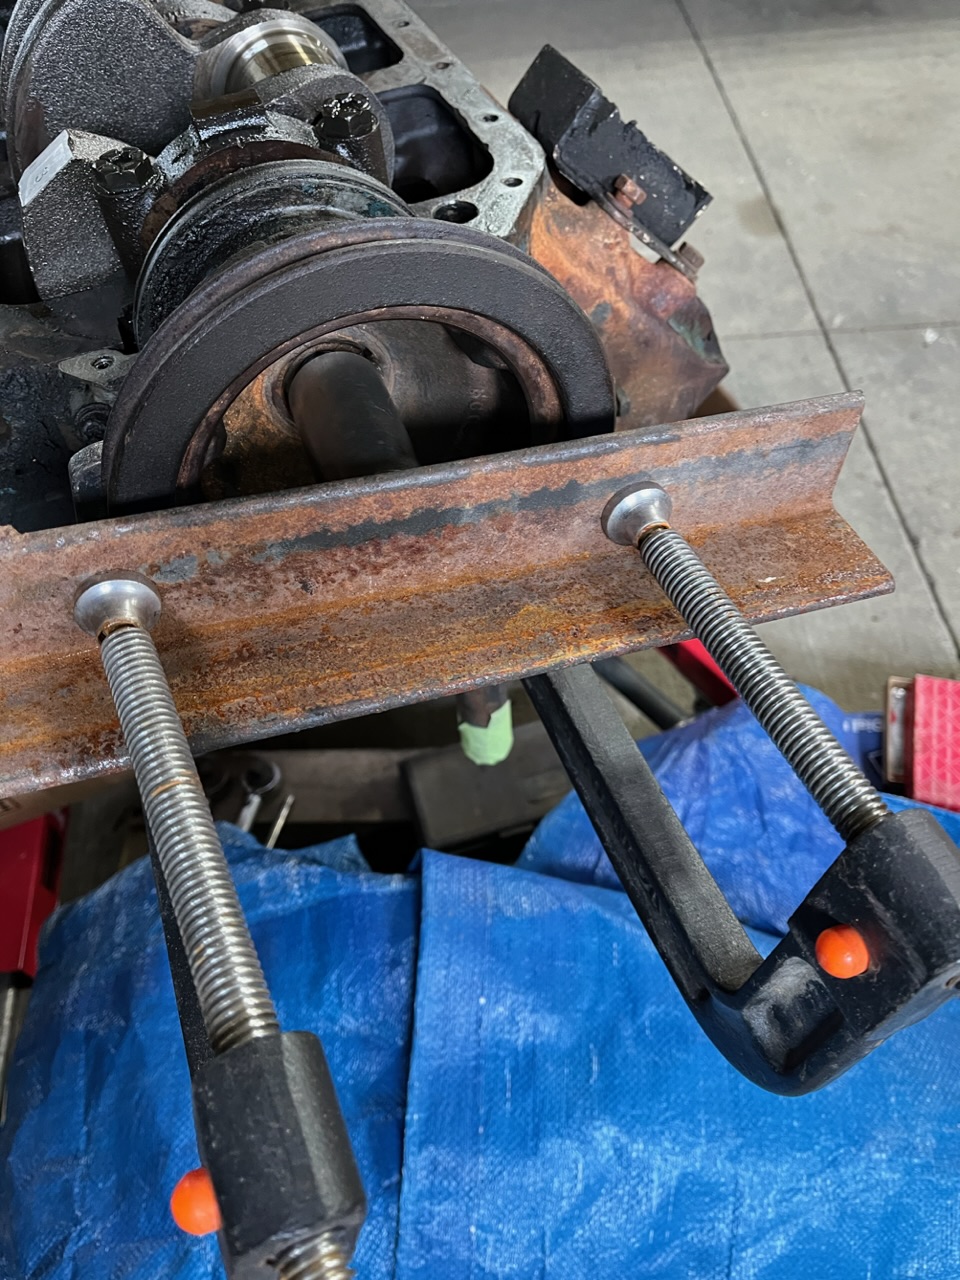 35372281-AACD-402A-B165-671470C067D1.jpeg (462.82 KB) 35372281-AACD-402A-B165-671470C067D1.jpeg (462.82 KB)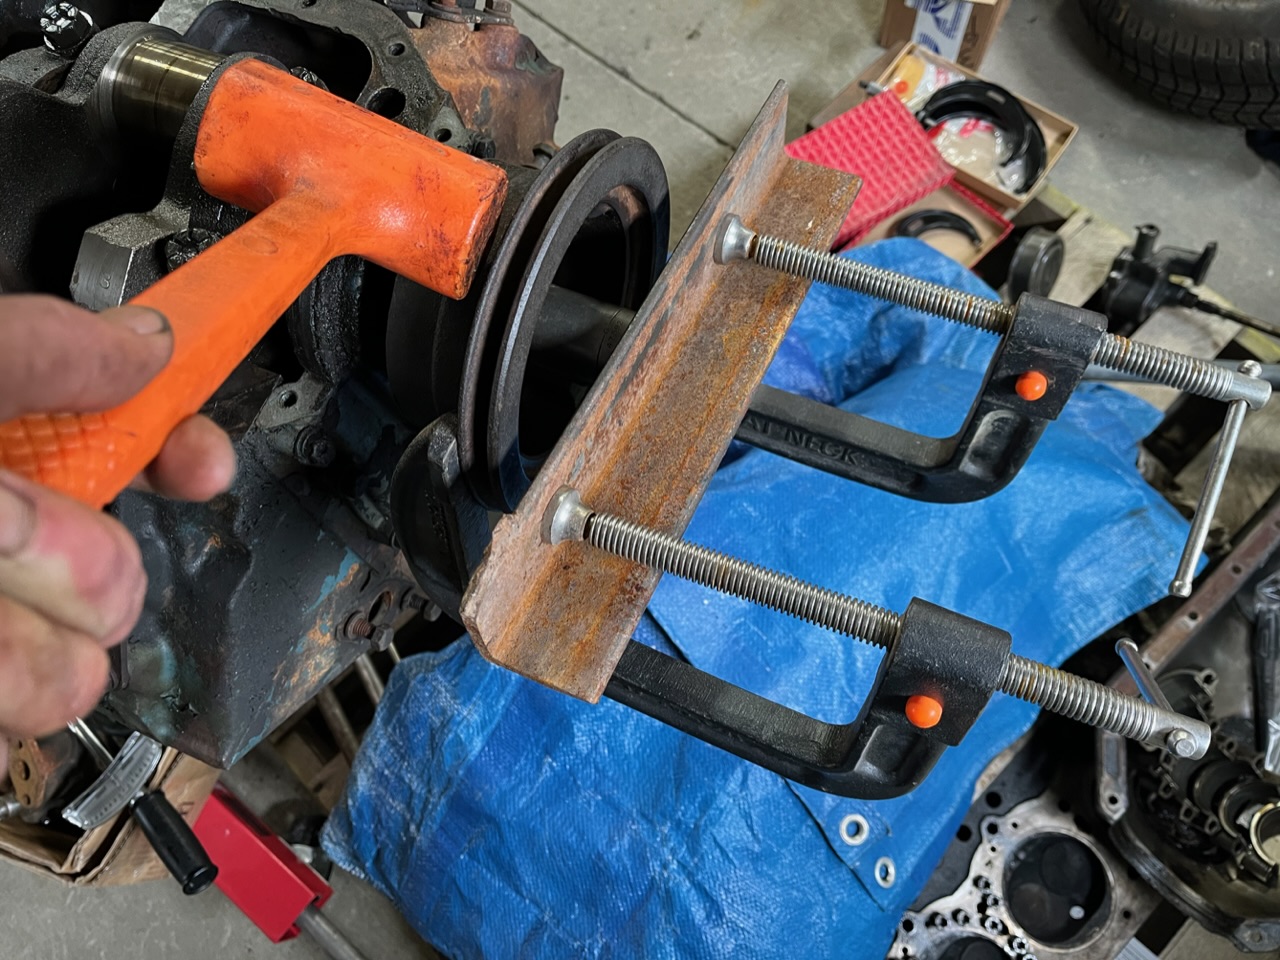
Posted on: 4/22 13:21
|
|||
|
'55 400. Needs aesthetic parts put back on, and electrical system sorted.
'55 Clipper Deluxe. Engine is stuck-ish. |
||||
|
||||
|
Re: hph's 55 Clipper Project
|
||||
|---|---|---|---|---|
|
Home away from home
|
I got the rear U joint disassembled yesterday. I had to use a wrench and hammer combo to bang out one side. Literally took probably 100 hits or more. But then I could just press out the other side. Unfortunately the U joint is a bit messed up as shown in the photo. Not sure if this is from the effort it took to remove it or if it happened on the road 30+ years ago (note the metal shavings that collected in the center, so I am thinking the latter). It still spins over okay so I just repacked it and stuck it back in, but I plan to replace it before too long.
I tested the tolerance on all the main bearings except #5 and they were all 1.9-2.2 thou. I removed all the pistons; the #2 cylinder looks a bit “ruff” so I think I want to hone them and install new rings. In the meantime I can de-gunk the pistons. Attach file: DE79BAD8-519A-4785-86A0-27FC7FEE6516.jpeg (405.37 KB)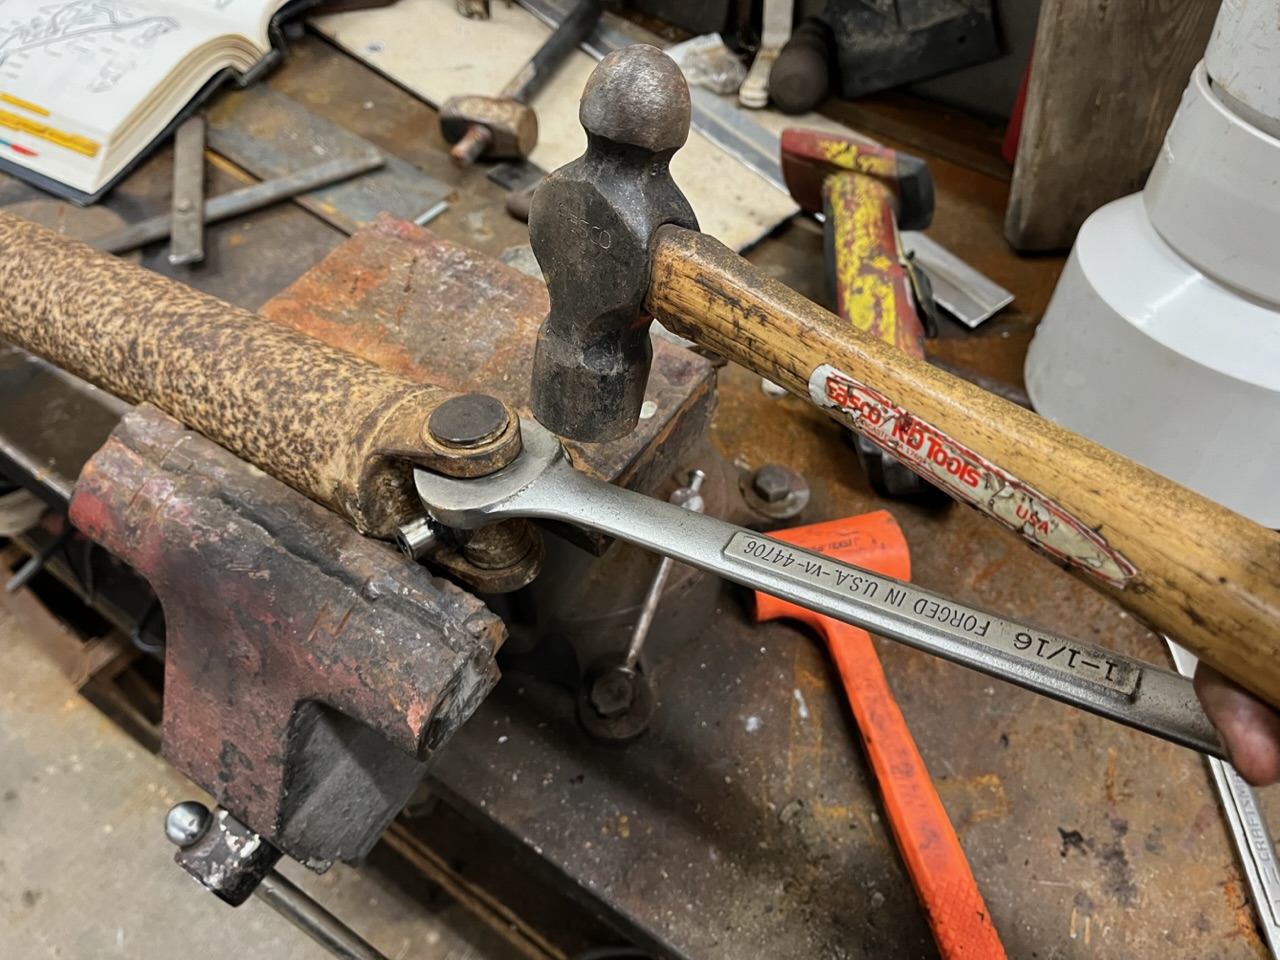 5837573F-C72F-4554-AD28-D82A9681E723.jpeg (384.32 KB) 5837573F-C72F-4554-AD28-D82A9681E723.jpeg (384.32 KB) ED28F154-BC86-487F-B89B-8719CDBF1570.jpeg (670.86 KB) ED28F154-BC86-487F-B89B-8719CDBF1570.jpeg (670.86 KB)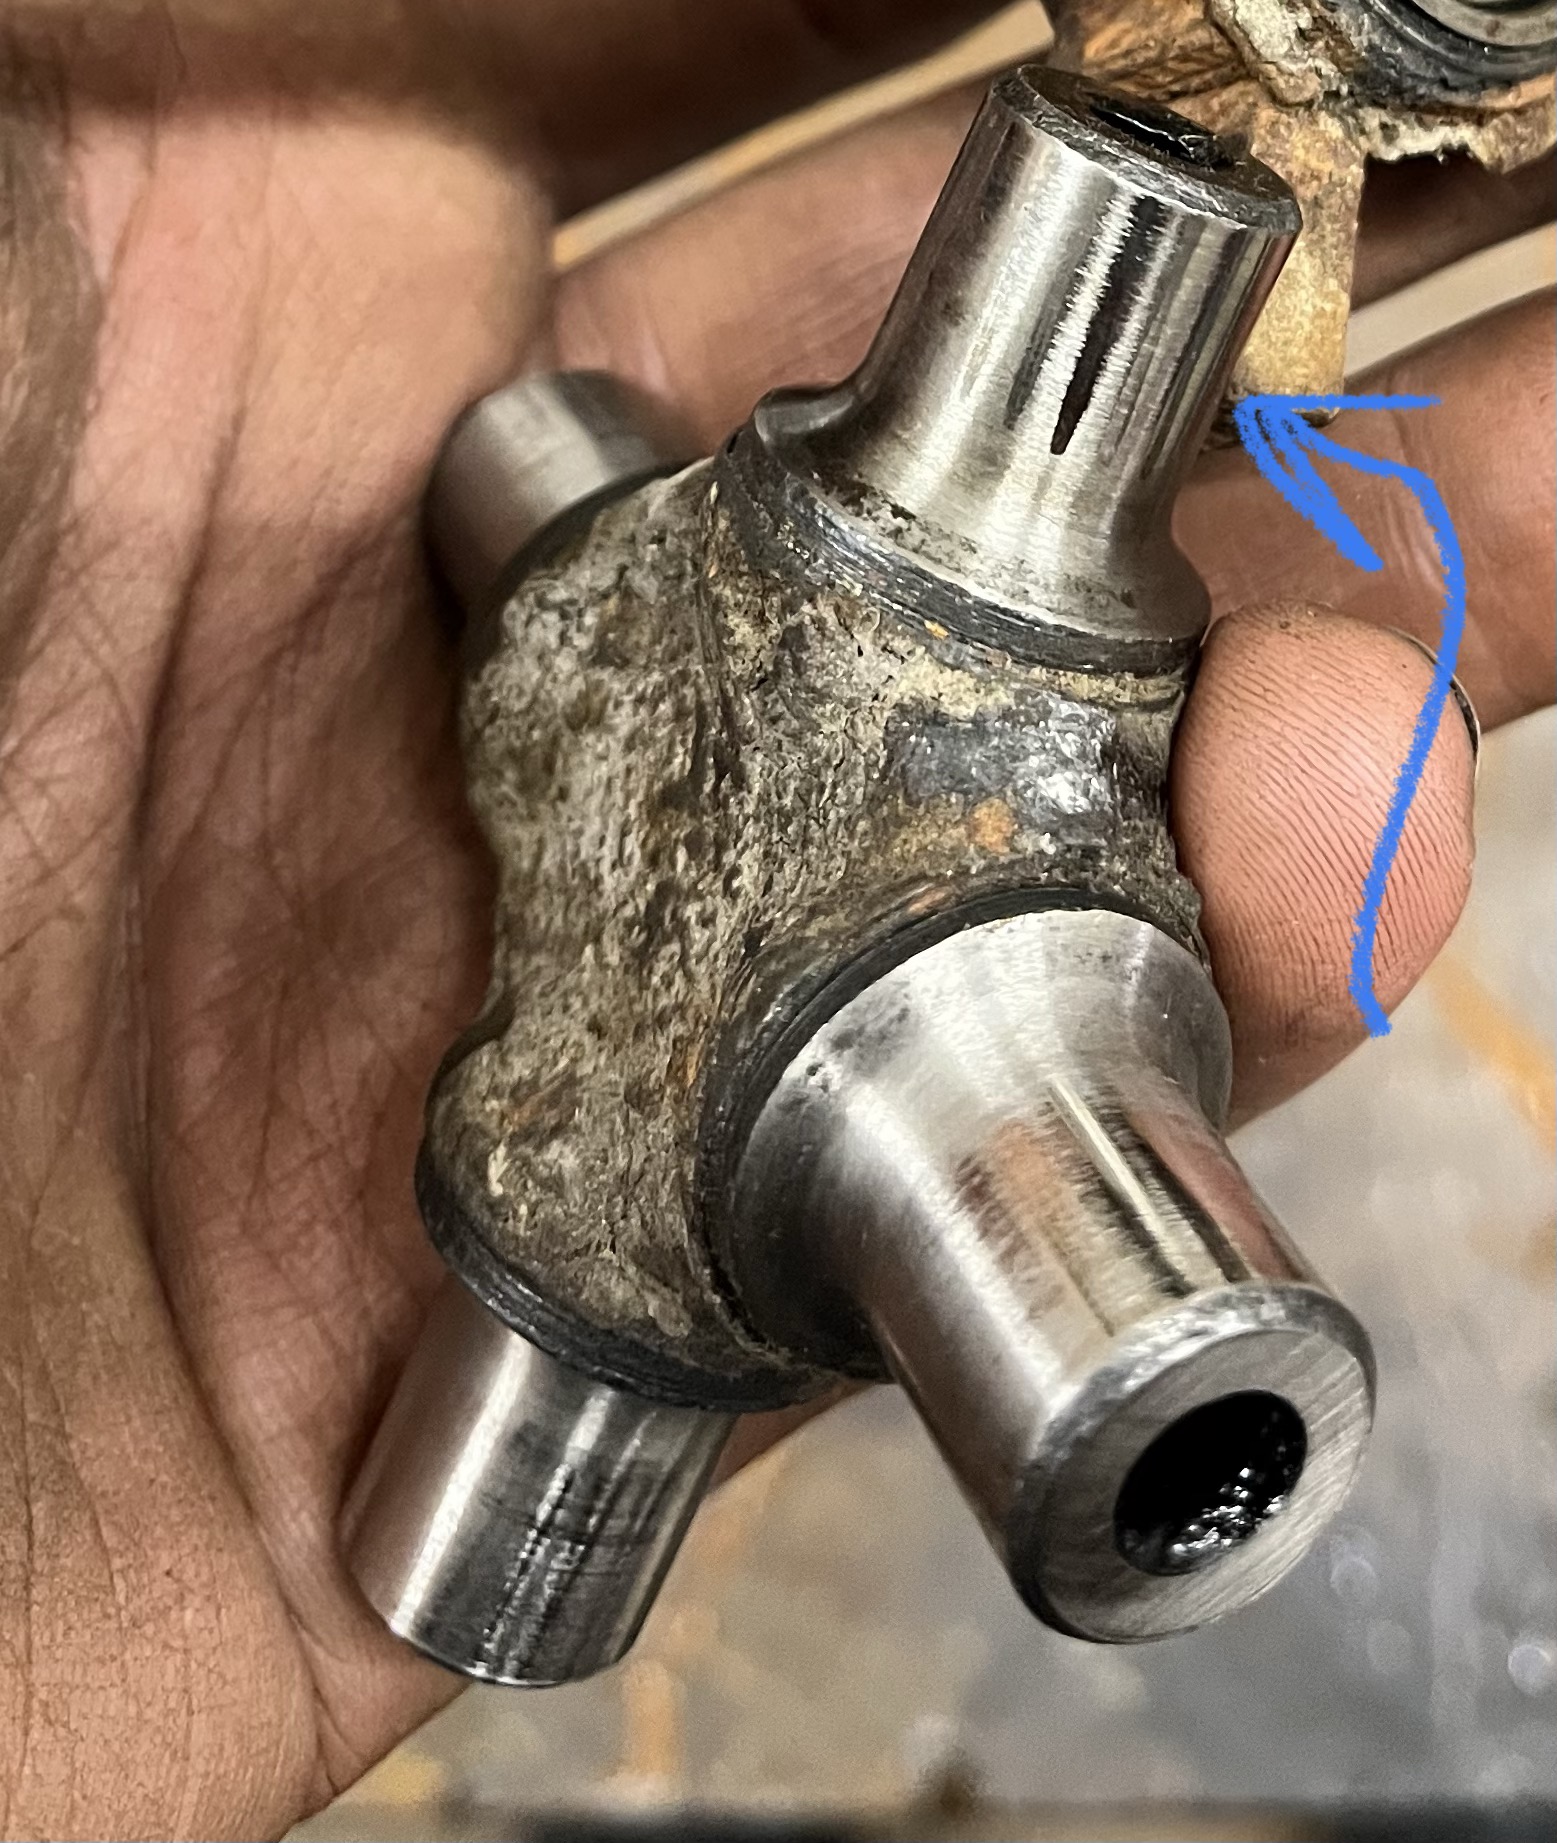 F9826AE0-1EFC-41C3-B5B1-CA27DA73399F.jpeg (674.63 KB) F9826AE0-1EFC-41C3-B5B1-CA27DA73399F.jpeg (674.63 KB)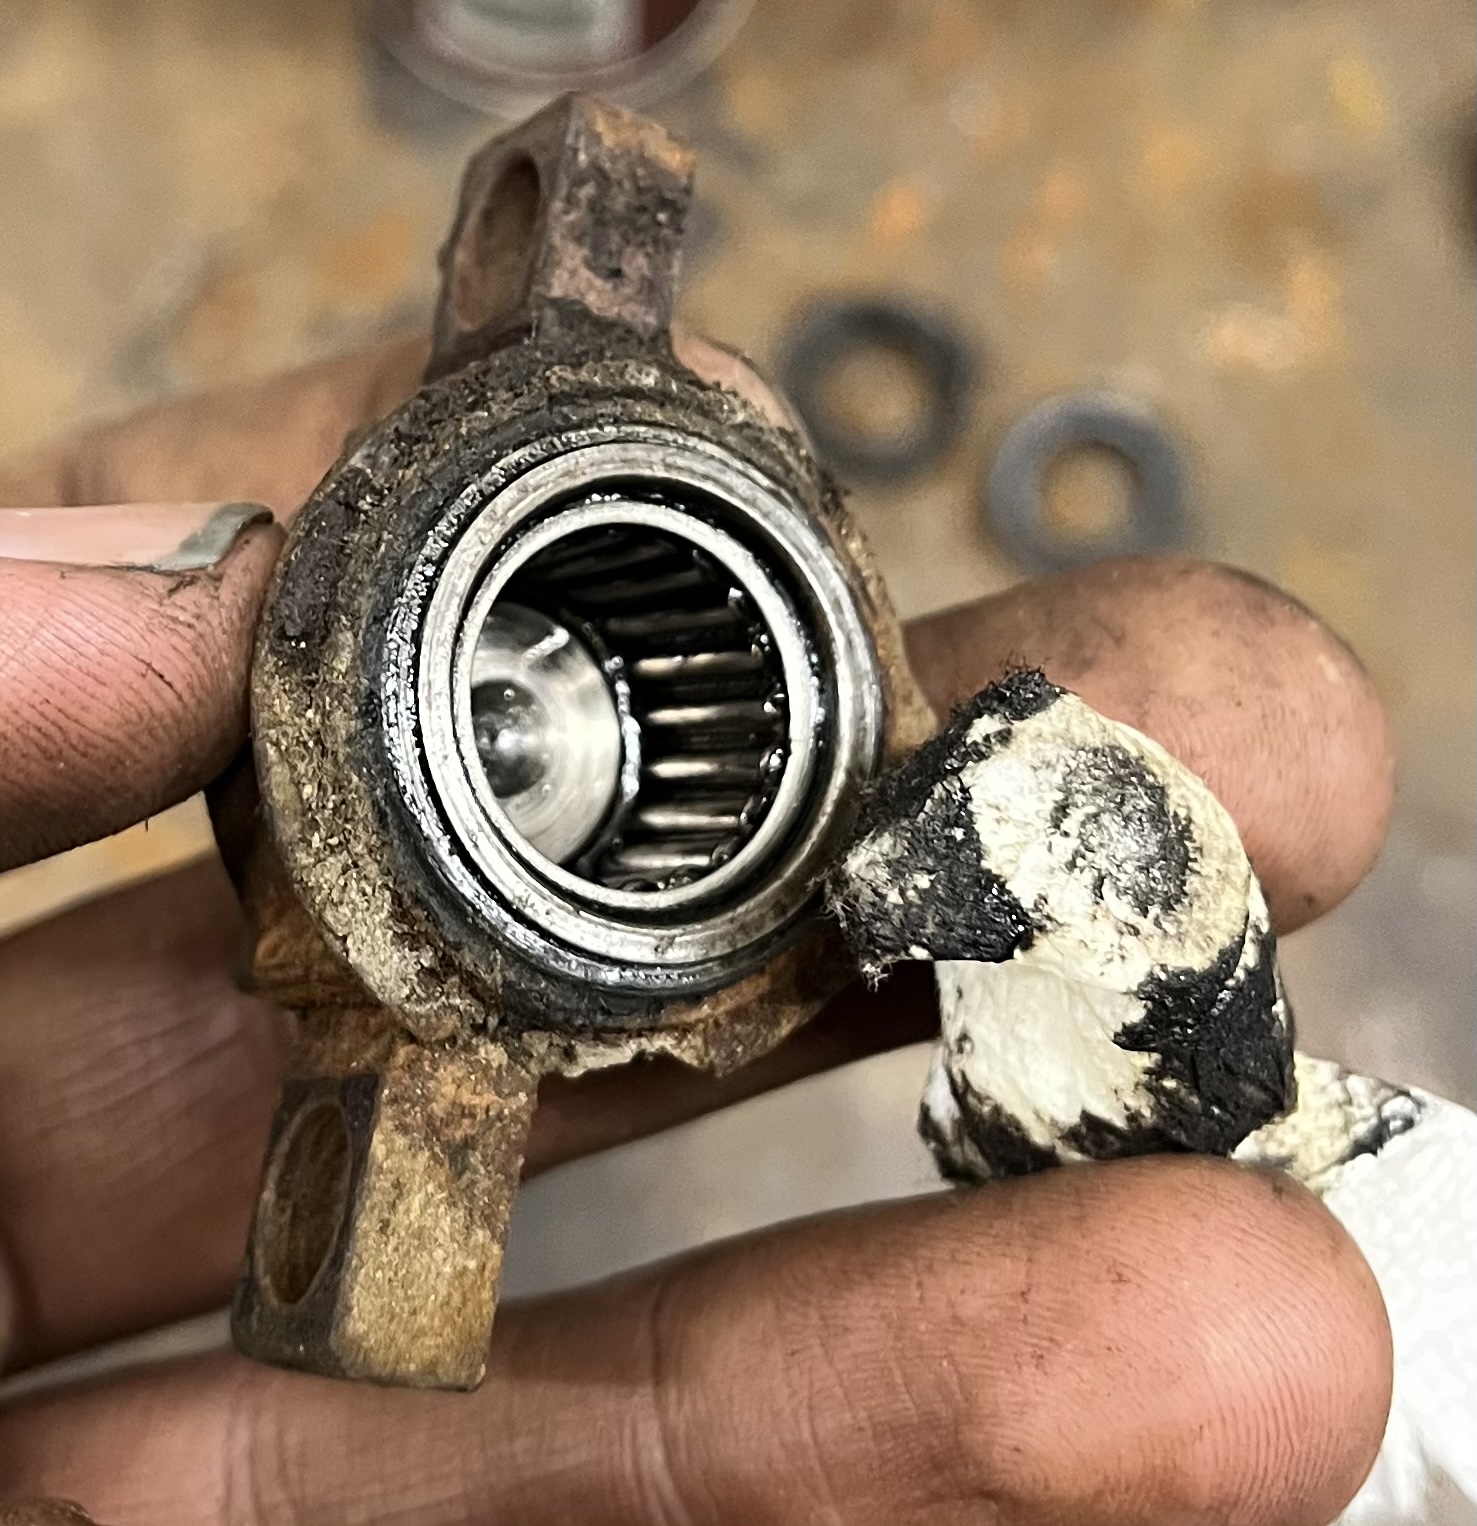
Posted on: 4/22 9:41
|
|||
|
'55 400. Needs aesthetic parts put back on, and electrical system sorted.
'55 Clipper Deluxe. Engine is stuck-ish. |
||||
|
||||
|
Re: '51 Master Cylinder Removal
|
||||
|---|---|---|---|---|
|
Home away from home
|
"Step 1" can be ignored. Once you take the 2 bolts out and disconnect the brake lines, just slide off the master cylinder.
P.S. Where are you getting a rebuild kit? Check the parts X ref as you can probably get a whole new one for about the same price as a kit from the major vendors.
Posted on: 4/21 21:03
|
|||
|
'55 400. Needs aesthetic parts put back on, and electrical system sorted.
'55 Clipper Deluxe. Engine is stuck-ish. |
||||
|
||||
|
Re: Packard organ?
|
||||
|---|---|---|---|---|
|
Home away from home
|
Nope. The organ company actually predates the car company and I think also Packard Electric.
Likewise as far as I’m aware that Packard family had no connection with the others. Interesting story, there is a very fancy and expensive organ in the Crescent Hotel, Eureka Springs, Arkansas USA which was custom made for the Packard family (though not a Packard organ). This organ was made in Germany and was planned to be shipped, with its creator riding along for delivery, on the maiden voyage of the Titanic. But thankfully it was not completed in time! So the automotive Packards we know were certainly fans of organs, enough to buy an elaborate German organ.
Posted on: 4/21 16:04
|
|||
|
'55 400. Needs aesthetic parts put back on, and electrical system sorted.
'55 Clipper Deluxe. Engine is stuck-ish. |
||||
|
||||


