|
Re: The Duchess Project: 1940 Super 8 Convertible Sedan
|
||||
|---|---|---|---|---|
|
Home away from home

|
I removed the window trim, the two nuts at the bottom left and right of the back side of the dash, and the screws across the top edge of the dash. I disconnected the radio cables, the accessory switches, overdrive lockout cable, two hex screws holding the steering column, and popped out the dash. Only the Temperature/Oil gauge was left in the car. I removed wires from the back side of the dash, I used Velcro labels on each wire I disconnected. I moved the dash and instruments to the basement and took everything off the dash. My big idea was to use disconnects on the dash itself with matching sets for wires from the wiring harness. Thus I could ensure that all terminals had eyelet wire ends instead of sliders that sometimes work their way out if the terminal screw vibrates a little loose. These could be fastened up tight with new nuts and lock washers; then, when it was time to reinstall, I’d just push the mating disconnects togethers. I’m a concept guy and that was the concept. Easy peasy. Haha. (See previous posts for photos of some of these items.)
I ordered new 160 plastic from LaVine. It took a while, but the result was worth it, and I was fully occupied in the meantime because things got confusing with all these wires. I also read some posts about using electronic relays and decided they could be a good addition for reliability. I didn’t understand anything about them. Before I set out to modify the wiring, I thought I better get a thorough understanding of the original wiring scheme. The wiring schematic in the 1940 160 180 Owner’s Manual is so tiny, I scanned it, scaled it up to be readable without a magnifying glass and proceeded to redraw it using Adobe Illustrator. I numbered each wire per the manual, and if no number, I used Harnesses Unlimited numbers (They had changed all the original wire numbers, but I stayed with the original numbers unless they were missing. Then I added new numbers for items like my cooling fan which were not included in either source. I changed the location of some of the accessory switches, then prepped them in the car since they would be the last items added to the dash. Attach file:  12NottomCornerBolt.jpg (41.70 KB) 12NottomCornerBolt.jpg (41.70 KB)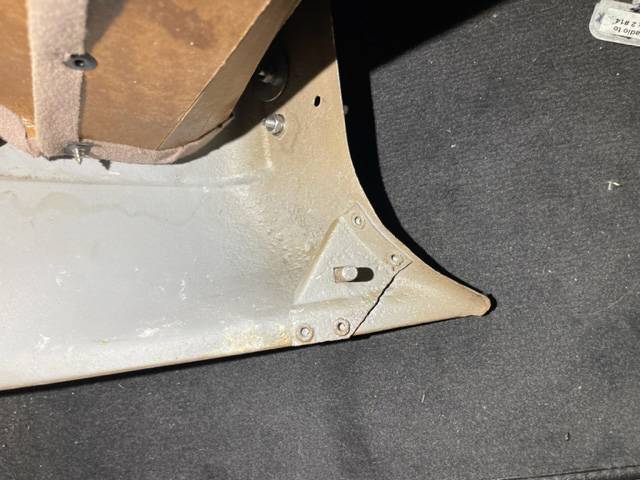 13HoleInDashUnderstructure.jpg (22.25 KB) 13HoleInDashUnderstructure.jpg (22.25 KB)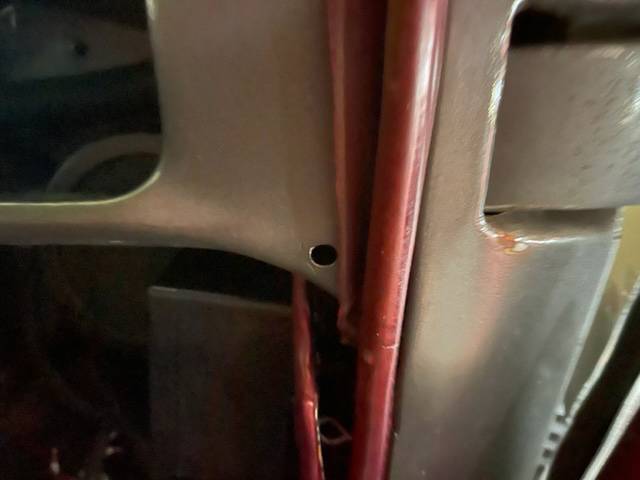 14LabelsAndTags.jpg (278.06 KB) 14LabelsAndTags.jpg (278.06 KB)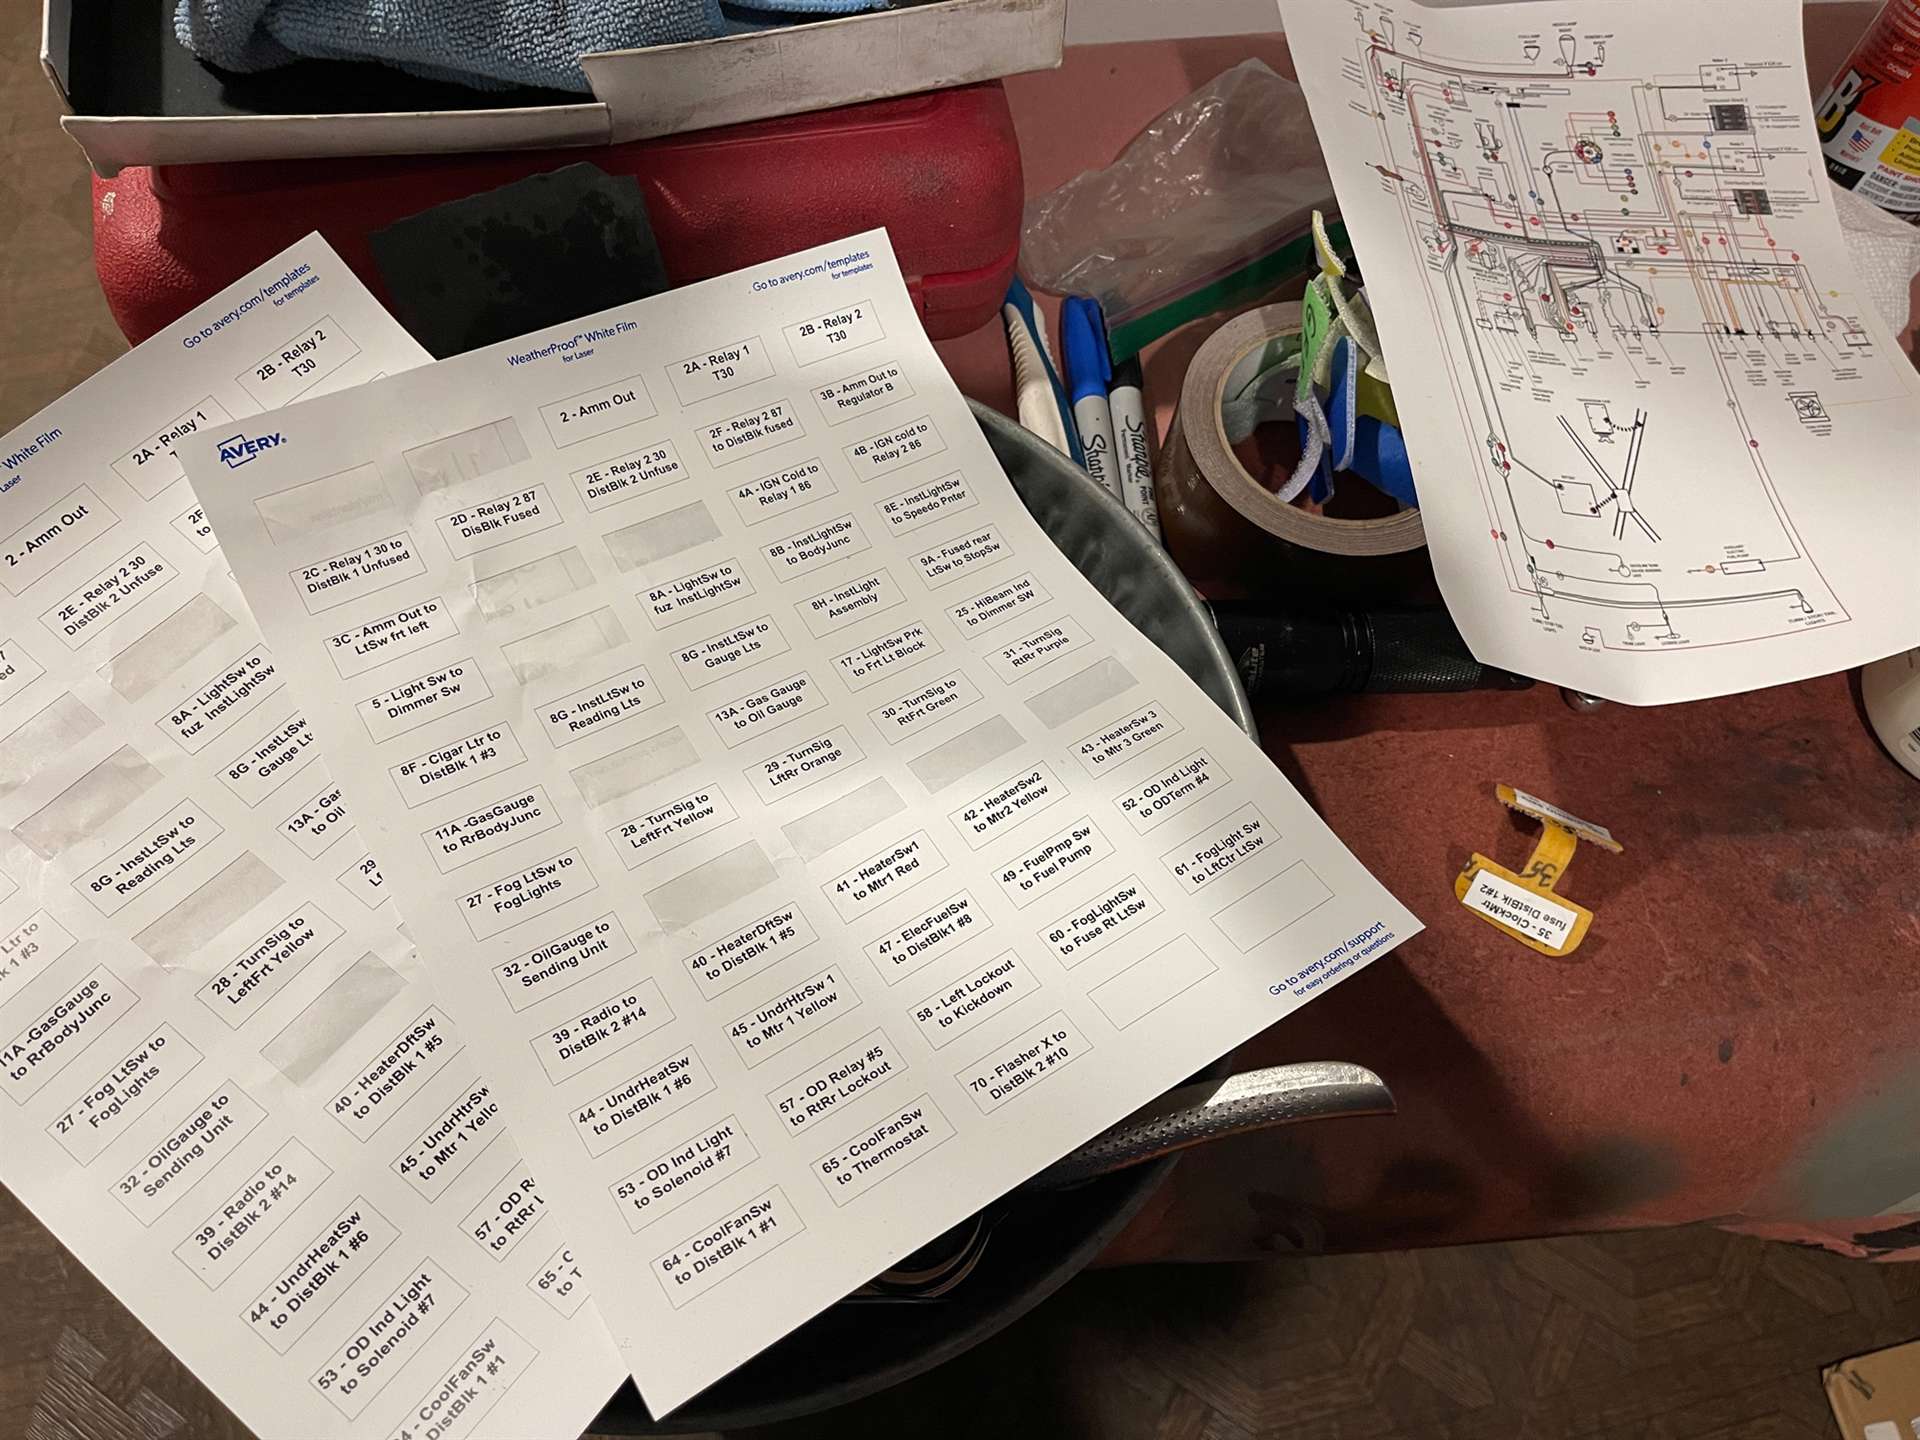 15PreppedSwitches.jpg (246.49 KB) 15PreppedSwitches.jpg (246.49 KB)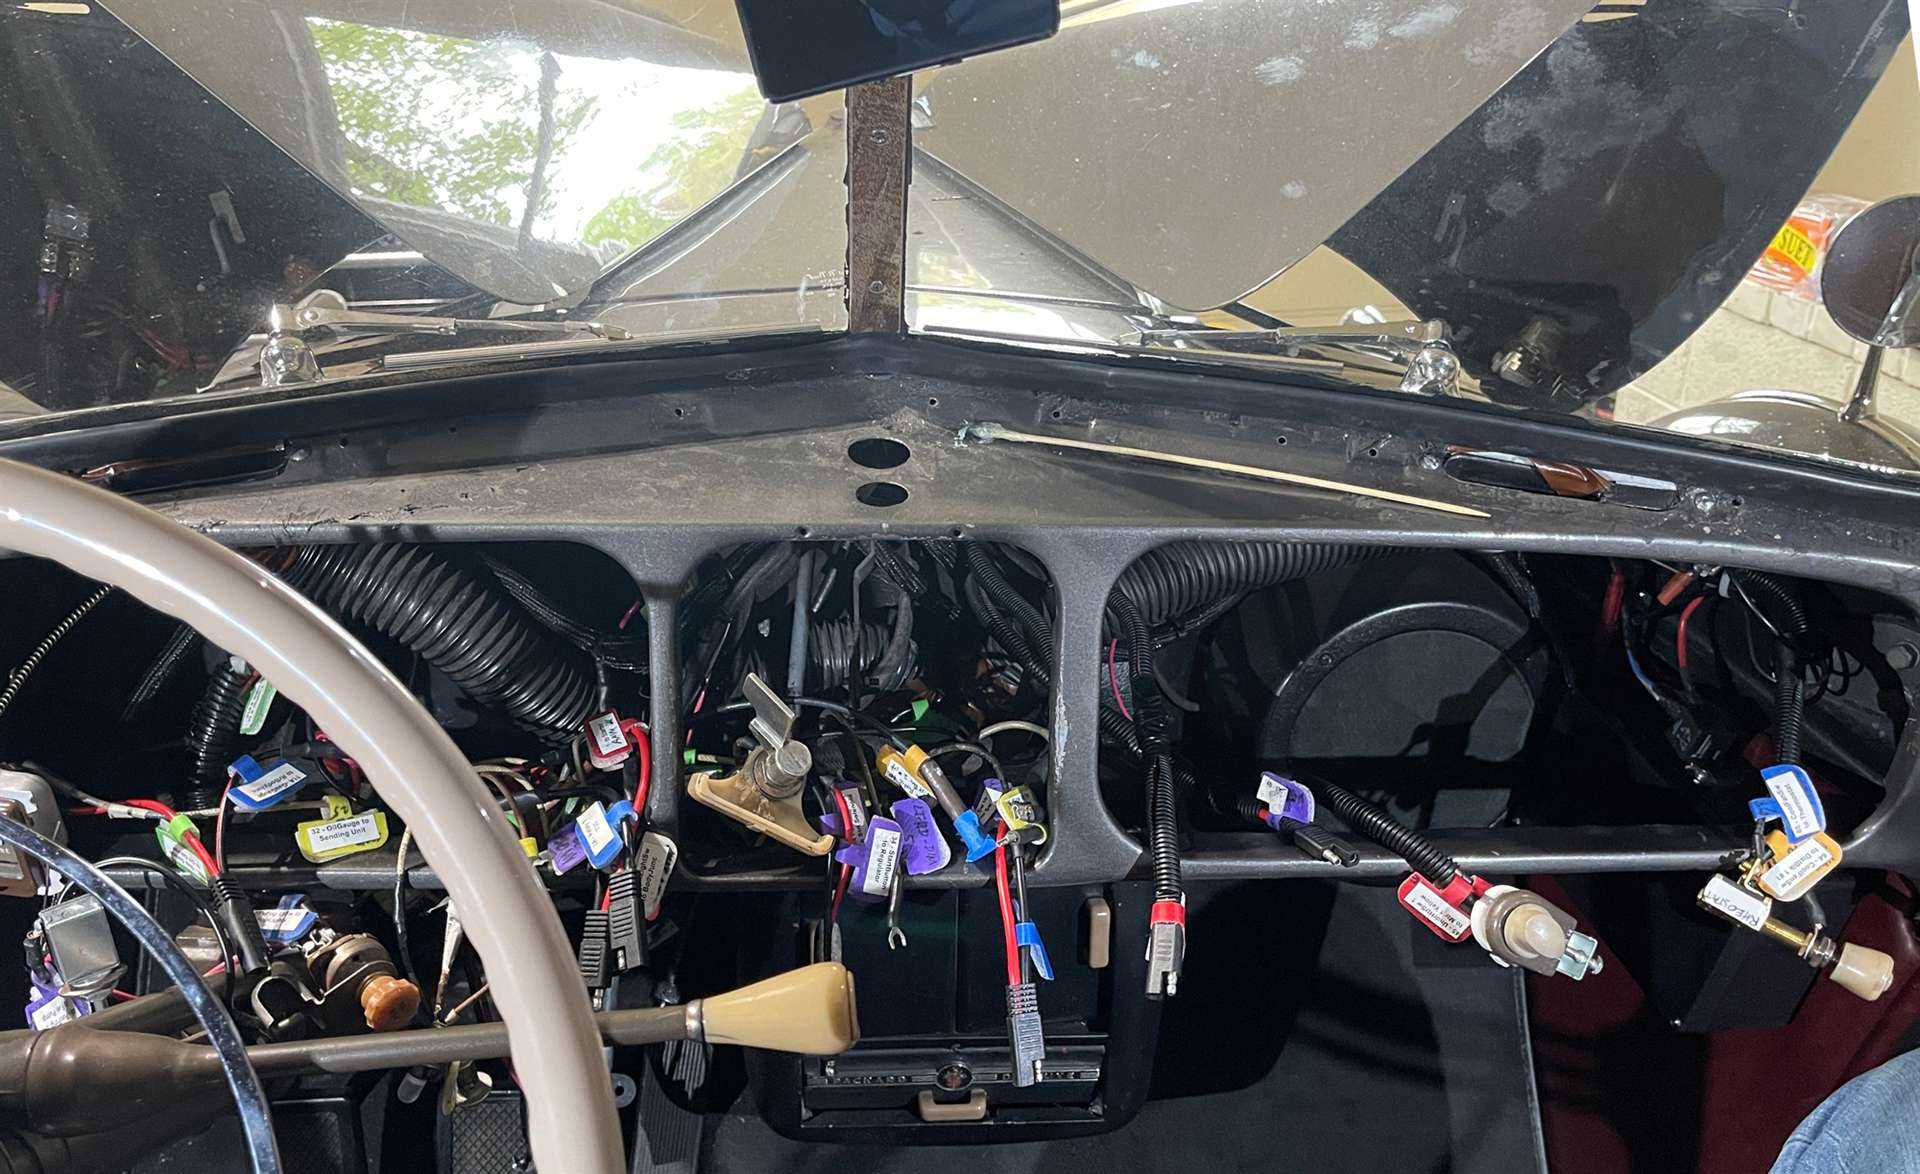 15SwitchPrepping.jpg (293.47 KB) 15SwitchPrepping.jpg (293.47 KB)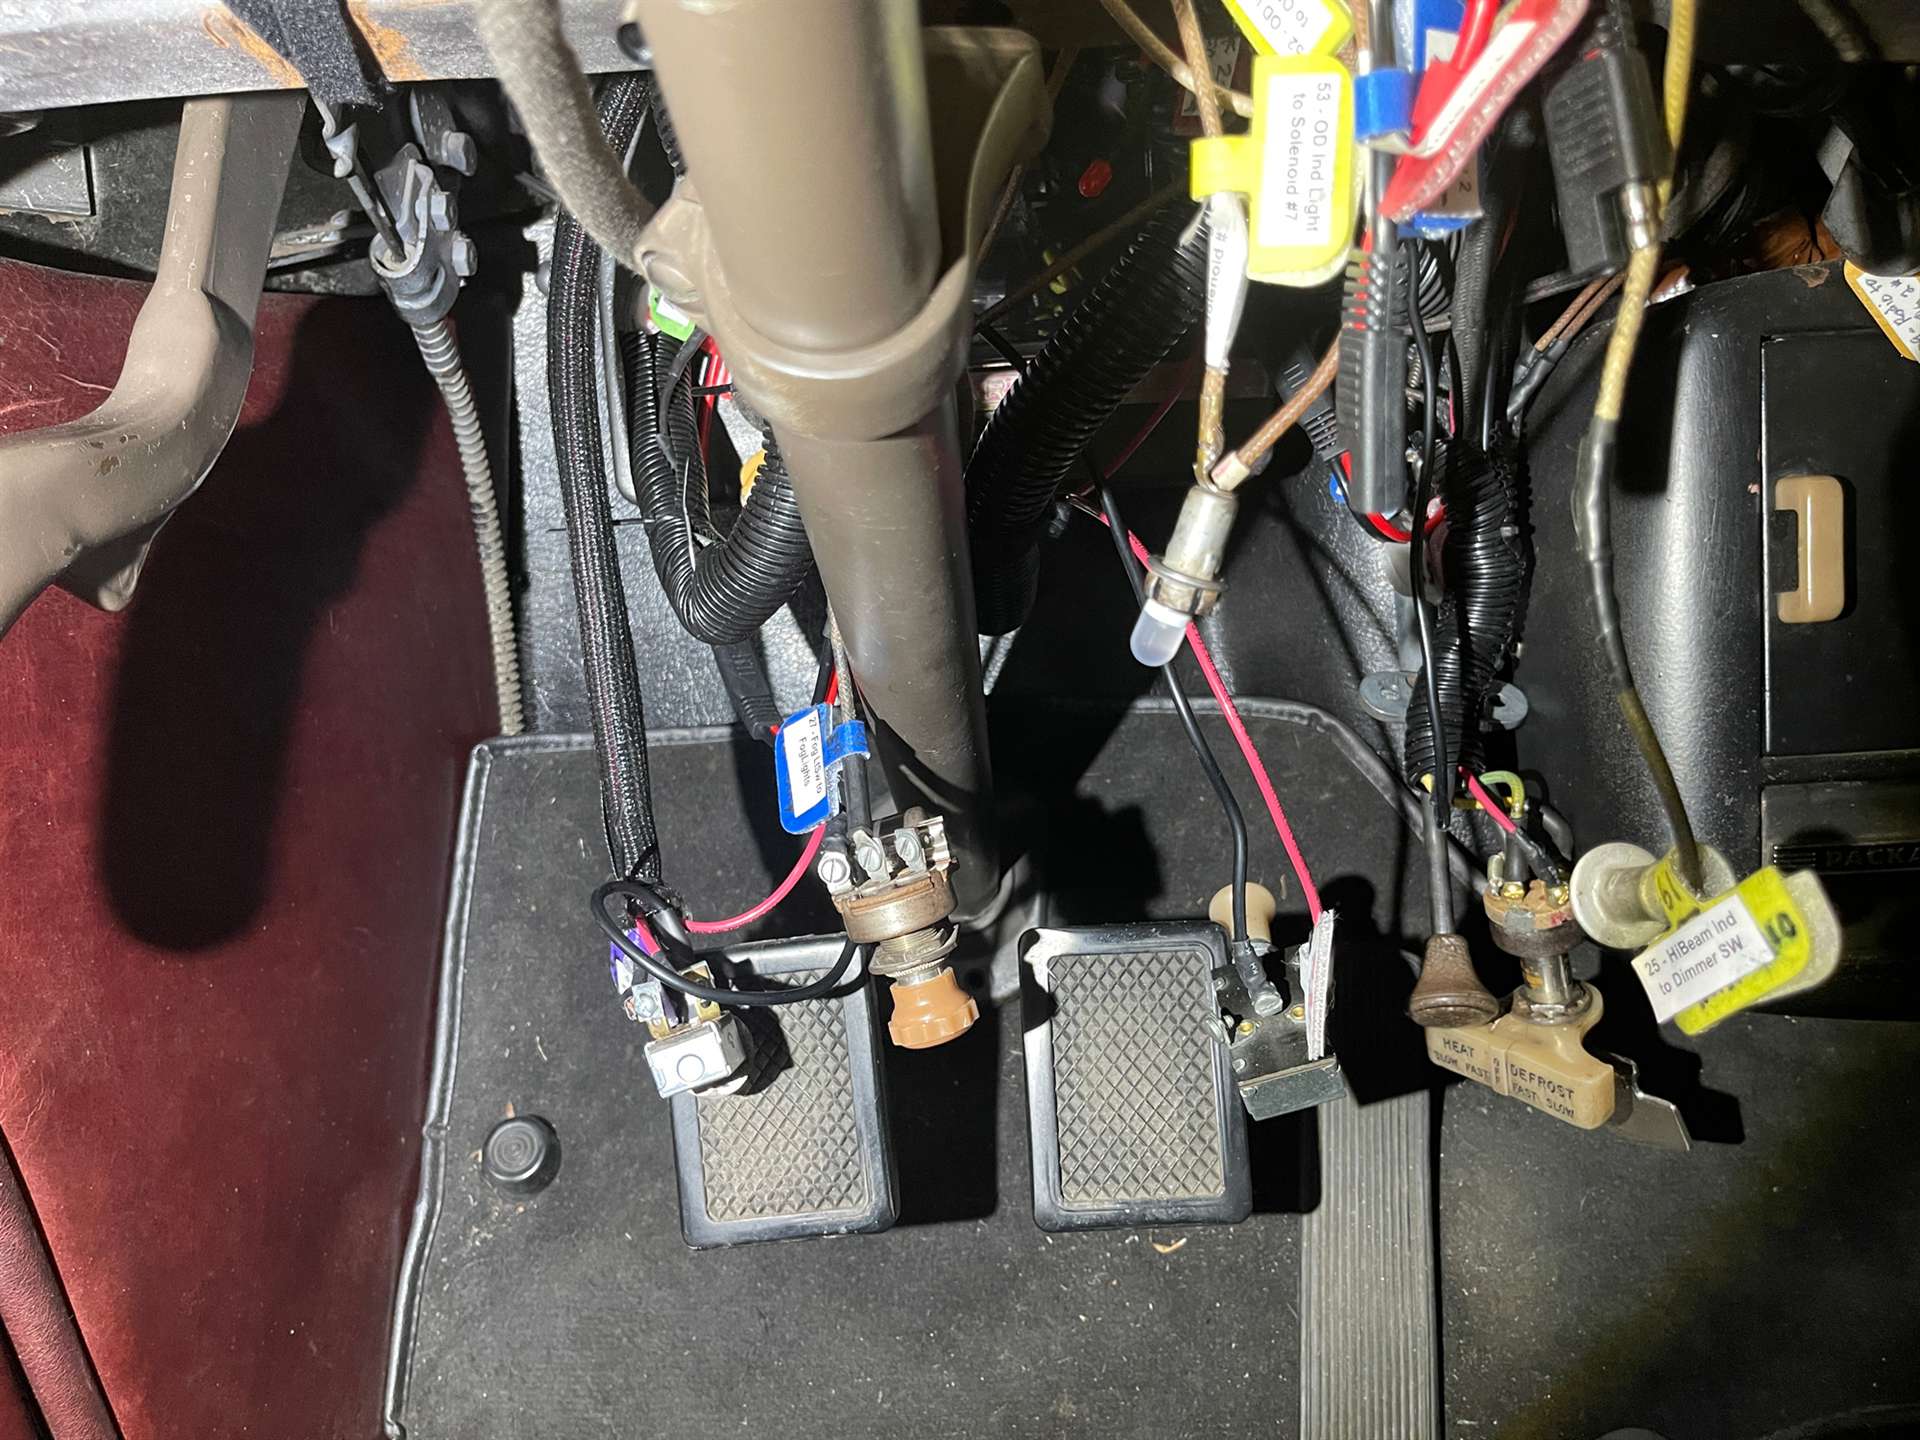
Posted on: 2023/5/25 9:25
|
|||
|
||||
|
Re: The Duchess Project: 1940 Super 8 Convertible Sedan
|
||||
|---|---|---|---|---|
|
Home away from home
|
There were quite a few items that had been neglected over the years, none as critical as a non-functional ignition switch. The gas gauge was stuck on Empty, the battery gauge on DIS, the heater/defroster switch wanted to swivel (even when tightened), the radio 5-station push button mechanism did not work, the clock hour hand would slip out of position after 3 months running, several of the 160 dash plastic pieces were warped from too much heat and UV exposure (Check out the clock surround and glove box plastic), the glove box was warped from windshield or wiper-mount leaks, the trip odometer cable was broken, and the vent handle and overdrive knob still had the original ‘marble fudge’ plastic, and several dash lights didn’t work even with new bulbs. The whole dash needed refreshing. To add the new overdrive cable knob and the vent handle, the old ones had to be removed. I didn’t know what to expect. The overdrive cable rod had to be threaded to accept a new knob.
Attach file: 04ODKnobMarble.jpg (203.89 KB)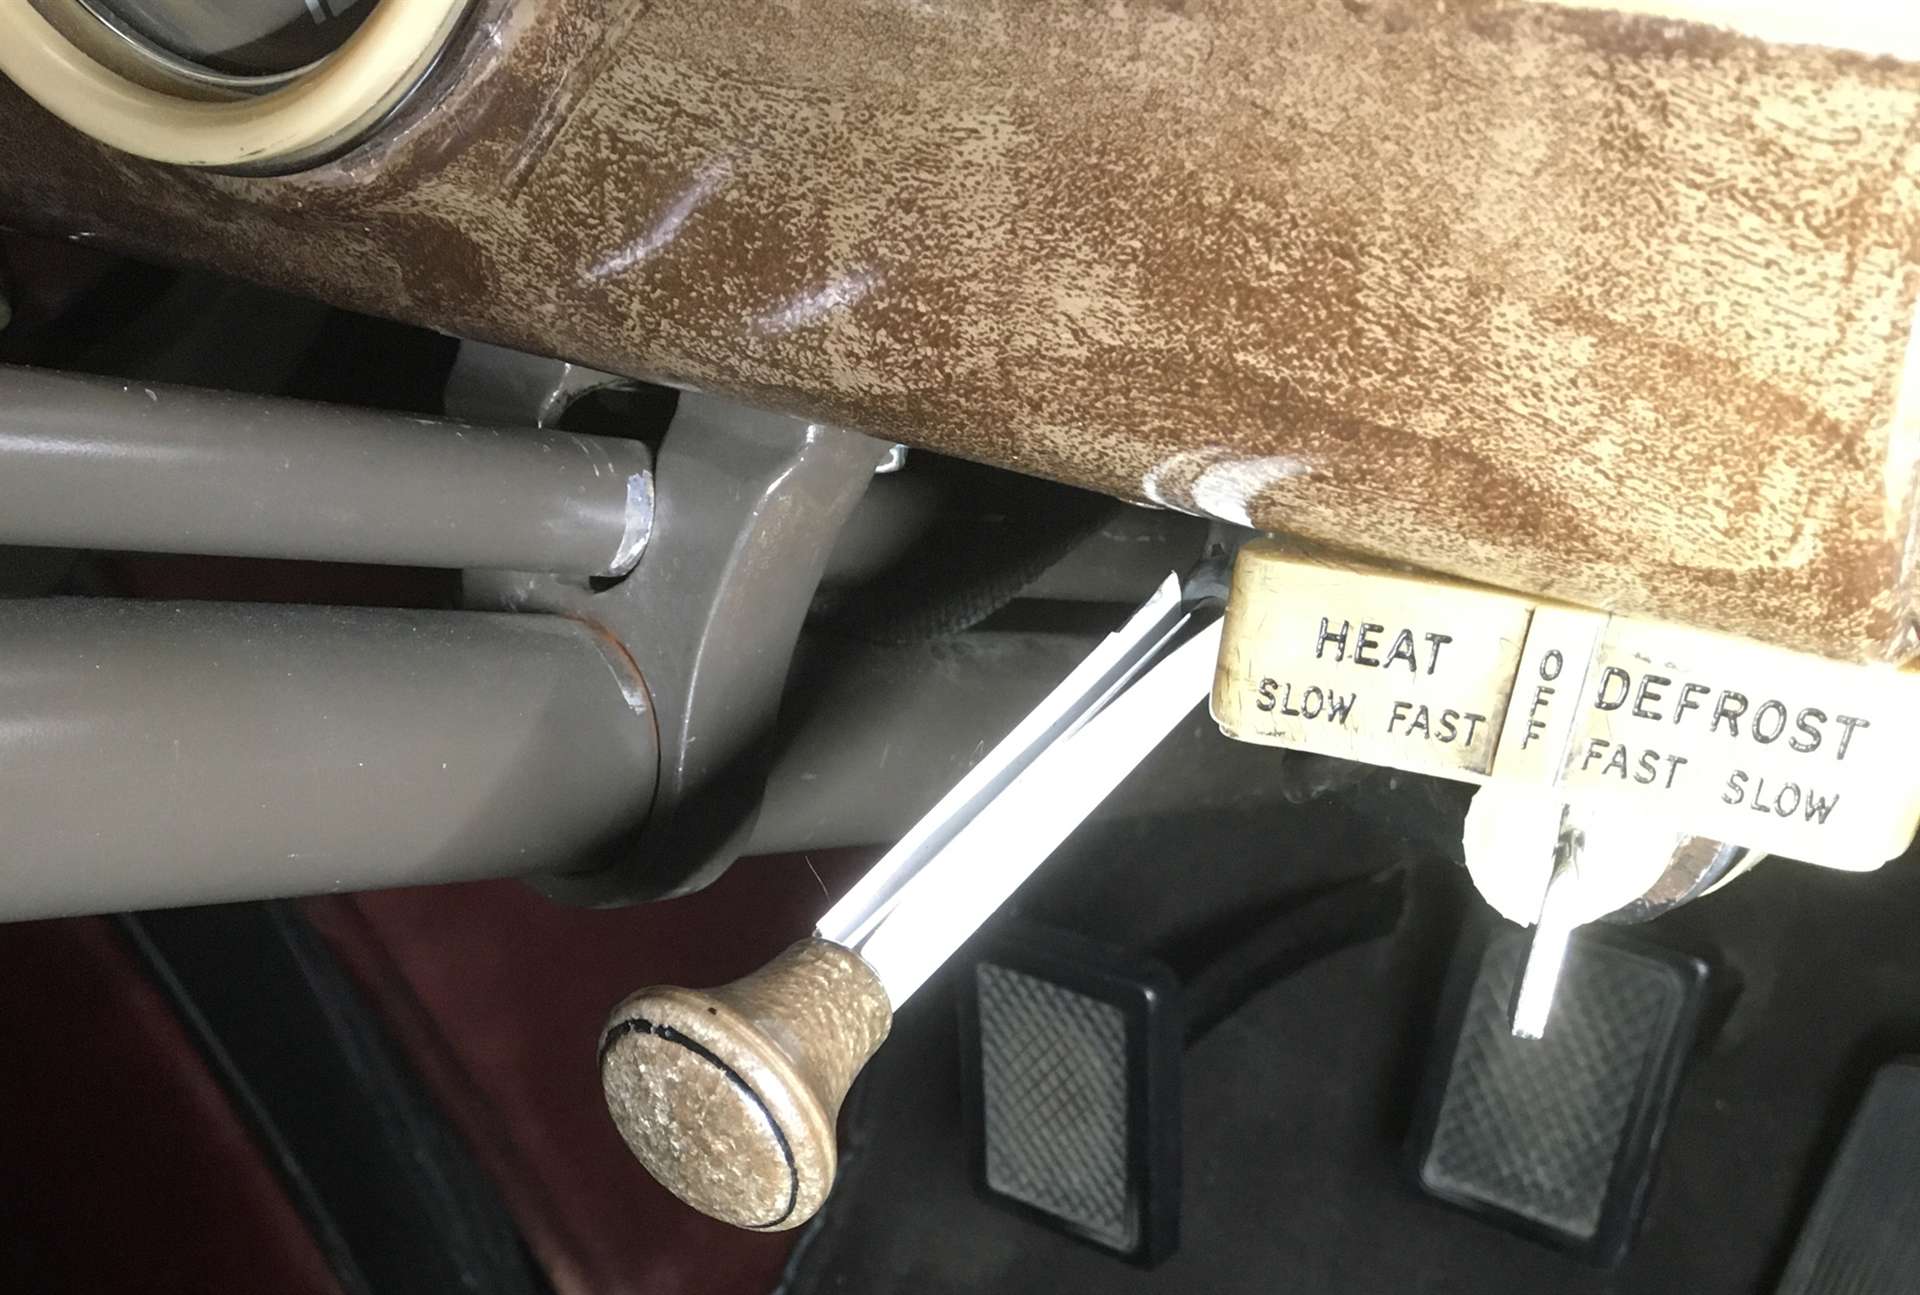 05ODKnobs.jpg (168.45 KB) 05ODKnobs.jpg (168.45 KB)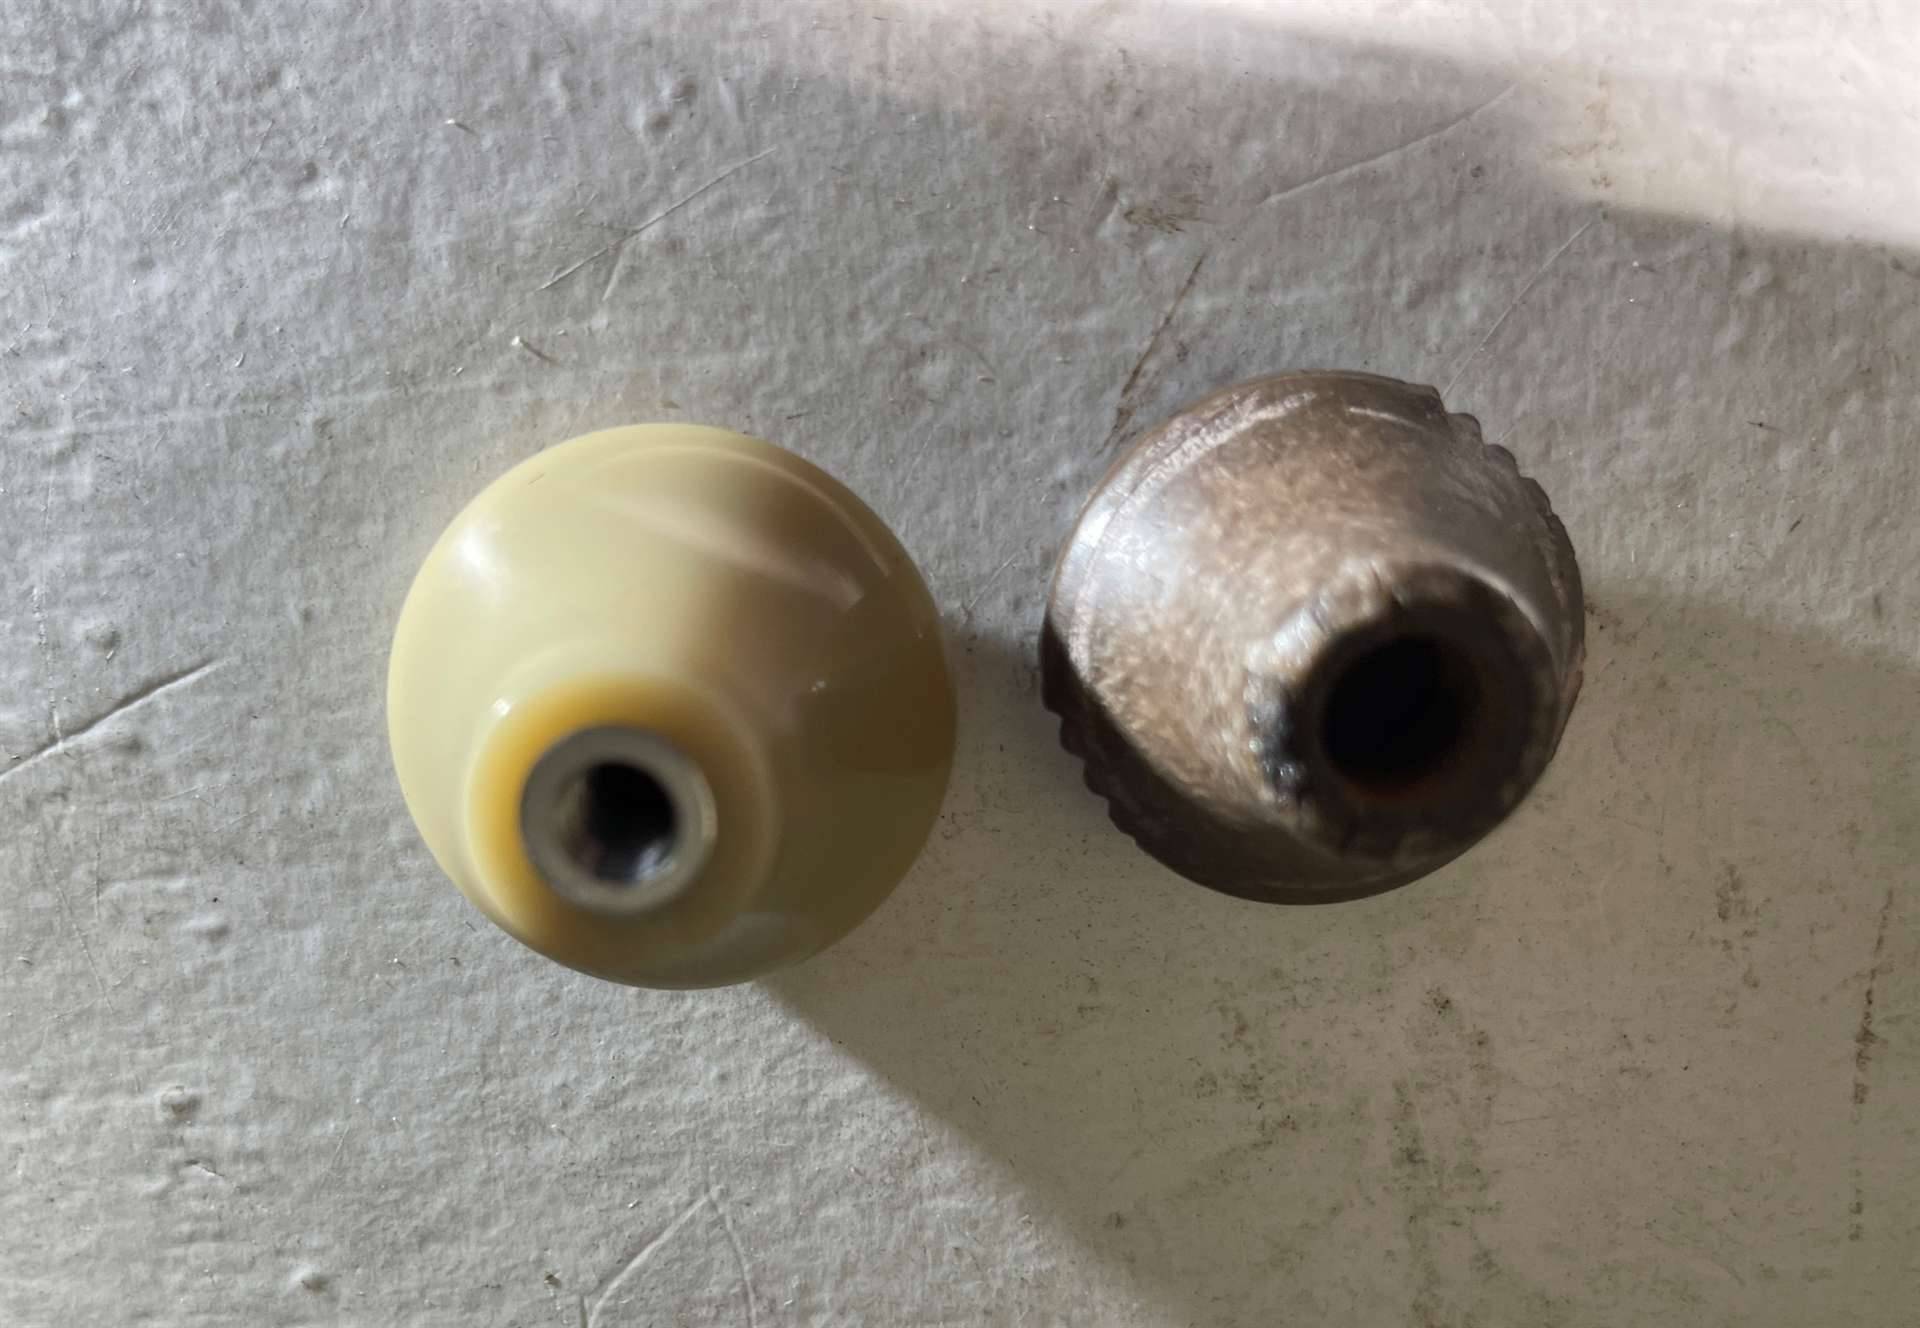 06ODRodNeededThreads.jpg (148.62 KB) 06ODRodNeededThreads.jpg (148.62 KB)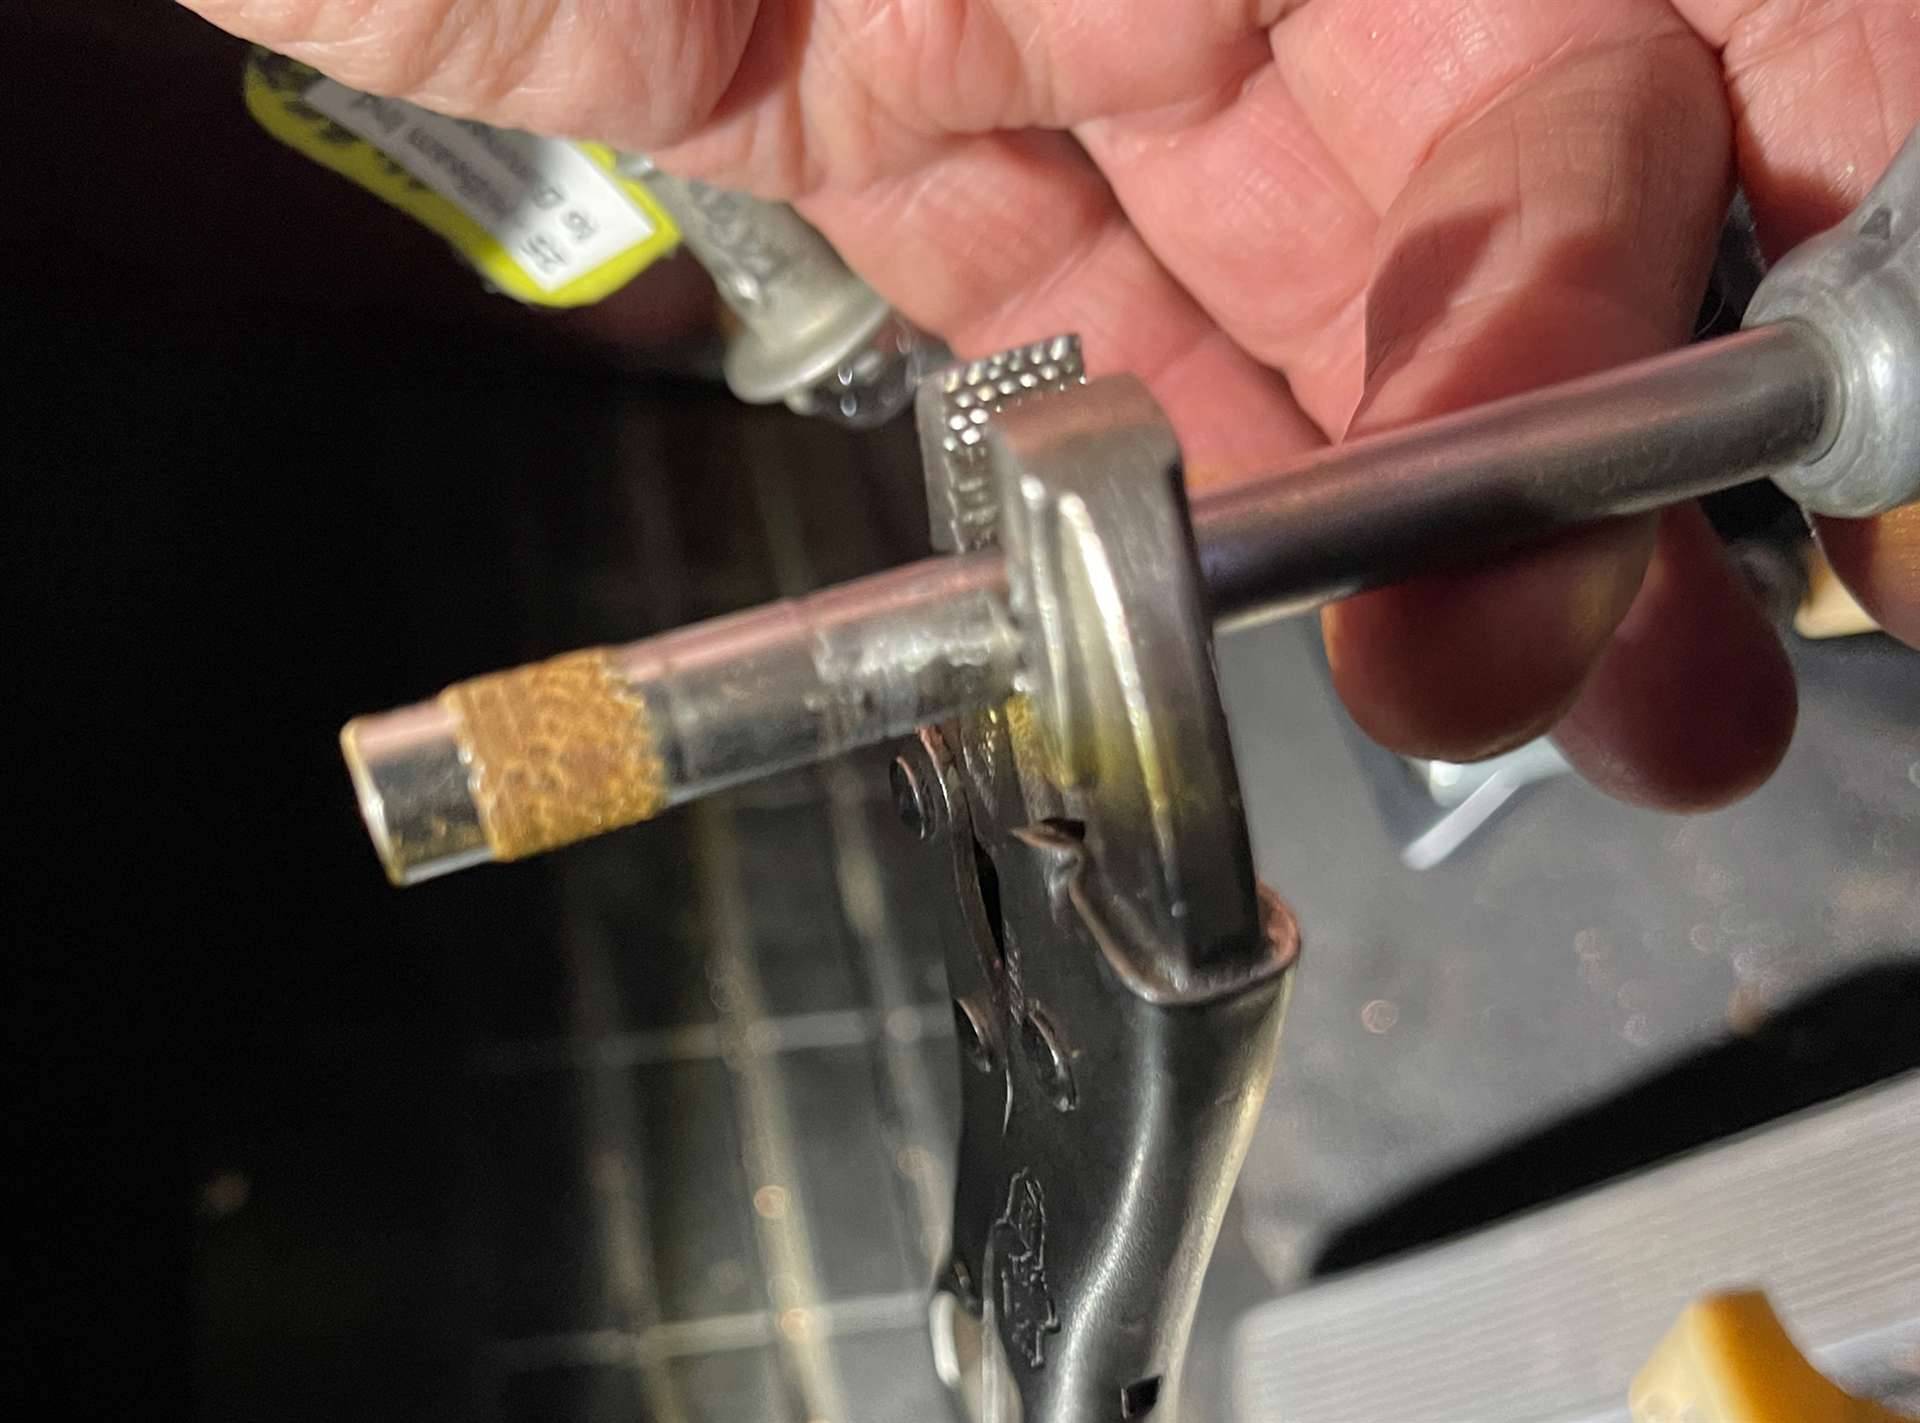 07NewODKnob.jpg (145.22 KB) 07NewODKnob.jpg (145.22 KB)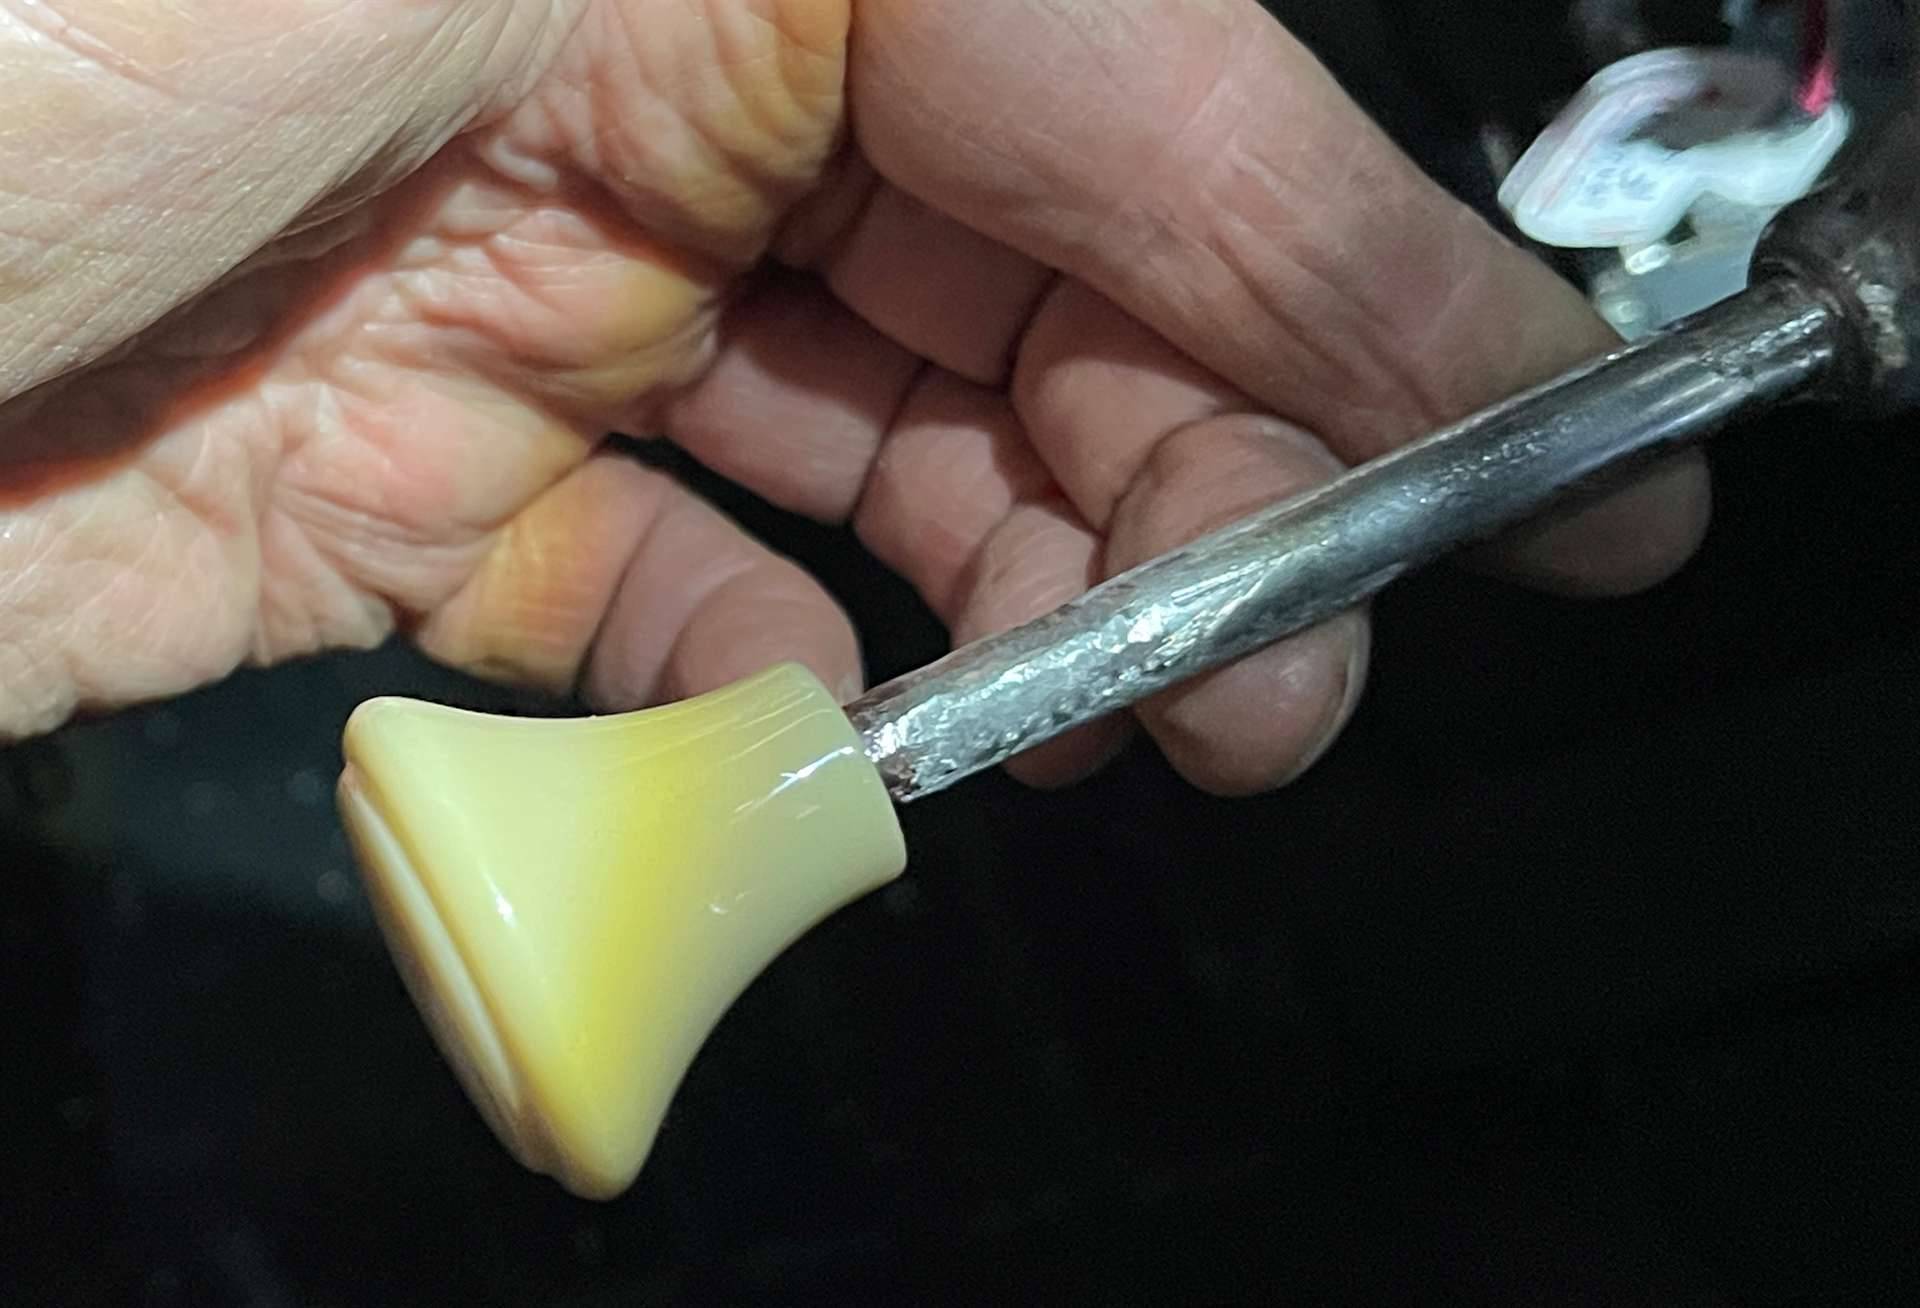 08BareVentHandle.jpg (217.63 KB) 08BareVentHandle.jpg (217.63 KB)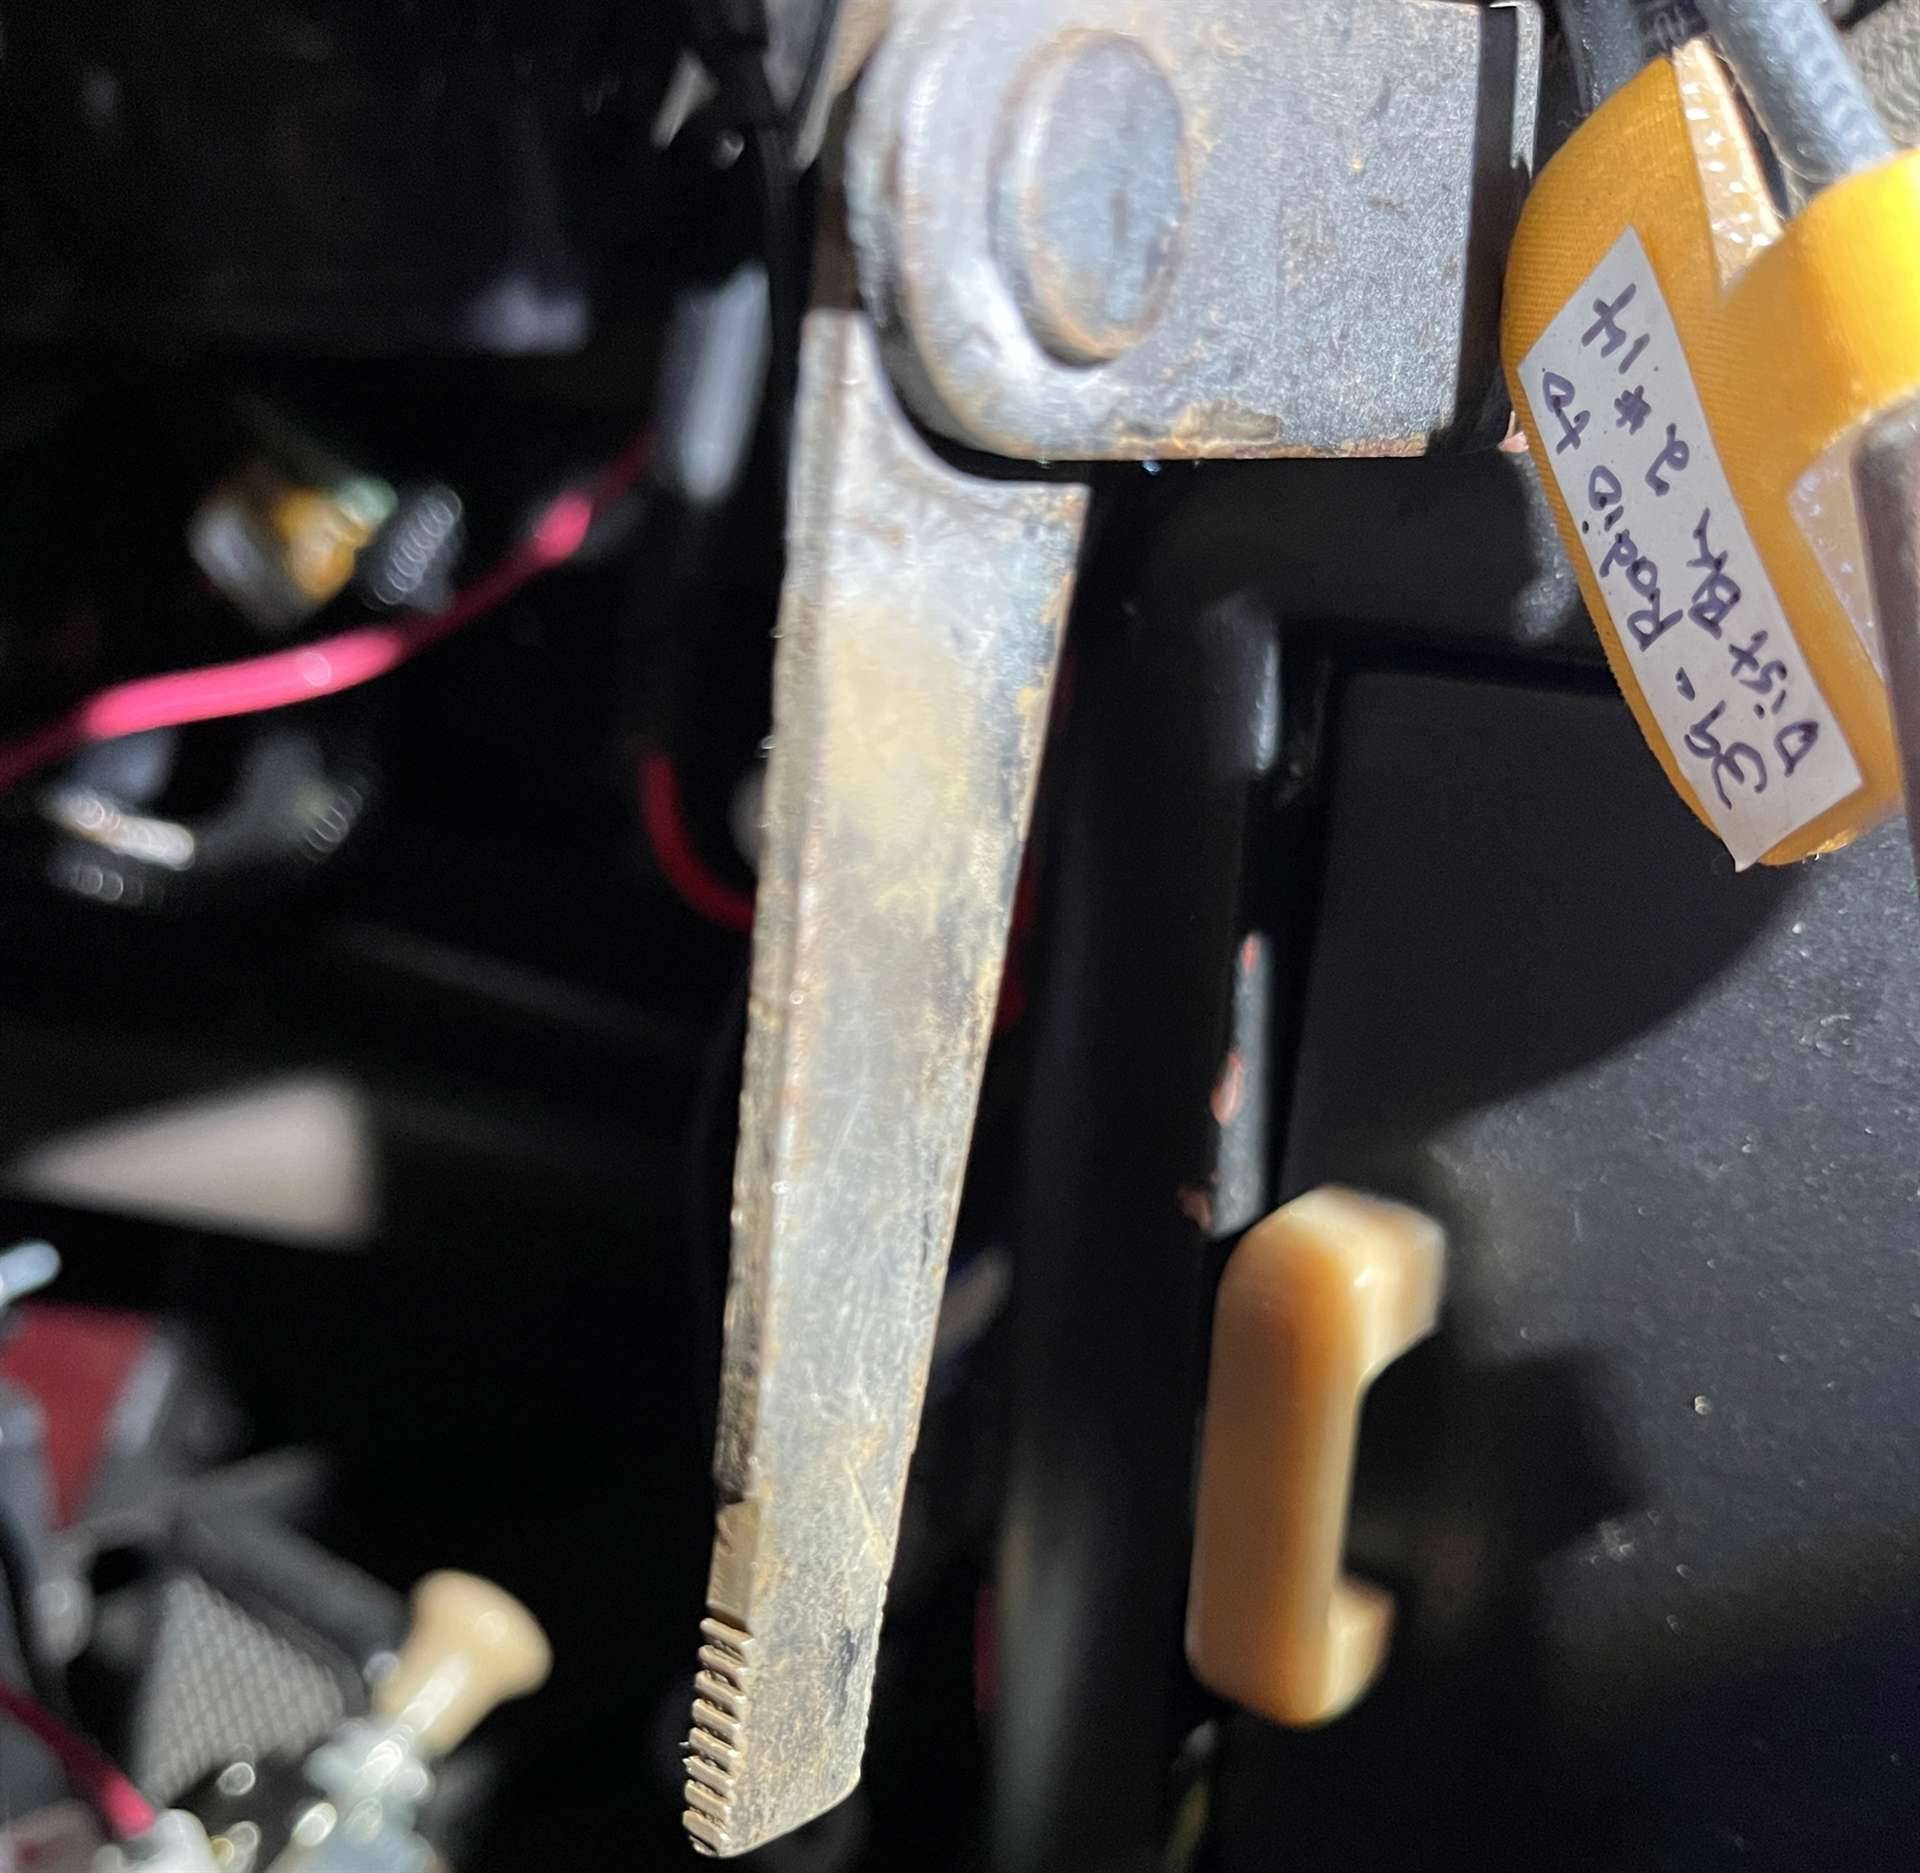 09WarpedPlasticPieces.jpg (105.98 KB) 09WarpedPlasticPieces.jpg (105.98 KB)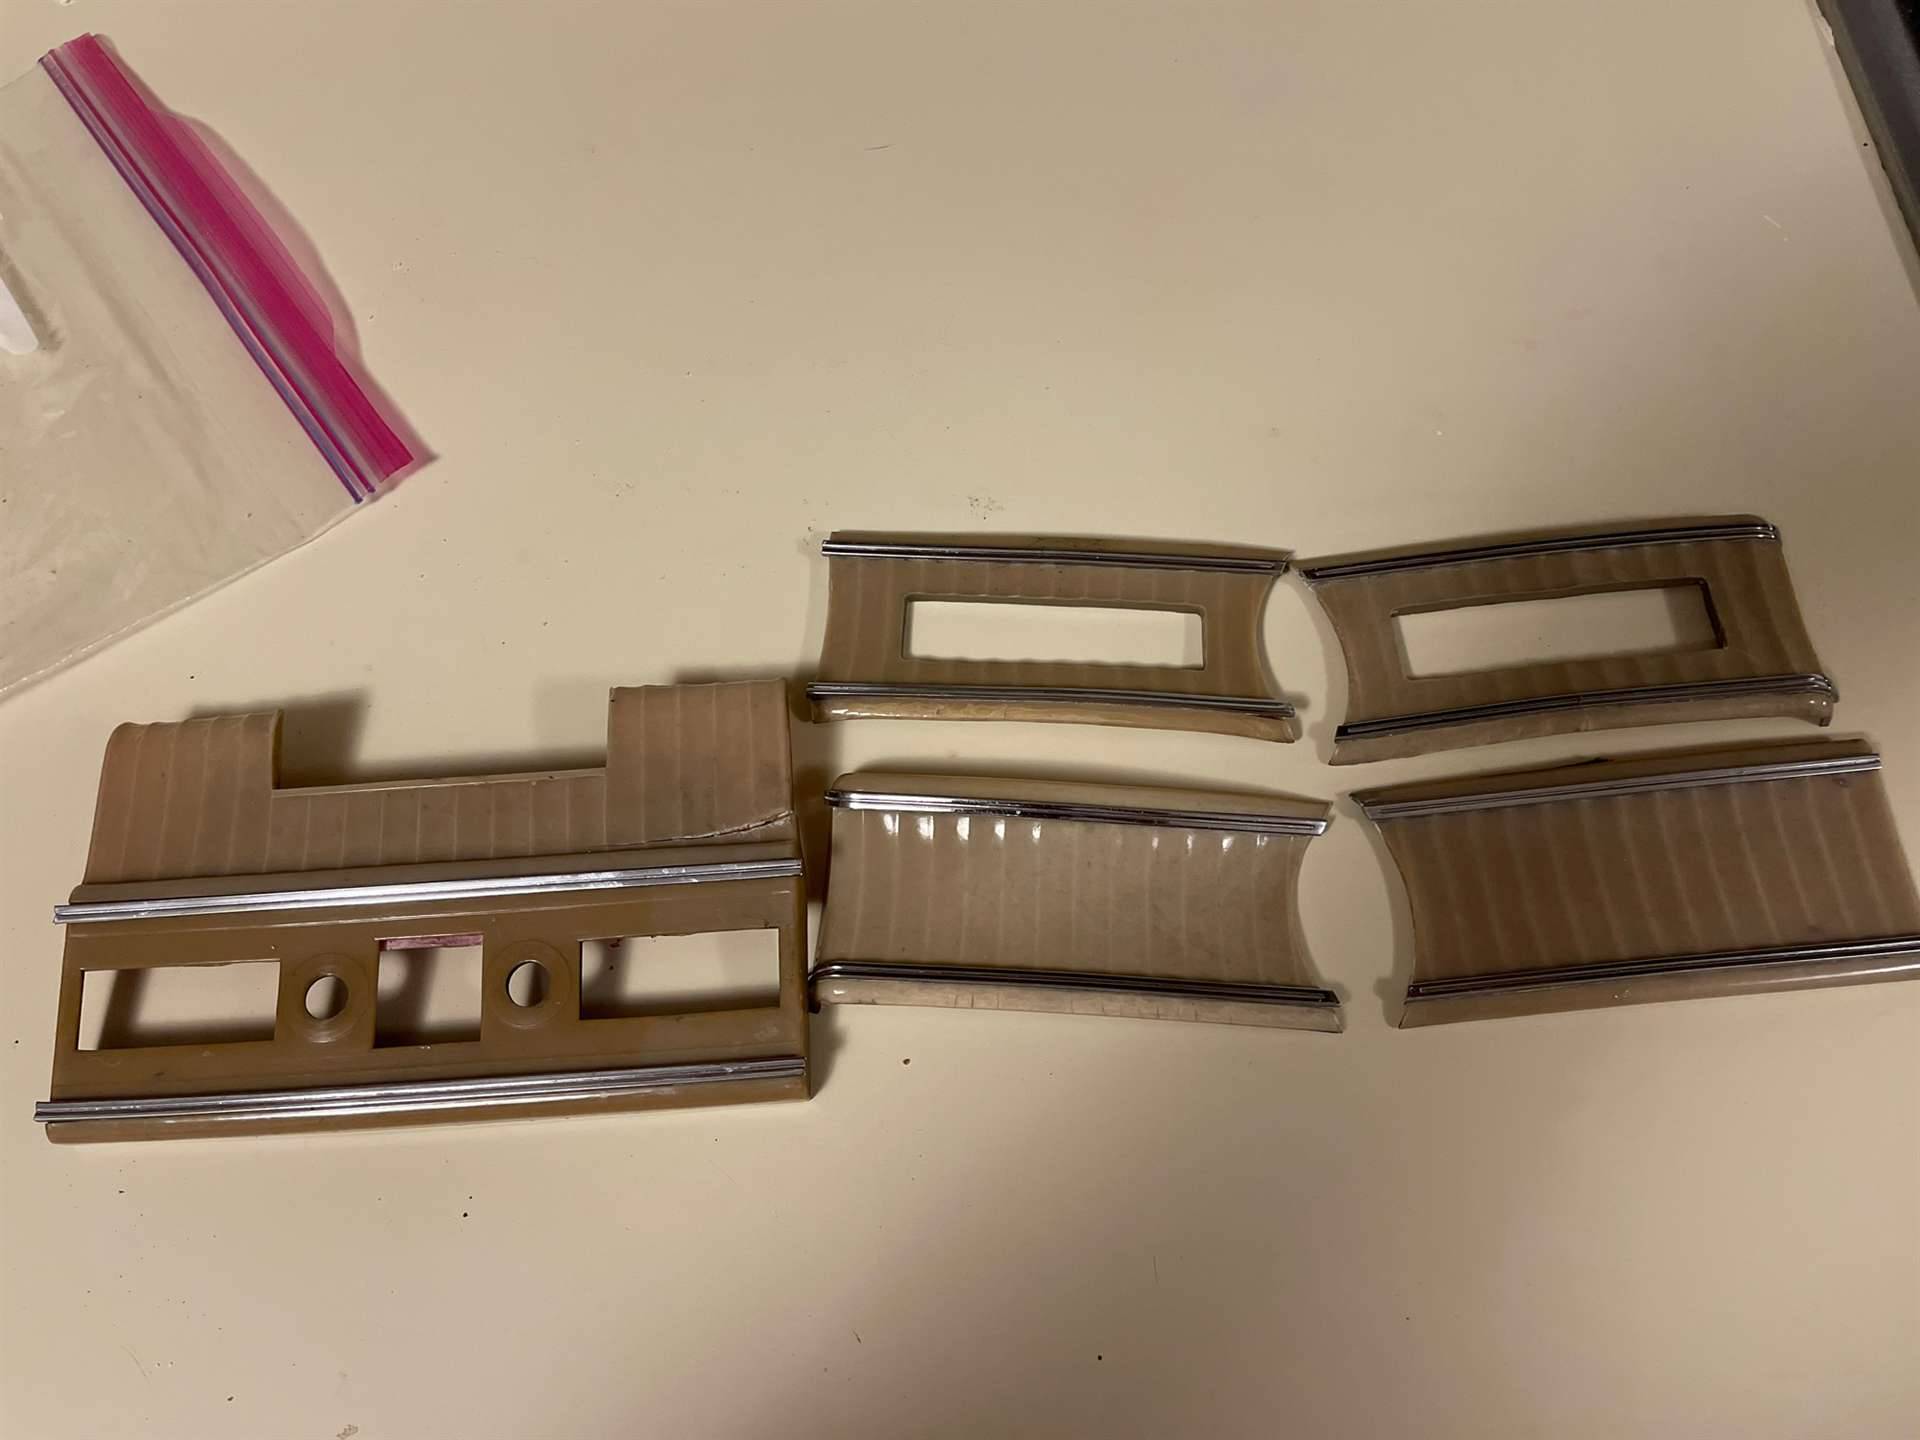 10WarpedGloveBox.jpg (230.71 KB) 10WarpedGloveBox.jpg (230.71 KB)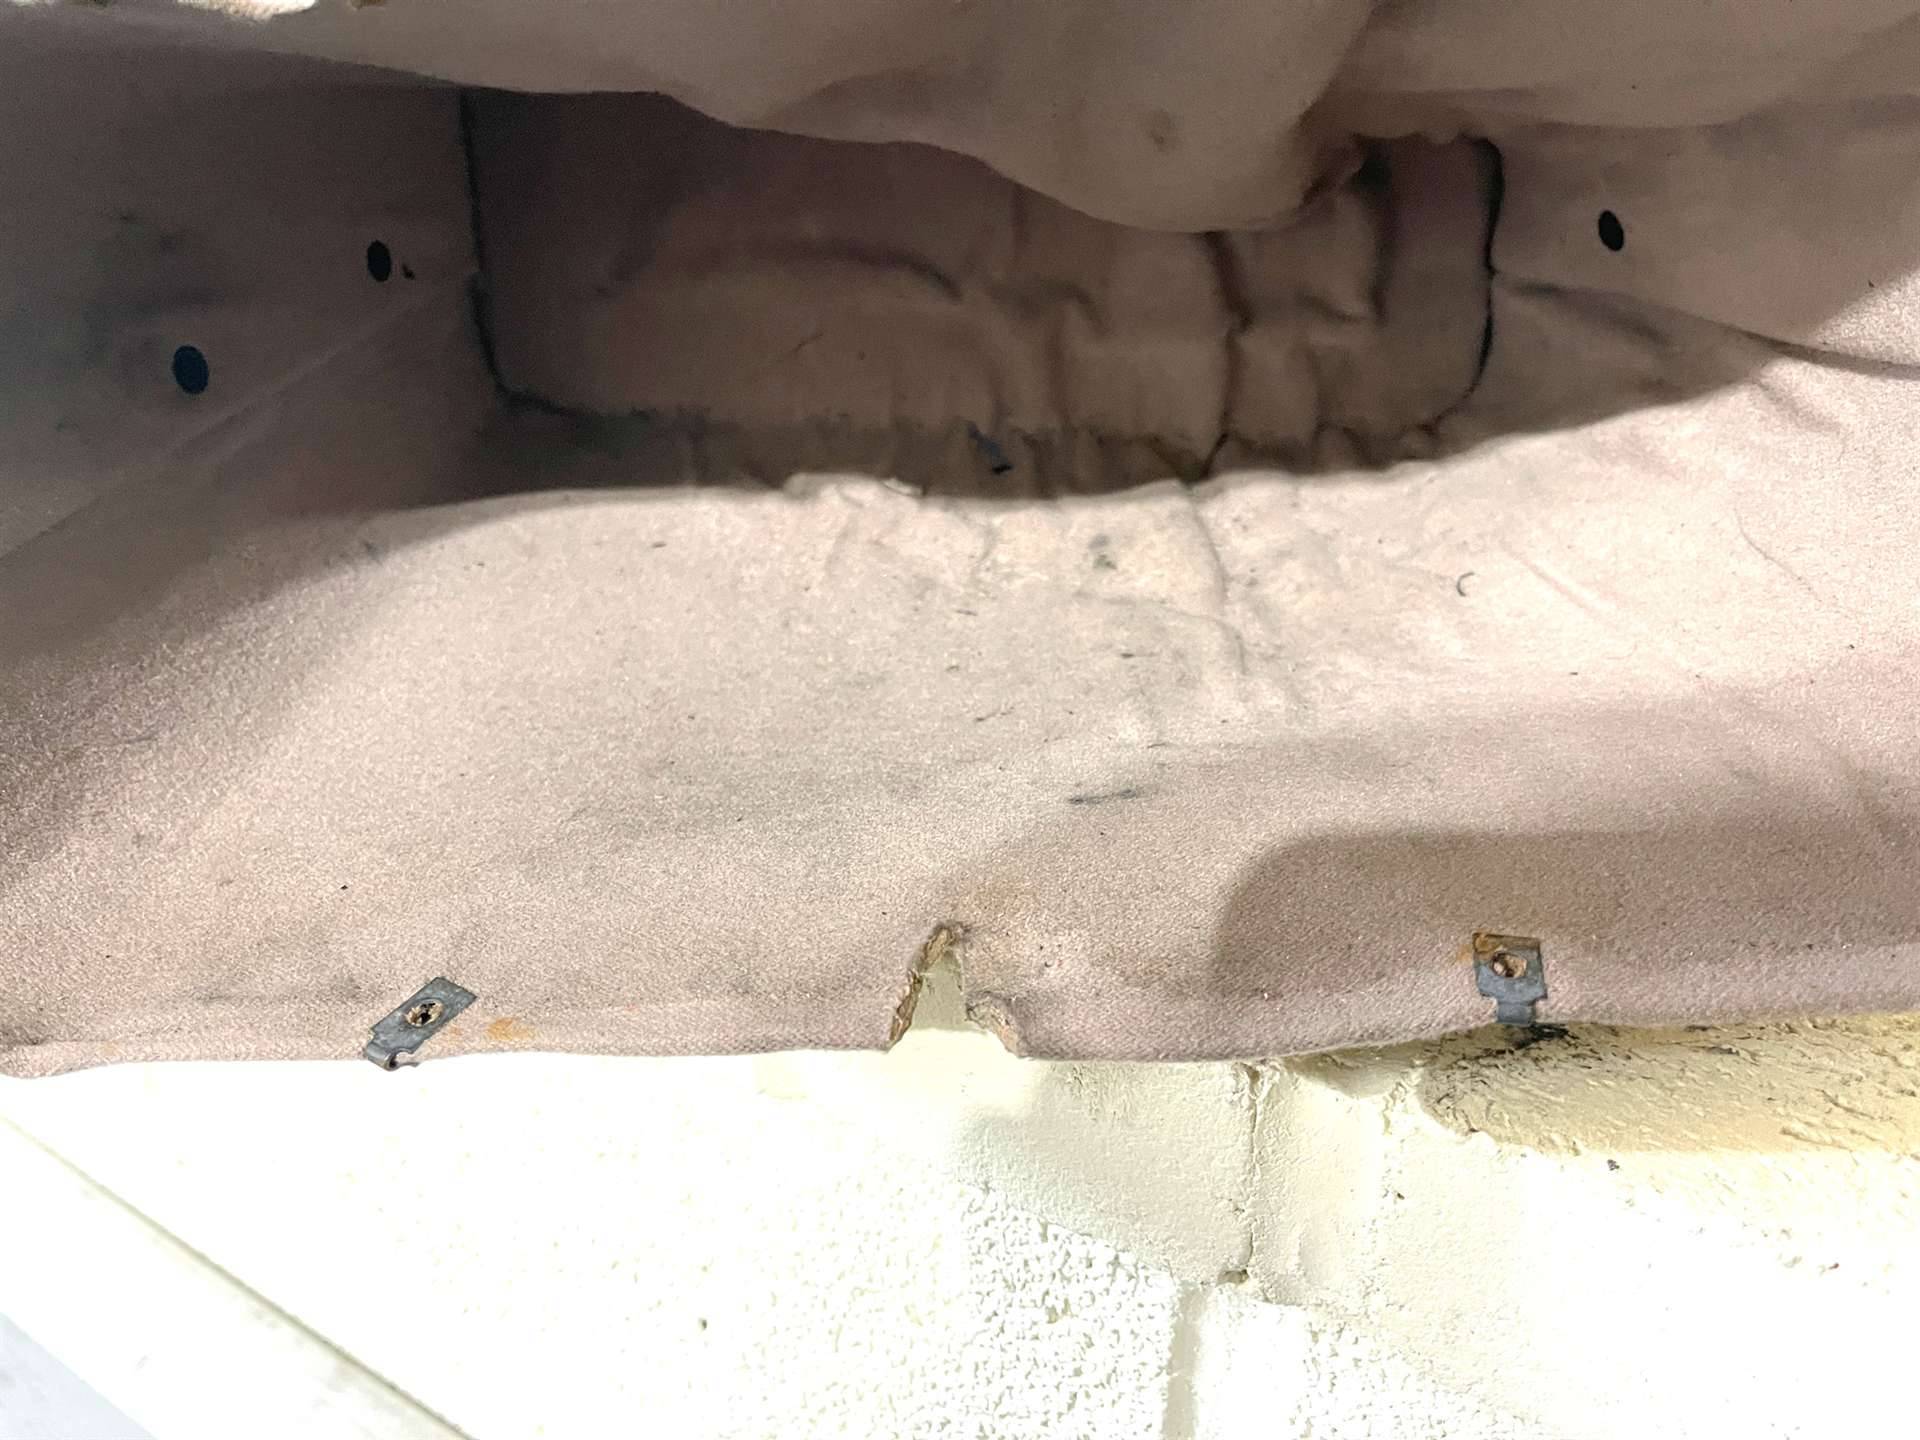
Posted on: 2023/5/25 9:22
|
|||
|
||||
|
Re: The Duchess Project: 1940 Super 8 Convertible Sedan
|
||||
|---|---|---|---|---|
|
Home away from home
|
DASHBOARD, A FIVE-MONTH SAGA: If you perused a few previous posts, you’ll know that in -December 2022, an overdrive and transmission were installed, provisioned from Ross Miller and rebuilt by Bill Aske. I drove the car home, about a 1-1/2 hour drive, no problem, other than the kickdown switch did not work, yet. I no sooner pulled into the garage than the ignition switch after 83 years locked up halfway between off and on, fortunately locked off. I had a number of other issues with the dash that needed fixing, so I decided to pull the dash out completely.
Being mid-December, I put an electric heater in the back seat, stuck up 2 Eastwood puck lights and proceeded to take the dash apart. Ross recommended these puck lights and I used them a lot throughout the process, often quitting when they needed recharging after 4 or 5 hours. Attach file: 01BackseatHewater.jpg (192.93 KB)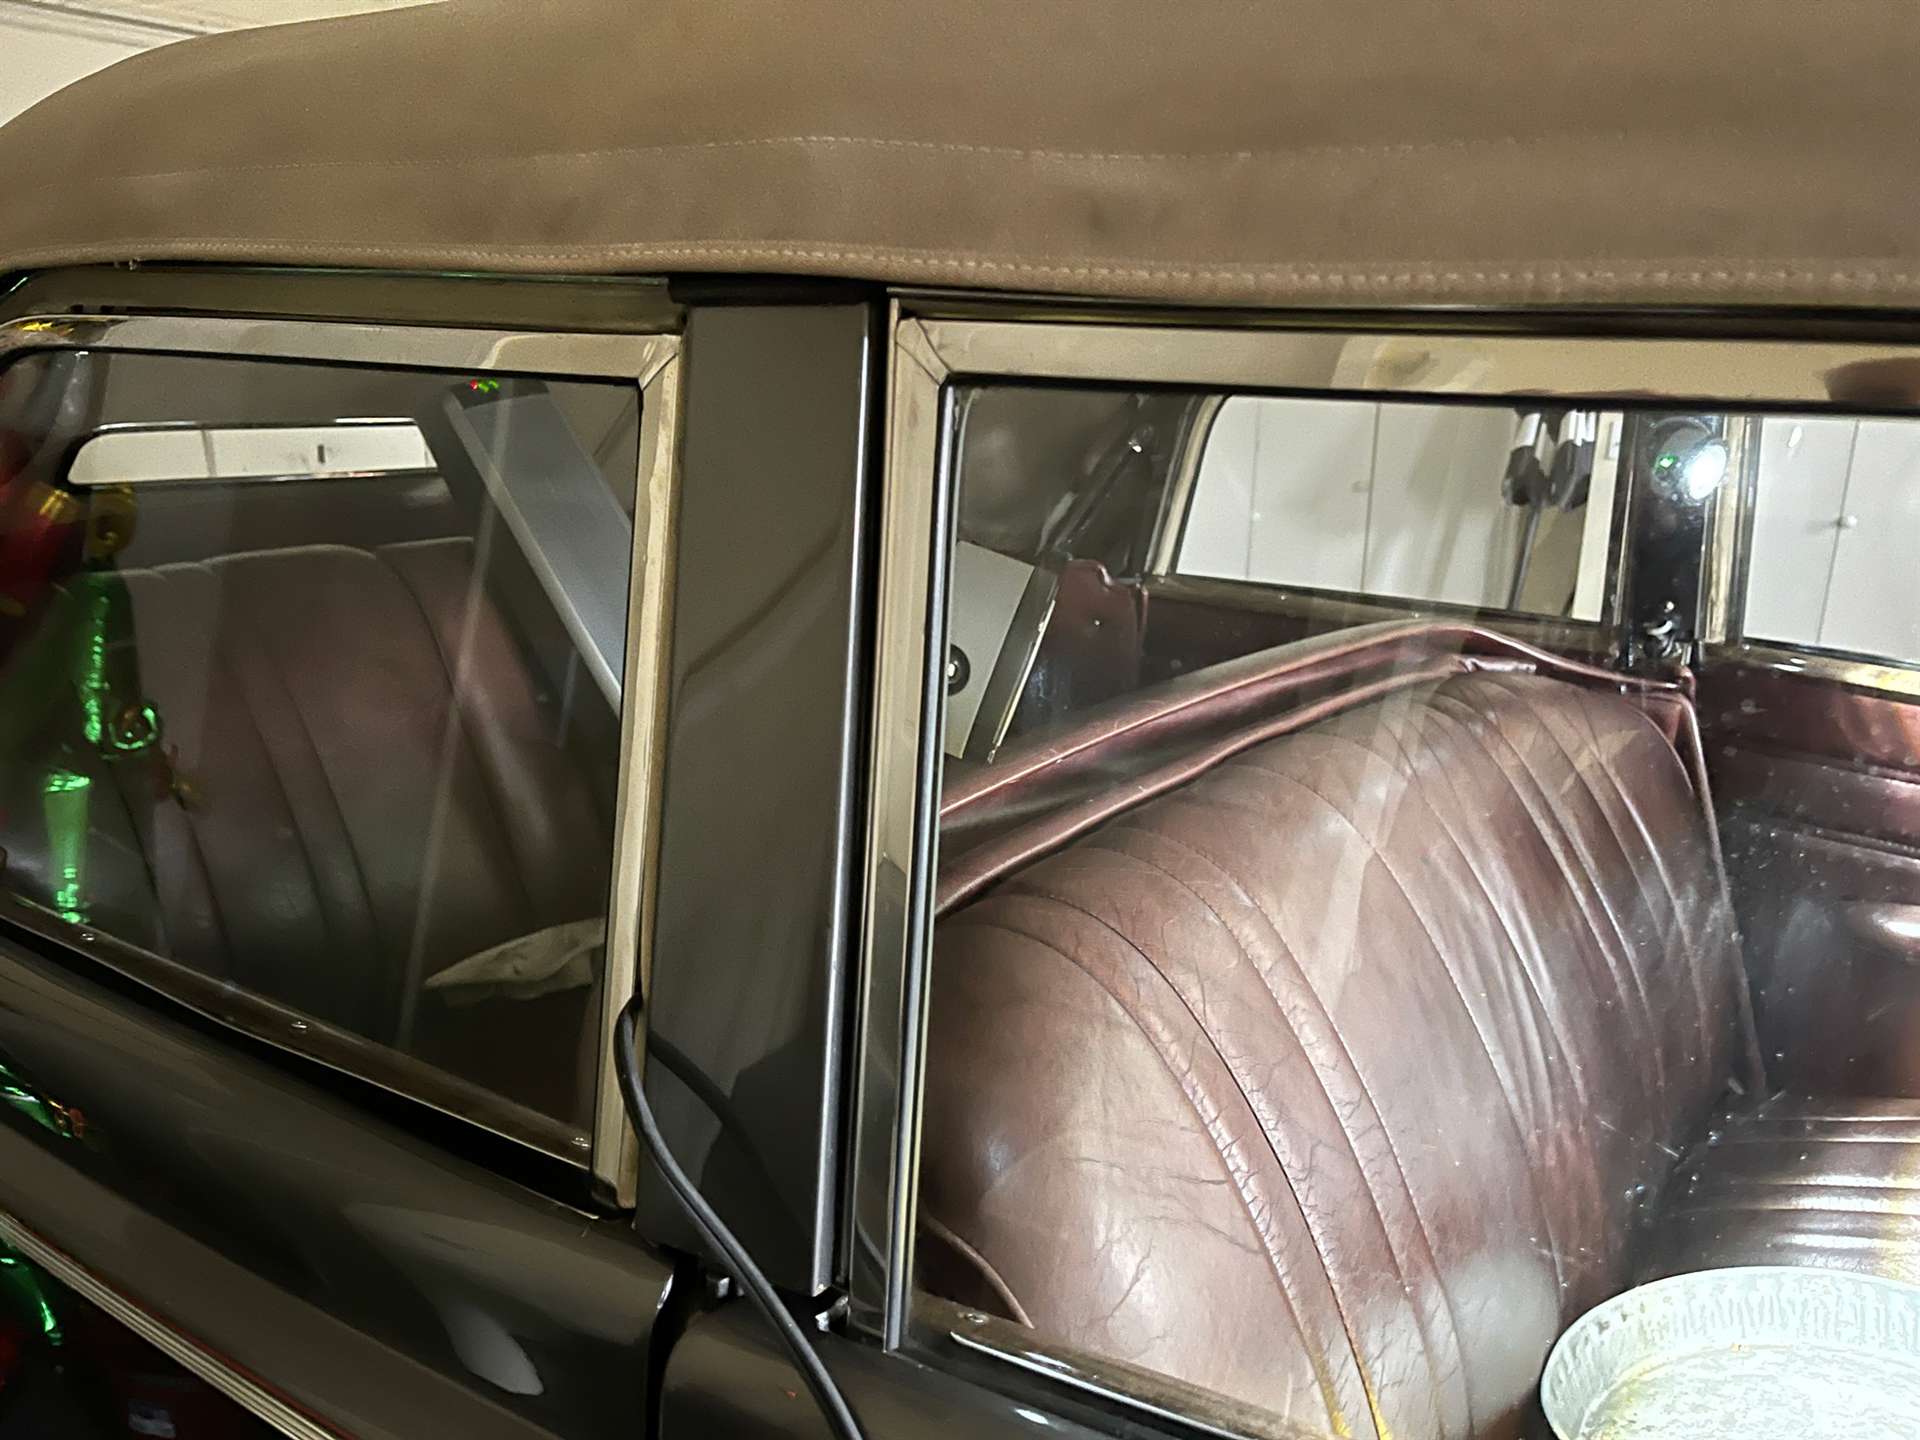 02-EastwoodPuckLight.jpg (125.08 KB) 02-EastwoodPuckLight.jpg (125.08 KB)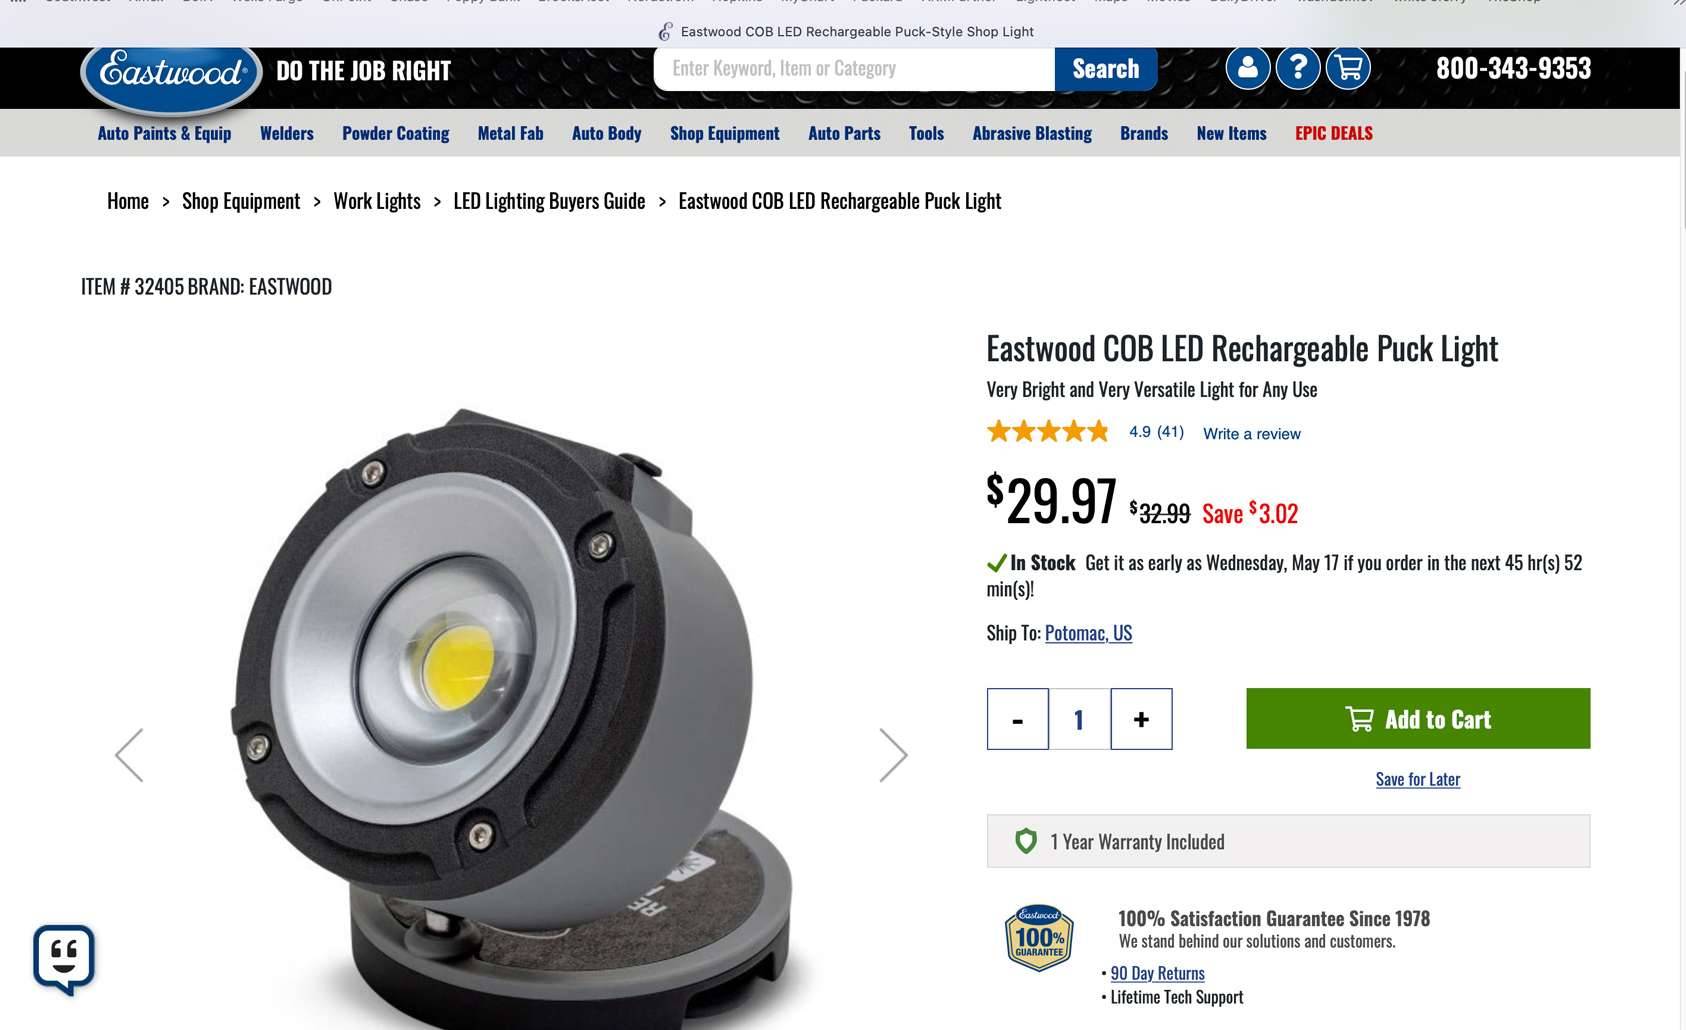 03B1940Plastic.jpg (247.22 KB) 03B1940Plastic.jpg (247.22 KB) 03PuckLightIllumination.jpg (205.25 KB) 03PuckLightIllumination.jpg (205.25 KB)
Posted on: 2023/5/25 9:17
|
|||
|
||||
|
Re: Seattle Packard Company
|
||||
|---|---|---|---|---|
|
Home away from home
|
David Moe is a good guy. Here's a pic from a few years ago at the Portland Swap Meet.
Attach file: DavidMoe.jpg (136.29 KB)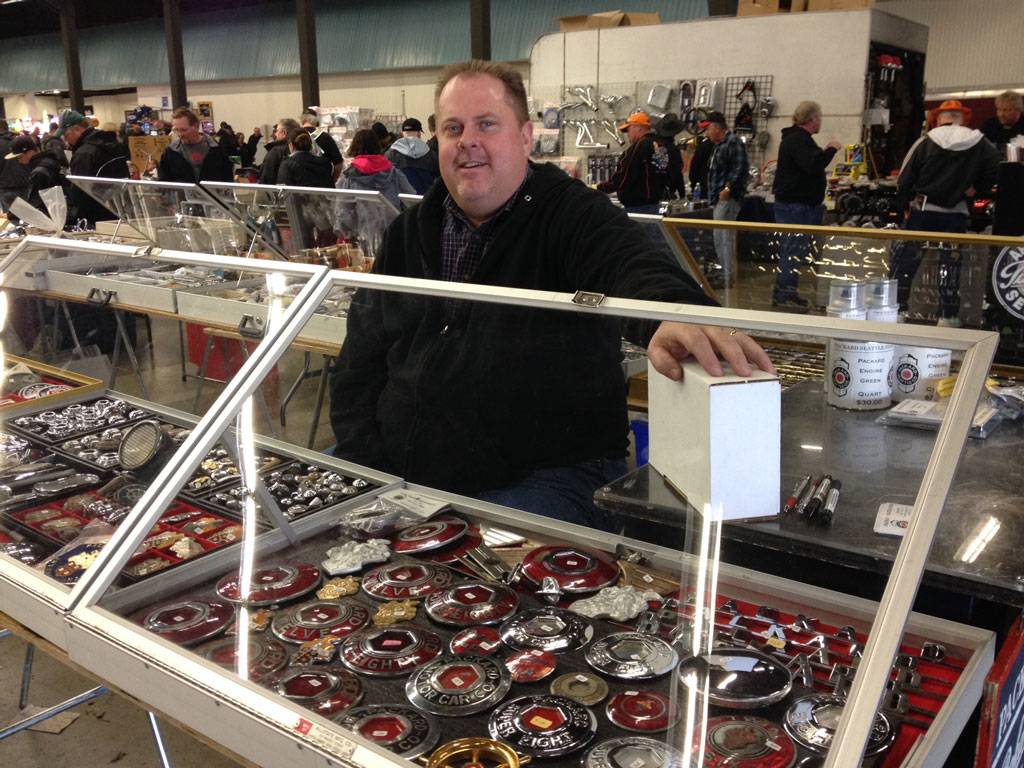
Posted on: 2023/5/18 16:35
|
|||
|
||||
|
Re: KPack's 1954 Panama
|
||||
|---|---|---|---|---|
|
Home away from home
|
Magnificent job, Kevin. Long lasting, too.
Posted on: 2023/4/27 22:39
|
|||
|
||||
|
Re: Sidemount molding clips 1936 120
|
||||
|---|---|---|---|---|
|
Home away from home
|
Try Restoration Specialties. You’ll probably need one original and them match it in their catalog.
It may be worth checking the packardinfo Literature section for a Parts List. It might give you a picture and how many you need. It might be 354442 with a drawing and dimension in section 50.600 of the 1935-1941 Parts List
Posted on: 2023/4/10 21:29
|
|||
|
||||
|
Re: 1948 Super Eight Convertible Fuel Tank and Straps
|
||||
|---|---|---|---|---|
|
Home away from home
|
You have a great solution from the flackmaster, but I just want to say that the Moparpro repro tanks, expensive as they are, are really well made. For years we begged the usual suspects with pre-order promises to make these new tanks. Kanter has metal straps. Steele rubber has the cushion strips for the straps and McMaster has stainless t-bolts and nuts.
Posted on: 2023/4/1 19:02
|
|||
|
||||
|
Re: Year for a Packard Trunk with emblem
|
||||
|---|---|---|---|---|
|
Home away from home
|
A few weeks ago, I was given an identical trunk by a car buddy with a 120. It was given to him, it didn’t fit, so he gave it to me. It’s an incredible gift since mine “disappeared” in the early ‘ 80s. I subsequently removed the rack. When the car was painted in 2010, the rack etc were painted, too.
The trunk will be a project which I cant start until I finish the dash restoration and electrical. This trunk will need the blue moldy fabric lining replaced and the exterior painted to match the car, plus keys made. No dents. Chrome is in good shape. I’m working with flackmaster to get the additional parts I need to pick up at Hershey. That’s another way to deliver and pick up the trunk. Go to Hershey. Attach file:  B92F840B-E2DB-4B8B-875B-A47720CED77A.jpeg (11.43 KB) B92F840B-E2DB-4B8B-875B-A47720CED77A.jpeg (11.43 KB) A94ADDBF-024E-4AC4-813A-620C1A350341.jpeg (13.67 KB) A94ADDBF-024E-4AC4-813A-620C1A350341.jpeg (13.67 KB)
Posted on: 2023/3/31 22:33
|
|||
|
||||
|
Re: 1932 Light Eight window lift
|
||||
|---|---|---|---|---|
|
Home away from home
|
Try Roy,http://www.regulatorroy.net/
He did not have what I needed so I obtained blueprints from the Studebaker Museum, duplicated the drawing in Illustrator and made an AutoCad file. Joe Block in Washougal WA made the gears on a laser cutter. Ross Miller at Speedwell Garage, Parkton MD disassembled and installed the gear. It was quite an ordeal due to children cranking too hard on the rear window and breaking about 4 teeth. Extras were made, but for the rear window regulator for a ‘40 Conv sedan.
Posted on: 2023/3/25 23:40
|
|||
|
||||
|
Re: Replacing Vent Handle
|
||||
|---|---|---|---|---|
|
Home away from home
|
Assuming it’s a crank handle. If not, I’ll send pix that might help.
Don, where did you get that tool??? I need one.
Posted on: 2023/3/25 23:20
|
|||
|
||||


