|
Re: Vacation Car - 56 Patrician
|
||||
|---|---|---|---|---|
|
Home away from home

|
Quote:
Howard, when it comes to grounding the double terminal ends I have not done that. seems very simple to do. I will try this with the box that doesnt automatically send the rear of the car down. when it comes to your second test Howard, I can continue with that after I do your first. I do know that when I ground the top terminals of either solenoids on the inner fender the motor does move. So I believe that says the solenoids are correct and they're are okay (?). When it comes to the limit switches. I do know both are closed when the pivot arm on the compensator motor is parallel with the centerline of the car. I can take a test light and I see I am getting power at both terminals when I go from the back side of the terminal connections at both limit switches. I am also getting power at the connections on the compensator box that go to the limit switches. The only time I am not getting power through both limit switch wires is when the rear sinks to the ground then I am not getting anything from my test light at the yellow wire at the switch or in the control box. Which I believe means those connections and switch are good(?). Mr.Pushbutton, I can easily adjust those contacts. I can also clean up all the contacts and and check the solder like you mentioned in our message. Do I know I am getting a good ground? I guess I do not know. When It comes to testing these boxes while on the car I bolt them to the frame in their mounting location. The frame and bolt have surface rust, but are not painted. The faces surrounding the mounting holes on the compensator box are painted but showing marks of bare metal where the star washer is digging into when I mount the boxes up. But given the issues I am having, to rule that out I can clean those areas to bare metal to insure a bad ground is not adding to my problem. Thank you everyone for the help!
Posted on: 2023/4/12 16:15
|
|||
|
||||
|
Re: Vacation Car - 56 Patrician
|
||||
|---|---|---|---|---|
|
Home away from home
|
I got a little time to look into this a little more.
I did not see any chewed through wires, and all the connections I made while putting the car together involved light sanding on the terminals and adding dielectric grease. So far I have tried 3 compensator boxs: Box one: originally came on the car. I am getting some clicking when its installed on the car when I move and hold the rotating arm. Box two: looks the best, has a date painted on it of 1961. Automatically moves the rear of the car down regardless of the position of the on off switch. Box three: doesnt do anything unless you touch the threads of one of the screws in the area of where you connect the wires. if that is done, the car will plant the rear of the car on the ground. Below I added screen shots of what John Lauter (who I believe is Mr. Pushbutton on here) posted on facebook regarding the operation of the control box. I will use his terminology and his indicators he put on his attached photos. I opened up box one and box two. I connected the green terminal on the box to the positive side of the battery and attached the base plate of the box to the negative side of the battery. I rotated the rotating arm so I was getting contact in the timing box marked "A". On both box 1 and box 2 I was seeing movement in the time delay switch marked "B". depending on which side I moved the rotating arm too the time delay switch would have the arm move to the closest terminal for that. So I can assume that on both box 1 and box 2 that the timing section of the boxes are in working order. On box 1 I was seeing (and heard while under the car) movement of the C&D relays trying to close. However, the contacts on the copper arm were not moving enough to make contact with their corresponding terminals on the steel arms below. On Box 2 I was not seeing any movement of the relays C &D. I believe I found my issue of the leveling not working. The third photo shows a close up of the C&D relays where the copper armed terminals and steel arm terminals would make contact. In order to get box one to work, can I just bend the steel arm terminals closer so that the terminals will make contact once those relays see power? Seeing that I have 2 boxes that have no movement of the C & D relays. Is there a place I can send them to get them rebuilt? Can I get new relays like them? or could there be enough tarnish/corrosion at the terminals that are preventing a good connection when they close? could I lightly sand the contact terminals? I heard of the solid state conversion for these, but I heard that they dont function as well? is that true? thanks again for all the help! Attach file:  IMG_1660.PNG (632.08 KB) IMG_1660.PNG (632.08 KB)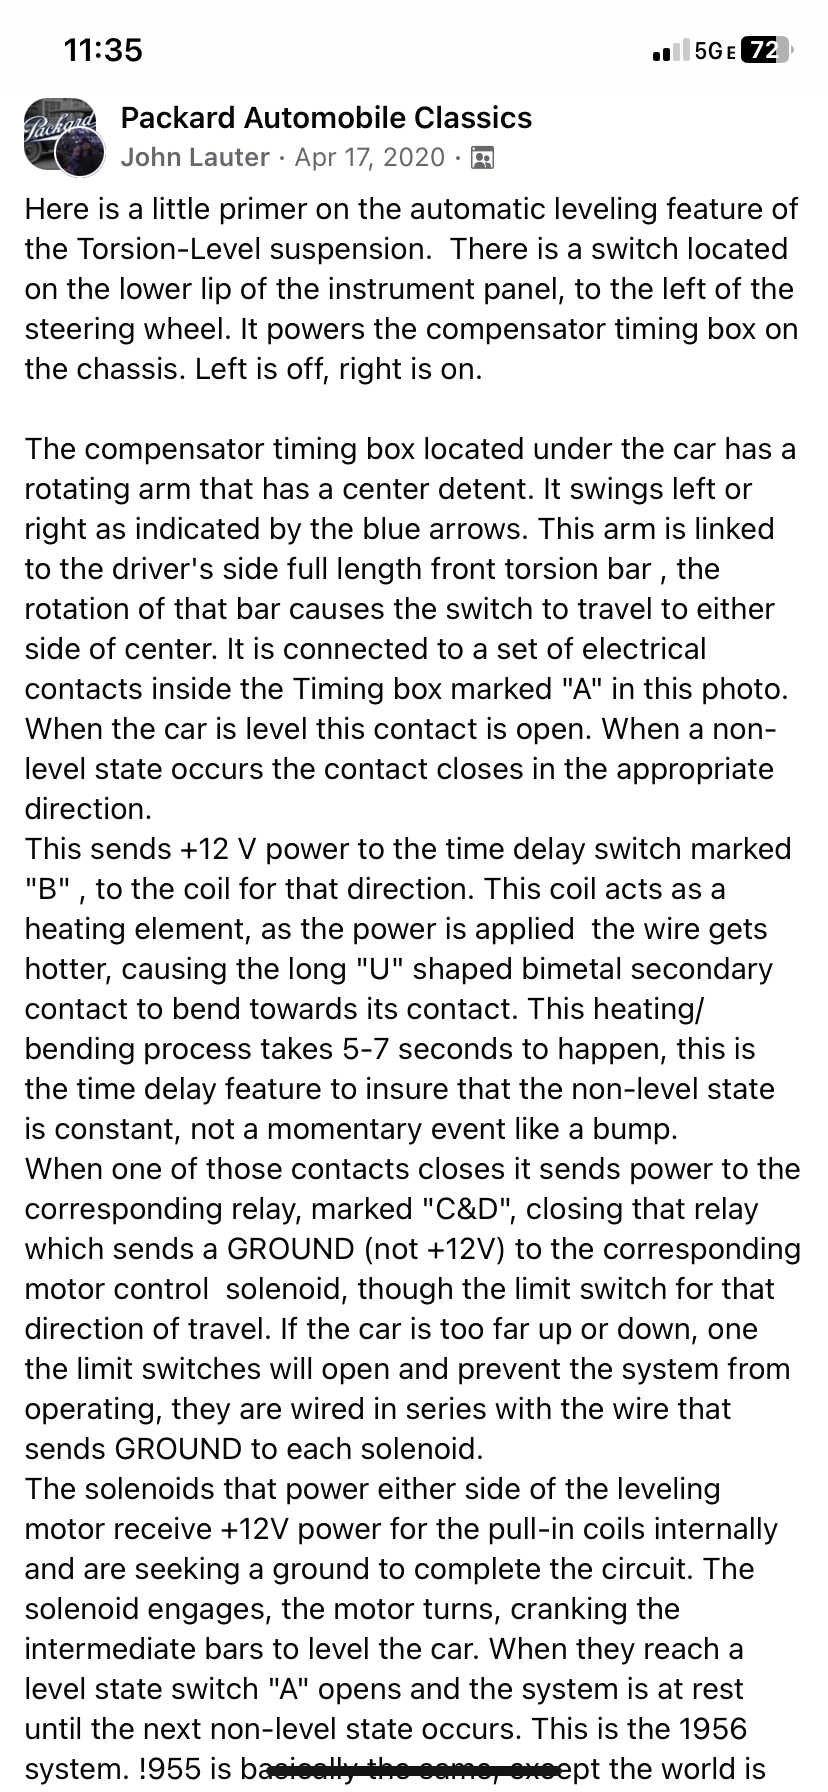 IMG_1661.PNG (1,574.74 KB) IMG_1661.PNG (1,574.74 KB)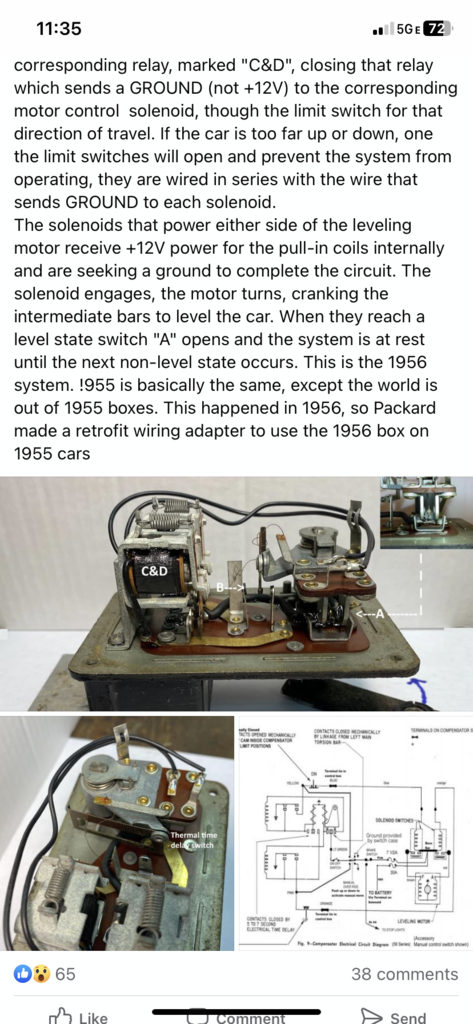  IMG_1744.jpg (242.43 KB) IMG_1744.jpg (242.43 KB)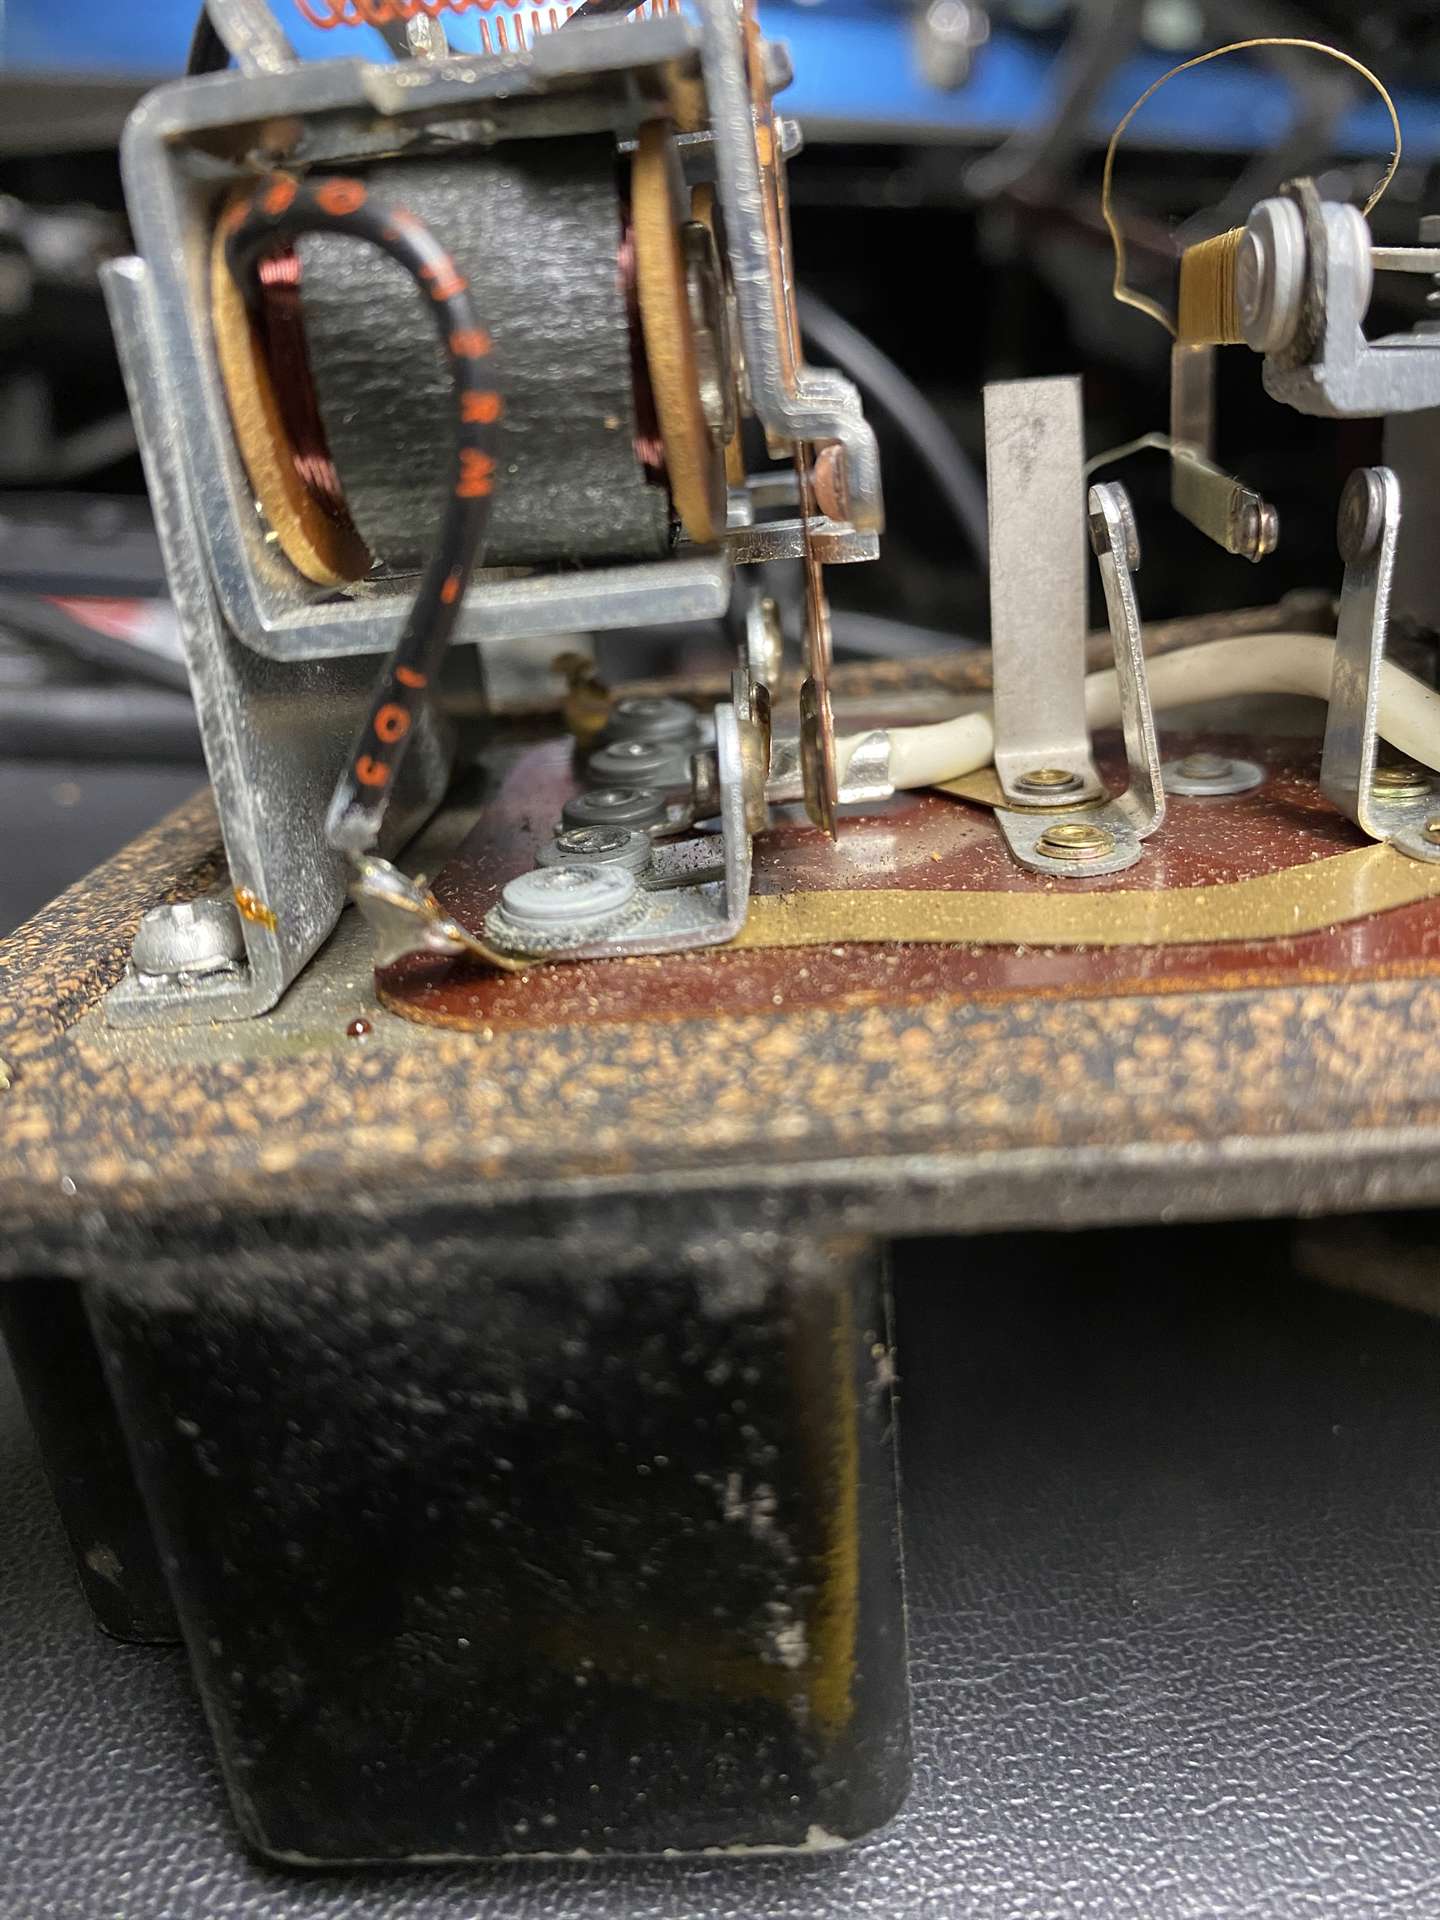
Posted on: 2023/4/12 12:21
|
|||
|
||||
|
Re: Vacation Car - 56 Patrician
|
||||
|---|---|---|---|---|
|
Home away from home
|
Quote:
Alright Ross!! First thing was I disconnected the turn bucket at the controller so I knew it was in the center position and checked that the dash switch was in the off position. Connected the battery and the back end dropped. I checked the green wire at the controller and it did not light my test light. I turned the switch to the on position and that green was hot when I tested it with the test light. I did try to move the arm on the control box after the back end sank, but nothing happens Does this prove my issue is with the control box? I do have other ones here I can try. Also. The solenoids on the fender have rubber insulators that mount them to the inner fender. However, on the Caribbean they are bolted straight to the fender. Do they need to be ground through their mounting or not? Or does it not really matter? The rubber is cracking and falling apart
Posted on: 2023/4/8 18:16
|
|||
|
||||
|
Re: Vacation Car - 56 Patrician
|
||||
|---|---|---|---|---|
|
Home away from home
|
Okay, put the fuse in and connected the battery. The compensator motor automatically kicked on and lowered the rear all the way down until I guess it hit the limit switch? However, this happened with the under dash switch in the off position.
Either way. I was able to get the motor to turn when grounding either of the top terminals on the solenoids. But if I tried to raise the rear the motor would just lower it once I got off the top terminal. Where do I go from here? Again, I appreciate all the help!
Posted on: 2023/3/28 18:05
|
|||
|
||||
|
Re: Vacation Car - 56 Patrician
|
||||
|---|---|---|---|---|
|
Home away from home
|
Alright!! I robbed some time in the garage and did ad you requested Ross:
I removed the clip (a lot easier than I expected it to be) and noticed the brush holders were frozen not allowing the brushes to contact the armature properly. Got them freed up with some good snap back action and closed it up. With the 30 amp fuse out of the fuse holder I connected the battery cables up and put a jumper cable between the positive post of the battery and post “F” on the compensator motor and it moved!! Tried the same on “A” but with all the corrosion I needed to scrape a little to get a good connection. But I did get it to move when connected to “A” as well! I’ll clean up those connections now Alright. What’s next?
Posted on: 2023/3/27 17:39
|
|||
|
||||
|
Re: Vacation Car - 56 Patrician
|
||||
|---|---|---|---|---|
|
Home away from home
|
Quote:
thanks for that Ross!! doing that power test as you suggested would bypass the limit switch that is currently active (or both wires are showing power going thru them), and that is okay? Could that be why the motor didnt want to run? as you might be able to deduce from the photos, the compensator motor is covered in a ton of crud. where would I be able to locate the band where the brushes reside? Which terminal is active that makes the rear go down? thanks!
Posted on: 2023/3/27 8:45
|
|||
|
||||
|
Re: Vacation Car - 56 Patrician
|
||||
|---|---|---|---|---|
|
Home away from home
|
Here are two more pictures for reference. One is showing the the Compensator bar being wound on the drivers side from the rear looking forward. Than the other picture shows the link that attaches to the compensator box from the front looking rearward
Attach file:  0A014B33-D55B-4EC9-A3C7-F6E5FF2E6FC7.jpeg (235.88 KB) 0A014B33-D55B-4EC9-A3C7-F6E5FF2E6FC7.jpeg (235.88 KB)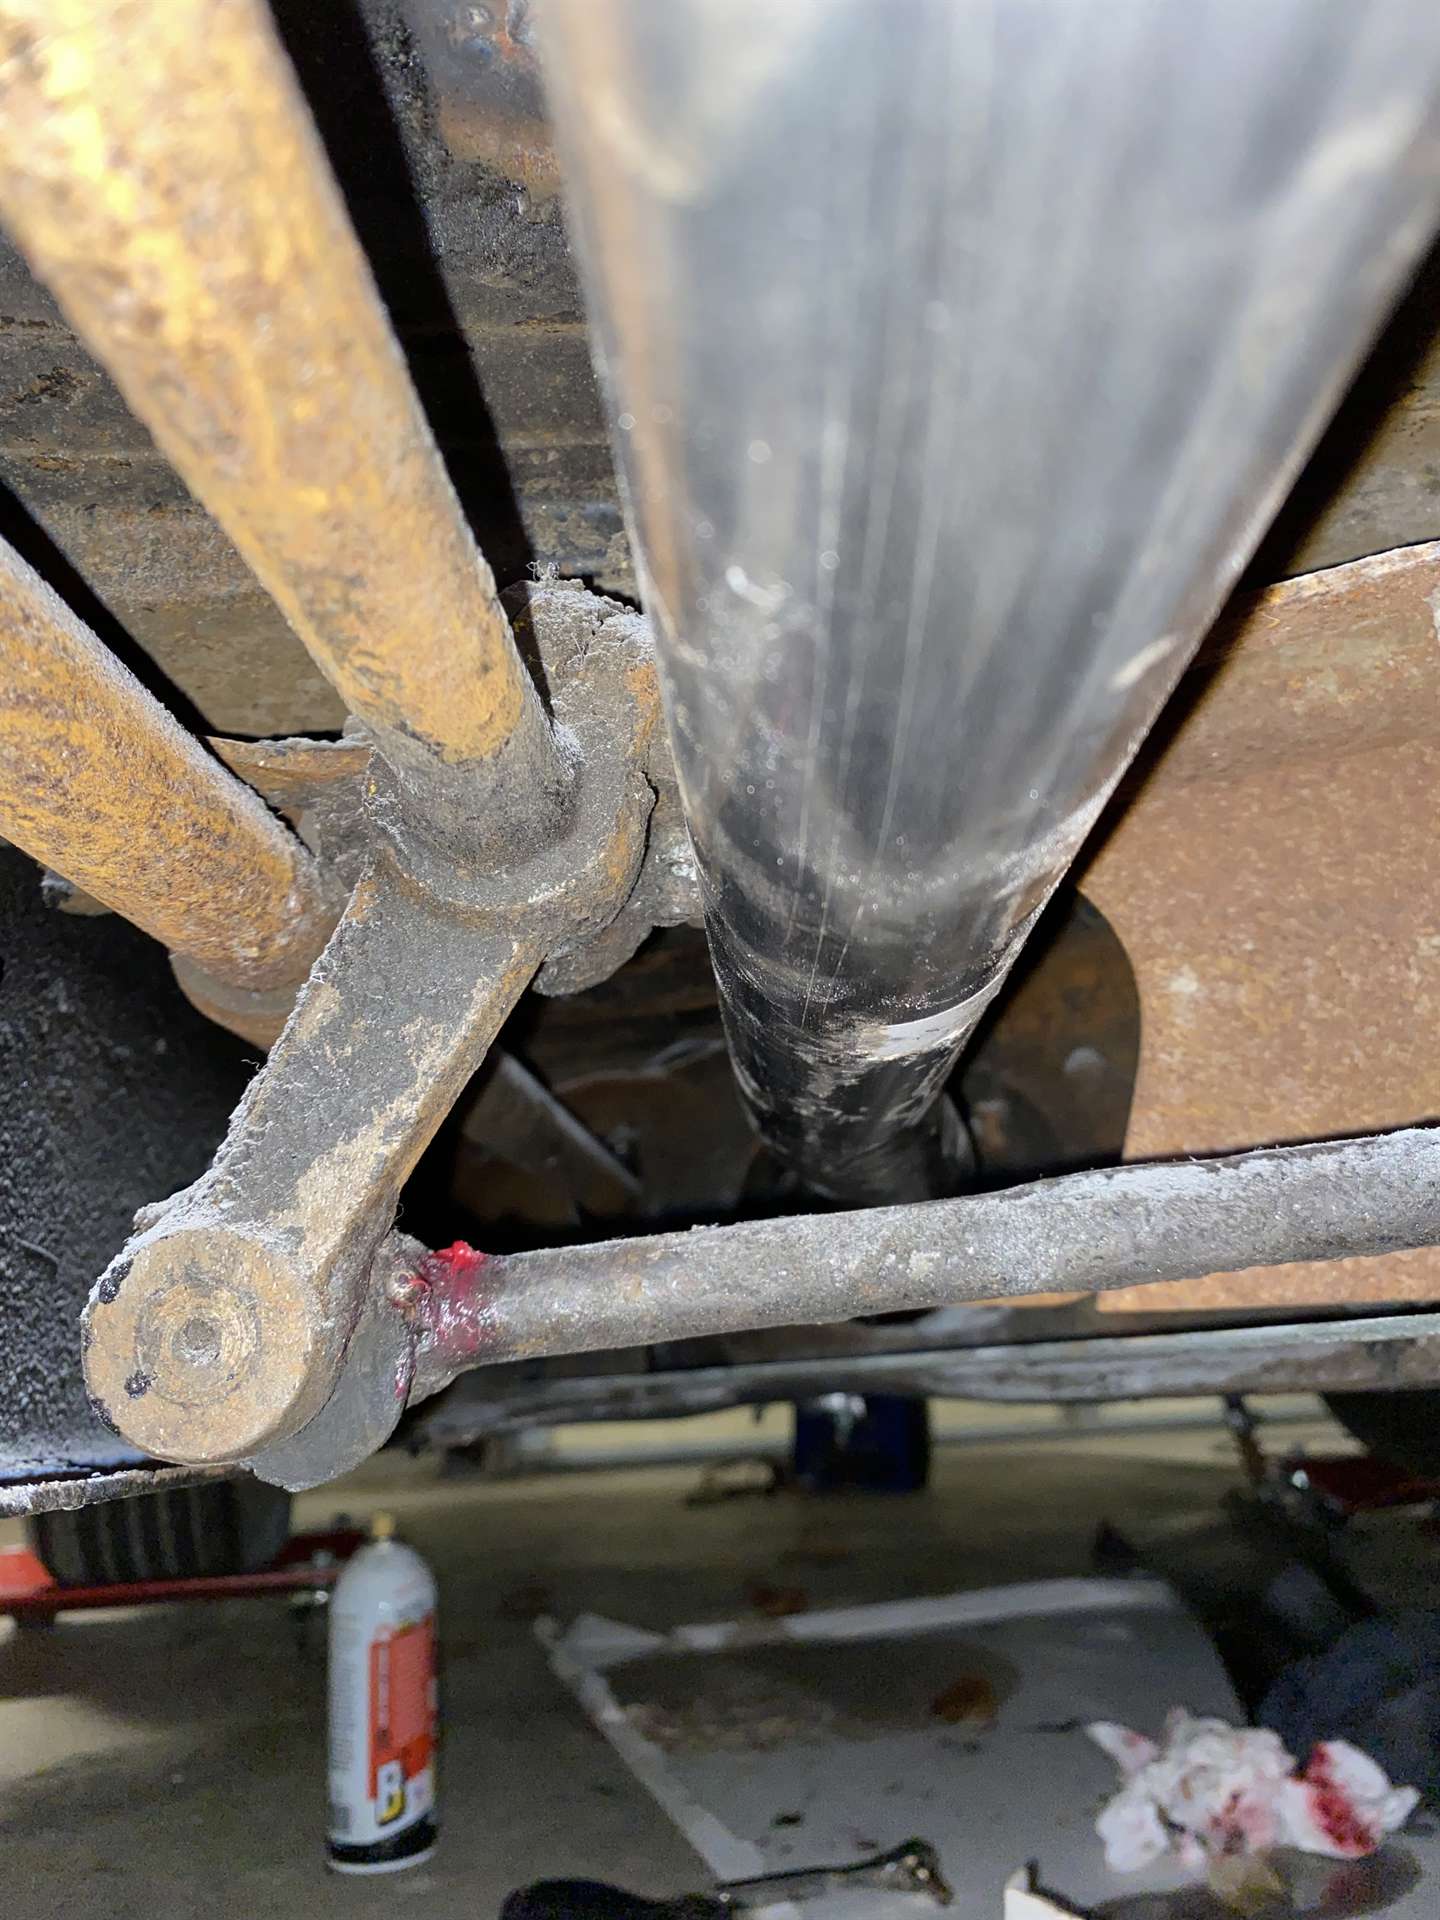 0FF0969A-9FA2-4D0E-BE6E-7D2DCBACF133.jpeg (281.17 KB) 0FF0969A-9FA2-4D0E-BE6E-7D2DCBACF133.jpeg (281.17 KB)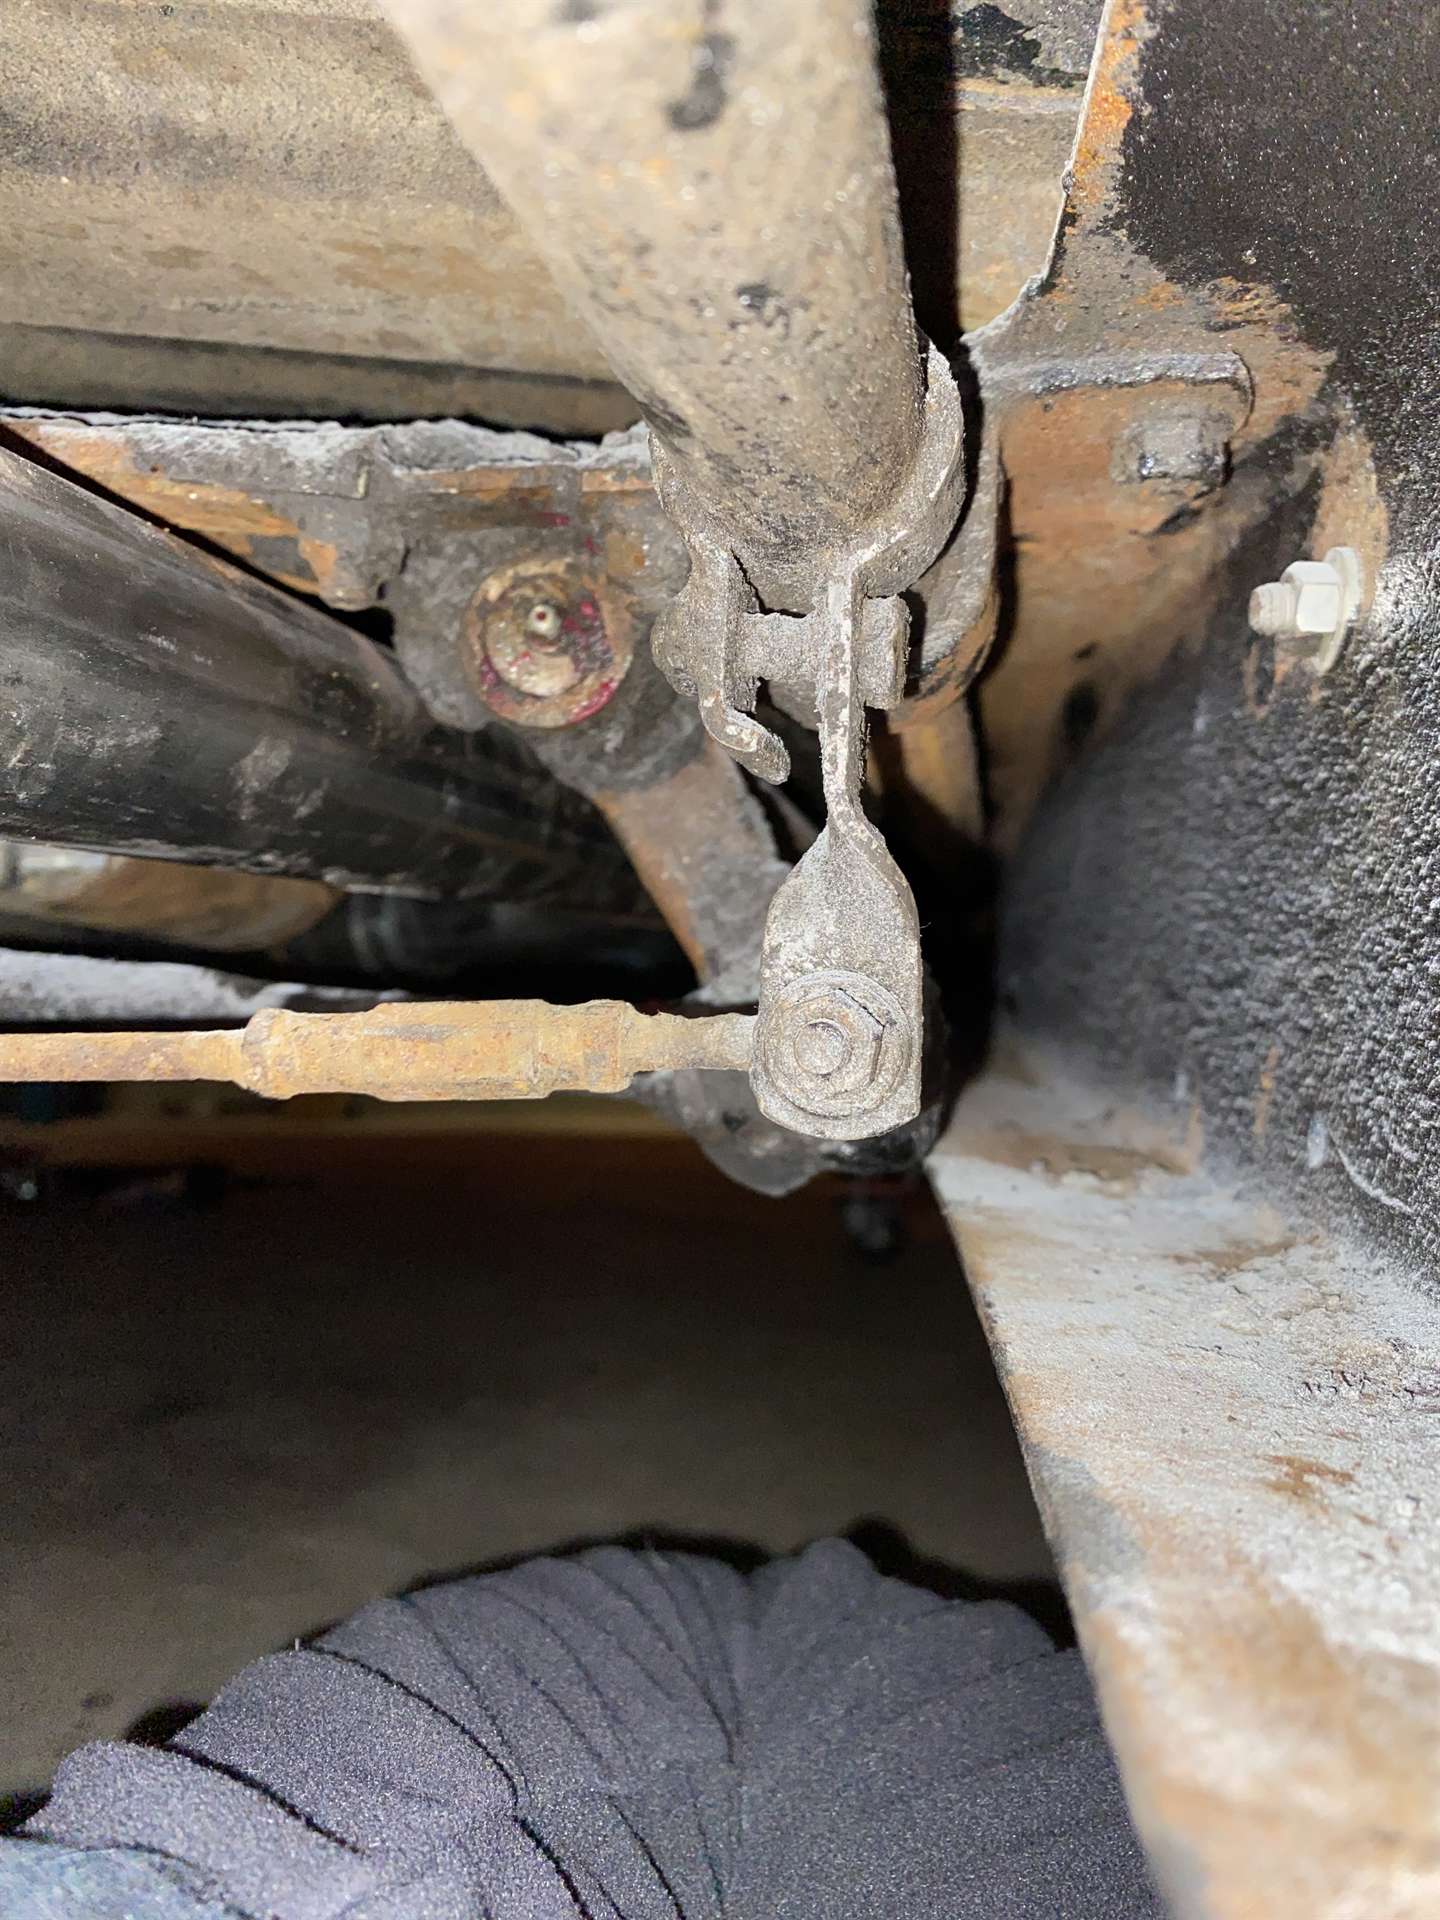
Posted on: 2023/3/27 6:26
|
|||
|
||||
|
Re: Vacation Car - 56 Patrician
|
||||
|---|---|---|---|---|
|
Home away from home
|
The picture from under the car is from the rear looking forward
Yes the bumpers and grill are on. Looks pretty spiffy!! I was informed the suspensions bushings were changed in the early 90’s… but from inspection I don’t know what was changed because everything is dry rotted I did grease all suspension fittings with the exception of two of the torsion bar compensator bearings where the short/long links attach to the compensator bars due to the extreme angle they are currently at Attach file: EC01E531-B660-4CFE-8E1F-004FCA517C8D.jpeg (297.81 KB)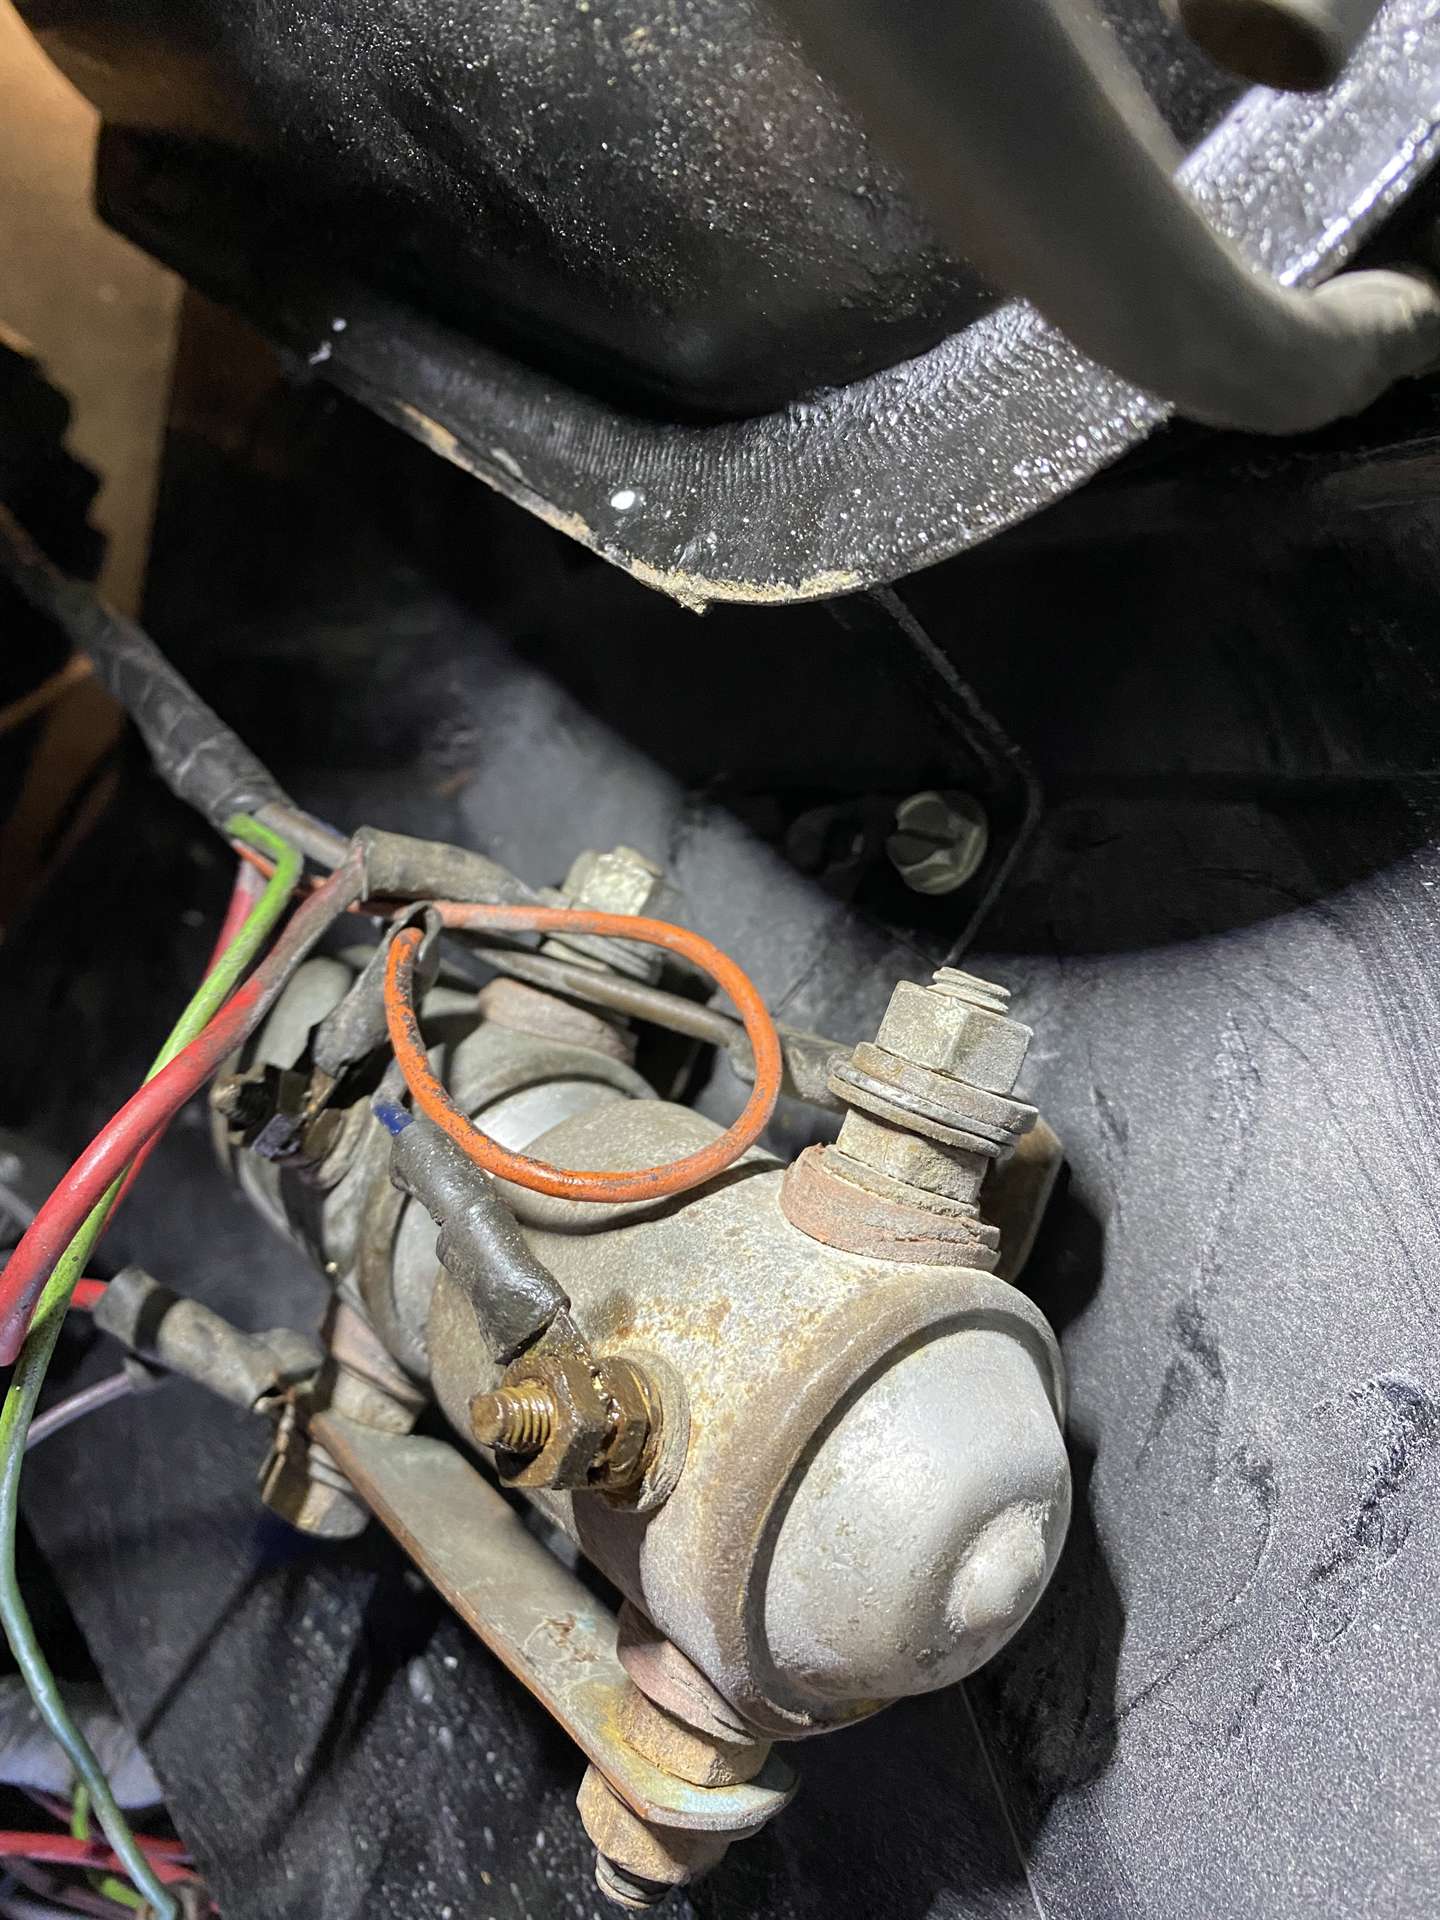 CFF7DC15-26A9-40A0-A796-2B25B026CAB6.jpeg (307.42 KB) CFF7DC15-26A9-40A0-A796-2B25B026CAB6.jpeg (307.42 KB)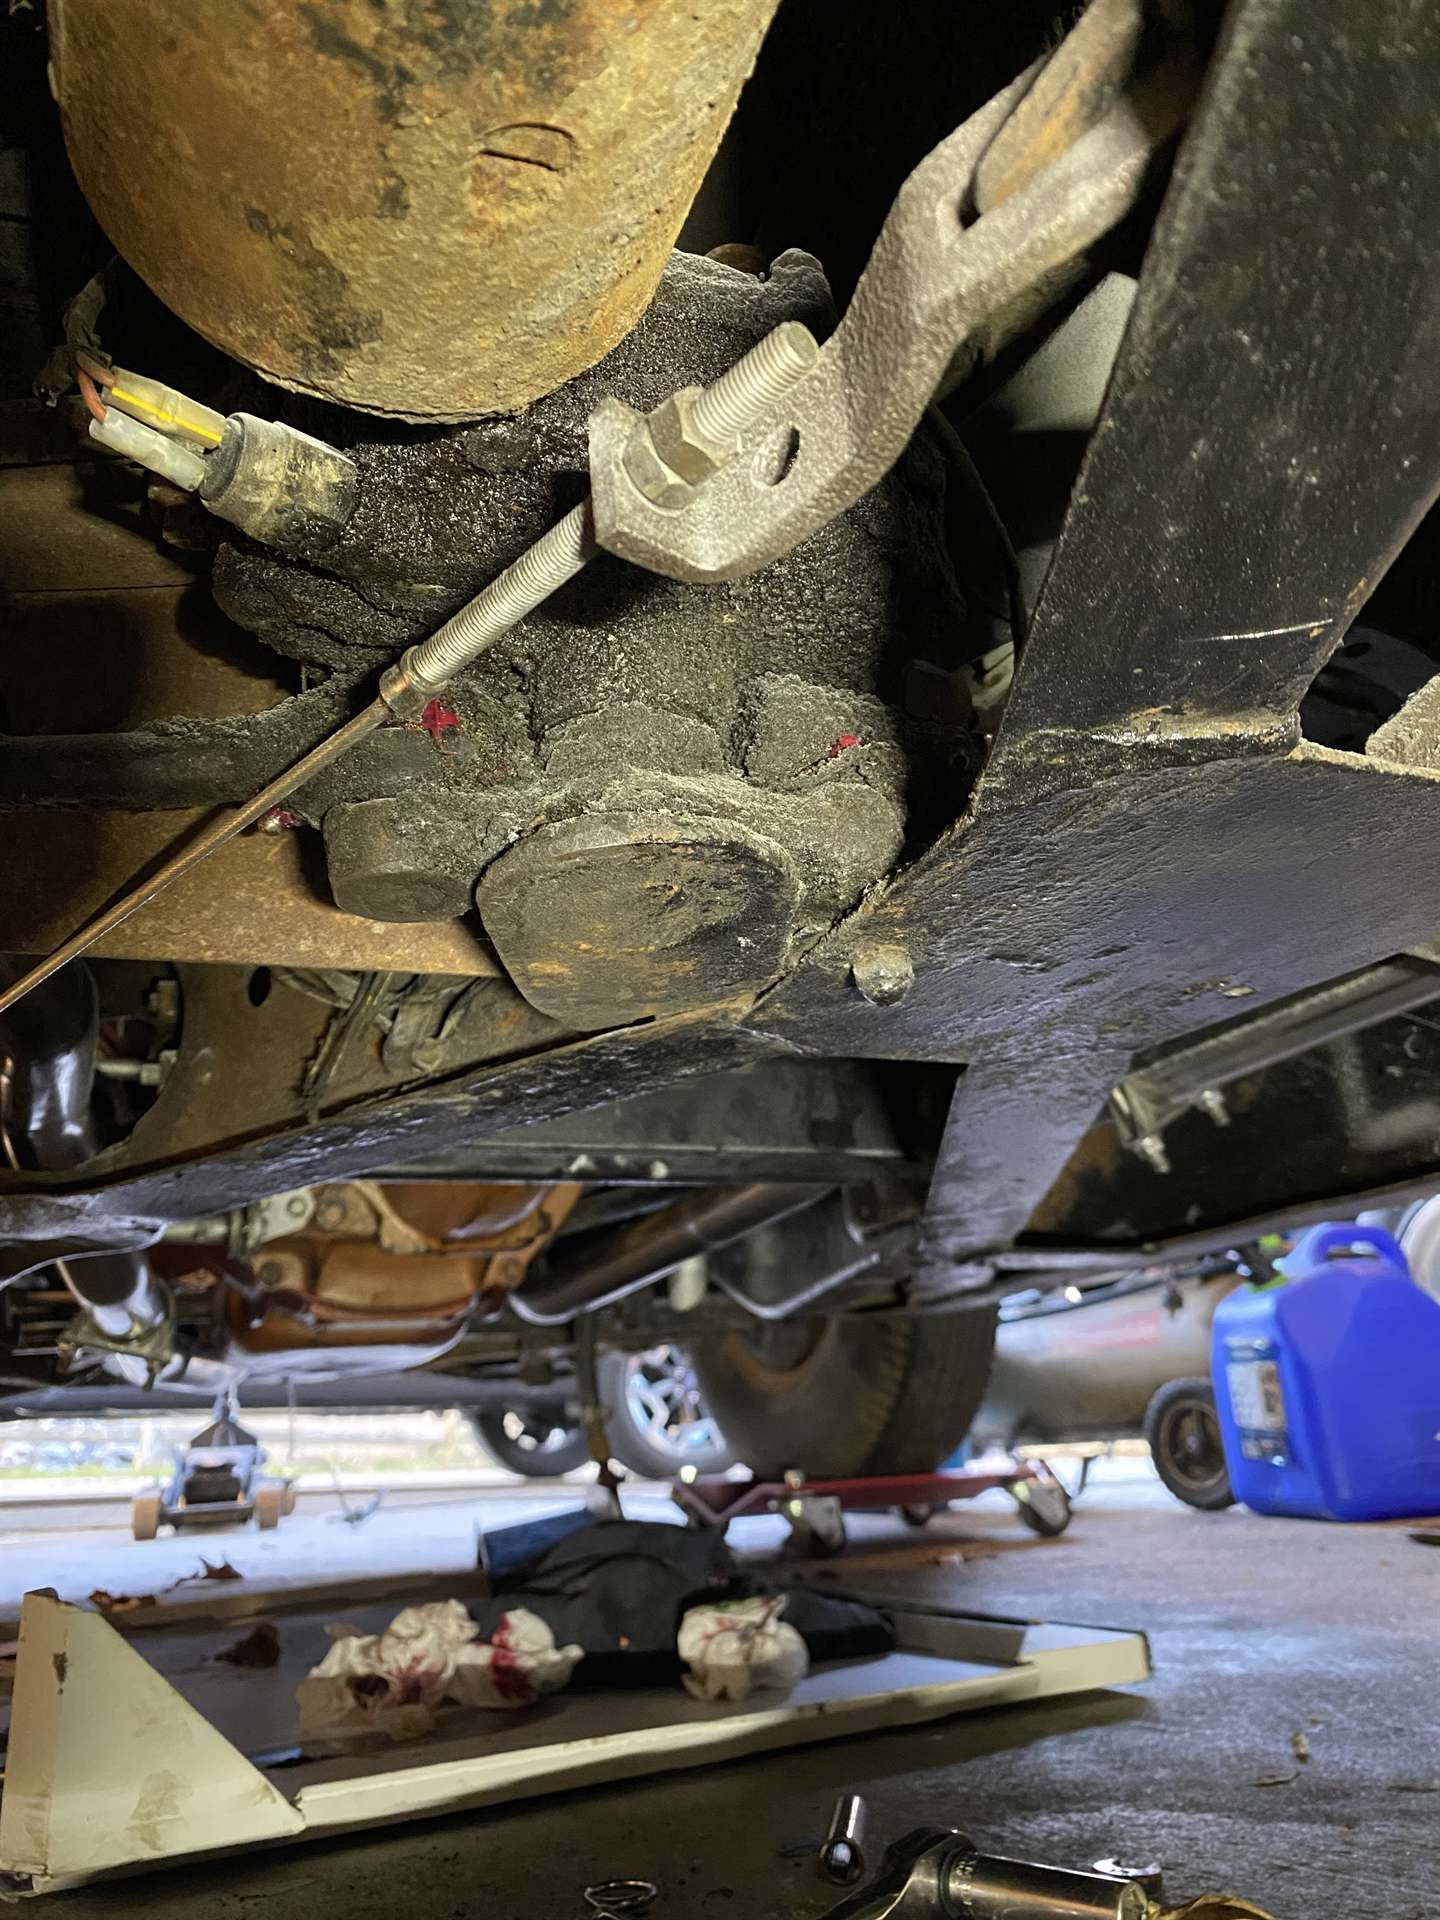 419E8B39-B5FC-46CD-8ACA-C13318AF7A60.jpeg (288.09 KB) 419E8B39-B5FC-46CD-8ACA-C13318AF7A60.jpeg (288.09 KB)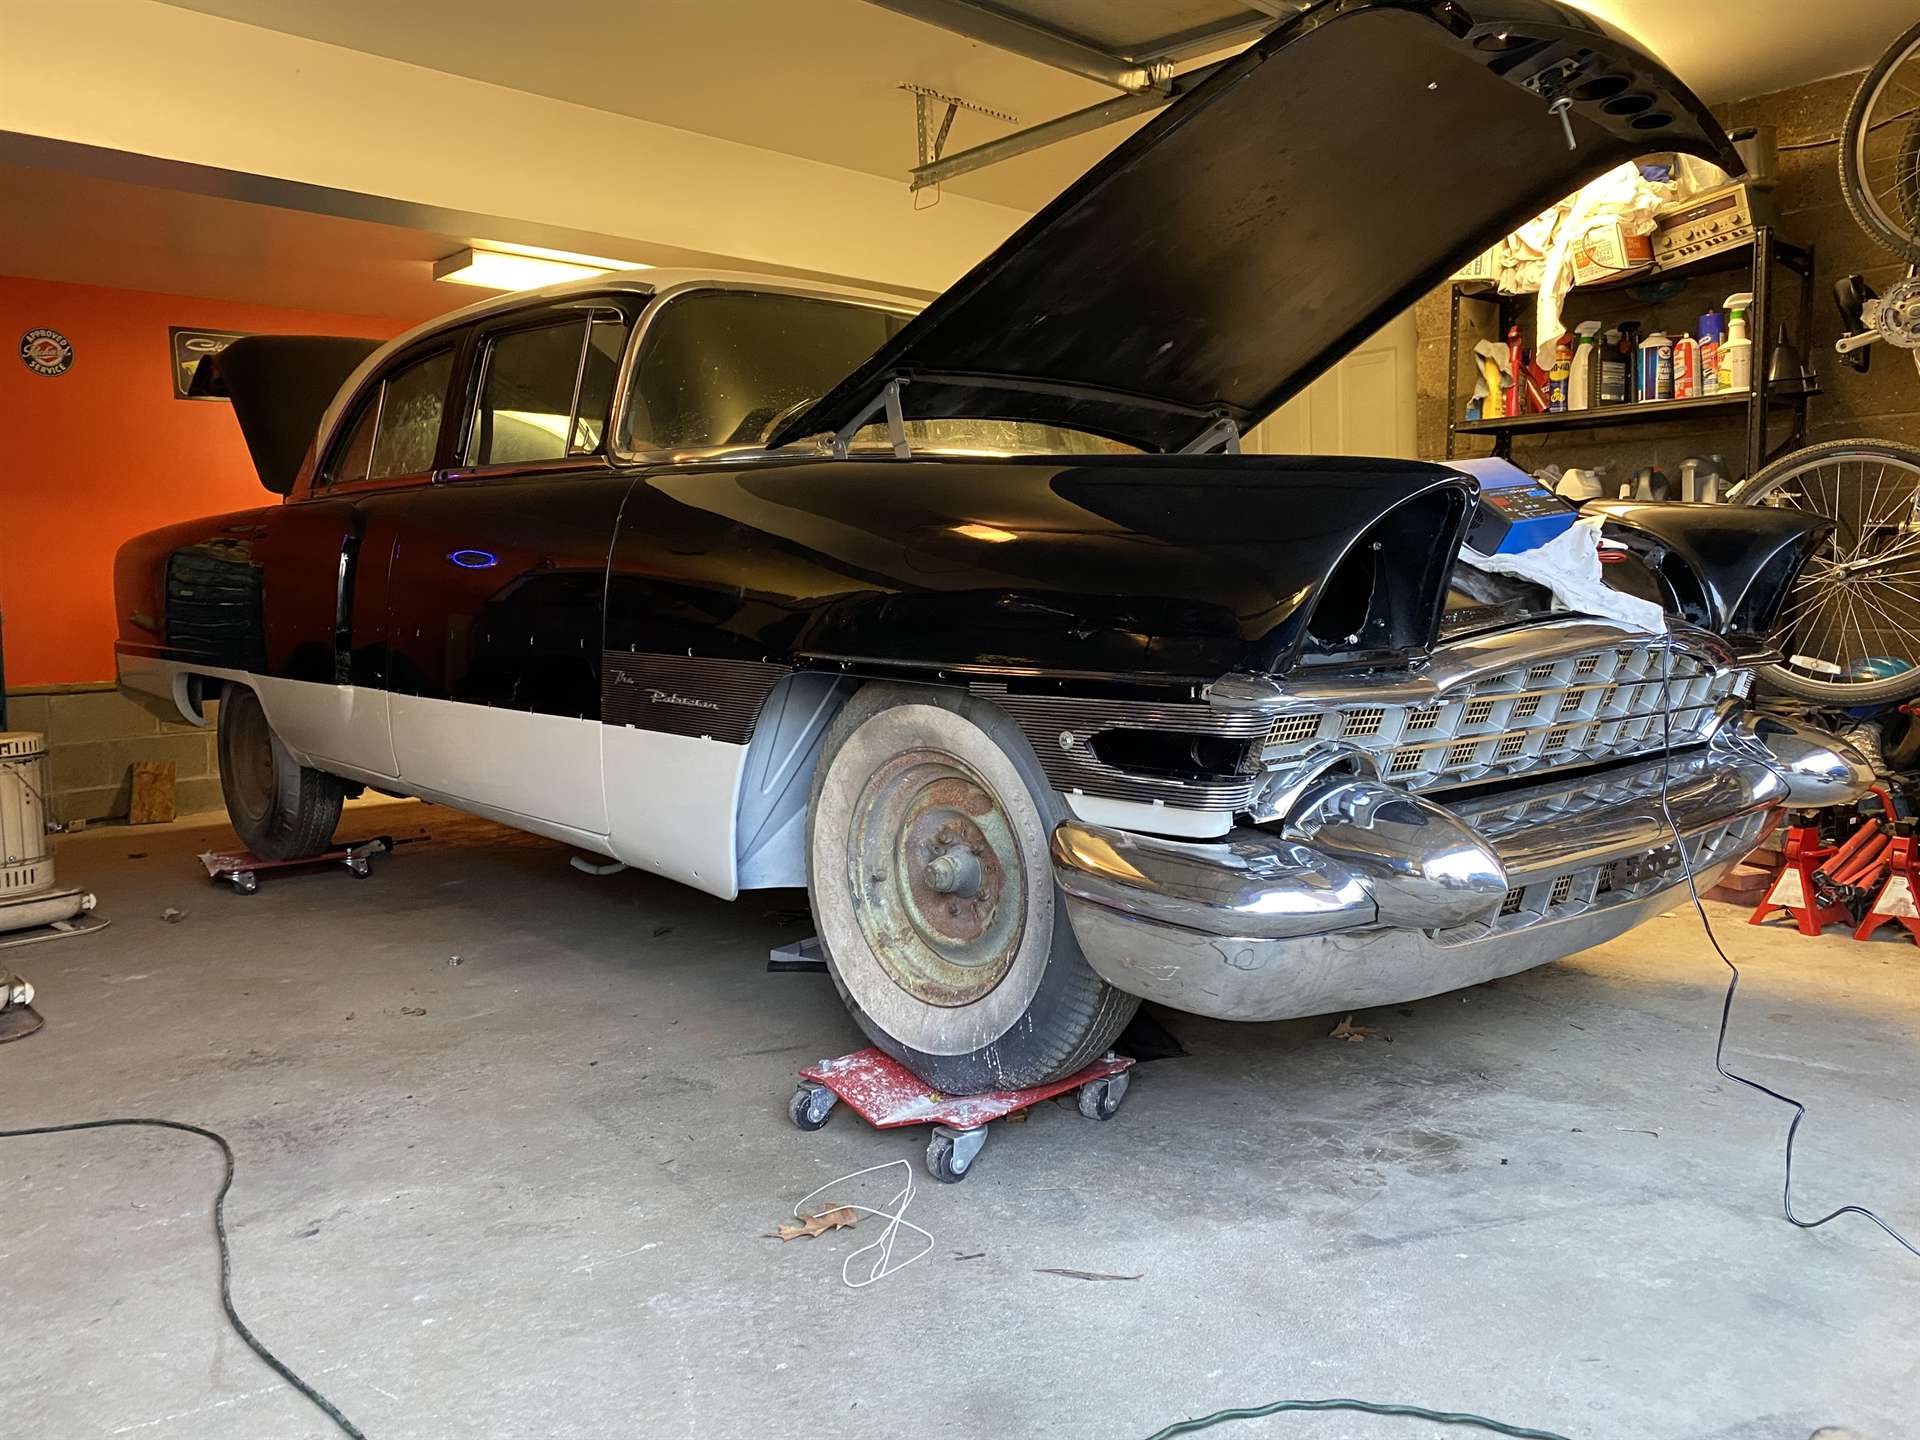
Posted on: 2023/3/26 18:15
|
|||
|
||||
|
Re: Vacation Car - 56 Patrician
|
||||
|---|---|---|---|---|
|
Home away from home
|
Alright, I am having some suspension problems…
So I verified that the fuses were good, verified that my mechanical brake light switch was energizing the suspension by using a test light at the brake light switch connector and the light green wire was shown to be energized at that location and down at the control box. Both solenoids were showing to get power. Both solenoids were lighting up the test light when probed at the top terminals. At the control box I verified that all the orange wires were energized, all blue wires were energized. The light green wire was energized. I also took note that the yellow wire was energized as well. The limit switch towards the center of the car (which I believe is the limit switch that says it’s time to go down) was the one with the blue and yellow wires are attached. Now the rear end is slightly higher, but not drastically. Another observation is that the pivot on the compensation motor is basically perpendicular to the center line of the car with the long bar side slightly to the rear. I tried to ground the top terminal of the solenoid that the blue wire was attached to, I heard the click of the solenoid but nothing from the motor. So I changed the control box. Once the control box was changed and everything connected the yellow and blue wire were barely lighting the test light down at the control box and the blue wire was barely illuminating the test light at the solenoid. However, the brown wire was energized at the solenoid and was also energized at the compensator motor that was attached to the bottom terminal. That situation was still occurring (brown wire hot) with the dash switch in the off position and the 7.5 amp removed. So where do I go from here? The pivot is obviously position incorrectly, but how do I adjust that pivot while making sure everything else is okay? Is everything connected properly? Pictures to follow
Posted on: 2023/3/26 18:02
|
|||
|
||||
|
Re: Trunk key hole cover on '56 Packard
|
||||
|---|---|---|---|---|
|
Home away from home
|
I recently done this on my 56 Patrician trunk lock. Its a pain to get it, but its really not that bad once you get it.
I am not to sure how to explain it well, so bare with me. first I separated the lock cylinder from the decorative front. I used an flat blade eye glass screw driver to insert in the keyway opening of the brass keeper on the back. I rotated the key hole cover slightly opened and used the screw driver to rotate the brass keeper. I directed the pressure of the driver on the brass keeper to keep every thing centered and continued to rotate the keeper while keeping the key cover in that slightly opened position. It took a couple attempts.
Posted on: 2023/3/13 11:16
|
|||
|
||||


