|
Re: Work on the 1953 Derham Formal
|
||||
|---|---|---|---|---|
|
Home away from home

|
Awesome! I'm excited to see you bring this back to life! Such a cool car!
Posted on: 2017/6/14 16:32
|
|||
|
[url=h
|
||||
|
||||
|
Re: 51Packards....52 Packard 200 Deluxe!
|
||||
|---|---|---|---|---|
|
Home away from home
|
Thanks for the feedback guys. I knew POR15 was super tough when dry so I guess I equated that with being thick. I really need something to cover up my poor welds so I'm not against a thin layer of fiberglass to get the pinholes and cover things up or seam sealer if it will do the job. Chasing the small holes in the pan will just lead to bigger ones. Maybe I'll do the underside of the car first with the paint and if there is any left, use it inside. I don't want to have to wire brush and primer the interior as it would be easier to just paint the rust with POR15.
Posted on: 2017/5/31 19:02
|
|||
|
[url=h
|
||||
|
||||
|
Re: 51Packards....52 Packard 200 Deluxe!
|
||||
|---|---|---|---|---|
|
Home away from home
|
5-29-17
Here I thought the passenger side would be easier and no such luck! Running out of patch metal so I tried to be creative with my shape to maximize coverage. I tried turning up the heat on the welder and my final patch on the drivers side seemed to come out better, but not on the passenger side! I've been experiencing a lot of blow through. I'll have to dial it down some and fill with weld. More rust holes are making their presence known too so that was disappointing. When I'm done, I'm planning on painting the ceiling and floor with POR15. Anyone with experience with this paint please comment if it will cover any pinholes in the metal I miss? Should I bother to put seam sealer on the welds? If so, before or after paint?
Posted on: 2017/5/30 17:52
|
|||
|
[url=h
|
||||
|
||||
|
Re: 51Packards....52 Packard 200 Deluxe!
|
||||
|---|---|---|---|---|
|
Home away from home
|
I guess you're right! At least on this car, any welding I have to do will be covered and out of sight. At least the metal is sticking together!
Posted on: 2017/5/28 19:24
|
|||
|
[url=h
|
||||
|
||||
|
Re: towing / driveshaft removal
|
||||
|---|---|---|---|---|
|
Home away from home
|
When I bought my first Packard, it was towed by the front wheels about 50 miles of highway driving. When the driver arrived at our house, the transmission was smoking! Never worked right after that. It was in neutral.
Posted on: 2017/5/28 18:10
|
|||
|
[url=h
|
||||
|
||||
|
Re: 51Packards....52 Packard 200 Deluxe!
|
||||
|---|---|---|---|---|
|
Home away from home
|
5-28-17
The worse rust on the car is the front floor boards. I removed the seat bottom and cut out the damaged metal. Originally I was going to flange the metal so it would sit down flat, but with the brace there and the complicated bends the metal takes in this area made me change my mind and just overlap the metal. It's not that thick anyway and will eventually be covered with carpet. I had to make a separate patch to cover the area by the body mount hole due to the size of the scrap metal I was using. The fuel line was routed on this side because I have a more modern gas tank in the car. I was concerned welding near the line so I soaked some shop towels in water and draped them over the line. Almost finished the welding, but ran out of welding wire. My welding skills have not improved! Still have to do some grinding and seeing where I missed spots. I hope the passenger side does not need as large of a patch. Attach file:  (171.11 KB) (171.11 KB)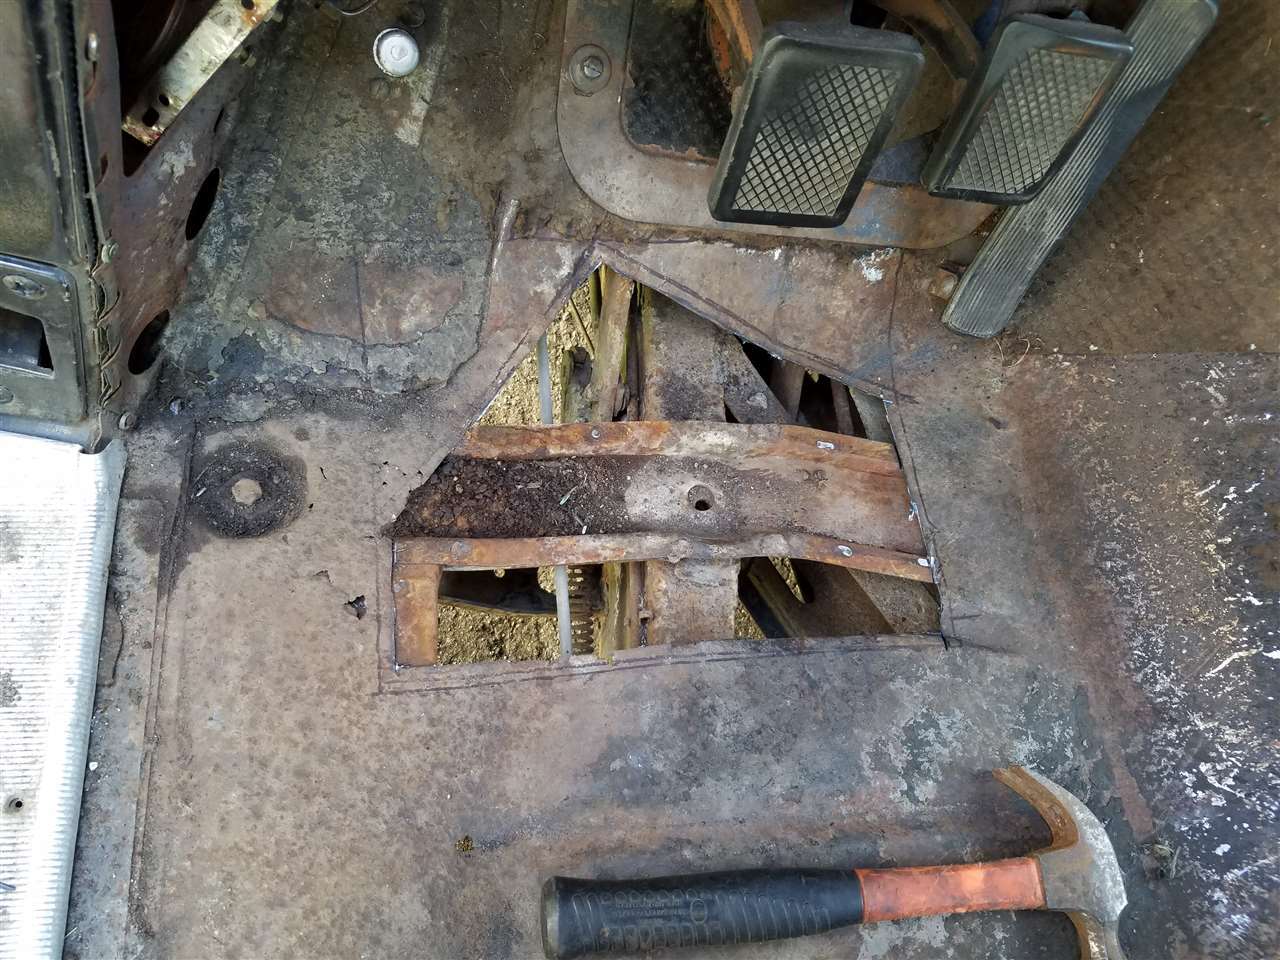 (178.15 KB) (178.15 KB)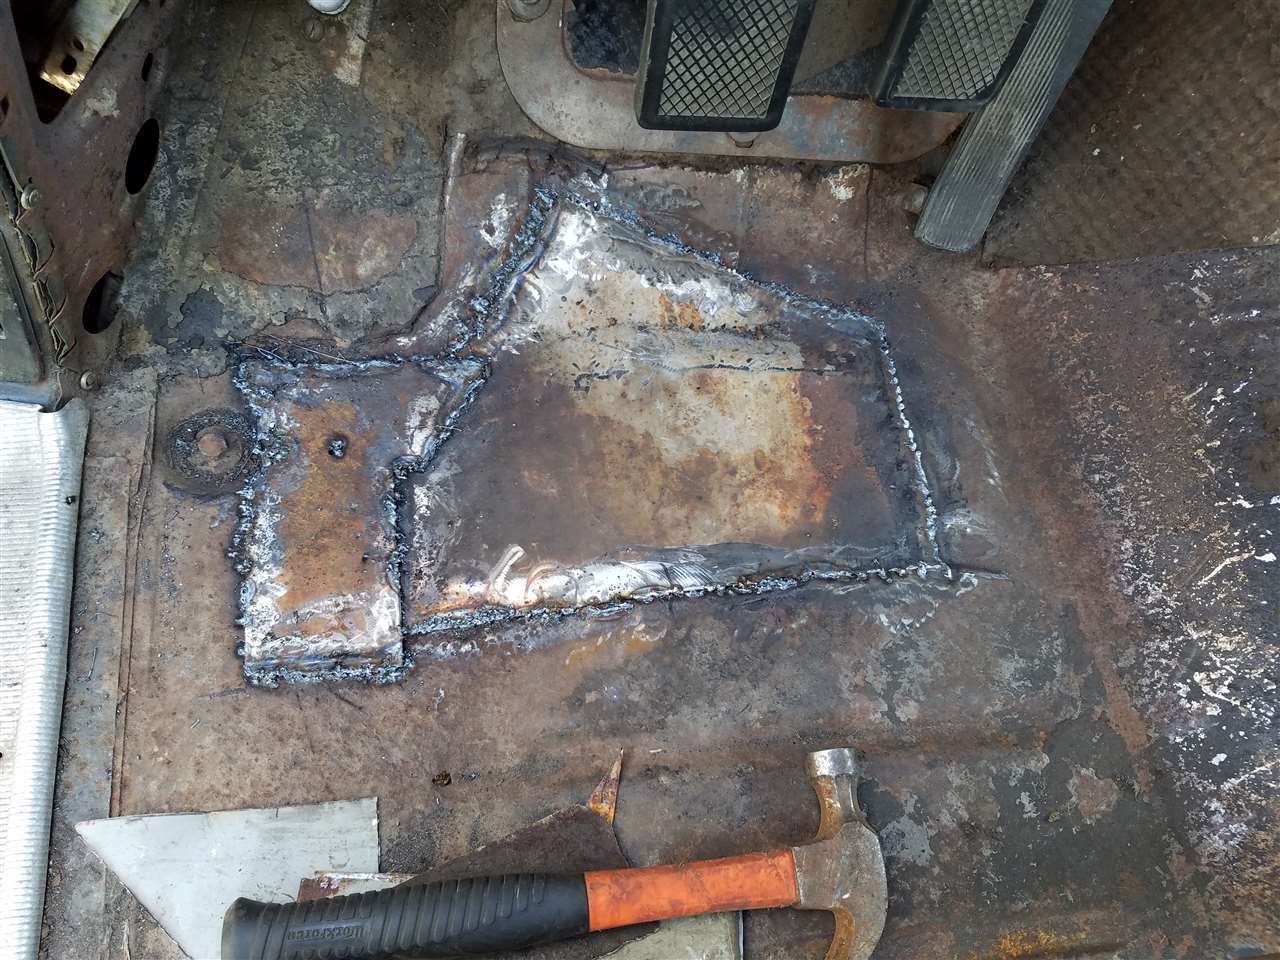
Posted on: 2017/5/28 17:36
|
|||
|
[url=h
|
||||
|
||||
|
Re: How to replace the bulb on the dome light, 1953/1954
|
||||
|---|---|---|---|---|
|
Home away from home
|
For your radio, more than likely you will need to replace every capacitor in it. I have 2 radios and I had to do that with both of them. All of my tubes were good and one radio had a bad vibrator. If you check my blog I have it documented. If I can do it, anyone can! Seems like a big job, but is doable.
Posted on: 2017/5/14 17:38
|
|||
|
[url=h
|
||||
|
||||
|
Re: Why would my headlights be dim?
|
||||
|---|---|---|---|---|
|
Home away from home
|
Brenda, most of my electrical problems were solved with a new wire harness. I made my own, but you can buy one with modern wires reasonably or spend more money and get a proper cloth covered version (I think your car should have cloth). Anyway, with new wires everything pretty much worked except for a few bugs that I can trace down to bad grounds. Also watch that a 12v bulb didn't find it's way into your car. I had one in my front turn signal light that sent the turn signals into a tizzy.
Posted on: 2017/5/14 17:29
|
|||
|
[url=h
|
||||
|
||||
|
Re: Ultramatic Hard Shifting into Reverse
|
||||
|---|---|---|---|---|
|
Home away from home
|
I wrote that I borrowed a 15/16" socket from my work. Here is a link to my very old blog...https://packardinfo.com/xoops/html/modules/newbb/viewtopic.php?topic_id=5434&viewmode=flat&order=ASC&type=&mode=0&start=50
Posted on: 2017/5/9 18:16
|
|||
|
[url=h
|
||||
|
||||
|
Re: 51Packards....52 Packard 200 Deluxe!
|
||||
|---|---|---|---|---|
|
Home away from home
|
5-7-17
In am effort to fix my dash lights I ran a ground wire from a mount screw on the Speedo to the voltage regulator. I know I didn't have to go that far to find ground but it will be easy for me to see if there were still problems. The ground helped with the turn signal bit not the high beam. Also my oil and bat lights were working sporadically. I added a bare ground wire from the Speedo mount and wrapped it tightly around the bulb sockets. That seemed to do the trick and also revealed the bat light was staying on! Well that kept me from taking a drive today. I checked the wiring and saw the middle wires on the voltage regulator had come off! I replaced those thinking problem solved ... but no! Some time later of more wiring review and I saw the middle wire on the generator had come off! WTF! Why would that happen and what are the odds? I replaced that connector with a round connector and problem solved! That was a relief...I didn't want to remove the generator but I'm bummed I couldn't go for a ride today.
Posted on: 2017/5/7 18:03
|
|||
|
[url=h
|
||||
|
||||


