|
Re: An Air Cleaner from a '33 - To Clean or Disassemble
|
||||
|---|---|---|---|---|
|
Home away from home

|
Dave & Tim,
After studying your pictures, it appears that you air cleaners are 5 to 10 degrees from being parallel to the engine. Your cars have a "S" metal bracket somewhat like the sketch below. If this is so, I'm unable to rotate the air cleaner on my carburetor enough to achieve an angle even approaching yours as mine hits a fitting on the carburetor (see photo). My carburetor is a Stromberg EE-22. Would you please let me know if this is true? Attach file:  (25.87 KB) (25.87 KB)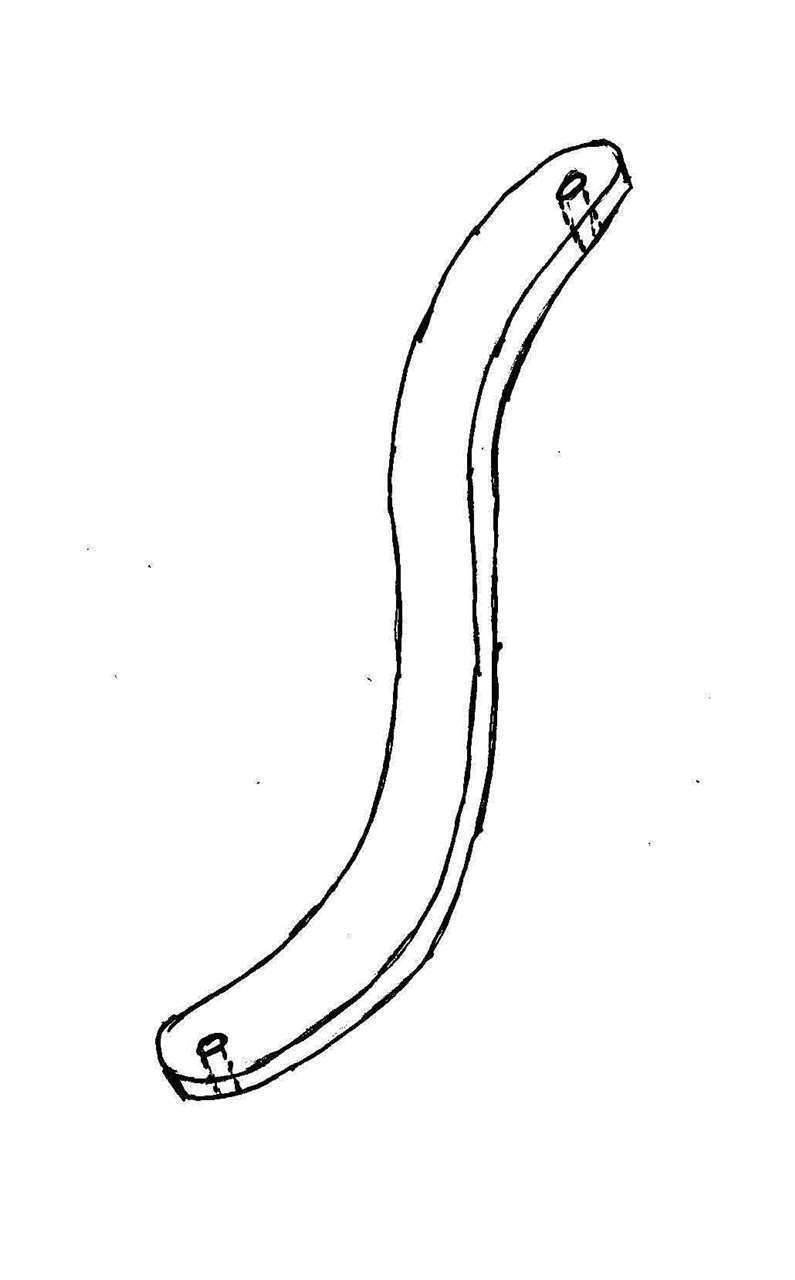 (90.98 KB) (90.98 KB)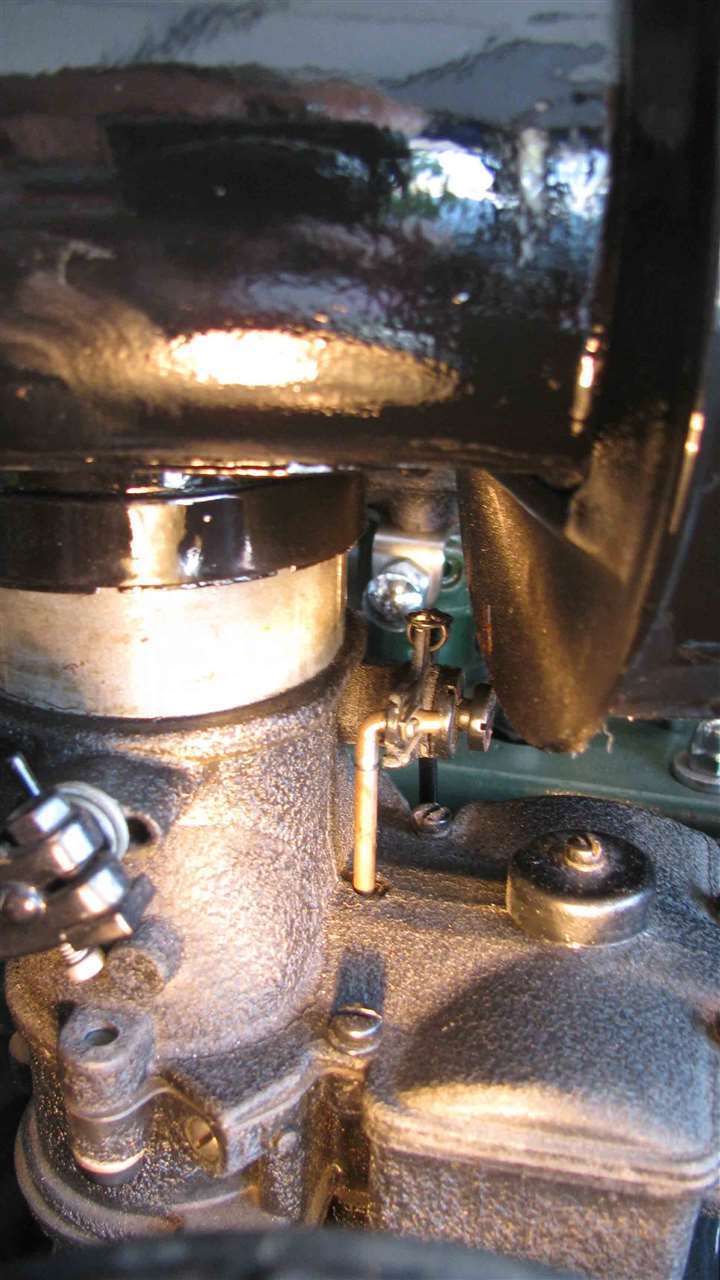
Posted on: 2014/8/1 10:08
|
|||
|
||||
|
Re: Other type wheels for '47 Clipper
|
||||
|---|---|---|---|---|
|
Home away from home
|
I'm assuming that you need to push the car around your garage or shop. So, would dollies like those at Harbor Fright do if wood blocks were used to raise the car?
Posted on: 2014/7/30 8:00
|
|||
|
||||
|
Re: An Air Cleaner from a '33 - To Clean or Disassemble
|
||||
|---|---|---|---|---|
|
Home away from home
|
Tim & Dave,
Thanks for the input. If You could take a few close up photos with a ruler I'll see what I can do to duplicate it if I can not find one out there in the Packard world. And if you don't mine, a few pictures of the linkage to the carburetor would be helpful at this stage of my restore.
Posted on: 2014/7/28 11:51
|
|||
|
||||
|
Re: An Air Cleaner from a '33 - To Clean or Disassemble
|
||||
|---|---|---|---|---|
|
Home away from home
|
To close out this post - I left the air cleaner intact and cleaned the insides. I soaked it in odorless paint thinner changing the thinner several times. Cleaned and sanded the outside. Then it was primed with two coats of a black polyester primer. Several small dents were filled with Evercoat body filler. More primer followed with a light sanding and two coats of a single phase enamel paint.
I needed to make the bracket since I didn't have the one that came with the car. I used a piece of 1/8" X 3/4" steel flat bar. It followed the air cleaner through the painting process. While it looks real, the single phase has a little orange peel so I'm not completely satisfied, but since I have enough to do on the project the air cleaner will do as is. That is unless one of my friends that drop by calls it to my attention. Then I'll need to decide if I should tell him to go fly a kite, or something close to what he should do, or maybe just repaint it. Dave thanks for your input. Attach file: (93.54 KB)
Posted on: 2014/7/27 18:05
|
|||
|
||||
|
Re: Exhaust Manifold
|
||||
|---|---|---|---|---|
|
Home away from home
|
Have you looked at Muggy Weld's products for welding cast iron? This should not be taken as an endorsement as I have not used any of their products yet, but may need to on repairing a pot metal trim piece.
Good luck and keep us advised on your steps and results.
Posted on: 2014/7/27 9:17
|
|||
|
||||
|
Re: Water Pump on 1951
|
||||
|---|---|---|---|---|
|
Home away from home
|
Thanks for both inputs. I installed the pump today using Permatex 2 and copper washers on the bolt that go into the water jacket. Everything appears to be leak free. So I'll keep an eye on the situation. If it develops a leak I'll post it.
Again thanks
Posted on: 2014/7/23 17:15
|
|||
|
||||
|
Water Pump on 1951
|
||||
|---|---|---|---|---|
|
Home away from home
|
The water pump on my 200 deluxe started leaking with the coolant dripping from the fan blade. I assumed it was coming from the shaft seal. So I ordered a rebuilt one and waited for it to arrive before removing the "bad" pump. During the removal step, I discovered that the leaked was coming from one of the bolts on top and figured that it was because the bolt went into the water jacket, which it was.
I have since discovered that several of the bolts had flat copper washers on them while several had lock washers. The leaking one has a lock washer. Should all of the washers where the bolt goes into the water jacket have copper washers? Also when I install the rebuilt pump I plan on using #2 non-hardening Permatex on the gaskets. Should I also use it or something else on the bolt threads that go into the water jacket? In addition, since some of the bolts are somewhat rusted I'm going to replace all of them with new grade 5 bolts. Any and all thoughts on the matter are welcomed and will be greatly appreciated.
Posted on: 2014/7/21 19:35
|
|||
|
||||
|
Re: How To Remove Temperature Gauge Wire From Head
|
||||
|---|---|---|---|---|
|
Home away from home
|
You may want to consider removing the head and position it so one of the phosphoric acid rust removing solutions can be used. Make a dam out of some sort material (plumber's putty?) so the acid can be allowed to sit in the cavity for several hours. You may also want to consider pouring some of the solution into the head and position it so it flows to the point where the bulb is.
Good luck.
Posted on: 2014/7/15 20:20
|
|||
|
||||
|
Re: 1932 roadster
|
||||
|---|---|---|---|---|
|
Home away from home
|
You don't say if your roadster is a light or not, but go tohttps://www.packardinfo.com/xoops/html/downloads/1932_FactBook901-902.pdf and see the pages under paint schemes starting on page 22.
With a 900 series, it could have been ordered from the factory in primer and painted by the owner. So one might say that for the body any color that was available in 1932 would be a possibility. I selected Carnival Red, IM-504 which could be found on a 1931 De Soto. The frame is black as is the lower section of the car (fenders, etc.). A purist might say I should have selected one of the colors mentioned in the booklet above. Good luck on your project and keep us posted. You may want to consider posting on this forum under "Project Blogs".
Posted on: 2014/7/10 10:24
|
|||
|
||||
|
Re: Safety Glass LOGO
|
||||
|---|---|---|---|---|
|
Home away from home
|
I don't know how well it works, but there is a company Glass Etching that has a kit for $15 that seems interesting.
I'm a retired chemist who also worked in a Health & Safety department. Using reasonable measures like safety glasses, rubber type gloves and working in an area where there is some air movement (outside), I would not hesitate using the etching gel that is used in a kit like this.
Posted on: 2014/6/18 21:05
|
|||
|
||||


